No Products in the Cart

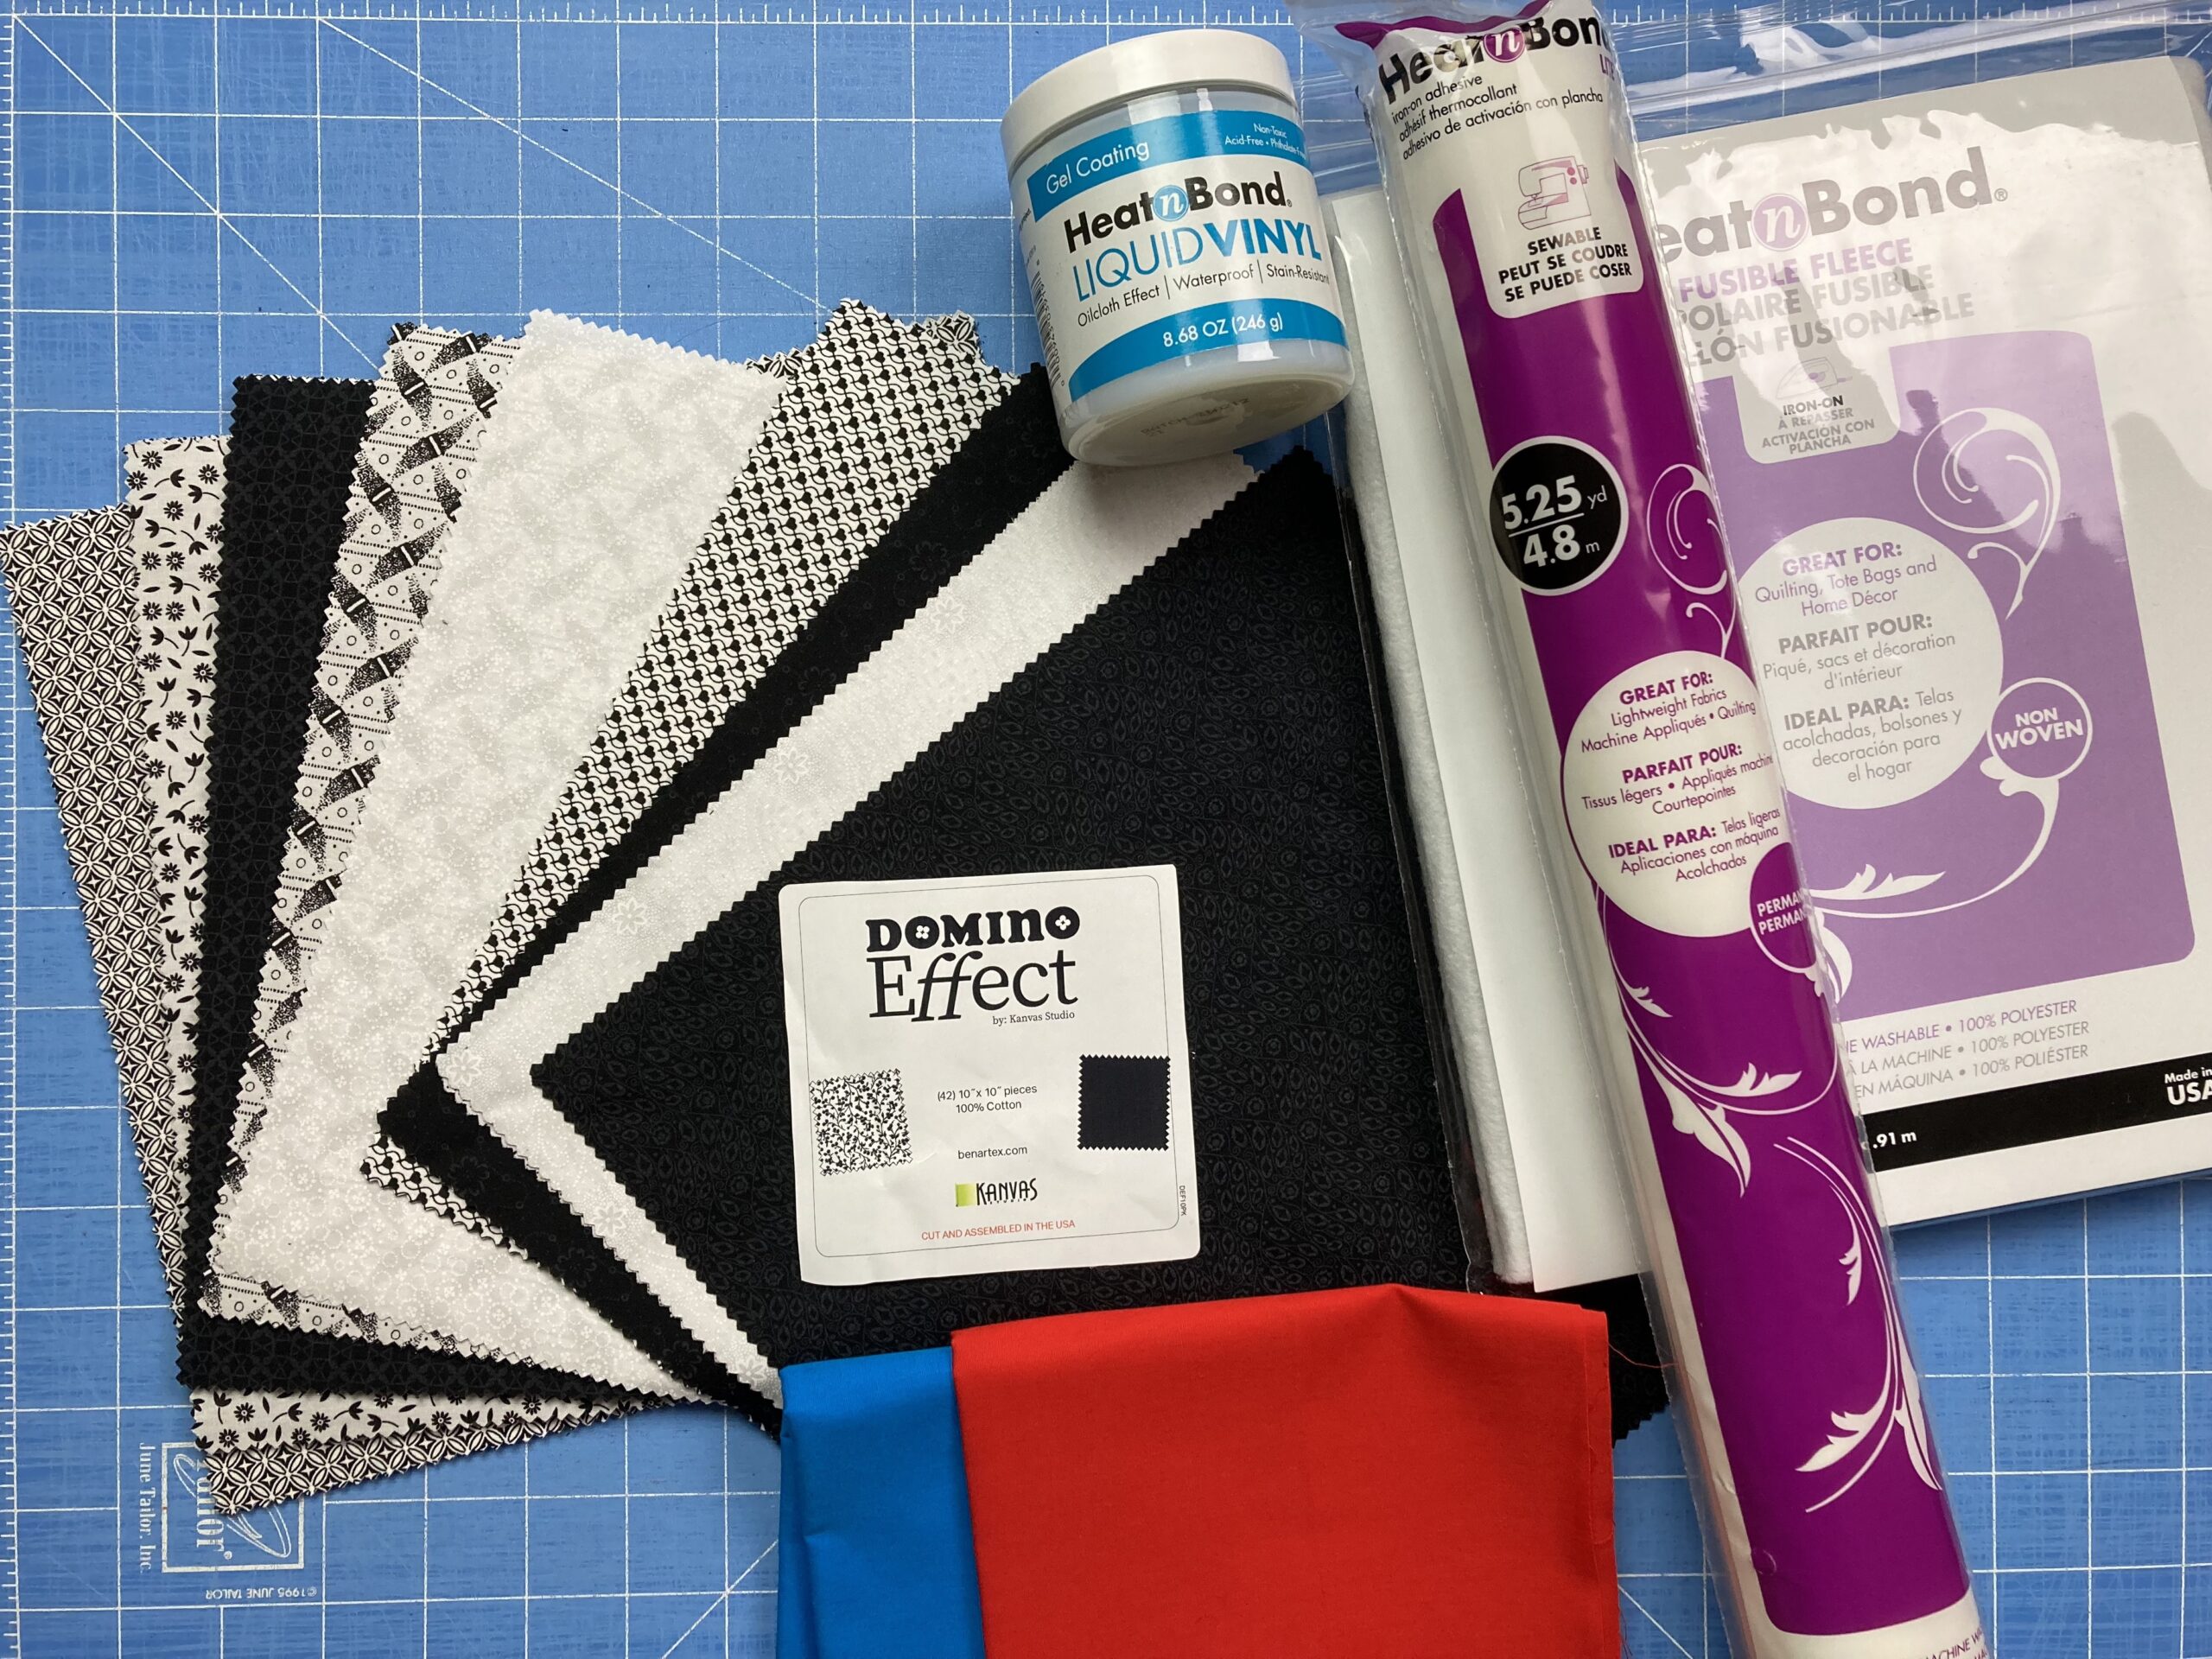
My Supplies:
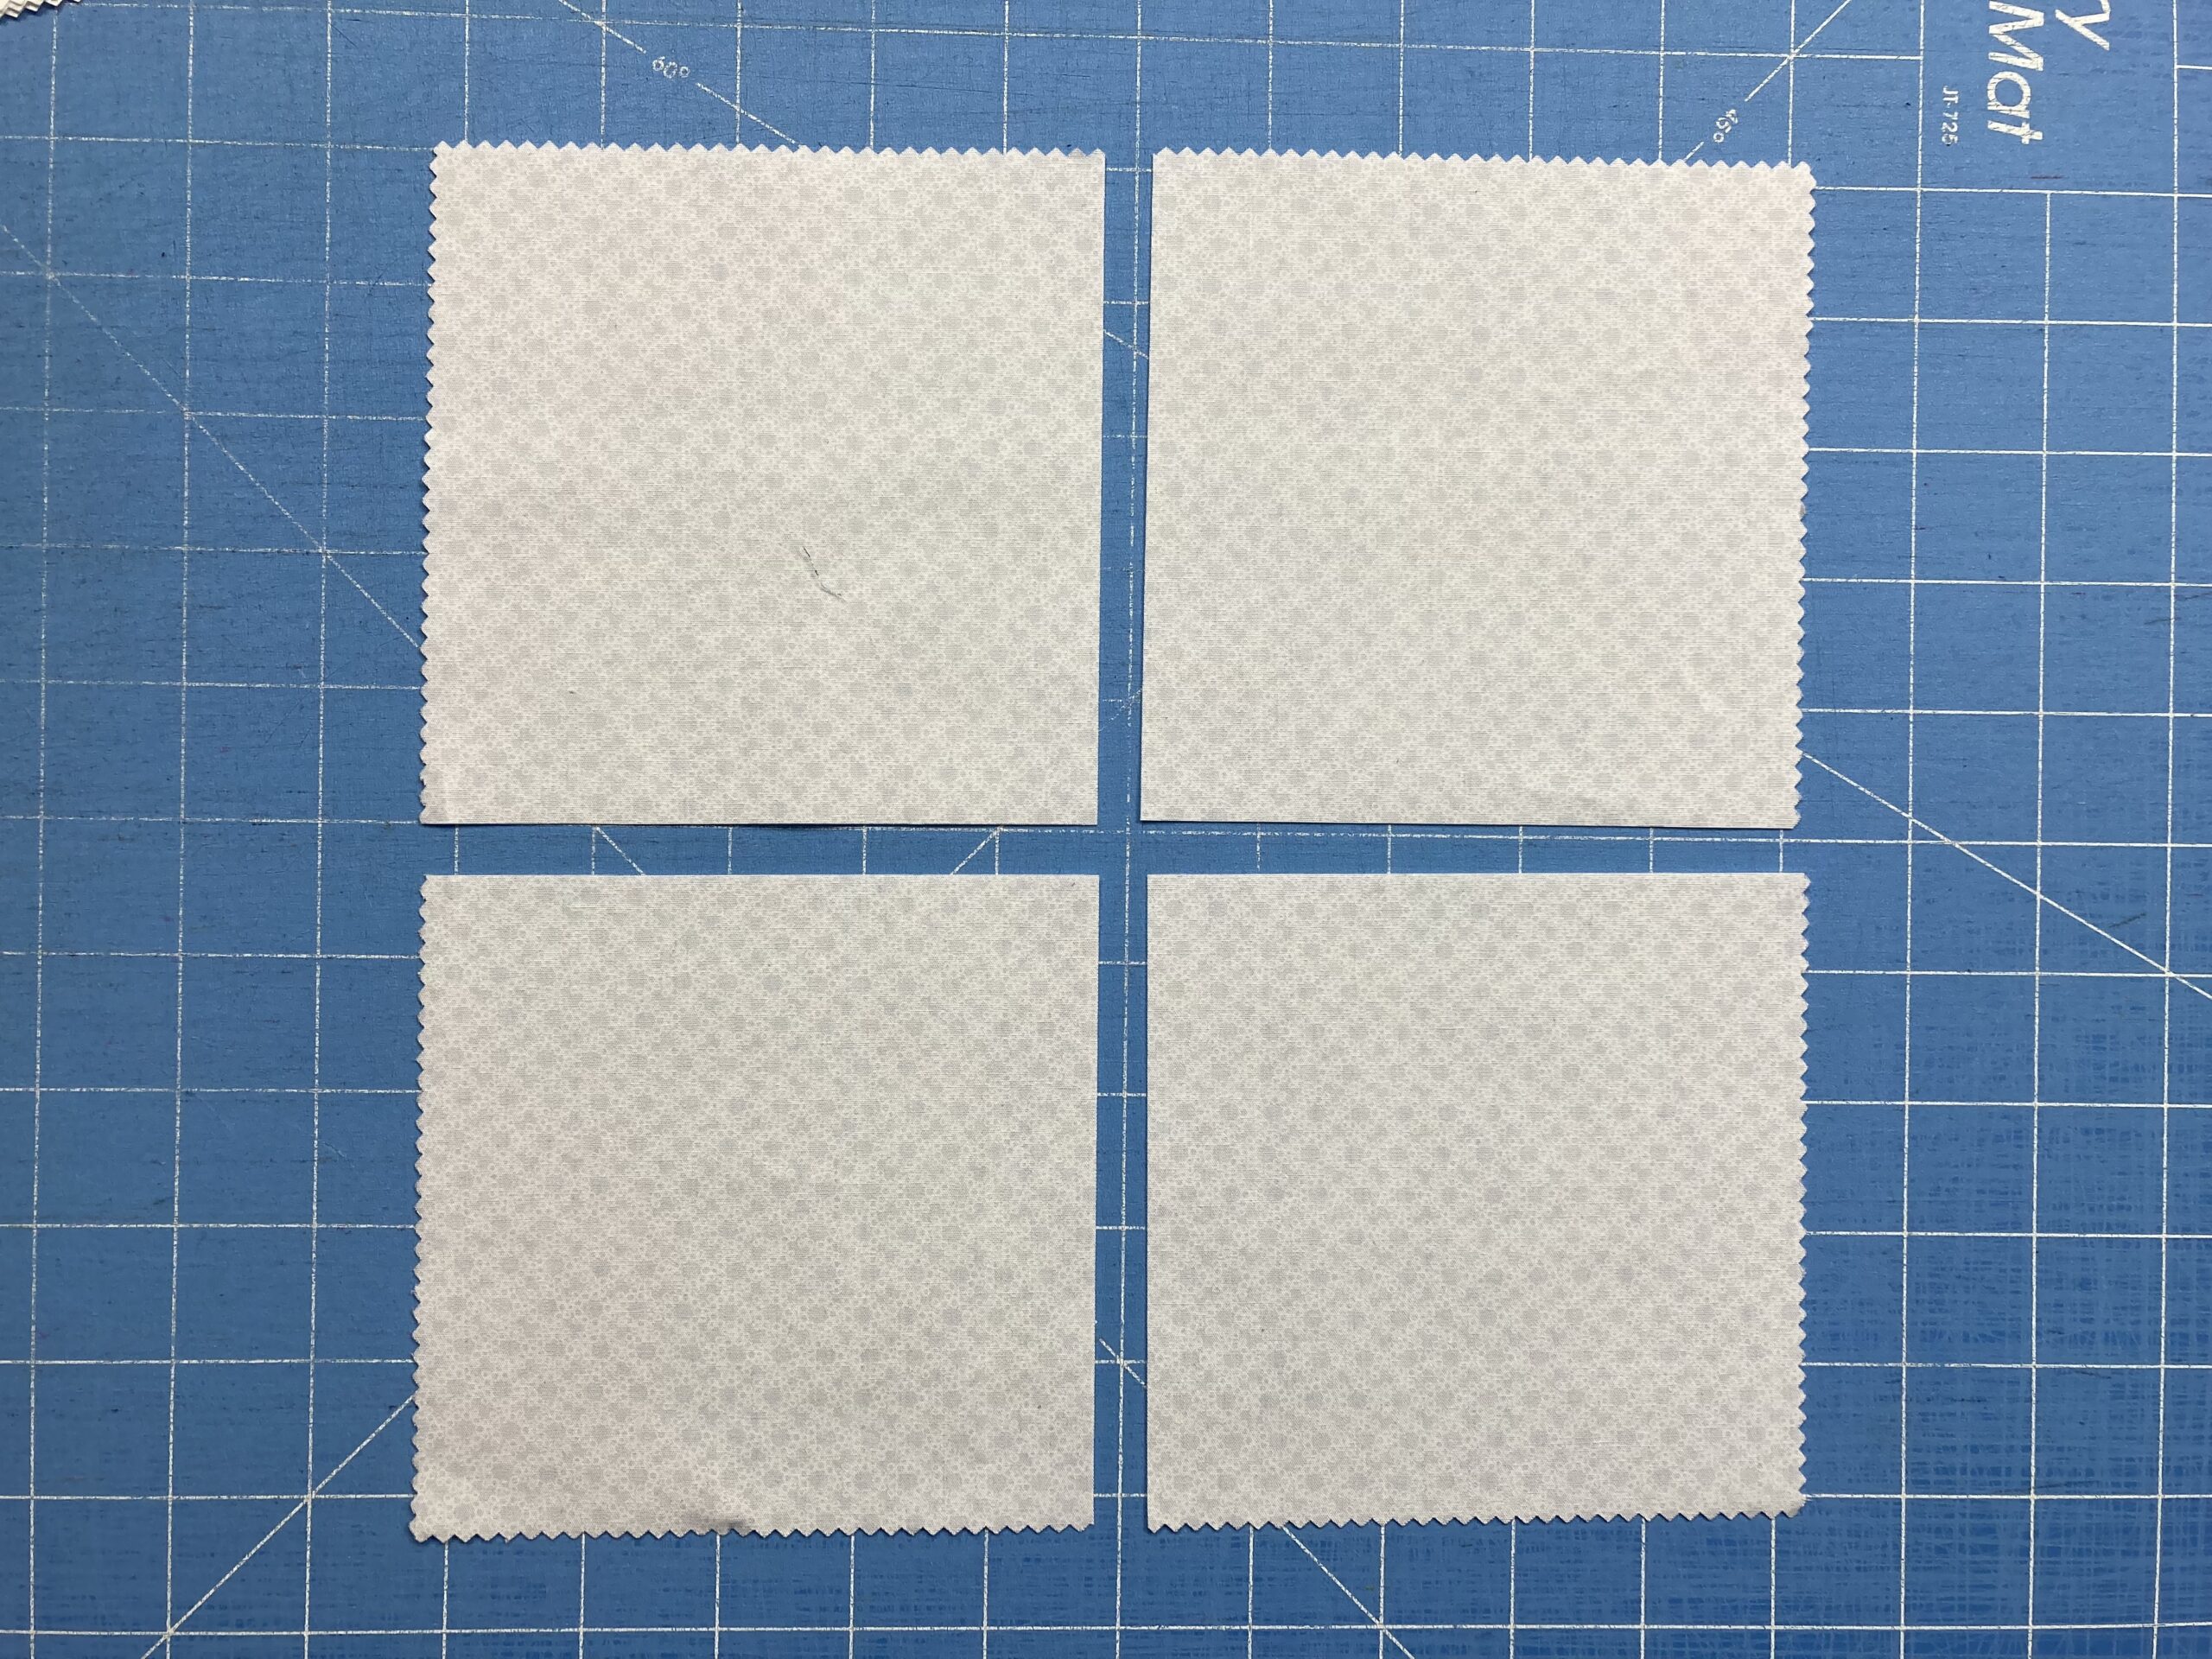 Cut each 10" square in half in both directions to make (4) 5" squares.[/caption]
From the black and white yardage:
(4) 2-1/4" x WOF strips for binding
(1) 42" square piece for backing
From the Fusible Fleece:
(1) 40" square piece
(12) 5" x 10" pieces
Making the Checkerboard
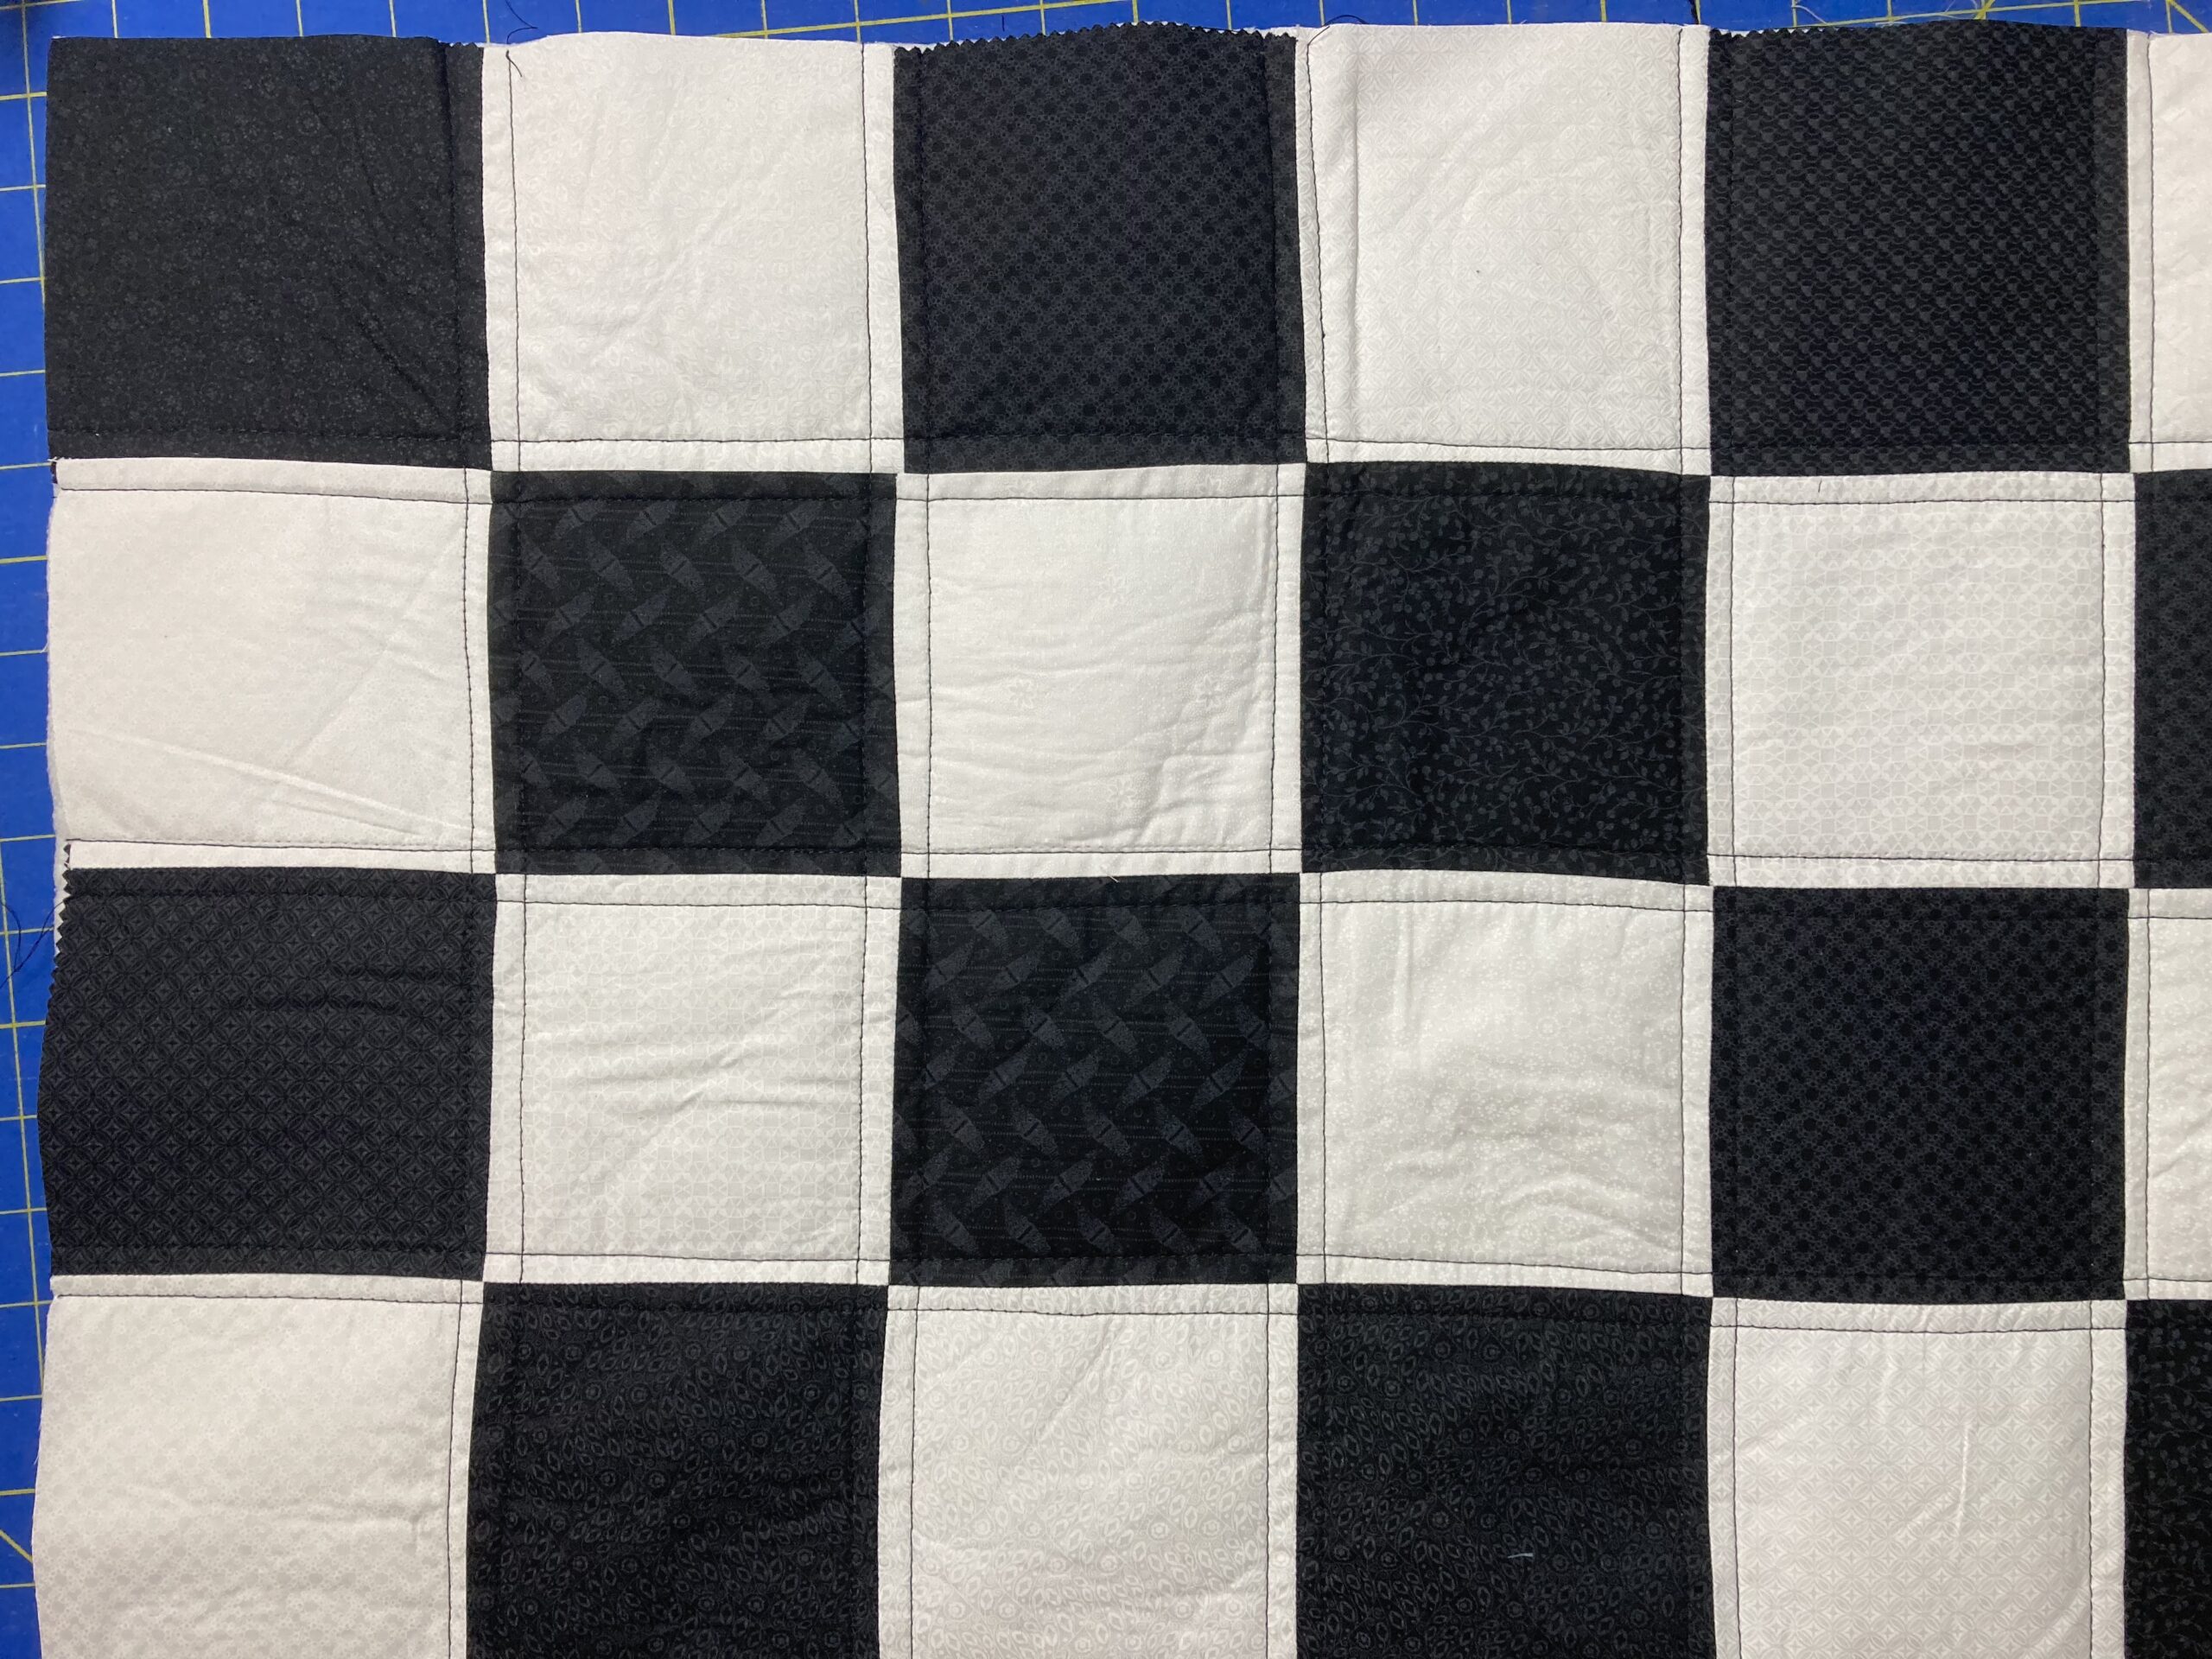
Step 1 Lay out the (64) 5" squares into (8) rows of (8), alternating black and white. Here are the first four rows of my layout.
Cut each 10" square in half in both directions to make (4) 5" squares.[/caption]
From the black and white yardage:
(4) 2-1/4" x WOF strips for binding
(1) 42" square piece for backing
From the Fusible Fleece:
(1) 40" square piece
(12) 5" x 10" pieces
Making the Checkerboard
Step 1 Lay out the (64) 5" squares into (8) rows of (8), alternating black and white. Here are the first four rows of my layout.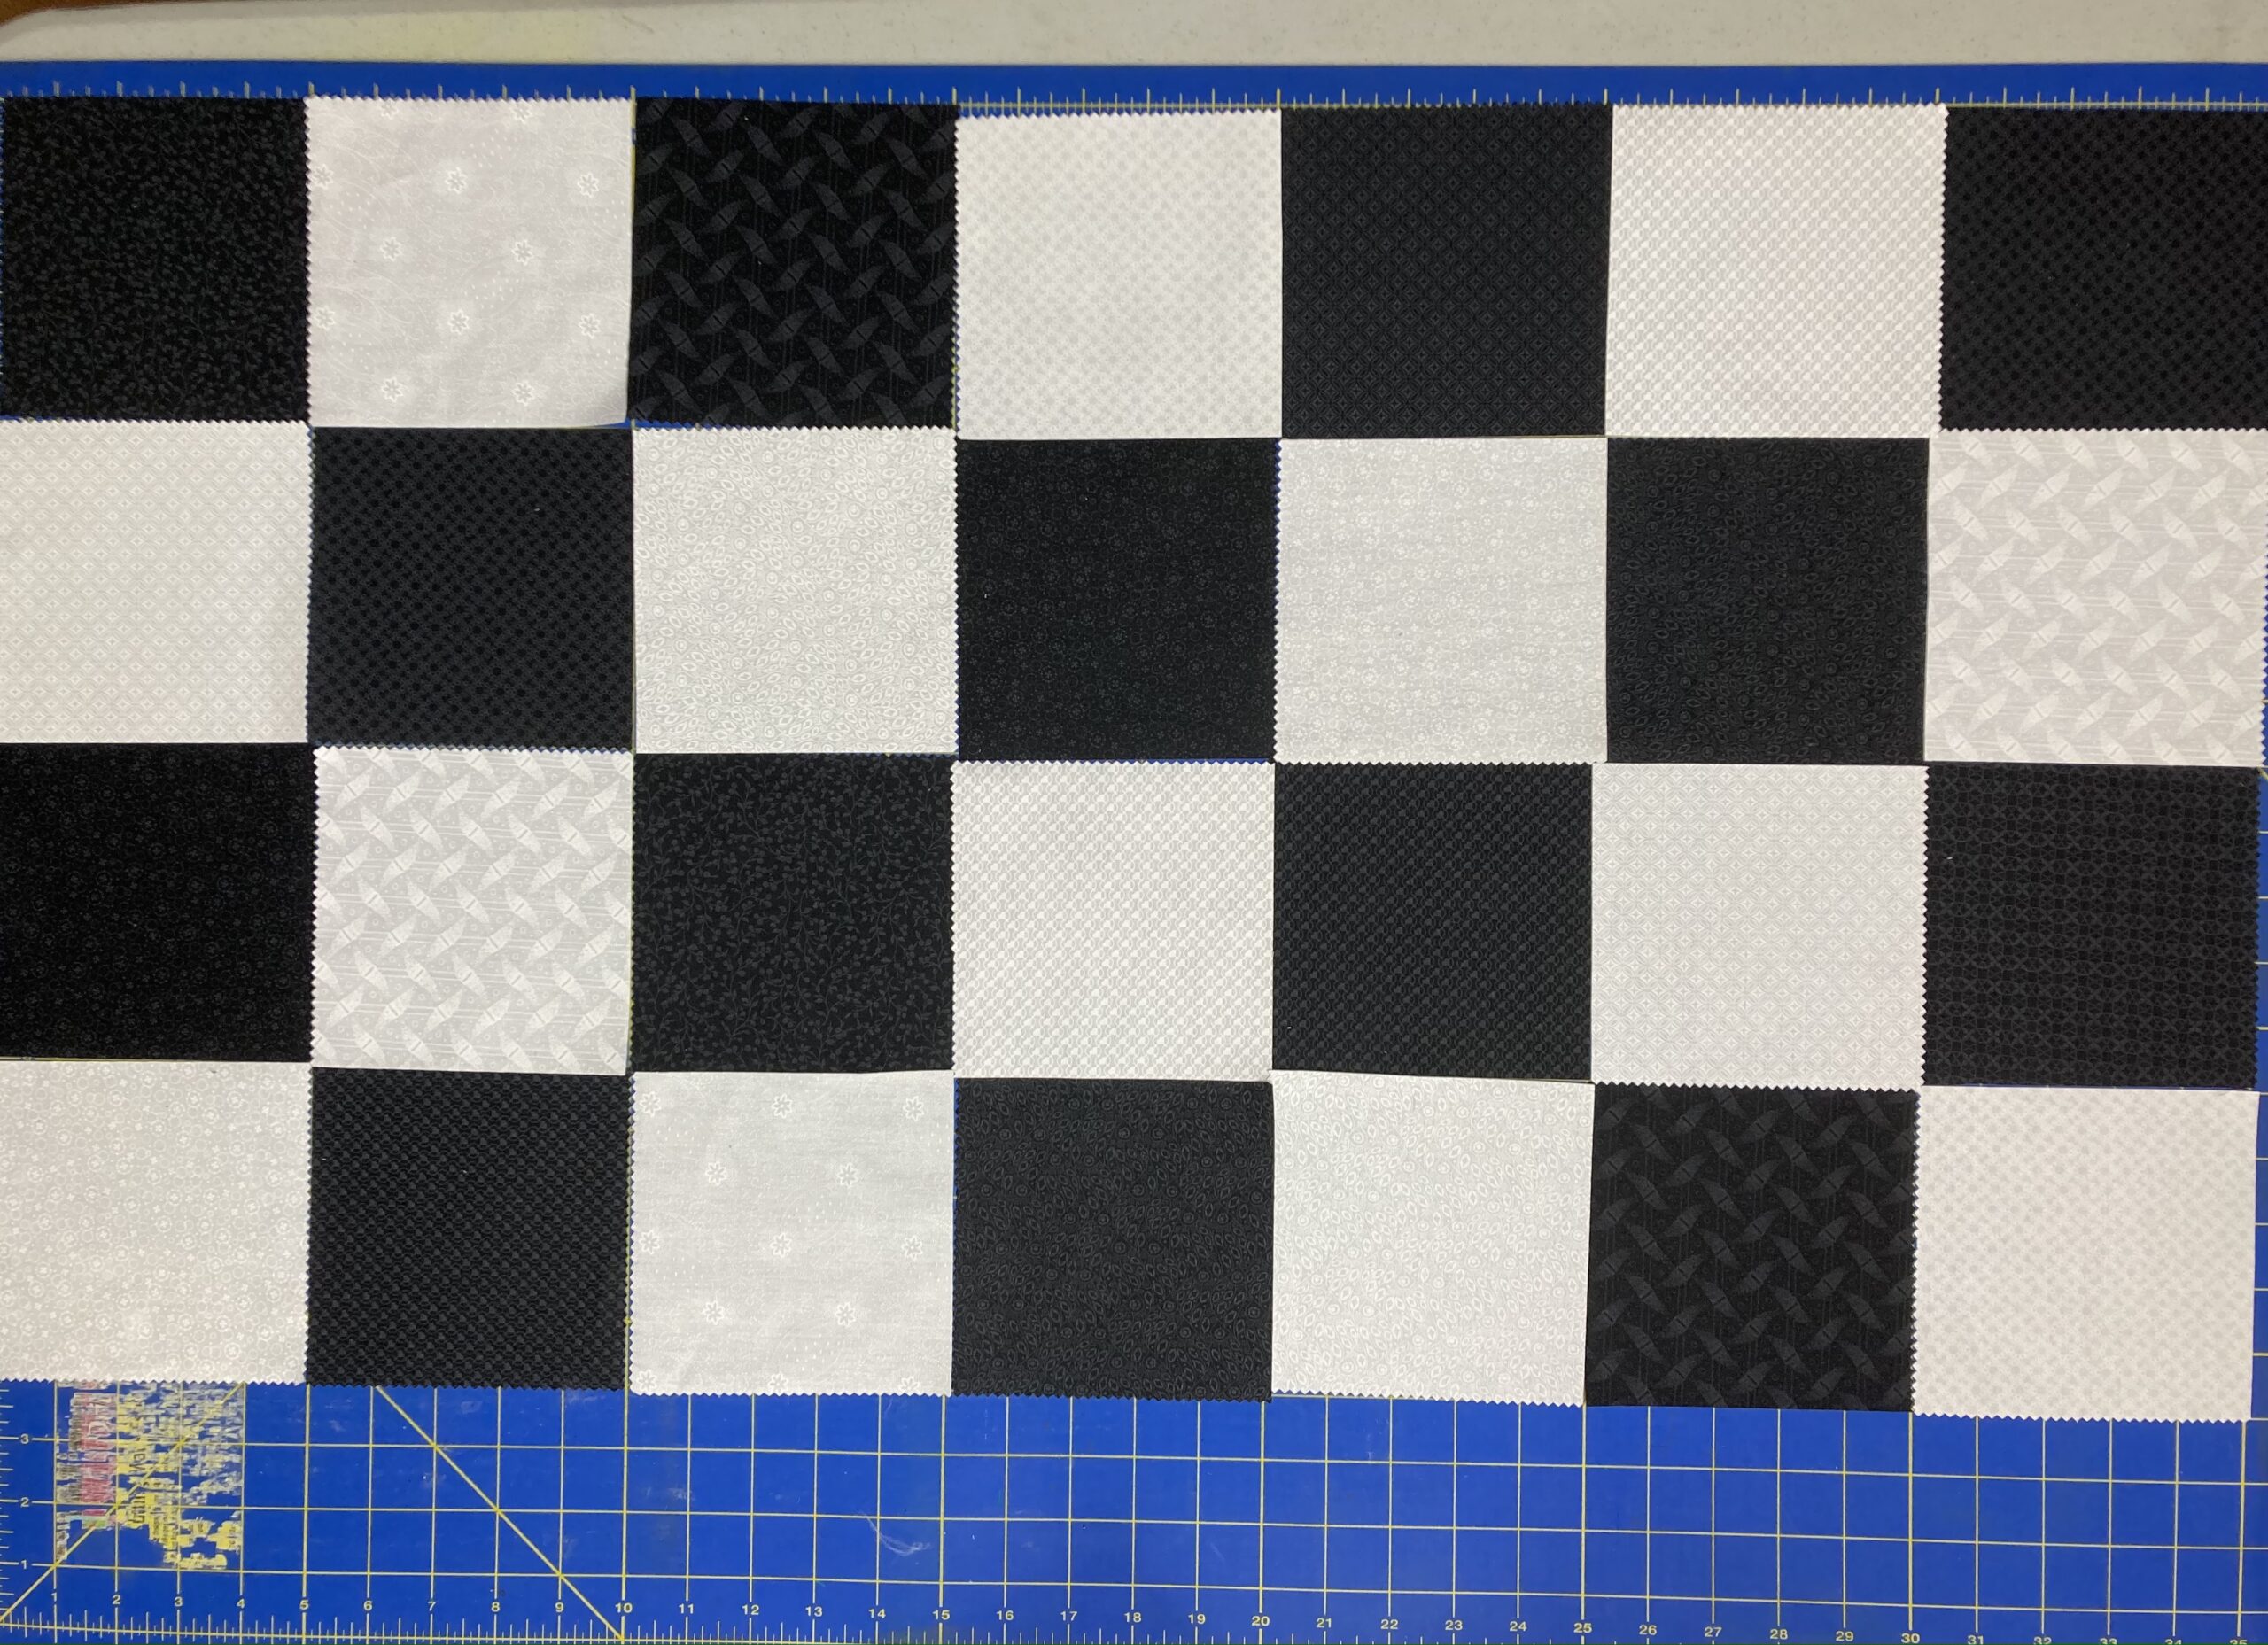 Step 2 Sew the squares into rows, pressing toward the black fabric.

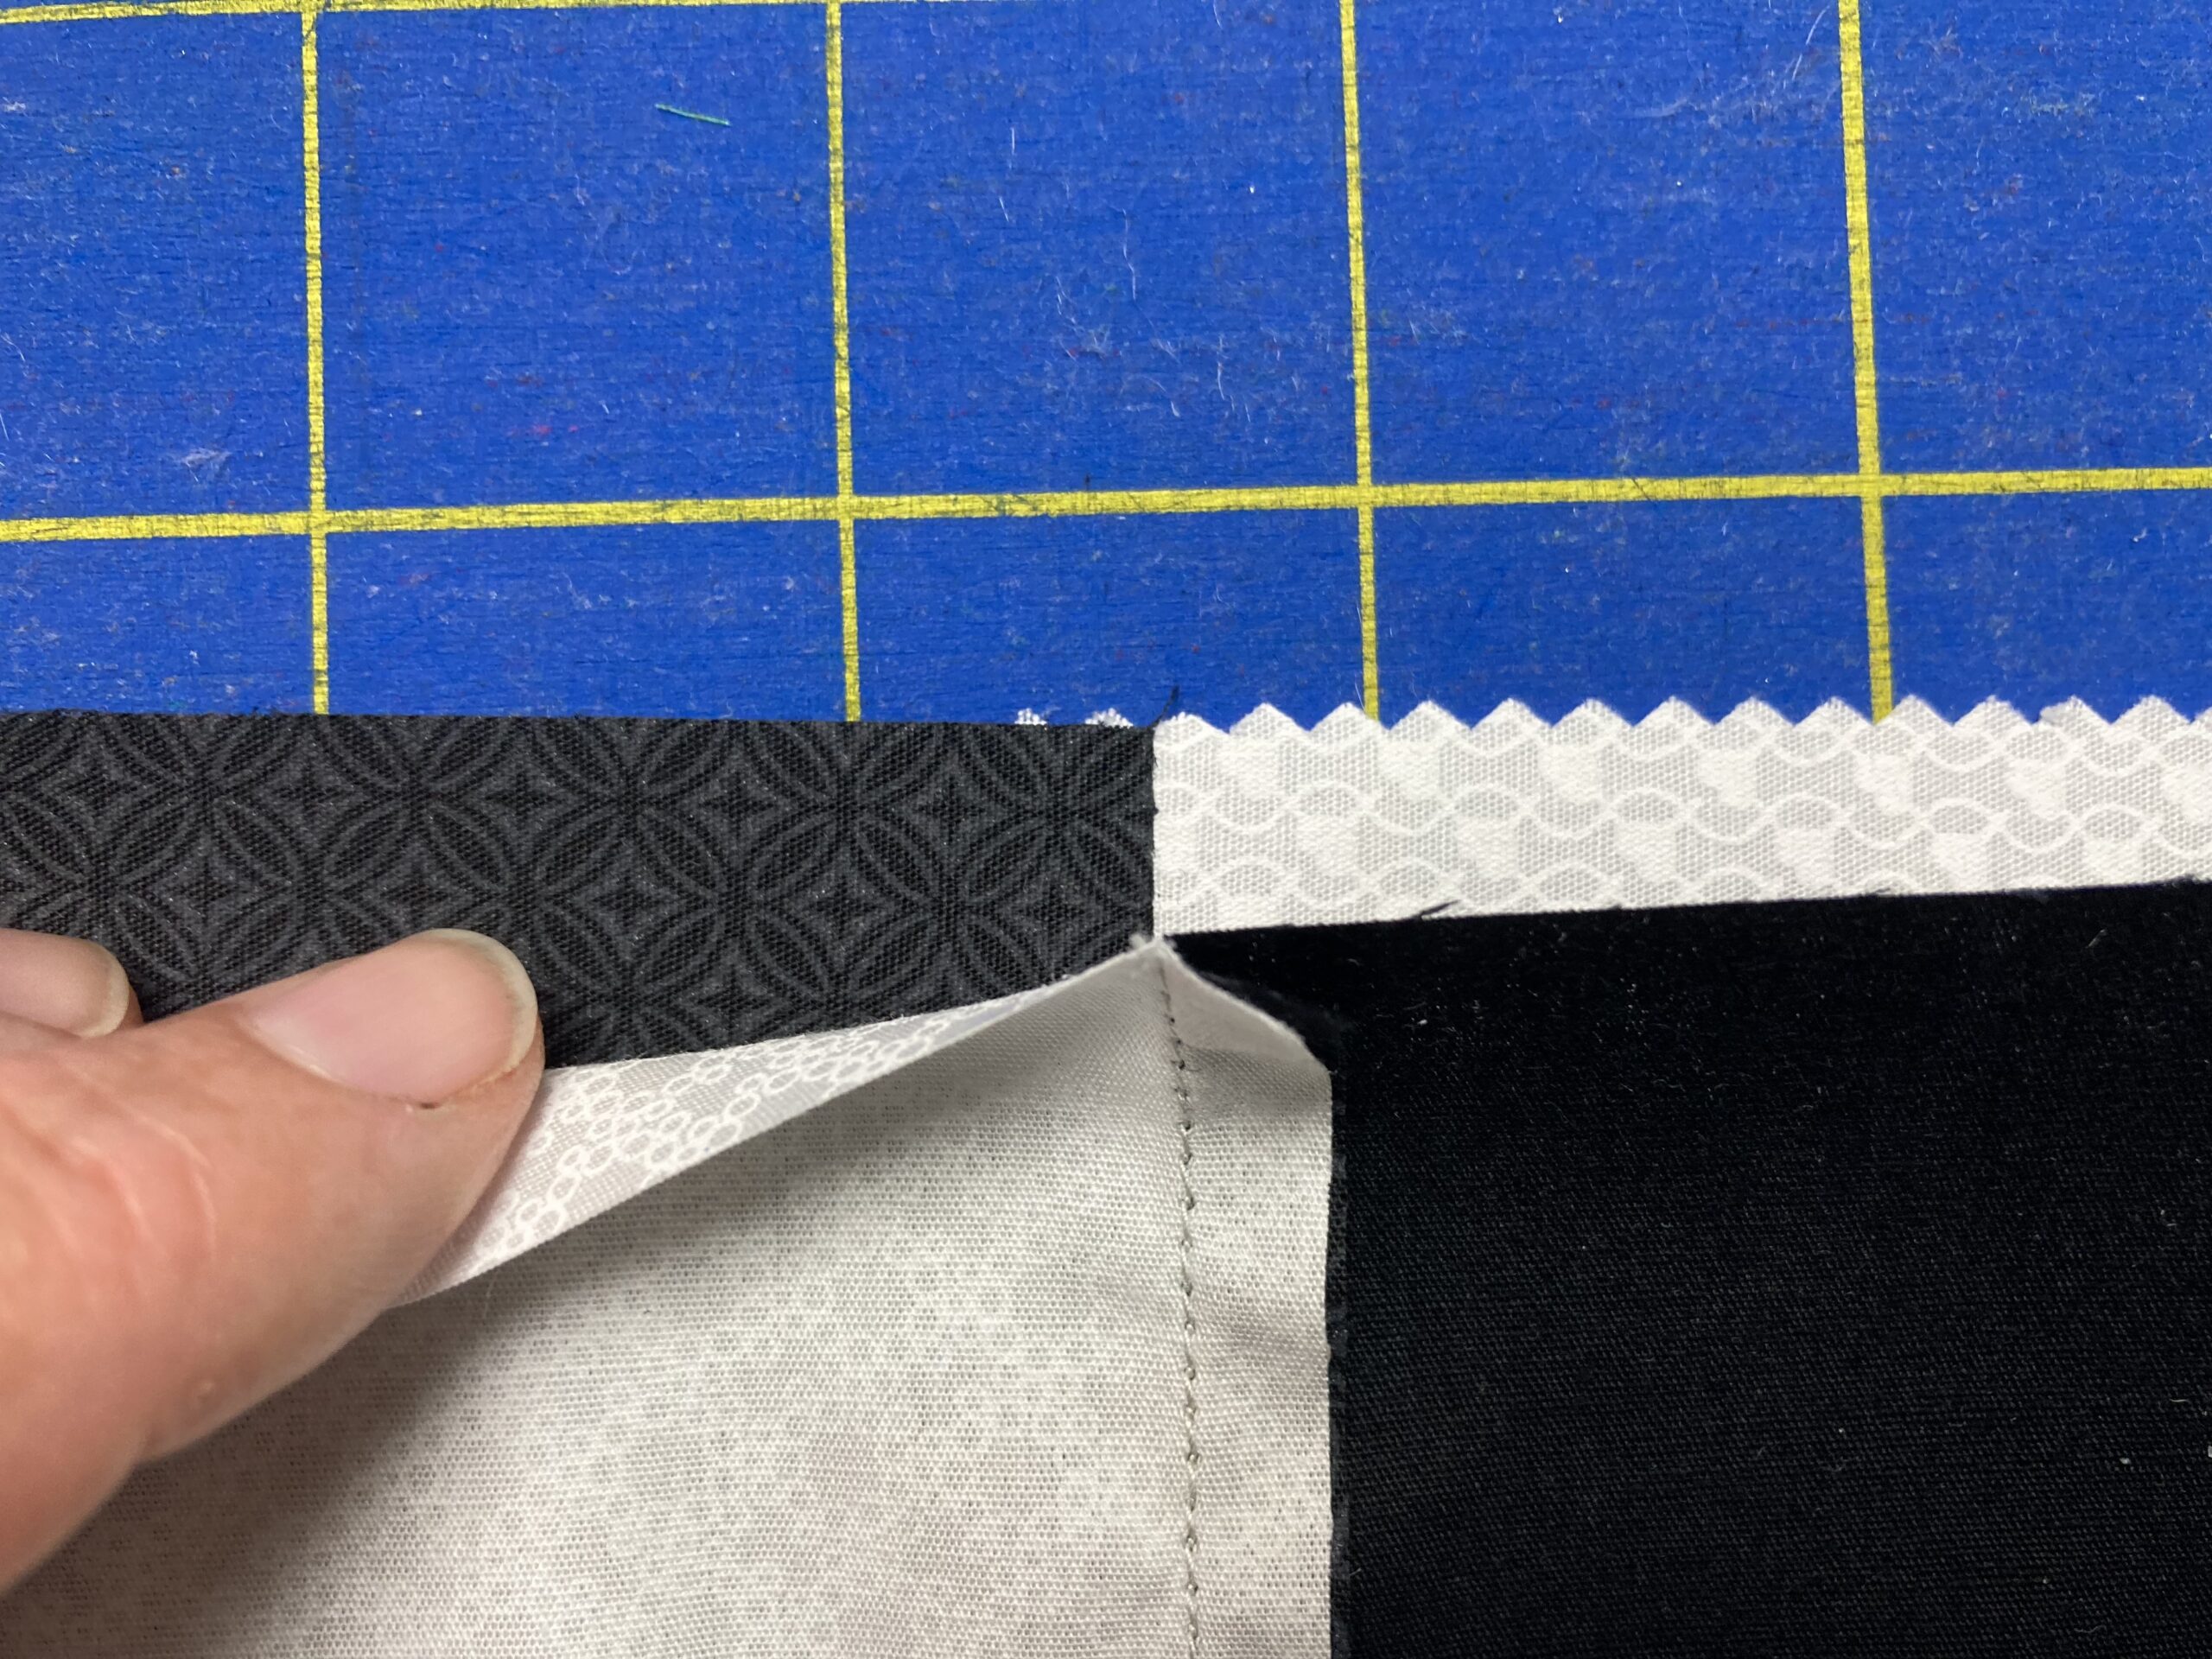
Step 3 Join the rows together, nesting the seam allowances so your seams align.
Finished Checkerboard quilt top

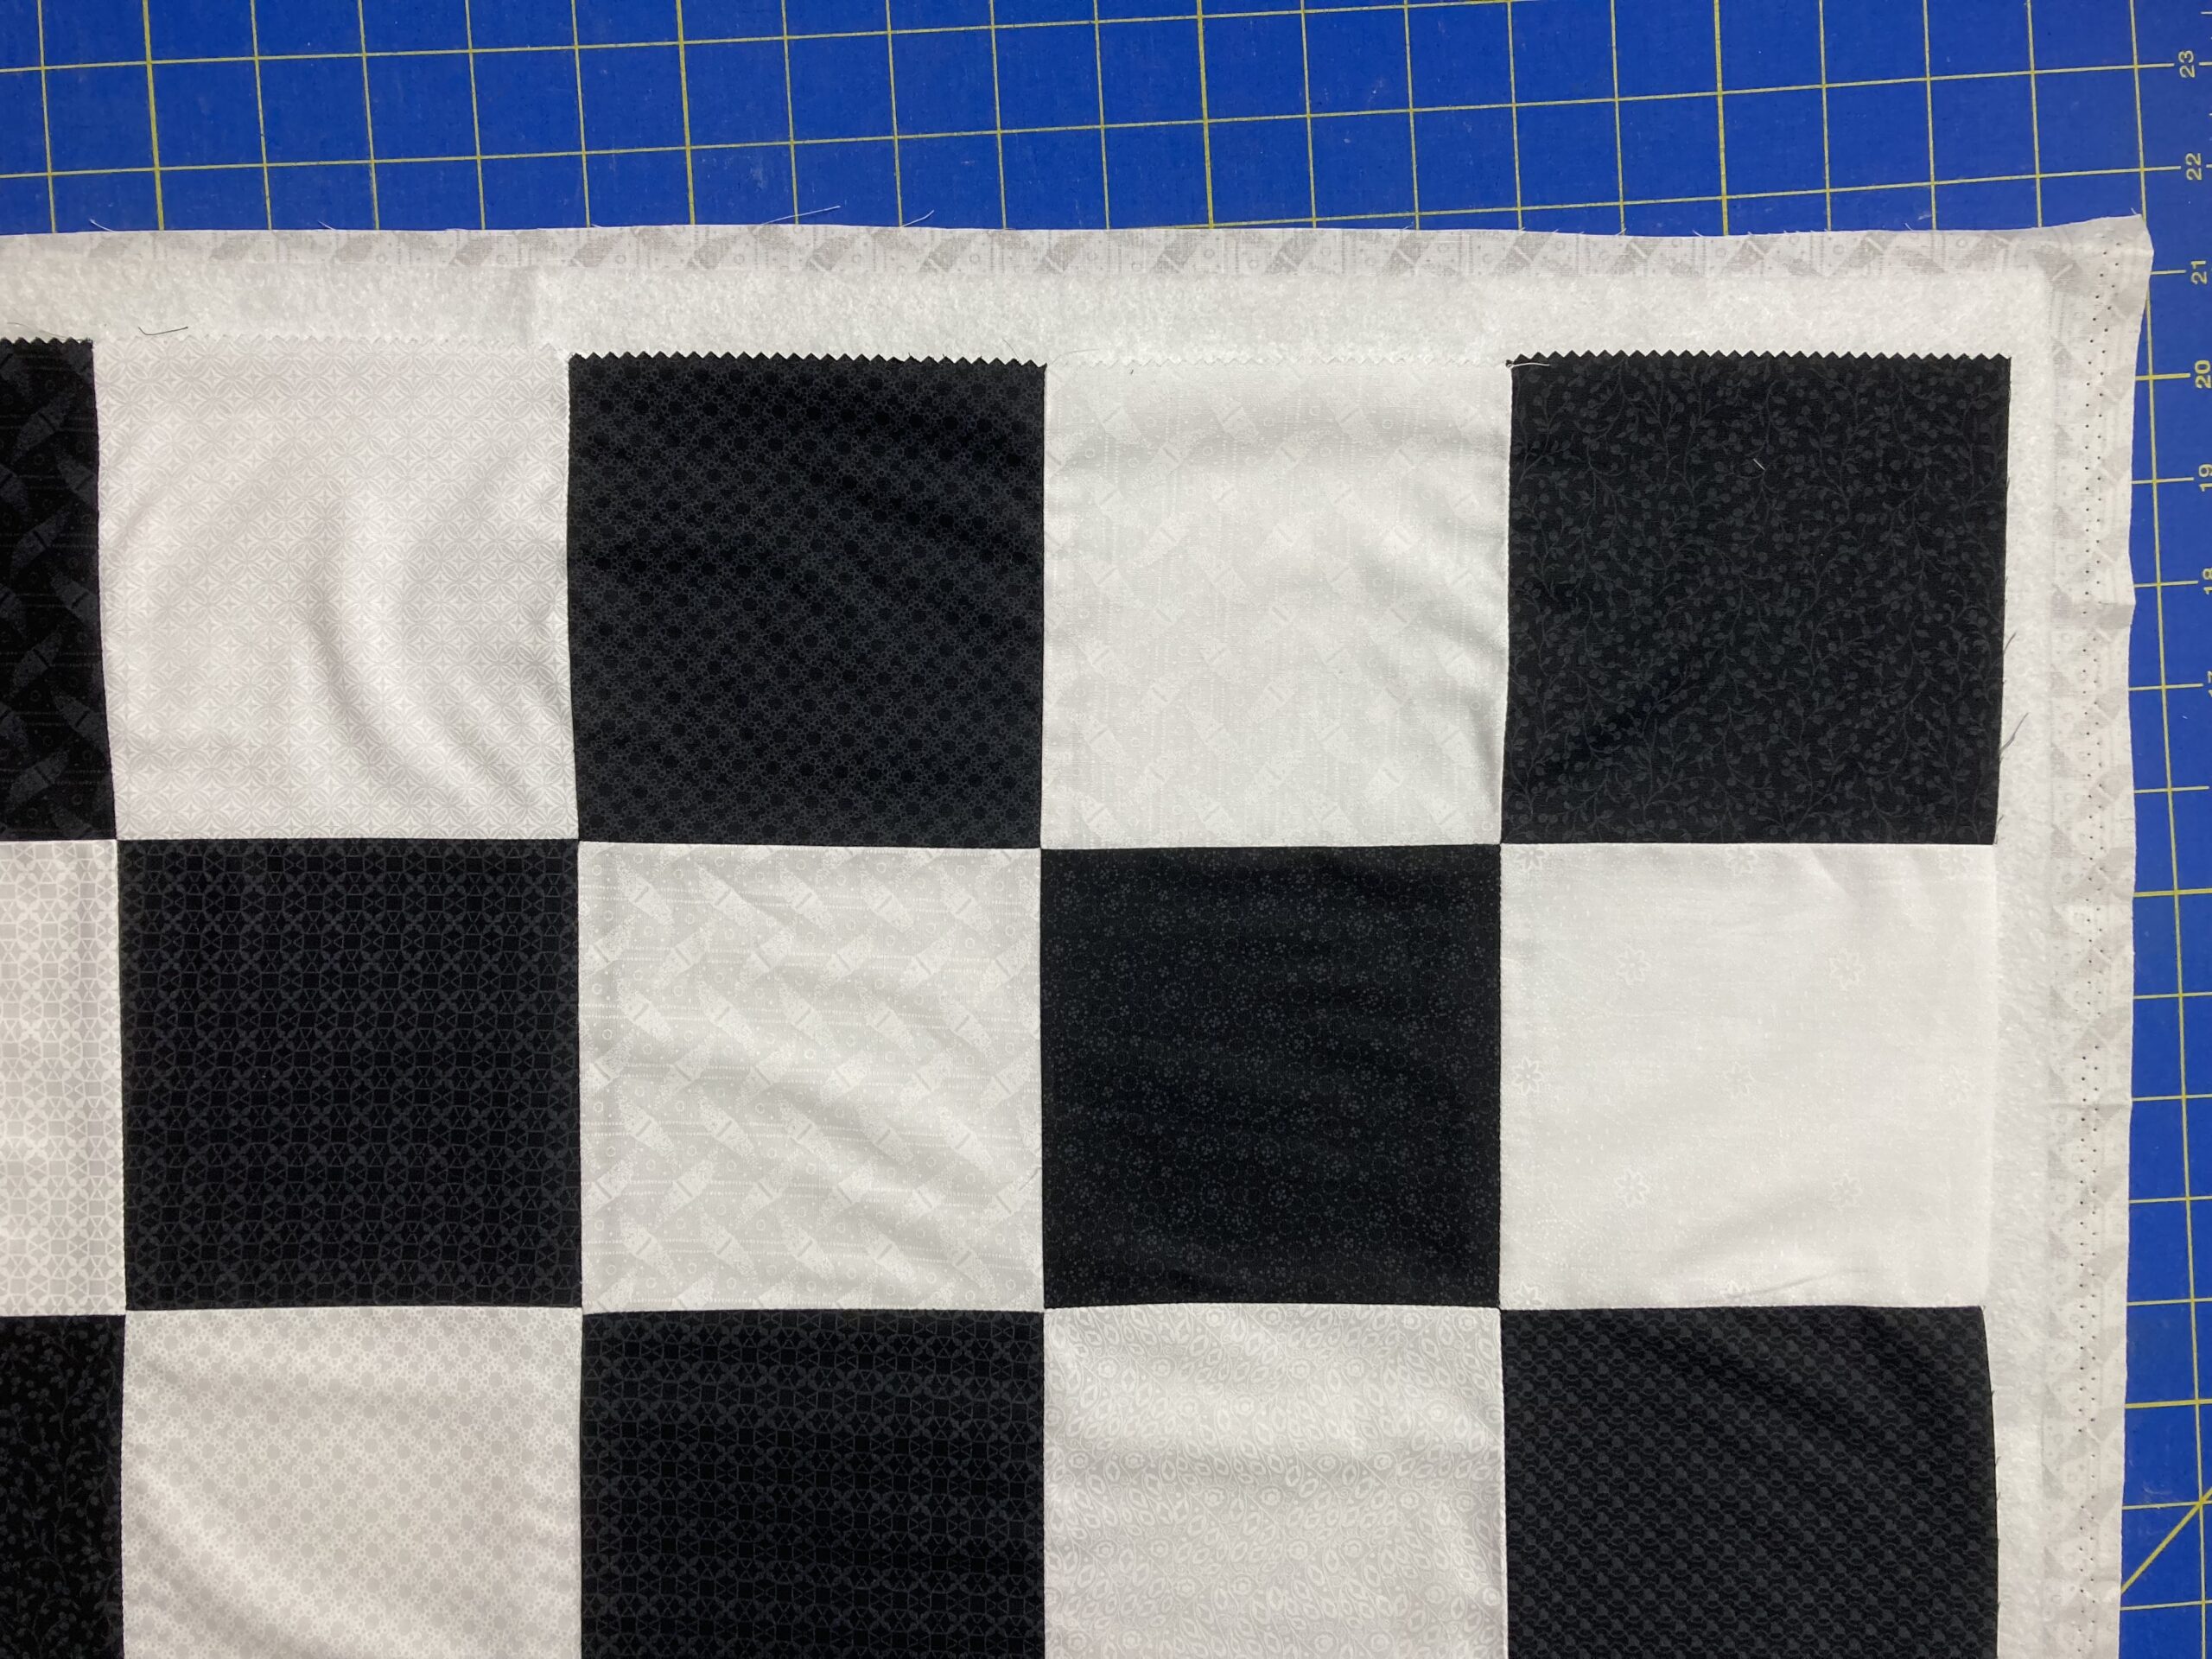
 Step 5 Trim backing and batting even with the quilt top. Use the (4) 2-1/4" x WOF black and white strips to bind the checkerboard.
Making the Checkers
Step 1 Trace (24) of the smaller circle onto the paper side of the fusible web, leaving 1/2" between circles. Fuse (12) circles onto solid red and (12) onto solid blue. Cut out each circle using pinking shears. Set aside.
Step 5 Trim backing and batting even with the quilt top. Use the (4) 2-1/4" x WOF black and white strips to bind the checkerboard.
Making the Checkers
Step 1 Trace (24) of the smaller circle onto the paper side of the fusible web, leaving 1/2" between circles. Fuse (12) circles onto solid red and (12) onto solid blue. Cut out each circle using pinking shears. Set aside.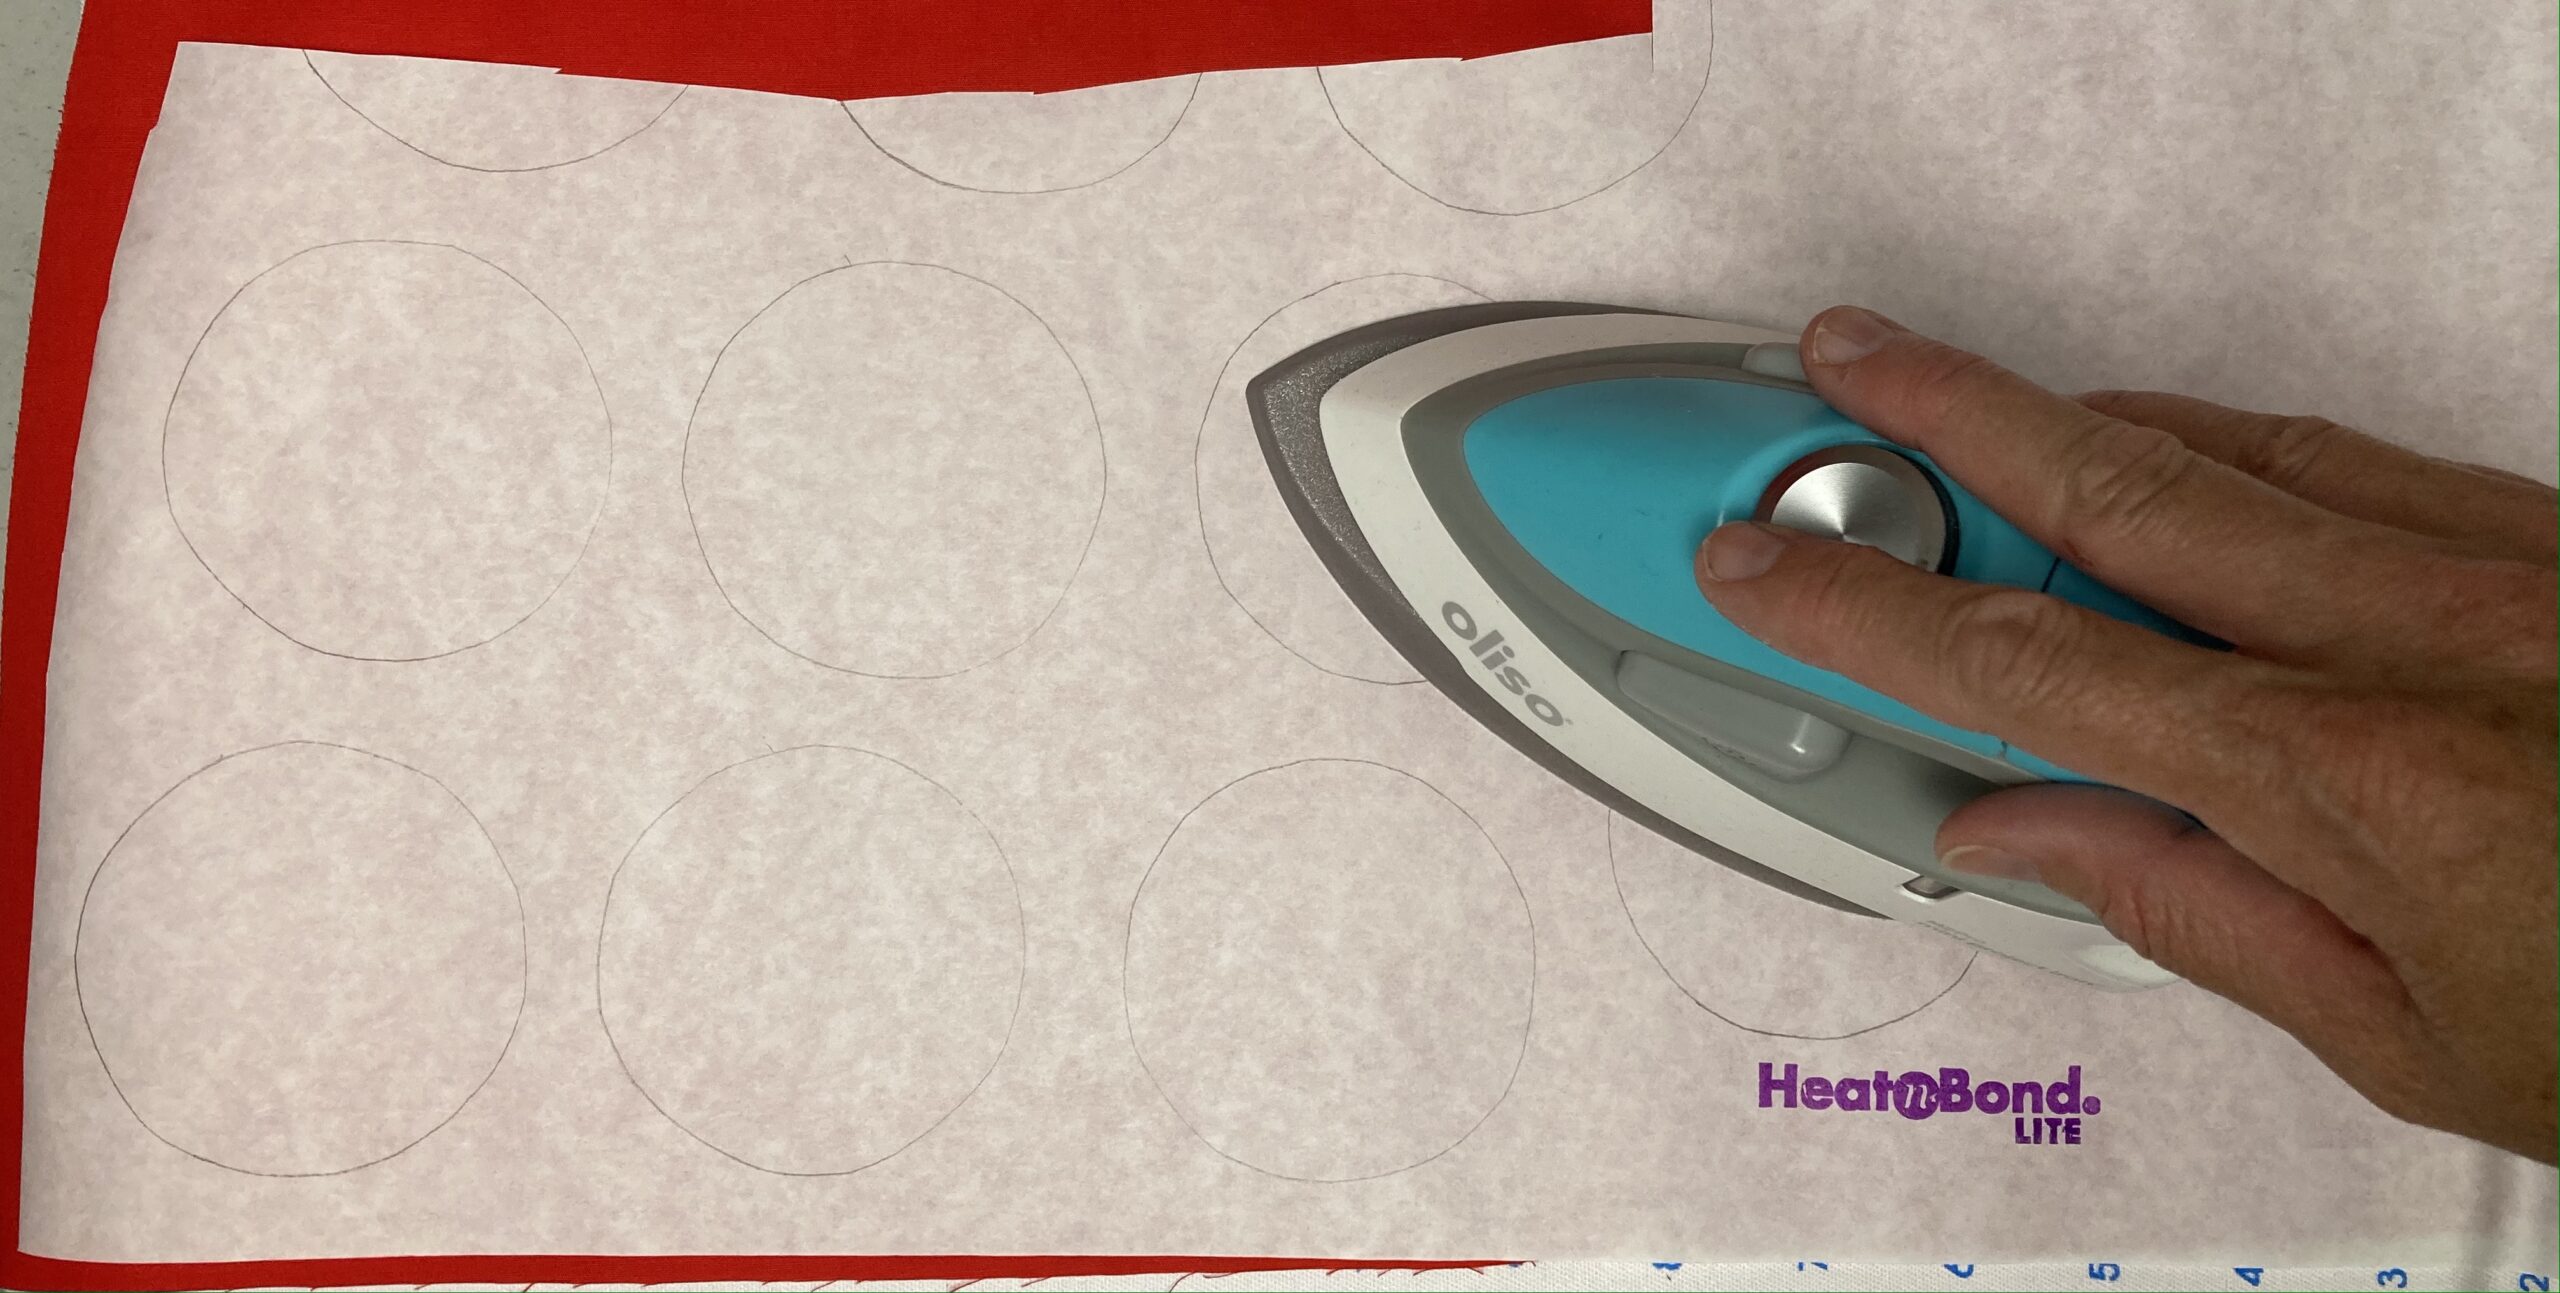
 Step 2 Fold (1) black and white 10" square in half, right sides together. Trace the (2) of the larger circle onto the folded square. Layer the folded square on a 5" x 10" piece of Fusible Fleece and fuse to the bottom half of the folded square.
 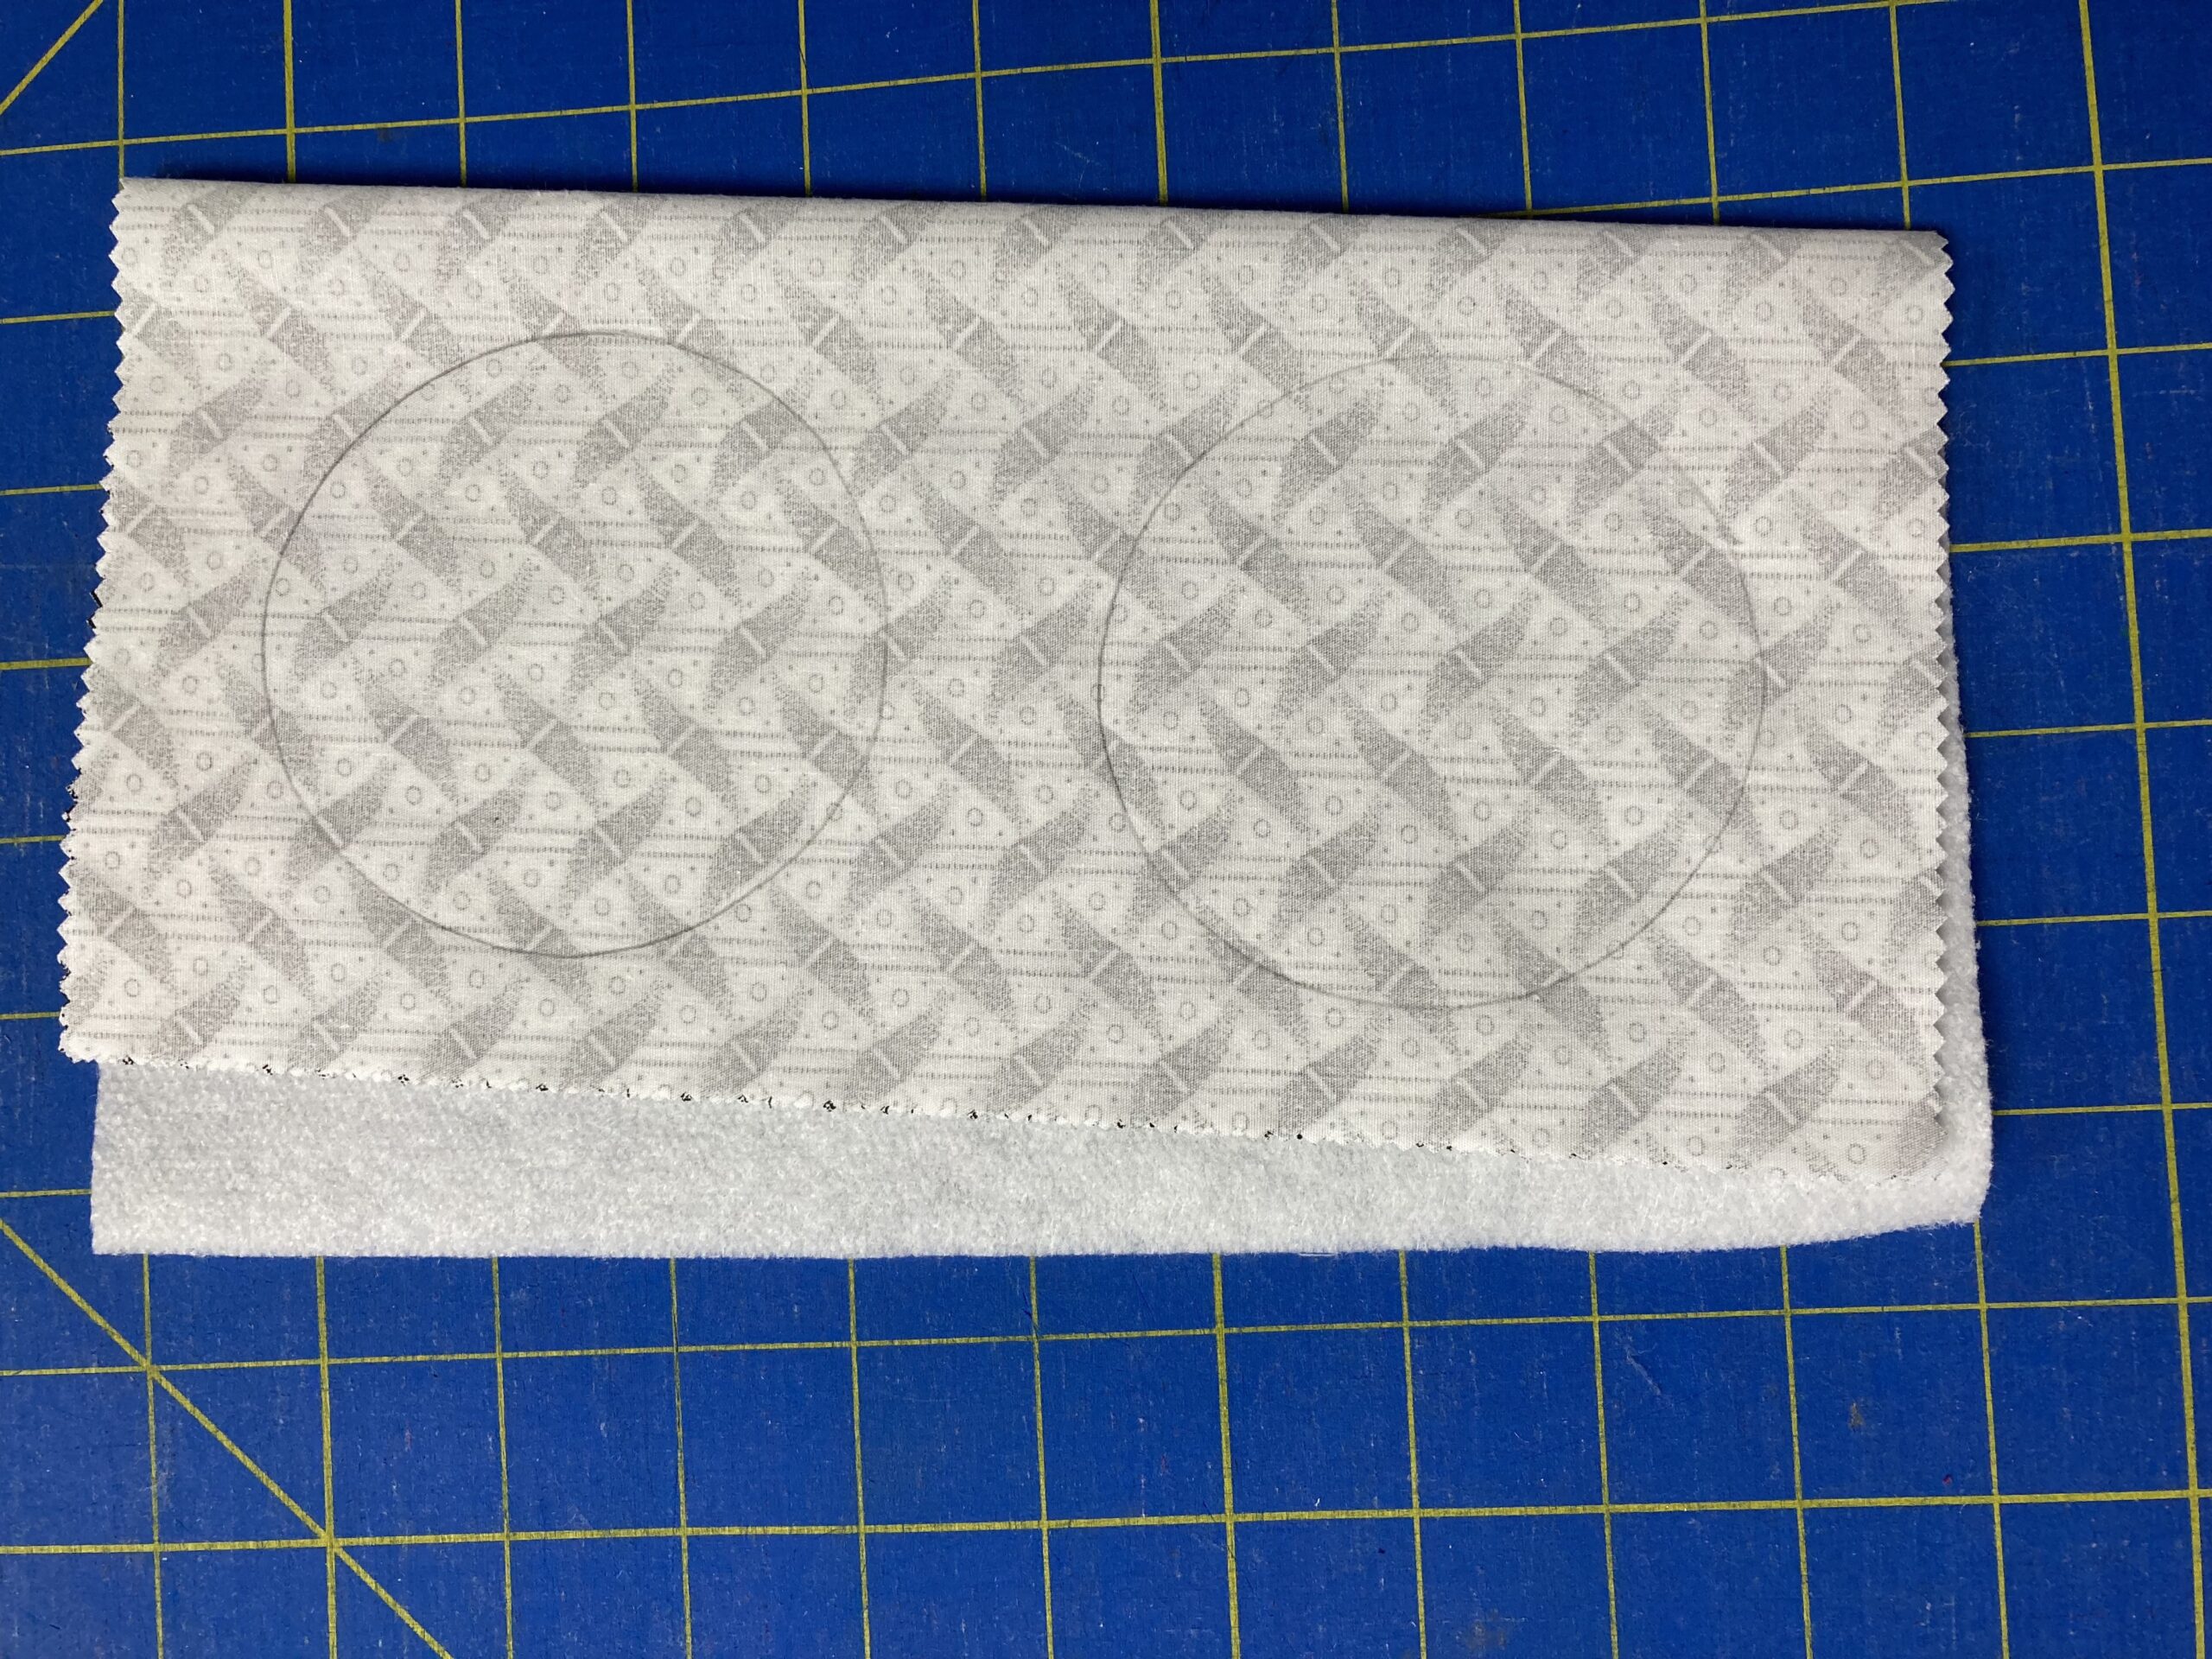 Step 3 Cut a slit across the center of each traced circle, at least 1/4" from the traced line. This is for turning the circle right side out.
 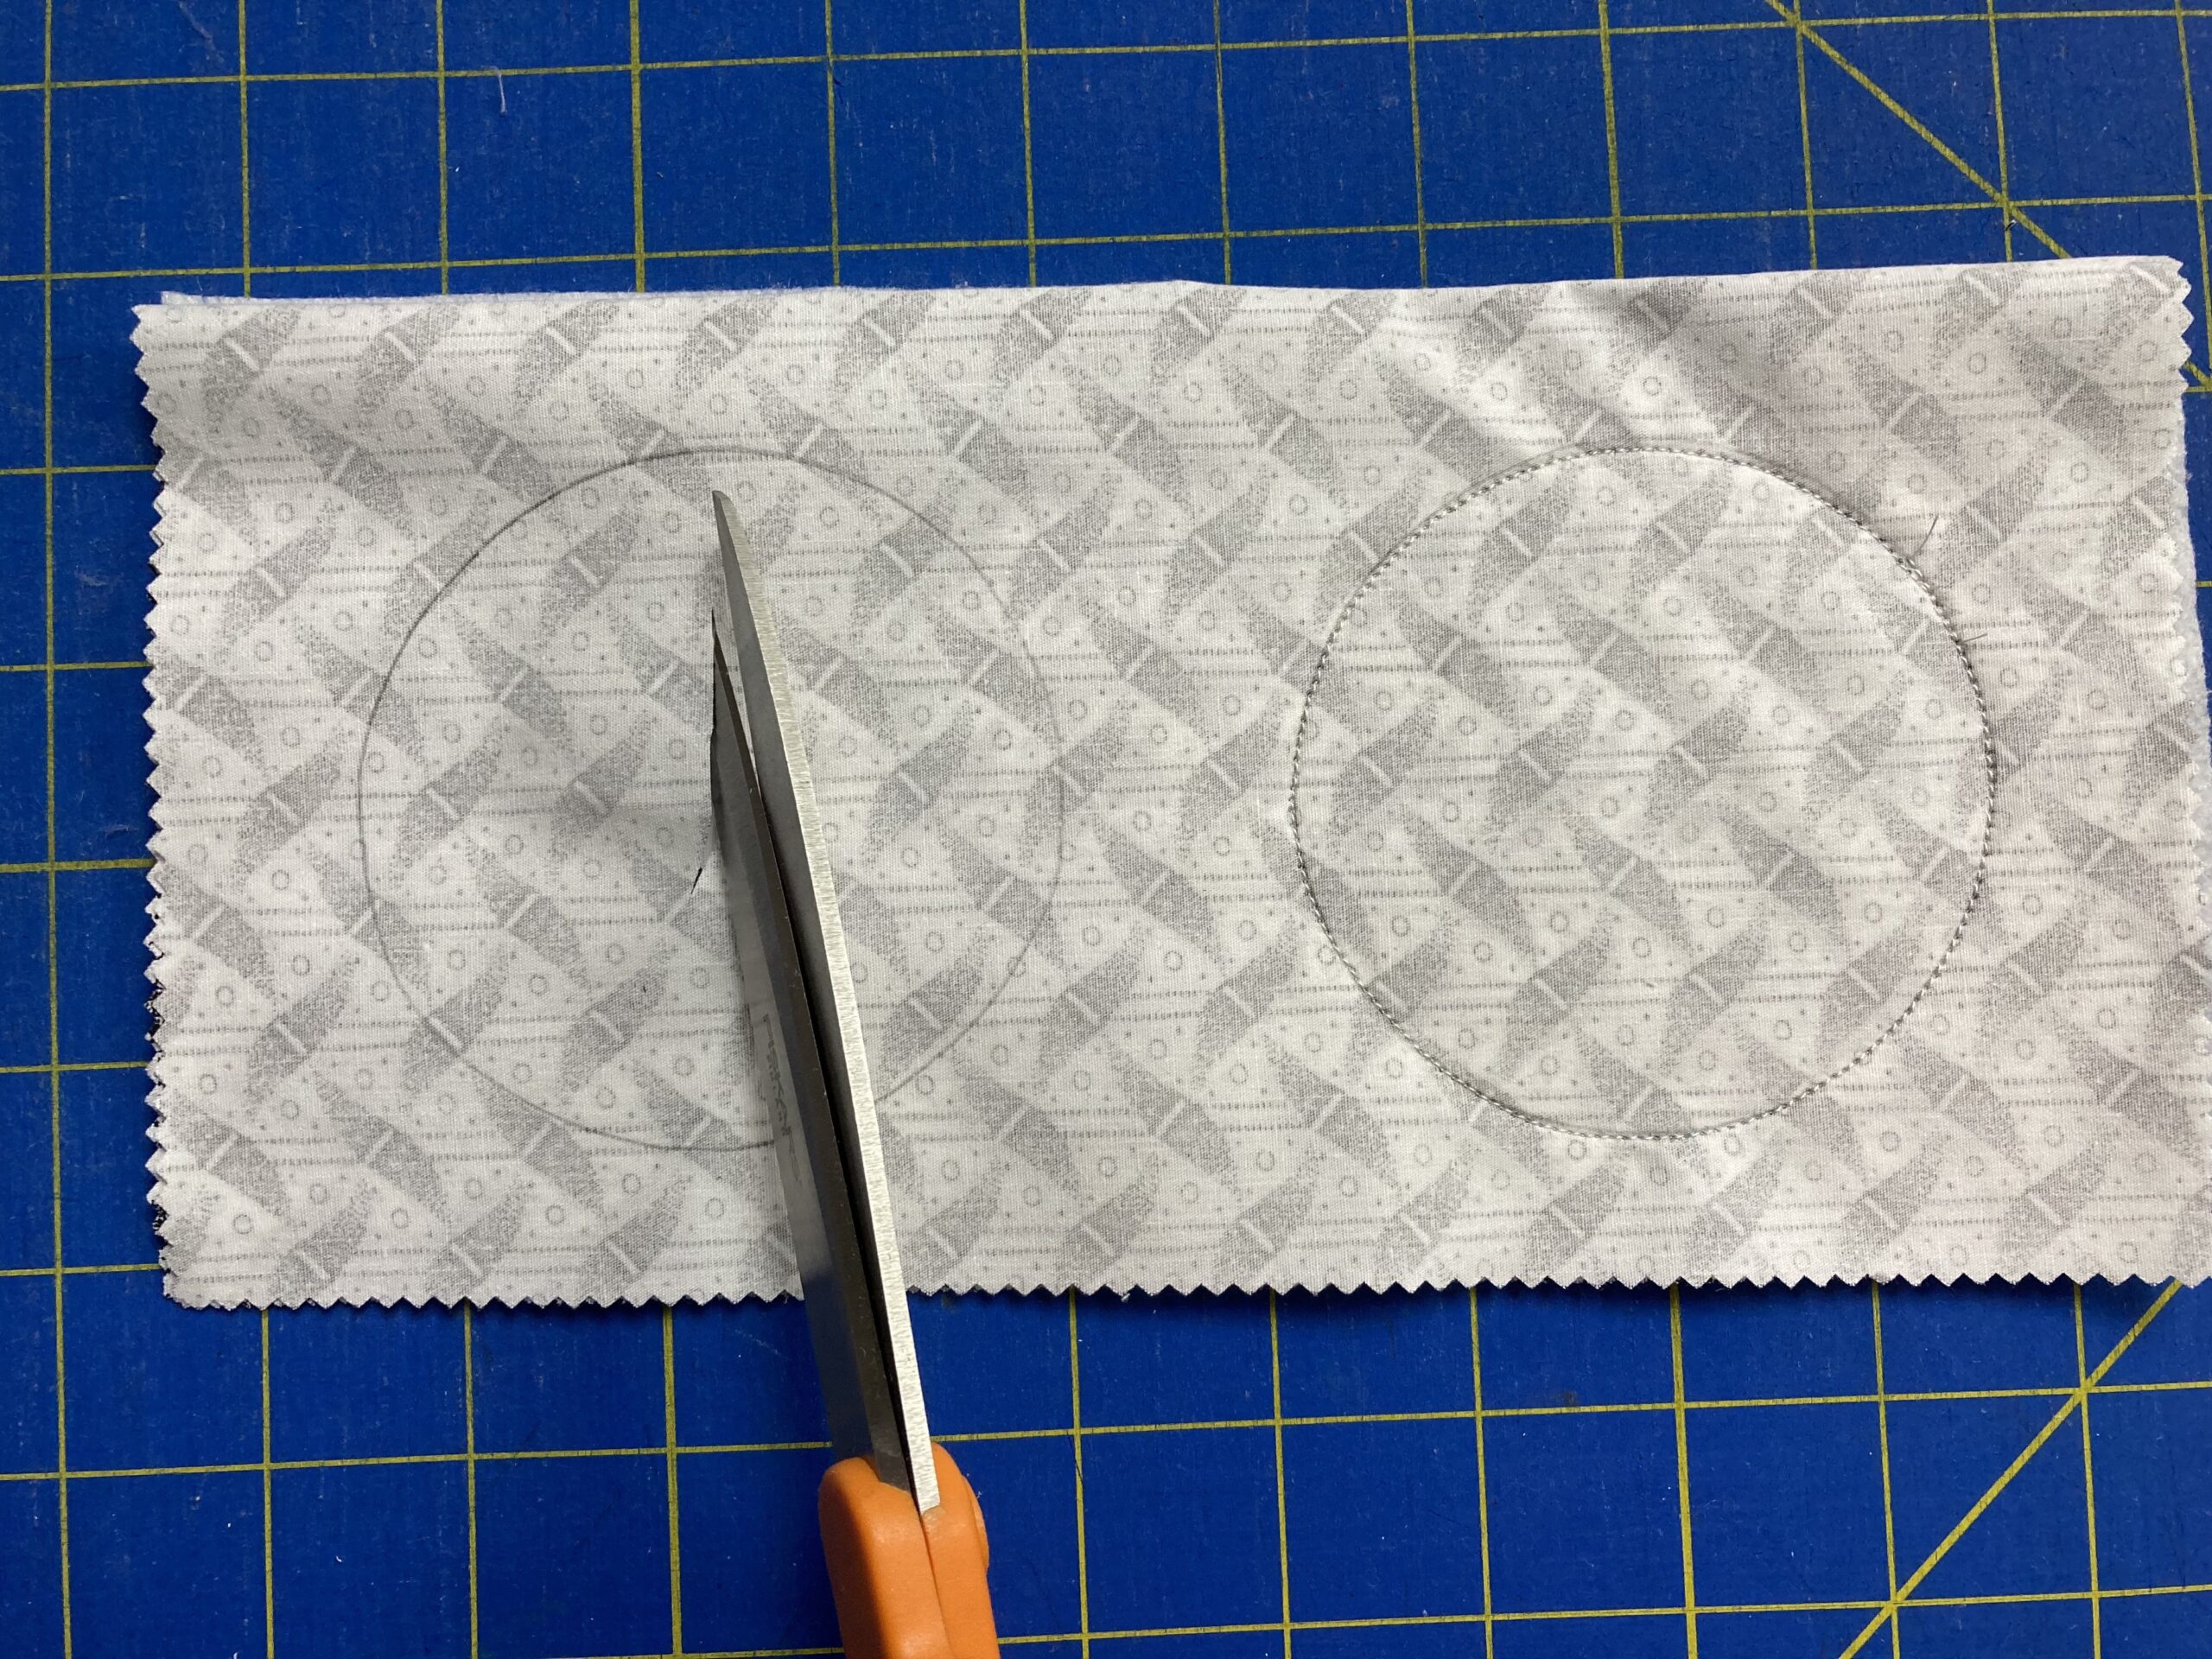 Step 4 Stitch around each traced circle (through all layers). Trim circles 1/4" past the stitched lines.
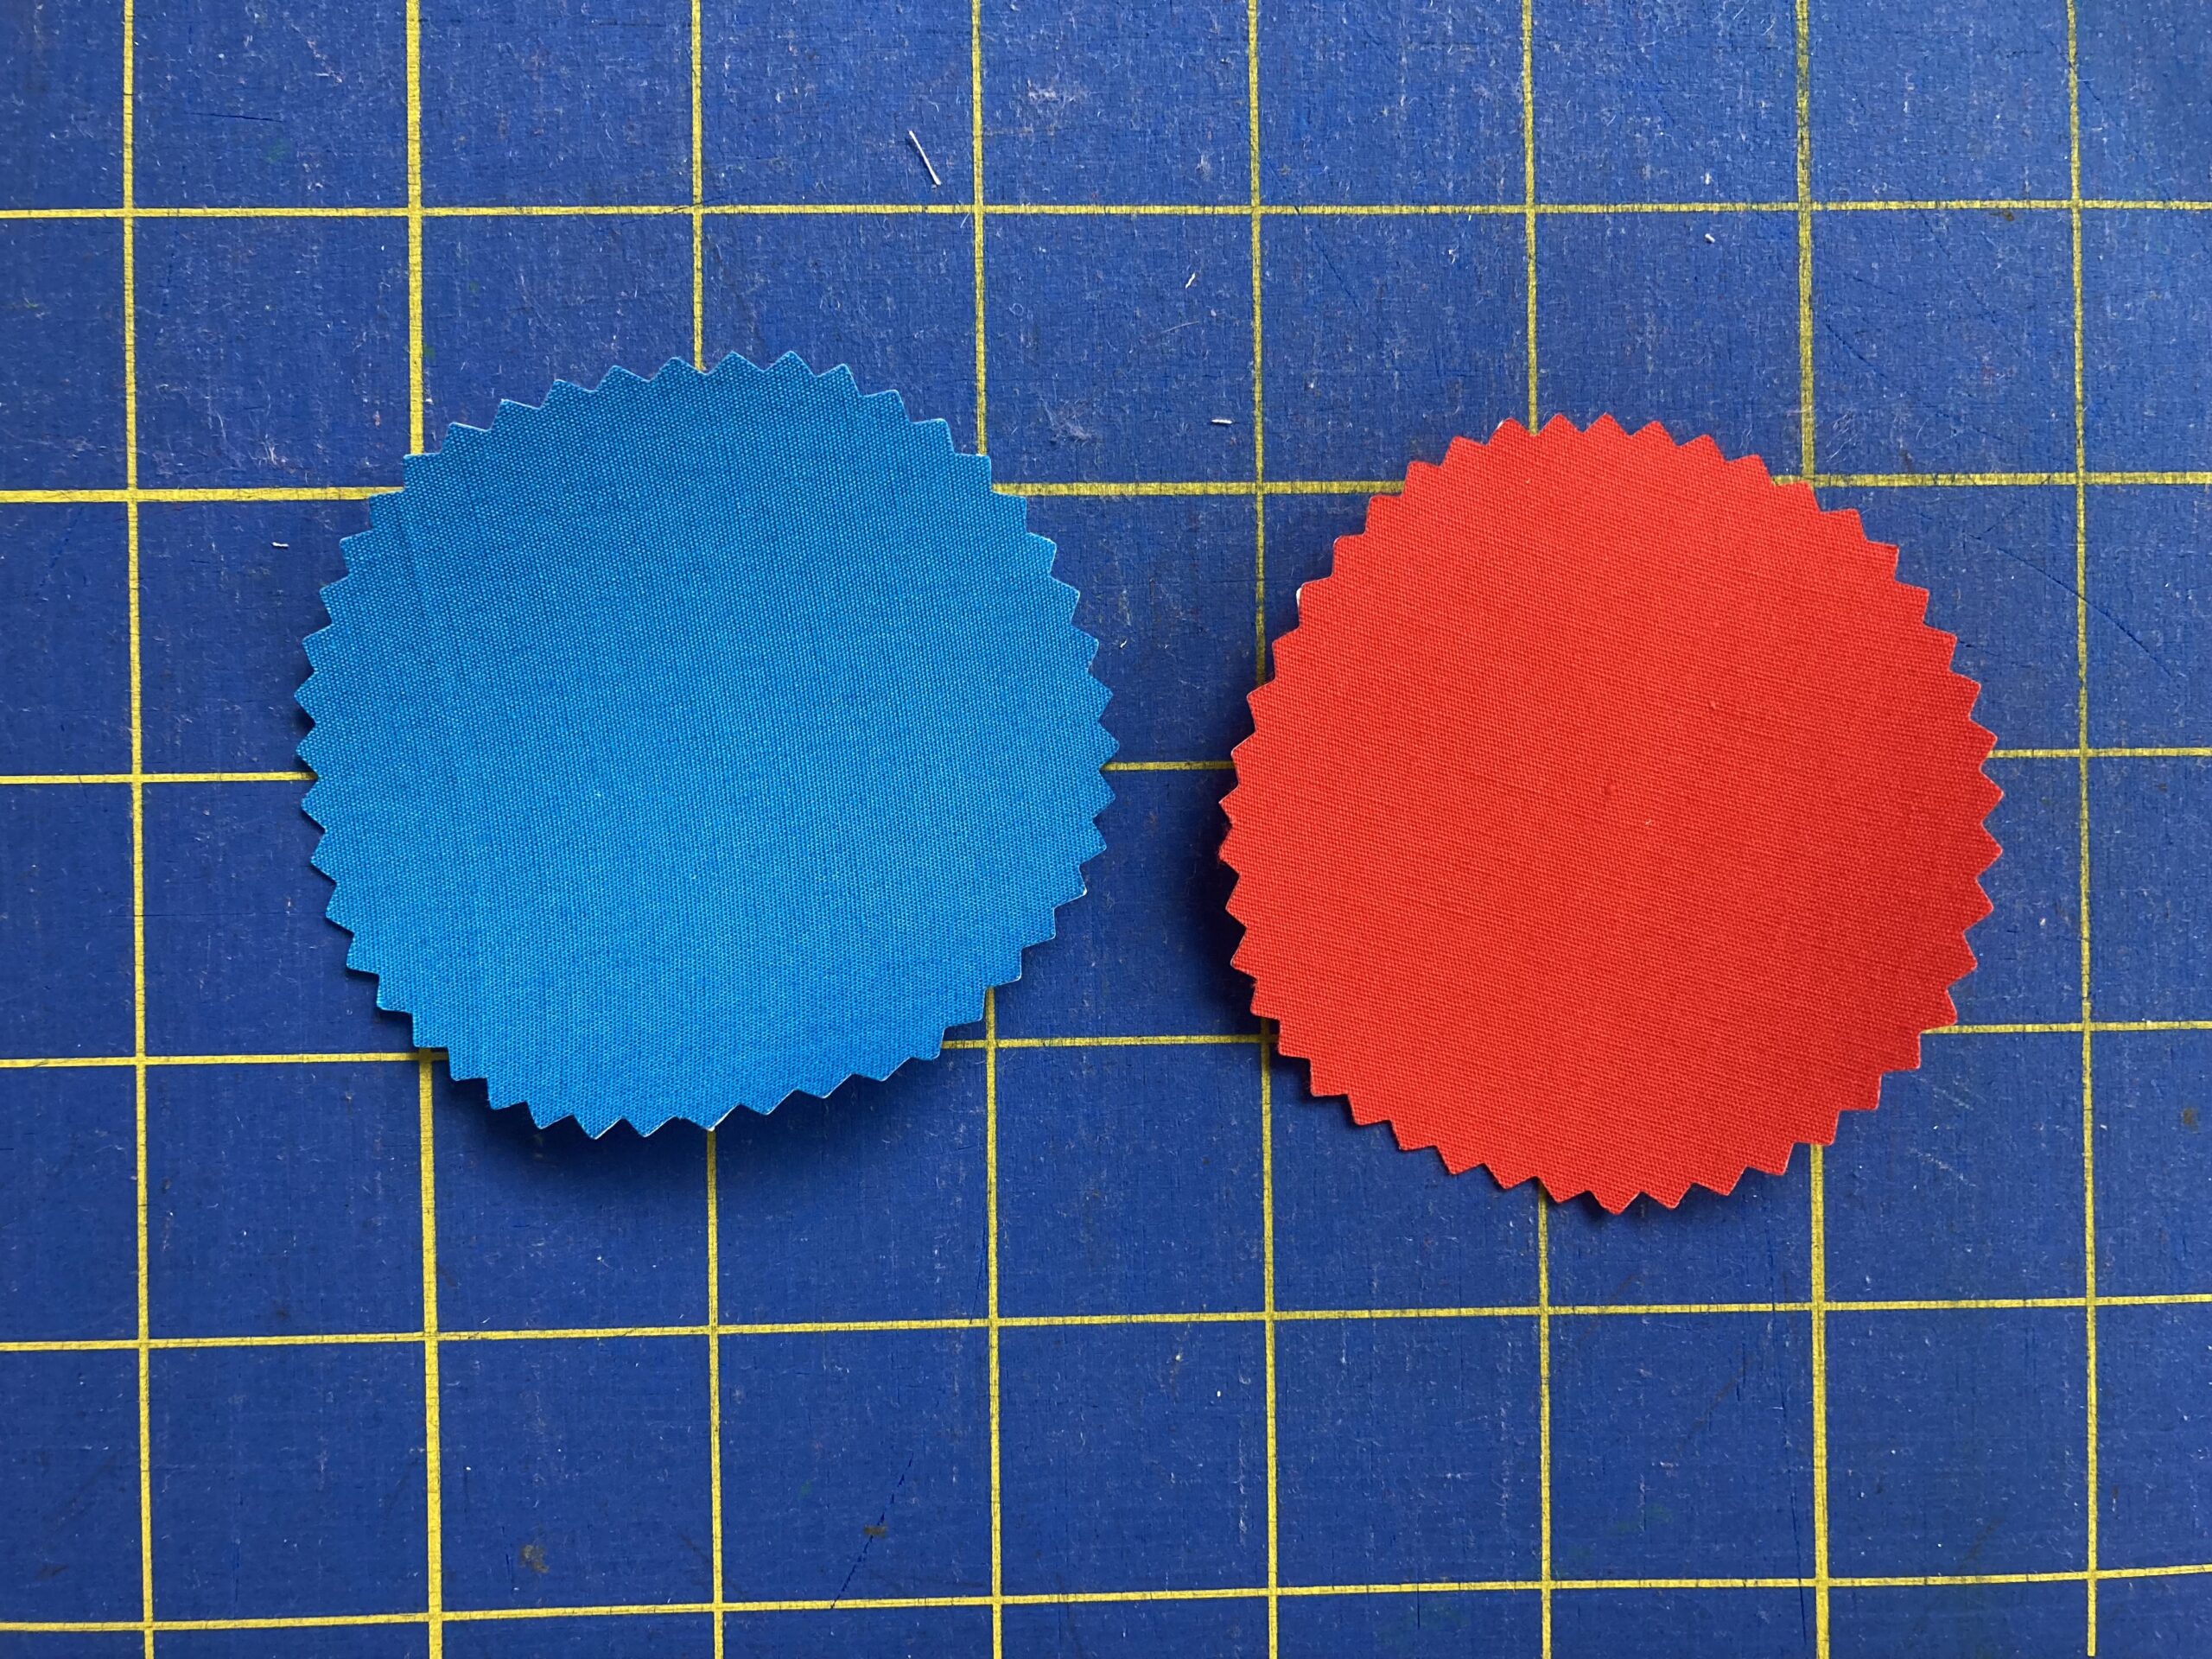
 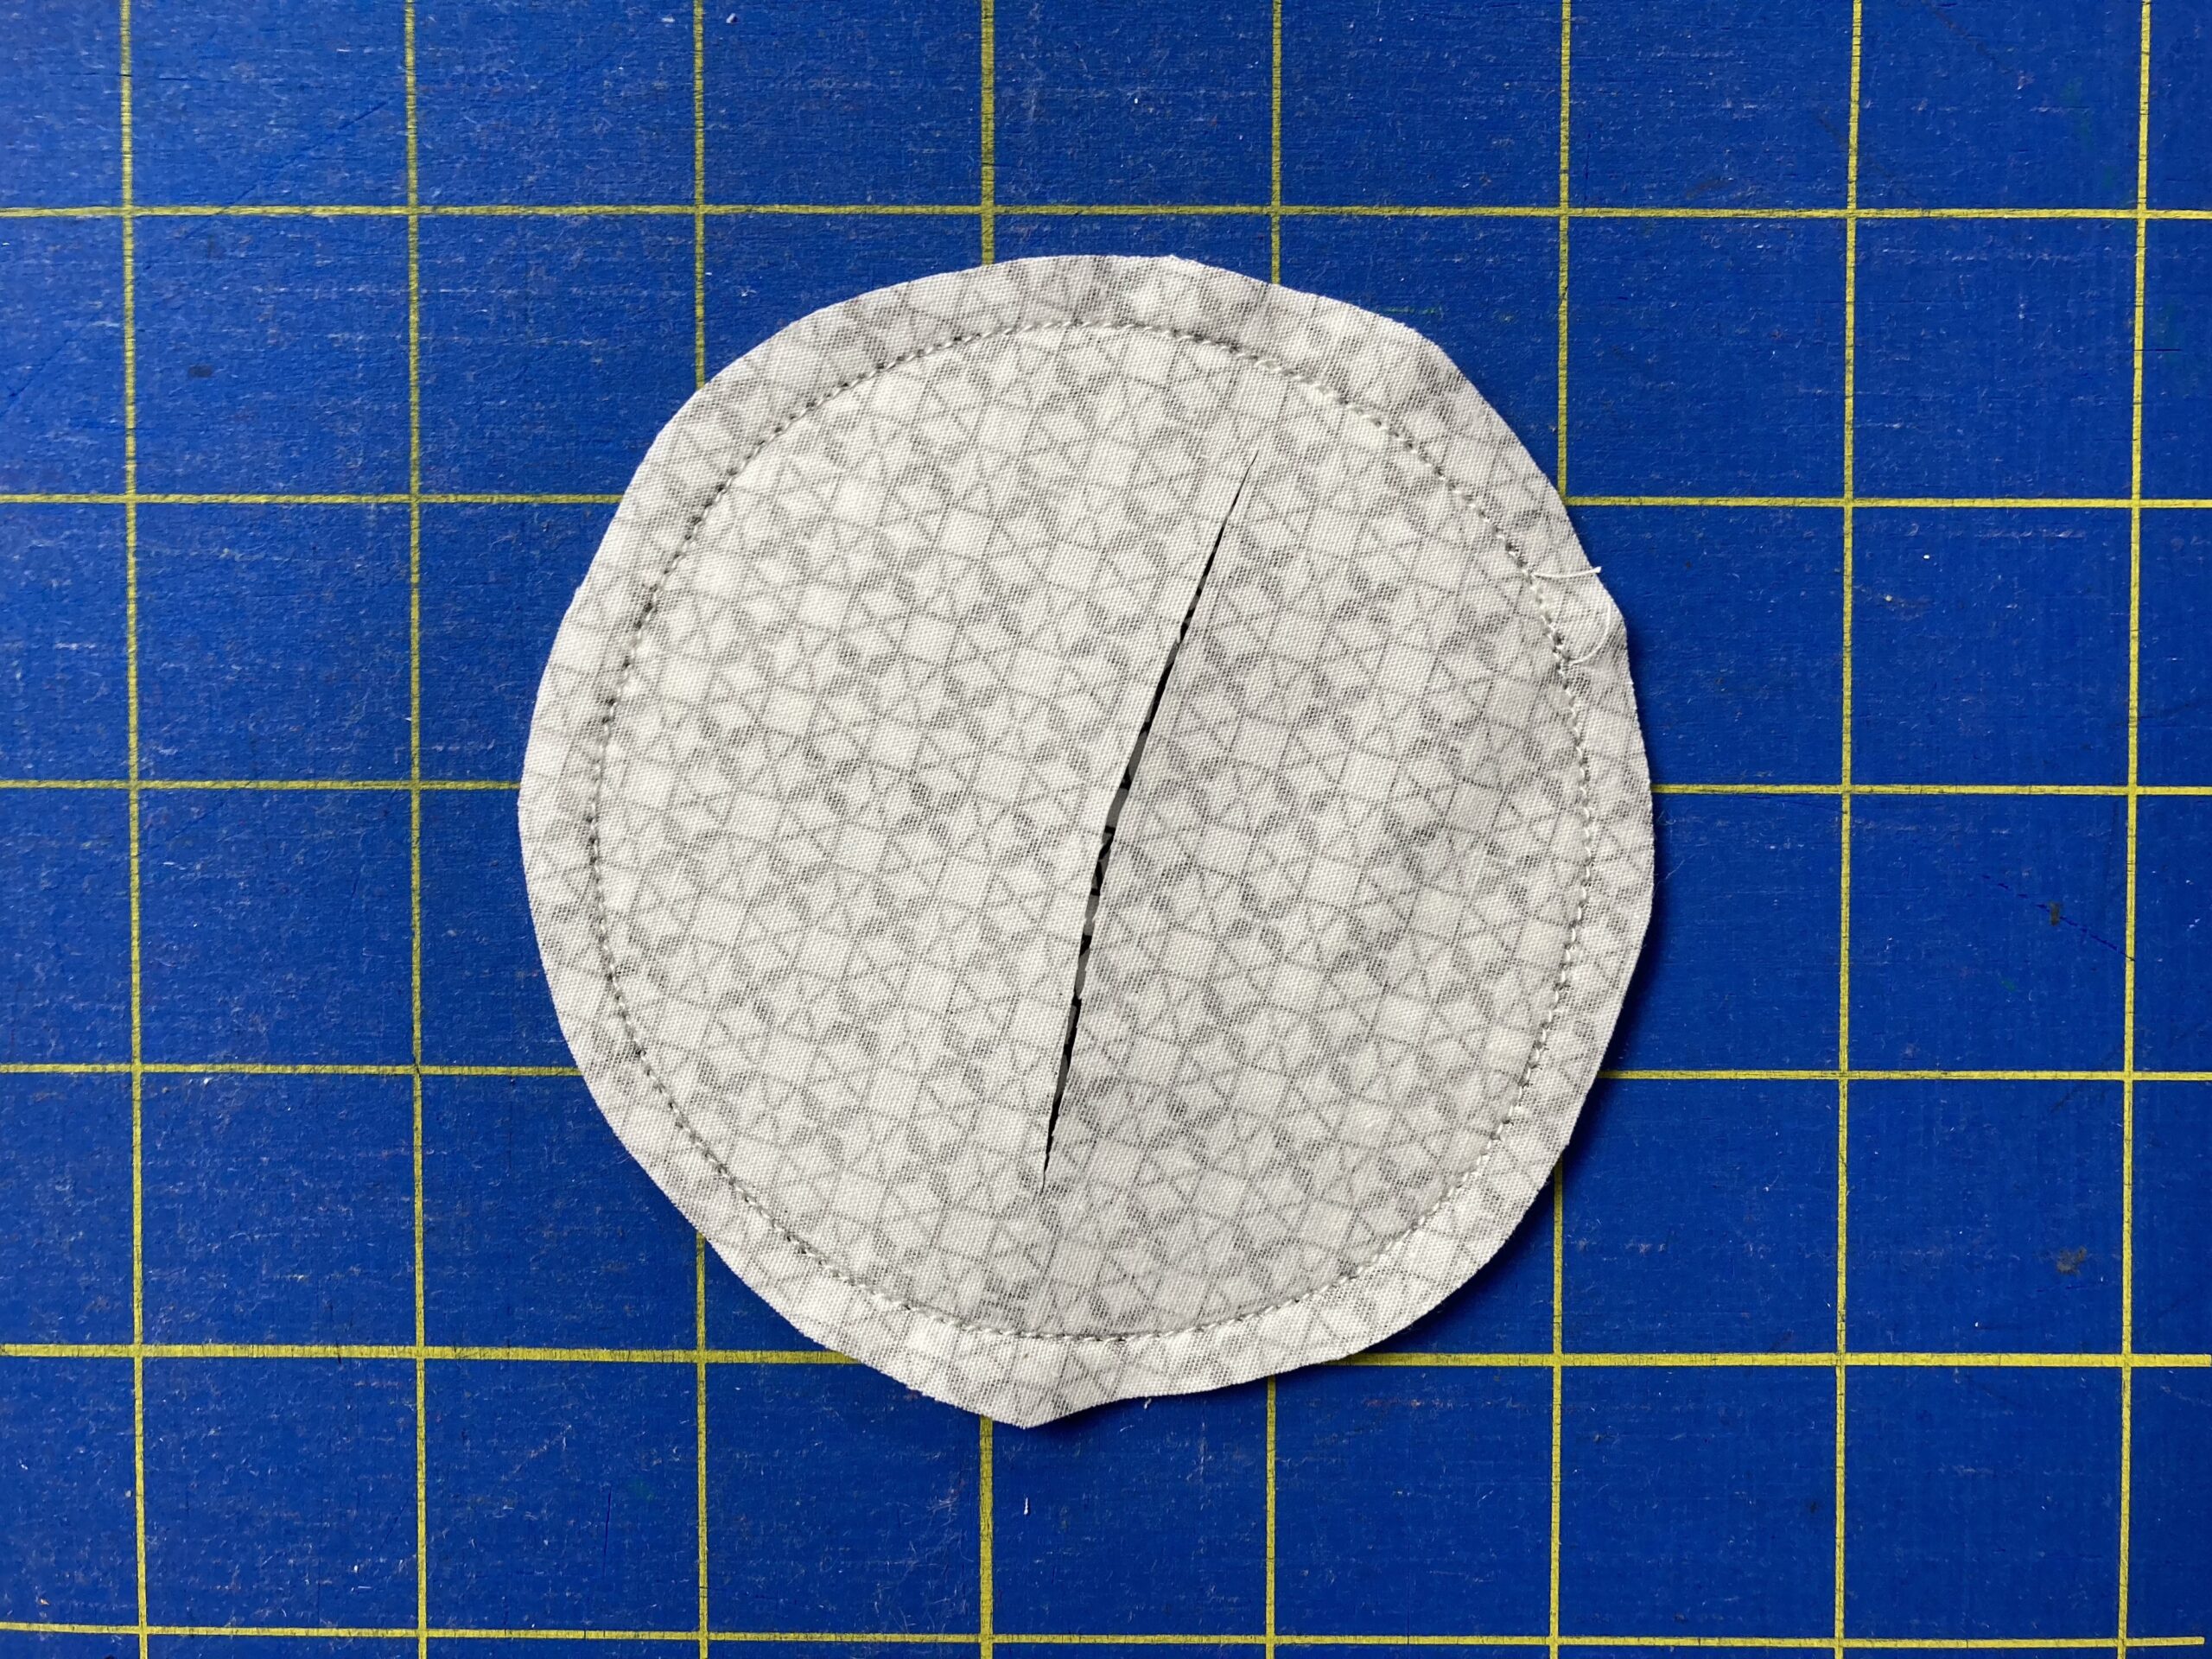 Step 5 Turn the checker right side out and press to flatten. Fuse a red or blue circle to the side of the checker with the slit, centering it.
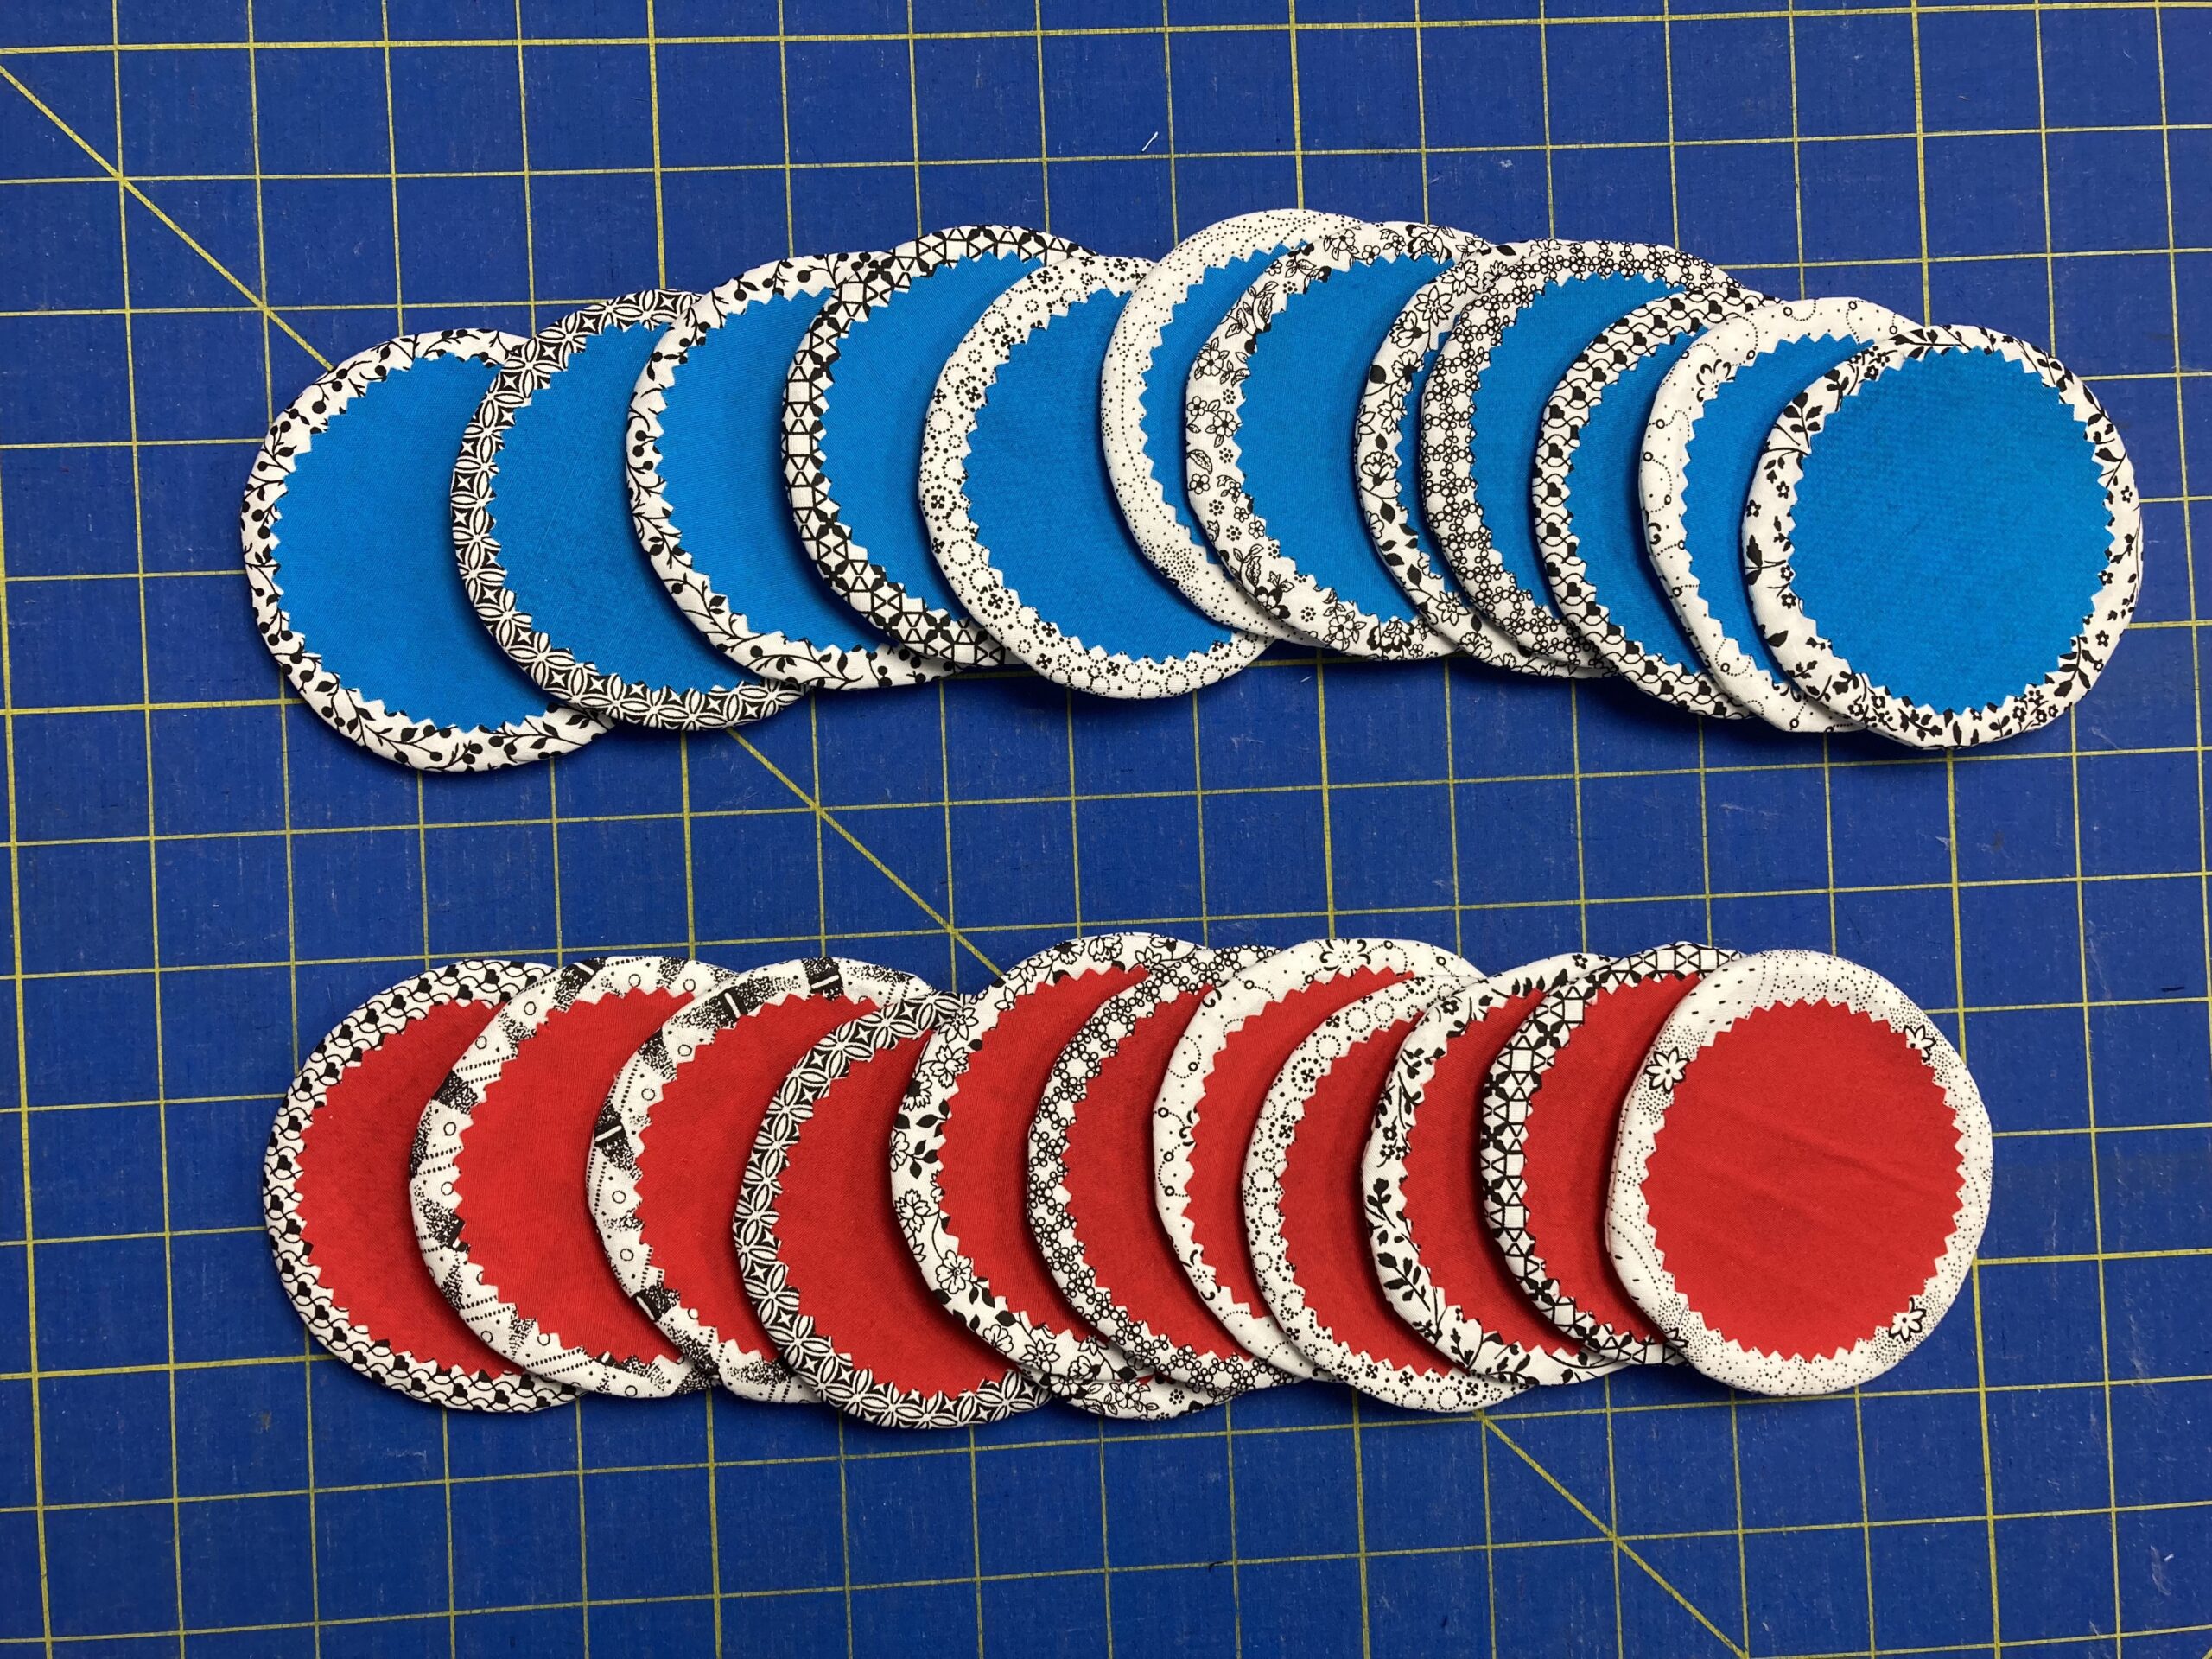
 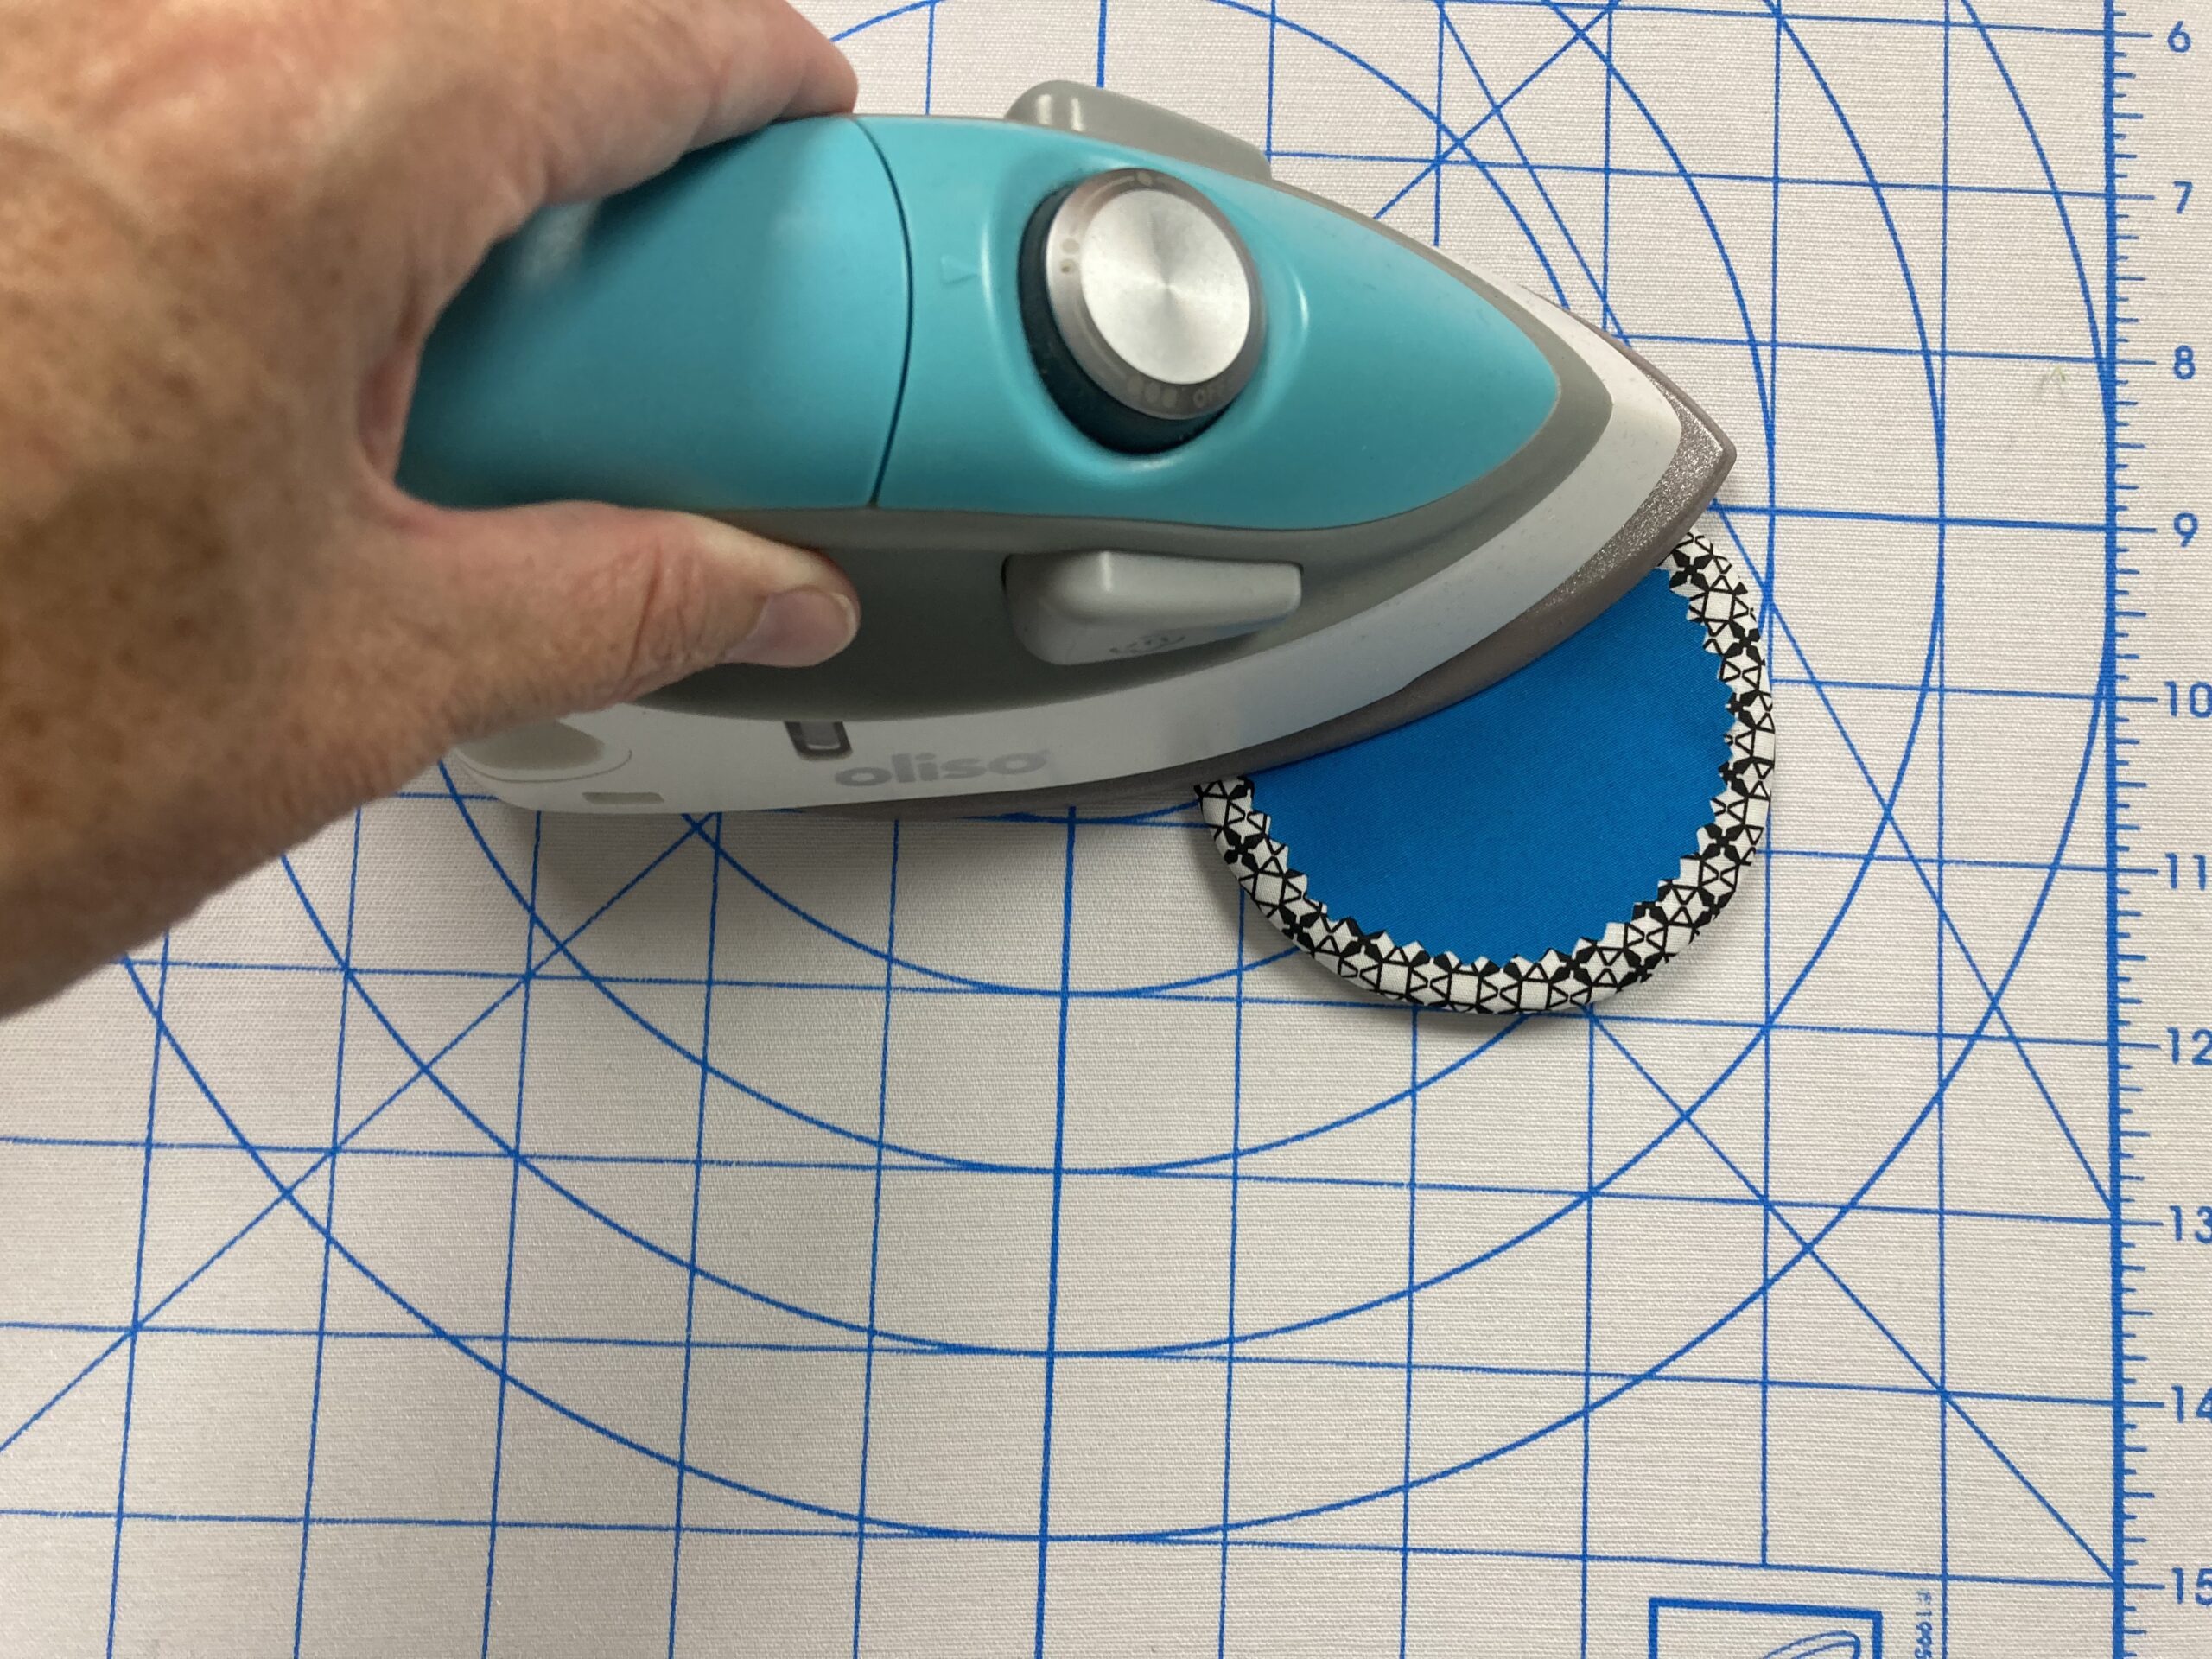 Step 6 Repeat steps 2-5 to make a total of (12) red and (12) blue checkers.
 Finishing
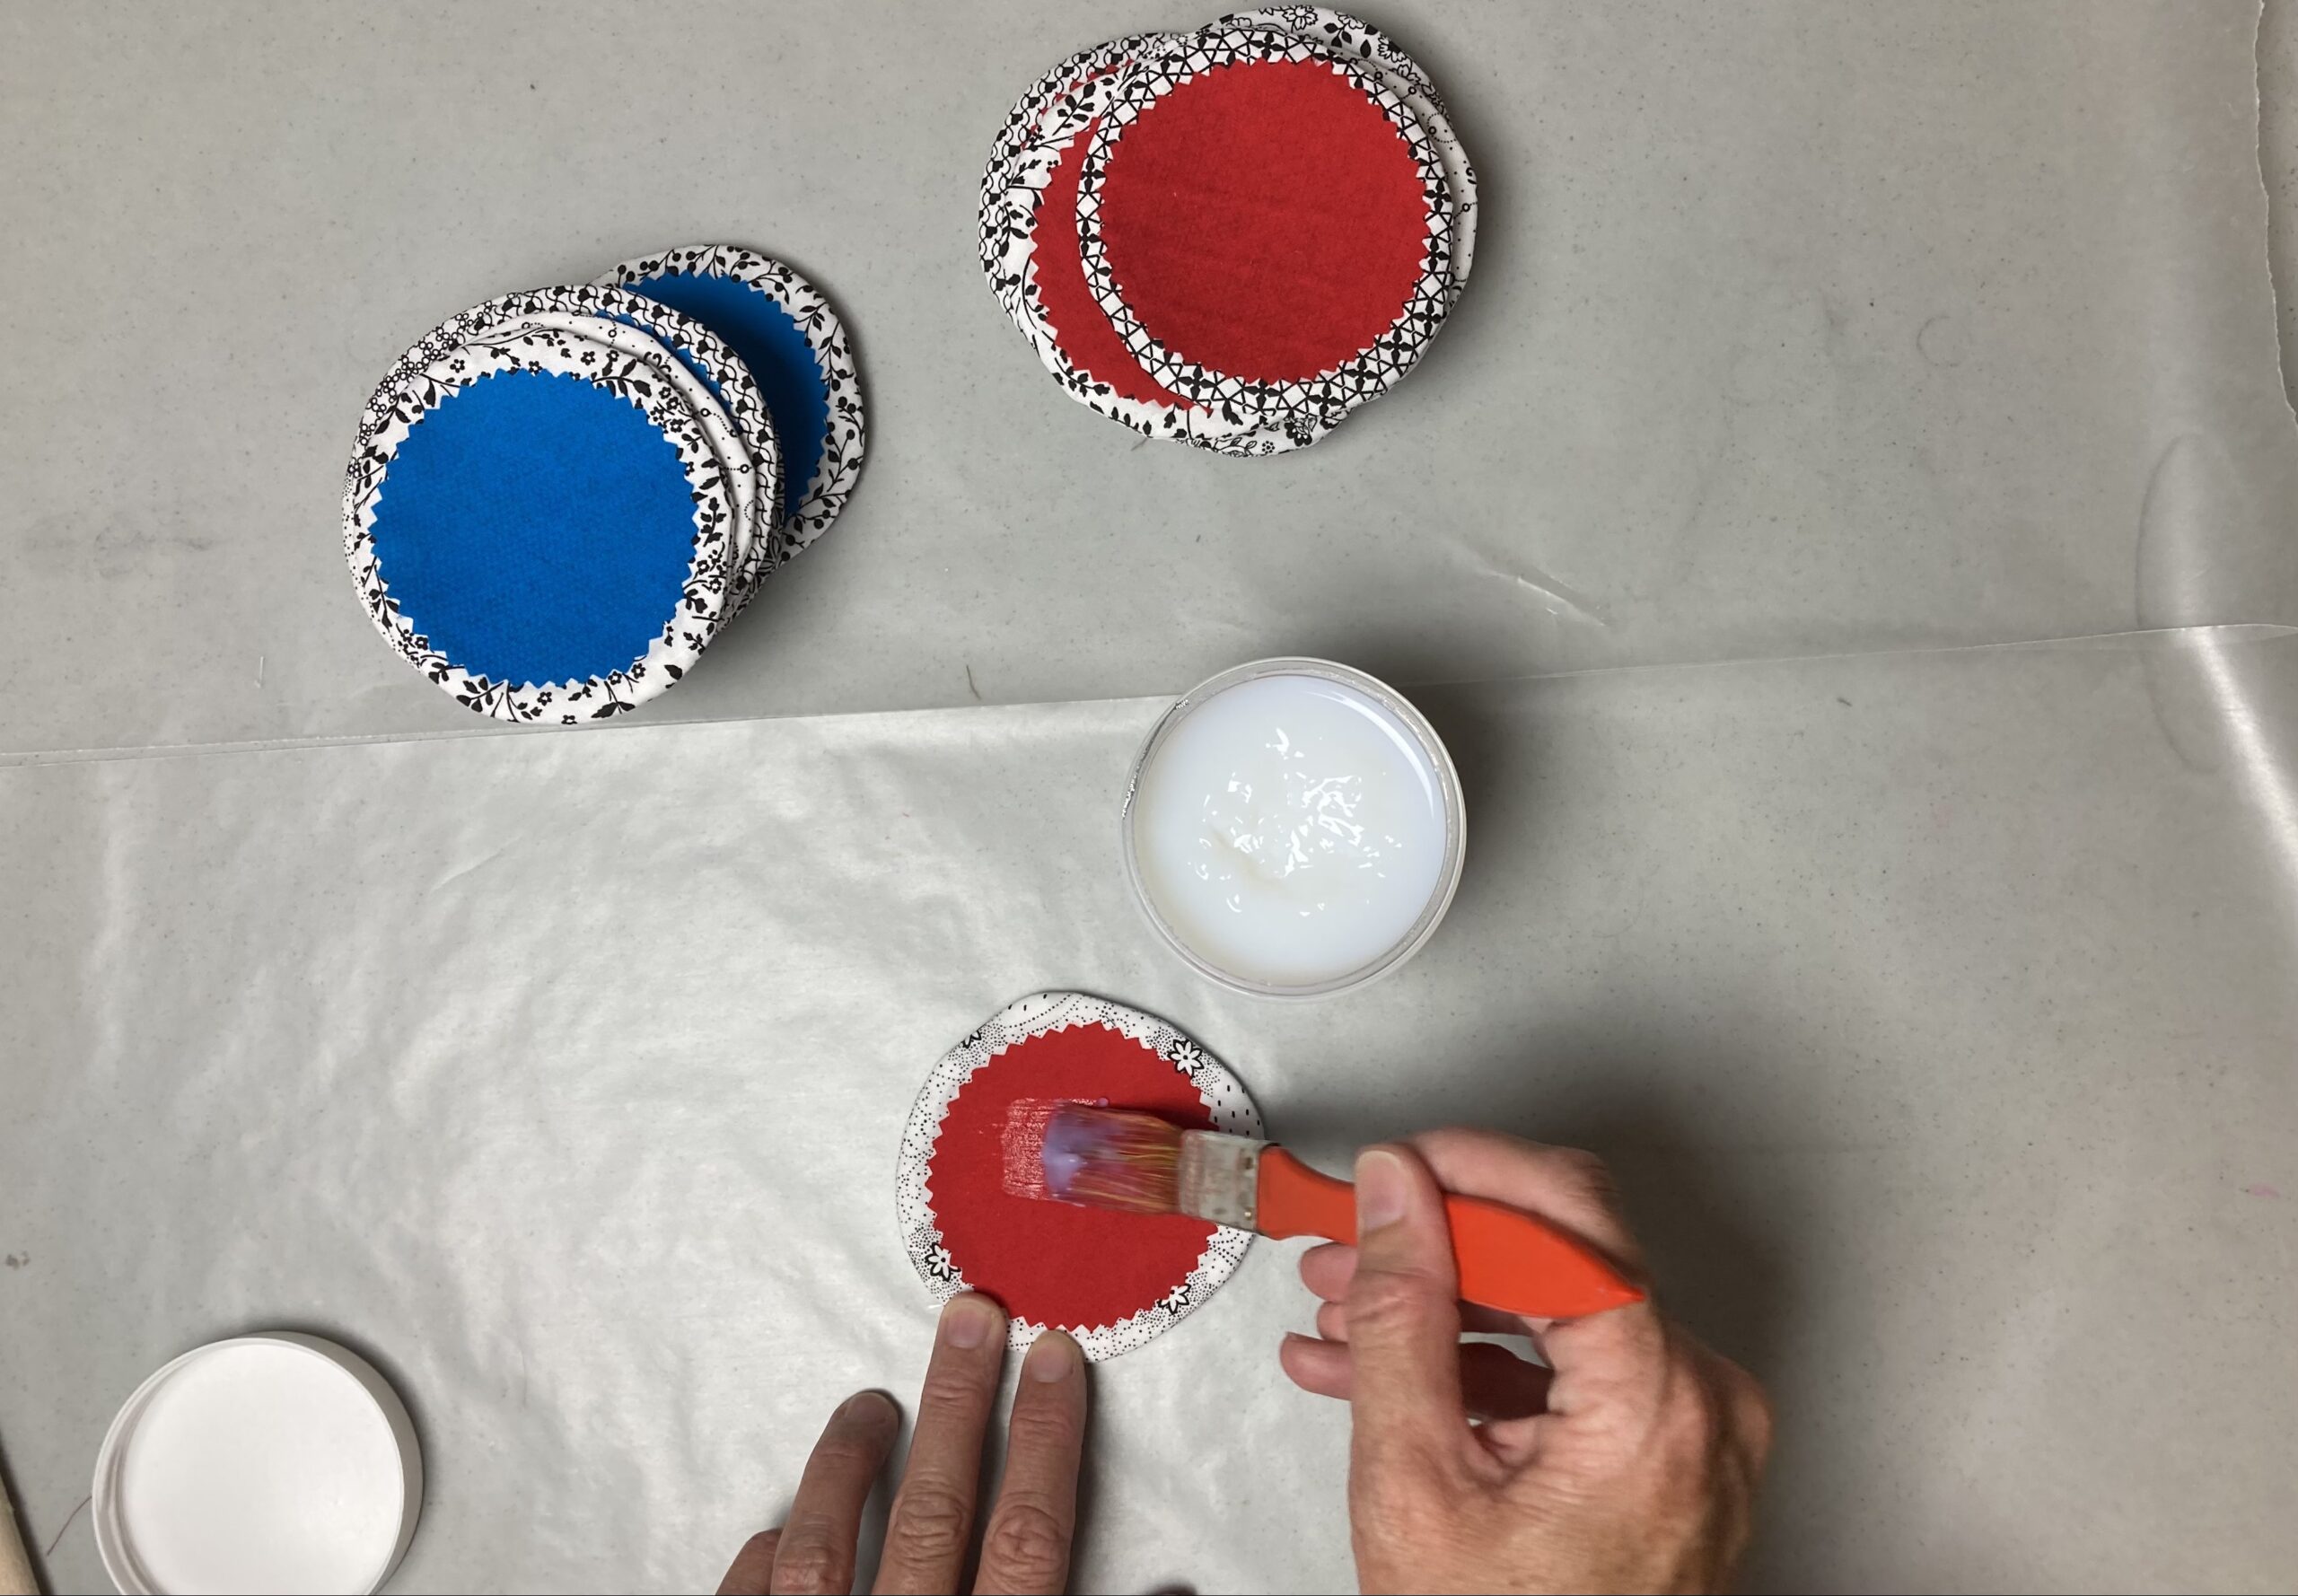
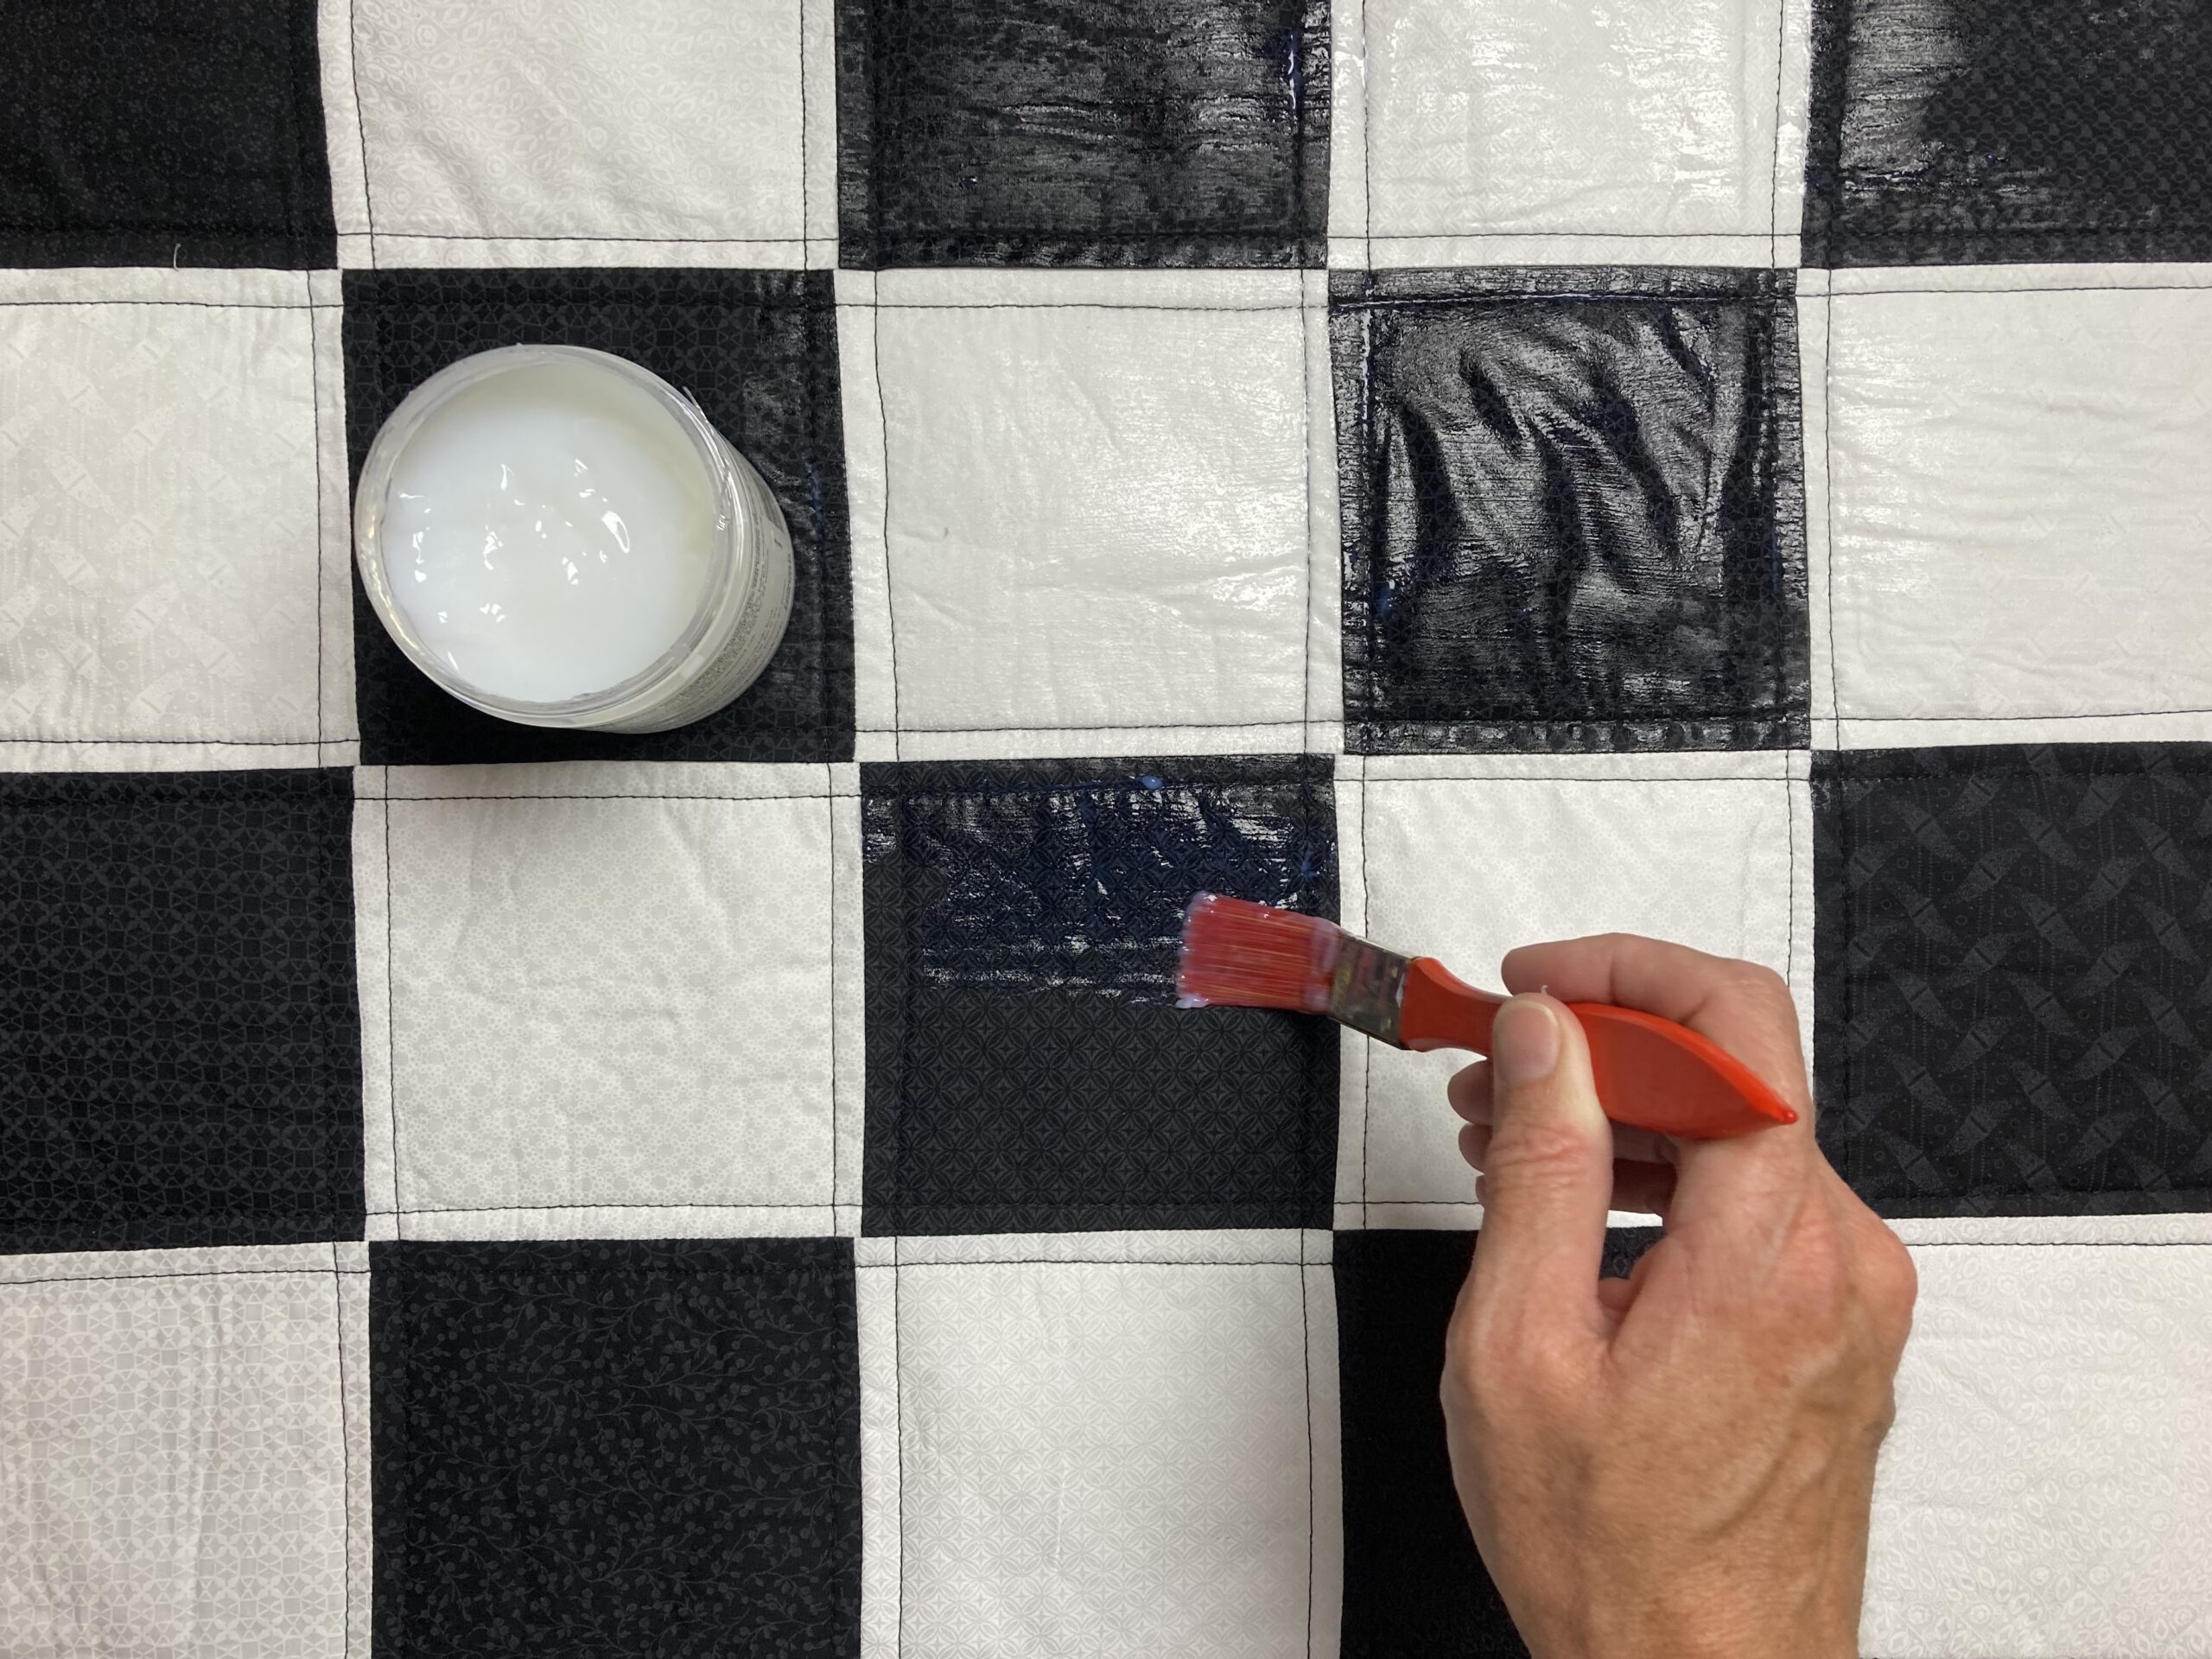
Following the manufacturer's directions, apply Liquid Vinyl to each checker and the checkerboard and press to finish.
Finishing
Following the manufacturer's directions, apply Liquid Vinyl to each checker and the checkerboard and press to finish.
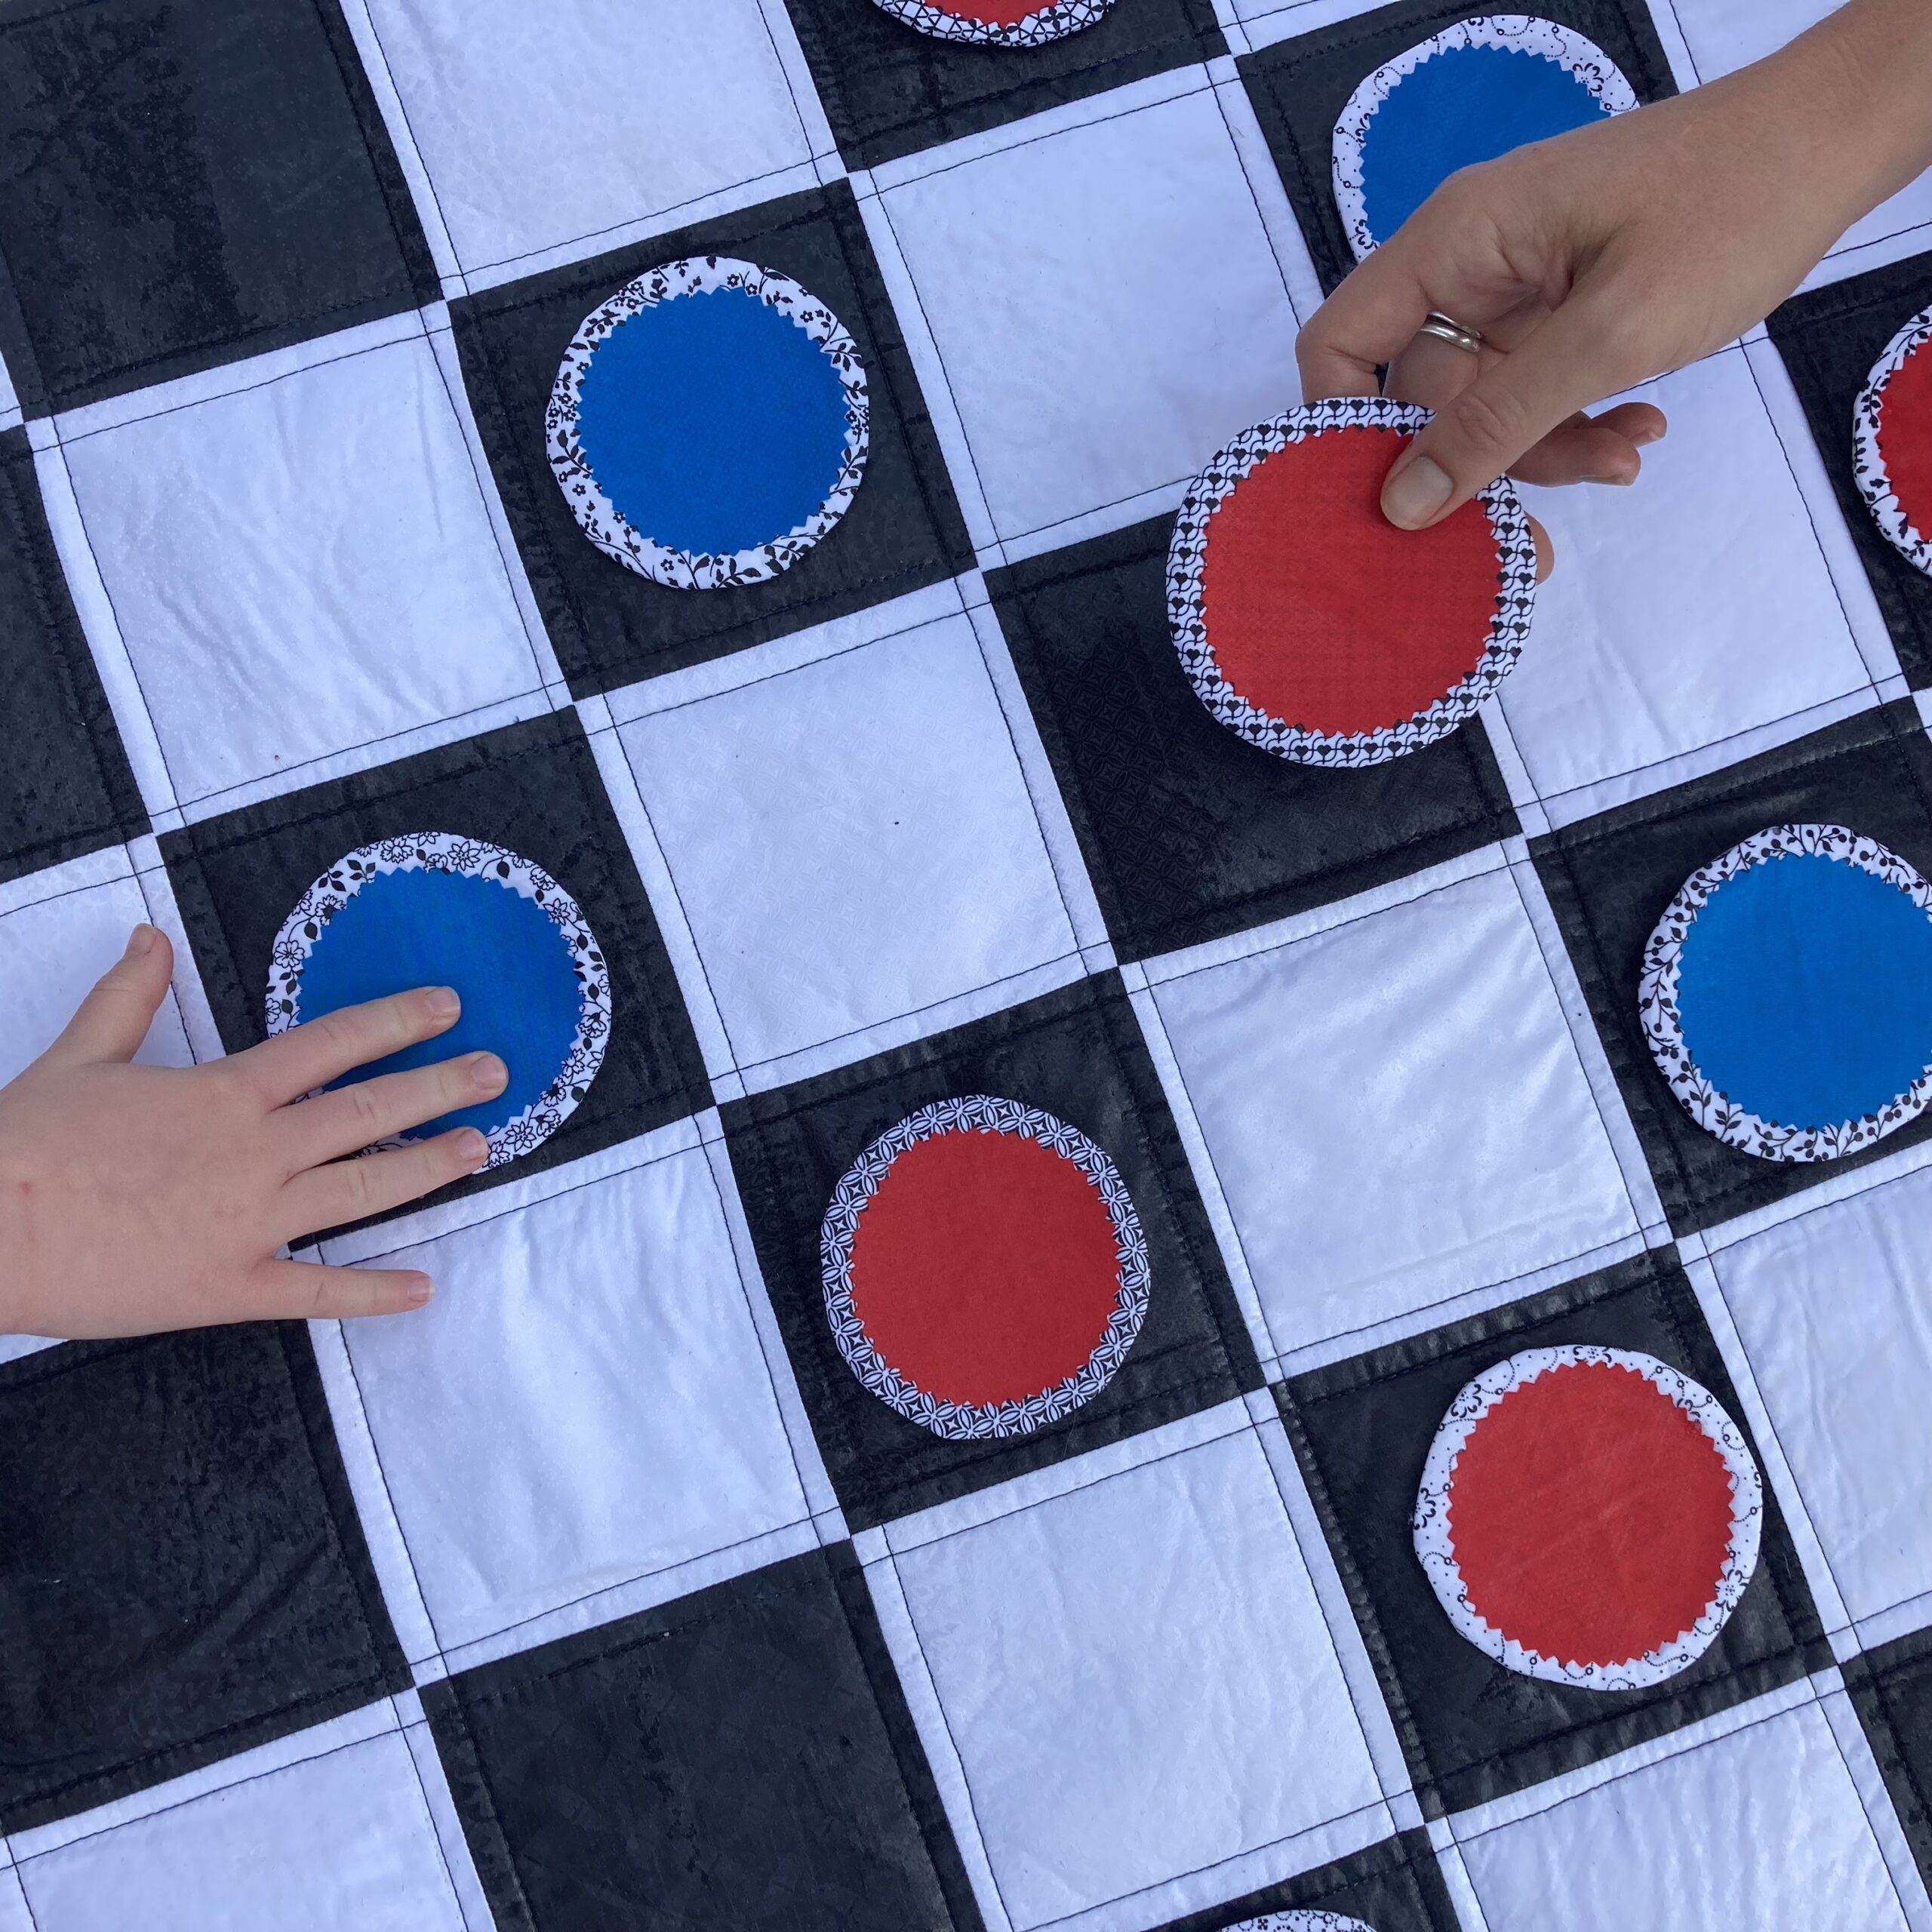
And you're done!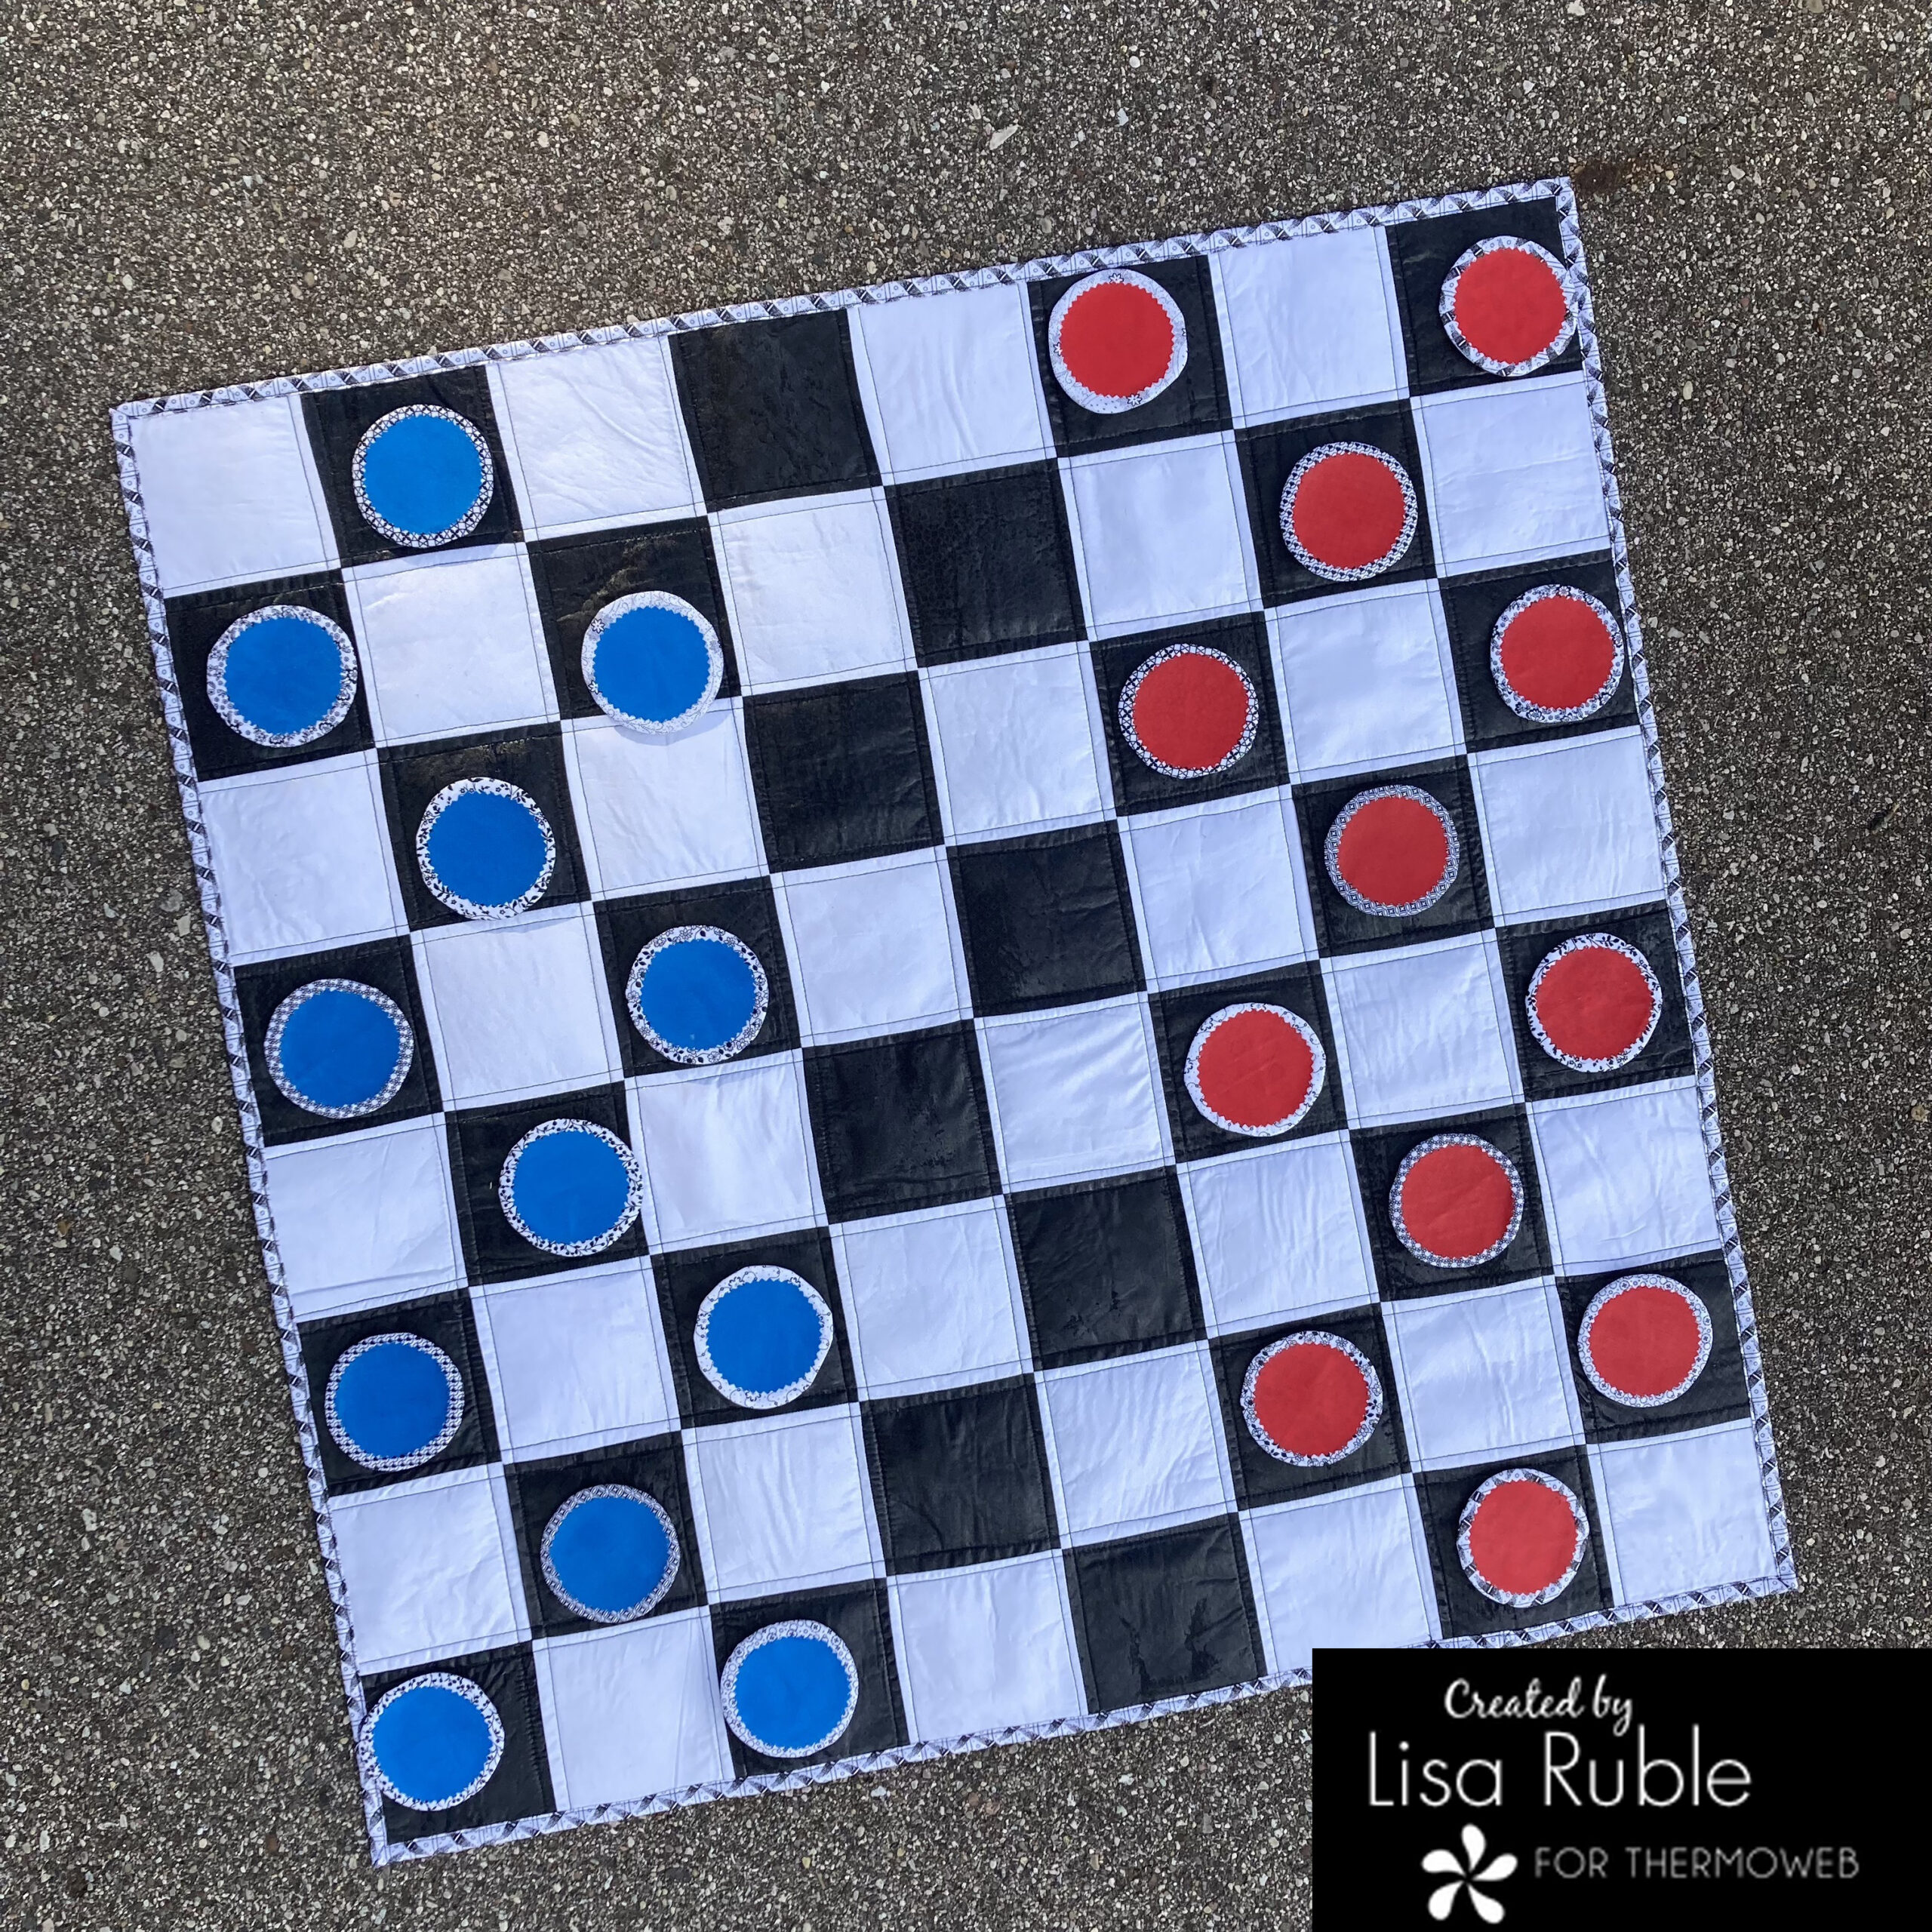
Challenge your friend to a game of checkers! Good luck!