No Products in the Cart
 Therm O Web Supplies Used:
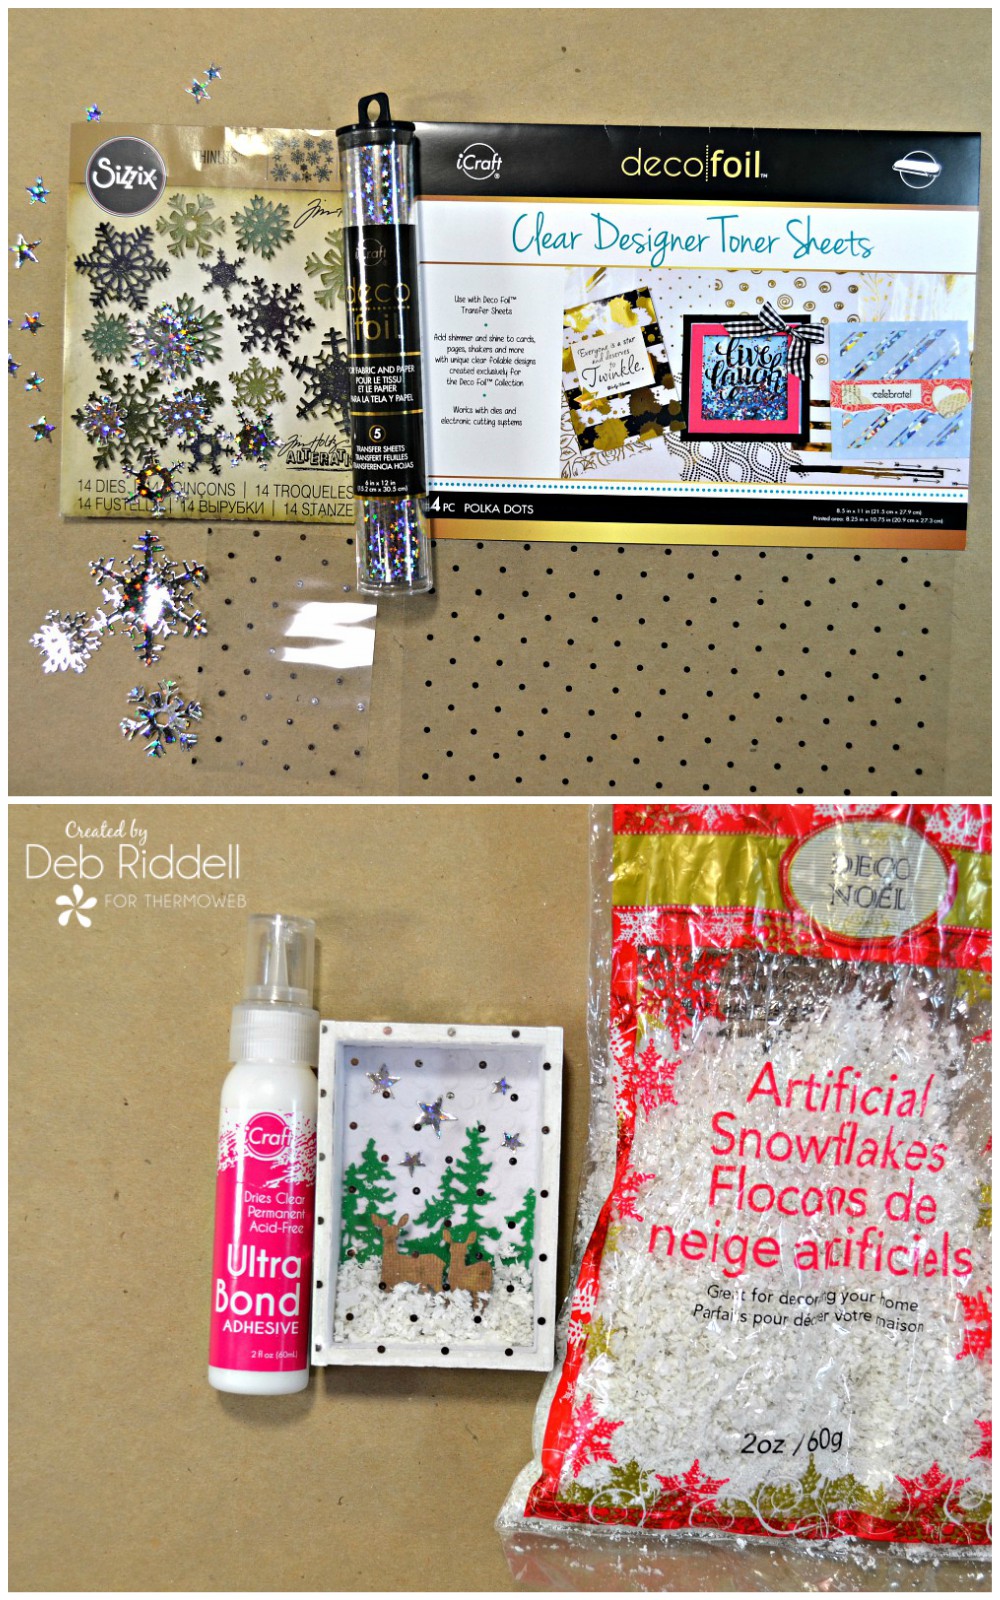
Deco Foil Flock Transfer Sheets – Emerald Green
Deco Foil Flock Transfer Sheets – White Latte
Deco Foil Clear Toner Sheets - Polka Dots
Deco Foil Transfer Sheets - Silver
Deco Foil Transfer Sheets - Silver Stars
Deco Foil™ Toner Sheets
iCraft Ultra Bond Adhesive 2 fl oz
Other supplies used:
Sizzix - Tree Line die; Swirling Stars die; Paper Snowflakes dies; Winter Wonderland dies
Ranger Ink - Opaque Matte Texture Paste; Clear Rock Candy Distress Glitter; Picket Fence Distress Crayon; Distress Embossing Ink
Advantus - Vignette Box; Classic Kraft Stock; Tim Holtz Design Tape; Christmas Typed Tokens
We R Memory Keepers - Polka Dots embossing folder
Miscellaneous - white sparkle embossing powder; brad; artificial snowflakes; white acrylic paint; heat laminator; die cutting machine; heat gun
Therm O Web Supplies Used:
Deco Foil Flock Transfer Sheets – Emerald Green
Deco Foil Flock Transfer Sheets – White Latte
Deco Foil Clear Toner Sheets - Polka Dots
Deco Foil Transfer Sheets - Silver
Deco Foil Transfer Sheets - Silver Stars
Deco Foil™ Toner Sheets
iCraft Ultra Bond Adhesive 2 fl oz
Other supplies used:
Sizzix - Tree Line die; Swirling Stars die; Paper Snowflakes dies; Winter Wonderland dies
Ranger Ink - Opaque Matte Texture Paste; Clear Rock Candy Distress Glitter; Picket Fence Distress Crayon; Distress Embossing Ink
Advantus - Vignette Box; Classic Kraft Stock; Tim Holtz Design Tape; Christmas Typed Tokens
We R Memory Keepers - Polka Dots embossing folder
Miscellaneous - white sparkle embossing powder; brad; artificial snowflakes; white acrylic paint; heat laminator; die cutting machine; heat gun
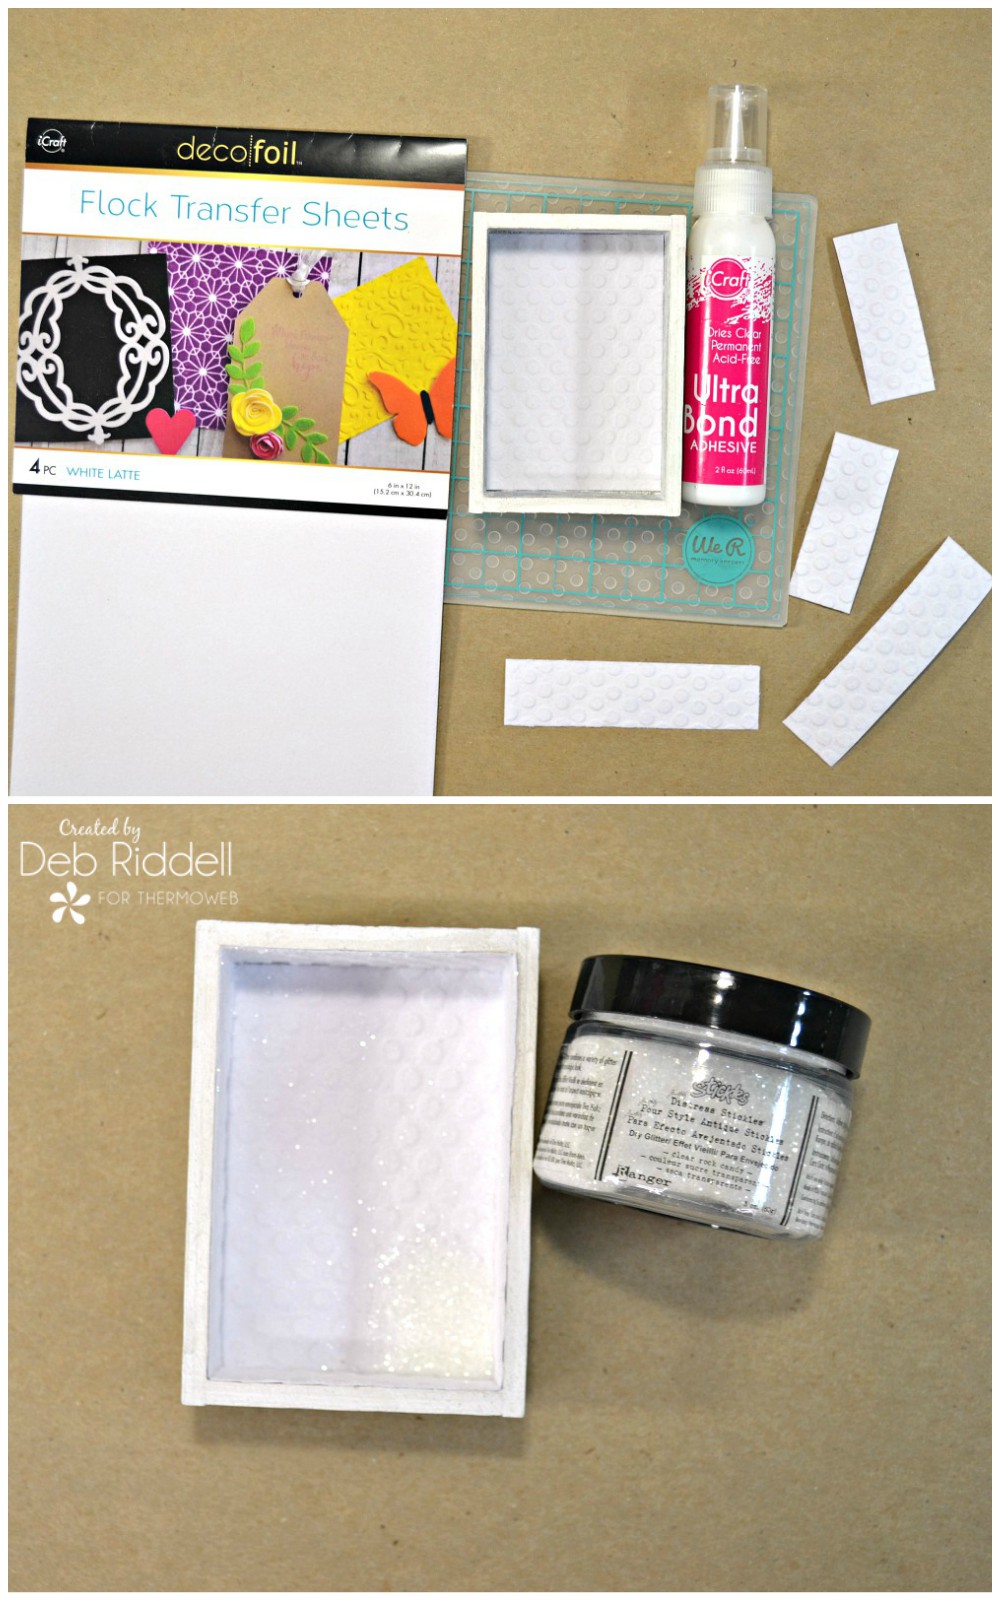 Sprinkle some clear glitter inside the flock lined box and shake it about to cover all the flocked surfaces, dumping out the excess. The glitter will cling to the flock for a wonderful wintery shimmer!
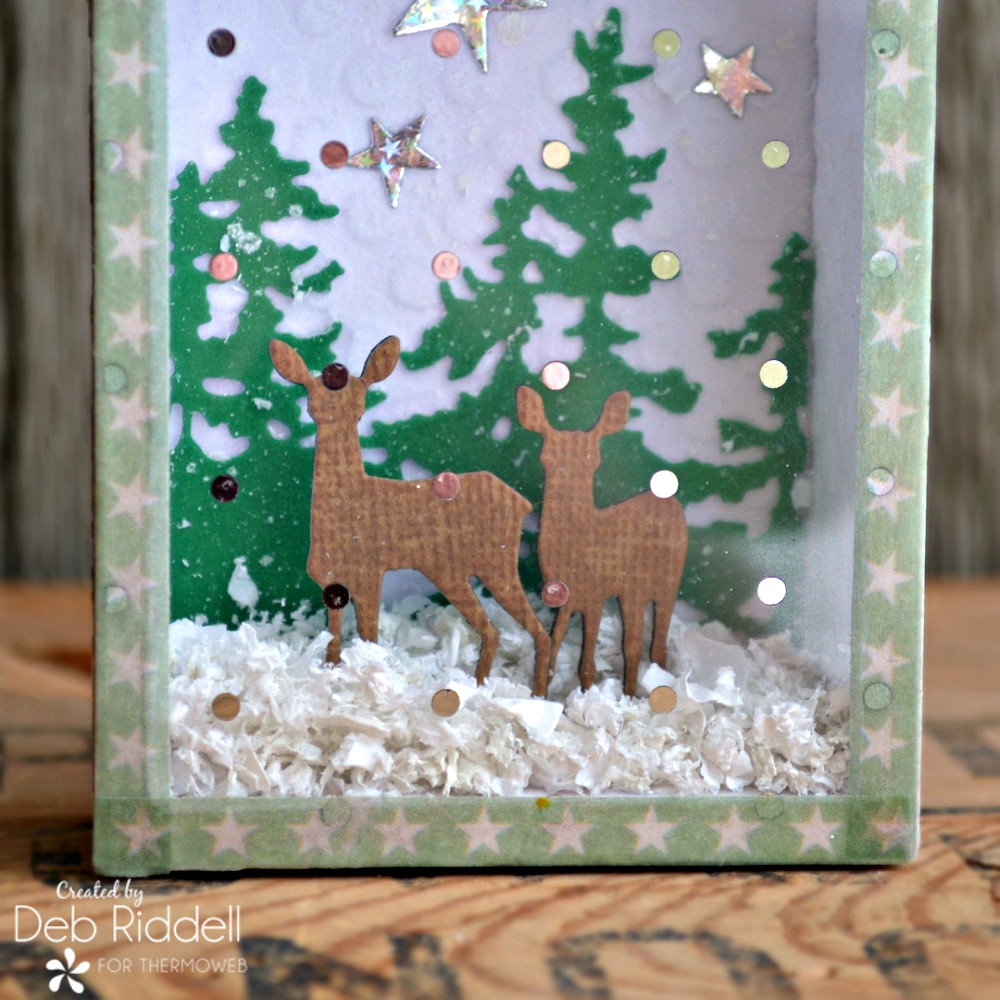
Die-cut some trees with the Tree Line die from Emerald Green Deco Foil Flock Transfer Sheet. Cut the die cut flocked trees to size to fit inside the vignette box.
Sprinkle some clear glitter inside the flock lined box and shake it about to cover all the flocked surfaces, dumping out the excess. The glitter will cling to the flock for a wonderful wintery shimmer!
Die-cut some trees with the Tree Line die from Emerald Green Deco Foil Flock Transfer Sheet. Cut the die cut flocked trees to size to fit inside the vignette box.
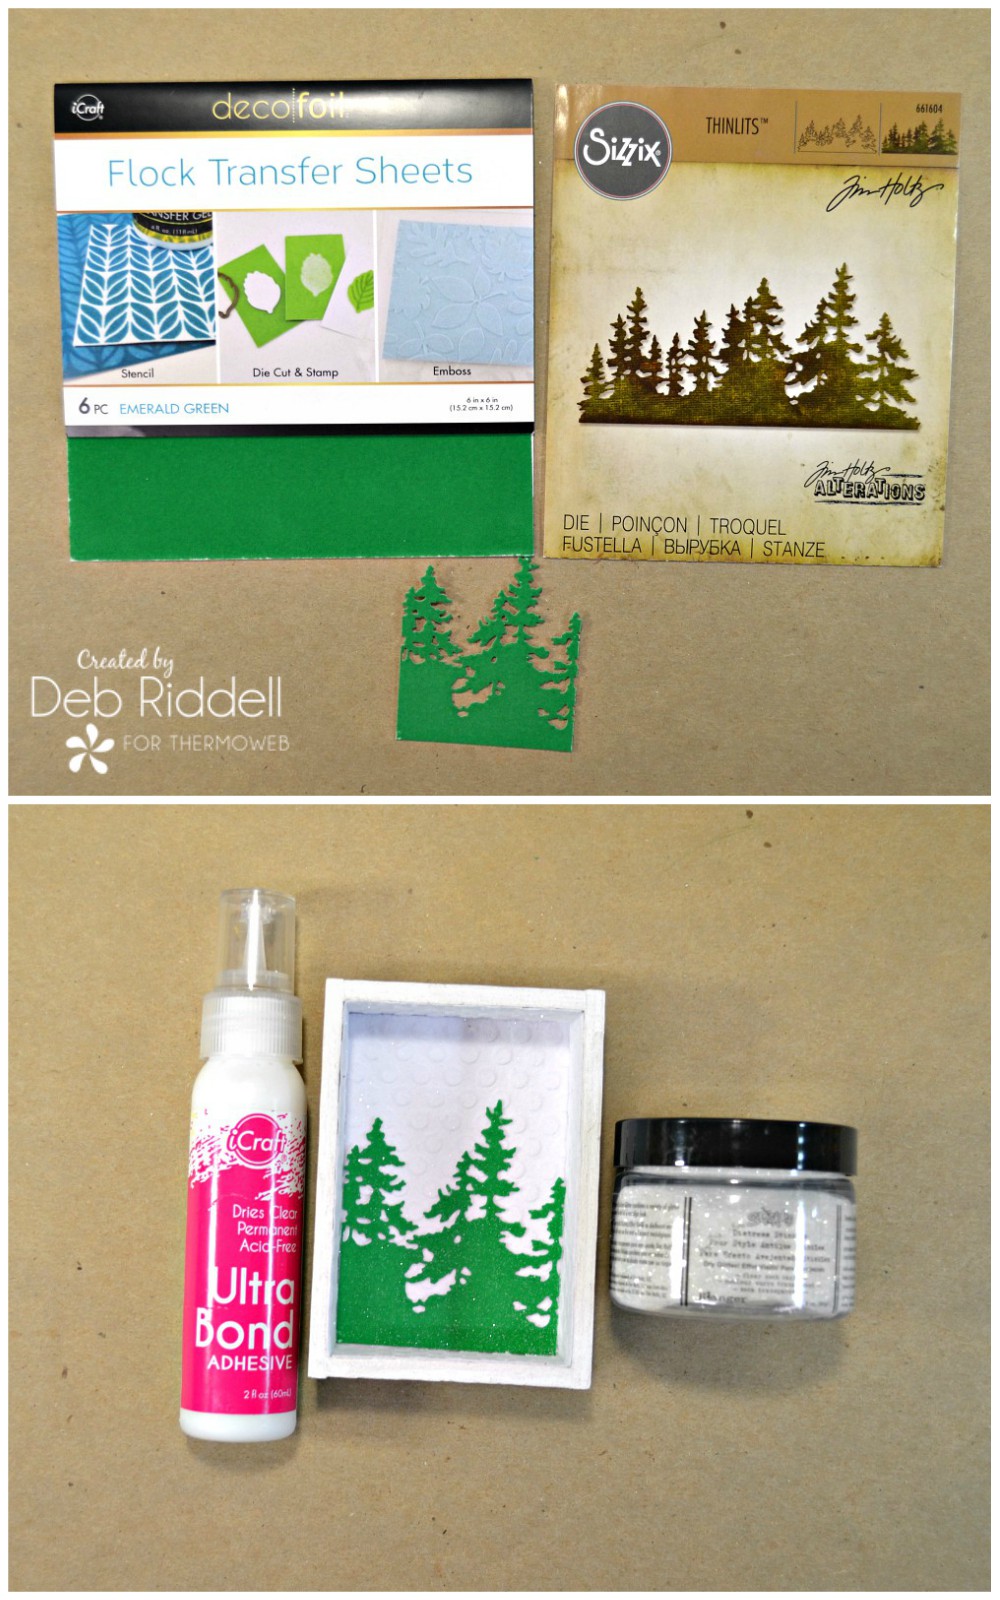 Adhere the flocked trees inside the vignette box with iCraft Ultra Bond Adhesive. Sprinkle more clear glitter over the flocked trees and dump out the excess as before.
Dilute white acrylic paint and spatter the inside of the vignette box for more snowy details.
Adhere the flocked trees inside the vignette box with iCraft Ultra Bond Adhesive. Sprinkle more clear glitter over the flocked trees and dump out the excess as before.
Dilute white acrylic paint and spatter the inside of the vignette box for more snowy details.
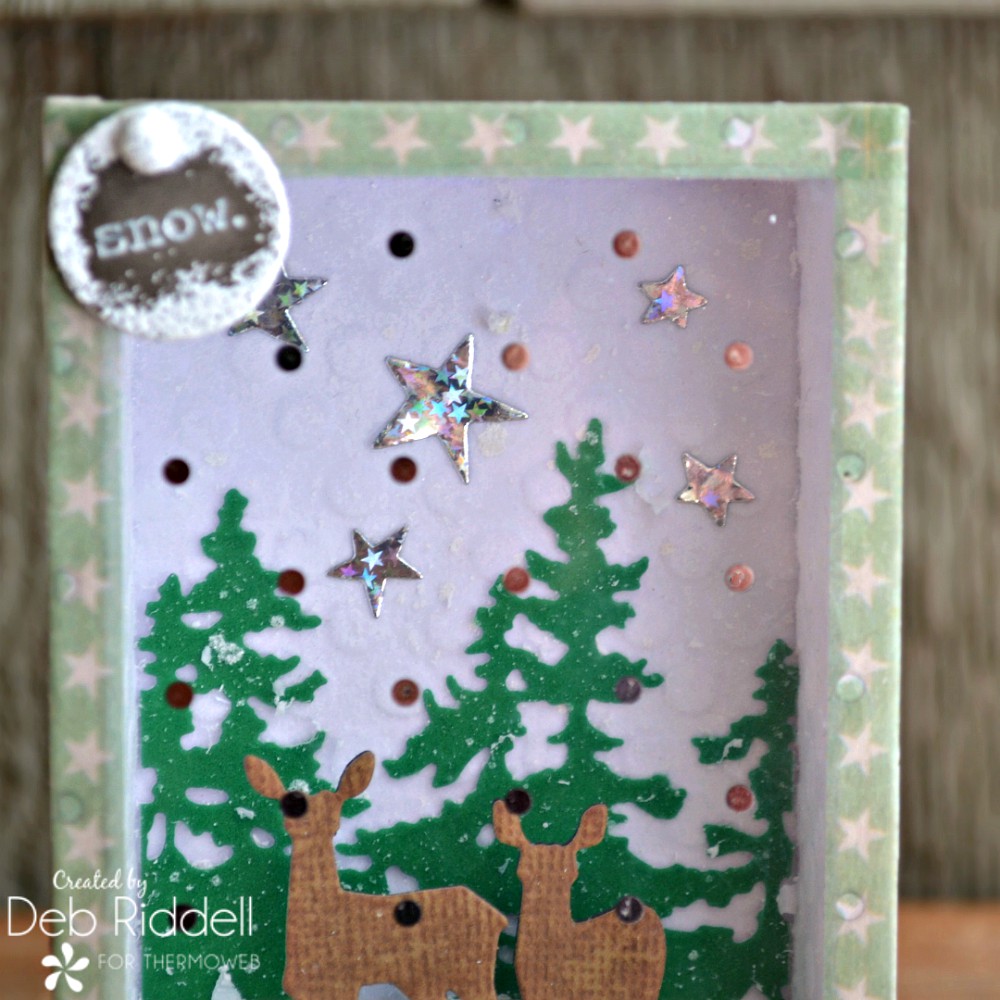
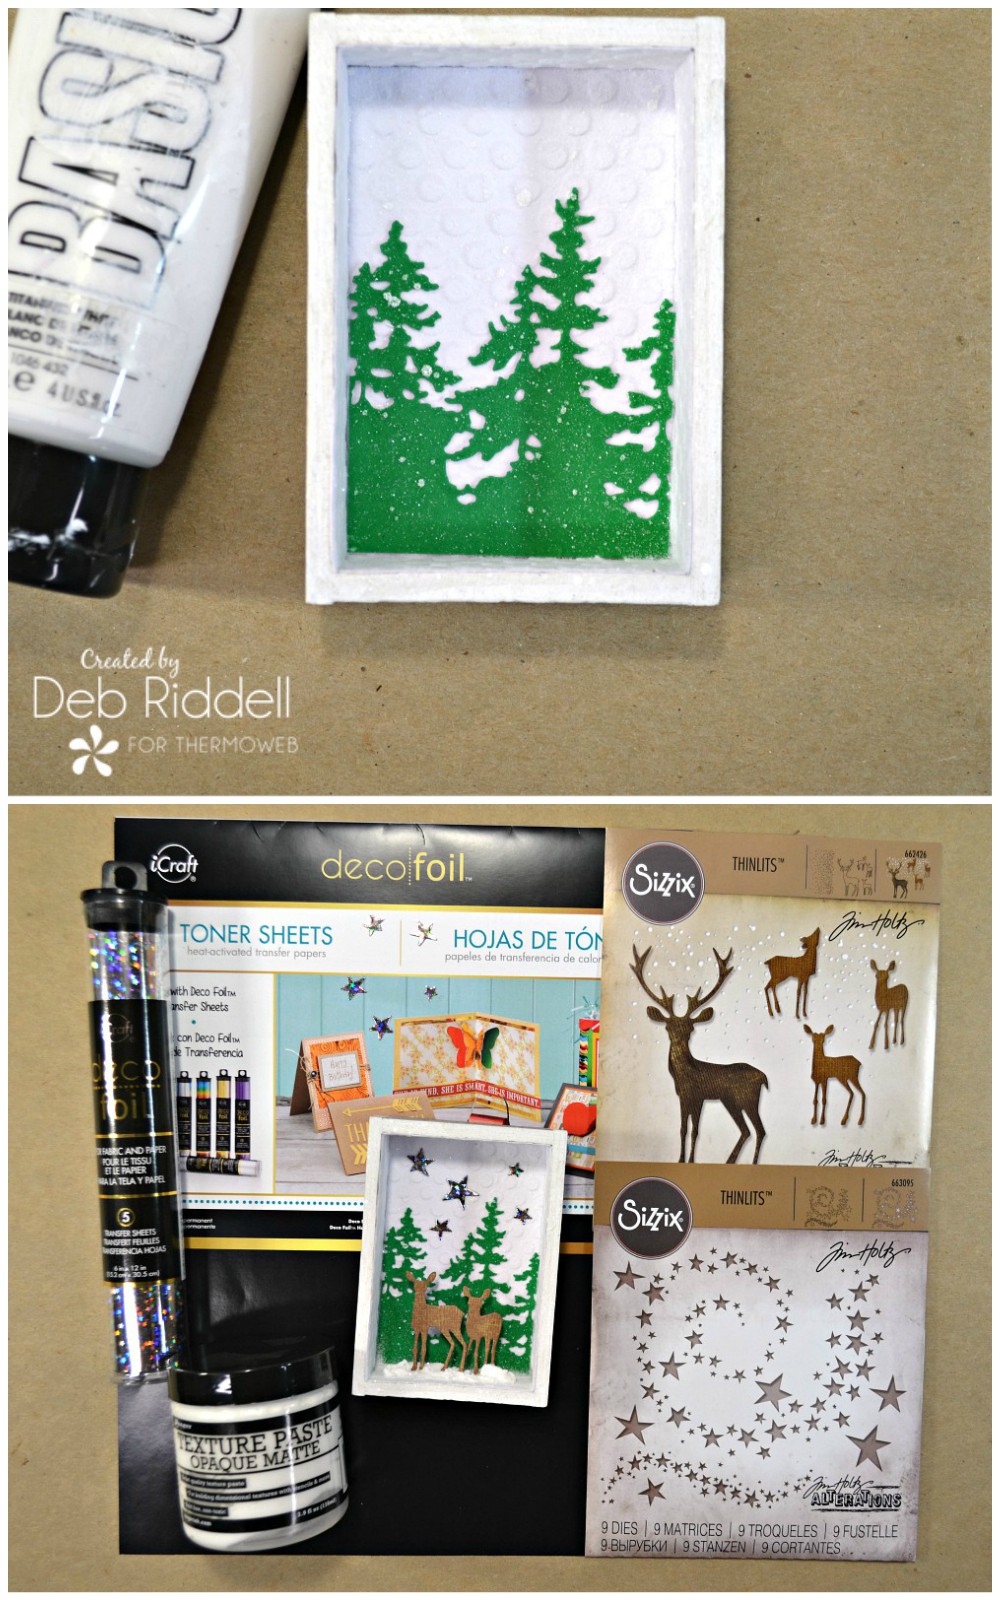 Preheat your foil laminator and foil a piece of Deco Foil Toner Sheet with Silver Stars Deco Foil Foil Transfer Sheet. Die-cut some stars from the foiled toner sheet and adhere them to the back of the vignette box with iCraft Ultra Bond Adhesive. Die-cut a couple of deer from sanded Classic Kraft Stock and insert them into a 'snow bank' created with Opaque Matte Texture Paste in front of the flocked trees. Sprinkle more clear glitter onto the texture paste while it's still wet, dumping out the excess. Set aside to dry.
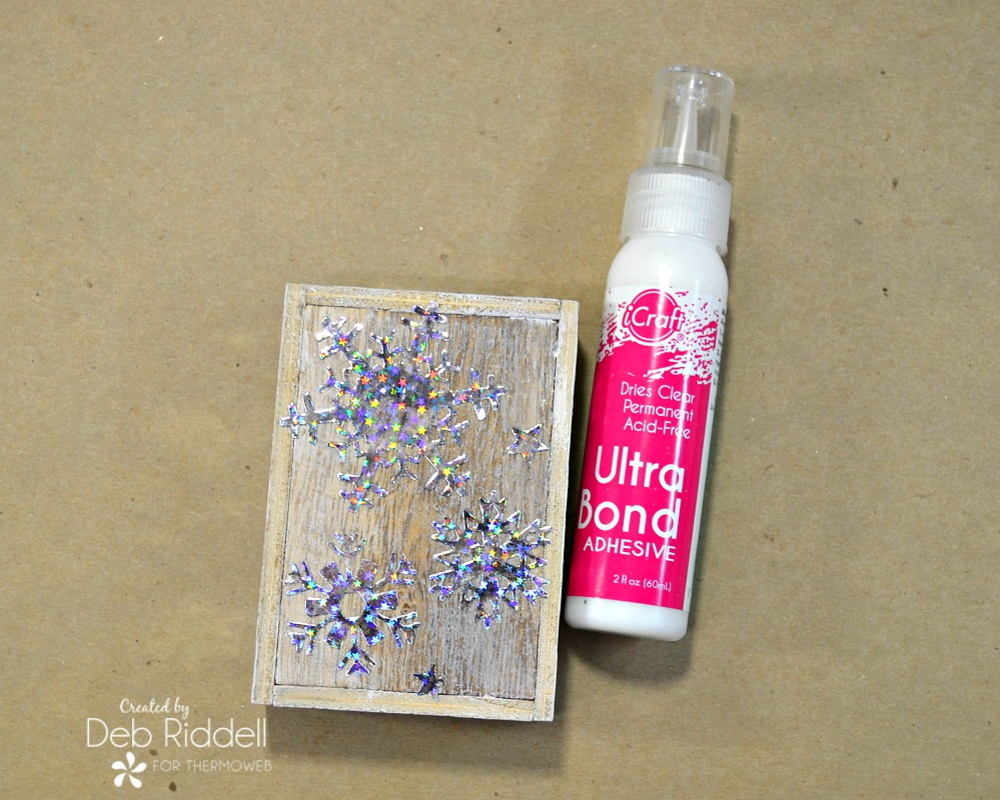
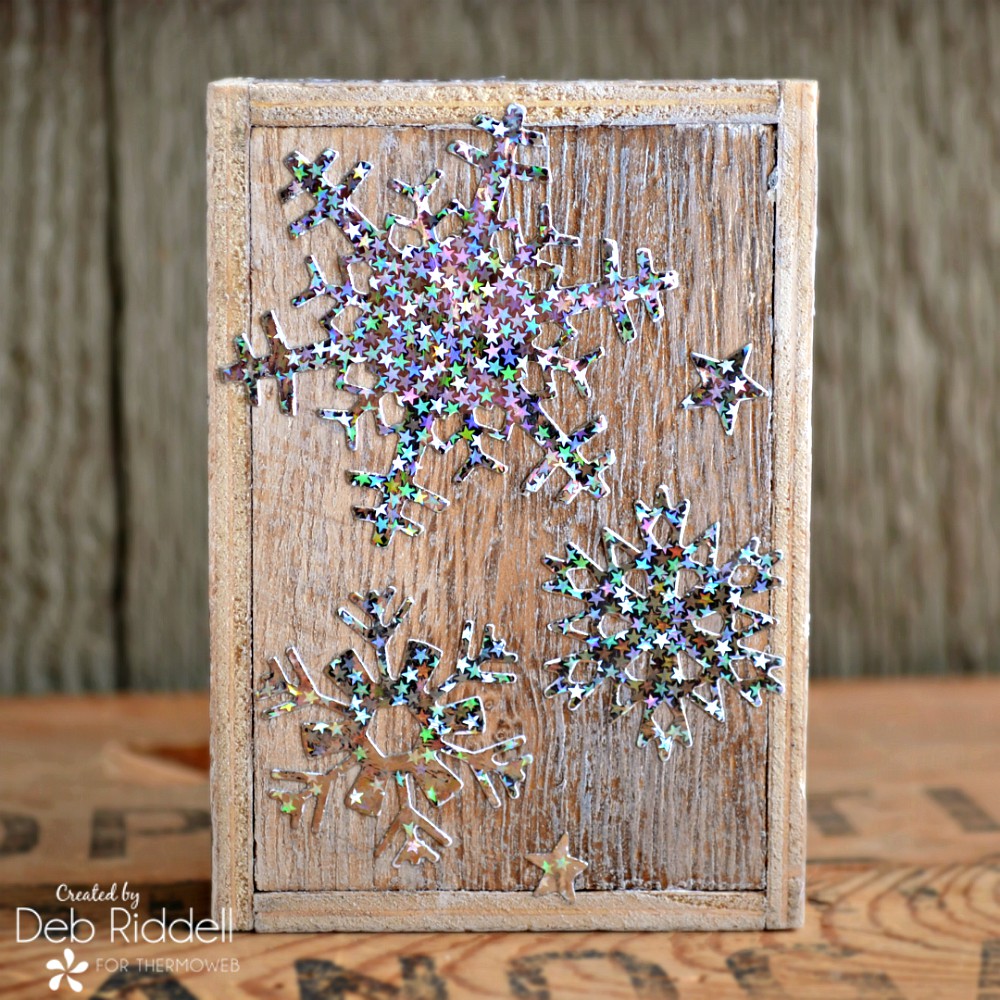
Foil a piece of Polka Dot Clear Designer Toner Sheet with Silver Deco Foil Foil Transfer Sheet and cut it to size to cover the front of your vignette box. Die-cut some snowflakes from the Silver Stars foiled Toner Sheet for the outside of your snowglobe.
Preheat your foil laminator and foil a piece of Deco Foil Toner Sheet with Silver Stars Deco Foil Foil Transfer Sheet. Die-cut some stars from the foiled toner sheet and adhere them to the back of the vignette box with iCraft Ultra Bond Adhesive. Die-cut a couple of deer from sanded Classic Kraft Stock and insert them into a 'snow bank' created with Opaque Matte Texture Paste in front of the flocked trees. Sprinkle more clear glitter onto the texture paste while it's still wet, dumping out the excess. Set aside to dry.
Foil a piece of Polka Dot Clear Designer Toner Sheet with Silver Deco Foil Foil Transfer Sheet and cut it to size to cover the front of your vignette box. Die-cut some snowflakes from the Silver Stars foiled Toner Sheet for the outside of your snowglobe.
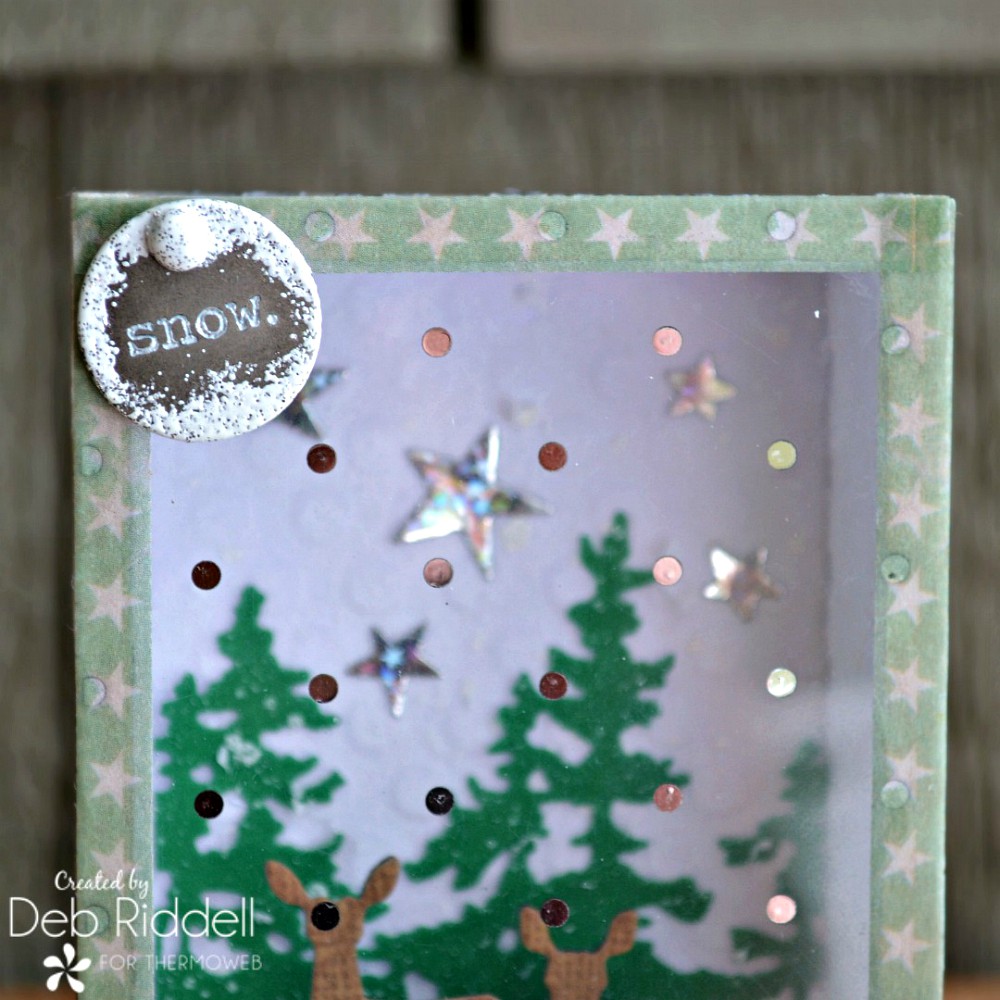
 Once the texture paste has dried, add some artificial snowflakes to the vignette box and enclose the snowglobe by adhering the Silver Foiled Polka Dot designer toner sheet over the front with iCraft Ultra Bond Adhesive.
Colour a 'snow' Typed Token with Picket Fence Distress Crayon and rub the crayon back with a soft cloth to leave it in the recesses of the lettering only. Add some embossing powder around the edges of the Typed Token, sprinkle on white sparkle embossing powder and heat activate if with your heat gun. Repeat the embossing on a small brad and insert it through the hole on the Typed Token.
Once the texture paste has dried, add some artificial snowflakes to the vignette box and enclose the snowglobe by adhering the Silver Foiled Polka Dot designer toner sheet over the front with iCraft Ultra Bond Adhesive.
Colour a 'snow' Typed Token with Picket Fence Distress Crayon and rub the crayon back with a soft cloth to leave it in the recesses of the lettering only. Add some embossing powder around the edges of the Typed Token, sprinkle on white sparkle embossing powder and heat activate if with your heat gun. Repeat the embossing on a small brad and insert it through the hole on the Typed Token.
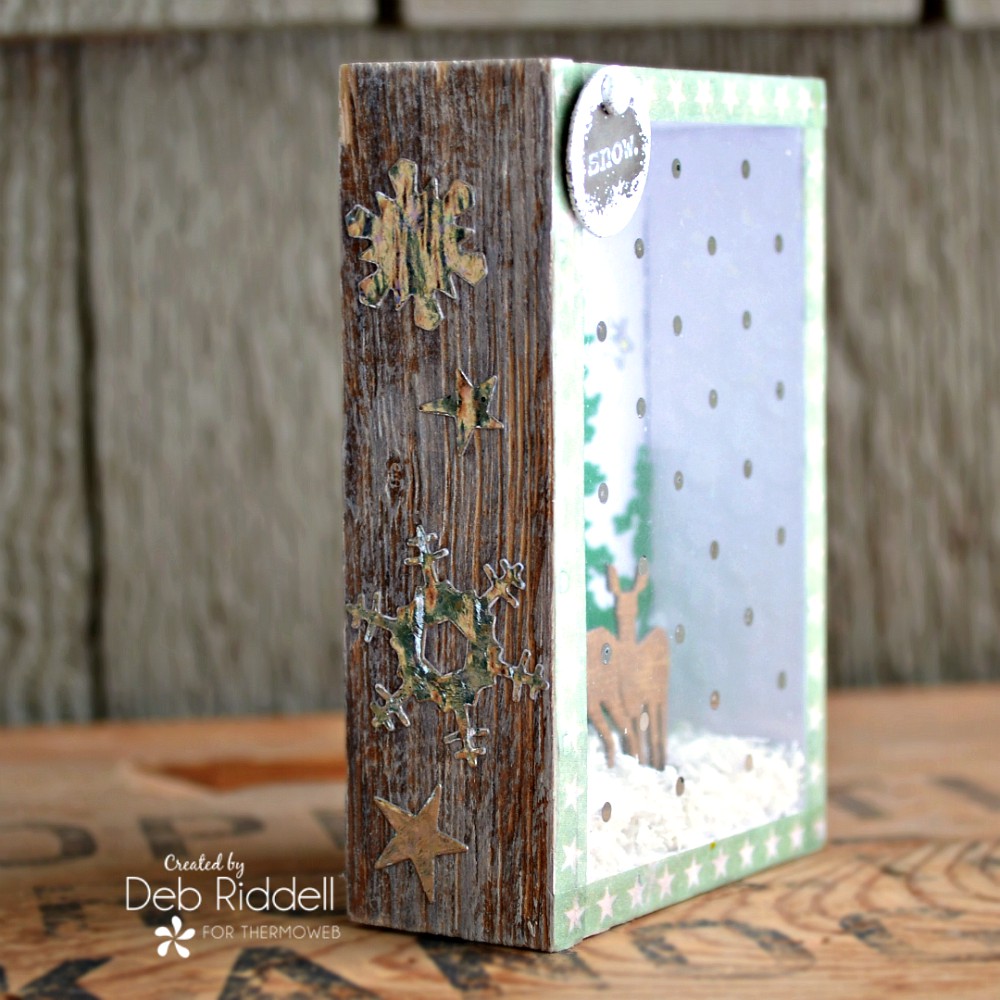
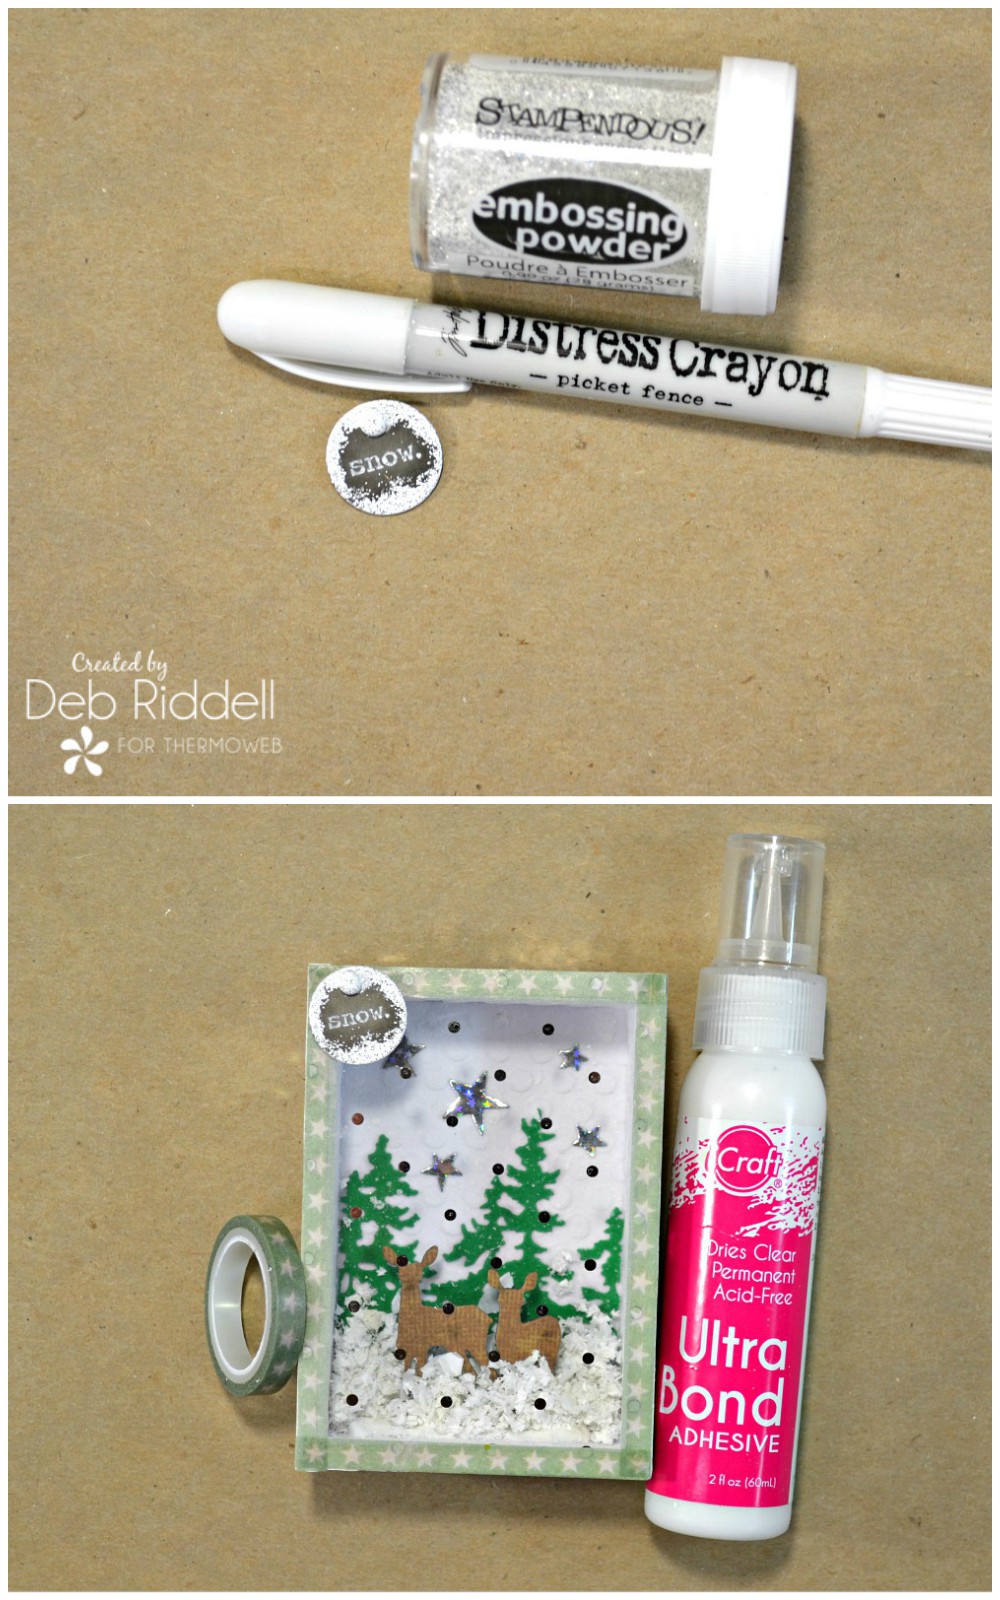 Cover the front edges of the vignette box with 1/4" washi tape and adhere the 'snow' typed token to the upper left corner with iCraft Ultra Bond Adhesive.
Adhere the Silver Stars foiled snowflakes to the back and sides of your snowglobe with iCraft Ultra Bond Adhesive and you are done!
Cover the front edges of the vignette box with 1/4" washi tape and adhere the 'snow' typed token to the upper left corner with iCraft Ultra Bond Adhesive.
Adhere the Silver Stars foiled snowflakes to the back and sides of your snowglobe with iCraft Ultra Bond Adhesive and you are done!
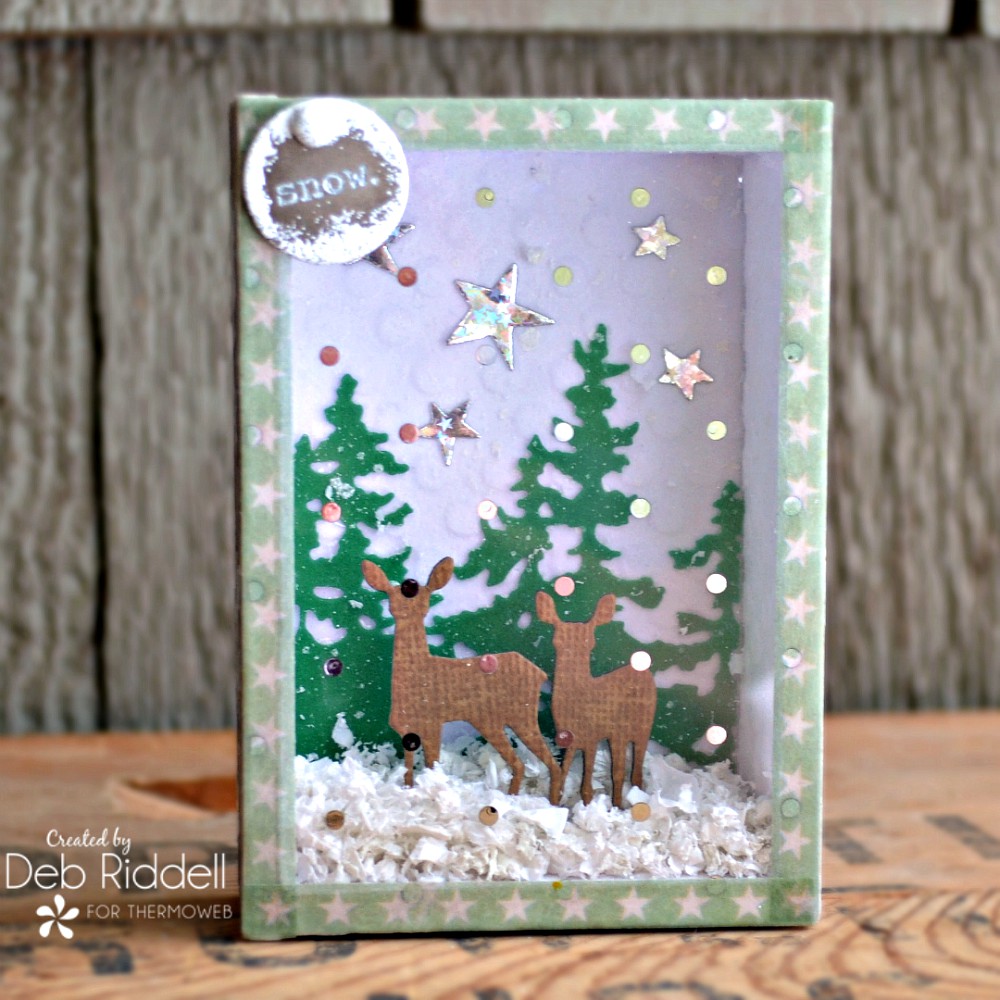
 Here are a few closeups of the finished Winter Forest snowglobe vignette box.
 I hope that you have enjoyed seeing how it all came together and that you've been inspired to think outside the globe to create your own snowglobe inspired vignette box with Deco Foil Flock Transfer Sheets and Designer Toner Sheets! Thanks as always for stopping by today and happy creating,
Deb xo
I hope that you have enjoyed seeing how it all came together and that you've been inspired to think outside the globe to create your own snowglobe inspired vignette box with Deco Foil Flock Transfer Sheets and Designer Toner Sheets! Thanks as always for stopping by today and happy creating,
Deb xo