No Products in the Cart
 Products used:
Deco Foil Toner Card Fronts - Wild Thing
Deco Foil Adhesive Transfers - Love & Kisses
Deco Foil Transfer Sheets - Red and Enchanted Rose
Deco Foil Craft & Carrier Sheets
iCraft foam tape roll
iCraft foam squares
Easy-Tear Tape
UltraBond liquid glue
MFT Stamps Paradise Pals stamps and dies
Distress Oxide Ink - picked raspberry and kitsch flamingo
Twiddler's Nook blending brushes
Glossy accents
Products used:
Deco Foil Toner Card Fronts - Wild Thing
Deco Foil Adhesive Transfers - Love & Kisses
Deco Foil Transfer Sheets - Red and Enchanted Rose
Deco Foil Craft & Carrier Sheets
iCraft foam tape roll
iCraft foam squares
Easy-Tear Tape
UltraBond liquid glue
MFT Stamps Paradise Pals stamps and dies
Distress Oxide Ink - picked raspberry and kitsch flamingo
Twiddler's Nook blending brushes
Glossy accents
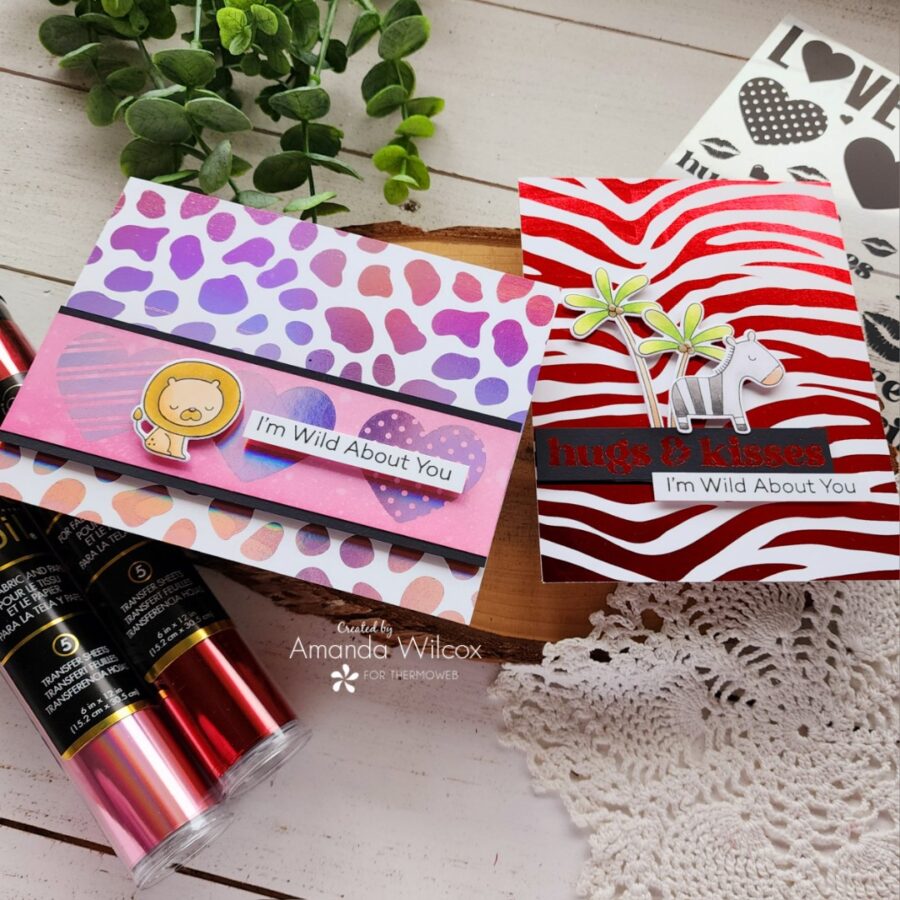
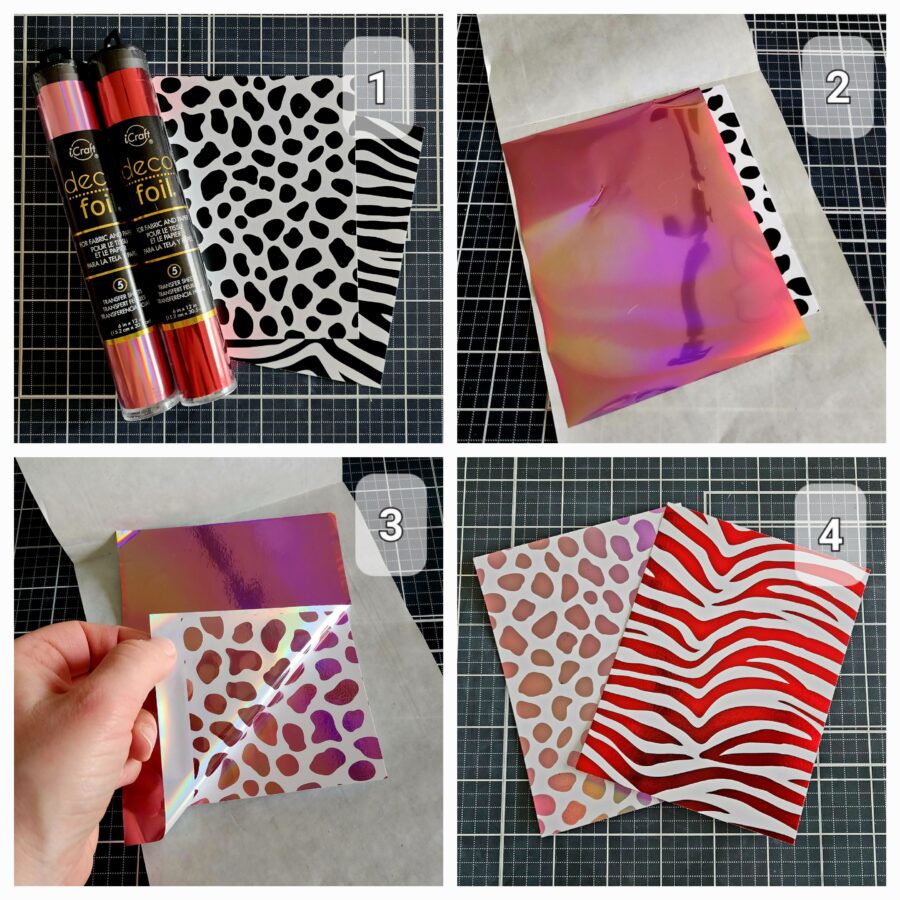 I started with foiling my toner card fronts for backgrounds. It's a super simple process.
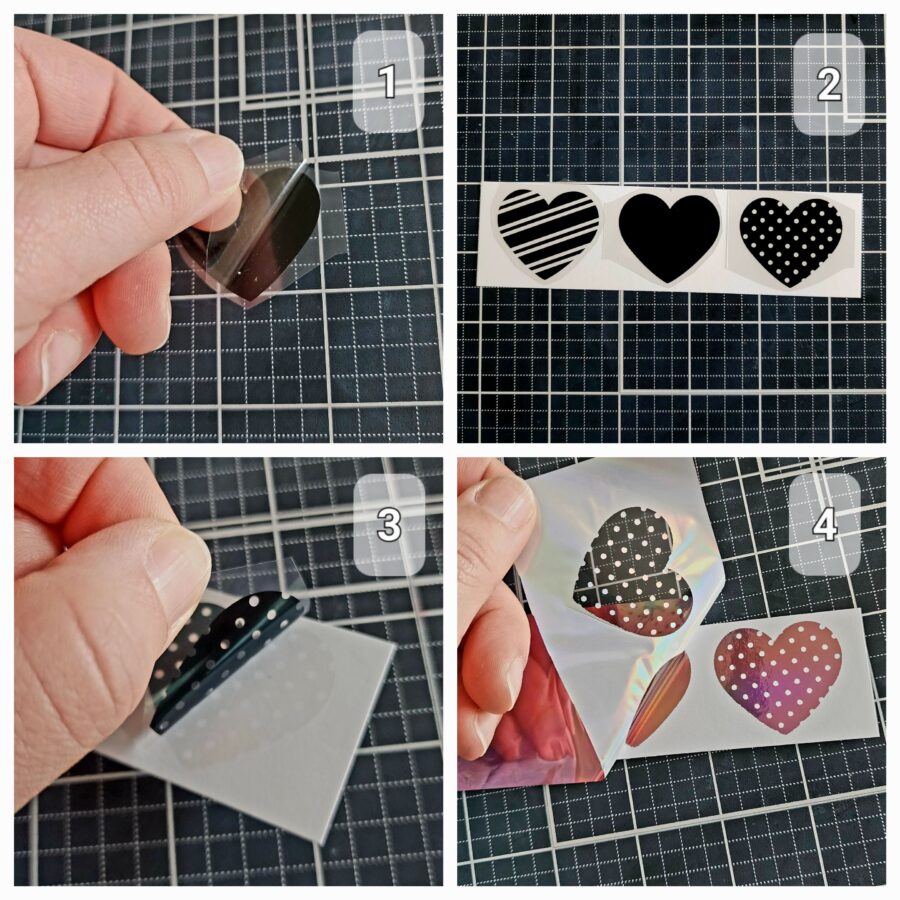 While my laminator was on, I pulled out the new Love & Kisses adhesive transfers and chose a few for my designs. The steps to using these are also really simple!
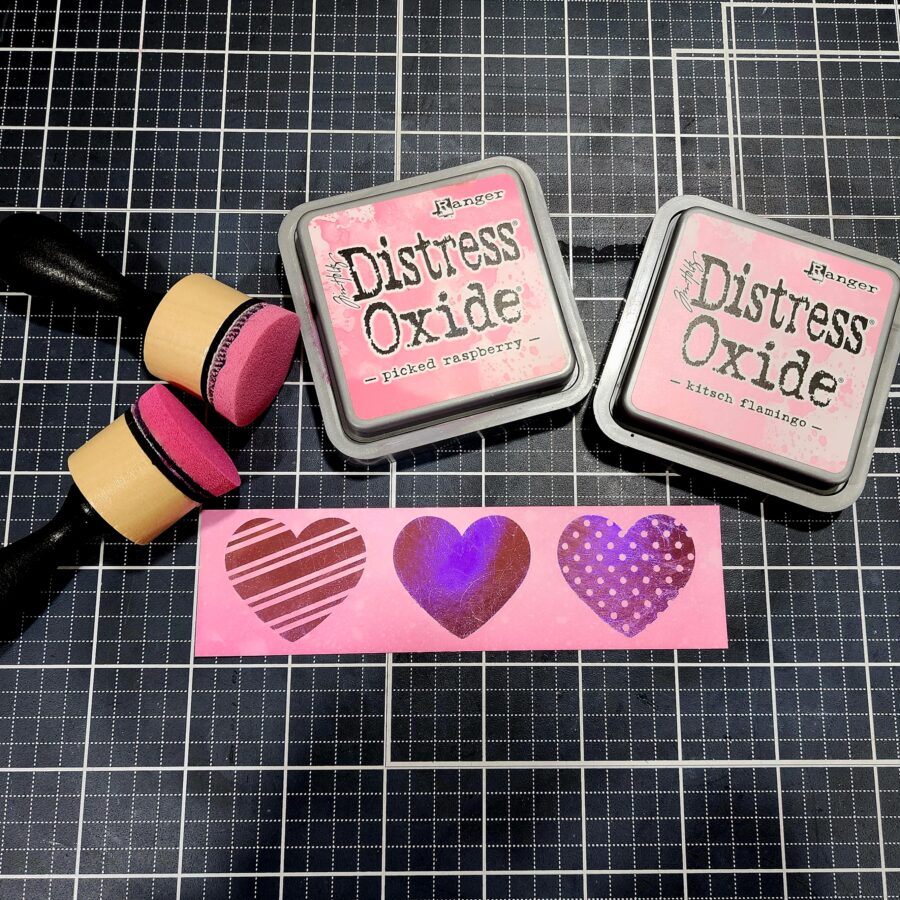 For today's cards, I chose to ink blend over the foiled adhesive transfer hearts. I used a couple of pink distress oxide inks to keep with the pink theme on that card. Once the blending was where I wanted it, I spritzed the panel with water and blotted that dry. Then I took a clean cloth and wiped away excess ink from the foil.
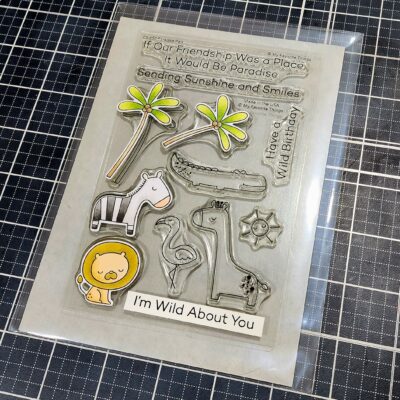 Next, I stamped and colored images from MFT Stamps Paradise Pals set with my Copic markers. Then I used the coordinating dies and cut everything out. I also took a moment to stamp and cut sentiment strips using one of the perfectly fitting sentiments in the set.
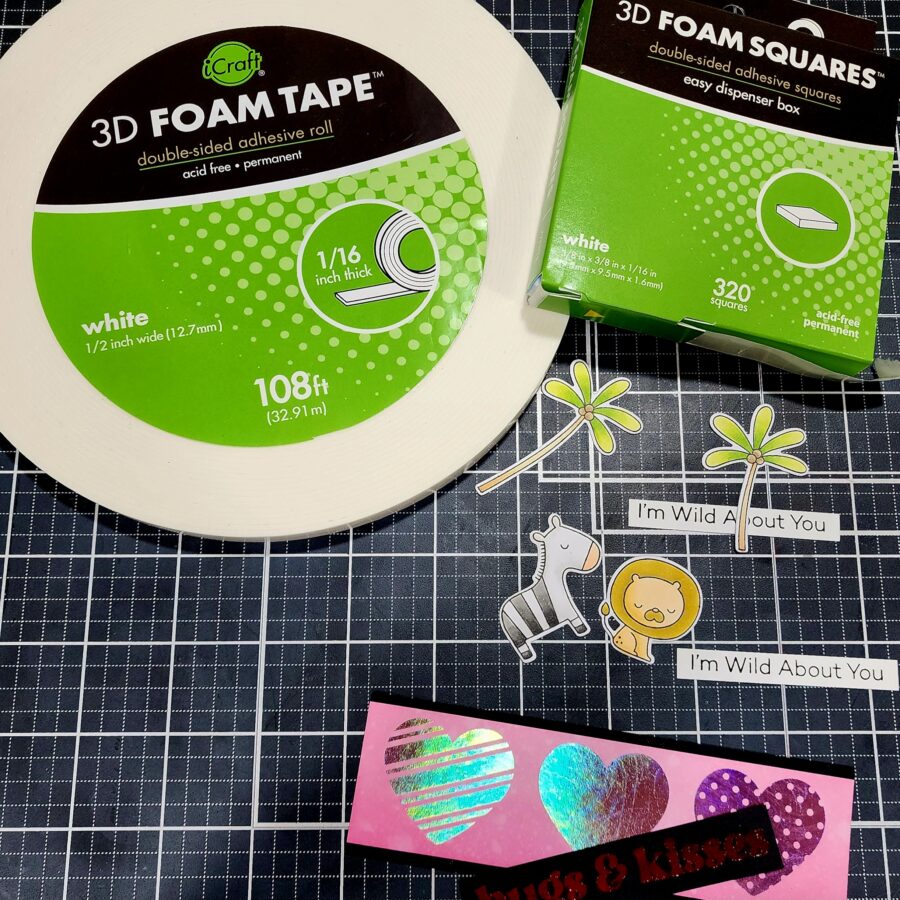 Next, I prepped my pieces with foam tape and squares because, by now you all know, I love dimension on my cards! One quick note too, I cut two 1/4" strips of black cardstock and adhered them to the top and bottom of the foiled heart strip with easy tear tape. I like the border and how it separates it from the foiled card front.
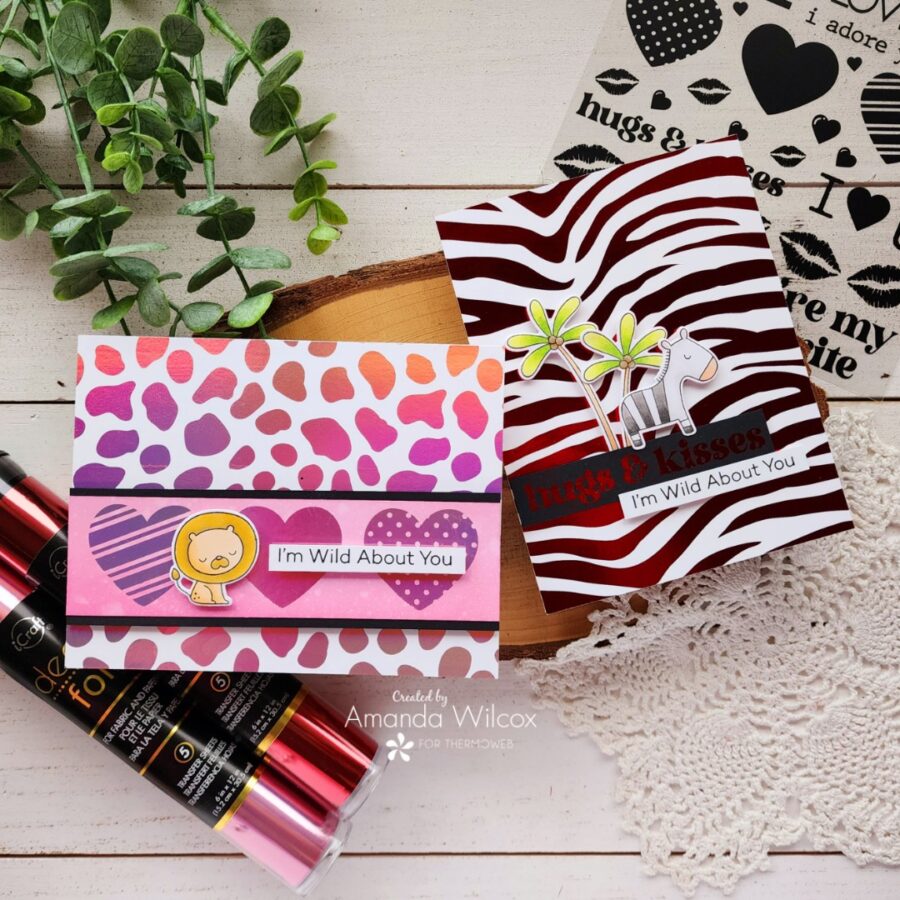
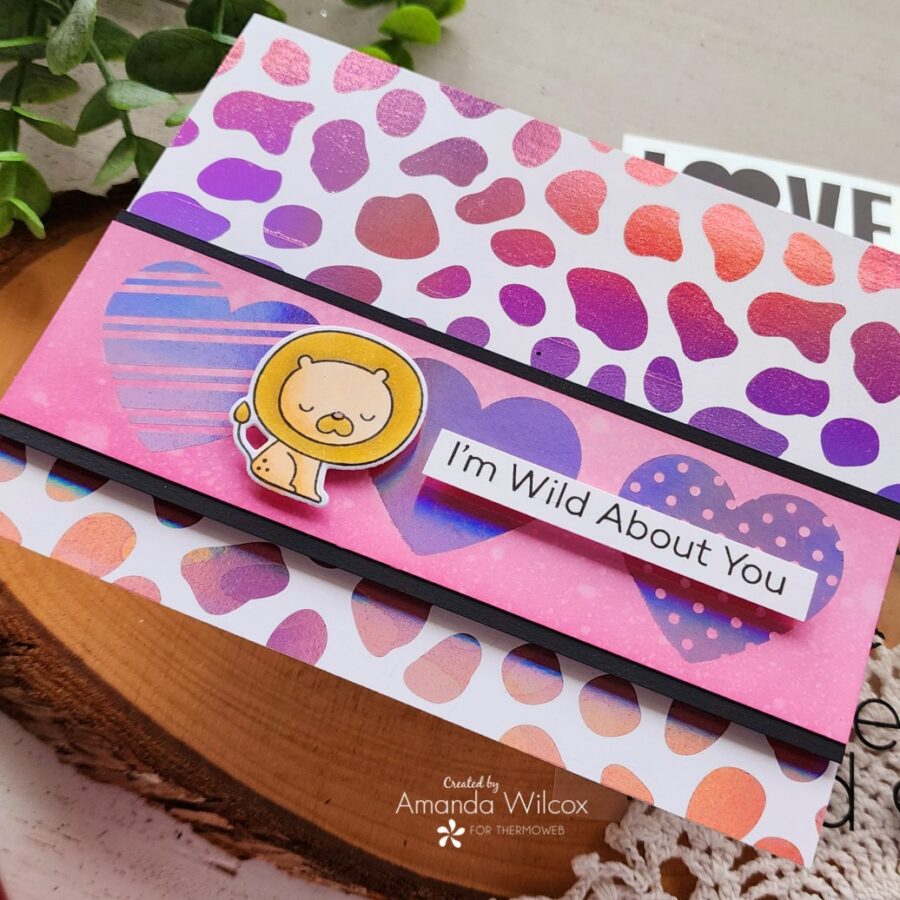 For this sweet pink card, I added the heart strip and then popped the adorable lion and sentiment strip on that. I honestly can't get enough of this card. I think it is so cute and love how the lion pops off the pink.
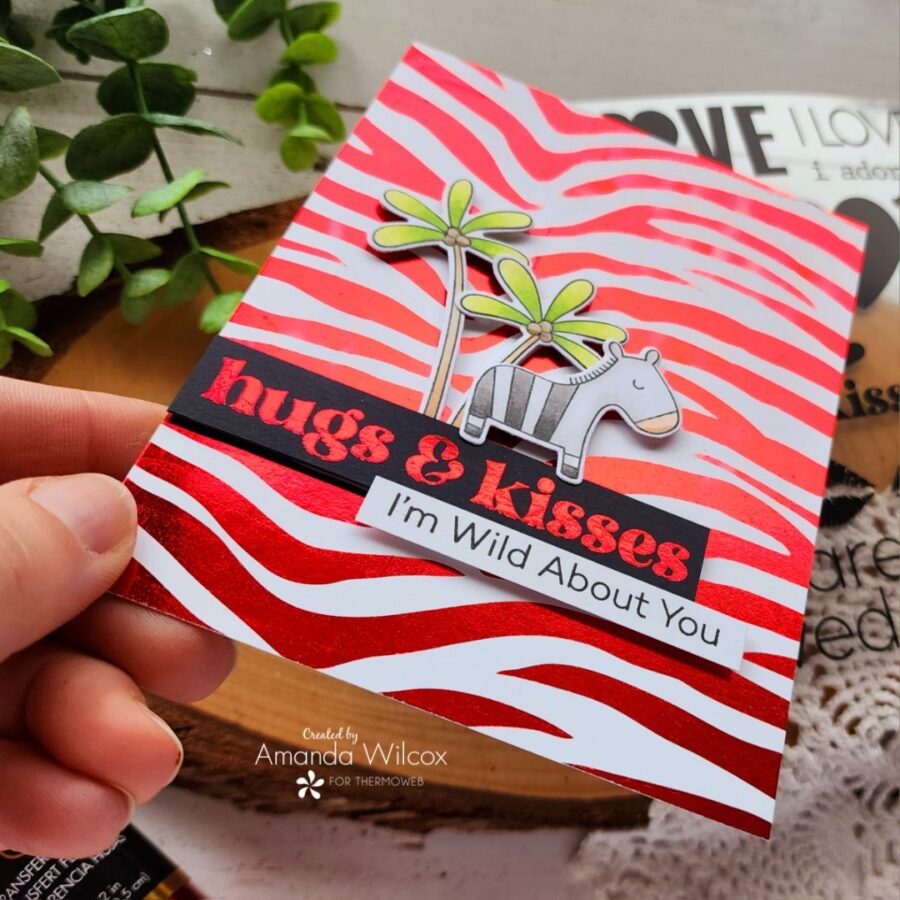 This red foil on my second card is absolutely stunning in person! And for some reason those zebra stripes in red really get me! I love them!
Anyway, for this card, I added the hugs and kisses strip with foam squares and then added the trees tucked underneath the top of it before placing the zebra over that. Then I finished it off by adding the stamped sentiment layering over the other strip just a bit but offset. I think this little detail looks really cool too!
This red foil on my second card is absolutely stunning in person! And for some reason those zebra stripes in red really get me! I love them!
Anyway, for this card, I added the hugs and kisses strip with foam squares and then added the trees tucked underneath the top of it before placing the zebra over that. Then I finished it off by adding the stamped sentiment layering over the other strip just a bit but offset. I think this little detail looks really cool too!
 I hope you enjoyed both of today's cards and will look at your toner card fronts to see what different occasions you can use them for!
I appreciate you sharing your time with me. Have a fabulous day!
I hope you enjoyed both of today's cards and will look at your toner card fronts to see what different occasions you can use them for!
I appreciate you sharing your time with me. Have a fabulous day!