 Welcome to the 4th Annual Handmade Holidays Blog Hop!
 A few years ago we were looking online for handmade gift ideas and thought it would be great if there was a resource dedicated JUST to handmade gift ideas. Enter the Handmade Holidays hop! We've gathered over 100 of our creative blogger friends in the craft industry as well as some of our fellow product manufacturers to bring you a plethora of inspiring gift ideas you can make now to give to your friends, family, and colleagues. Pin and bookmark these ideas for this holiday season and to use throughout the year! Each day of the hop features approximately 30 gift projects and you can "hop" from one blog to another to check them all out.
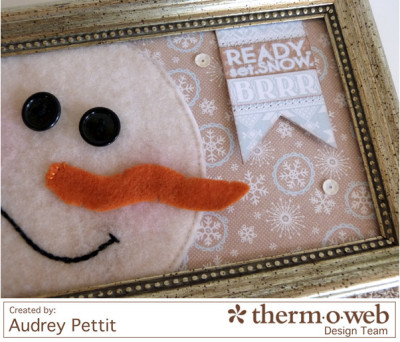
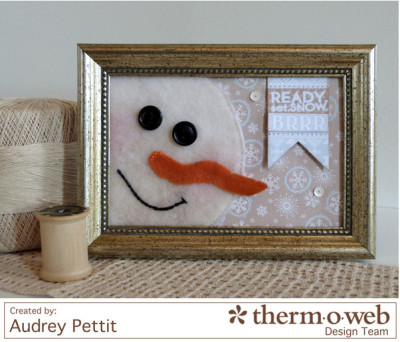 Hi everyone, and welcome to the Handmade Holiday Blog Hop! Today I'm going to be sharing a quick and easy snowman home decor project using Therm O Web Stitchn'Sew™ interfacing and adhesives. Let's take a look.
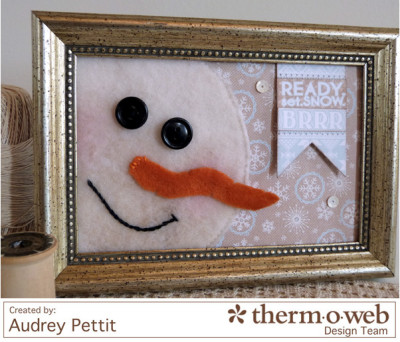 Ready. Set. Snow. Frame created by Audrey Pettit
Supplies:
Therm O Web Stitchn'Sew™ Interfacing
Therm O Web SuperStik Glue Stick
Therm O Web 1/2" SuperTape™
Therm O Web Fabric Fuse Glue
Ready. Set. Snow. Frame created by Audrey Pettit
Supplies:
Therm O Web Stitchn'Sew™ Interfacing
Therm O Web SuperStik Glue Stick
Therm O Web 1/2" SuperTape™
Therm O Web Fabric Fuse Glue
Patterned Paper, Die Cut, Sticker: Authentique
Floss: DMC
Chalk Pastels: Stampin'Up
Sewing Supply: orange felt, black buttons, sequins
To begin, find an unused desk frame and remove the glass. My frame is 4x6 and was a super steal for only 99 cents at the thrift store. Then gather your supplies.
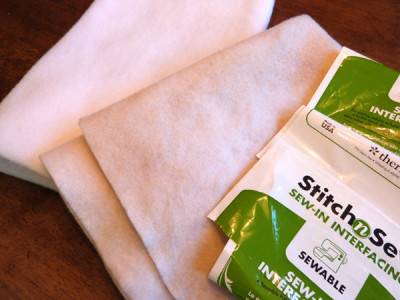
Therm O Web Stitchn'Sew™ Interfacing is known mostly for adding stability behind fabrics, but I love using it for lots of projects requiring fleece or felt. And because I am fond of primitive, shabby chic crafts, I like to give my interfacing a good soak in some coffee or tea before I get started. Here you can see the difference between the natural interfacing, and the piece I've stained in a coffee bath.
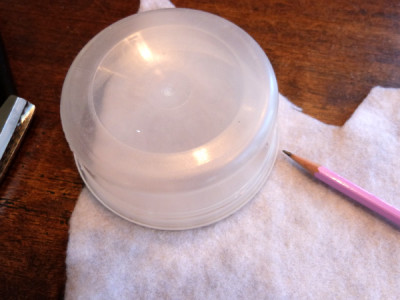
Die cut or hand cut a large circle from the interfacing to use for the snowman's head. I tried out a variety of round household objects until I found a size I liked for my frame. If using a template shape, simply trace around it with pencil, and then cut it out. We won't be using the entire circle, so I put my circle container slightly off the edge to conserve fabric.
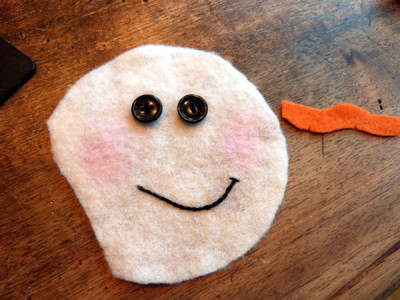
Hand stitch a mouth using 4 strands of black embroidery floss. Stitch on two black buttons for the eyes. Apply pink chalk pastel to the cheek area using a cotton ball. Hand cut a wavy carrot nose from a scrap of orange felt. Set aside the nose for now.
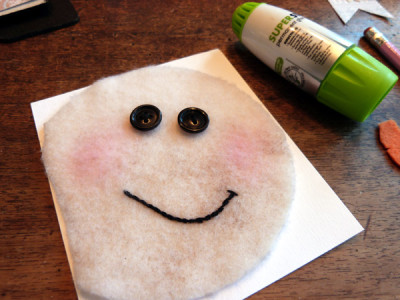
The snowman head can be inserted into the frame as is, or can be adhered to a cardstock backing for added durability. Trace your circle template onto a scrap of cardstock, and cut it out. Coat the cardstock with Therm O Web Super Stik Glue Stick, and apply the snowman face on top.
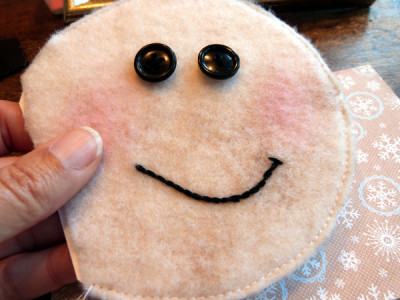
The Super Stik Glue Stick is sewable, so go ahead and machine stitch around the edge of the snowman head, if desired.
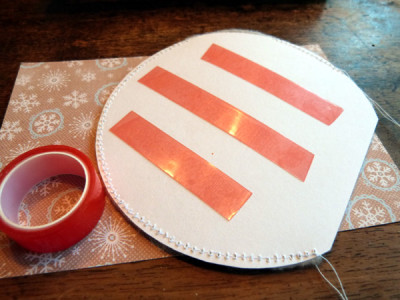
For a super strong hold, adhere the snowman to the background paper using Therm O Web SuperTape.
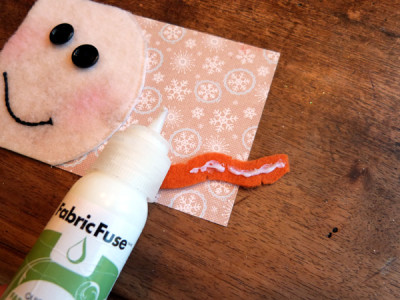
Adhere the carrot nose with Fabric Fuse Glue.
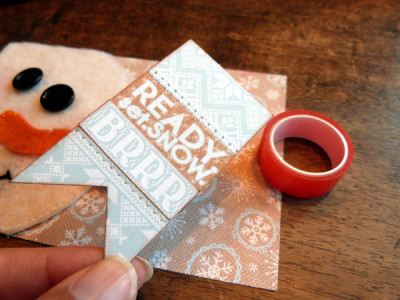
Add a die cut sentiment banner to the top right corner using SuperTape for a strong hold.
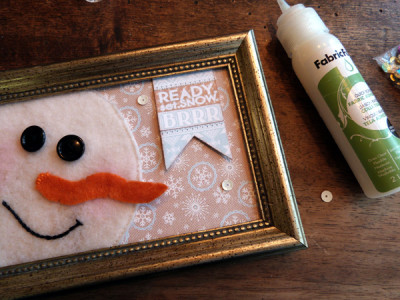
Pop the snowman panel into the frame. Add a few final sequins for embellishment, adhered with Fabric Fuse Glue.
Enjoy!
Are you ready for lots more creative handmade gift ideas and projects??
Follow along on our blog hop! Simply click on each of the links below to be taken to that post with additional information and photos on how to create a handmade gift project. Have fun and pin away!
Clearsnap
Westcott
Scrapbook Adhesives by 3L
Ellison Educational Equipment
ICE Resin
Neat and Tangled
Therm O Web <
Walnut Hollow <
Elizabeth Craft Designs
Rowland Technologies
Graphic 45
Hydrangea Hippo
Pink and Main
The Buckle Boutique
Tami Mayberry Art & Design - Tami Mayberry
Jamie Dougherty - Jamie Dougherty Designs
Elizabeth Craft Designs - Raquel Mason
Meagan - The Charming Farmer
Scrapbook Adhesives by 3L - Angela Ploegman
Carolyn Dube - A Colorful Journey
Pink and Main - Mistyana Wright
The Buckle Boutique - Niki Wilson
It’s Sew Lorine - Lorine Mason
Therm O Web - Andy Knowlton
L. Grace Lauer - Uniquely Grace
Clearsnap - Meihsia Liu
Oh Snap Lizzie - Lizzie Sanchez
Graphic 45 - Katie Zoey Ho
Charity Wings
ICE Resin - Tatiana Allen
Polly Carlson - Pieces by Polly
Ellison Educational Equipment - Jan Hobbins
RoseRedd Paper Studio - Rochelle Washington
We'd like to give you a way to save and stock up on your favorite Therm O Web and HeatnBond® products!
Take 20% off your order today through November 16th! Use coupon code: makeit
[caption id="attachment_15251" align="aligncenter" width="500"]

Offer may not combined with any other offers. Good through November, 16 2014.[/caption]
a Rafflecopter giveaway
Follow our Handmade Holidays Gift Ideas Pinterest board for even more inspiration!
Follow Jennifer Priest of RainMaker Media Works + Hydrangea Hippo's board Handmade Holidays on Pinterest.
A huge thank you to our sponsors for this hop - please visit their blogs & websites below and follow them. And be sure to come back tomorrow for another 30+ amazing Handmade Gift Ideas!
 Clearsnap
 ||
Ellison Educational Equipment ||
Walnut Hollow ||
Graphic45 ||
Westcott ||
ICE Resin ||
Therm O Web ||
Rowland Industries ||
Scrapbook Adhesives by 3L ||
Pink and Main ||
Elizabeth Craft Designs ||
The Buckle Boutique ||
Neat and Tangled
Additional Sponsorship provided to bloggers by:
Sakura ||
Fairfield Processing
Written by Andy Knowlton



