No Products in the Cart
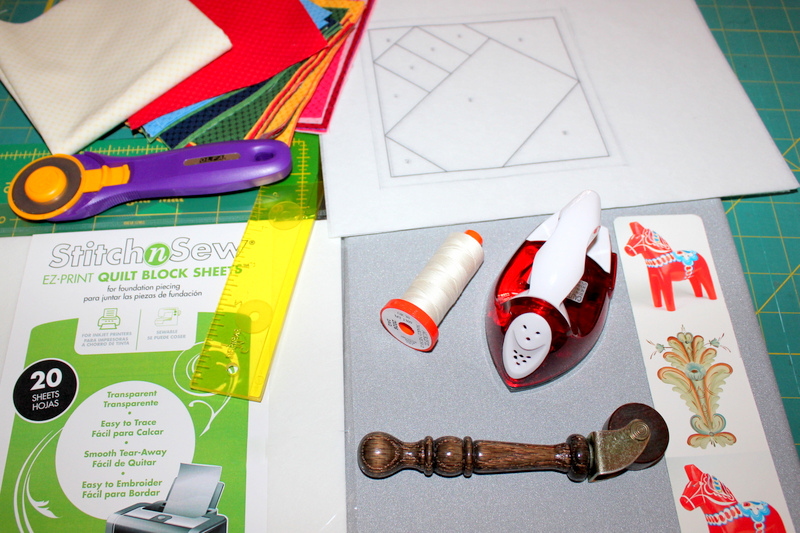
 Supplies:
HeatnBond Ultrahold Adhesive No-Sew
StitchnSew EZ Quilt Block Sheets
Oliso Iron
Aurifil Thread 50 wt
1/4" ruler for paper piecing
A small iron or roller (for the seams)
A piece of cardstock or bookmark
Rotary cutter
Fabric
Rice or beans for filling
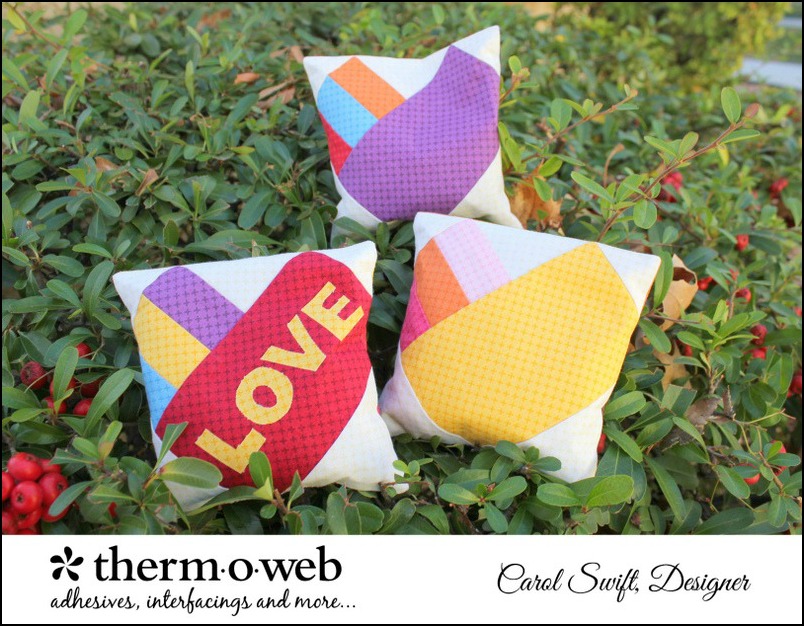
Valentine Paper Pieced Treat Pouches
Get your paper piecing tools together:
Supplies:
HeatnBond Ultrahold Adhesive No-Sew
StitchnSew EZ Quilt Block Sheets
Oliso Iron
Aurifil Thread 50 wt
1/4" ruler for paper piecing
A small iron or roller (for the seams)
A piece of cardstock or bookmark
Rotary cutter
Fabric
Rice or beans for filling
Valentine Paper Pieced Treat Pouches
Get your paper piecing tools together:
 [line]Valentine Fabric Paper Pieced Treat Pouches Instructions:
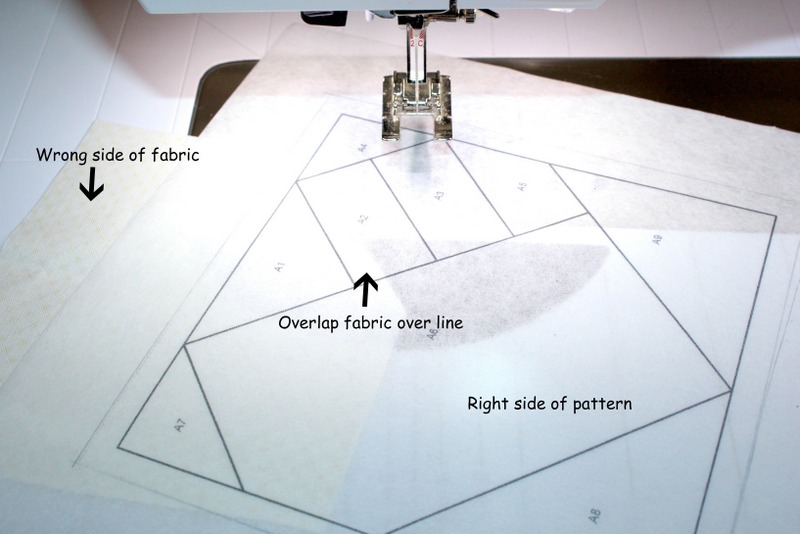
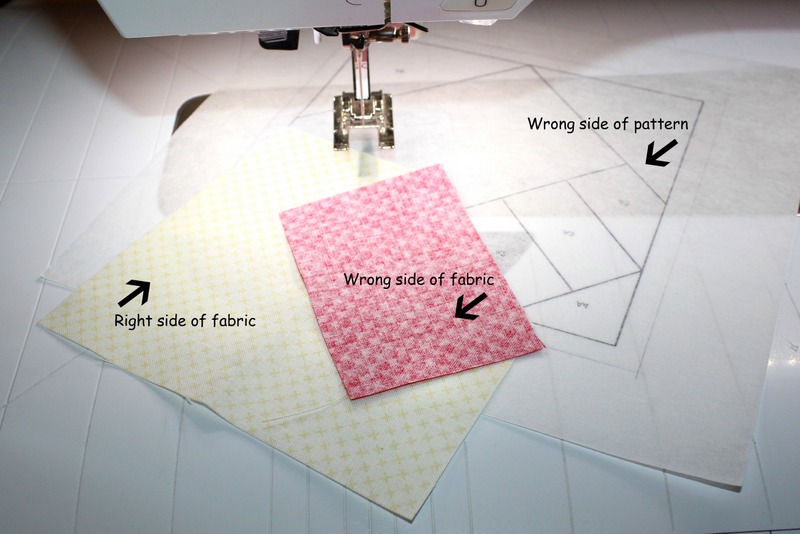
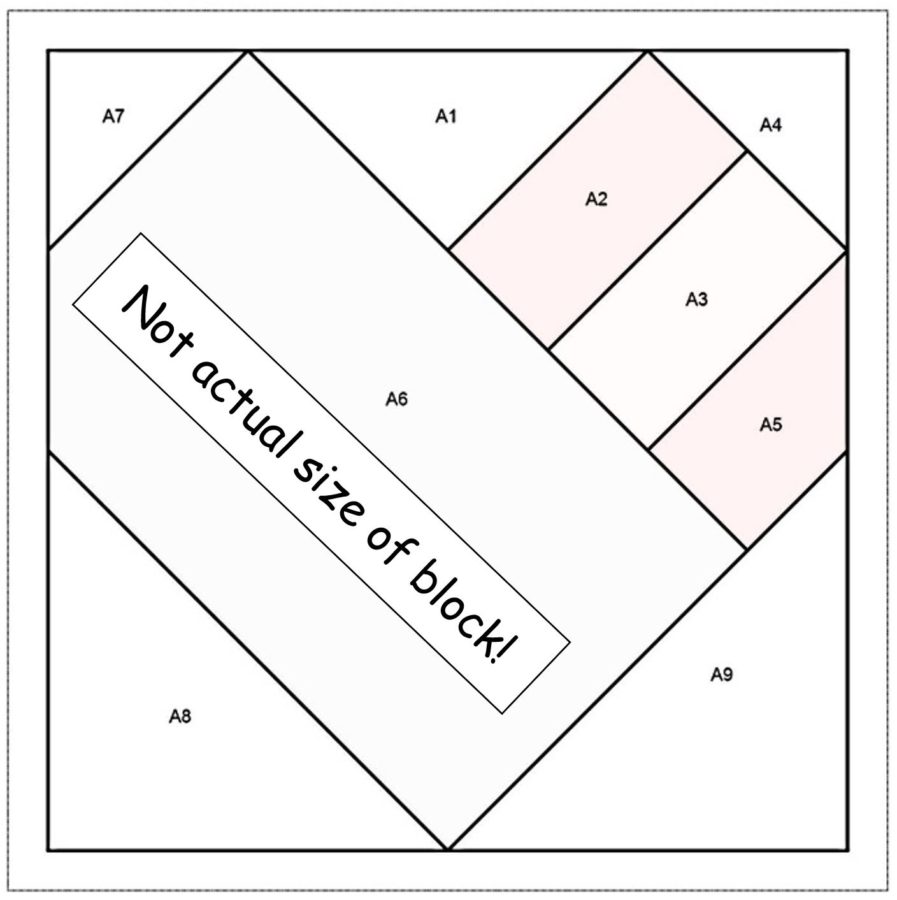 Place the fabric for #1 with the wrong side of the fabric to the wrong side of the pattern. Make sure the fabric overlaps line by about 1/4”. Holding pattern up to a light helps to make sure the fabric covers the section completely.
 On the wrong side of the pattern, place the fabric for #2 right sides together with fabric #1 making sure it is large enough to cover section #2 and both overlap line between #1 and #2. Pin in place if desired.
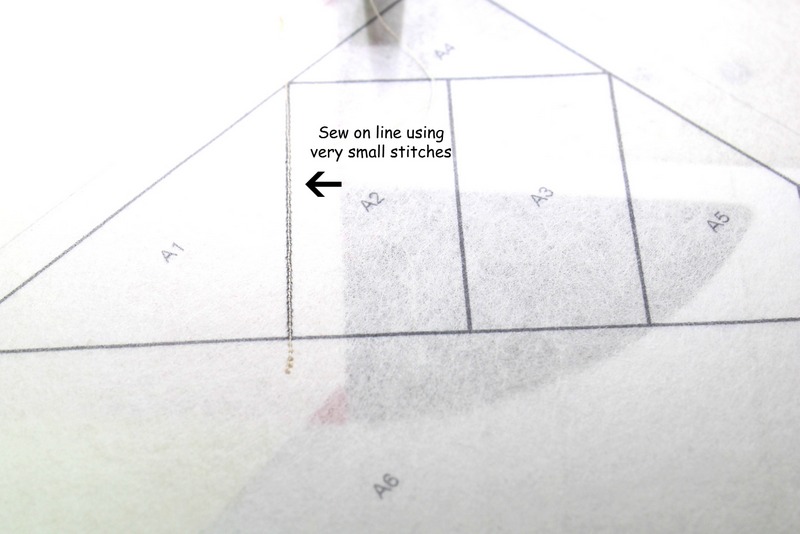
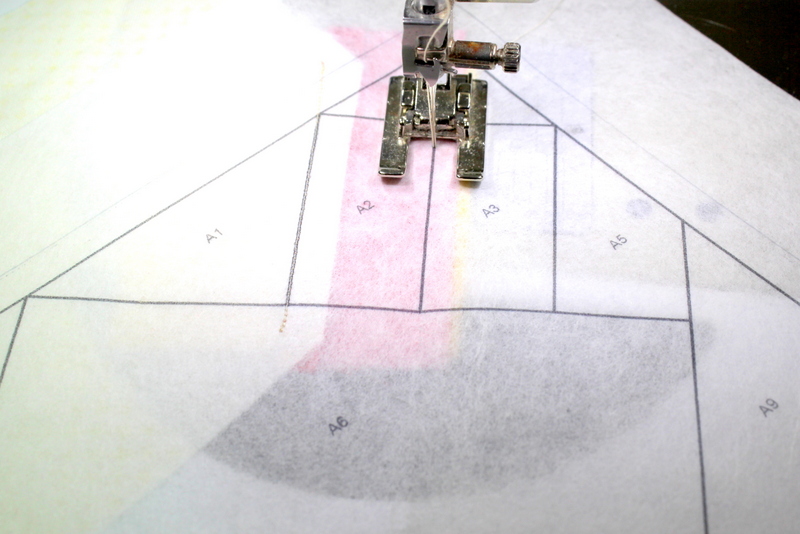
 With pattern right side up, sew on the line between #1 and #2 beginning and ending just before and beyond the lines.
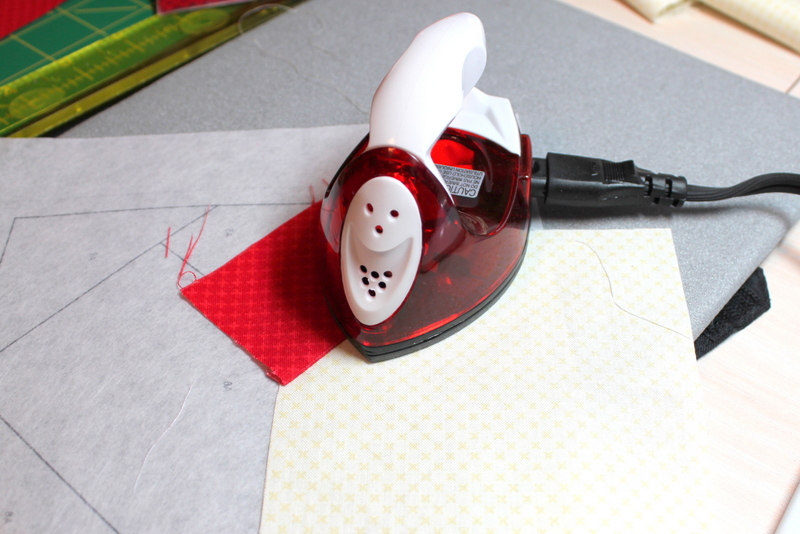
 Flip over to the wrong side of the pattern (fabric right side up) and press fabric along the seam with small iron or roller.
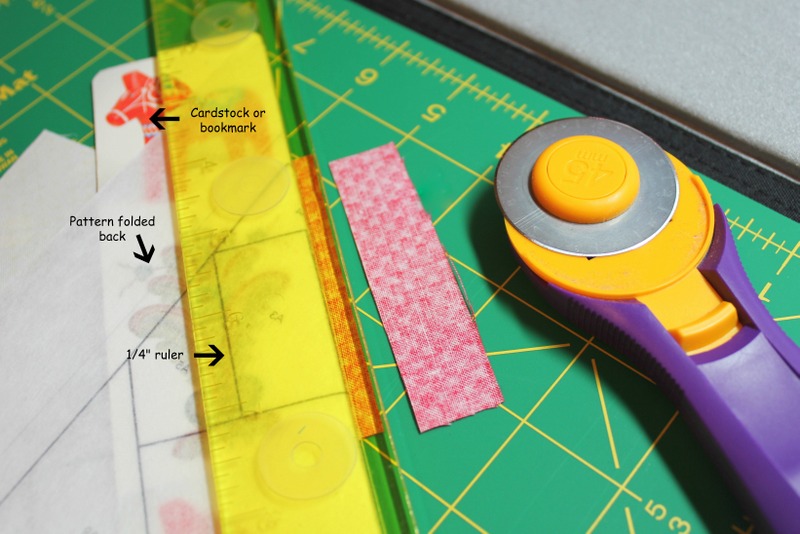
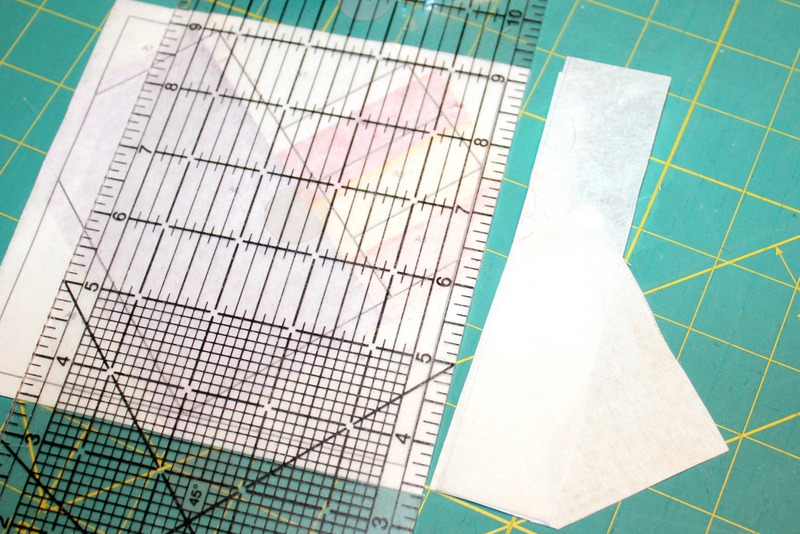
 With the right side of pattern facing up, place cardstock or bookmark along the line between #2 and #3. Fold pattern back along the line. Place 1/4” ruler along fold line and bookmark; cut leaving 1/4” of fabric.
 Continue adding fabric to each number in order, flipping over to sew, flipping back to press, and trimming.
 After adding all the sections, flip to right side and press using a large iron.
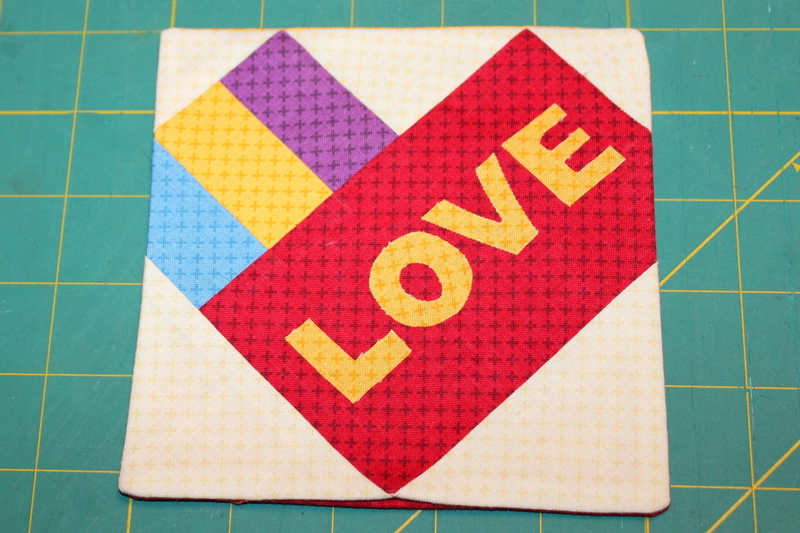
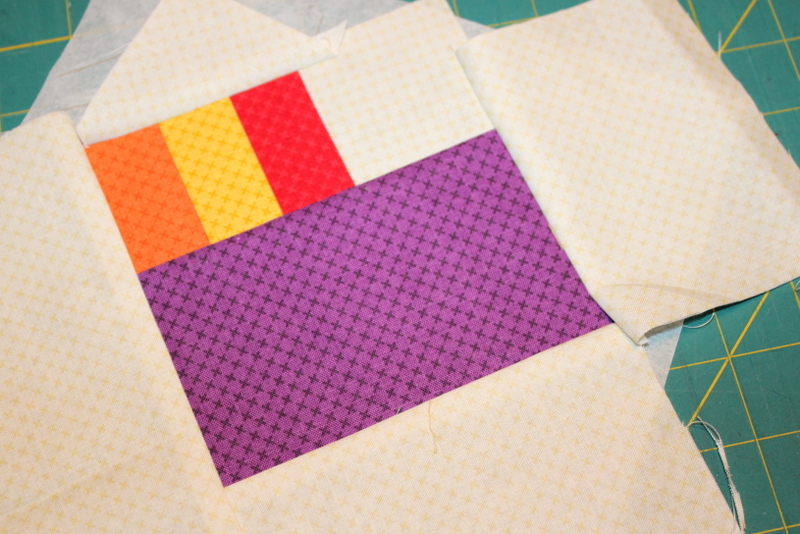 Normally at this point, you would remove the EZ Quilt Block Sheet from the back of the paper pieced block being careful not to pull on seams, but for the bean bags, you can leave it on if you want to. Use the pattern’s outside seam line to trim block to 6½” x 6½” including seam allowance.
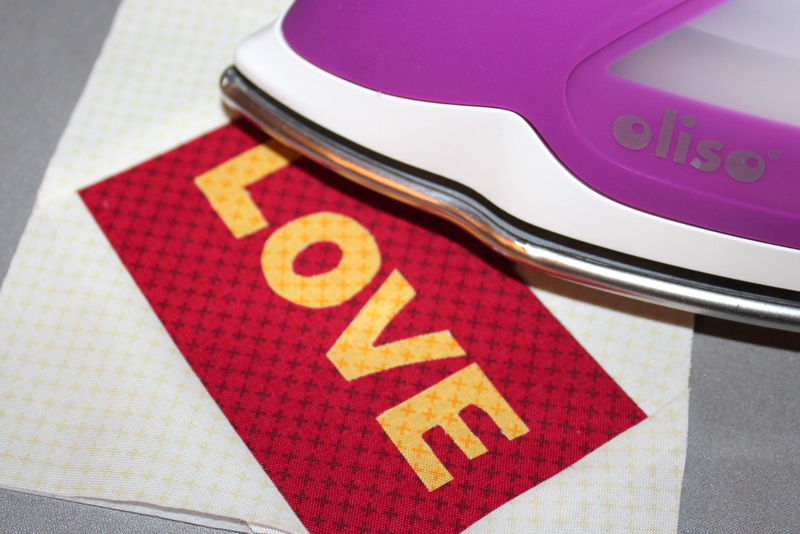
 Optional lettering - You DO NOT need to sew HeatnBond Ultrahold Adhesive…it will gum up your needle. Just iron in place following the directions below and you are done. It’s very strong! Trace applique designs on the smooth side of HeatnBond Ultrahold Adhesive, No-Sew.
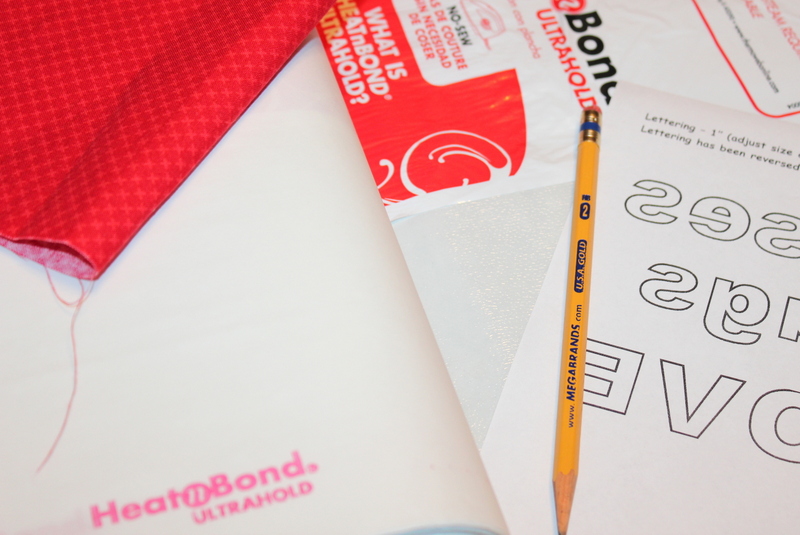 Iron adhesive pieces to wrong sides of fabrics with a medium heat iron, no steam. Press for 2 seconds. Repeat until all surfaces have been bonded to the fabric. Let cool. Cut out applique pieces. Peel off paper liner. Place applique shape, adhesive side down, on top of the project. Press and hold iron for 6 seconds on each section until the entire piece is bonded. Let cool.
 Step 4: Fold 5½” x 8½” fabric rectangle in half and press on the fold. Line up lower raw edges of pocket with the lower edge of 5½” x 5½” fabric square. Baste raw edges of pocket to fabric square, leaving fold open.
 Step 5: With right sides together, sew front to back around all edges using a 1/4” seam, leaving a 3” opening at the bottom. Clip corners.
 Step 6: Turn bag inside out. Push corners out to create points. Press.
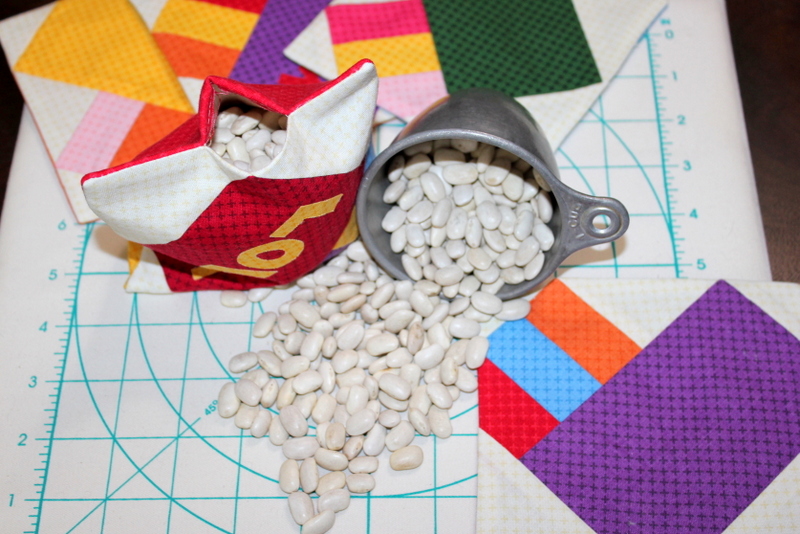
 Step 7: Fill the bag with 1½ cup of dry pinto beans using a funnel or roll a paper into a cone to create a funnel. Slipstitch opening closed.
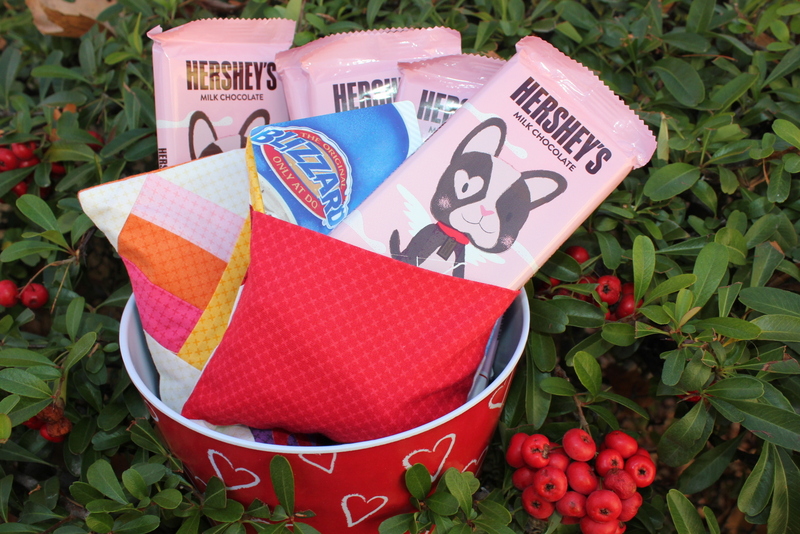
 Step 8: Slip some candy, gift card, toy, or other treats in the back pocket.

Written by Carol Swift