No Products in the Cart
 Most cover dies are an A2 size of 4 1/3 X 5 1/2. Cut your cardstock, I used water color paper because the Transfer Gel doesn't warp the watercolor paper.
[tooltip text="TooltipText"]*Deco Foil Transfer Gel when applied may appear to cause paper to slightly warp .....however once dry the paper will lie flat.[/tooltip]
Then tape it down to your work surface with Painter's tape.
Most cover dies are an A2 size of 4 1/3 X 5 1/2. Cut your cardstock, I used water color paper because the Transfer Gel doesn't warp the watercolor paper.
[tooltip text="TooltipText"]*Deco Foil Transfer Gel when applied may appear to cause paper to slightly warp .....however once dry the paper will lie flat.[/tooltip]
Then tape it down to your work surface with Painter's tape.
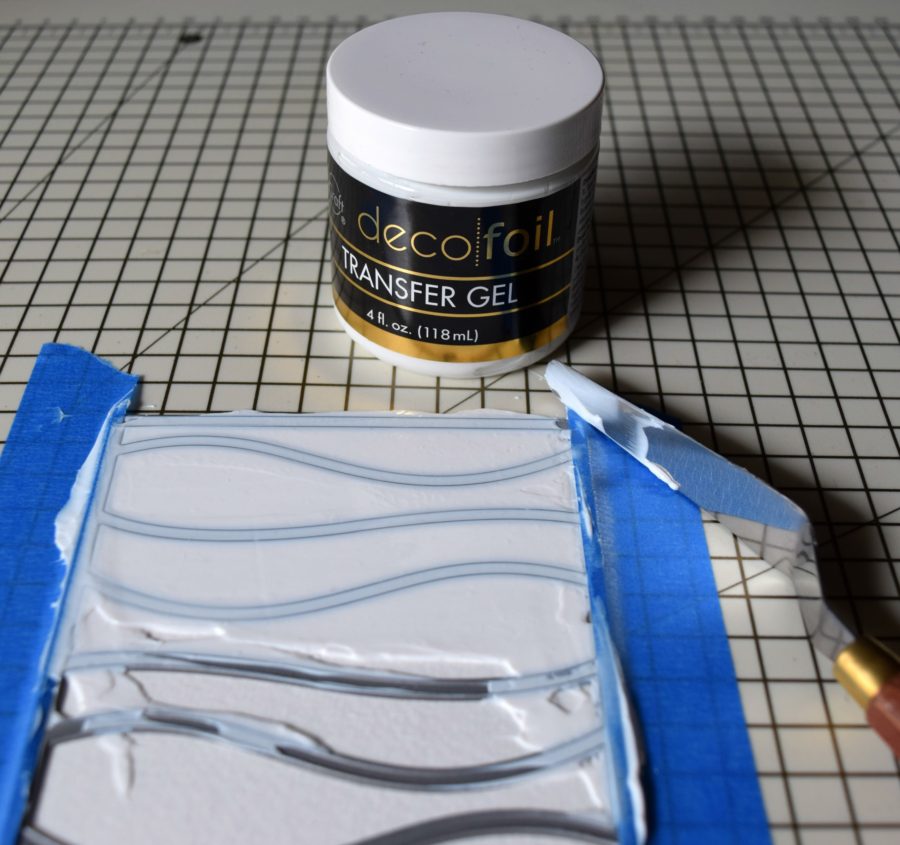 Apply the iCraft Deco Foil™ Transfer Gel over the die generously and scrape away the excess. Peel up the painters tape and then lift the die to reveal the design.
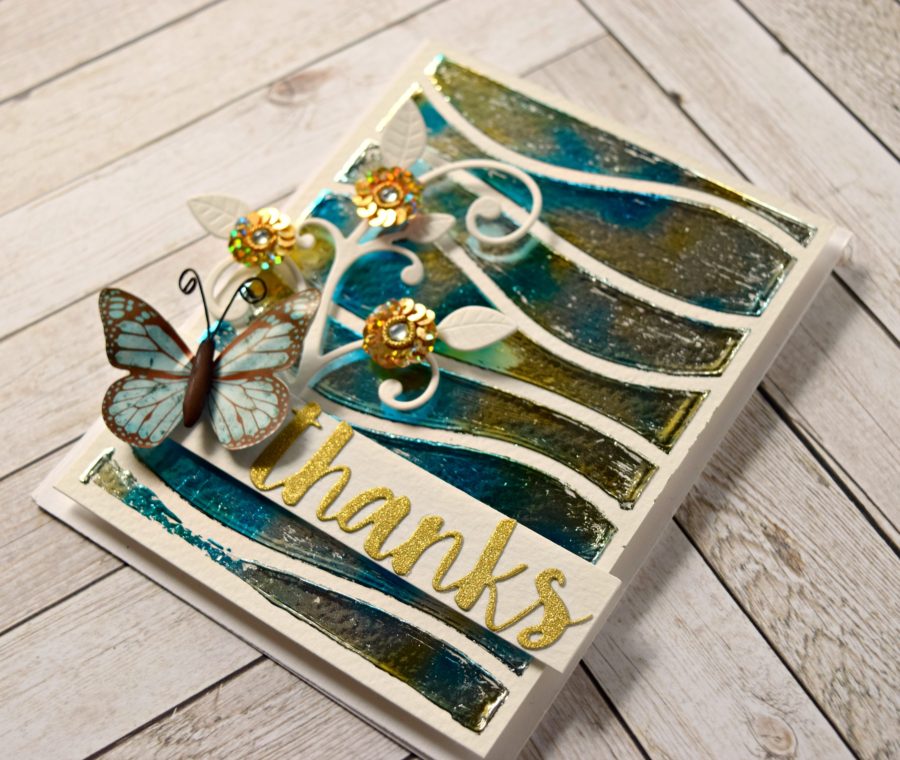
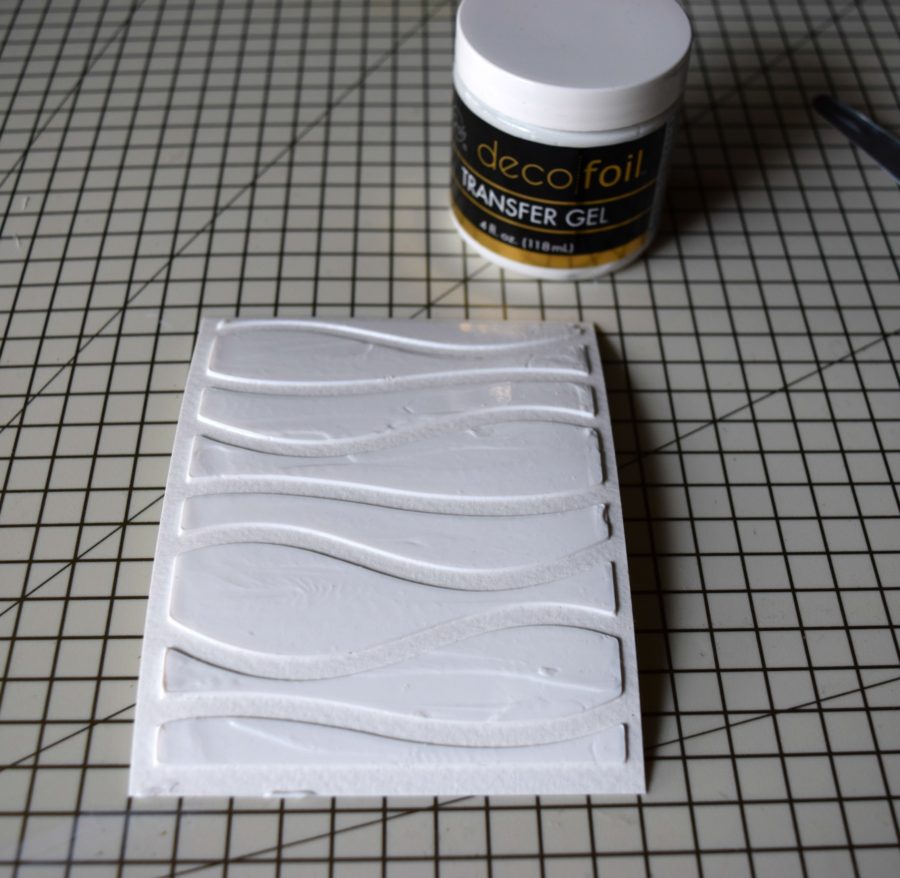 Allow the Transfer Gel to dry 30-45 mins. The Gel will go from a opaque white to clear when dry. Then cut a piece of DECO FOIL™ TRANSFER SHEETS • LAPIS WATERCOLOR to cover the design and run through the laminator. Peel off the foil to reveal the foiled design.
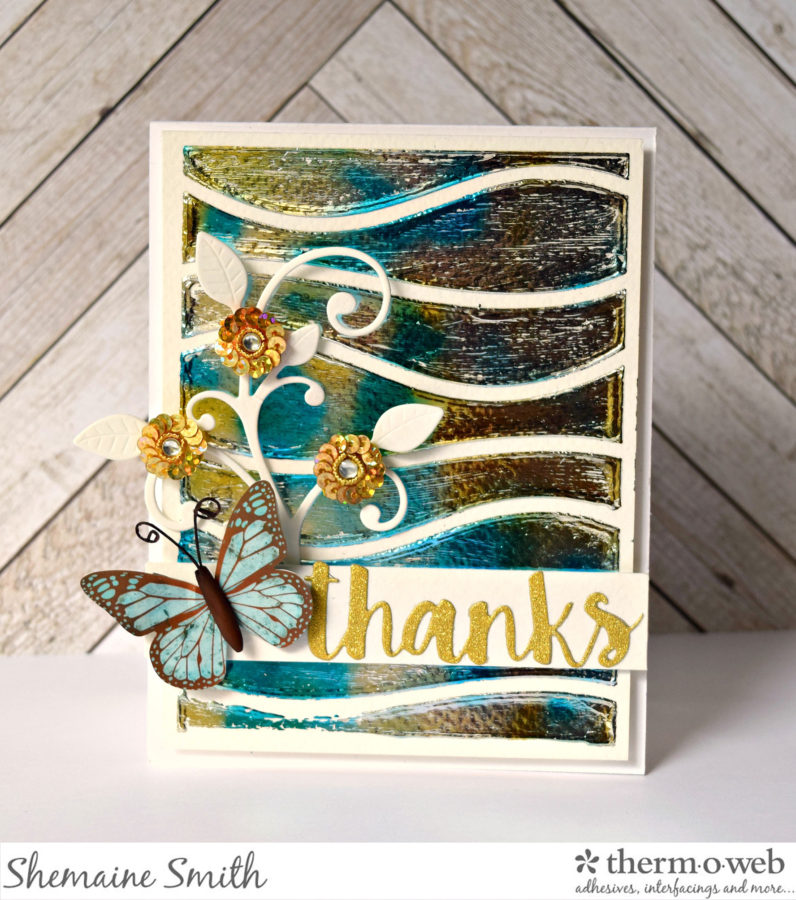
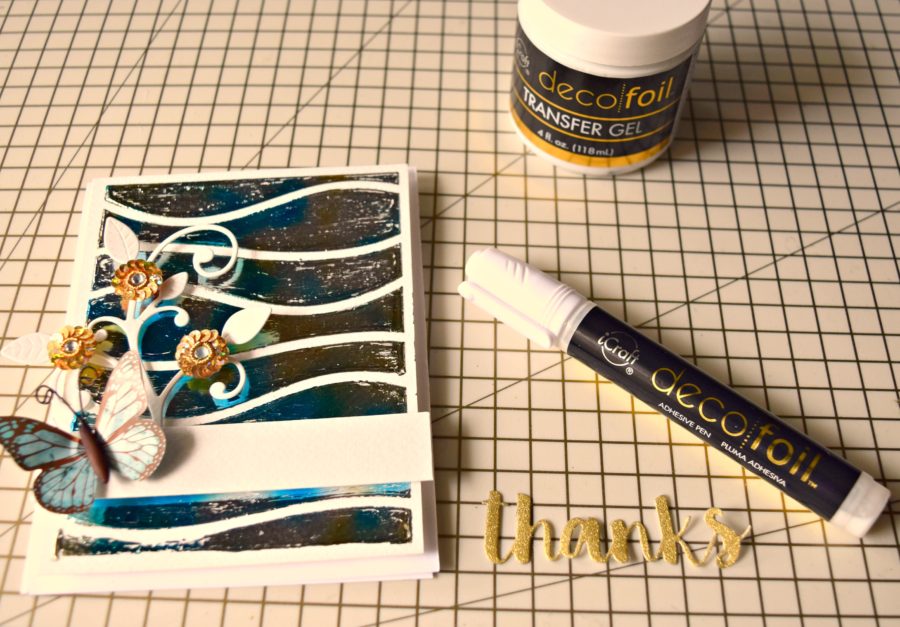 For the front of the card, decorate as desired. I used a flourish die and some sequin embellishments. To adhere the sentiment to the card, I used DECO FOIL™ ADHESIVE PEN .34FLOZ and applied the glue to the back of the die cut.
 Thank you for stopping by today. I hope you enjoyed this technique for using your metal dies to create unique card backgrounds with our Transfer Gel!
Shemaine
Thank you for stopping by today. I hope you enjoyed this technique for using your metal dies to create unique card backgrounds with our Transfer Gel!
ShemaineWritten by Shemaine Smith