No Products in the Cart
 Spring Decor by Alice Golden
Therm O Web Supplies:
Zips™ Adhesive Lines
Small Zots™ Adhesive Dots
iCraft™ Easy-Tear Tape
3D Foam Squares
Other:
Patterned papers - Prima Marketing
Spring Woods Stamps, Dies - Papertrey Ink
Assorted inks
Pink gingham ribbon
Instructions:
Step 1: Make a tuna sandwich.
Spring Decor by Alice Golden
Therm O Web Supplies:
Zips™ Adhesive Lines
Small Zots™ Adhesive Dots
iCraft™ Easy-Tear Tape
3D Foam Squares
Other:
Patterned papers - Prima Marketing
Spring Woods Stamps, Dies - Papertrey Ink
Assorted inks
Pink gingham ribbon
Instructions:
Step 1: Make a tuna sandwich.
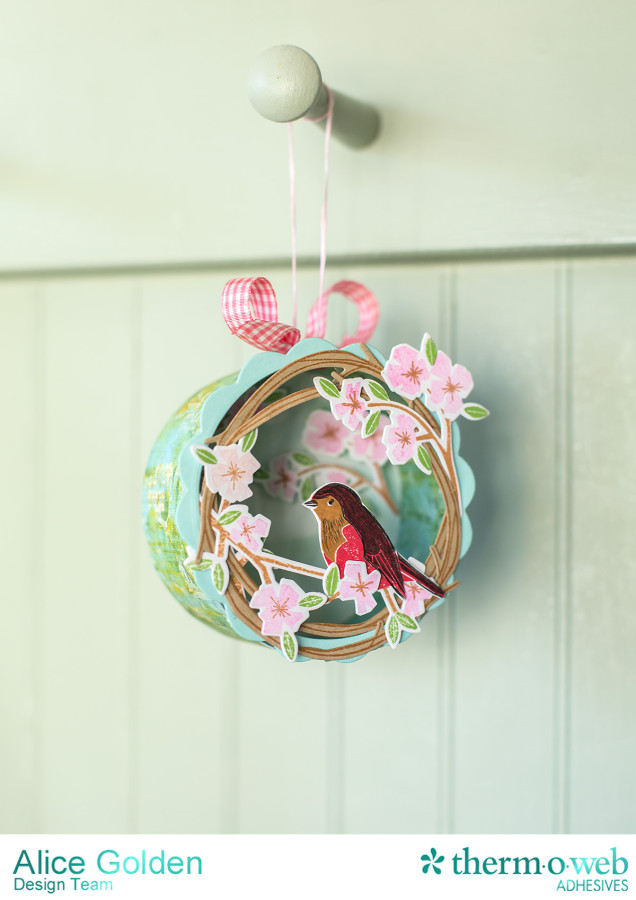
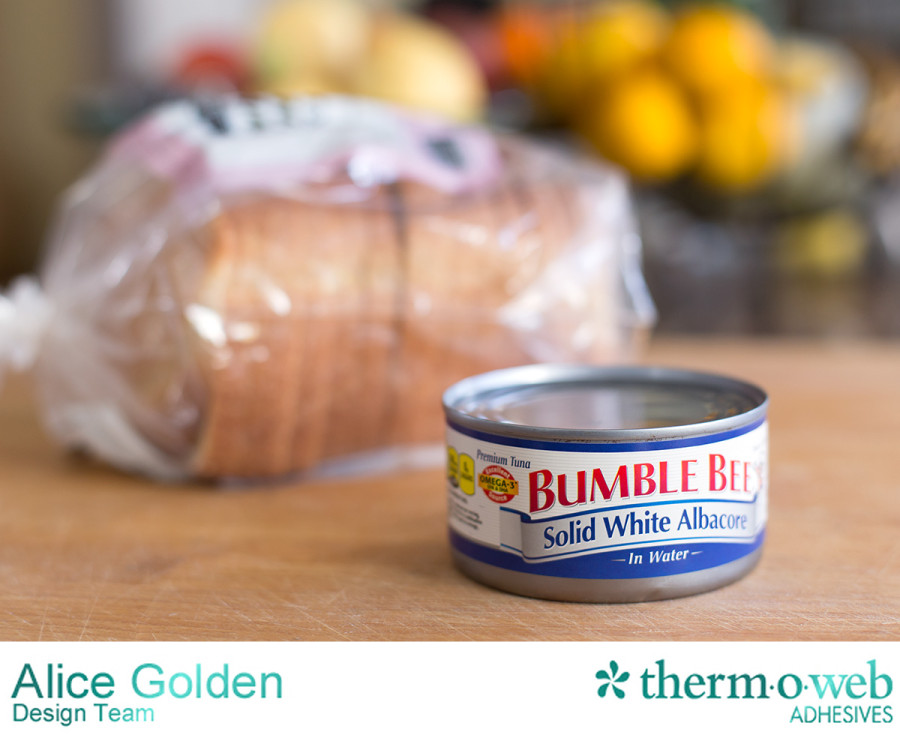 Maybe not what you were expecting? The base of the ornament is made from an up-cycled tuna can. (Search Pinterest for "tuna can crafts" and prepare to be amazed by some of the ways clever crafters have put these to use).
First, cover the inside and outside with patterned paper using iCraft® Easy-Tear tape. To cut the circle background piece use the can as a template and cut or die cut a circle slightly smaller so it will fit inside the can.
Cut two small holes in what will become the top of the can using a heavy duty hole punch and thread with ribbon.
Cut a strip of Zips™ adhesive to fit around the can. Make release cuts into one side of the protective liner to help it follow the contour of the can and apply to the rim of the can, as shown.
Maybe not what you were expecting? The base of the ornament is made from an up-cycled tuna can. (Search Pinterest for "tuna can crafts" and prepare to be amazed by some of the ways clever crafters have put these to use).
First, cover the inside and outside with patterned paper using iCraft® Easy-Tear tape. To cut the circle background piece use the can as a template and cut or die cut a circle slightly smaller so it will fit inside the can.
Cut two small holes in what will become the top of the can using a heavy duty hole punch and thread with ribbon.
Cut a strip of Zips™ adhesive to fit around the can. Make release cuts into one side of the protective liner to help it follow the contour of the can and apply to the rim of the can, as shown.
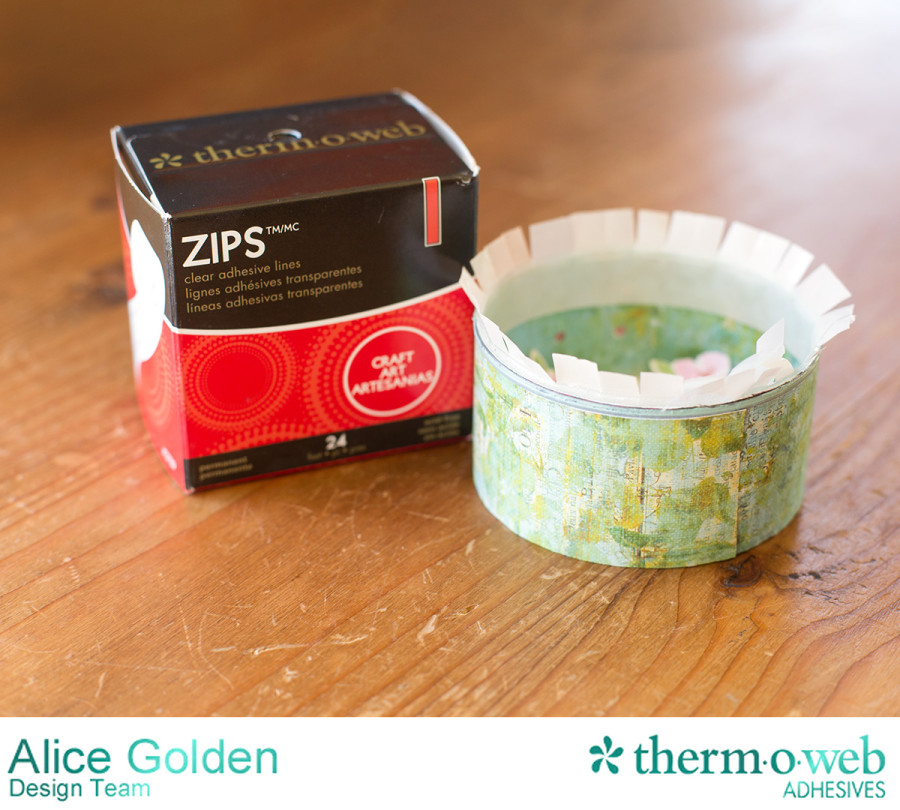 Zips™ work especially well when you need to adhere two different surfaces together, such as paper and metal. They are like a line of hot glue but much easier to use as there is no mess or burned fingers!
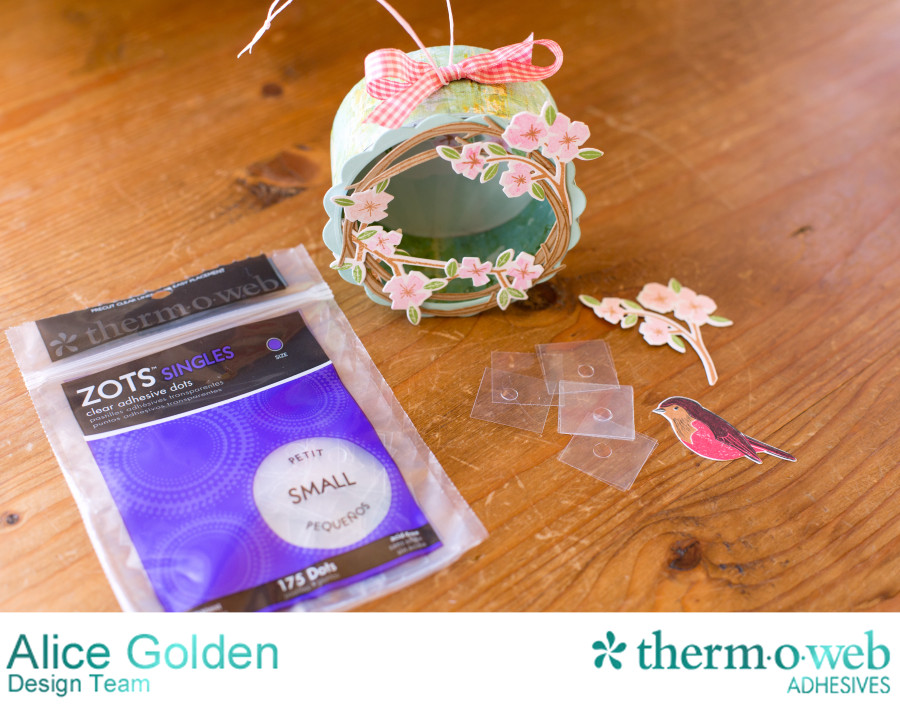
Create a frame out of nested circle dies and adhere stamped twig wreaths and blossoms together by placing Small Zots™ under the widest parts. Use 3D Foam Squares to attach a few smaller branches directly to background.
When the frame is ready, remove the protective liner from the Zips™ and press the frame into the adhesive to secure.
Zips™ work especially well when you need to adhere two different surfaces together, such as paper and metal. They are like a line of hot glue but much easier to use as there is no mess or burned fingers!
Create a frame out of nested circle dies and adhere stamped twig wreaths and blossoms together by placing Small Zots™ under the widest parts. Use 3D Foam Squares to attach a few smaller branches directly to background.
When the frame is ready, remove the protective liner from the Zips™ and press the frame into the adhesive to secure.
 Attach any additional pieces, such as the robin, using Small Zots™.
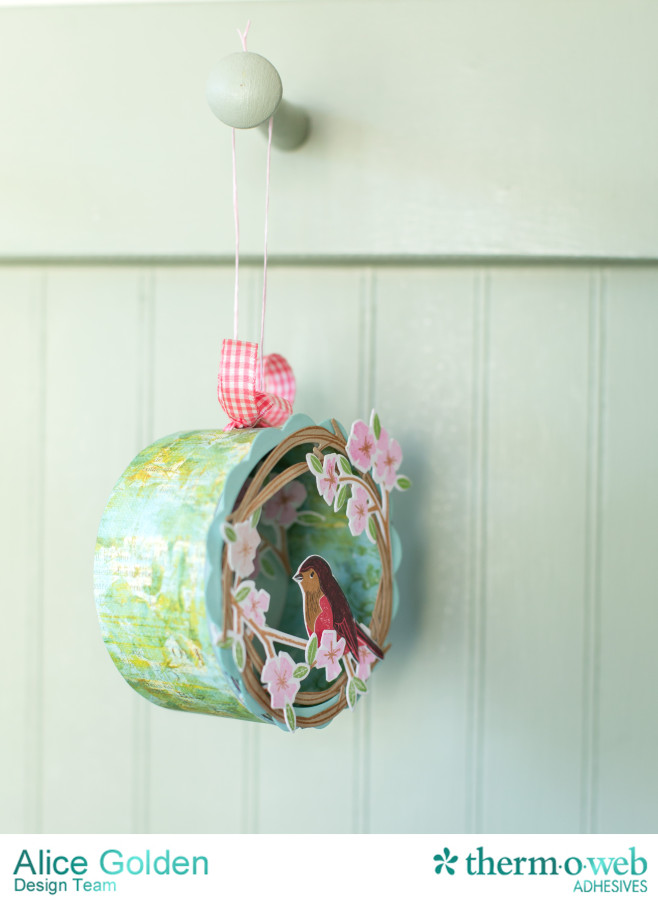
 I love the dimension you get by using a variety of layers and adhesive. This would be a fun project to recreate for all of the seasons.
 Thanks so much for stopping by today! Please let me know if you have any questions about this project.