No Products in the Cart
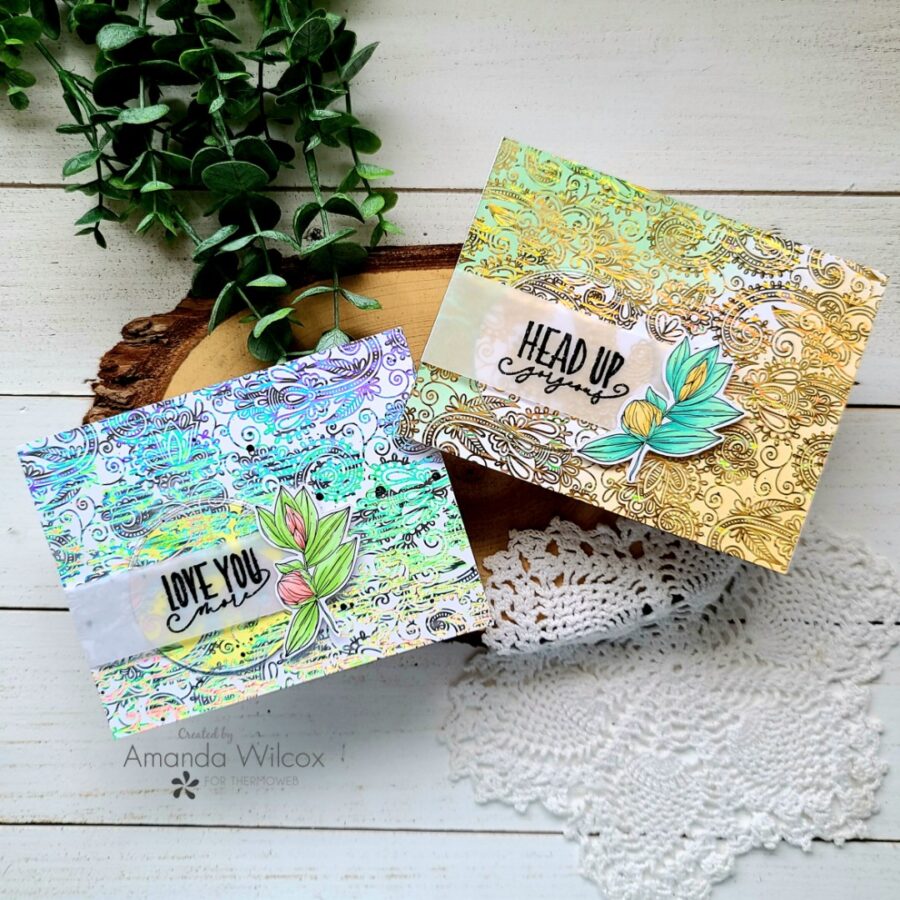
 Hey friends! It's Amanda from Twiddler's Nook today with a pair of cards using the newest Unity Toner Card fronts paired with the most recently released, incredible Maker Forte deco foils! I was so happy to pair these two together and love the outcome! Since the Maker Forte foils came out in gold and silver I decided to create with both colors.
 Products used on today's projects:
Maker Forte Deco Foil - Sunrise Lake and Moonlit Lake
Unity Toner Card Front - Paisley Dreams
Foam adhesive sheets
Trinity Stamps Embossed Edge Circle Stack dies
Unity You Go Girl stamps
iCraft tape runner
Distress Oxide Ink - cracked pistachio and dried marigold
Copic markers
Products used on today's projects:
Maker Forte Deco Foil - Sunrise Lake and Moonlit Lake
Unity Toner Card Front - Paisley Dreams
Foam adhesive sheets
Trinity Stamps Embossed Edge Circle Stack dies
Unity You Go Girl stamps
iCraft tape runner
Distress Oxide Ink - cracked pistachio and dried marigold
Copic markers
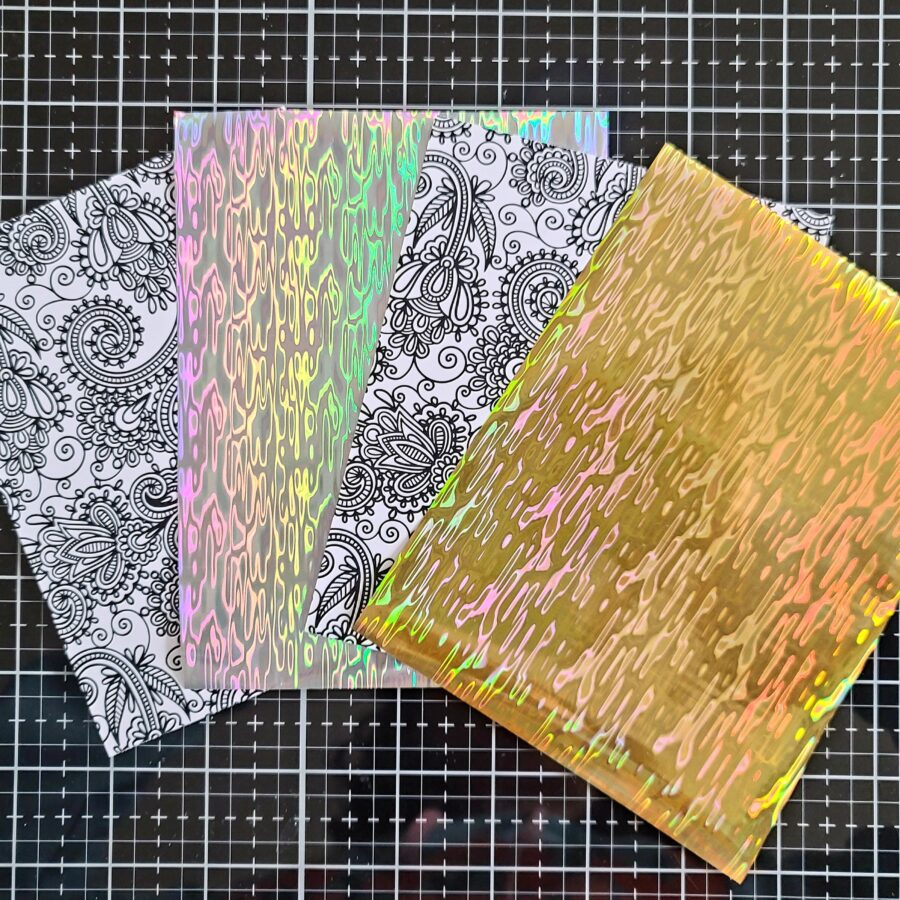 I created these cards simultaneously so let's just dive right in! I heated up my laminator and trimmed the Deco Foil down to fit the toner card fronts. I seriously couldn't wait to get these things foiled to see how cool they looked! I love these products!
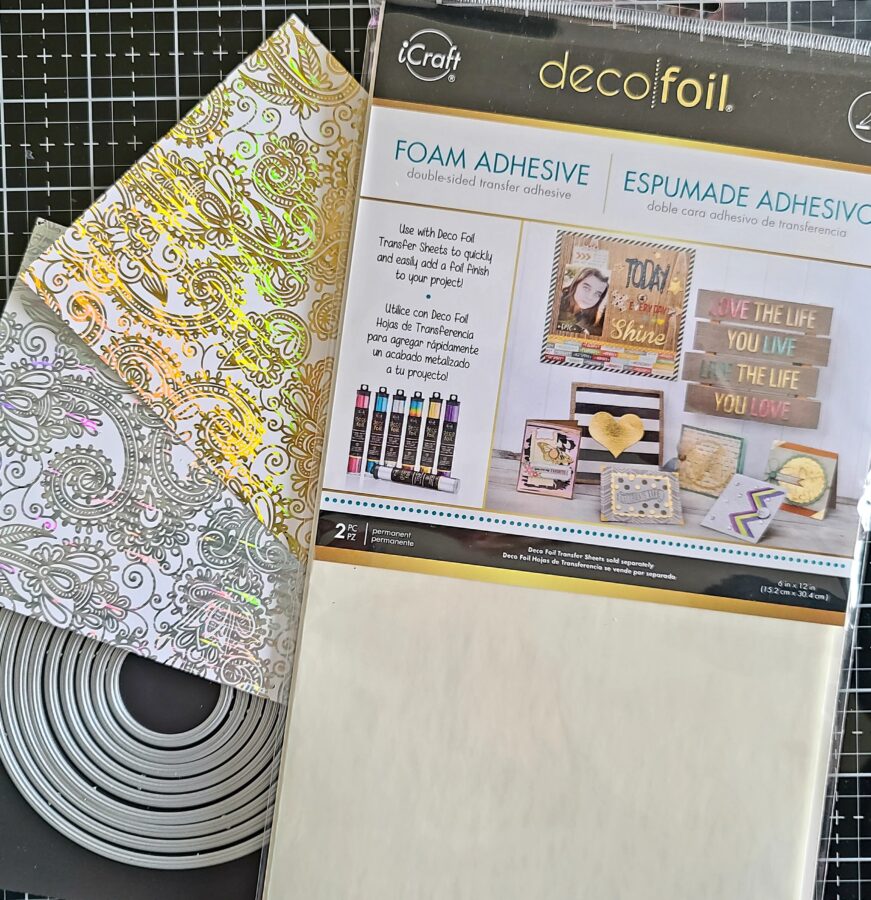 Once they were foiled, I took the 2 1/2 inch circle and cut it front both card fronts plus 2 more from the foam adhesive sheets. Then I pulled off one side of the backing paper and adhered the circles to the foam.
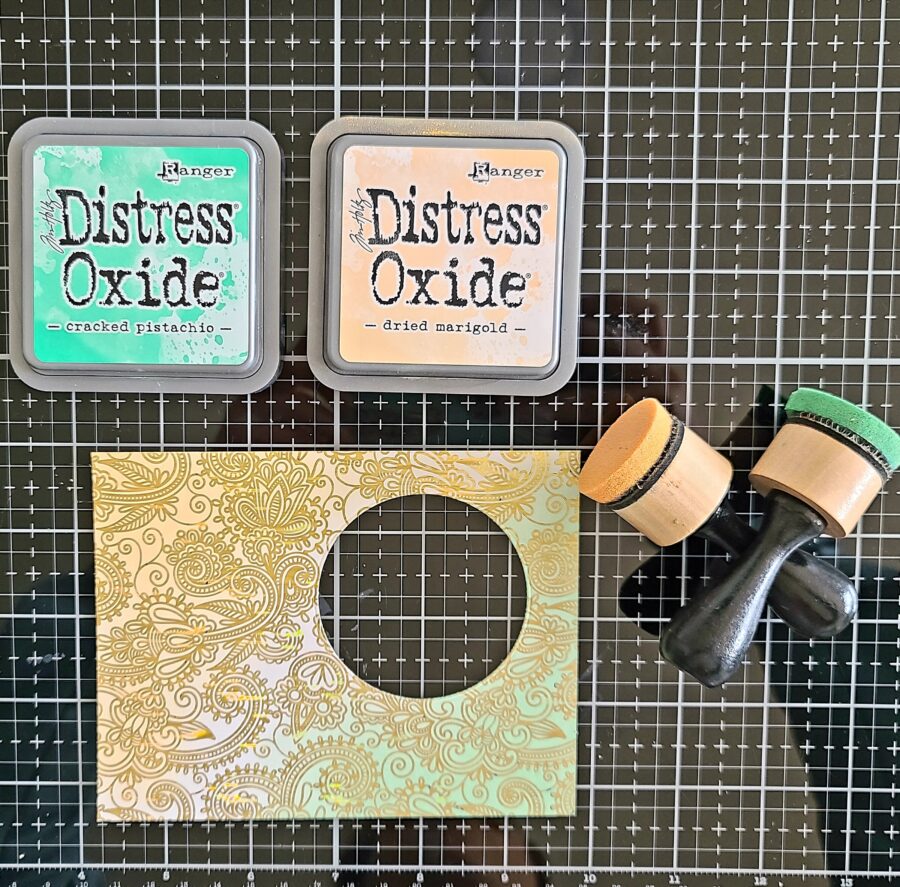 Next, I used cracked pistachio and dried marigold distress oxide inks on the sunrise lake card front. I faded them out toward the center leaving a little white space at an angle.
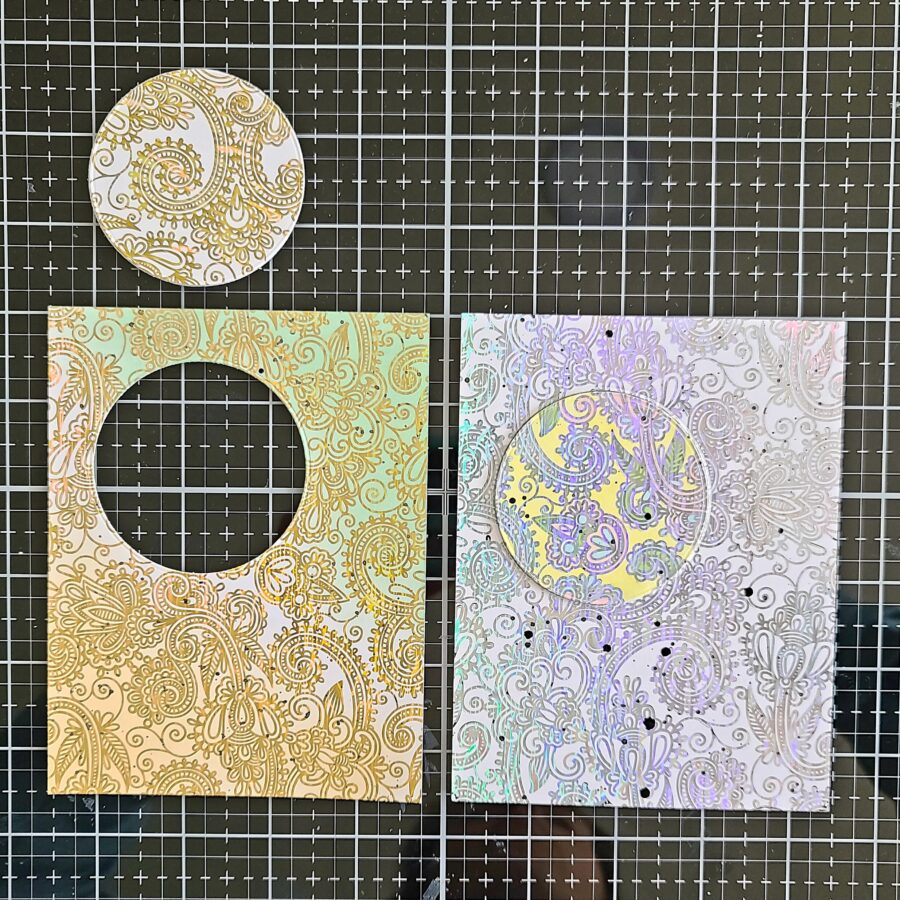 Then I used Copic Markers to color in the circle for the moonlit lake panel and splattered black acrylic paint on both panels and the colored circle.
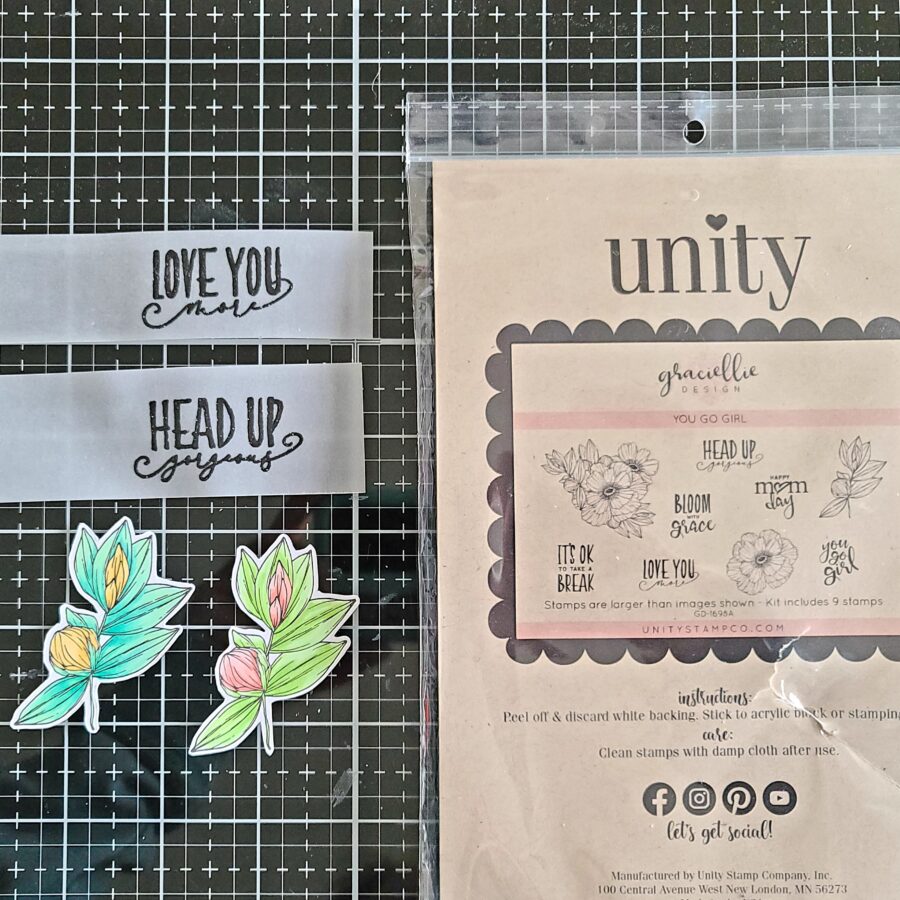 I pulled out the You Go Girl stamp set from Unity and stamped the leafy image and colored it with my Copics. I fussy cut them out and set them aside. Then I chose two sentiments and heat-embossed them on vellum strips. Now that everything is ready we can move on to assembly.
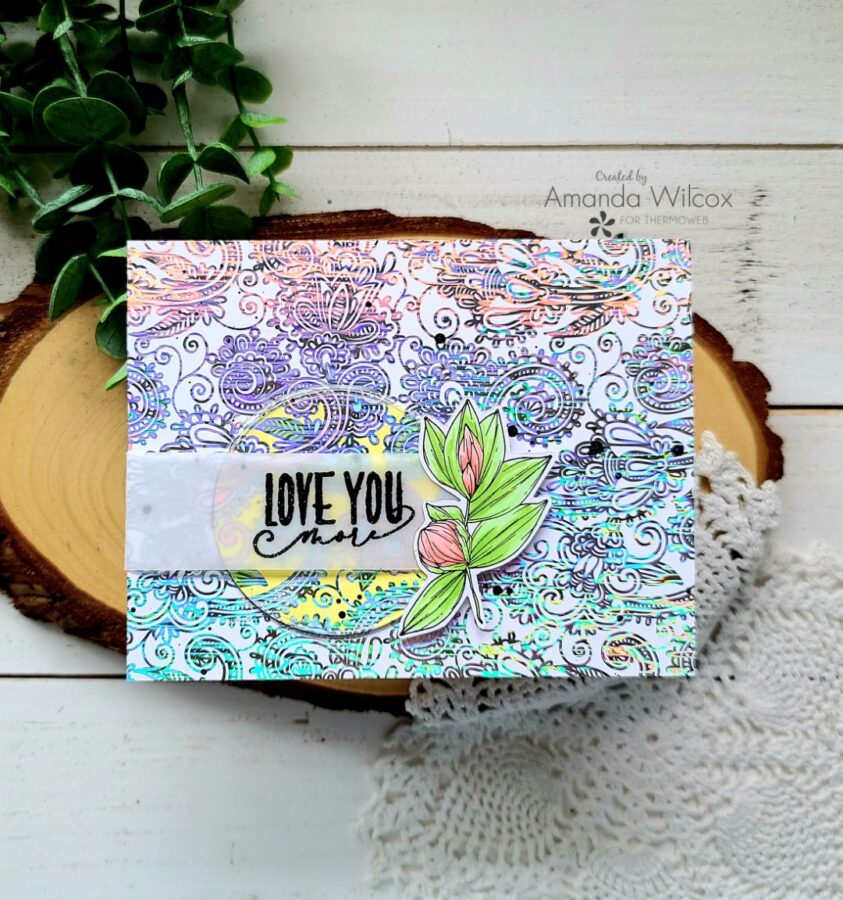 I added a strip of tape runner to the back of the stamped images and adhered them to the end of the sentiment strips. Then I added another strip of tape runner to the back of the card front so I could wrap my vellum around it and hide that adhesive. At this point, your sentiment and image are kind of flapping in the wind but we'll stick those down in a minute.
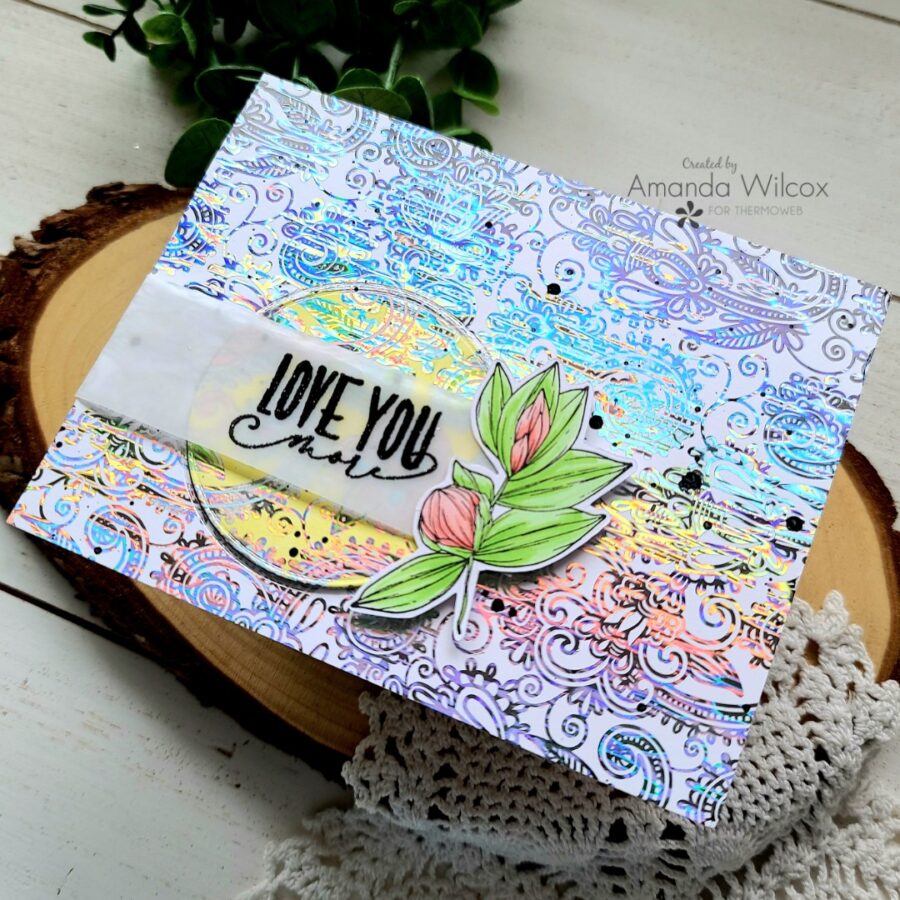 I added more tape runner to the back of the large panel and adhered it to a white card base. Then I removed the backing paper on the circles and carefully lined them up so the pattern continues.
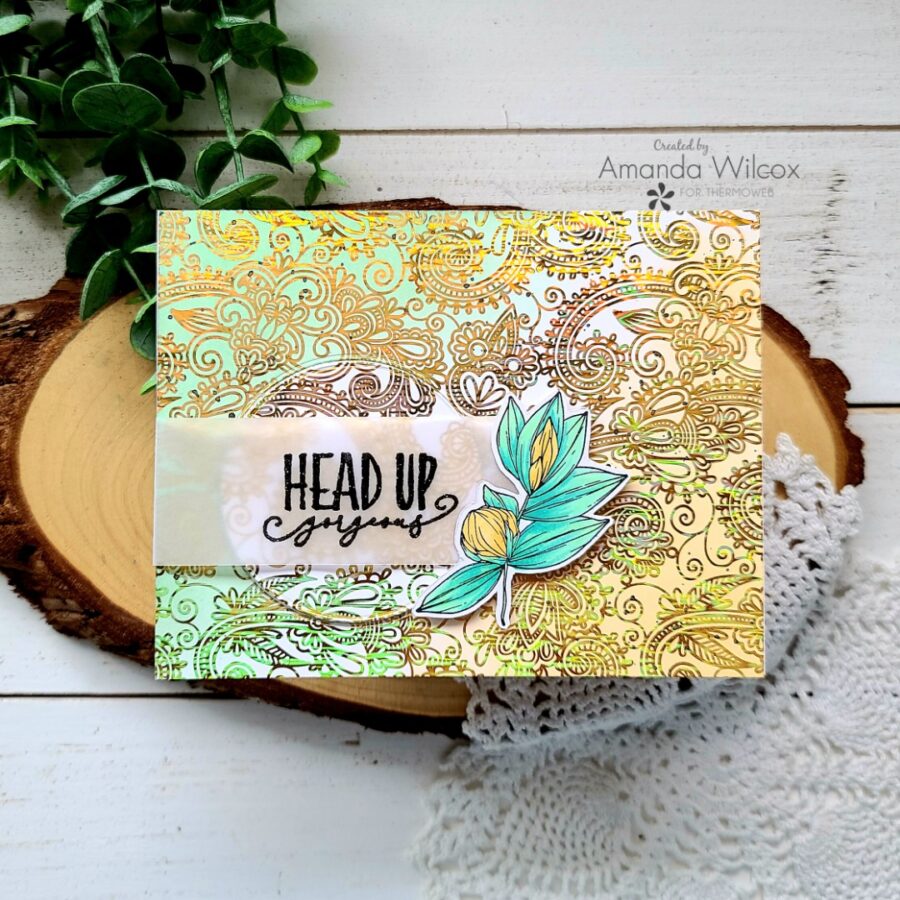 Next, I added foam squares to the back of the floral image that hangs off the foam circle so things would lay flat. I removed the backing paper and pushed those down in place.
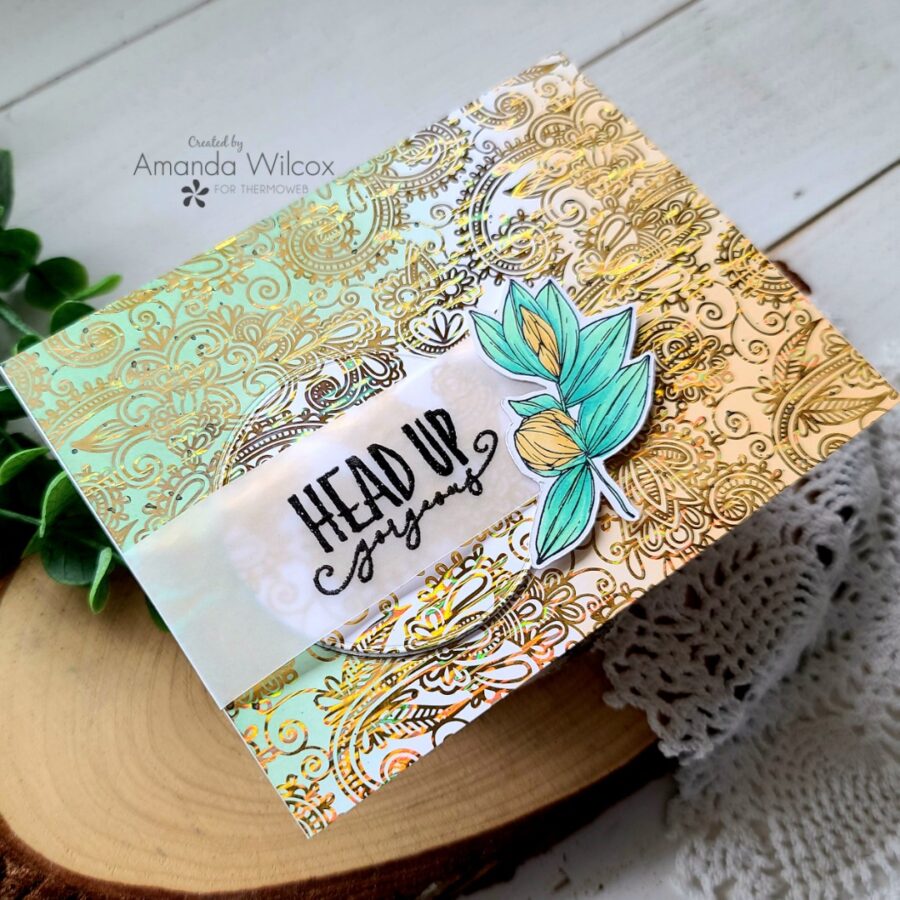 Aren't these just gorgeous?!? I had so much fun playing with the new foils and combining these products together.
I appreciate you sharing your time with me. Have a fabulous day!
(I have used affiliate links whenever possible, at no additional cost to you.)
Aren't these just gorgeous?!? I had so much fun playing with the new foils and combining these products together.
I appreciate you sharing your time with me. Have a fabulous day!
(I have used affiliate links whenever possible, at no additional cost to you.)