No Products in the Cart
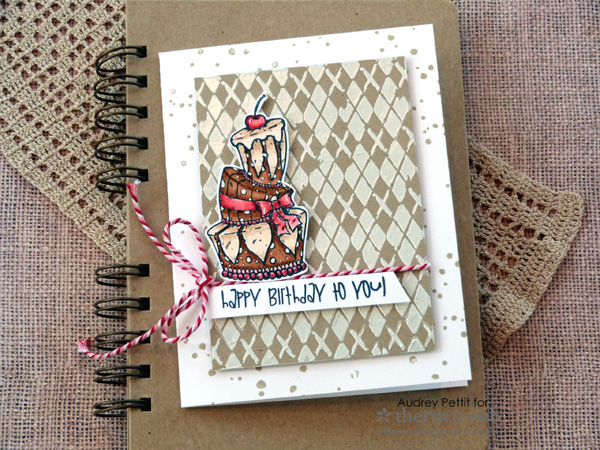 Happy Birthday to You Card with New Deco Foil Metallix Gel
by Designer Audrey Pettit
Therm O Web Supplies:
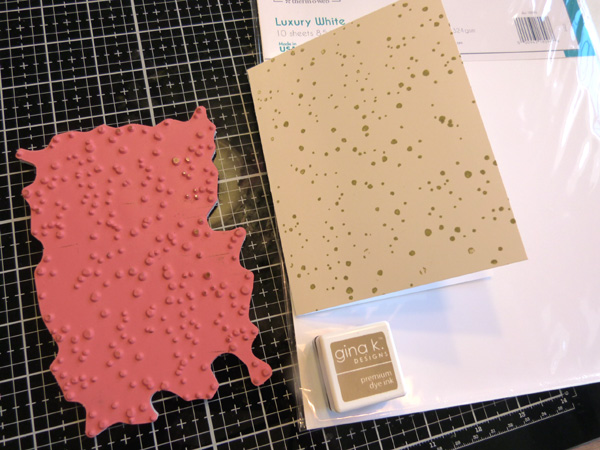
Gina K Designs Premium Cardstock: Luxury White
Deco Foil Metallix Gel: White Pearl
iCraft Ultra Bond Adhesive
Gina K Designs Foam Squares
iCraft Purple Tape
iCraft Stencil Pal
Gina K Designs Premium Cardstock: Kraft
Other Supplies:
Stamps: Brutus Monroe - Topsy Cakes, Stamper's Anonymous - Flurry & Pine
Stencil: Stamper's Anonymous - Argyle
Ink: Gina K Designs Premium Dye Ink - Kraft, Memento Tuxedo Black
Copic Markers, White Gel Pen
Baker's Twine
Happy Birthday to You Card with New Deco Foil Metallix Gel
by Designer Audrey Pettit
Therm O Web Supplies:
Gina K Designs Premium Cardstock: Luxury White
Deco Foil Metallix Gel: White Pearl
iCraft Ultra Bond Adhesive
Gina K Designs Foam Squares
iCraft Purple Tape
iCraft Stencil Pal
Gina K Designs Premium Cardstock: Kraft
Other Supplies:
Stamps: Brutus Monroe - Topsy Cakes, Stamper's Anonymous - Flurry & Pine
Stencil: Stamper's Anonymous - Argyle
Ink: Gina K Designs Premium Dye Ink - Kraft, Memento Tuxedo Black
Copic Markers, White Gel Pen
Baker's Twine
 Today I'll be sharing the step-by-step for creating a simple birthday card with a fun Metallix focal panel.
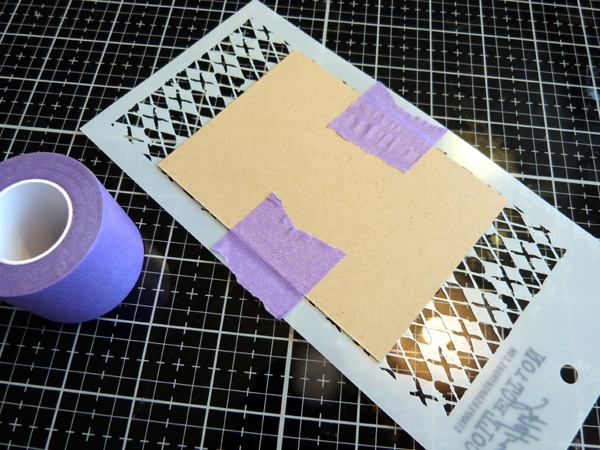 Cut a smaller panel of Gina K Designs kraft cardstock. Using Therm O Web's Purple Tape, adhere the cardstock to the back of a stencil.
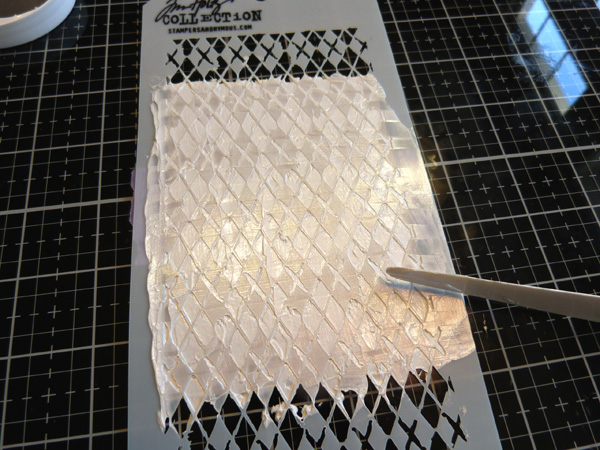 Using a palette knife, or the new Stencil Pal, apply a thin coat of Metallix gel through the stencil design. Scrap off any excess gel and return it to the jar. Remove the stencil from the paper. Set the paper aside to dry and immediately wash your stencil and palette knife with warm soapy water.
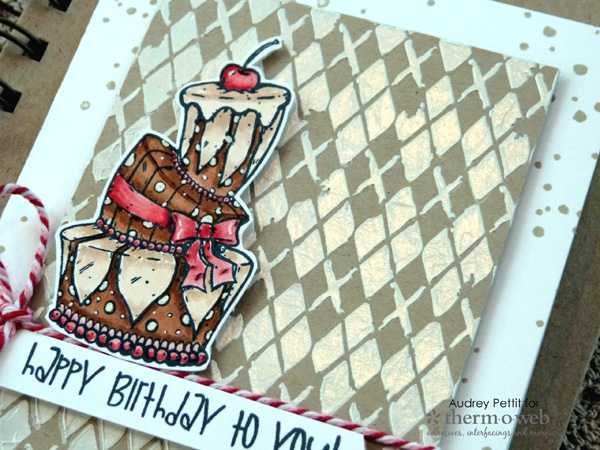
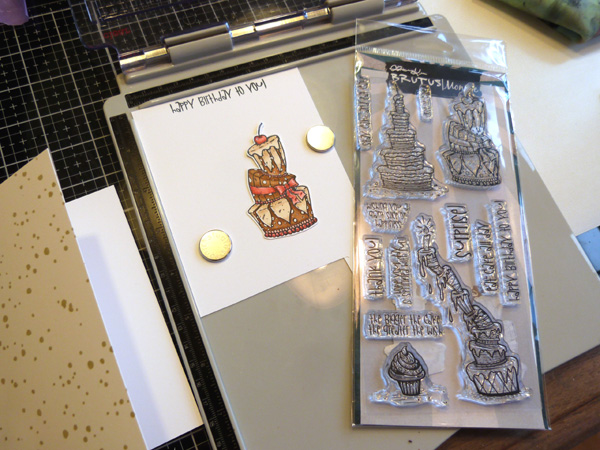 Stamp an image and sentiment onto Luxury White cardstock with black ink that works with alcohol markers. Trim the sentiment out into a thin strip. Color the image with Copic markers and add accents with a white gel pen before fussy cutting or die cutting the image.
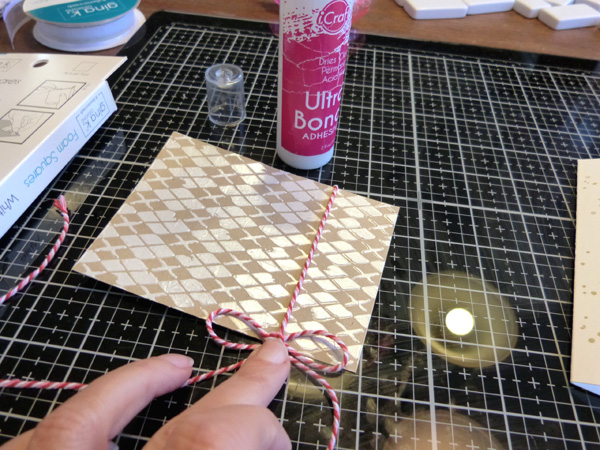 Once the Metallix gel is completely dry, wrap some baker's twine around the bottom of the panel and tie it into a simple bow on the left side. I wanted the loops of my bow to stay completely parallel with the edge of the cardstock to keep it from covering the sentiment, so I added a drop of Ultra Bond adhesive under the knot and held the bow in place for a few moments.
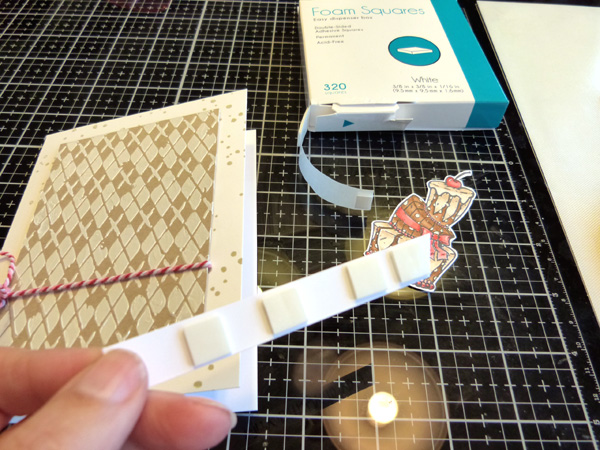 Now simply use Gina K Designs Foam Squares to attach all the elements to the card.
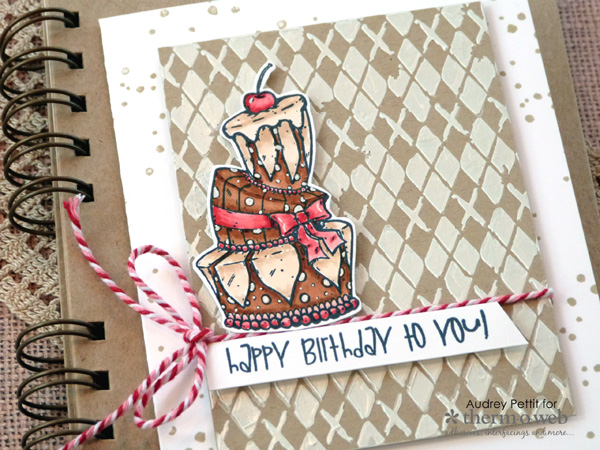 Enjoy!
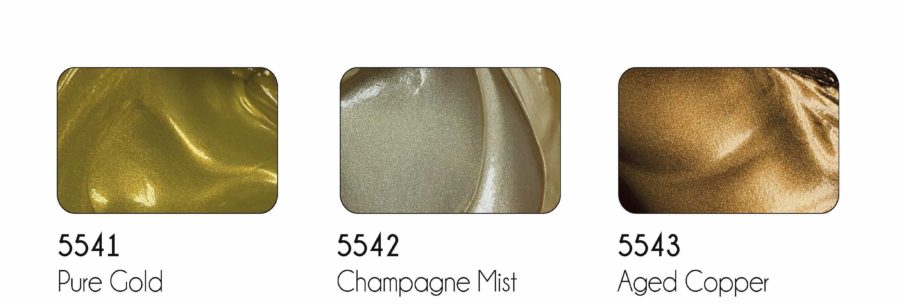 You'll find all SIX colors of our Metallix Gels in stock and available to ship! SHOP now during National Craft Month and receive a FREE GIFT with all orders over $31. No code needed!
Click here to shop!
You'll find all SIX colors of our Metallix Gels in stock and available to ship! SHOP now during National Craft Month and receive a FREE GIFT with all orders over $31. No code needed!
Click here to shop!