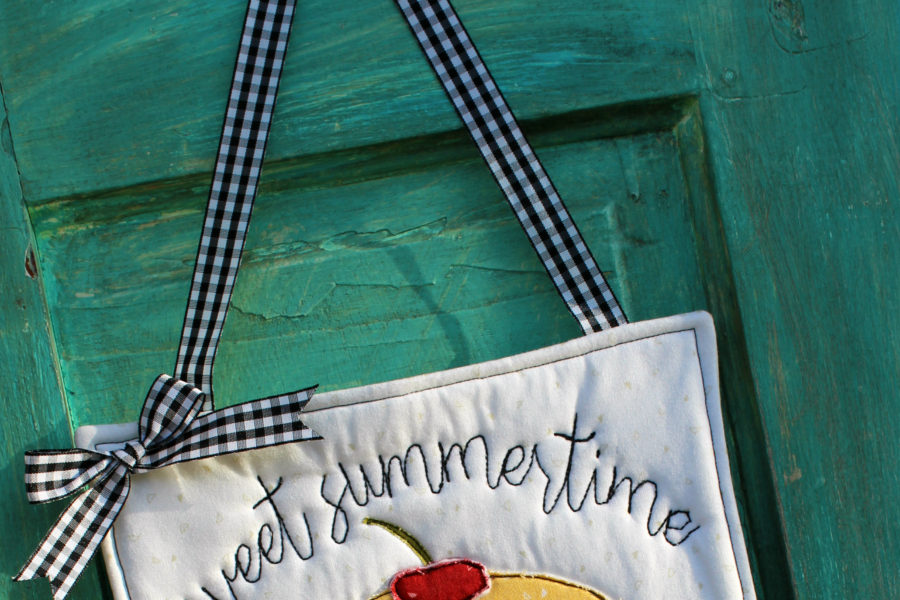
There's nothing quite like a double scoop ice cream cone on a beautiful summer day. Celebrate summer with a Sweet Summertime Door Hanger made with HeatnBond Fusible Fleece.
Sweet Summertime Door Hanger with HeatnBond Fusible Fleece
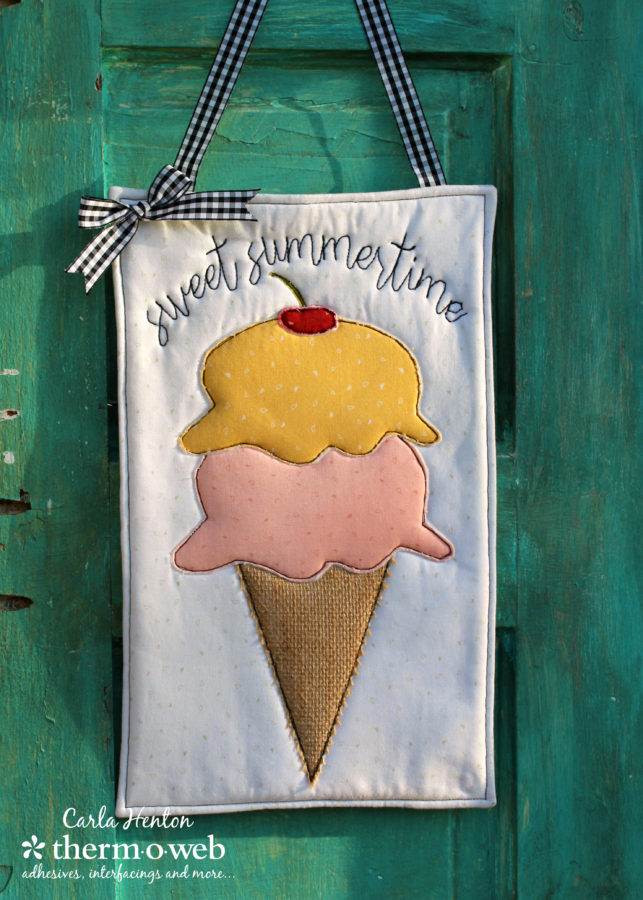
Sweet Summertime Door Hanger
by Carla at C
reatin' in the Sticks
Finished size: 9 1/2" x 15" without the ribbon hanger
Please read all the instructions before starting.
All seams are stitched at 1/4″ unless otherwise stated.
Supplies
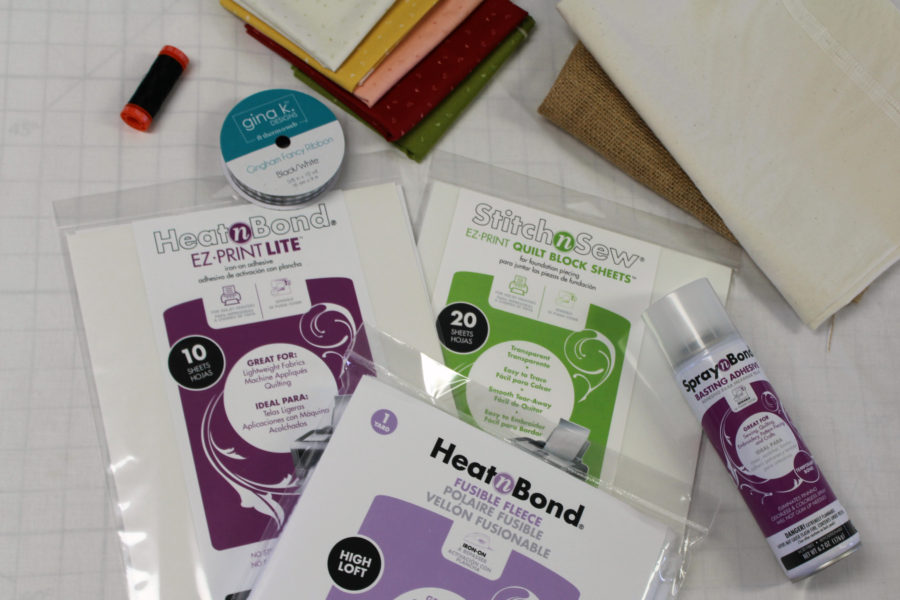 Pattern - download here
Gina K. Designs Gingham Fancy Ribbon 5/8" x 10 yd • Black/White
HeatnBond Fleece Fusible High Loft
Pattern - download here
Gina K. Designs Gingham Fancy Ribbon 5/8" x 10 yd • Black/White
HeatnBond Fleece Fusible High Loft (White 22 in. x 1 Yard pack)
HeatnBond EZ Print Lite • 8.5"x11"
StitchnSew EZ Quilt Block Sheets • 8.5 in x 11 in
SpraynBond • Basting Adhesive
Fabric:
Vintage Berries by Sweet Bee Designs
Aurifil thread: 50wt #2692
Muslin - 10" x 15 1/2" (to cover the back of the door hanger)
Burlap - 4 1/2" x 6 1/2" (for the cone)
Inkjet printer, Iron, sewing machine, sharp scissors, and other basic sewing supplies
Step 1: Cutting
2 - 10" x 15 1/2"
1 of each of the following sizes:
4 1/2" x 7 1/2", 4" x 7", 4 1/2" x 6 1/2", and 2 1/2" x 1 1/2"
Cream: 10" x 15 1/2"
Pink: 4 1/2" x 7 1/2"
Yellow: 4" x 7"
Red: 2 1/2" x 1 1/2"
Green: 2 1/2" x 1 1/2"
Step 2: Prepare the hanger.
Bond the
HeatnBond Fleece Fusible High Loft to the wrong side of the cream 10" x 15 1/2" background and muslin pieces of fabric following the package instructions.
Cut a piece
Gina K. Designs Gingham Fancy Ribbon 18" long. Measure 1 1/2" from the side edges on the right side of the cream fabric and place the outside of the ribbon ends. Pin the ribbon in place at the top of the rectangle.
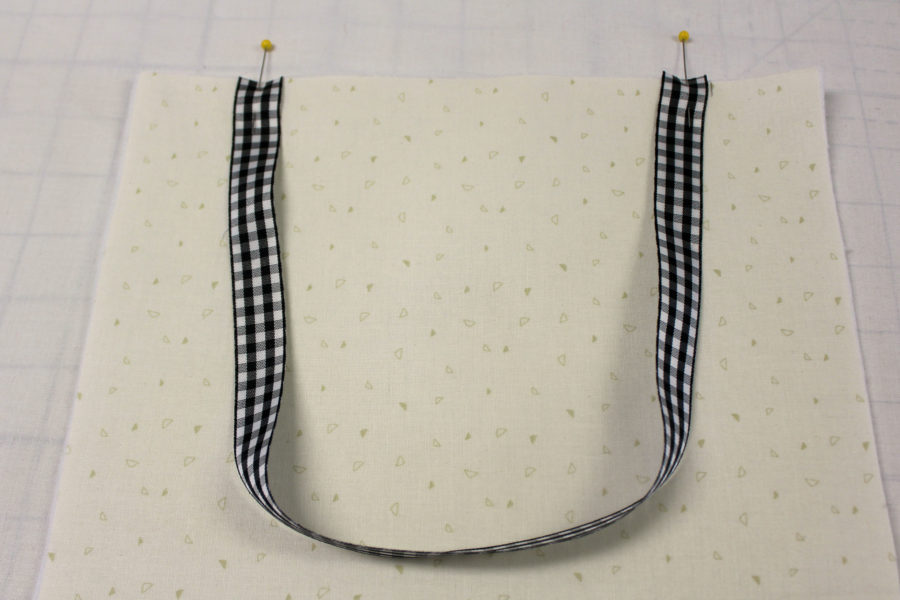
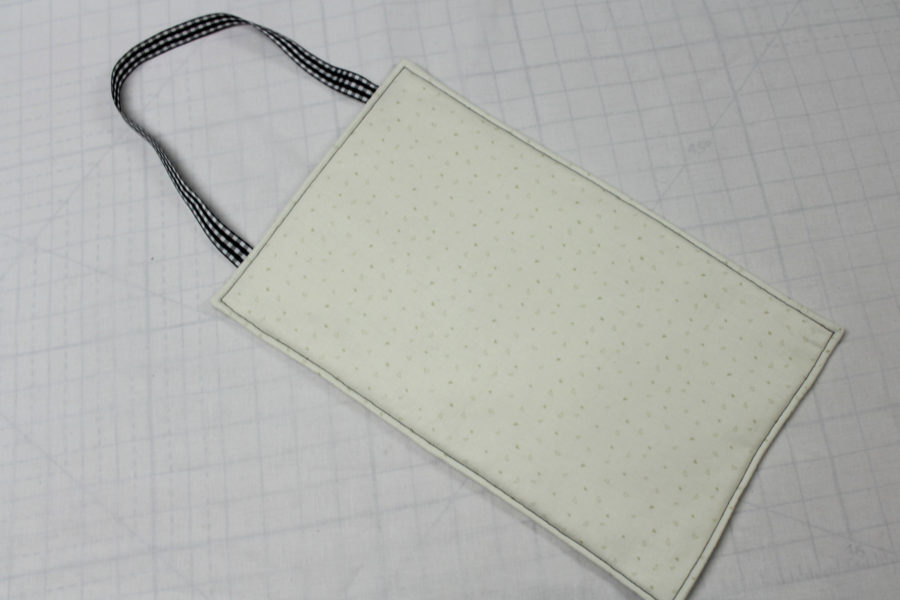
The next step is to stitch across the ribbon 1/8" from the top raw edge of the rectangle. Now, sandwich the ribbon between the 2 fleece backed 10" x 15 1/2" pieces (cream and muslin), right sides together and pin. Leave a 3" opening on the bottom for turning right side out.
Stitch 1/4" from the edge all around the sandwiched rectangles, starting and stopping with a backstitch. After stitching, trim the corners off and turn the hanger right side out through the 3" opening. Press the hanger, then pin and hand stitch the opening shut. Topstitch around the hanger with
Aurifil thread: 50wt #2692.
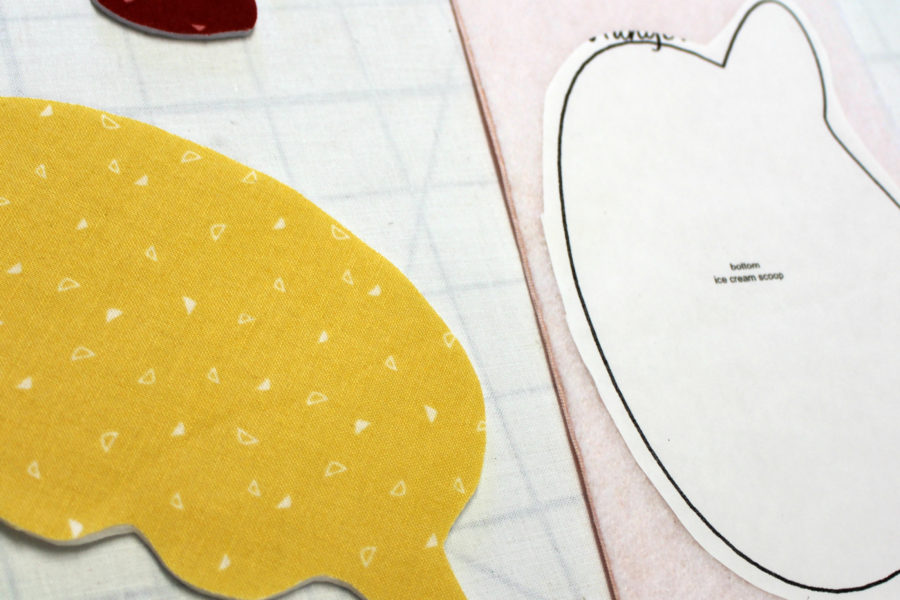
Step 3: Prepare the applique pieces
Bond all of the cut
HeatnBond Fleece Fusible High Loft pieces to the wrong side of the same sized fabric pieces including the burlap. The green piece of fabric for the stem of the cherry does not have fleece fused.
Print the ice cream cone pattern page on one page of
HeatnBond EZ Print Lite following the package instructions. Because the patterns are printed, there is no need for tracing!
Trim the patterns leaving 1/4" around each pattern. Fuse the HeatnBond Lite patterns to the fleece backed fabrics using the picture as a guide.
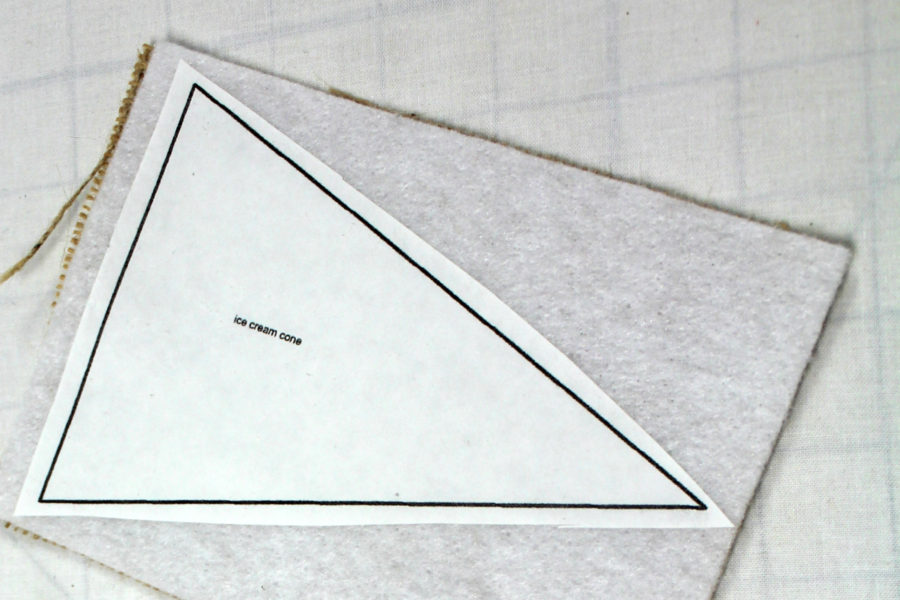
Fuse the stem pattern to the wrong side of the green fabric using the package instructions. Cut out all the patterns on the dark lines.
Step 4: Applique the ice cream cone to the hanger.
Remove the backing paper from the applique pieces and position the pieces, adhesive side down, on the prepared hanger. Use the finished picture as a guide. Allow enough room at the top for the lettering. The top of the cherry stem should be lower than 1 3/4" from the top. Follow the package instructions to bond the applique pieces all at once in sections to the hanger. After the pieces are bonded, stitch around the applique with a straight stitch 2 or 3 times with
Aurifil thread: 50wt #2692.
Step 5: Stitch sweet summertime on the hanger.
Print the letter pattern on one
StitchnSew EZ Quilt Block Sheets. The quilt block sheet is transparent to make placement of the letters easy. Use
SpraynBond • Basting Adhesive to hold the quilt block sheet in place. This is the pattern to stitch the letters with a sewing machine or embroidery if it is preferred.
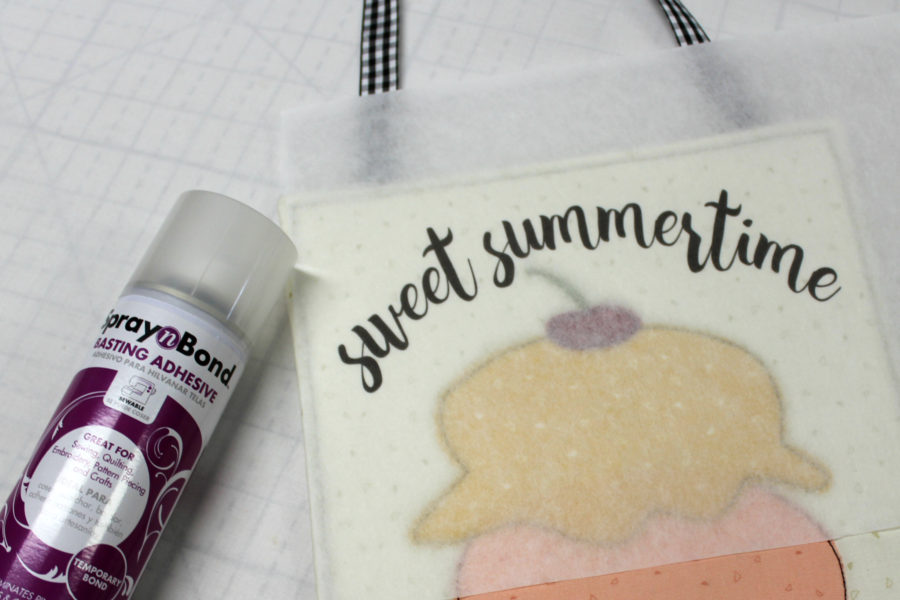
Machine stitch on top of the quilt block sheet to make the letters. Use a triple stitch or stitch a single stitch 2 or 3 times.
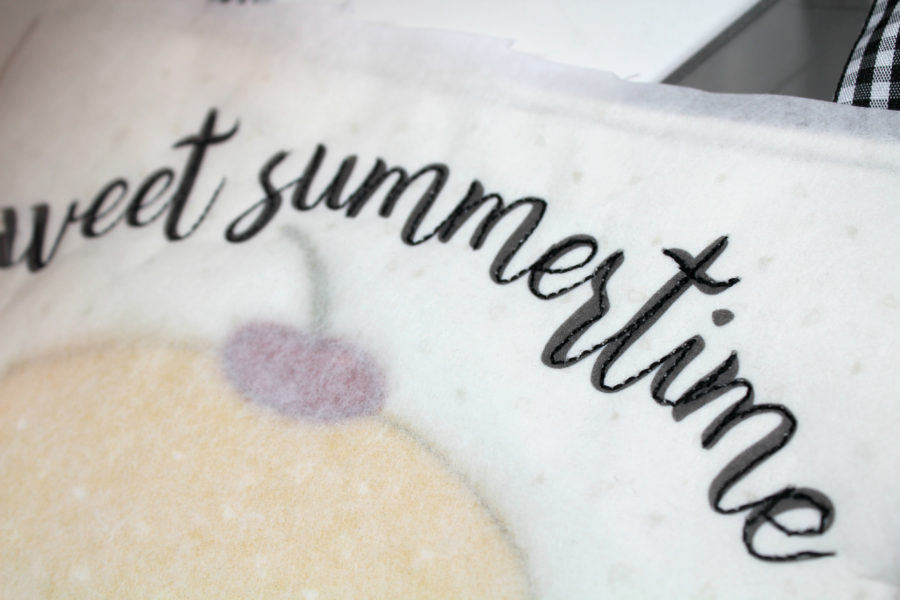
After the stitching is finished, gently tear away the quilt block sheet.
Step 6: Add a bow to the hanger.
To finish the hanger, make a bow with a piece of the Gina K. Designs Gingham Fancy Ribbon and hand sew it to the upper left-hand corner.
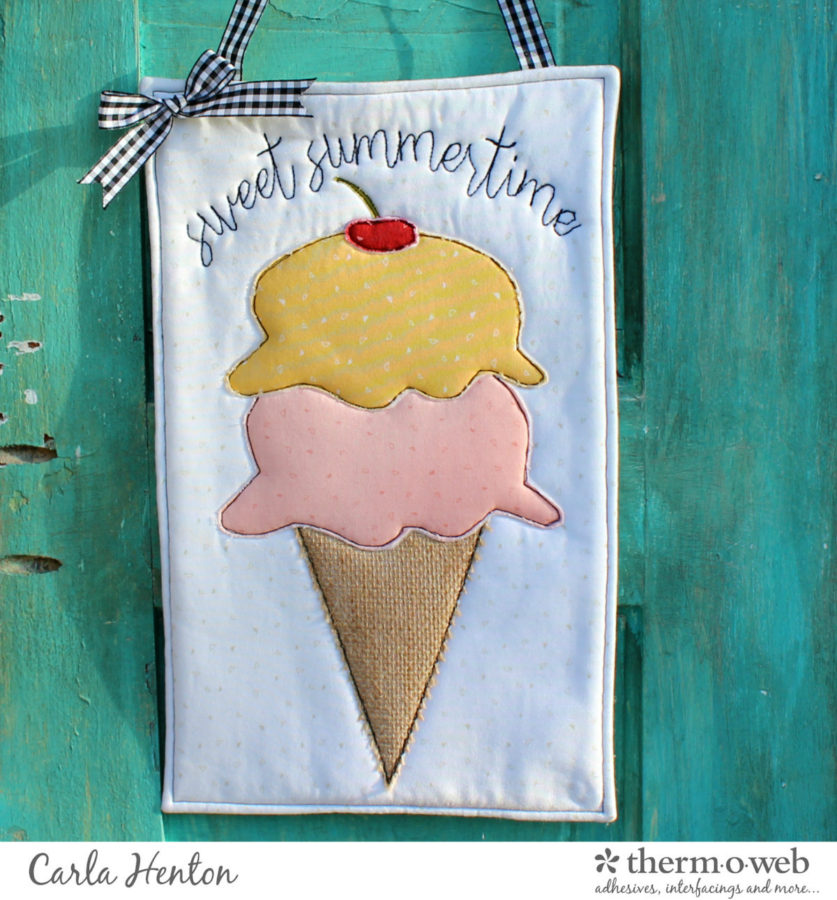
Be "ice cream social" this summer with this fun door hanger.
Carla