No Products in the Cart
 Therm O Web Supplies Used:
Therm O Web 3D Foam Squares– 1/2 inch
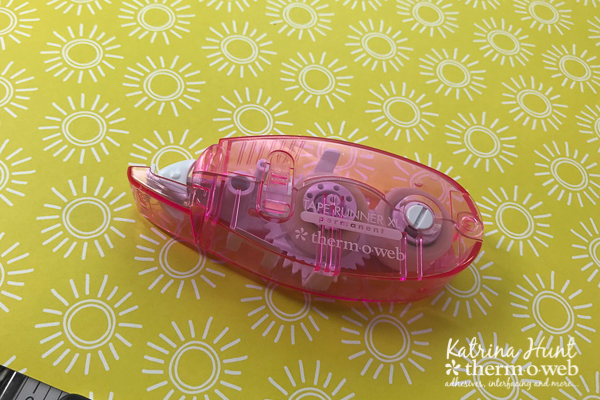
Therm O Web Memory XL Tape Runner
Therm O Web Deco Foil - Pink Melon
Therm O Web Purple Tape
Therm O Web Deco Foil – Aqua
12″ inch Laminator
Therm O Web Deco Foil White Foam Adhesive
Them O Web Deco Foil - Silver Shattered Glass
Therm O Web Deco Foil - Rainbow Value Pack
Therm O Web iCraft Mixed Media Adhesive
Therm O Web Deco Foil Transfer Gel
iCraft Happy Birthday Stencil
Other Supplies Used: Pattern Paper, Stickers-Simple Stories; Letters-American Crafts; Dies/Stamps-Waffle Flower Crafts; Twine-May Arts; Pen-Sharpie
Therm O Web Supplies Used:
Therm O Web 3D Foam Squares– 1/2 inch
Therm O Web Memory XL Tape Runner
Therm O Web Deco Foil - Pink Melon
Therm O Web Purple Tape
Therm O Web Deco Foil – Aqua
12″ inch Laminator
Therm O Web Deco Foil White Foam Adhesive
Them O Web Deco Foil - Silver Shattered Glass
Therm O Web Deco Foil - Rainbow Value Pack
Therm O Web iCraft Mixed Media Adhesive
Therm O Web Deco Foil Transfer Gel
iCraft Happy Birthday Stencil
Other Supplies Used: Pattern Paper, Stickers-Simple Stories; Letters-American Crafts; Dies/Stamps-Waffle Flower Crafts; Twine-May Arts; Pen-Sharpie
 Turn laminator on and let warm up at least 20 minutes.
You will use a stencil, Purple Tape, Transfer Gel and paper of your choosing to create images to be foiled with Deco Foil. Tape stencil down to paper and use a palette knife, credit card, etc to spread a thin even coat of Transfer Gel over parts of the stencil that are being used. Repeat this process until you have the number of images you want to foil.
Turn laminator on and let warm up at least 20 minutes.
You will use a stencil, Purple Tape, Transfer Gel and paper of your choosing to create images to be foiled with Deco Foil. Tape stencil down to paper and use a palette knife, credit card, etc to spread a thin even coat of Transfer Gel over parts of the stencil that are being used. Repeat this process until you have the number of images you want to foil.
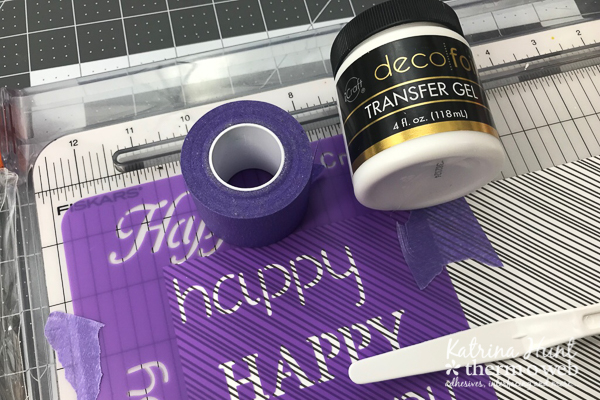 The Transfer Gel will take about an hour or so to try depending on the humidity in your area. The gel will dry clear and be slightly tacky to the touch.
 Select colors of Deco Foil to use for your images. Hold Deco Foil in place with small pieces of purple tape. Once all images are covered then run thru laminator using a cardstock shim and a parchment paper transfer sleeve.
[tooltip text="TooltipText"]NOTE: I made my own parchment paper sleeve to fit a full 12x12 sheet of pattern paper. I place a 12x12 piece of cardstock behind my 12 x 12 paper that I am foiling and slip both into my parchment paper sleeve. The laminator that ThermOWeb sells will fit a 12x12 sheet of paper easily.[/tooltip]
Select colors of Deco Foil to use for your images. Hold Deco Foil in place with small pieces of purple tape. Once all images are covered then run thru laminator using a cardstock shim and a parchment paper transfer sleeve.
[tooltip text="TooltipText"]NOTE: I made my own parchment paper sleeve to fit a full 12x12 sheet of pattern paper. I place a 12x12 piece of cardstock behind my 12 x 12 paper that I am foiling and slip both into my parchment paper sleeve. The laminator that ThermOWeb sells will fit a 12x12 sheet of paper easily.[/tooltip]
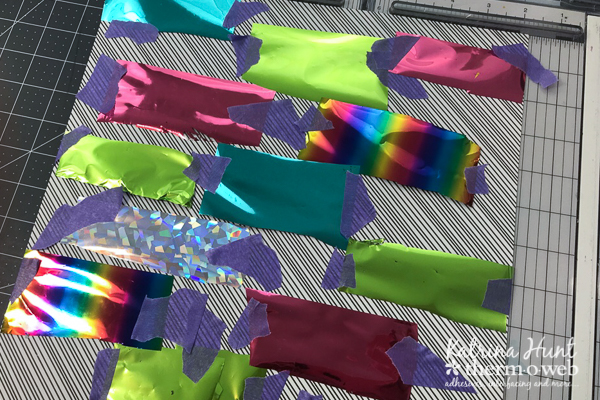 Remove foil and purple tape from areas to reveal foiled images.
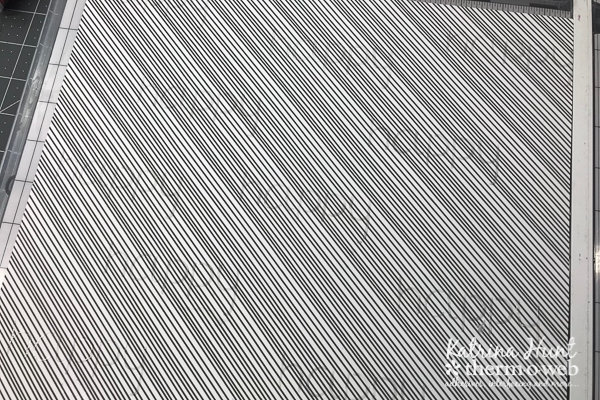
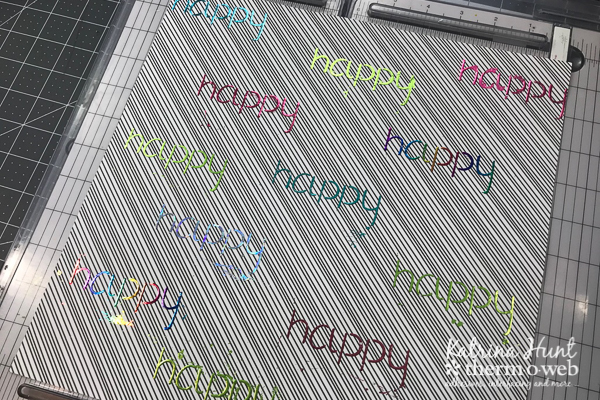 If you are not going to use the full sheet, trim down to what you are going to use.
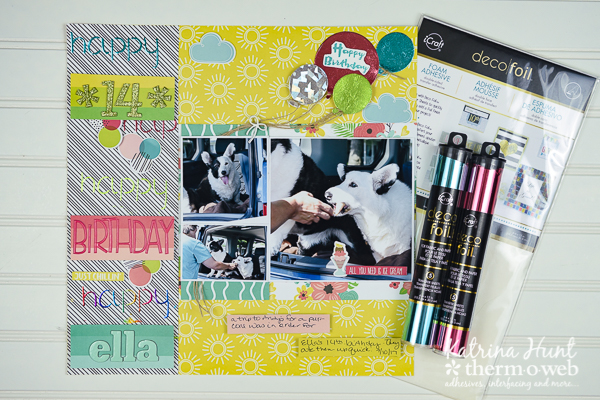
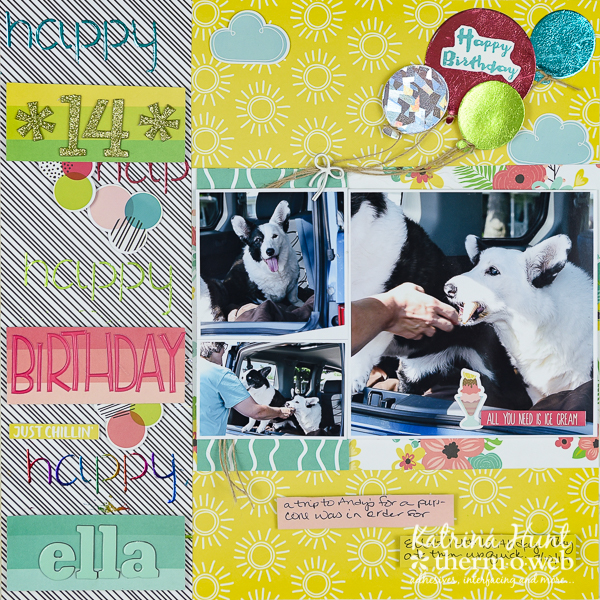
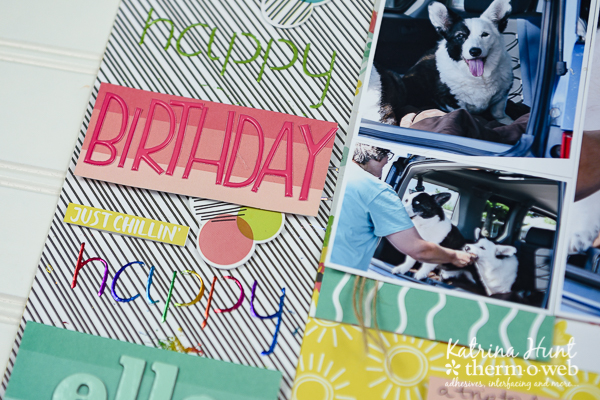 Use a combination of adhesive to put the layout together. I used the Memory Runner XL to adhere paper pieces on my background and then a mixture of 3D Foam Squares and Deco Foil foam adhesive for my pictures and embellishments.
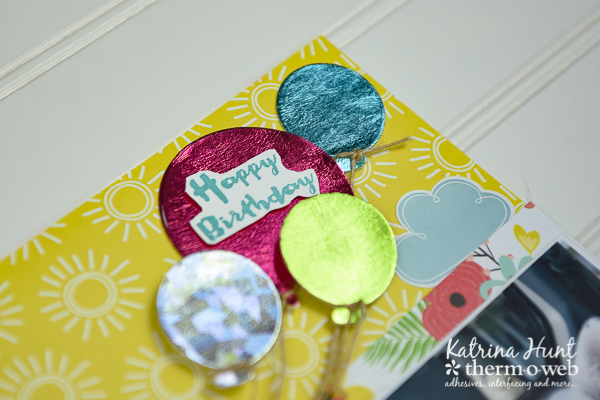
 To create balloons, use a die (or you can hand cut) and the Deco Foil Foam Adhesive. Place die on foam adhesive and run thru die cutting machine like normal. Remove one side of the protective backing and rub foil until die cut is covered. Peel off foil and repeat for other pieces. Remove second adhesive protective backing and adhere on the layout.
 Embellish balloon as you like with string, stamped images, etc. Add a die cut bow to the strings also.
 And now, enjoy the fact you have another birthday event documented!!! Try some of the Deco Foil products and you will fall in love!! Thanks for stopping by the blog today!