No Products in the Cart
 Supplies:
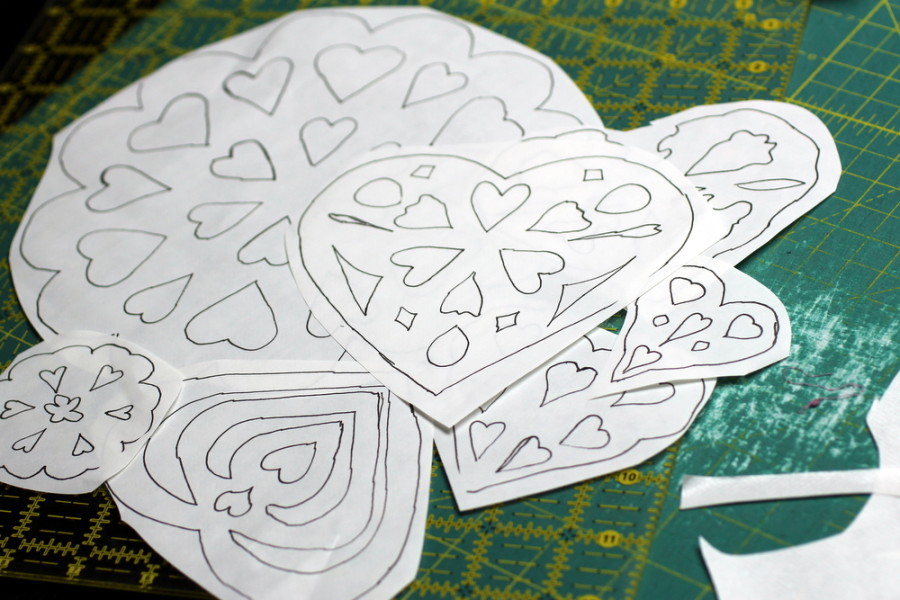 Now, cut out the hearts and snowflakes from the ez Print Lite Heat N Bond® sheets.
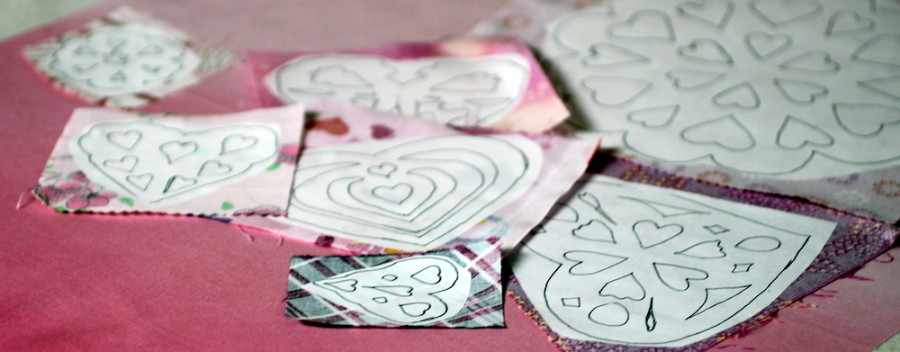 Fuse the hearts and snowflakes to the wrong sides of the scraps of fabric you chose for your pillow.
Now cut out the hearts and snowflakes along the lines. I’ll admit – this is a bit tedious but I promise it will be worth it in the end. This is something I will do in front of the tv or while watching my girls at a sporting event. If you can ... save the heart shapes you cut out from some of the designs. You can use these on the pillow too.
Fuse the hearts and snowflakes to the wrong sides of the scraps of fabric you chose for your pillow.
Now cut out the hearts and snowflakes along the lines. I’ll admit – this is a bit tedious but I promise it will be worth it in the end. This is something I will do in front of the tv or while watching my girls at a sporting event. If you can ... save the heart shapes you cut out from some of the designs. You can use these on the pillow too.
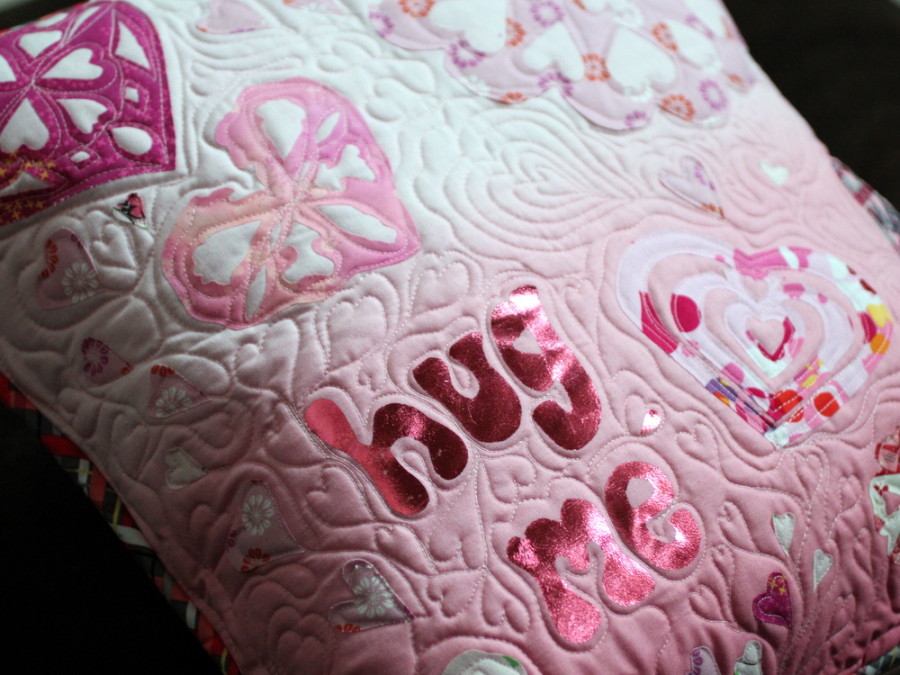
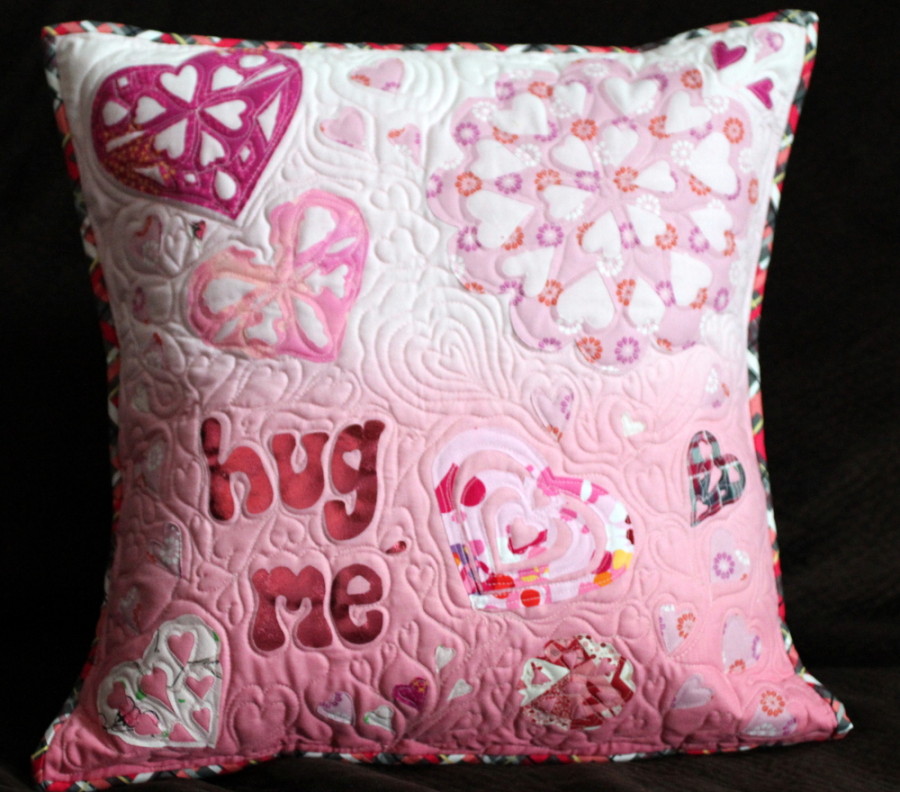
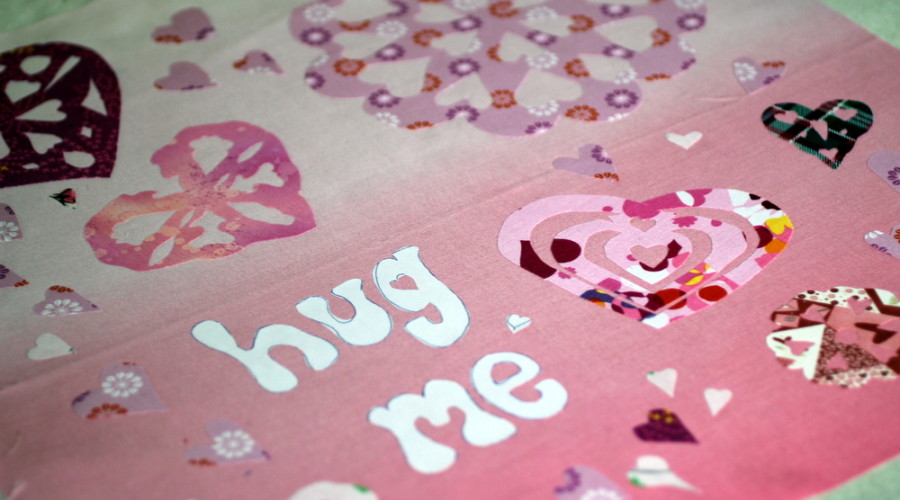 Once the hearts and snowflakes are all cut out lay them out on the pillow top in a manner that looks pleasing to you. Be sure to leave room for whichever word you’d like to add to the pillow top. Peel of the paper and press down securely with a hot iron.
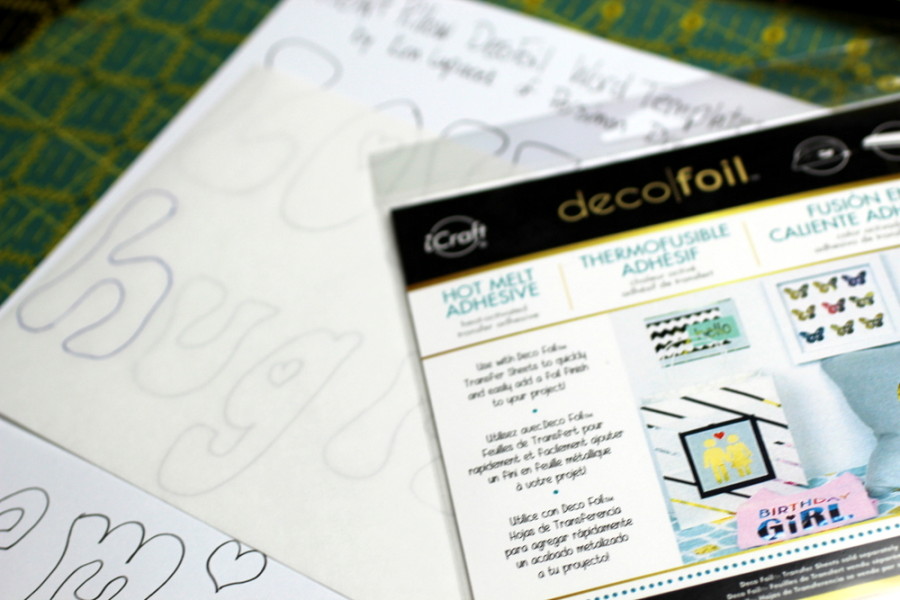 Now let’s add our DecoFoil word. I chose to use the words 'hug me’ (I thought it was funny since it's a pillow). I have included the options for 'love' and 'be mine' in the template as well. Trace the word you choose from the template printed out earlier onto the paper side of the DecoFoil™ Hot Melt Adhesive. Cut out along the lines you drew. Place the letters onto the pillow in a place that looks nice to you. Place a Pressing Sheet over the letters and with a hot iron press evenly for 30 seconds. Let the letters cool completely before peeling of the paper. Now, place your sheet of Pink Melon Deco Foil™ shiny side up over the letters. Cover with a pressing sheet. Press evenly with a hot iron for 30 seconds. Let everything cool down before peeling the decofoil off. Once things are properly cool … peel of the decofoil.
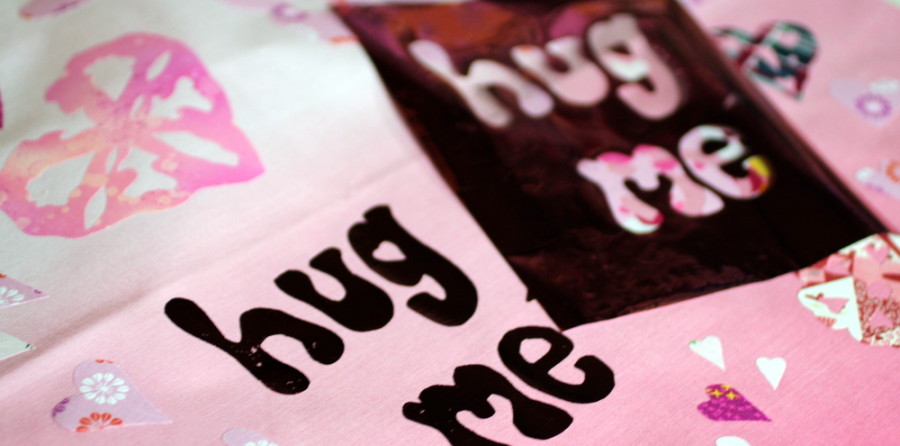 And voila! Your letters look amazing!
Create a quilt sandwich … backing fabric (right side down), batting, snowflake top (right side up) and fuse with your prefered method. I prefer spray basting and I really like the Spray N Bond® Basting Adhesive. Now it’s time to quilt your pillow top as you like. I free form quilted mine using Aurifil thread.
And voila! Your letters look amazing!
Create a quilt sandwich … backing fabric (right side down), batting, snowflake top (right side up) and fuse with your prefered method. I prefer spray basting and I really like the Spray N Bond® Basting Adhesive. Now it’s time to quilt your pillow top as you like. I free form quilted mine using Aurifil thread.
 Because I used ez Print Lite Heat N Bond® sheets to fuse my snowflakes down … they all needed stitching to secure them. This was simple to do with my free form quilting foot and really just added to the end overall effect.
Once you have your top quilted, trim the excess batting and backing fabric so your pillow top is 20″ square.
Because I used ez Print Lite Heat N Bond® sheets to fuse my snowflakes down … they all needed stitching to secure them. This was simple to do with my free form quilting foot and really just added to the end overall effect.
Once you have your top quilted, trim the excess batting and backing fabric so your pillow top is 20″ square.
 Follow the Finishing a Pillow with Binding tutorial on Sew Mama Sew (it’s the last one on the post) to finish off your piece and make it into a great pillow – perfect for winter! I purchased a 20″ pillow form to stuff into my pillow.