No Products in the Cart
 Stuffy Pattern 1
Stuffy Pattern 2
1 yard of fabric (I used grey but you could just as easily use a pattern.)
1 yard HeatnBond® fusible interfacing (or one package)
Poly-fil stuffing
Thread
Stuffy Pattern 1
Stuffy Pattern 2
1 yard of fabric (I used grey but you could just as easily use a pattern.)
1 yard HeatnBond® fusible interfacing (or one package)
Poly-fil stuffing
Thread
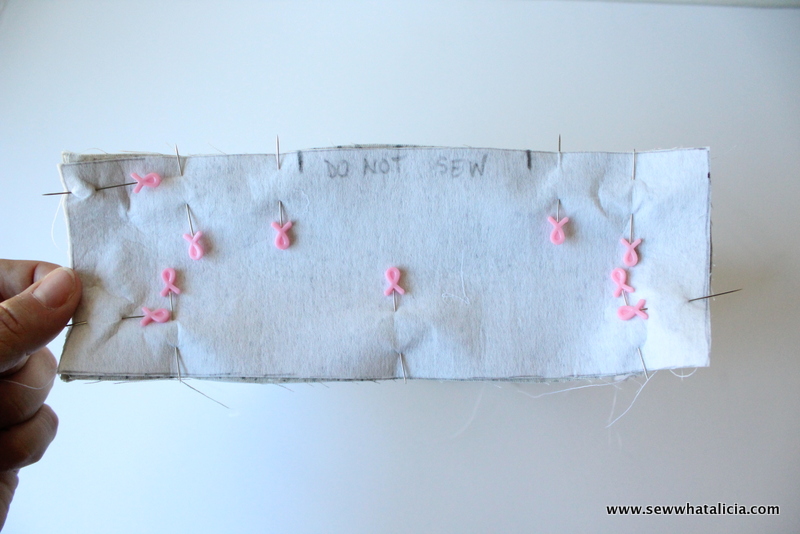
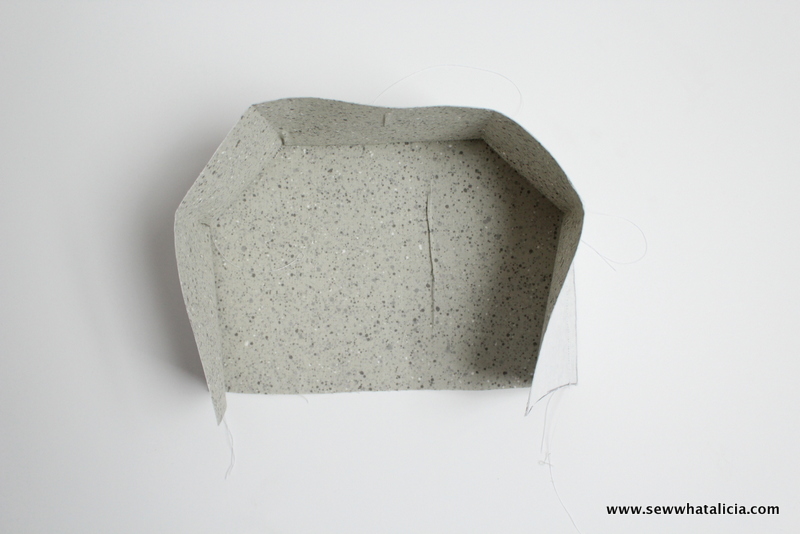 Next add the other side of the body onto the torso.
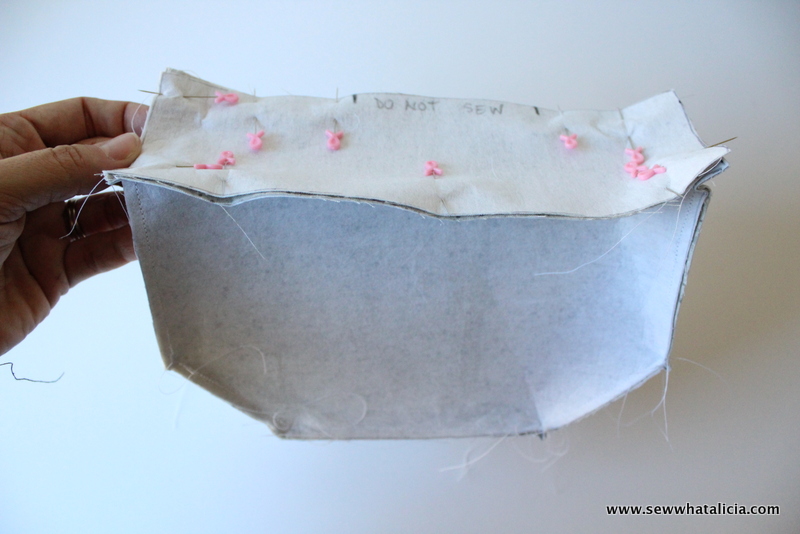
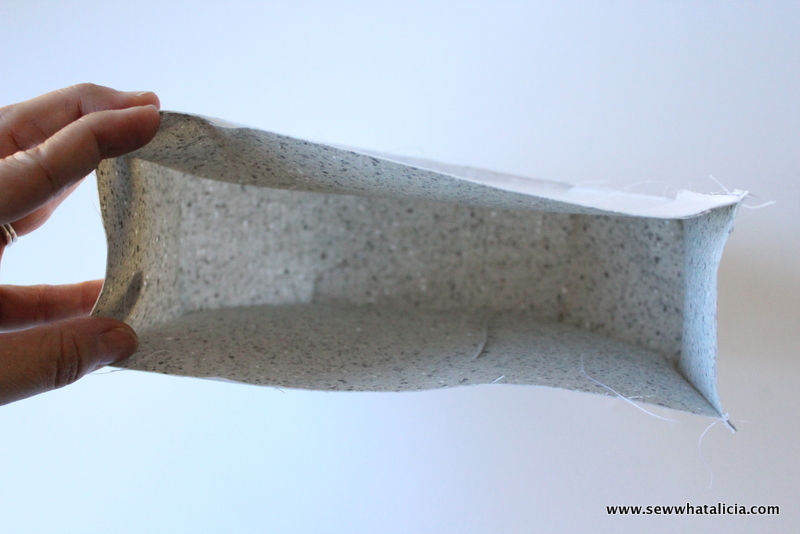 To finish the body place the belly piece onto the torso. You will have to do some y-seams. Be sure to leave a portion open (as indicated in the picture) to turn the whole body out.
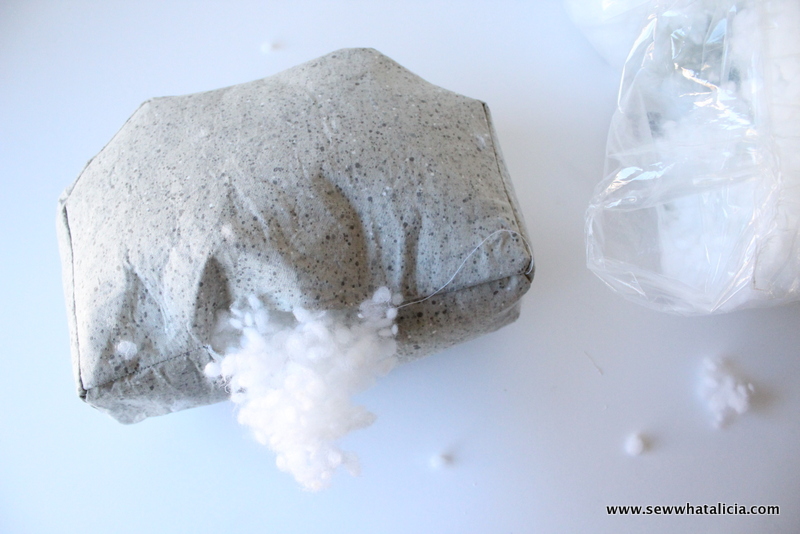
 Now stuff the body. Use a ladder stitch to close the hole.
 Now use the same technique to sew the head together. Stuff the head and sew it closed with a ladder stitch.
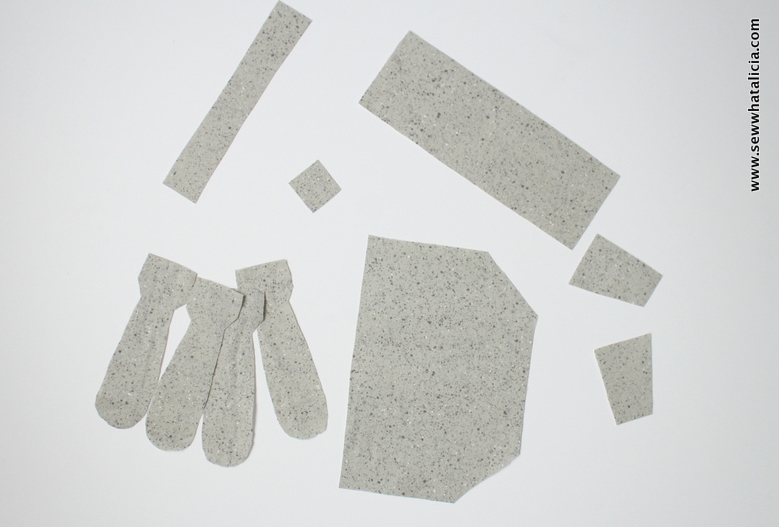
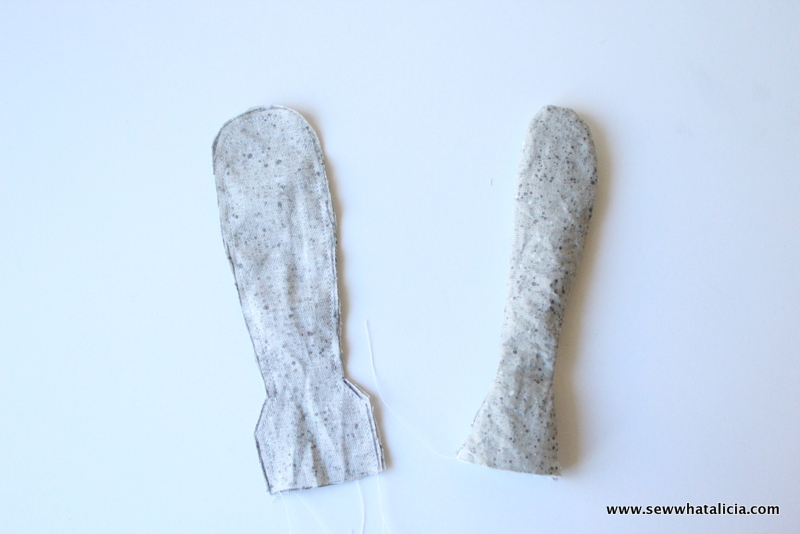
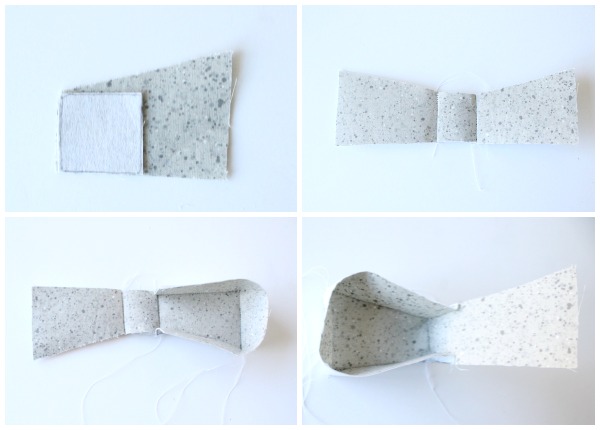 The next step is to create the four legs. Since we used the HeatnBond® interfacing the legs are a little difficult to turn out. I promise it is worth the work though. The stiffness will help to make it so that the toy can stand up. Sew around the edges leaving the bottom open. Then turn the piece out and stuff. Close the bottom with a ladder stitch.
 The last step is to assemble. Attach the 4 legs by hand sewing them down. Make a big X or attach them with grey buttons. For the neck press the edge under 1/4" and then sew around the bottom attaching it to the body. Add some stuffing to fill up the neck. Then attach the head in the same way you attached the neck to the body.
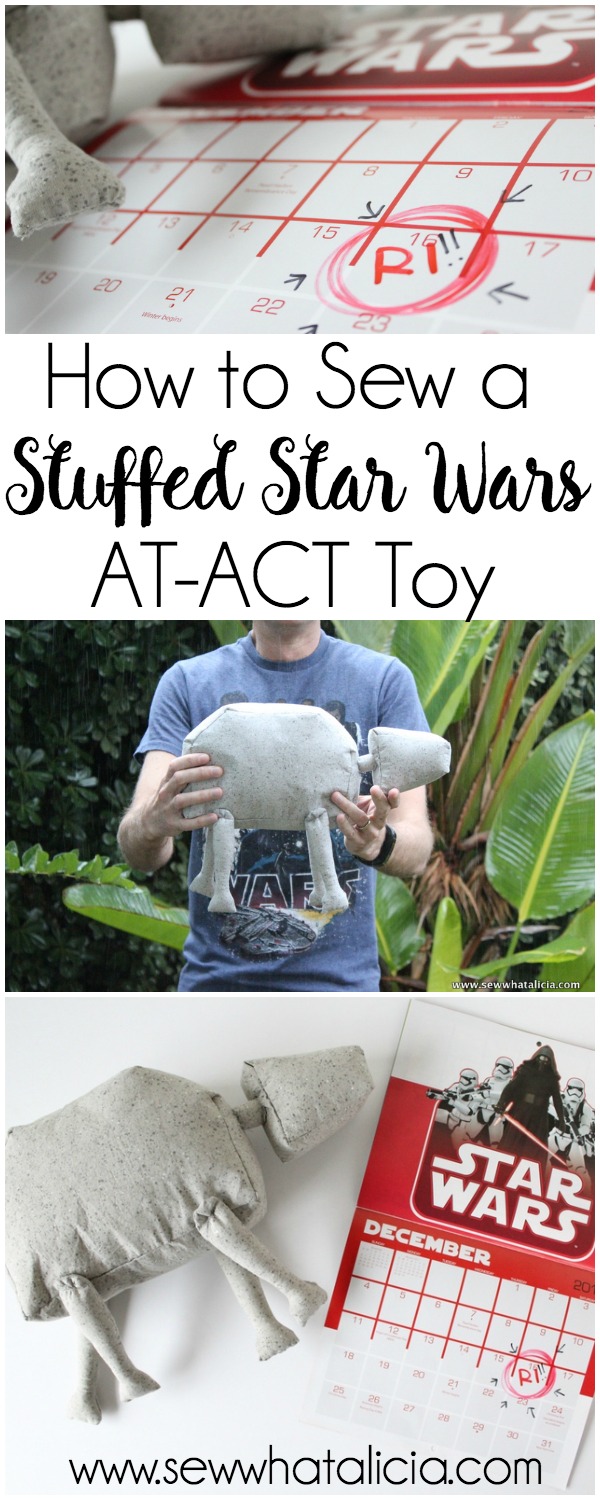
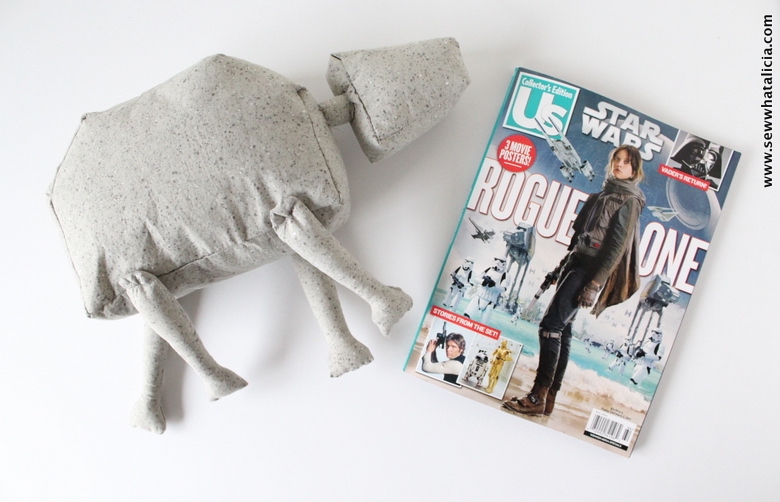 He is all set!! You can add a few more details by adding felt but I liked him without too much stuff cluttering up the body. I love him just as he is!! Do you have any little Jedi who need their own stuffed toy??

Thanks for letting me share this Star Wars stuffy with you! You can find me over on Sew What Alicia sharing sewing tutorials and other great sewing tips.
Connect with Sew What Alicia