No Products in the Cart



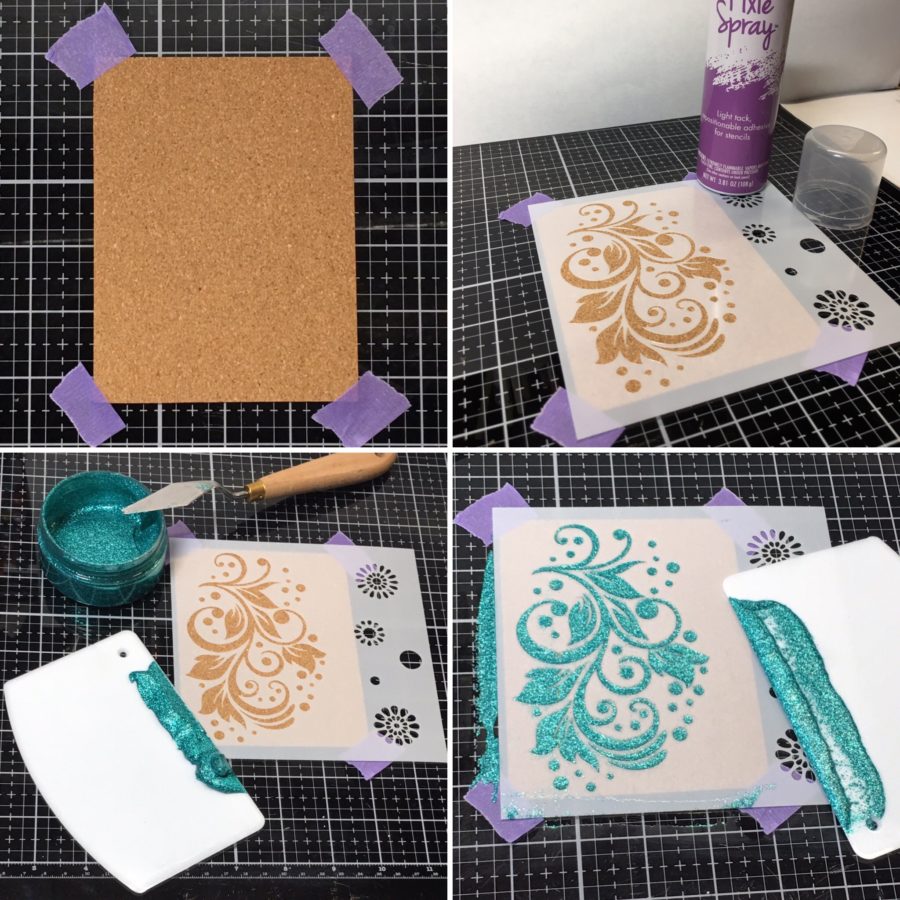 Step Two:
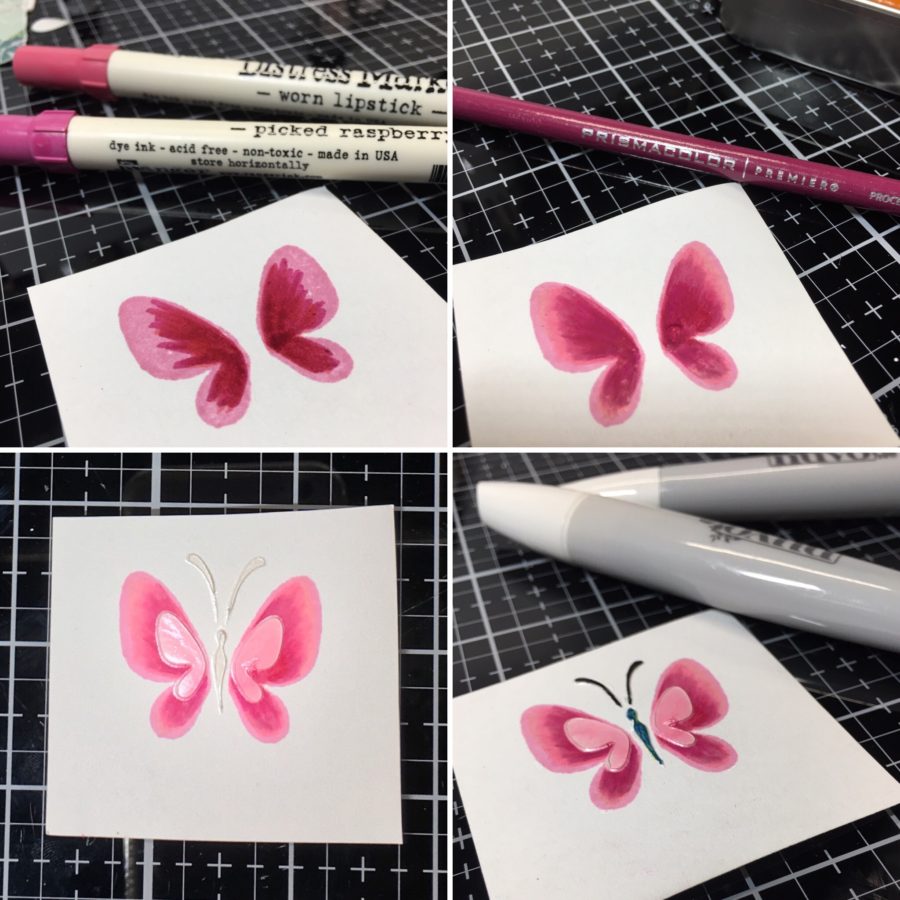
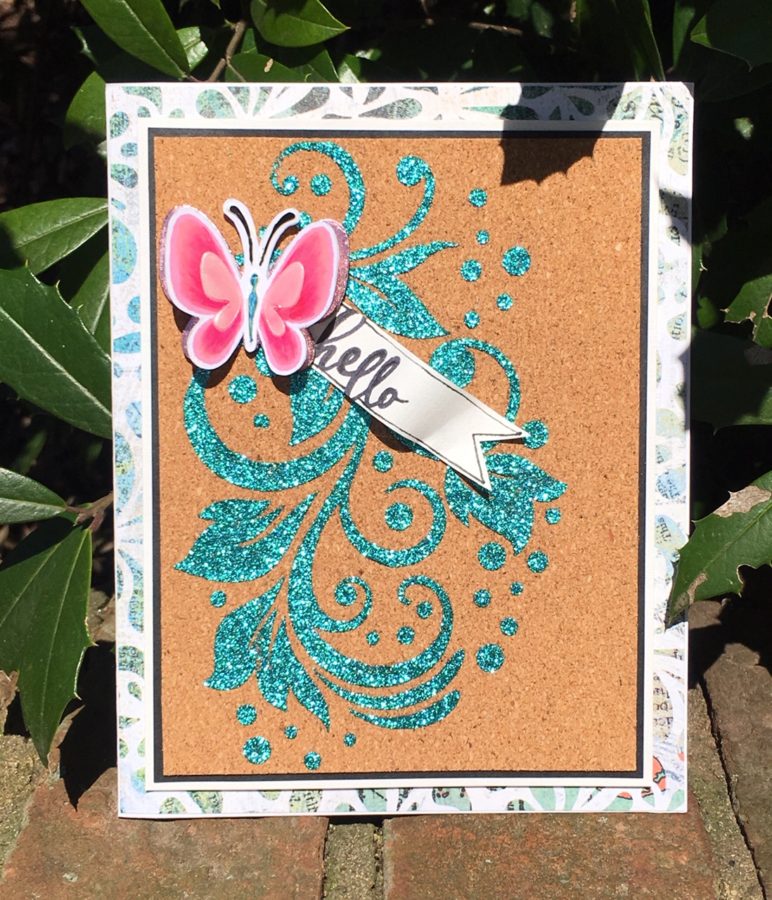
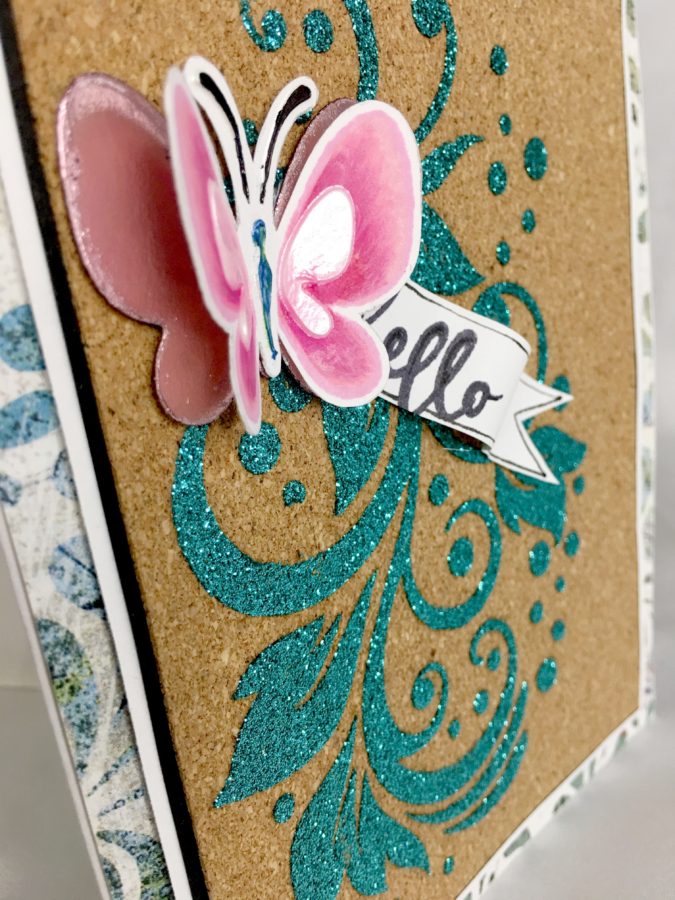
Stamp the butterfly wings image onto white cardstock and shade using Distress Markers and/or colored pencils. Following the stencil instructions in Step One, add the butterfly body and accents using White Pearl Metallix Gel and allow to dry. Once dry, use alcohol markers to color the body teal and the antennae black. Die-cut your butterfly.
Hint: If you do not wish the white Metallix to take on the color underneath, seal the wings with gel medium before stenciling.
Step Two:
Stamp the butterfly wings image onto white cardstock and shade using Distress Markers and/or colored pencils. Following the stencil instructions in Step One, add the butterfly body and accents using White Pearl Metallix Gel and allow to dry. Once dry, use alcohol markers to color the body teal and the antennae black. Die-cut your butterfly.
Hint: If you do not wish the white Metallix to take on the color underneath, seal the wings with gel medium before stenciling.
 Step Three:
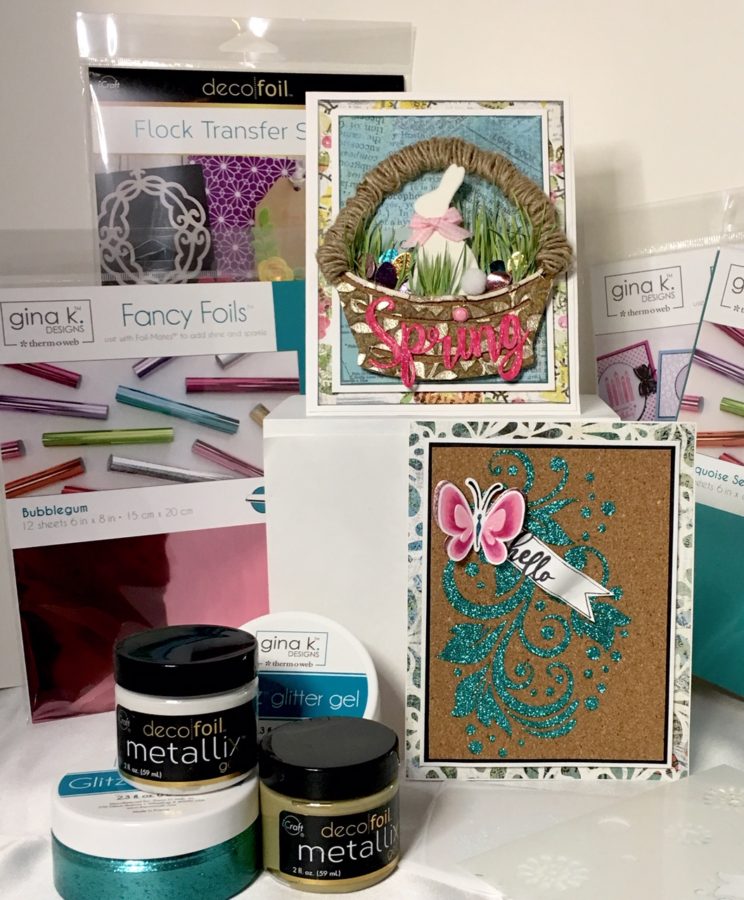
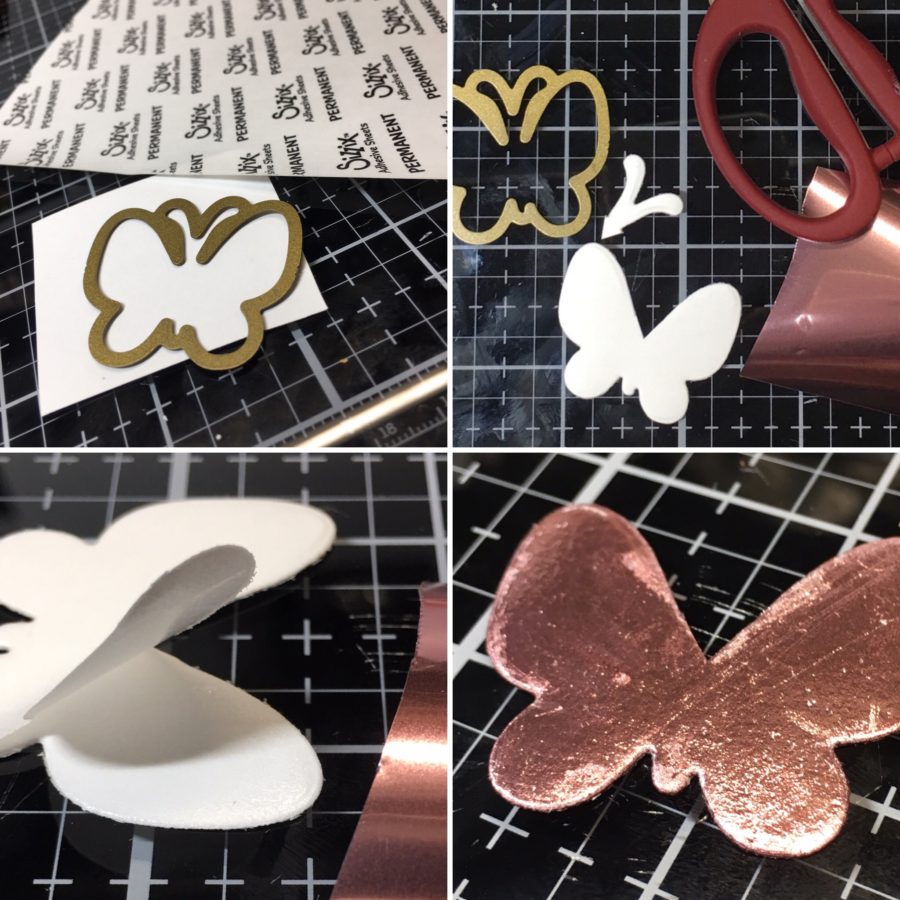
Layer a double-sided adhesive sheet onto cardstock and die-cut using the same butterfly die as in step two. Remove the antennae using scissors, peel away the release paper from the adhesive and press Foil (dull side down) onto the adhesive. Burnish the foil onto the butterfly shape using a bone folder or craft stick and gently peel away the foil release paper.
Hint: If you desire dimension, use the Deco foil White Foam Adhesive in place of the double-sided adhesive sheet.
Step Three:
Layer a double-sided adhesive sheet onto cardstock and die-cut using the same butterfly die as in step two. Remove the antennae using scissors, peel away the release paper from the adhesive and press Foil (dull side down) onto the adhesive. Burnish the foil onto the butterfly shape using a bone folder or craft stick and gently peel away the foil release paper.
Hint: If you desire dimension, use the Deco foil White Foam Adhesive in place of the double-sided adhesive sheet.
 Step Four:
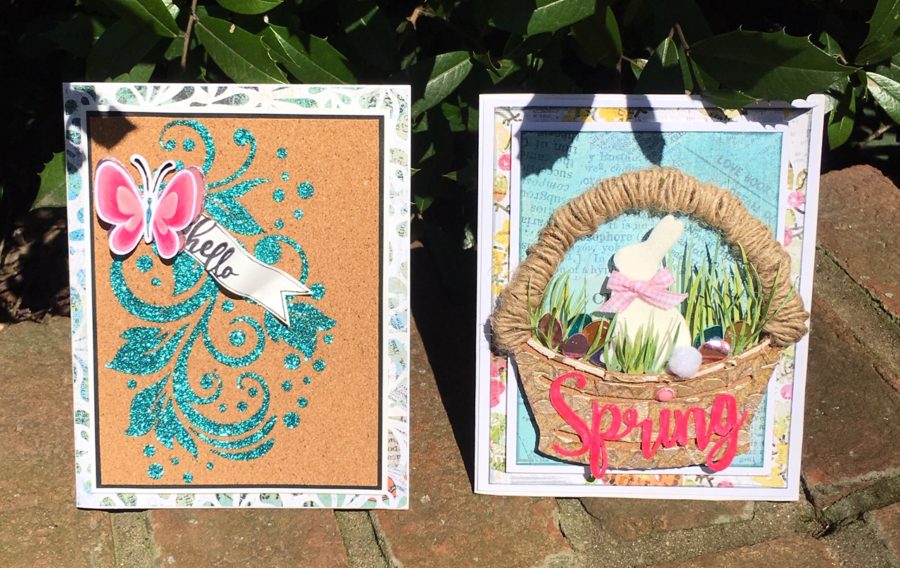
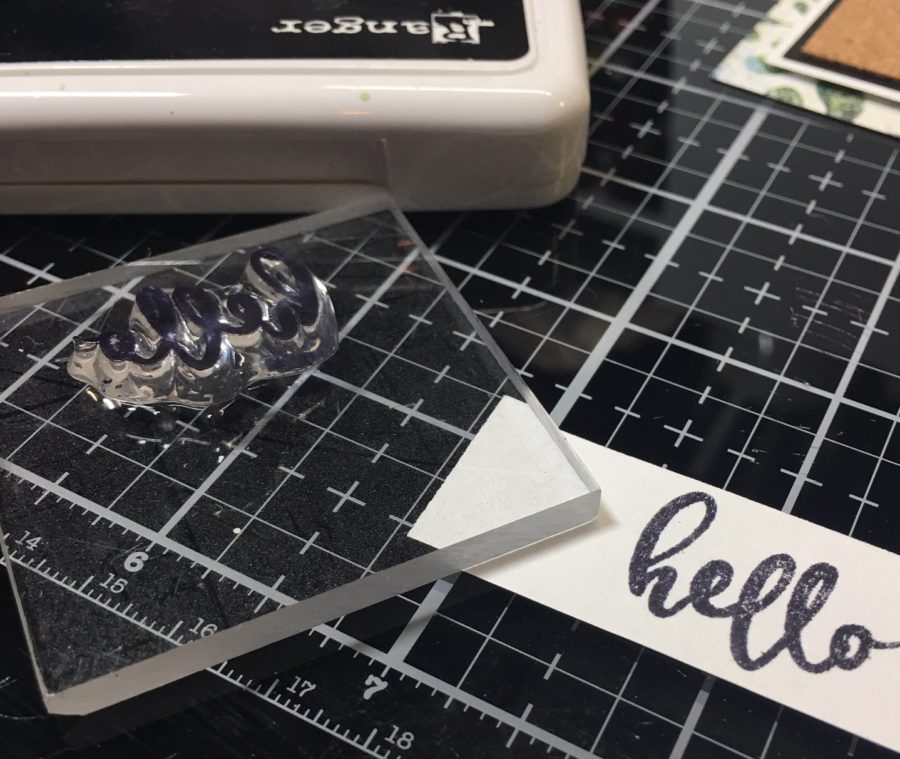
Adhere the inked and Metallix die-cut butterfly to the foiled butterfly and adhere to the cork. Mat the cork with a coordinating cardstock and patterned paper and mount onto a card base. Add your desired sentiment and admire your finished card!
Hint: Stamp your sentiment onto a strip of paper and create a flag by cutting a "v" shape on one end, creating a fishtail.
Step Four:
Adhere the inked and Metallix die-cut butterfly to the foiled butterfly and adhere to the cork. Mat the cork with a coordinating cardstock and patterned paper and mount onto a card base. Add your desired sentiment and admire your finished card!
Hint: Stamp your sentiment onto a strip of paper and create a flag by cutting a "v" shape on one end, creating a fishtail.
 Step One:
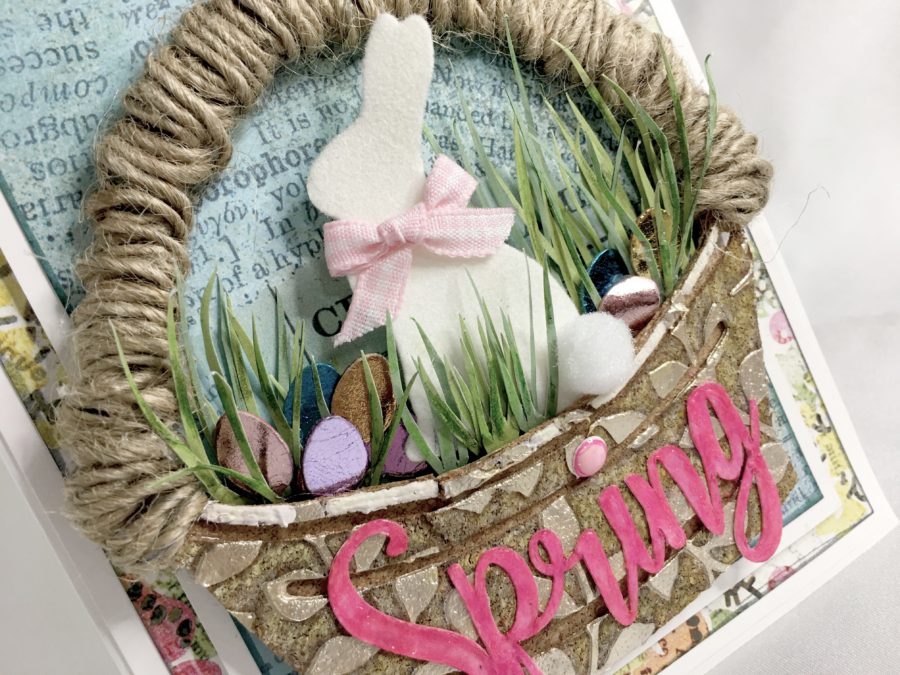
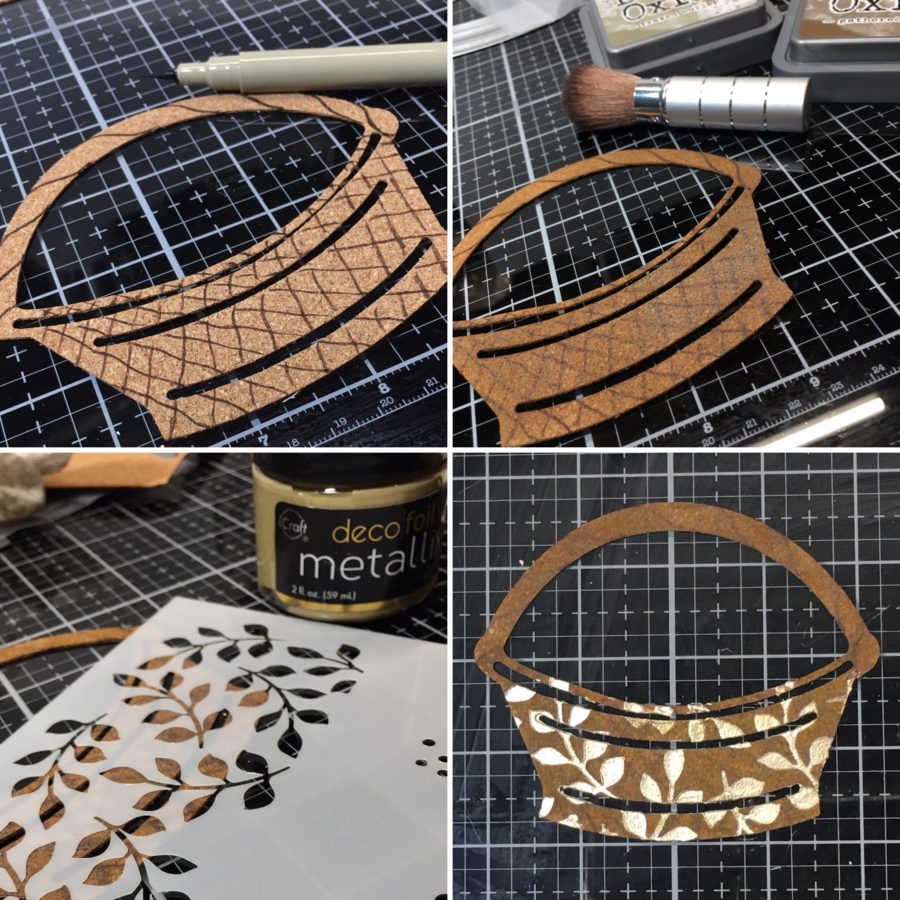
Begin by die-cutting or hand cutting a basket from cork or fabric. Draw a weave patterned onto the basket and apply Distress Inks for shading. Allow inks to dry completely and following the stencil instructions above, stencil the leaves pattern onto the bottom of the basket using Pure Gold Metallix Gel. Set aside to dry completely. While the Gel is drying, create a layered card base using cardstock and patterned paper.
Hint: If you desire the weave pattern to remain vibrant rather than fade into the background, omit the Distress Ink layer.
Step One:
Begin by die-cutting or hand cutting a basket from cork or fabric. Draw a weave patterned onto the basket and apply Distress Inks for shading. Allow inks to dry completely and following the stencil instructions above, stencil the leaves pattern onto the bottom of the basket using Pure Gold Metallix Gel. Set aside to dry completely. While the Gel is drying, create a layered card base using cardstock and patterned paper.
Hint: If you desire the weave pattern to remain vibrant rather than fade into the background, omit the Distress Ink layer.
 Step Two:
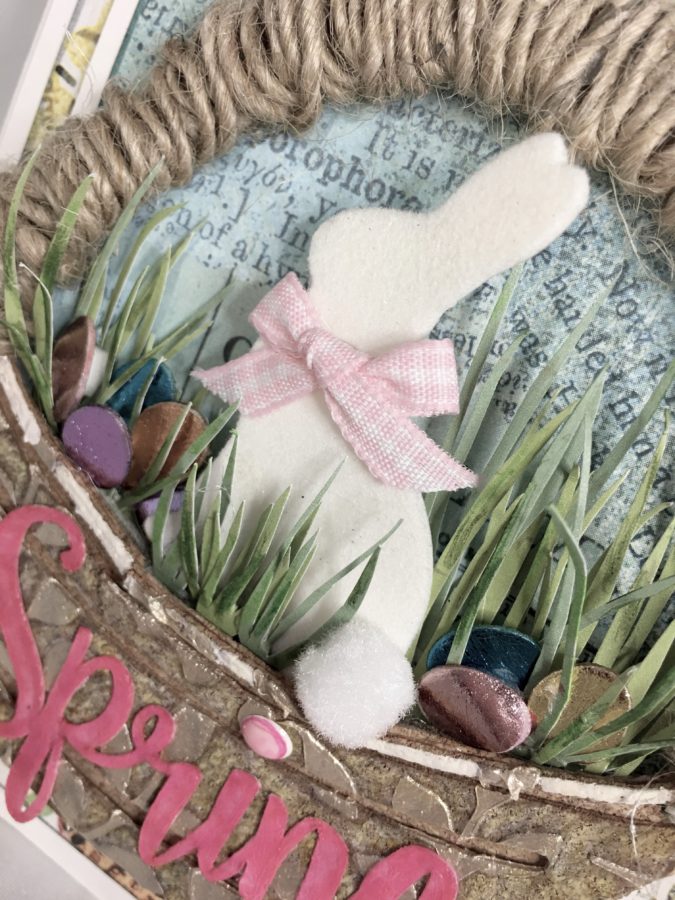
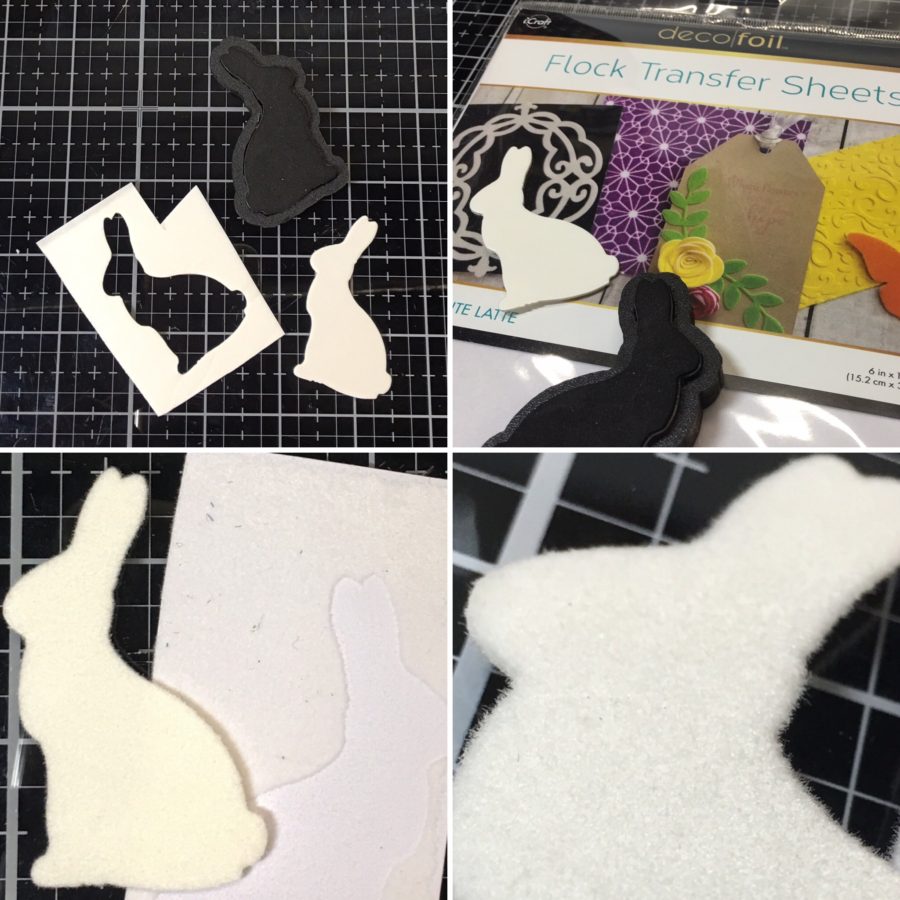
Die-cut two bunnies from a White Foam Adhesive Sheet. Cut a piece of White Latte Flock Transfer Sheet to the size of your die-cut bunny. Peel away the release paper from the front of your die-cut and press the sticky side onto the Flock Transfer Sheet (onto the fuzzy side). Run the die-cut through a die-cutting machine (using just the platform and cutting pads) to adhere the Flock completely. This process with squish your Adhesive Foam slightly. To create greater dimension, adhere the flocked bunny to the second bunny you die-cut from White Adhesive Foam. You should now have a wonderfully, fuzzy bunny that is two foam thicknesses. Add a small bow to the neck of the bunny.
Hint: If you do not have a die-cutting machine you can hand-cut a bunny and use a brayer to roll over the flocking to assure complete adhesion.
Step Two:
Die-cut two bunnies from a White Foam Adhesive Sheet. Cut a piece of White Latte Flock Transfer Sheet to the size of your die-cut bunny. Peel away the release paper from the front of your die-cut and press the sticky side onto the Flock Transfer Sheet (onto the fuzzy side). Run the die-cut through a die-cutting machine (using just the platform and cutting pads) to adhere the Flock completely. This process with squish your Adhesive Foam slightly. To create greater dimension, adhere the flocked bunny to the second bunny you die-cut from White Adhesive Foam. You should now have a wonderfully, fuzzy bunny that is two foam thicknesses. Add a small bow to the neck of the bunny.
Hint: If you do not have a die-cutting machine you can hand-cut a bunny and use a brayer to roll over the flocking to assure complete adhesion.
 Step Three:
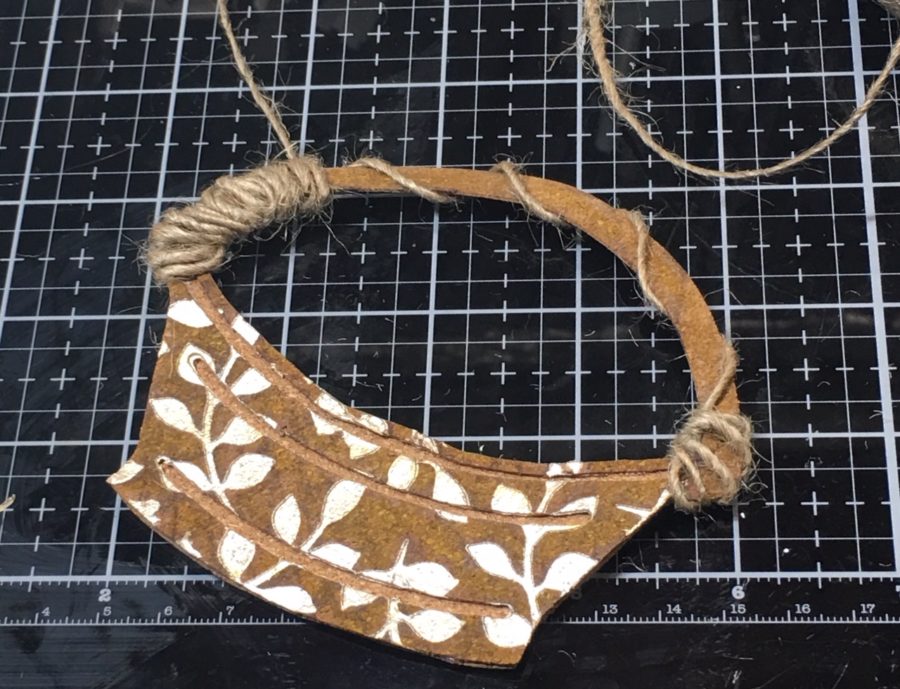
Create a dimensional basket handle by wrapping twine around the handle, adhering to the back every 1/4" using hot glue. Using scissors or a die-cut, create grass from green cardstock and set it aside to fill the basket.
Hint: You can use Easter basket fill as an alternative to paper grass.
Step Three:
Create a dimensional basket handle by wrapping twine around the handle, adhering to the back every 1/4" using hot glue. Using scissors or a die-cut, create grass from green cardstock and set it aside to fill the basket.
Hint: You can use Easter basket fill as an alternative to paper grass.
 Step Four:
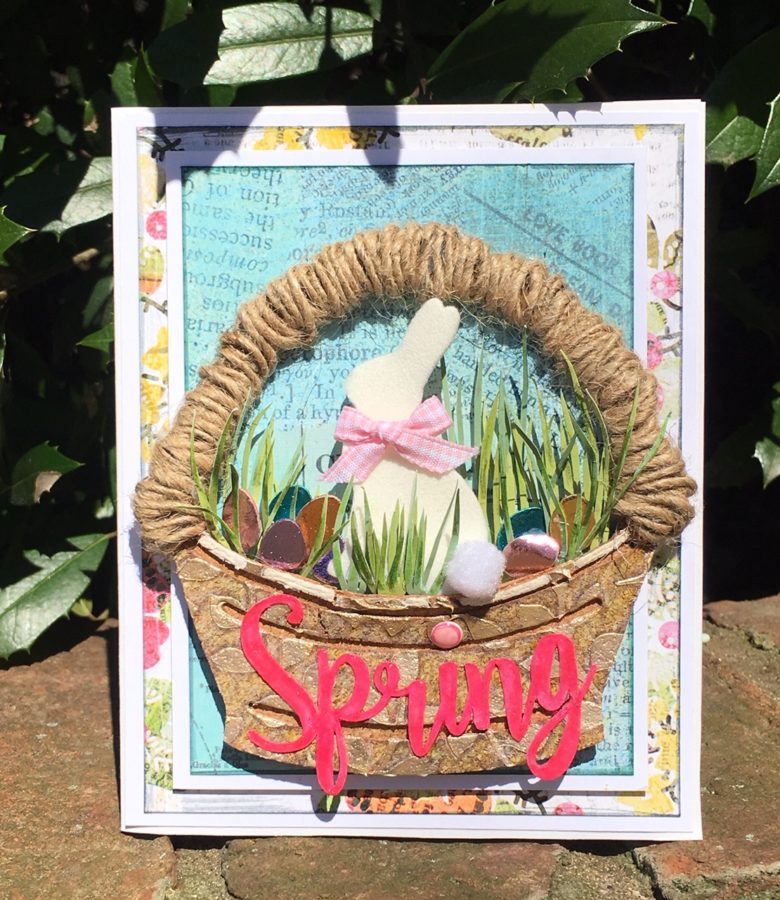
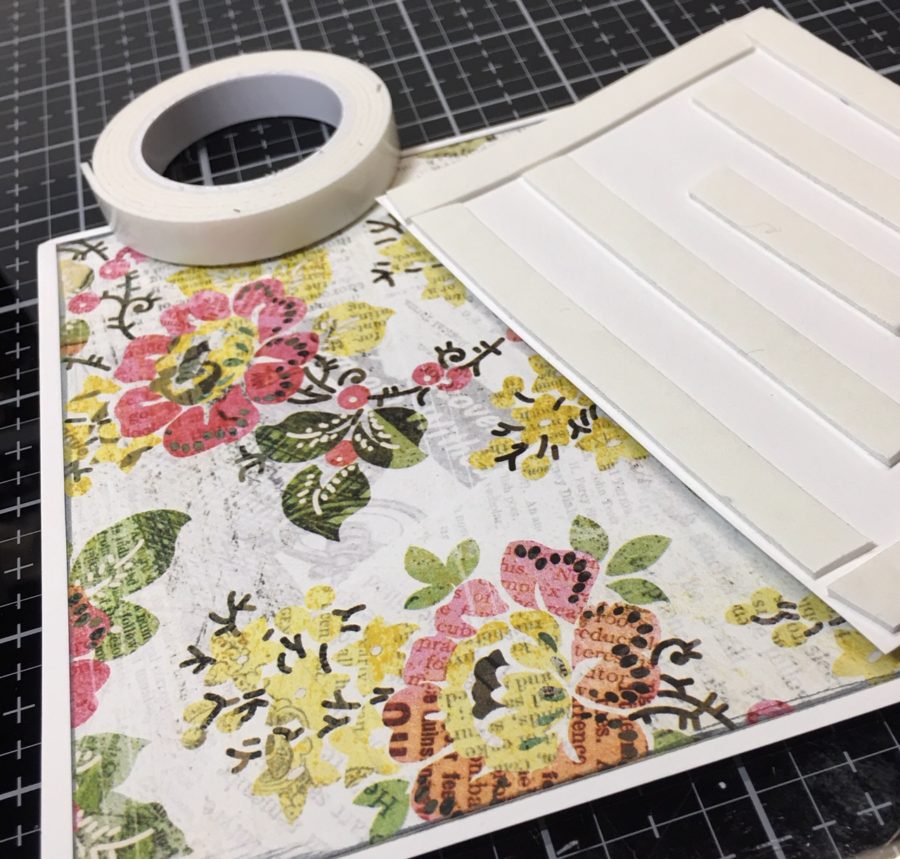
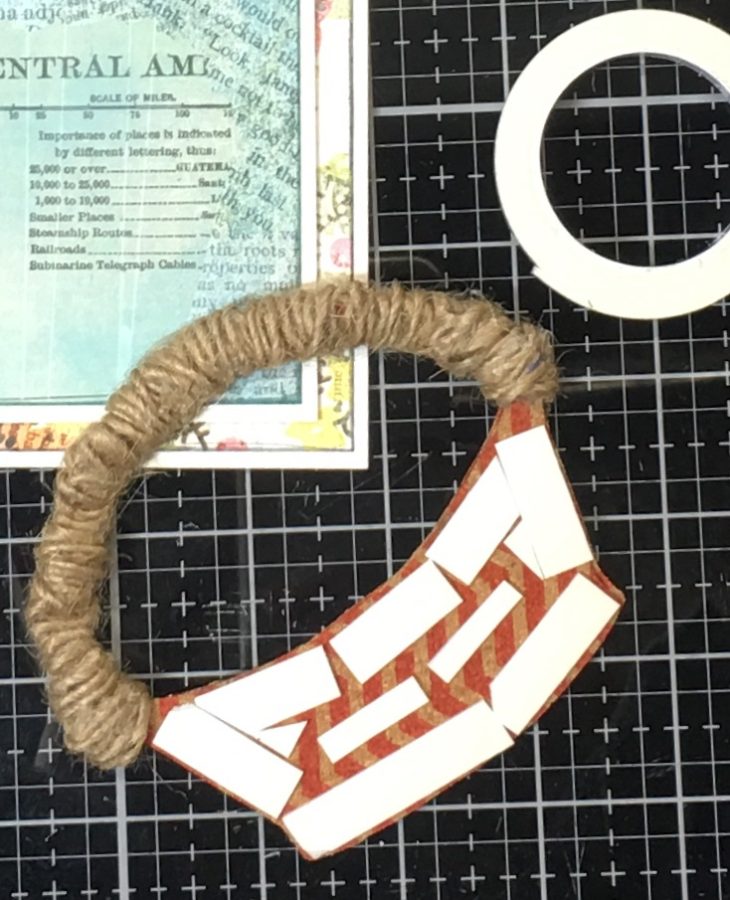
Create a card base, layering mats using Foam Tape for added dimension. Add foam tape to the back of the cork basket as well and adhere it to the front of your card base. Once you have placed your basket, tuck in some grass and your bunny.
Hint: For added texture, add a tiny pom pom for a bunny tail.
Step Four:
Create a card base, layering mats using Foam Tape for added dimension. Add foam tape to the back of the cork basket as well and adhere it to the front of your card base. Once you have placed your basket, tuck in some grass and your bunny.
Hint: For added texture, add a tiny pom pom for a bunny tail.
 Step Five:
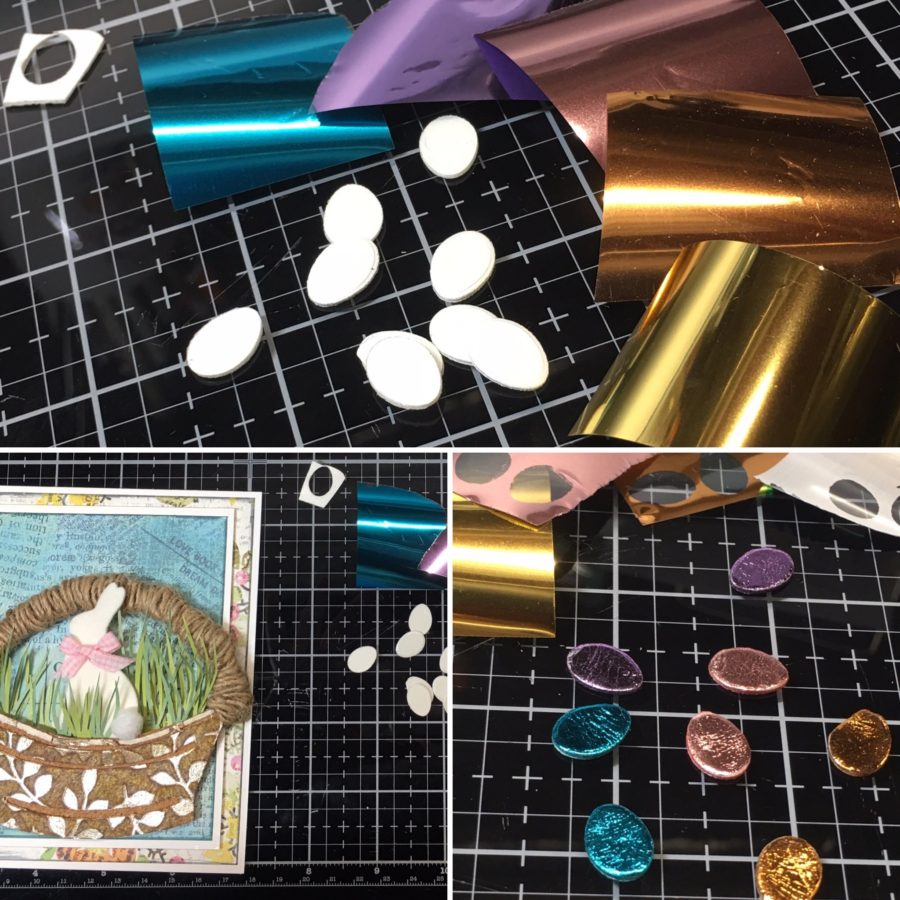
Die-cut tiny eggs (I used Sizzix Egg Framelits) from White Foam Adhesive. Peel the release paper from the foam and add foil pursuant to instructions for the first card. I did two of each color. I really love how these little eggs turned out. Peel the release paper from the back of each egg and tuck them into the grass around the bunny.
Hint: I used scraps of foam and foil both so as not to waste.
Step Five:
Die-cut tiny eggs (I used Sizzix Egg Framelits) from White Foam Adhesive. Peel the release paper from the foam and add foil pursuant to instructions for the first card. I did two of each color. I really love how these little eggs turned out. Peel the release paper from the back of each egg and tuck them into the grass around the bunny.
Hint: I used scraps of foam and foil both so as not to waste.
 Add a die-cut sentiment to complete your Bunny in a Basket Card!