No Products in the Cart
 Hey hey!! It's Katrina from Paper, Scissors, Glue and Hybrid Too here today on the blog!
I love Newton's Nook and am so excited about our team up this week. They have some super cute stamps and dies to document your memories or to make cards with. Our Deco Foil Flock probably isn't something you would think of to document a summer water layout, but it makes some darn cute paw prints when you use a Newton's Nook stencil! Let's take a look!
Hey hey!! It's Katrina from Paper, Scissors, Glue and Hybrid Too here today on the blog!
I love Newton's Nook and am so excited about our team up this week. They have some super cute stamps and dies to document your memories or to make cards with. Our Deco Foil Flock probably isn't something you would think of to document a summer water layout, but it makes some darn cute paw prints when you use a Newton's Nook stencil! Let's take a look!
 Therm O Web Supplies Used
Deco Foil Flock Transfer Sheets-Midnight Blue
Memory Runner XL
Memory Runner XL Refill
iCraft Easy Tear Tape 1/2 inch
Deco Foil Gel-Blanco
3D Foam Squares – Combo Pack
3D FOAM SQUARES BOX
NEW 3D FOAM TAPE ROLL 1/16
NEW 3D FOAM TAPE ROLL 1/8
Deco Foil Craft Carrier Sheets-NEW
Ultra Bond Liquid Adhesive
Pixie Tape
NEW Pixie Dots
Other Supplies Used
Echo Park Paper-Pool Party
Elle's Studio Puffy Alphas-Paper Issues (Use Code Katrina for 20% off)
White Cardstock
Karin Brush Markers Pro
Newton's Nook Dies-Frames and Flags Set
Newton's Nook Stamps and Matching Dies
Corgi Beach-Stamps
Corgi Beach-Dies
Welcome New Dog-Stamps
Welcome New Dog-Dies
Newton's Nook Stencil-Petite Paw Prints
Therm O Web Supplies Used
Deco Foil Flock Transfer Sheets-Midnight Blue
Memory Runner XL
Memory Runner XL Refill
iCraft Easy Tear Tape 1/2 inch
Deco Foil Gel-Blanco
3D Foam Squares – Combo Pack
3D FOAM SQUARES BOX
NEW 3D FOAM TAPE ROLL 1/16
NEW 3D FOAM TAPE ROLL 1/8
Deco Foil Craft Carrier Sheets-NEW
Ultra Bond Liquid Adhesive
Pixie Tape
NEW Pixie Dots
Other Supplies Used
Echo Park Paper-Pool Party
Elle's Studio Puffy Alphas-Paper Issues (Use Code Katrina for 20% off)
White Cardstock
Karin Brush Markers Pro
Newton's Nook Dies-Frames and Flags Set
Newton's Nook Stamps and Matching Dies
Corgi Beach-Stamps
Corgi Beach-Dies
Welcome New Dog-Stamps
Welcome New Dog-Dies
Newton's Nook Stencil-Petite Paw Prints
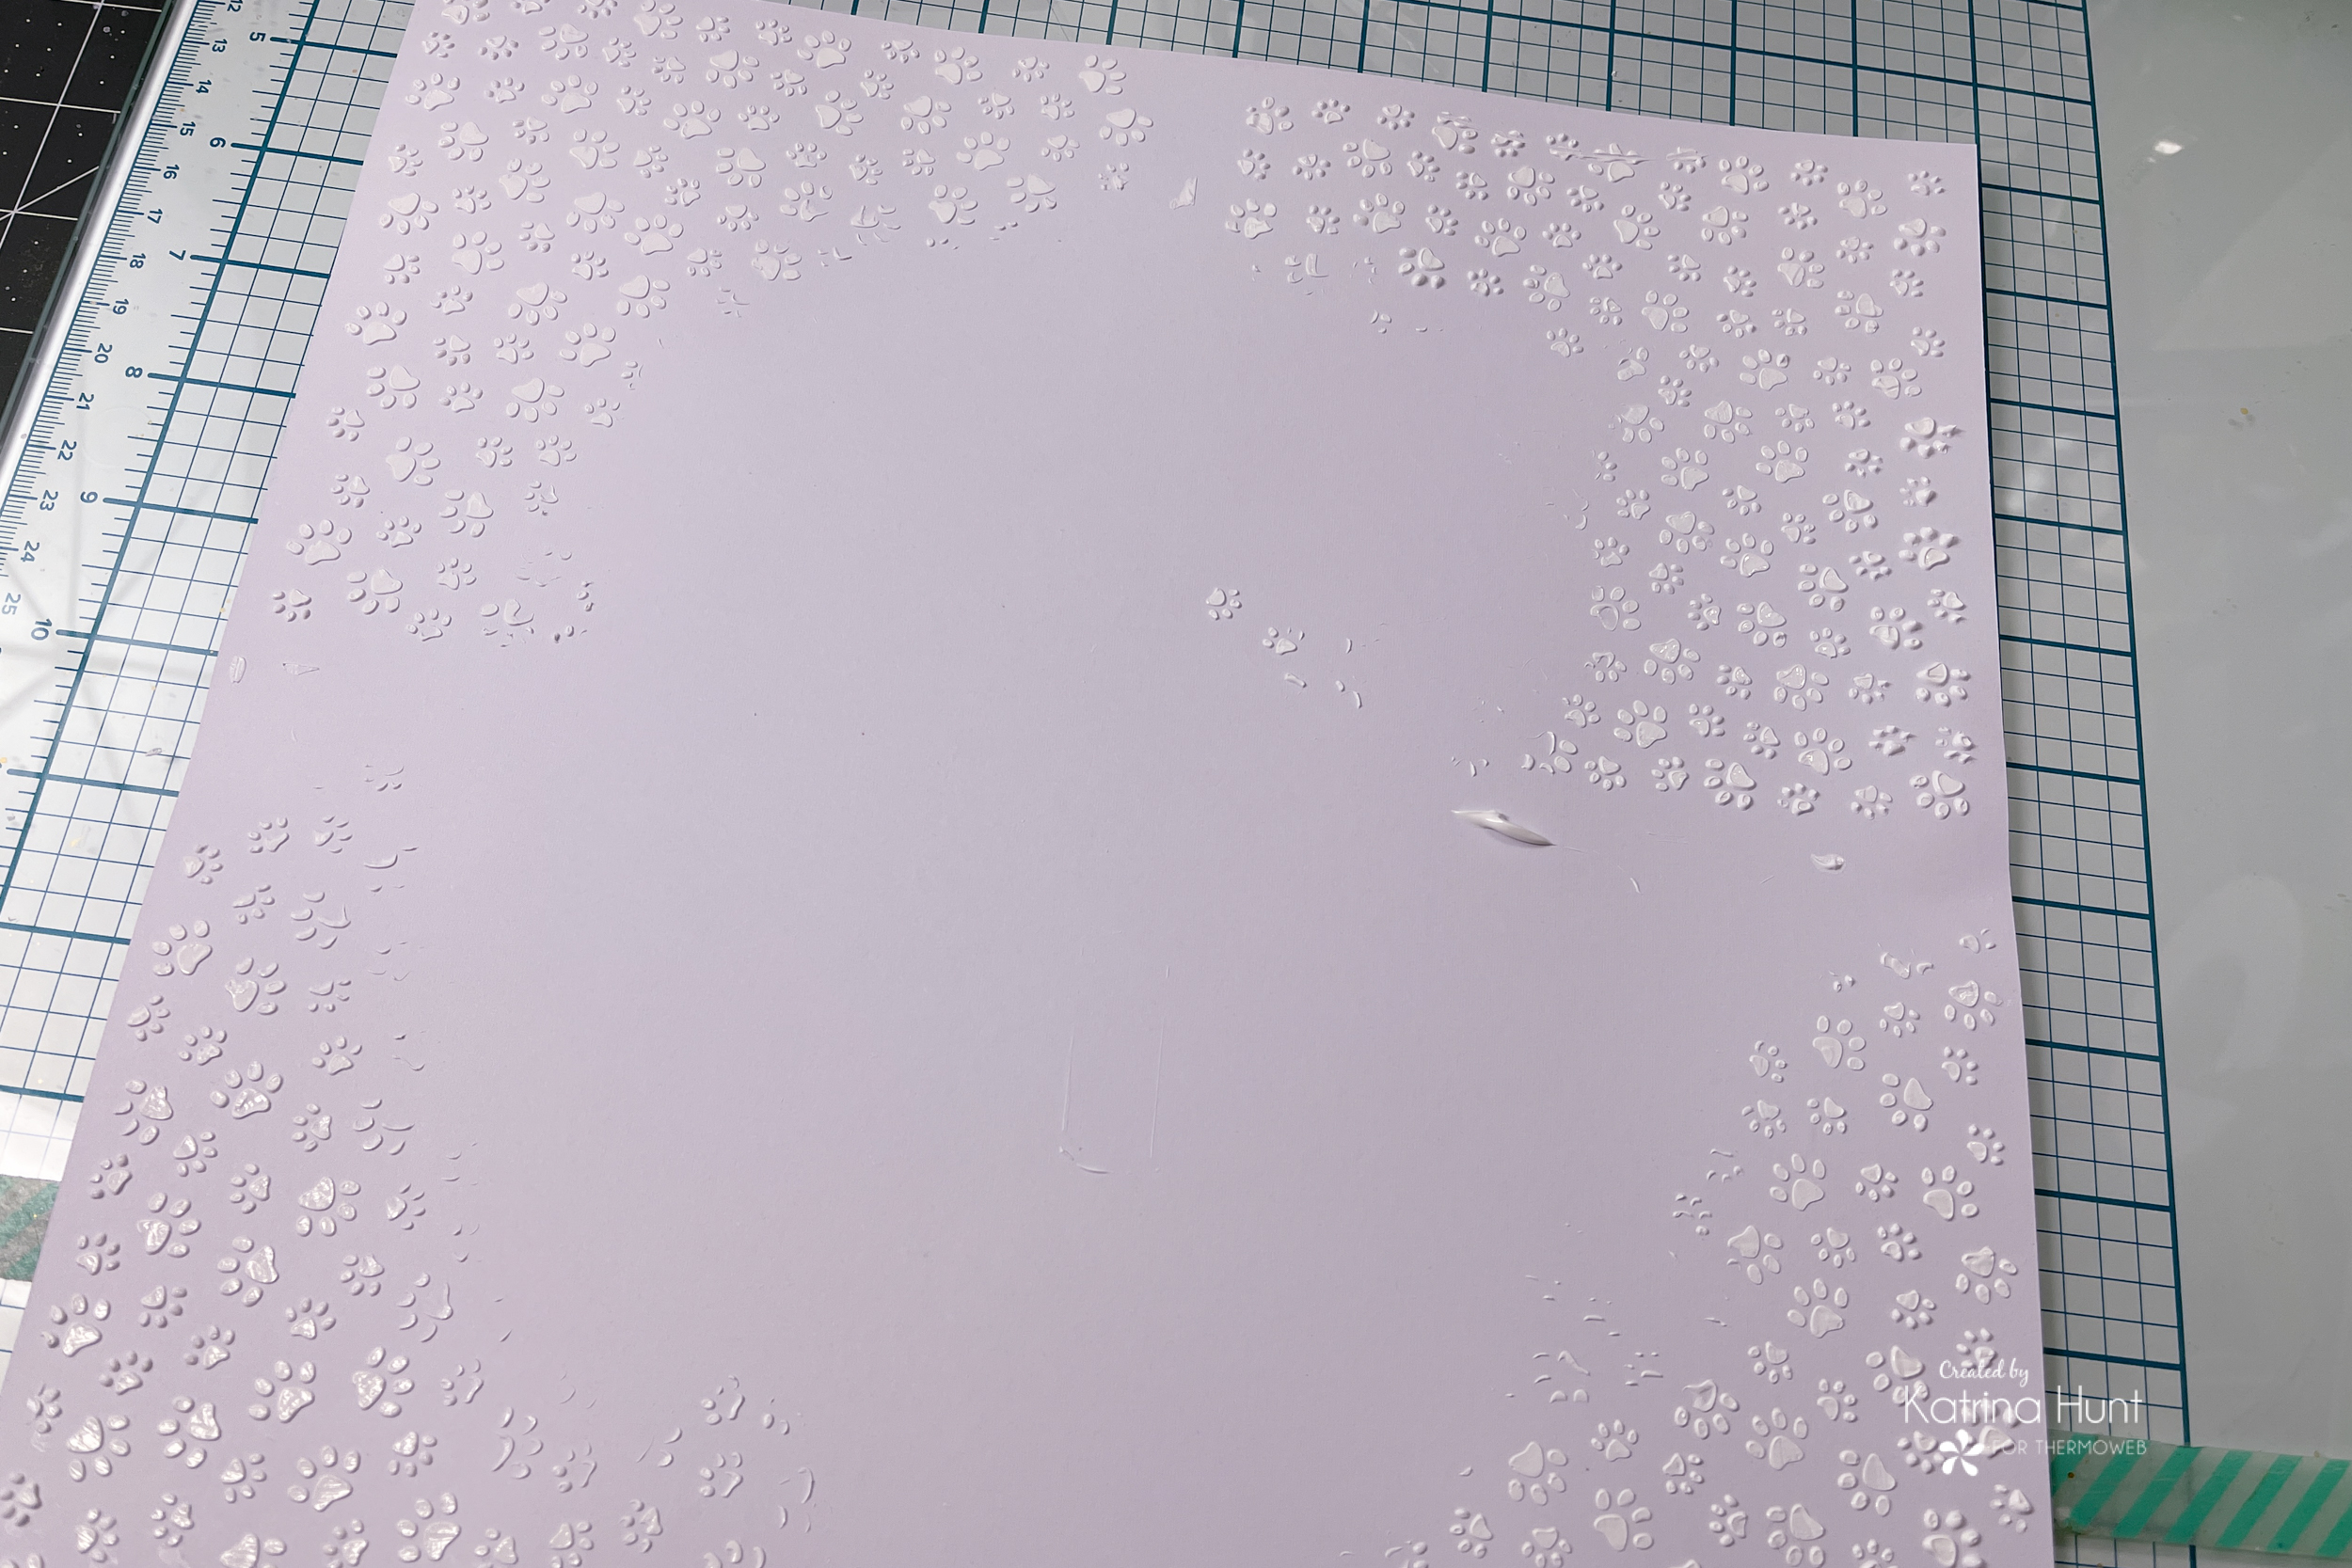
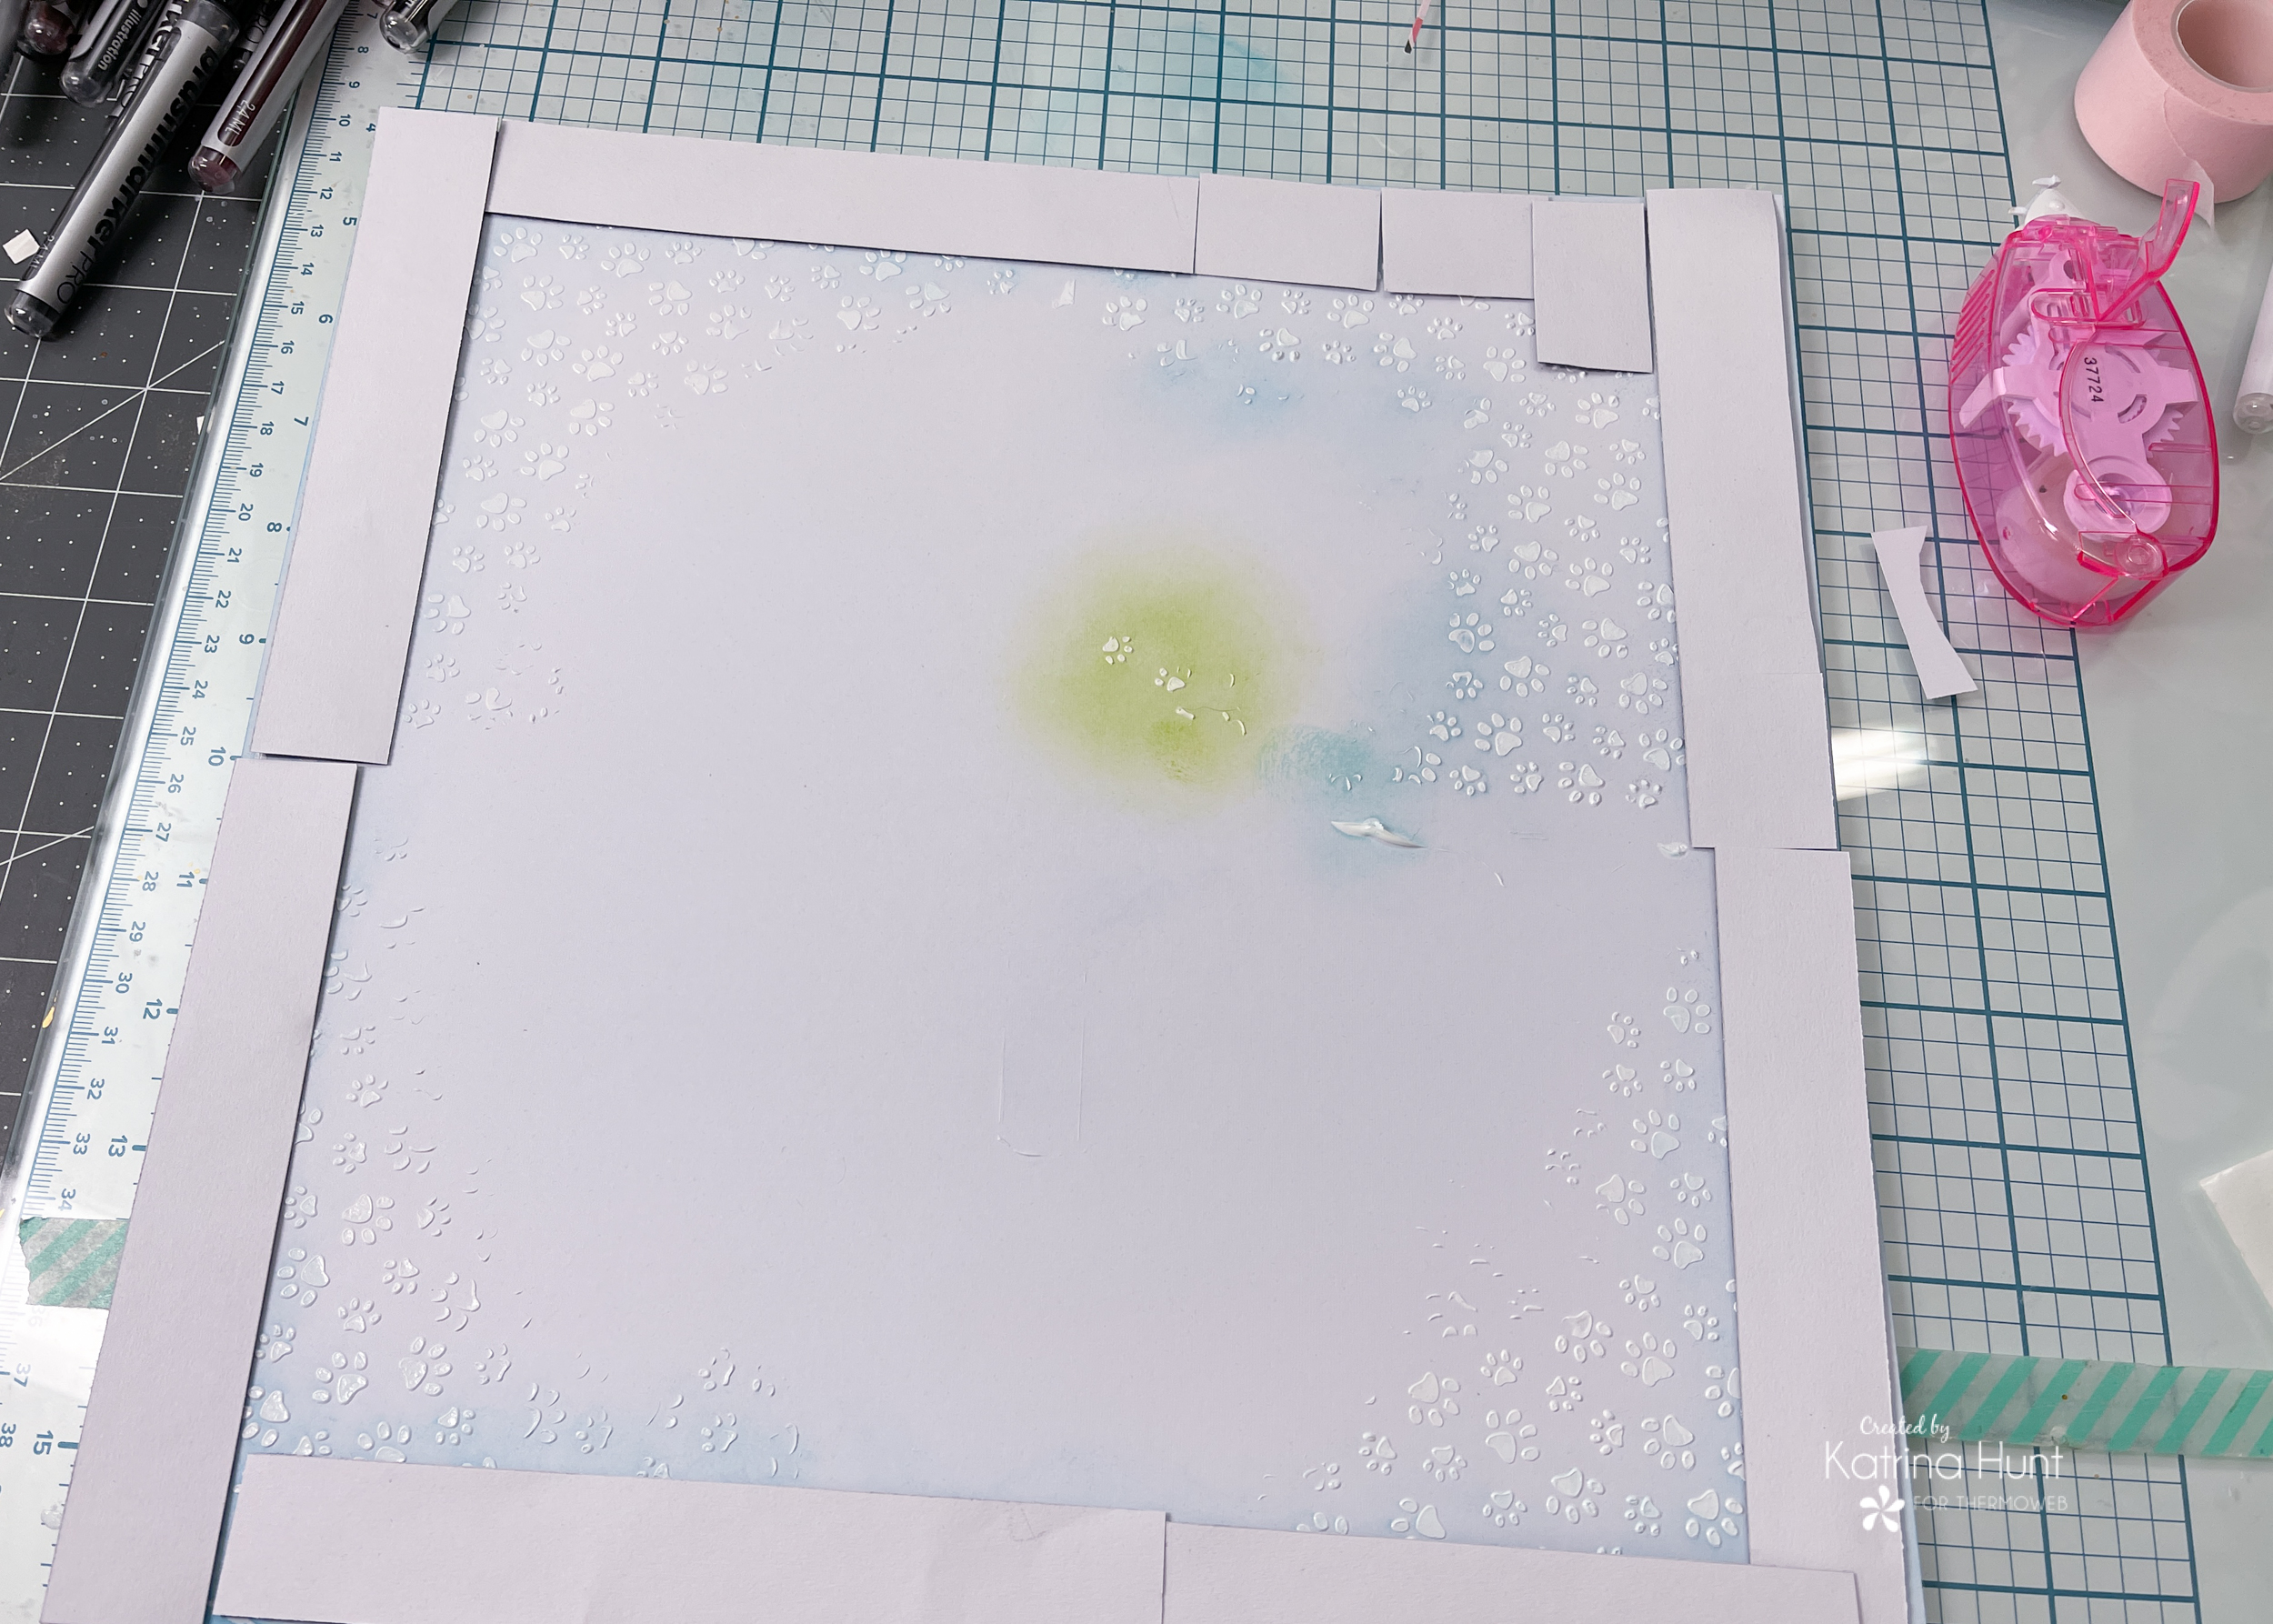
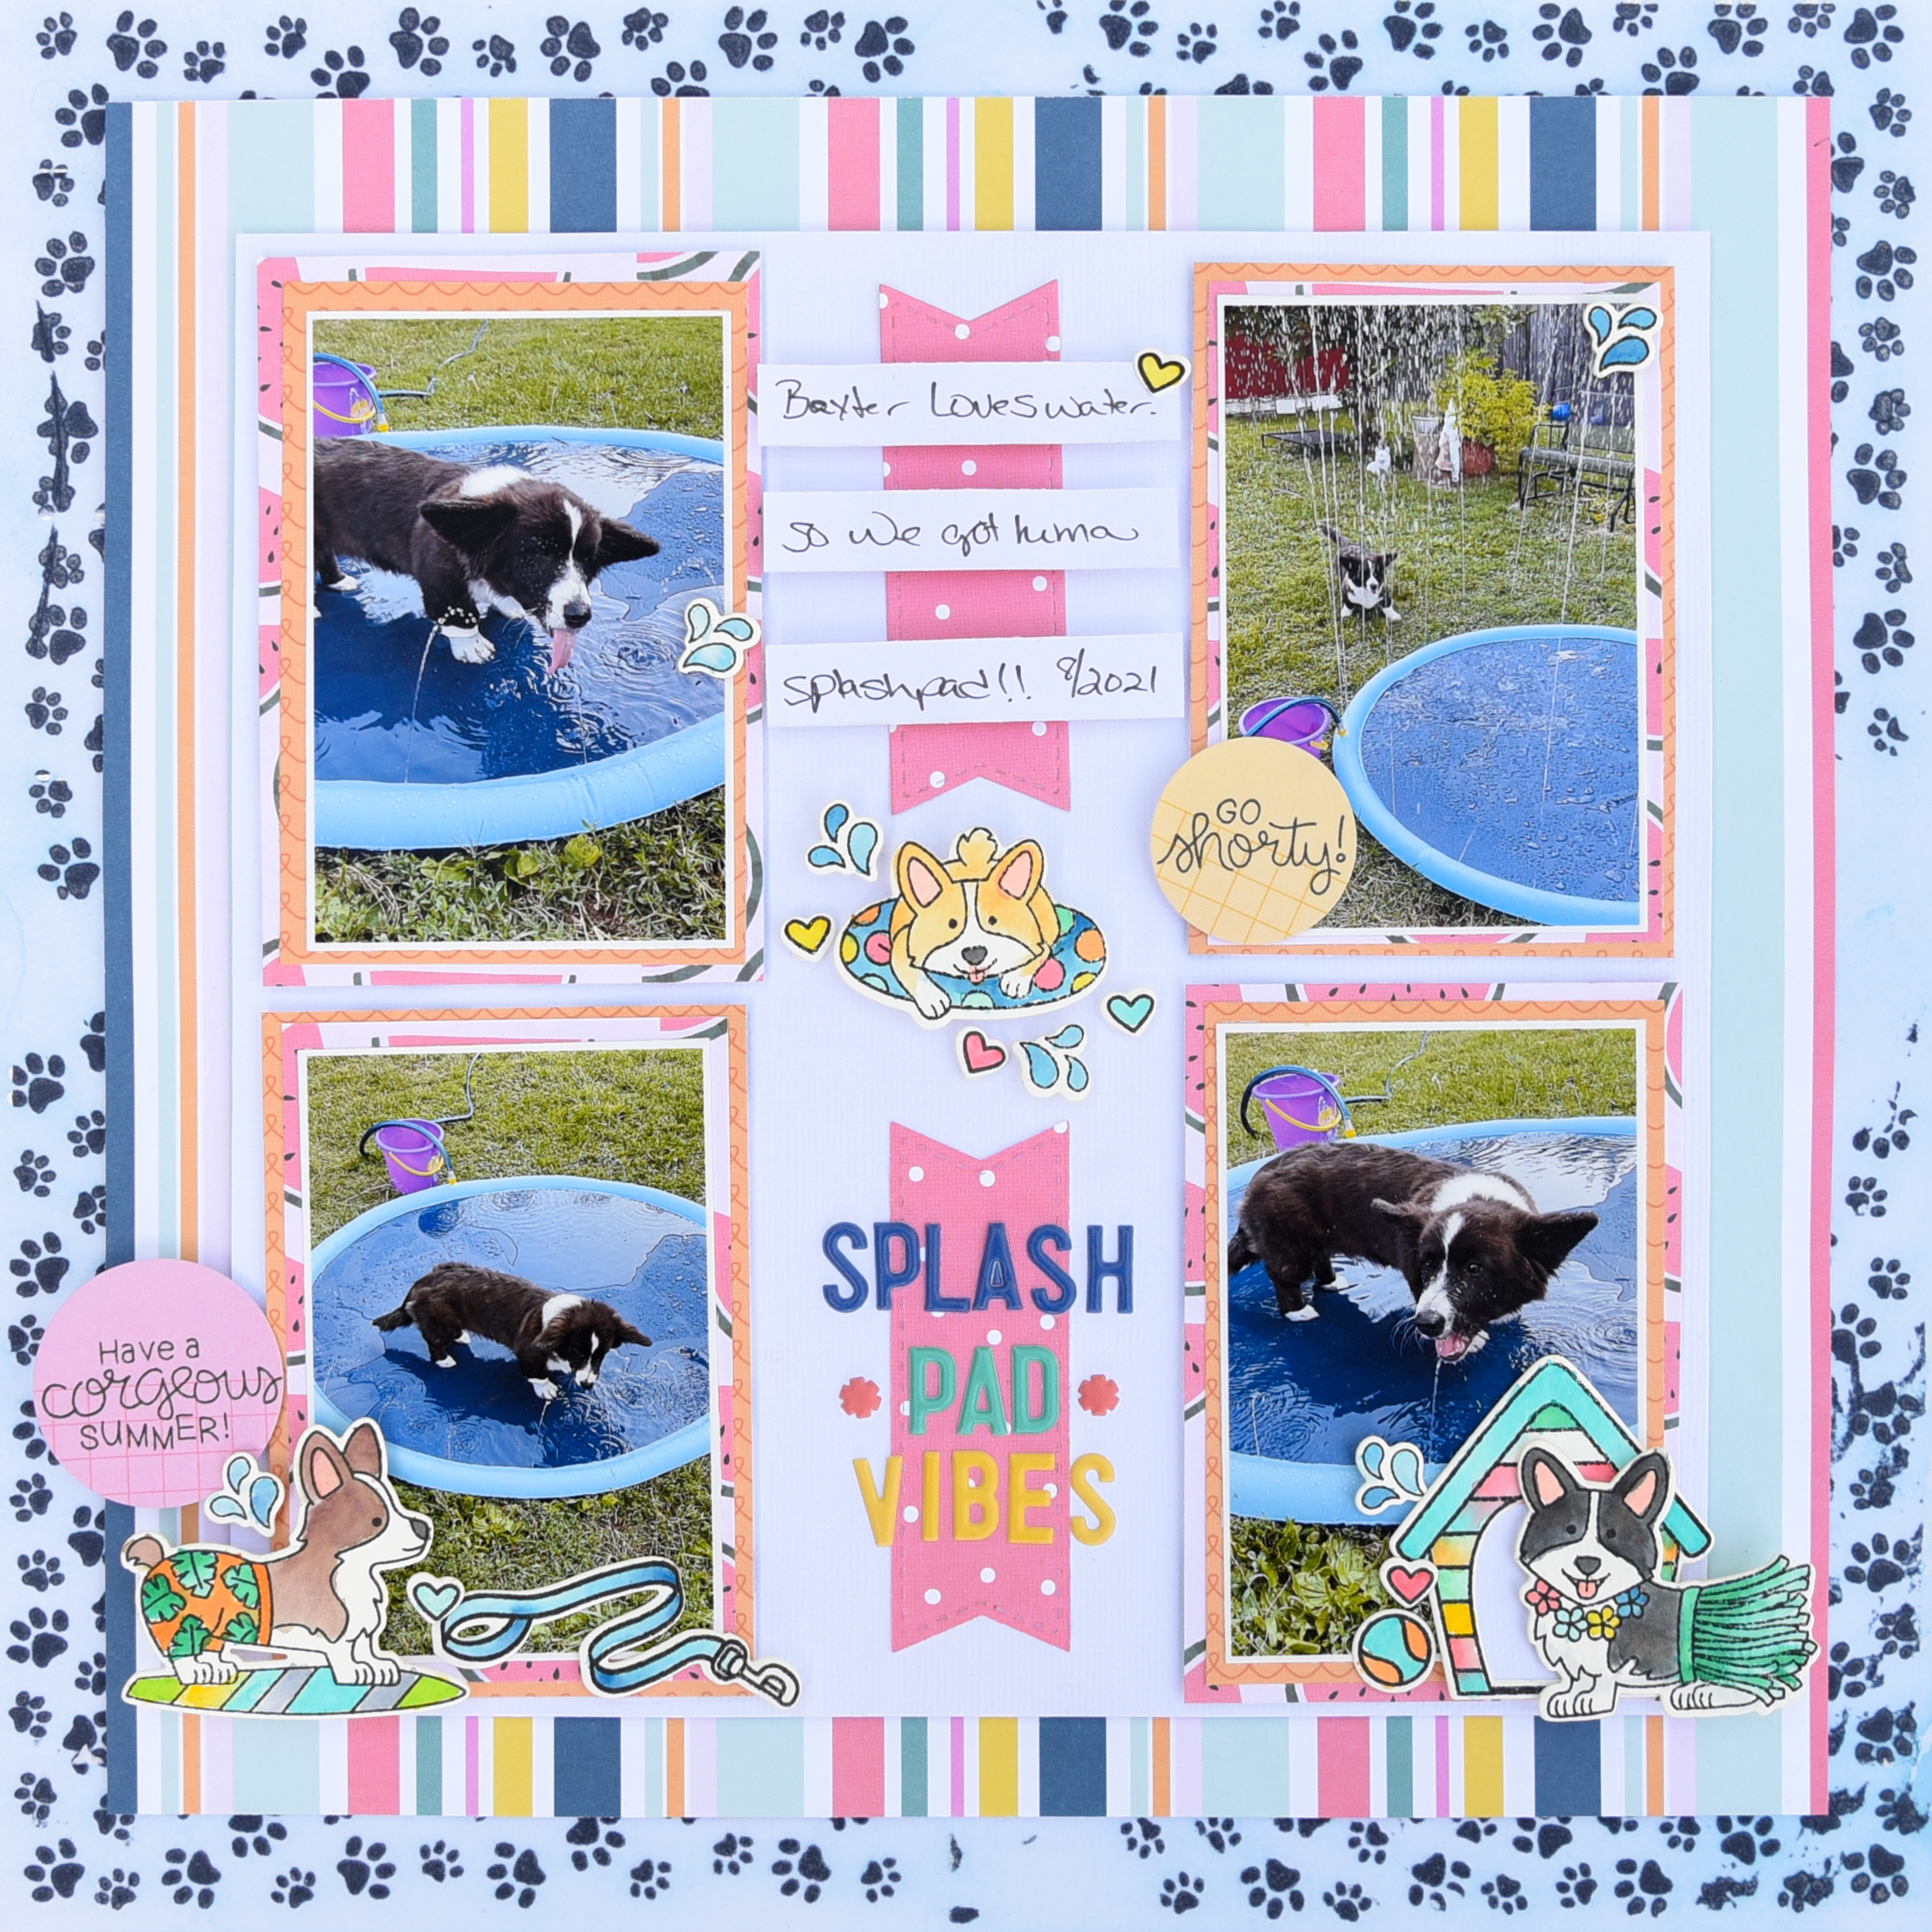 When I started my layout, I knew I wanted to use the stencil and make sure it was a feature on the page. I decided around the outside edge of the background would be fun. Think of wet footprints around a pool!
I started with a piece of heavy-weight white cardstock and my Deco Foil Transfer Gel in Blanco.
When I started my layout, I knew I wanted to use the stencil and make sure it was a feature on the page. I decided around the outside edge of the background would be fun. Think of wet footprints around a pool!
I started with a piece of heavy-weight white cardstock and my Deco Foil Transfer Gel in Blanco. 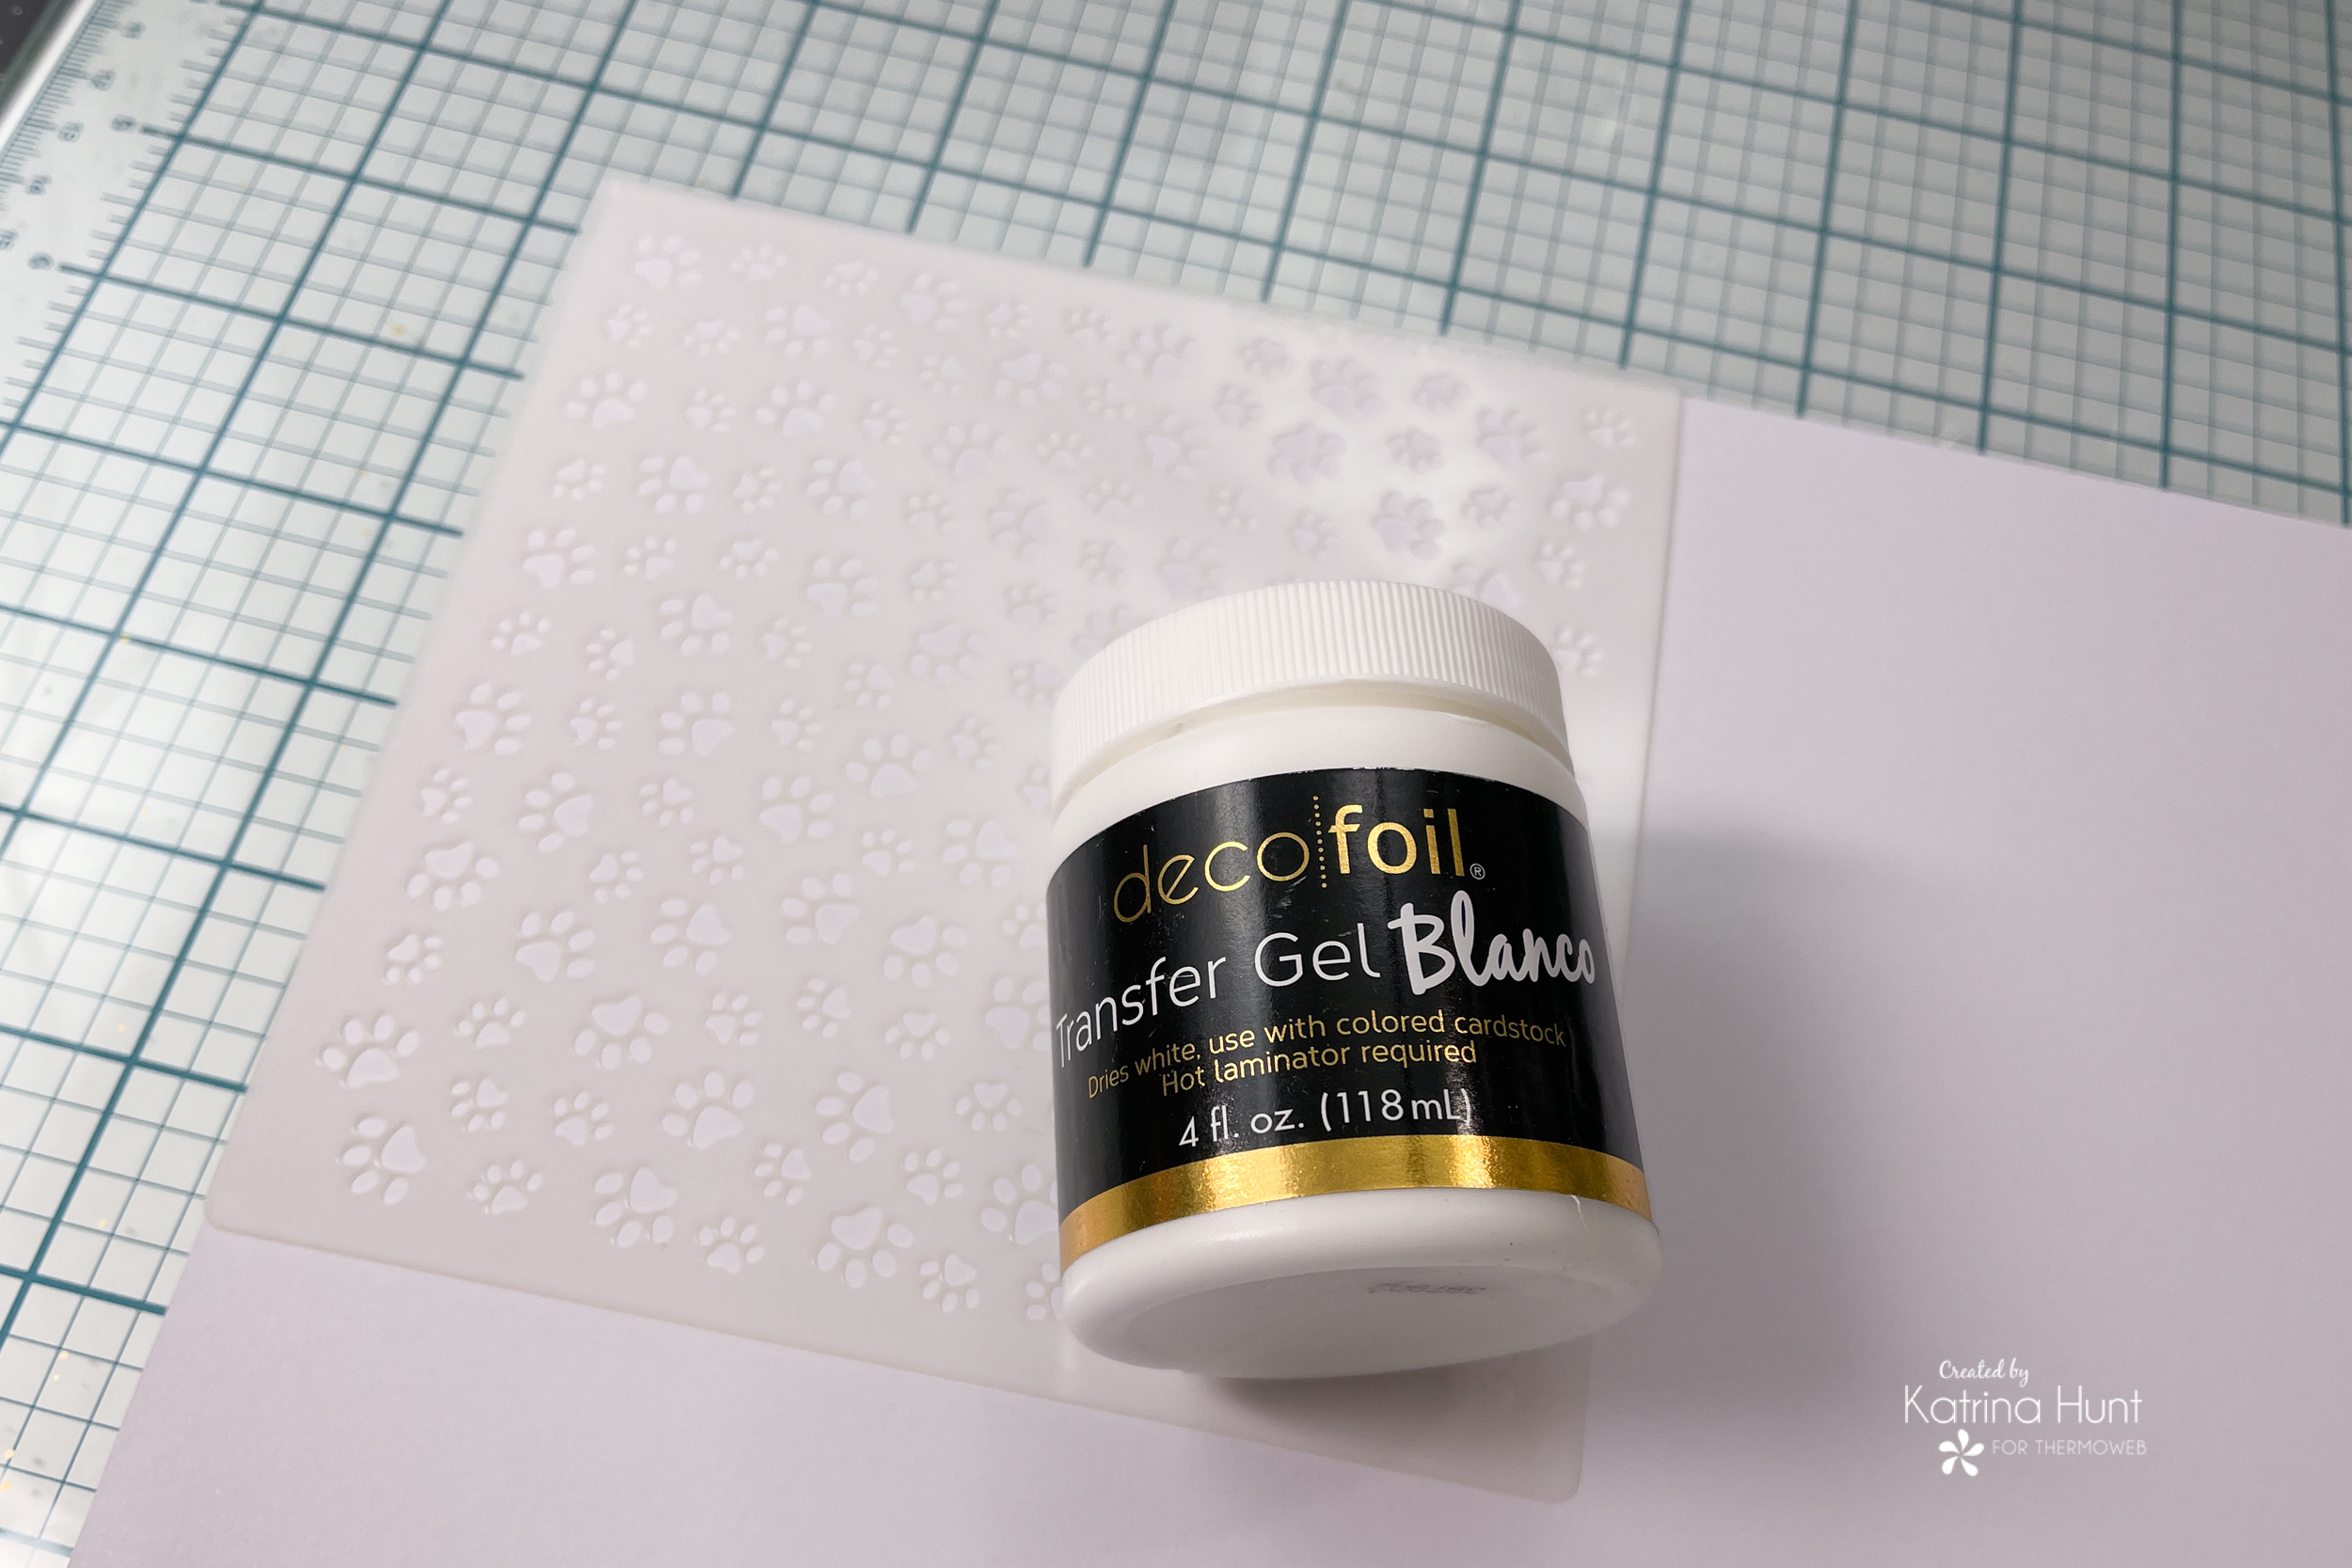 I created a hinge with my Pixie Tape because I wanted to be able to move my paper around to the stencil area. This would keep everything a little cleaner and more defined than holding the stencil, bending it, etc. Once one area was done, I carefully lifted the stencil and then positioned the next area underneath, then laid the stencil back down. This worked well.
 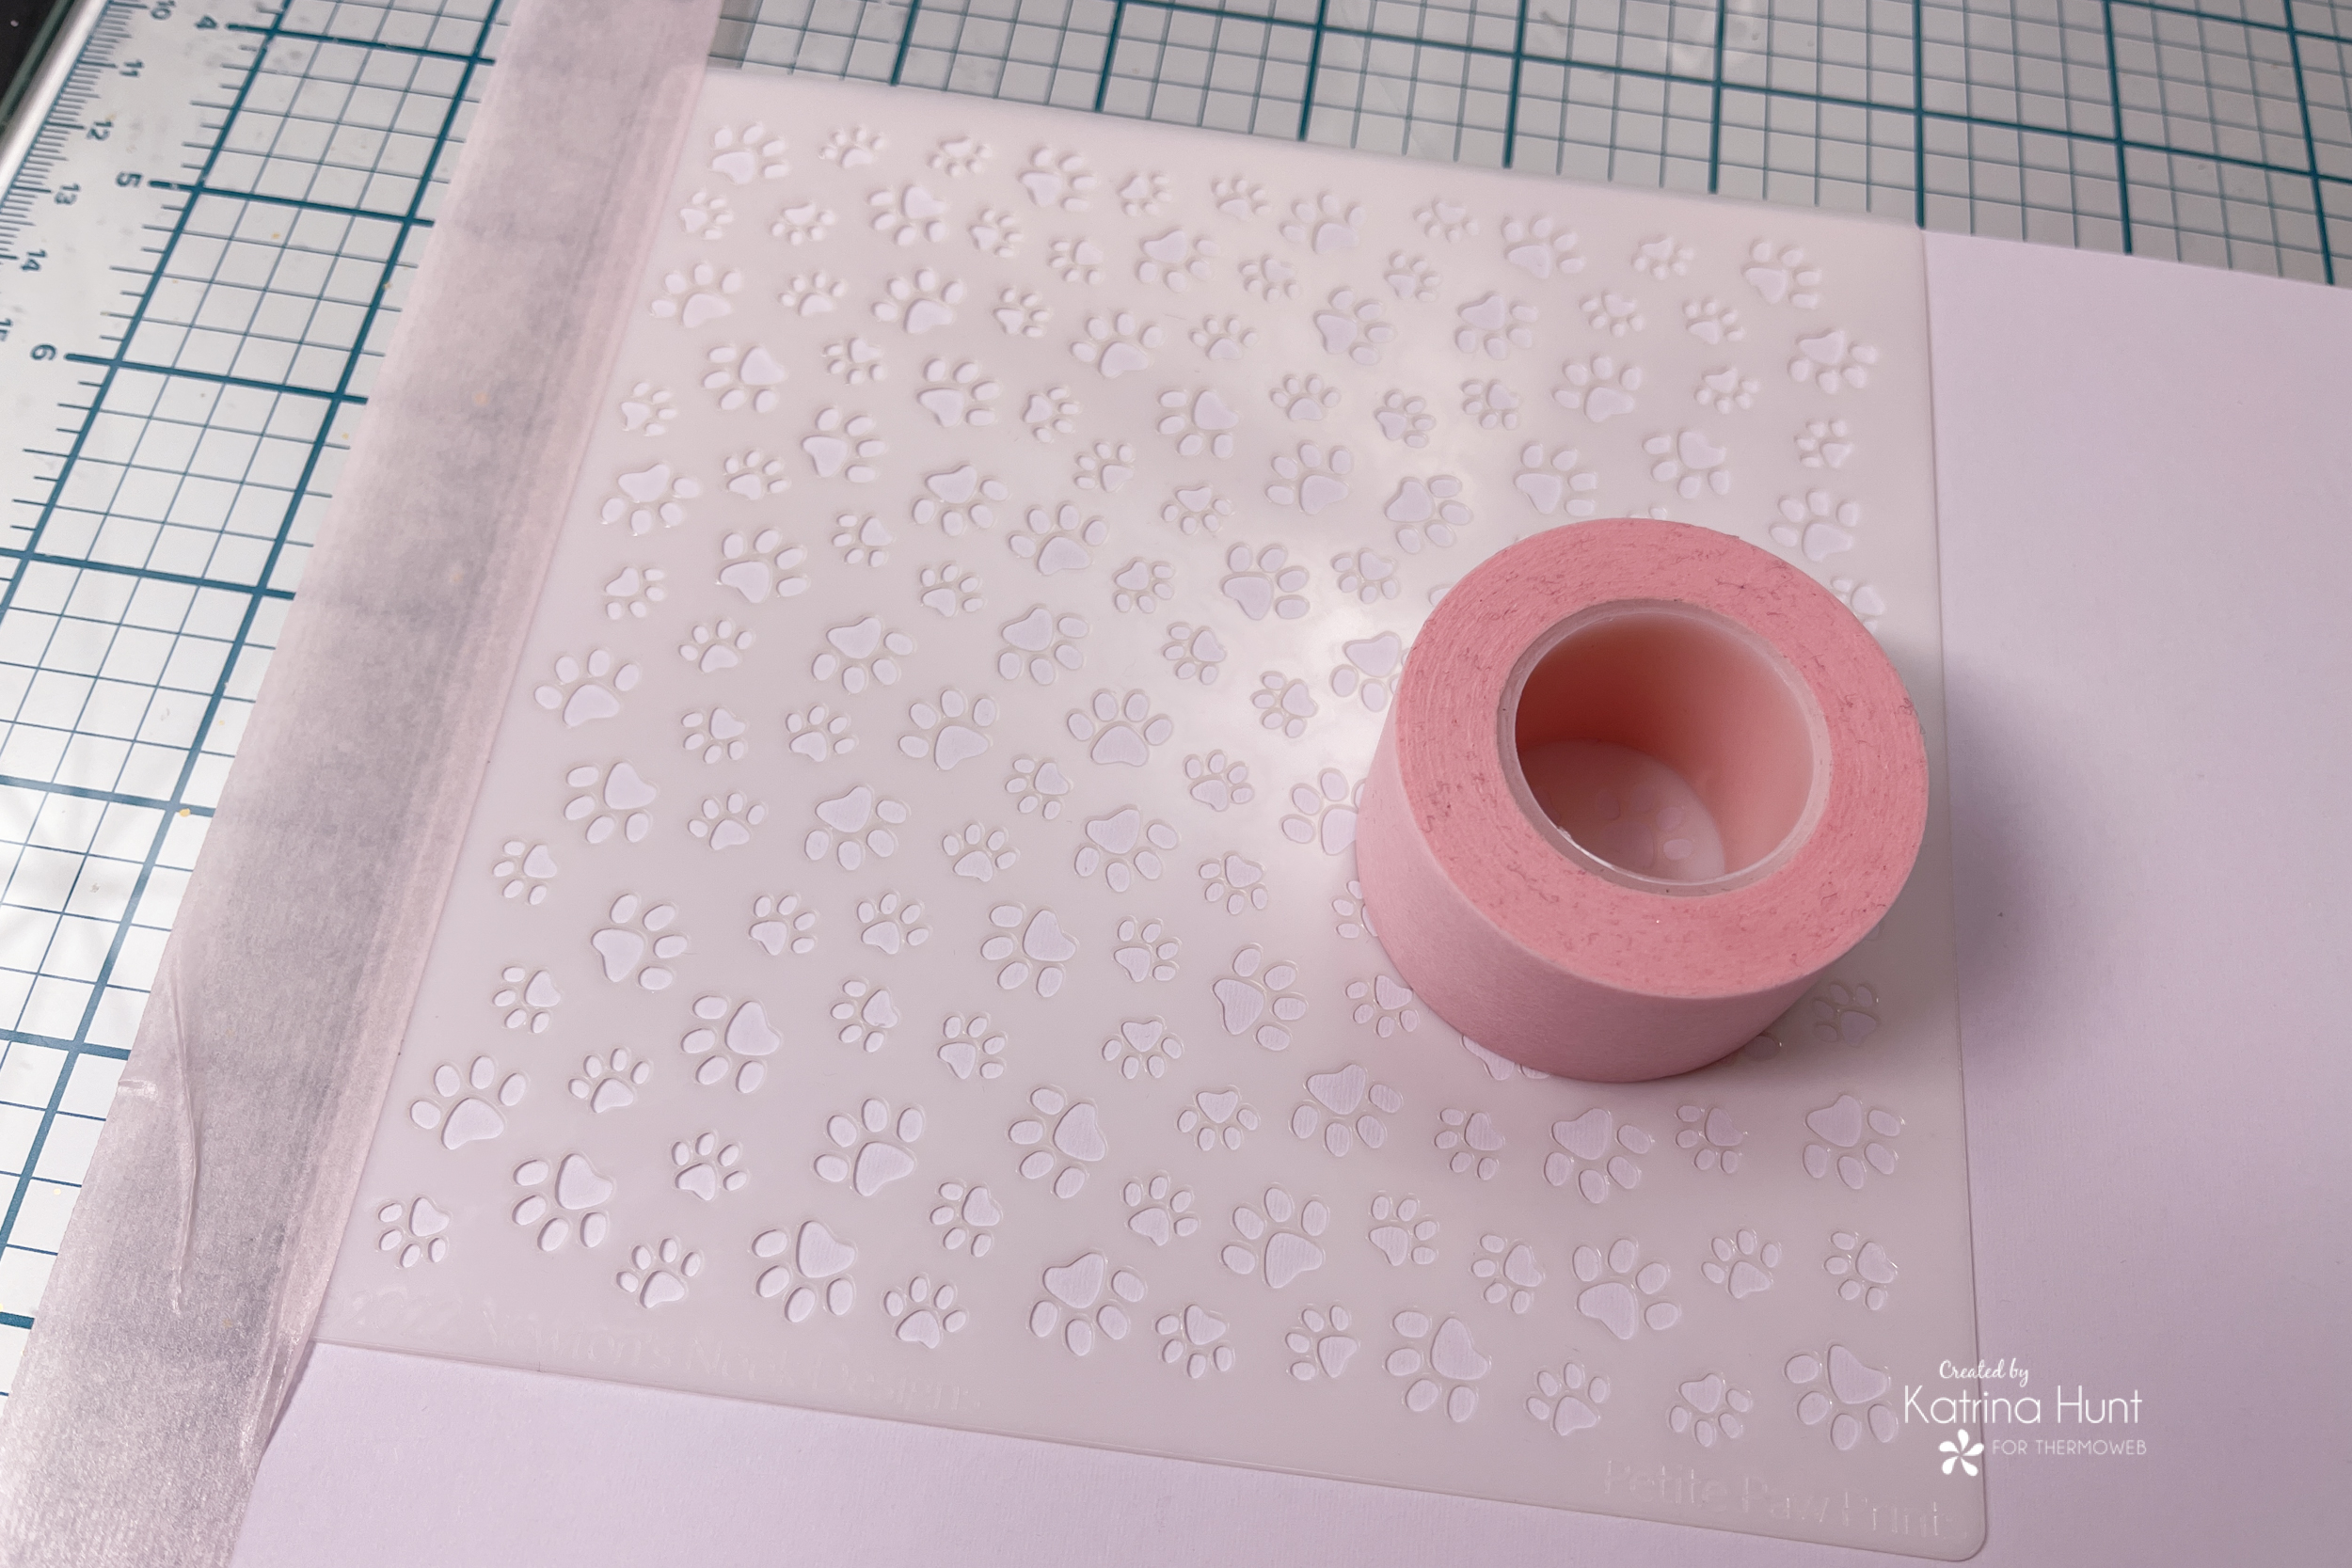 I did not do the entire page, because I knew I would be covering up the middle area. So, I basically arched the corners, to save product leaving the middle empty.
 When using stamps on layouts, I like to have a plan of action. So while the background piece was drying, I went to work. I figured out which stamps I would probably use from the two stamps I had picked out and then did a mock placement of my layout. This will give you a good idea of sizing and where to place them.
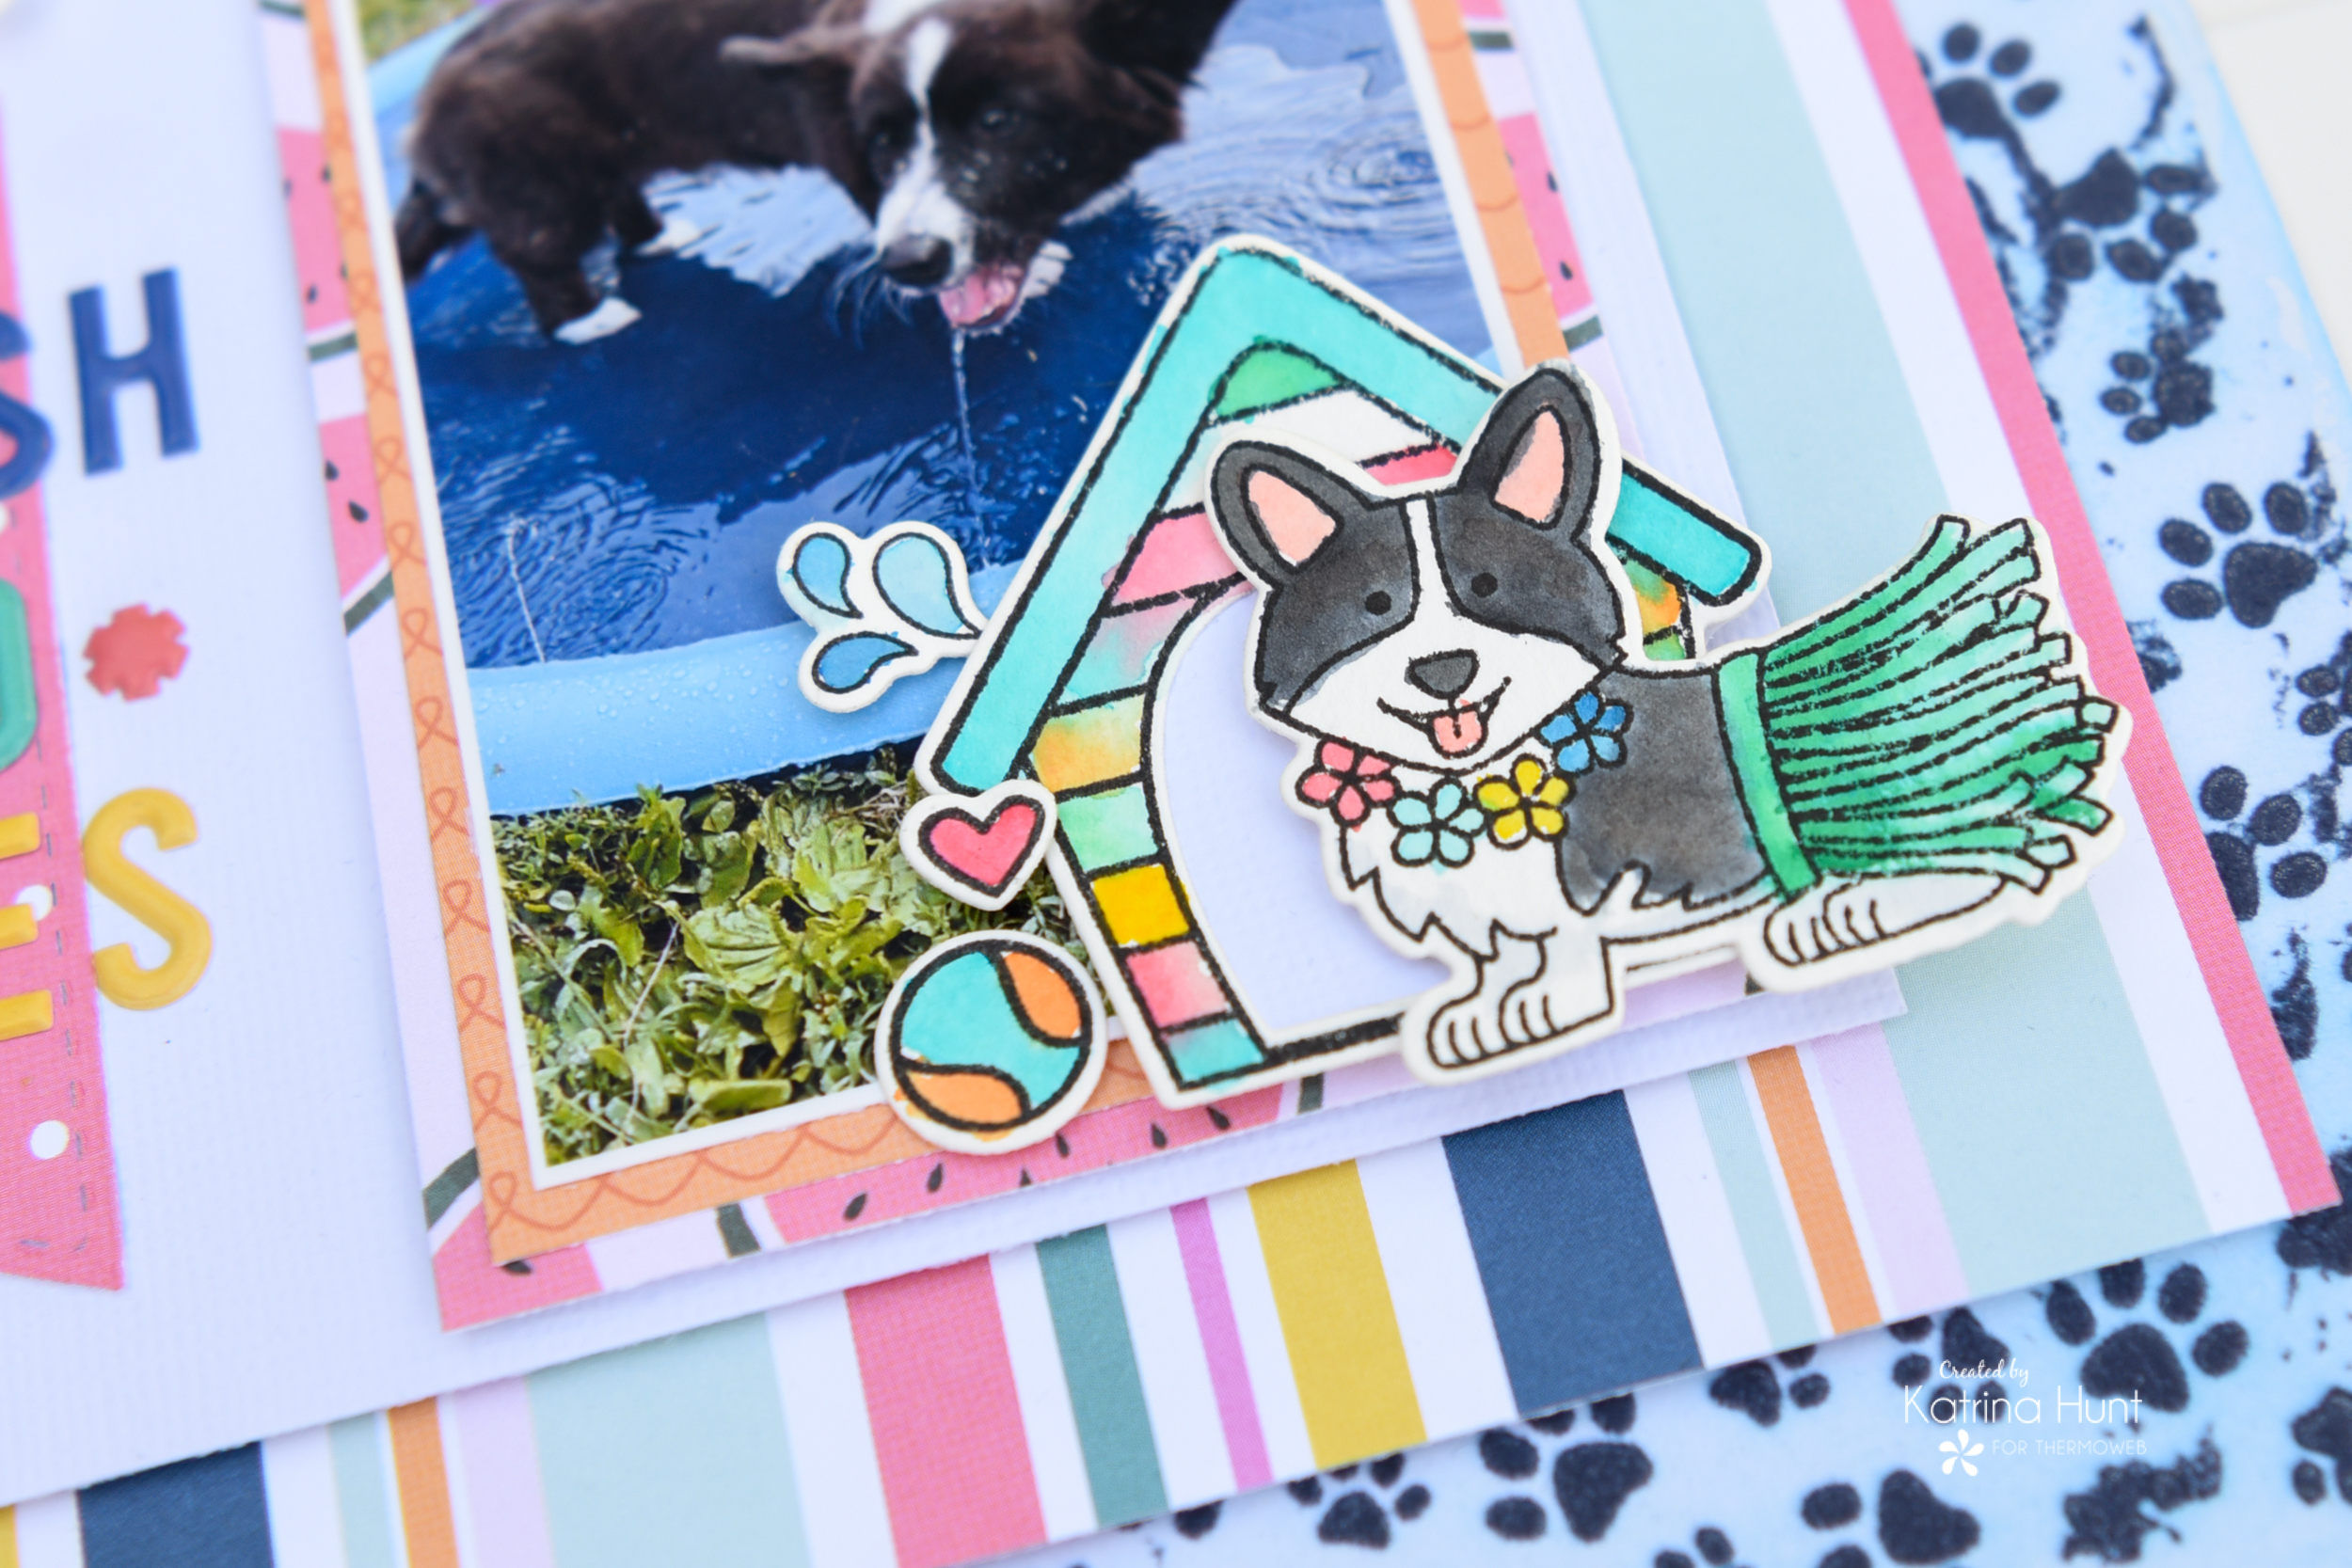
 Once I had that figured out, I went to work stamping and coloring. I stamped with Gina K Amalgam Ink in Black and colored with Karin Brush Markers Pro. I used watercolor paper to stamp and color on, since the markers are like watercolor markers. I always stamp images a few times, because I am not the best at coloring! But I try! And these images were perfect since I have corgis. I have the Cardigan Corgi variety, but the stamps are Pembroke Corgis. It's ok though, I was just excited to have corgi stamps!
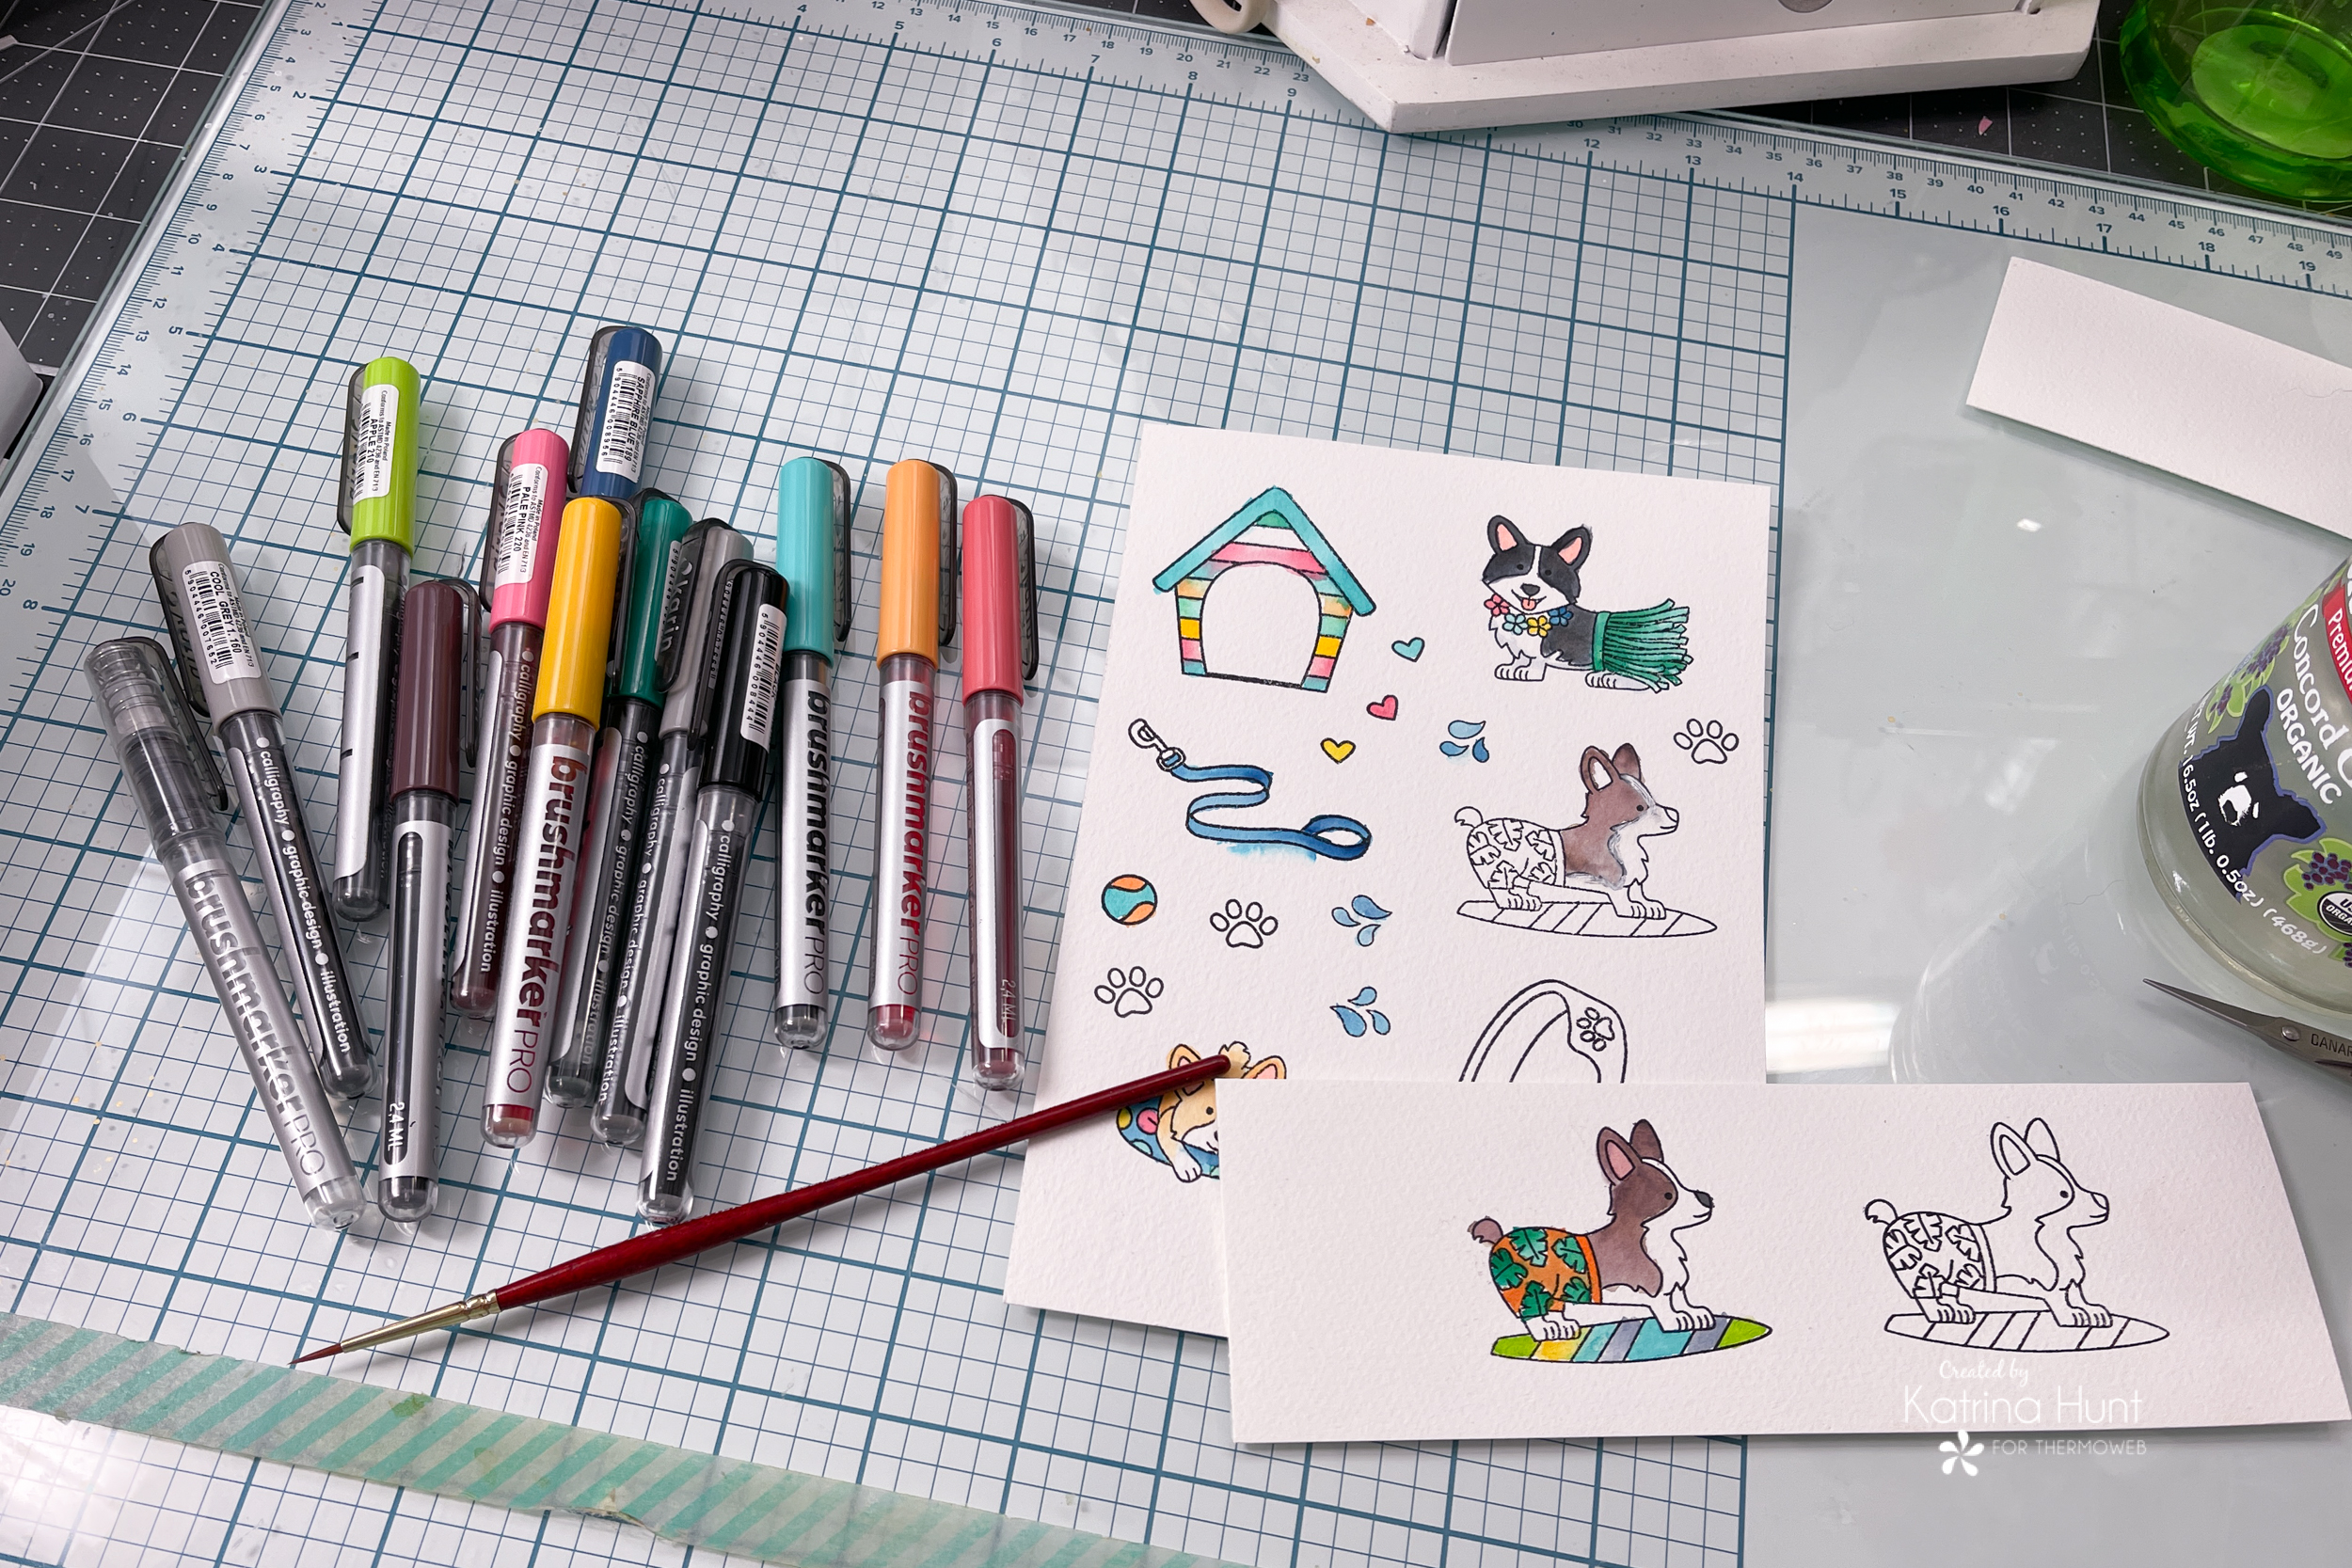 Once I had everything colored and die cut, I went to work on the center section of my layout that would be placed in the middle of my paw print page that was drying. I cut my striped paper 10.5 inches square and then my white cardstock was 9 inches square.
I used my foam tape in the 1/16th inch thickness. I love that it's a little thinner but will still give you dimension!
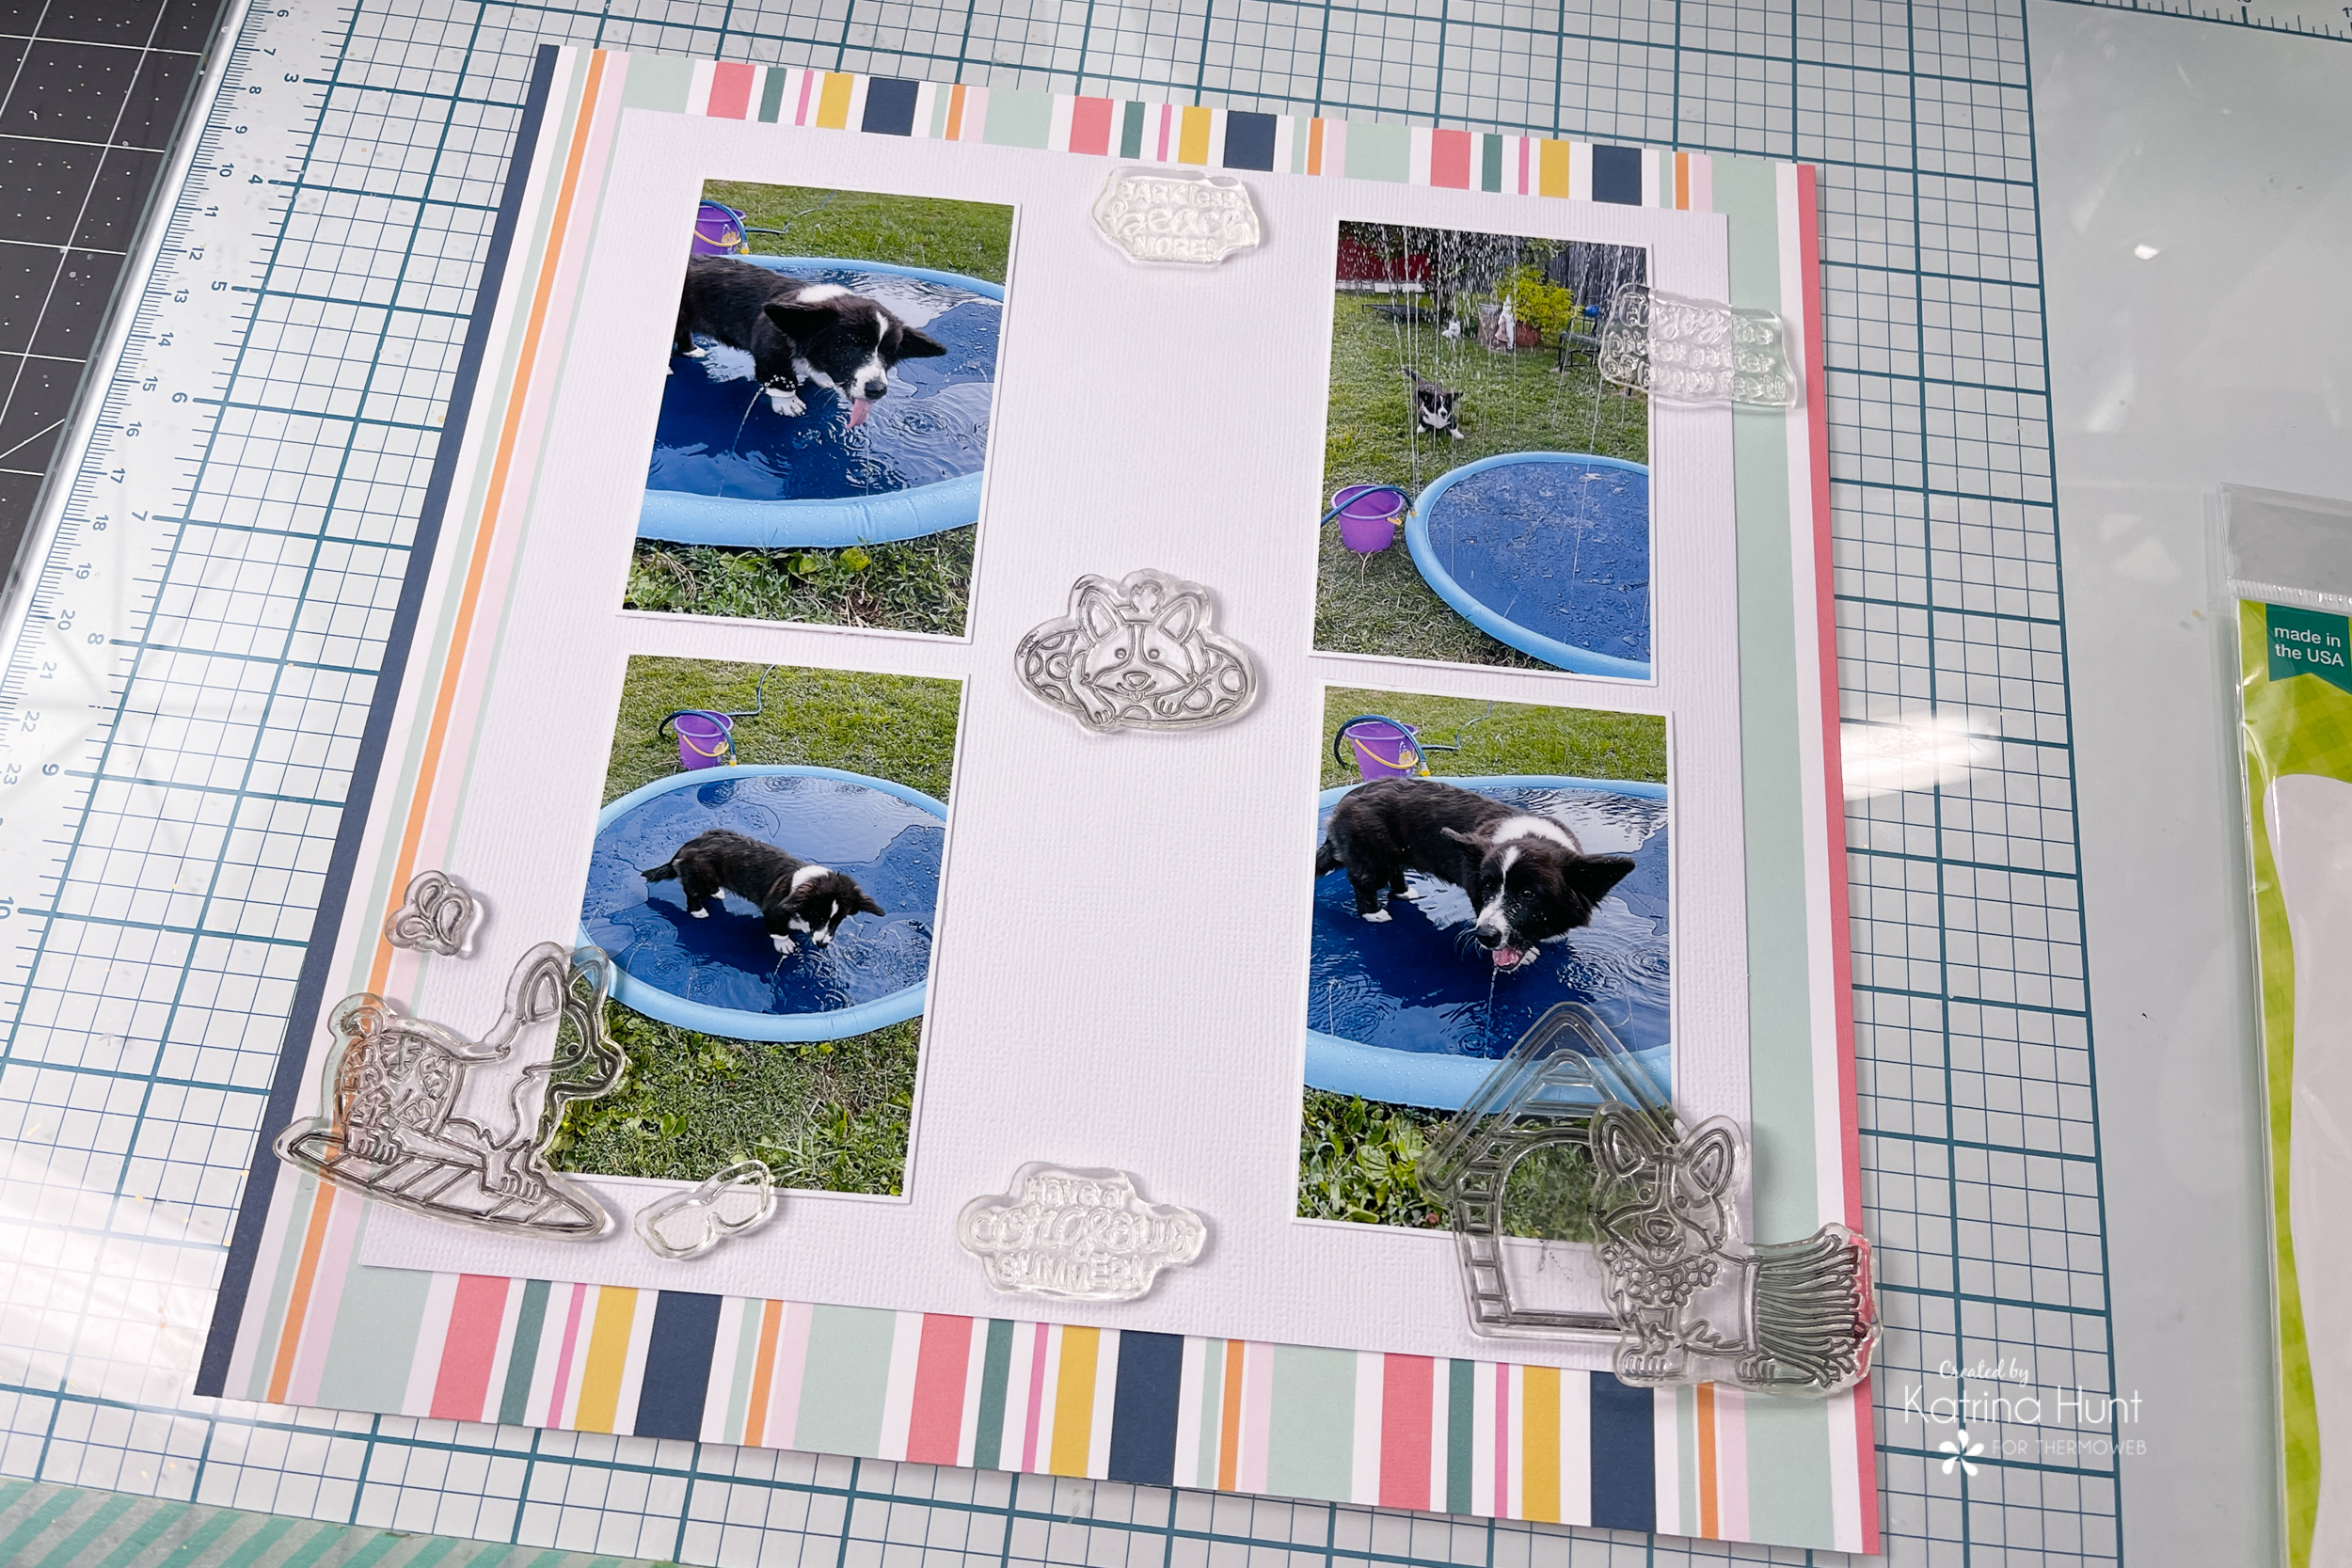
Once I had everything colored and die cut, I went to work on the center section of my layout that would be placed in the middle of my paw print page that was drying. I cut my striped paper 10.5 inches square and then my white cardstock was 9 inches square.
I used my foam tape in the 1/16th inch thickness. I love that it's a little thinner but will still give you dimension!
 I also knew I wanted to back my pictures with a couple of layers of pattern paper. I did this with my Memory Runner XL.
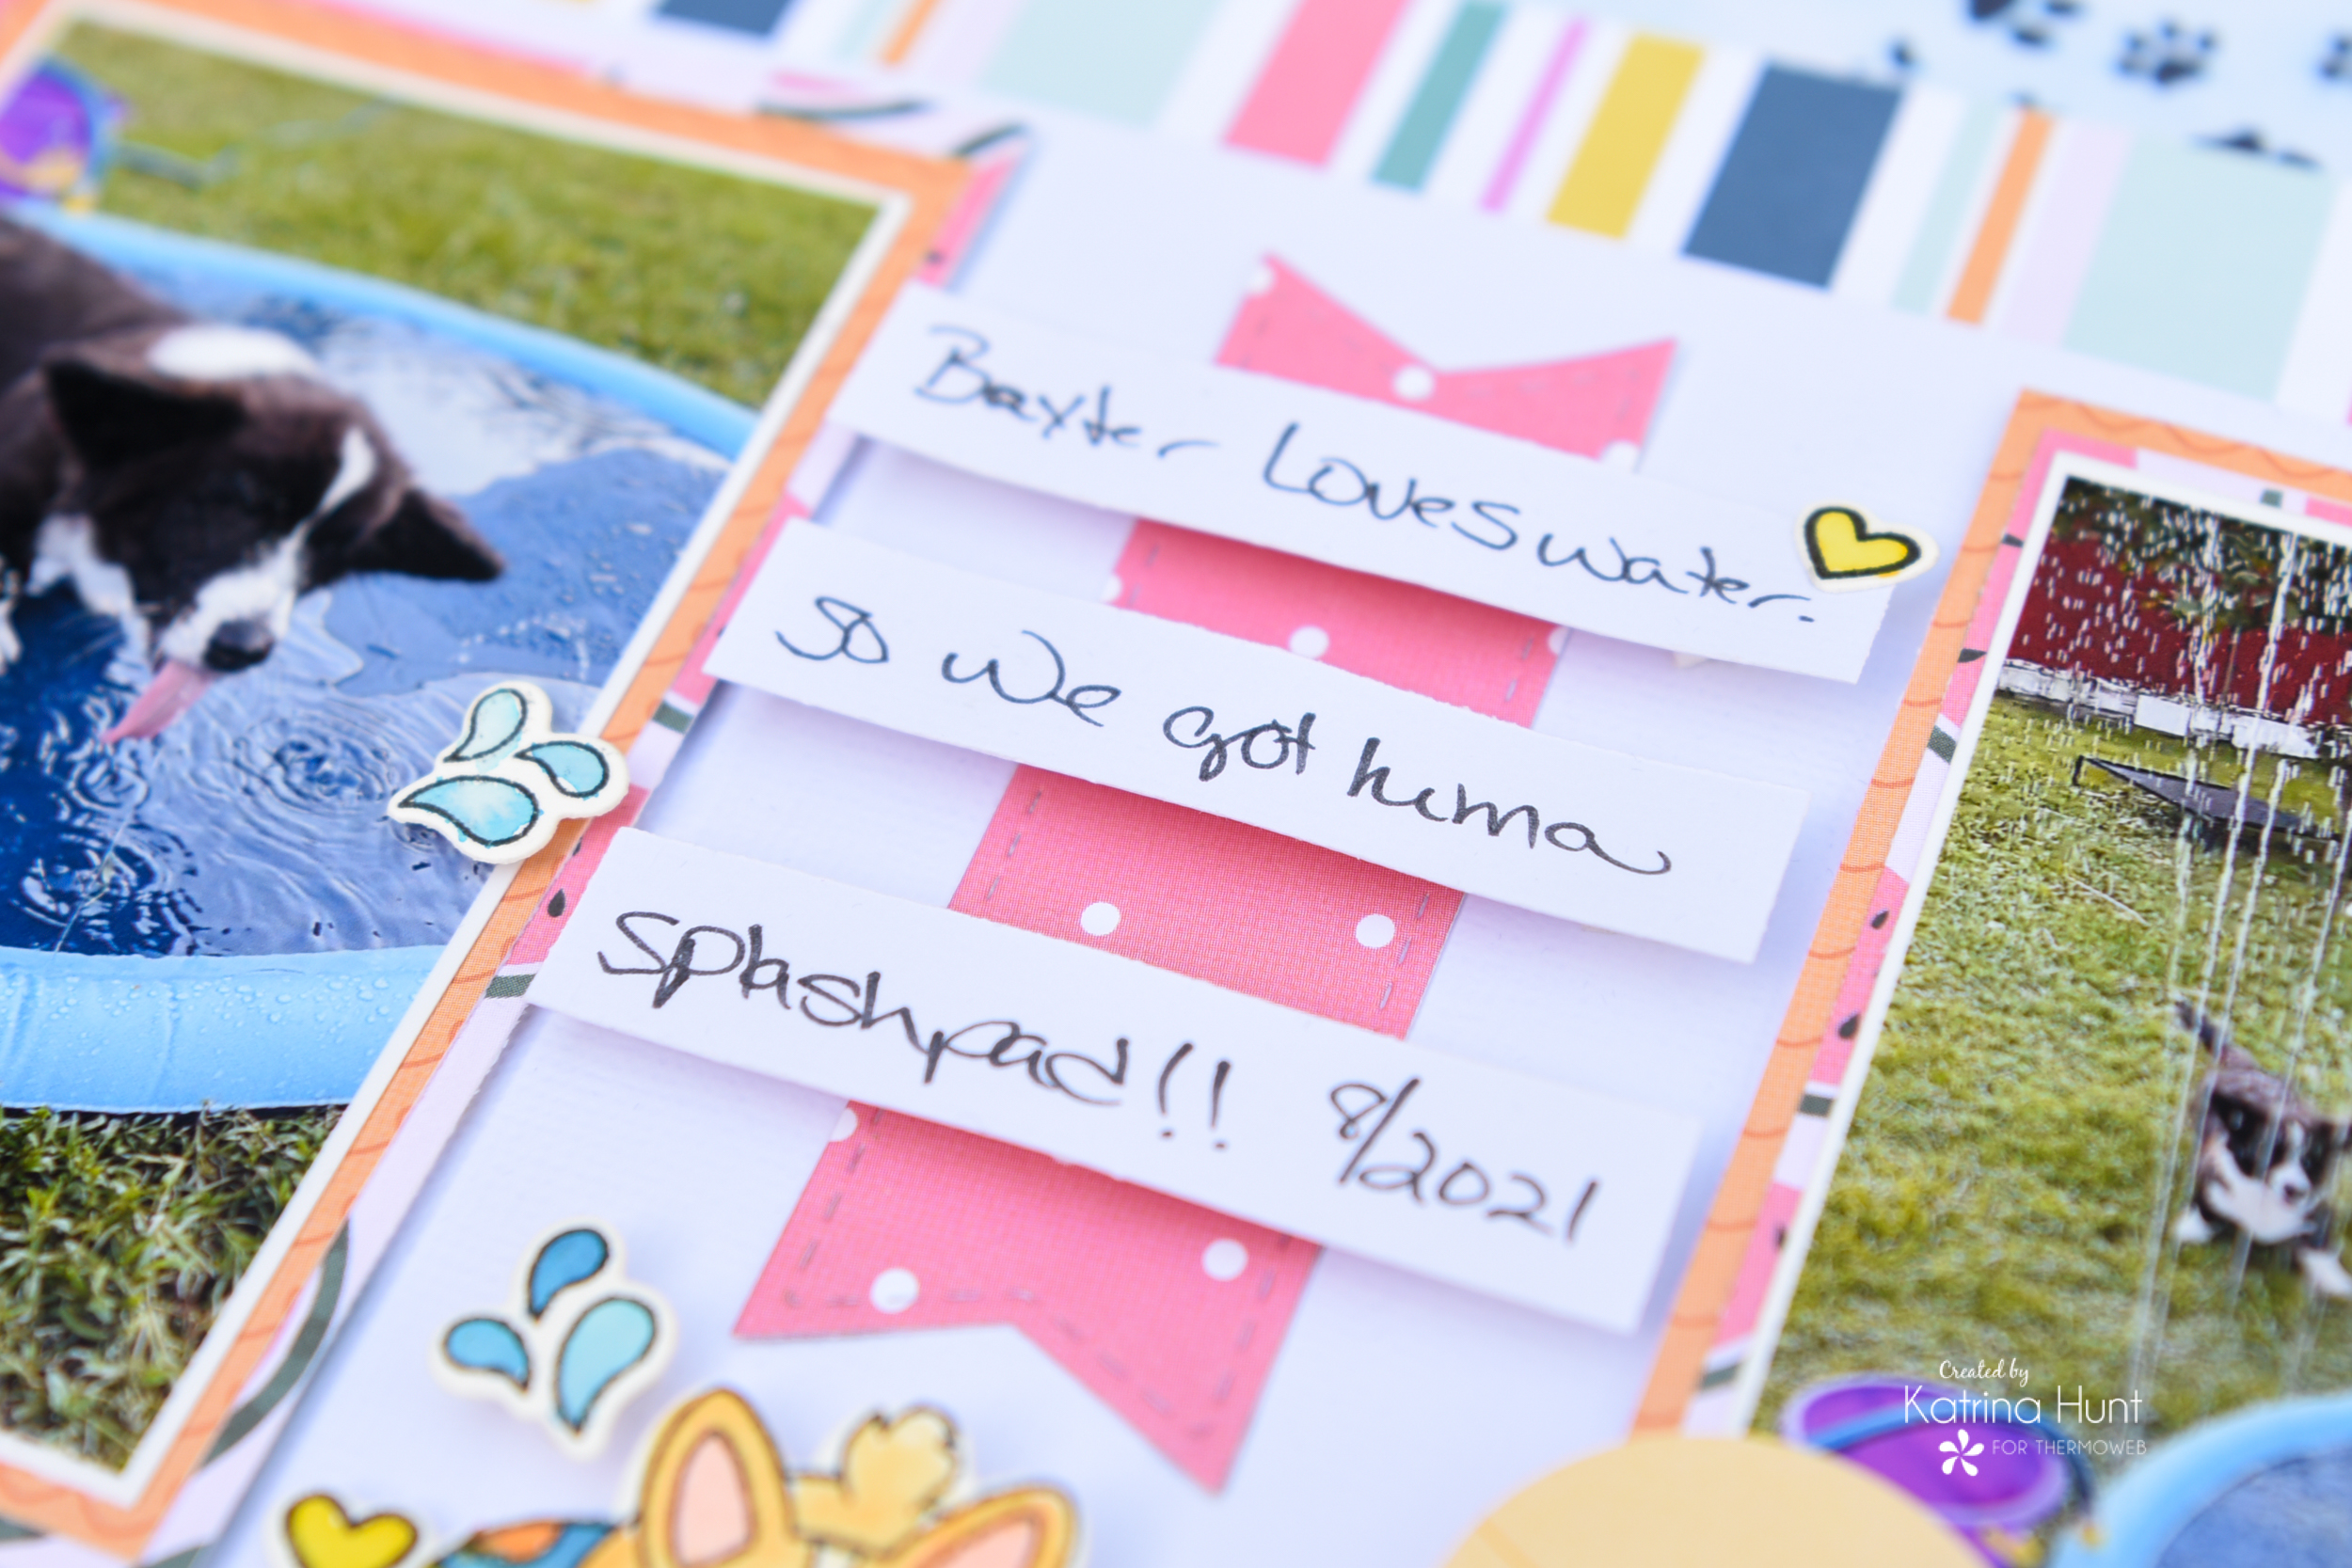
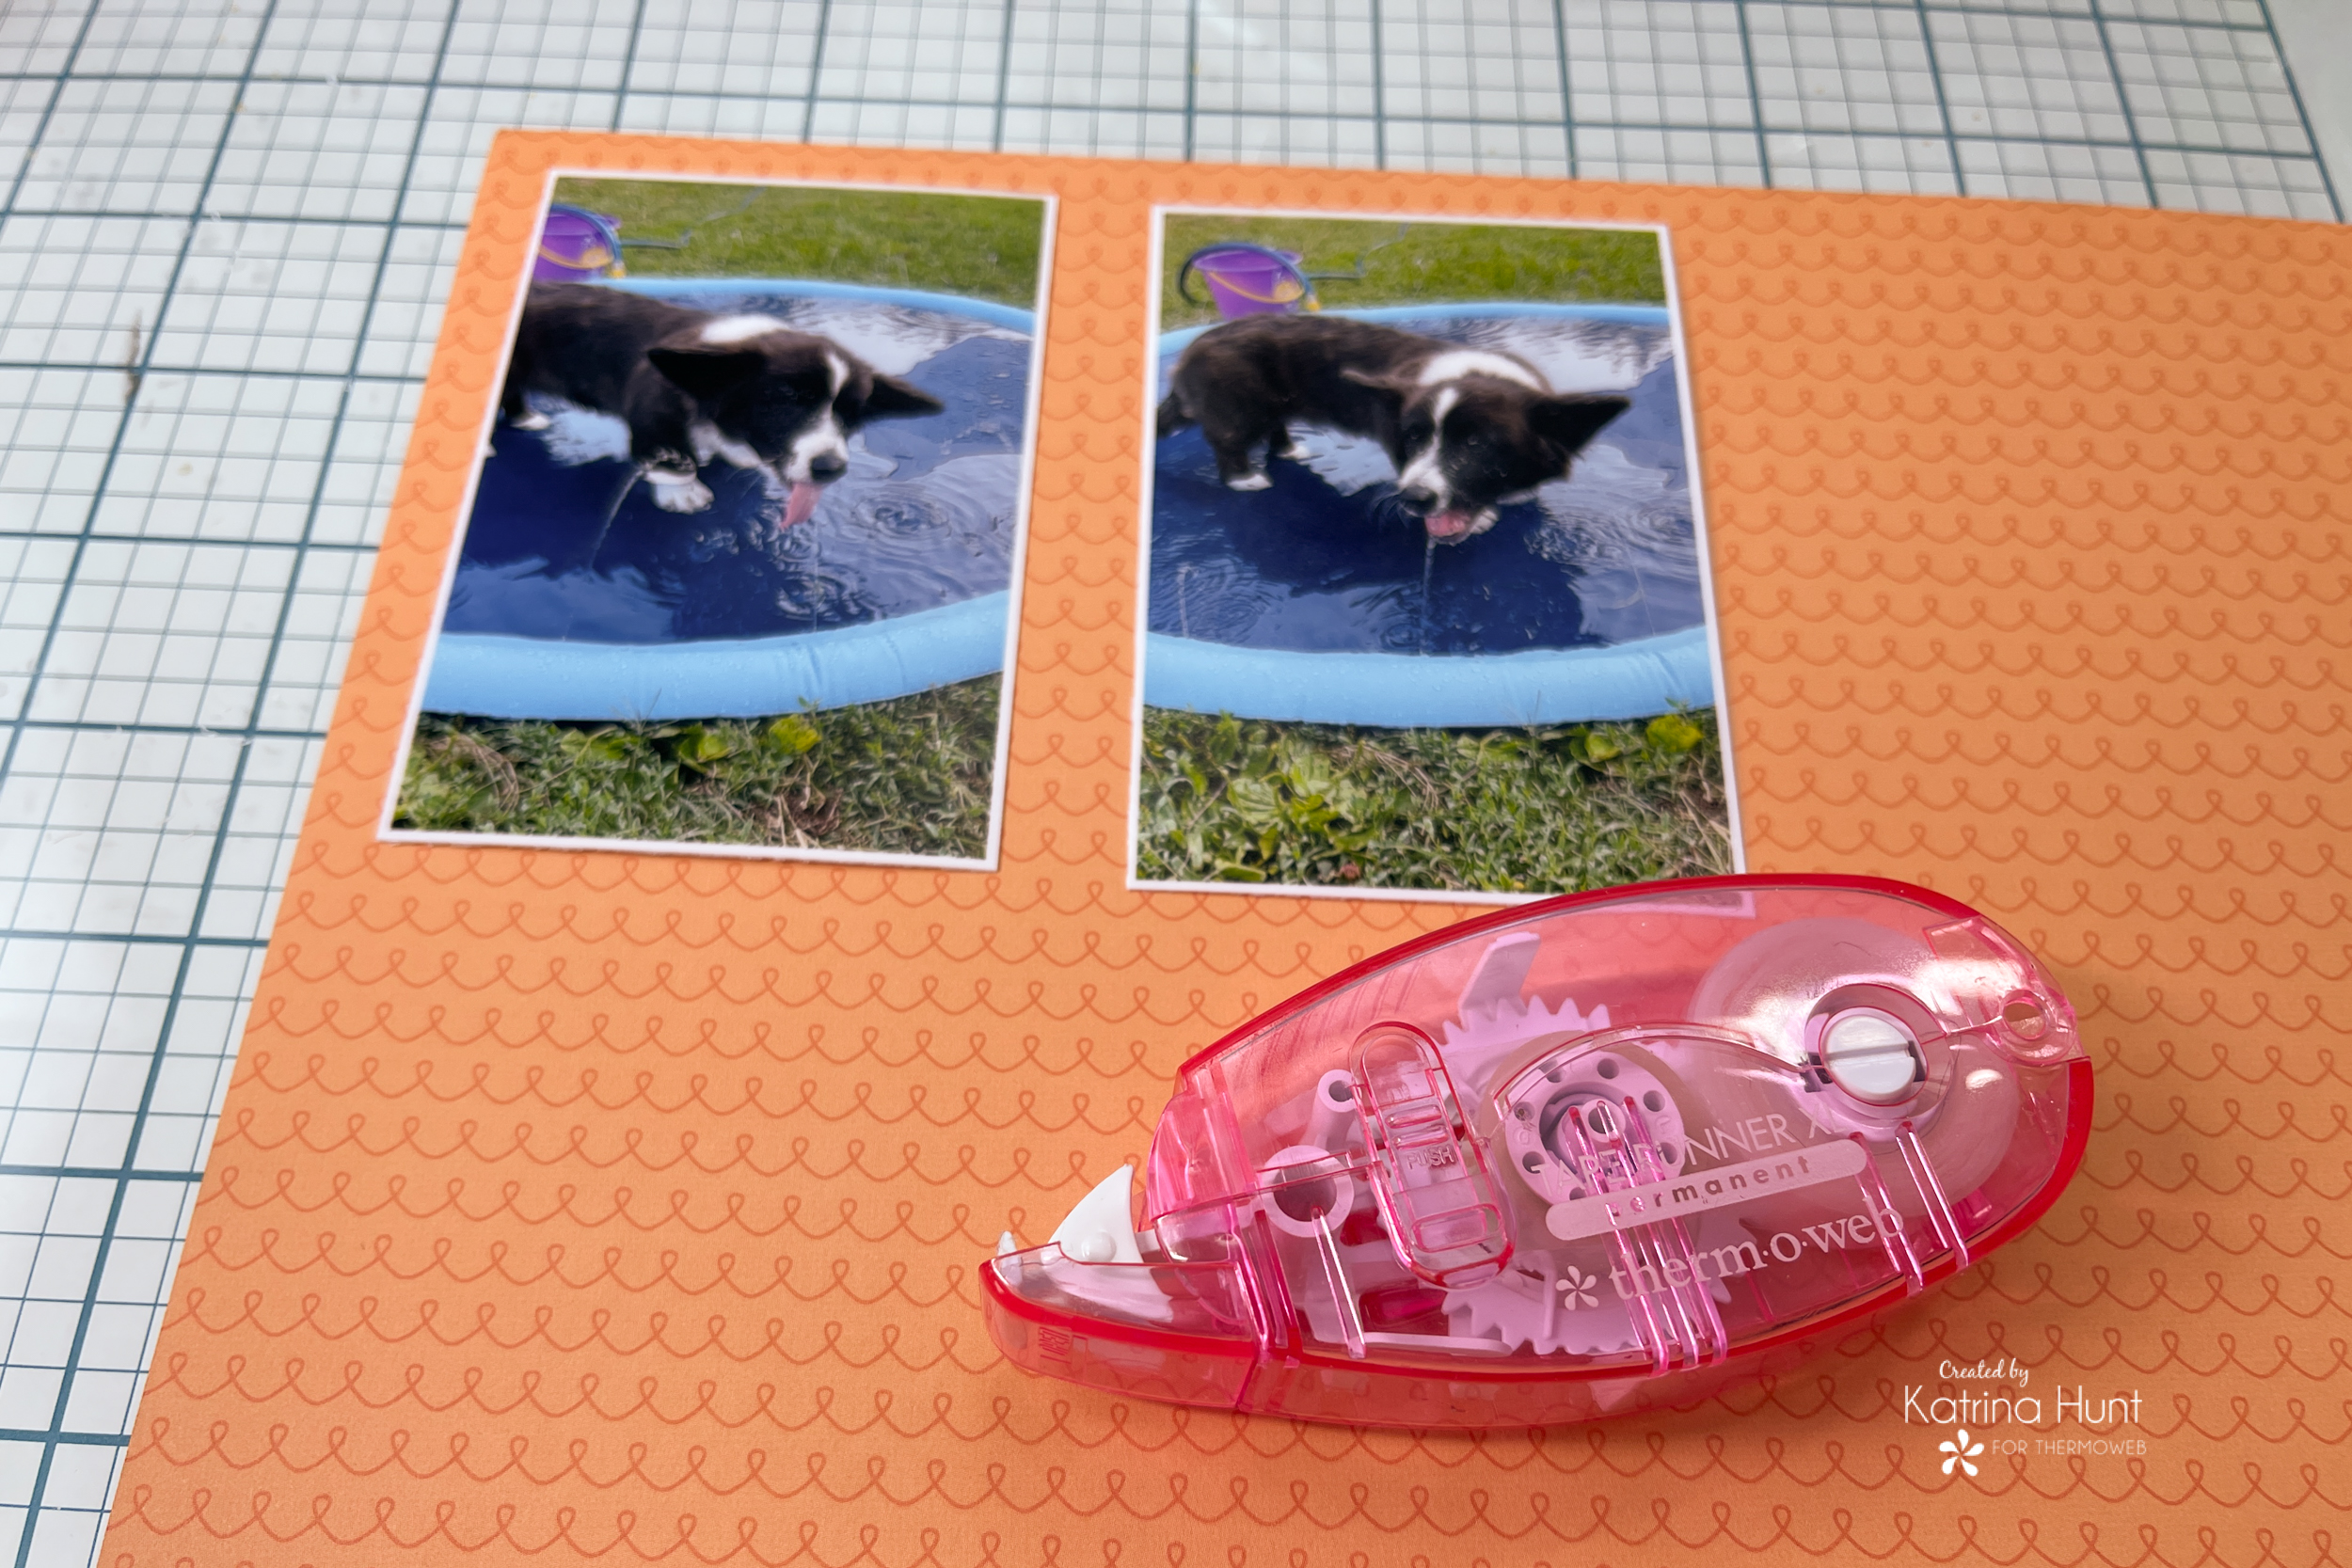 Baxter is just so dang cute lapping at the water. I used the foam tape here also to place the little water splash stamp die cut.

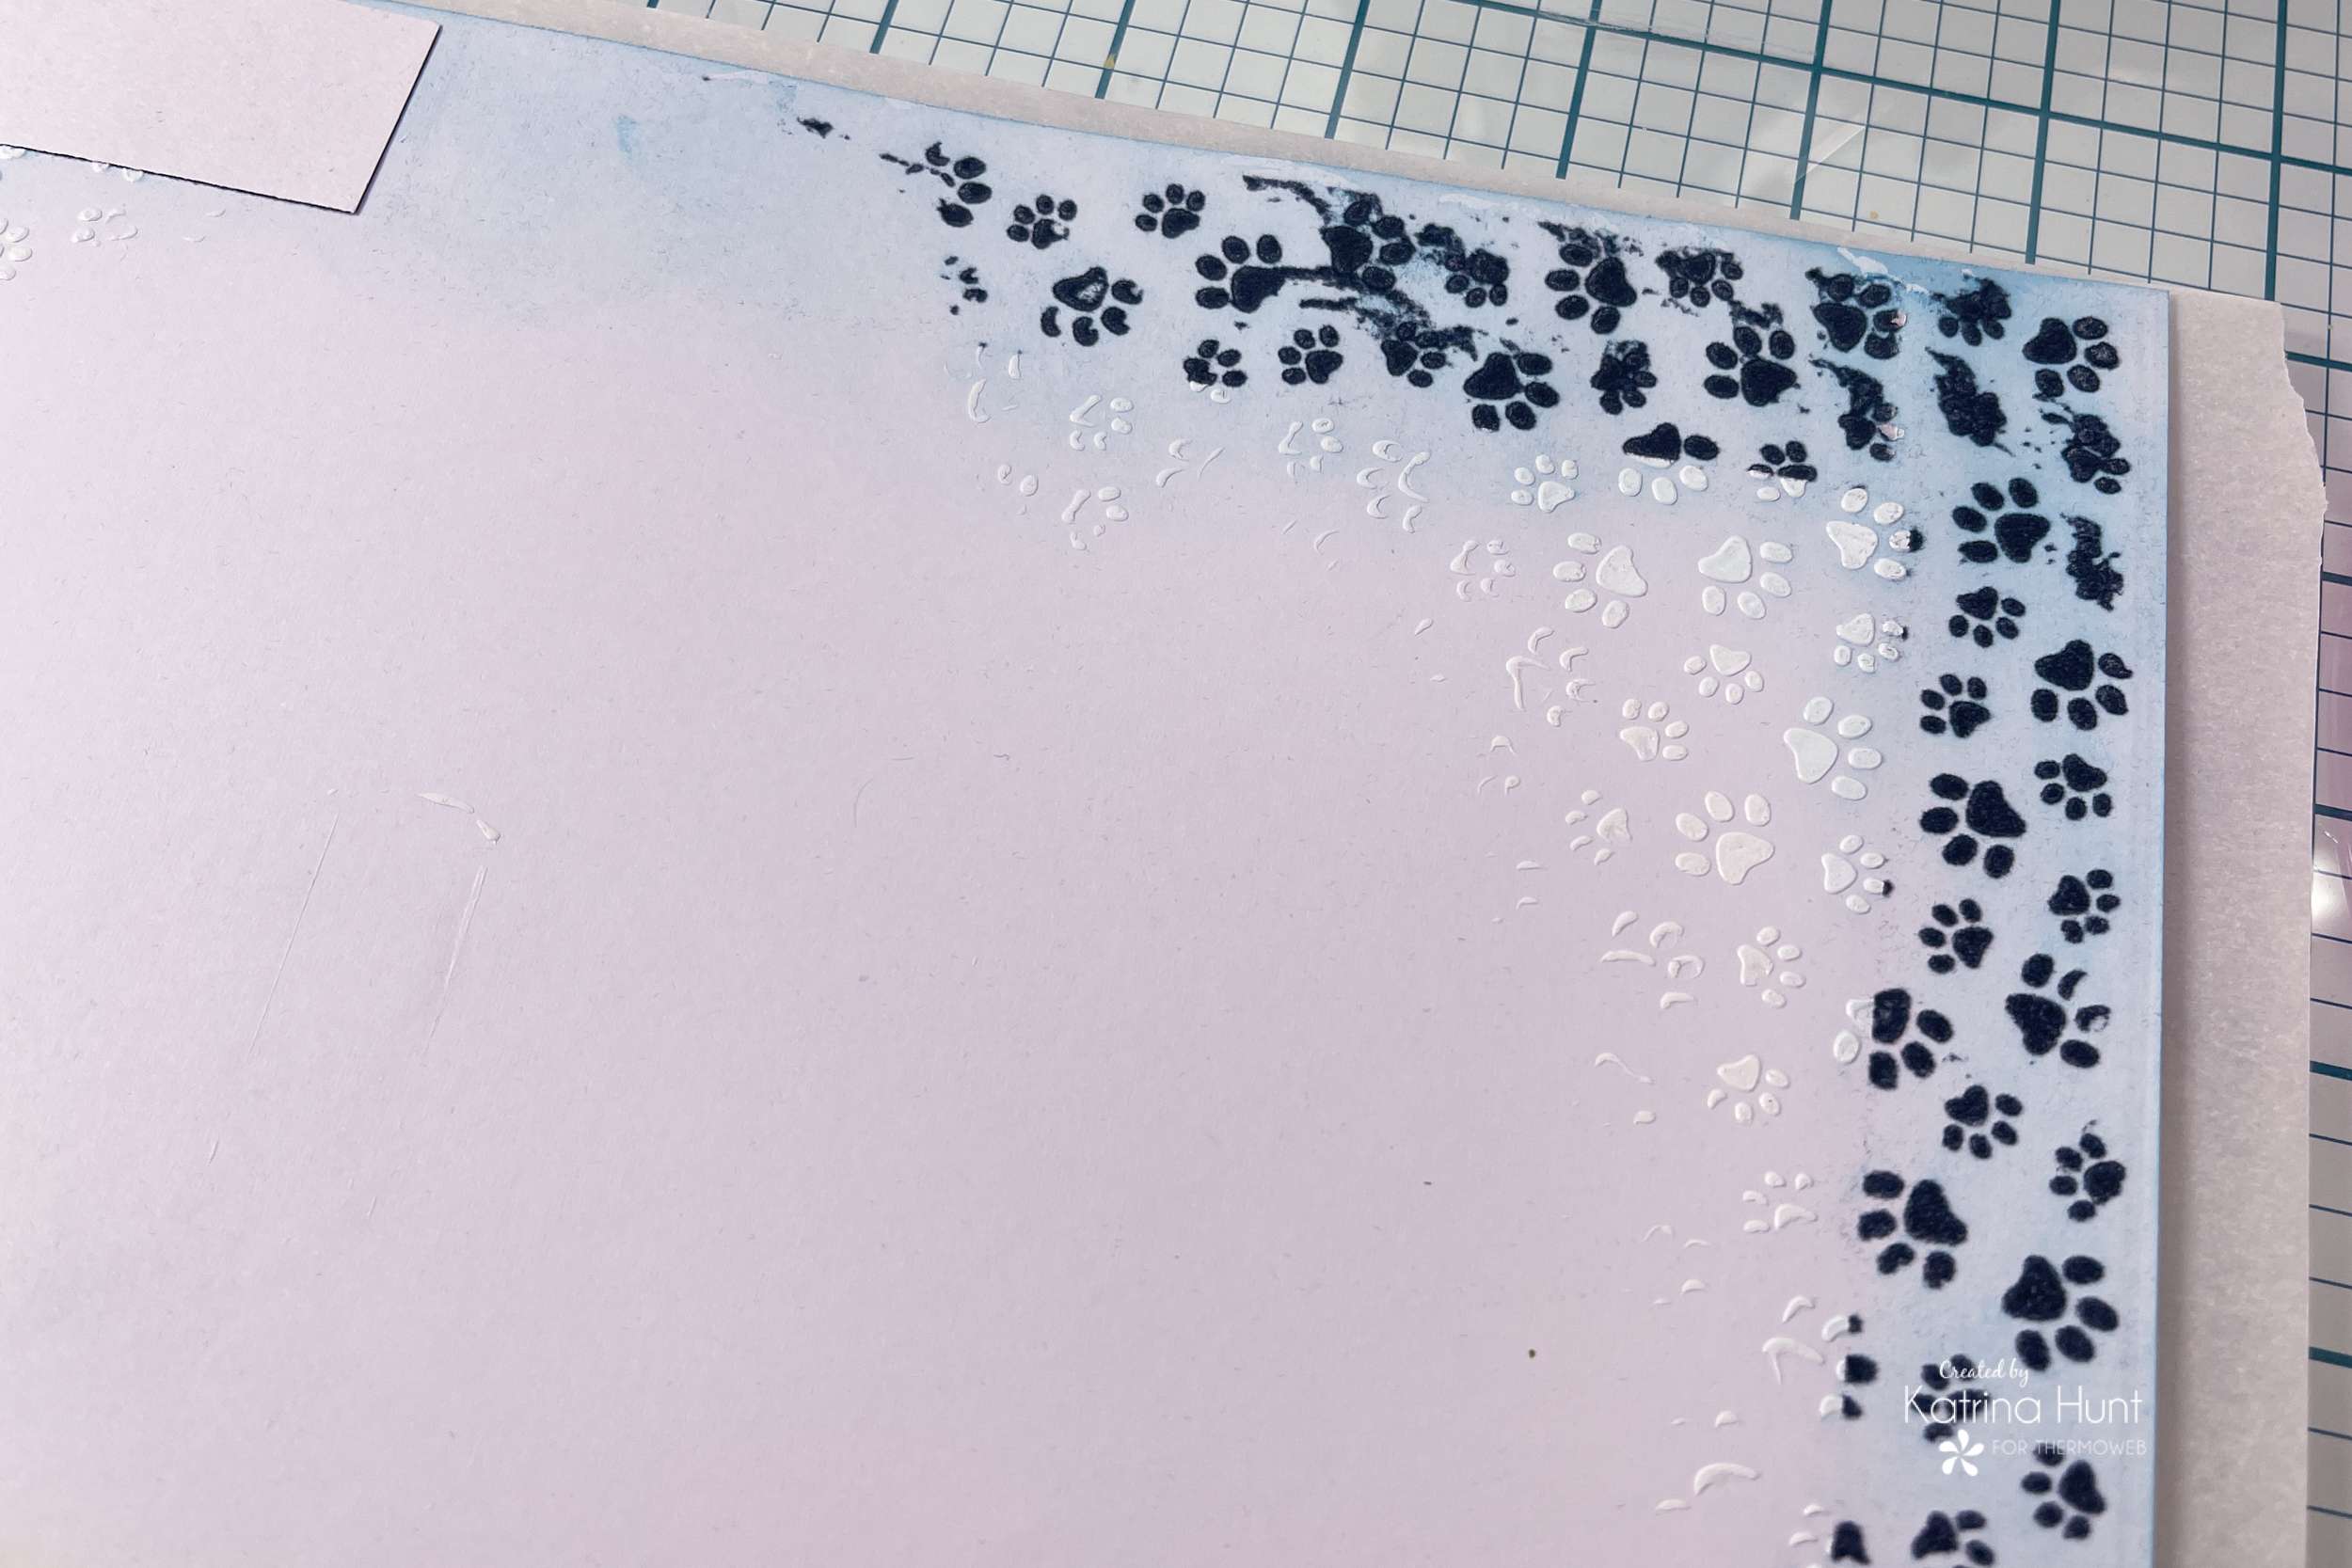
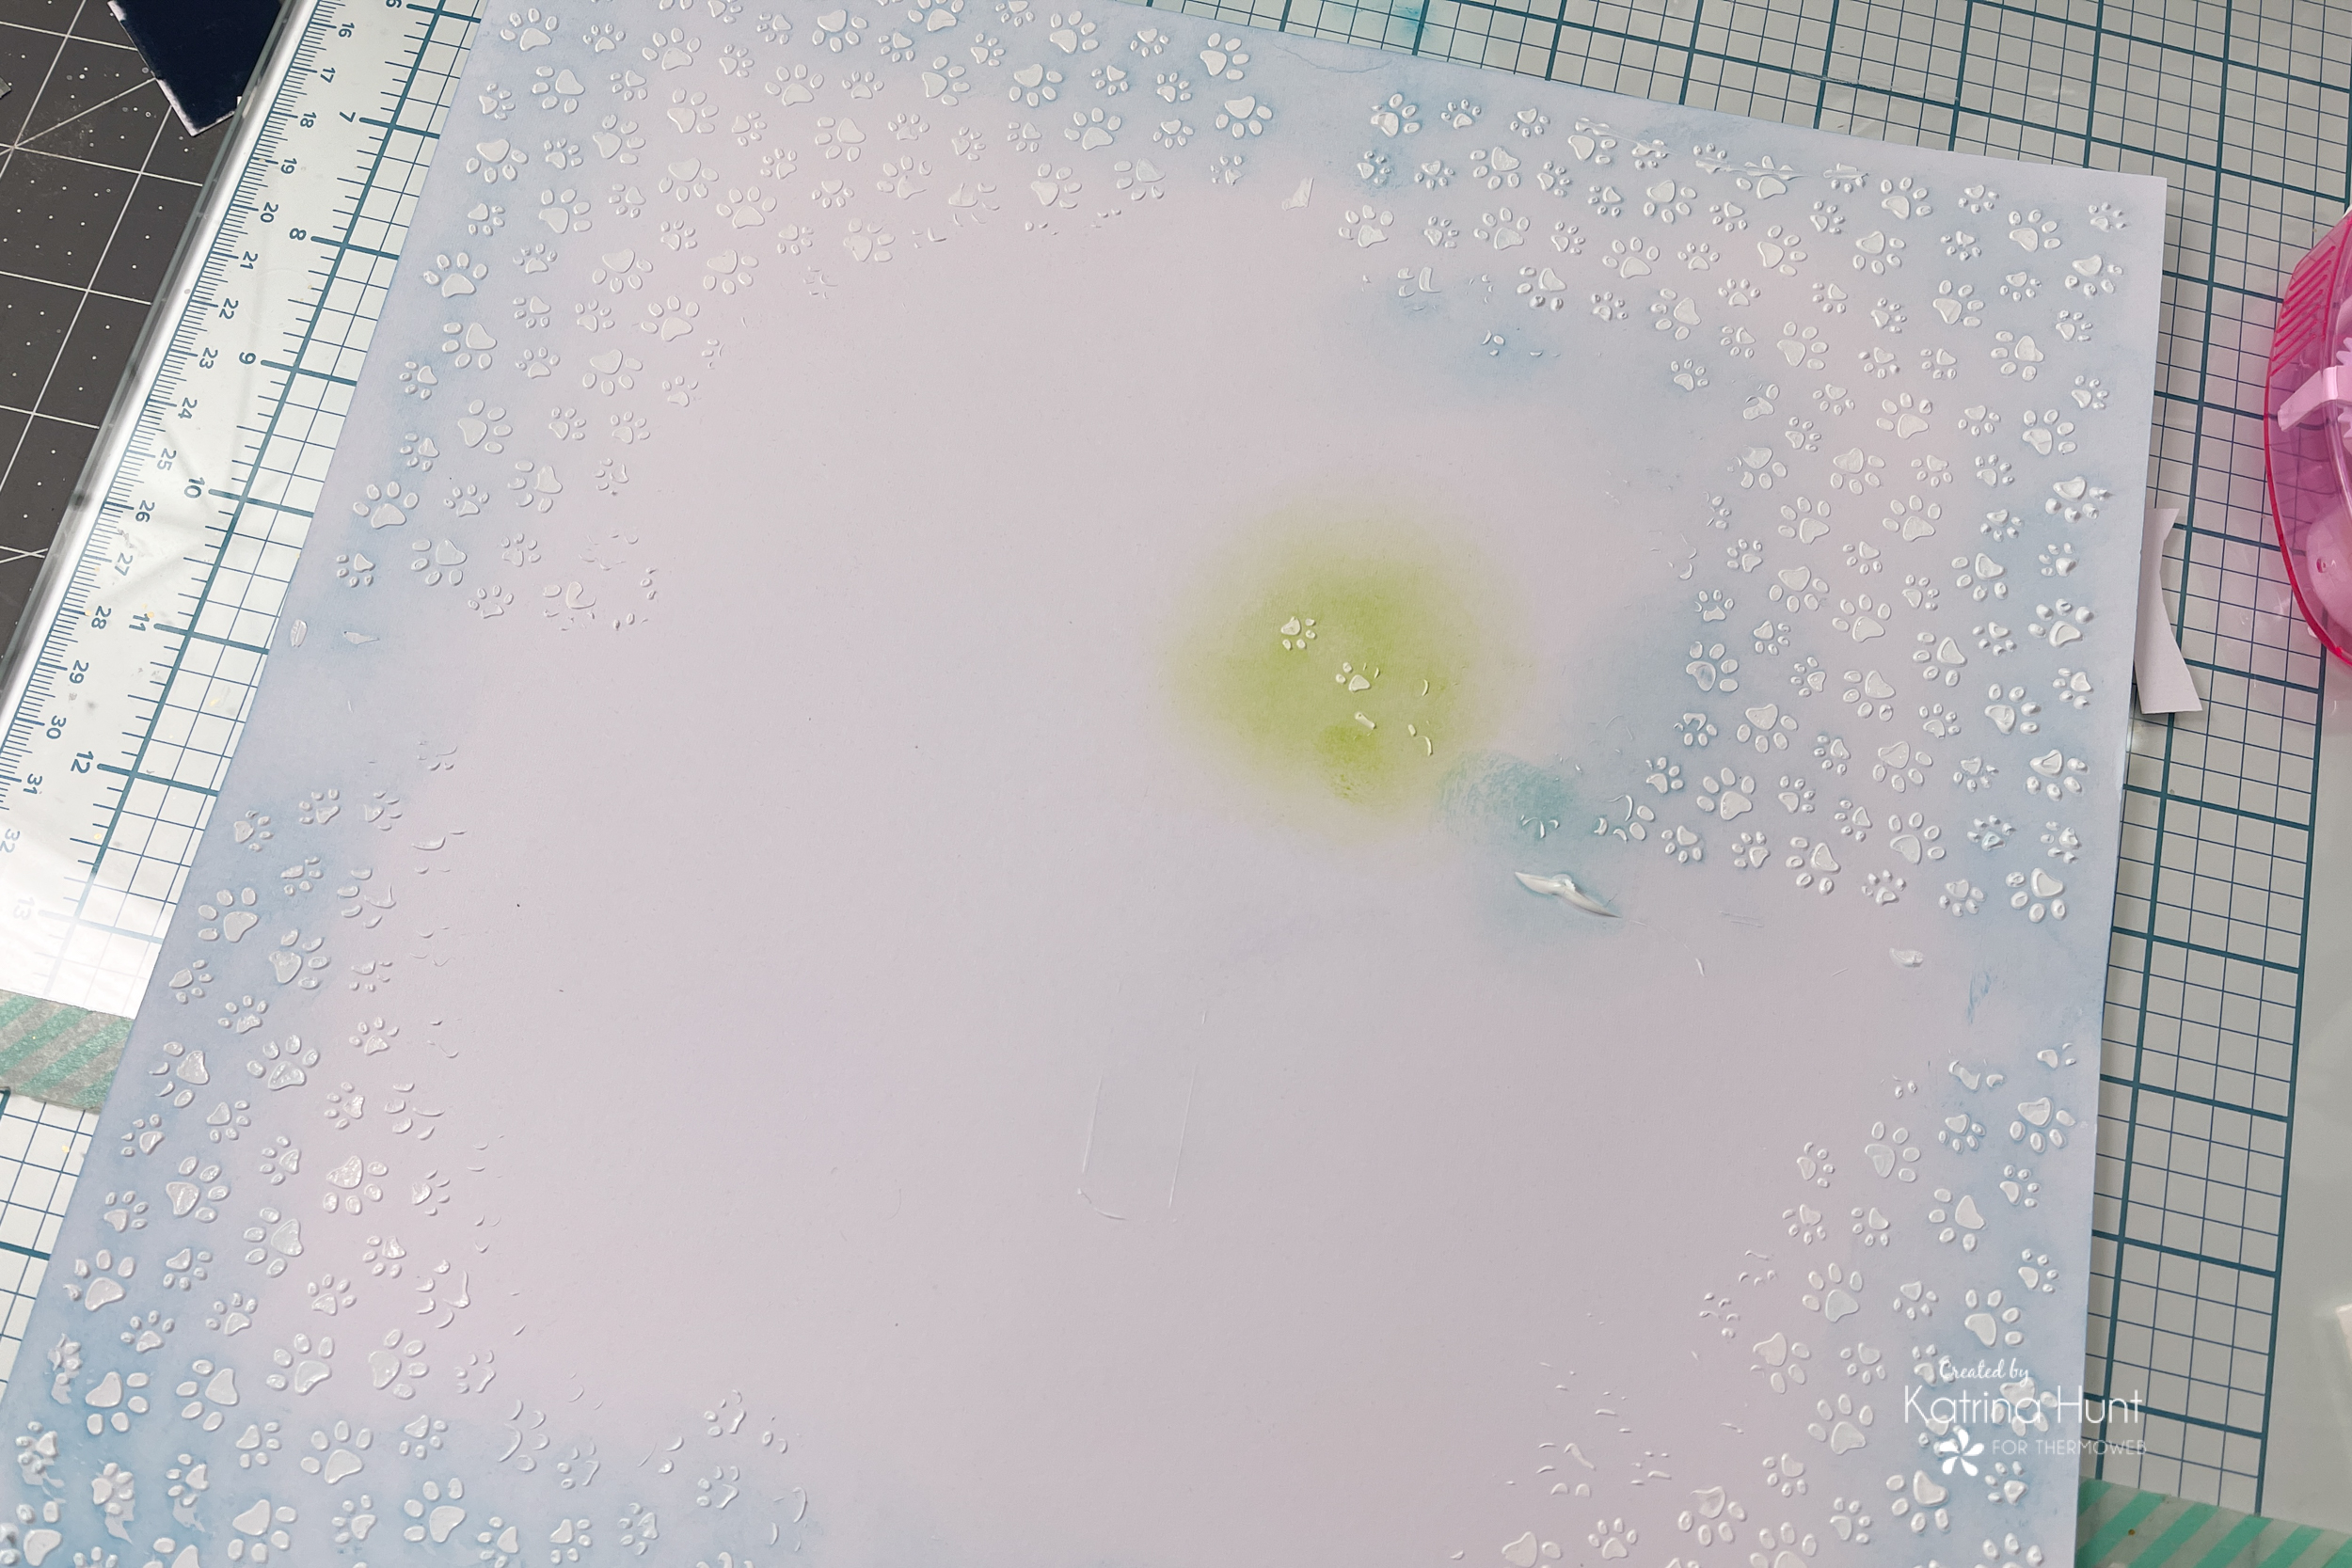 I cut pieces of the flock to fit my areas and then ran them thru my laminator, and placed them between a big 12.5x12.5 inch pocket I have created out of parchment paper!
 Once the piece came out of the laminator, I carefully peeled back the flock to reveal the footprints! And yes, part of it is messy, but I am ok with that!
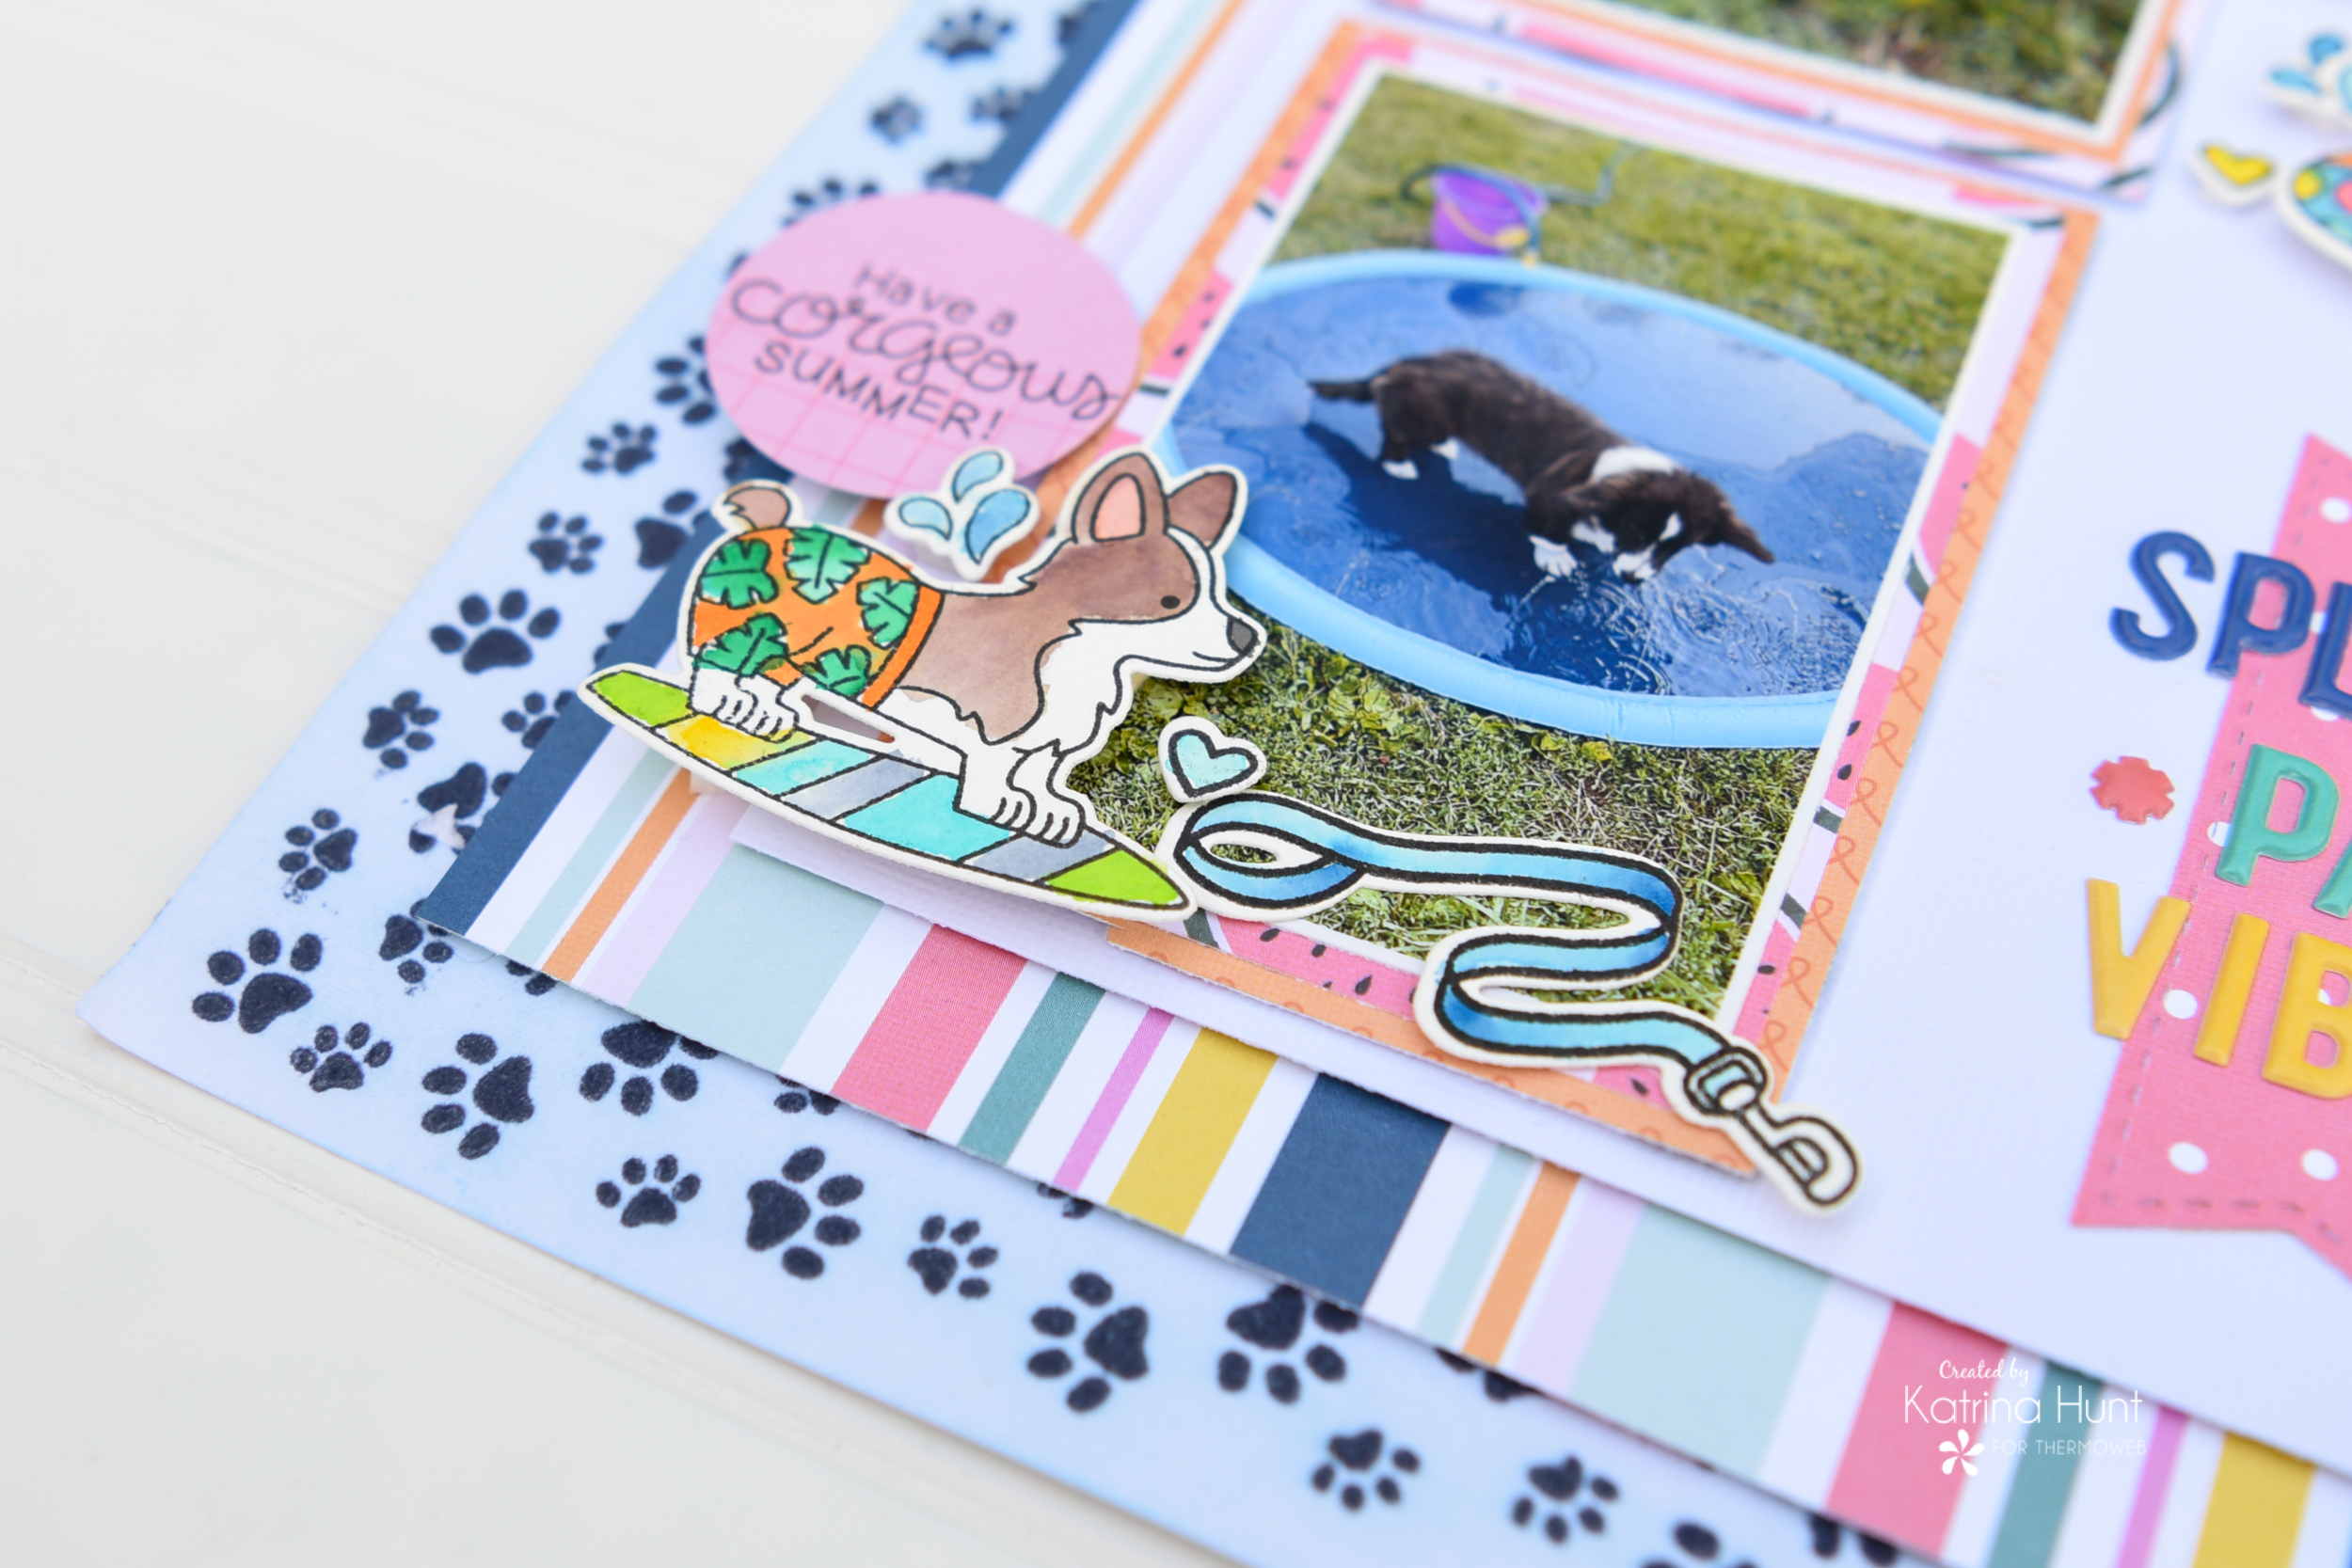 I adhered the center background section with foam tape also and then finished up by embellishing, doing the title and journaling. I created the middle banner strips from a set of Newton's Nook dies that I had in my stash. I feel like they tie the layout together!
 And I knew that little floating corgi HAD to go in the middle of the page! I added some of the splash stamps and the heart stamps to make it a little more fun and my page was done!!!
 Thanks for stopping by during our team-up with Newton's Nook. Head over there and check out all the fun and cute stamp sets they have! Have a wonderful weekend!!!