No Products in the Cart
 Shaker Card Supplies:
Memory Tape XL Runner
Denim Deco Foil
Gina K Designs Nested Single Stitched Rectangle Dies
iCraft Tape Runner XL
iCraft Mixed Media Adhesive
iCraft Deco Foil Transfer Gel
Deco Foil Stencils - Crackle
iCraft Purple Tape
Distress Oxide Inks
Sequins, Seed Beads for Filler
Sunny Studio Playful Bears Stamp
[line]Shaker Card with Deo Foil Clear Designer Toner Sheets Tutorial:
Shaker Card Supplies:
Memory Tape XL Runner
Denim Deco Foil
Gina K Designs Nested Single Stitched Rectangle Dies
iCraft Tape Runner XL
iCraft Mixed Media Adhesive
iCraft Deco Foil Transfer Gel
Deco Foil Stencils - Crackle
iCraft Purple Tape
Distress Oxide Inks
Sequins, Seed Beads for Filler
Sunny Studio Playful Bears Stamp
[line]Shaker Card with Deo Foil Clear Designer Toner Sheets Tutorial:
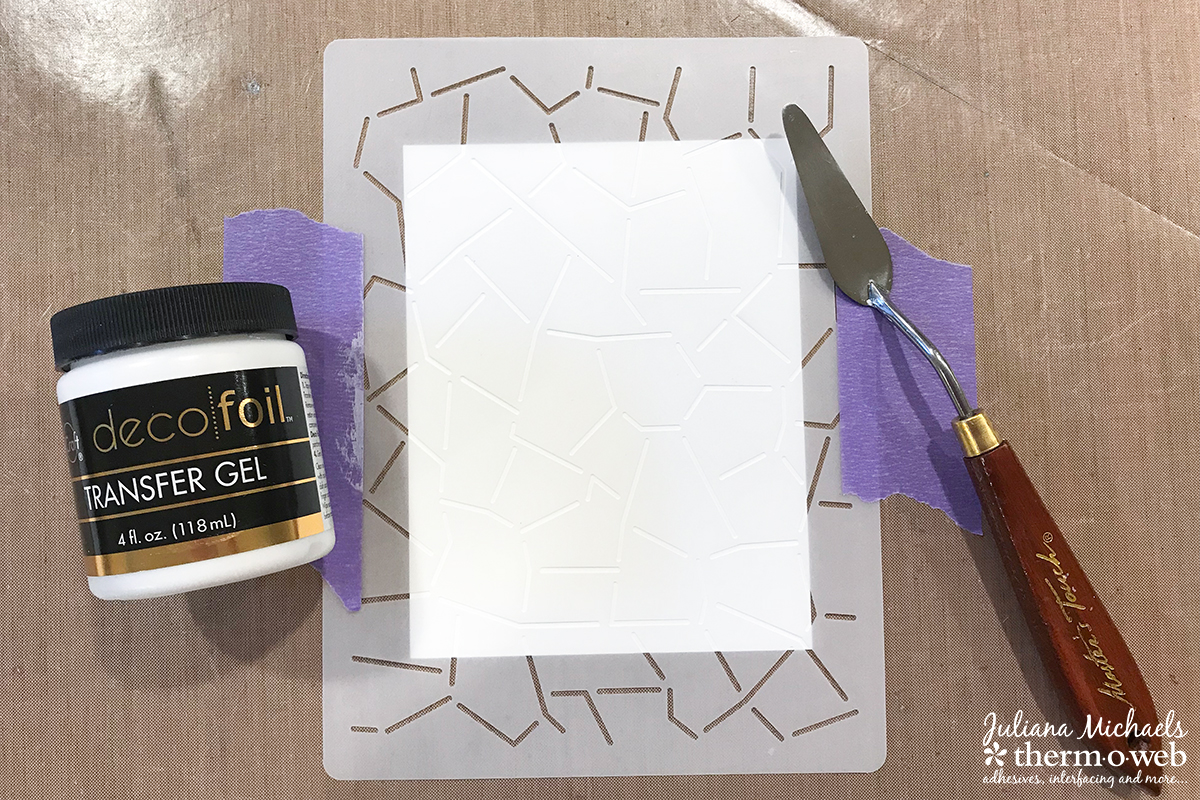 Begin by taking a piece of white cardstock. Tack it down on your surface by applying just a bit of Memory Tape XL Runner to the back side. Next, place the brand new Cracked Ice Designer Stencil and use the new Therm O Web iCraft Purple Tape to hold it in place.
Apply a light coating of iCraft Deco Foil Transfer Gel over the stencil using a palette knife. Gently peel off the stencil and set the paper to the side to dry until the gel turns clear
Once the gel is dry, cover it with a piece of Denim Deco Foil. Run it through a preheated laminator to adhere the foil to the stenciled design. Die cut this piece to the desired size. Use an ink blending tool to apply Distress Oxide Ink in Faded Jeans and Salty Ocean.
Begin by taking a piece of white cardstock. Tack it down on your surface by applying just a bit of Memory Tape XL Runner to the back side. Next, place the brand new Cracked Ice Designer Stencil and use the new Therm O Web iCraft Purple Tape to hold it in place.
Apply a light coating of iCraft Deco Foil Transfer Gel over the stencil using a palette knife. Gently peel off the stencil and set the paper to the side to dry until the gel turns clear
Once the gel is dry, cover it with a piece of Denim Deco Foil. Run it through a preheated laminator to adhere the foil to the stenciled design. Die cut this piece to the desired size. Use an ink blending tool to apply Distress Oxide Ink in Faded Jeans and Salty Ocean.
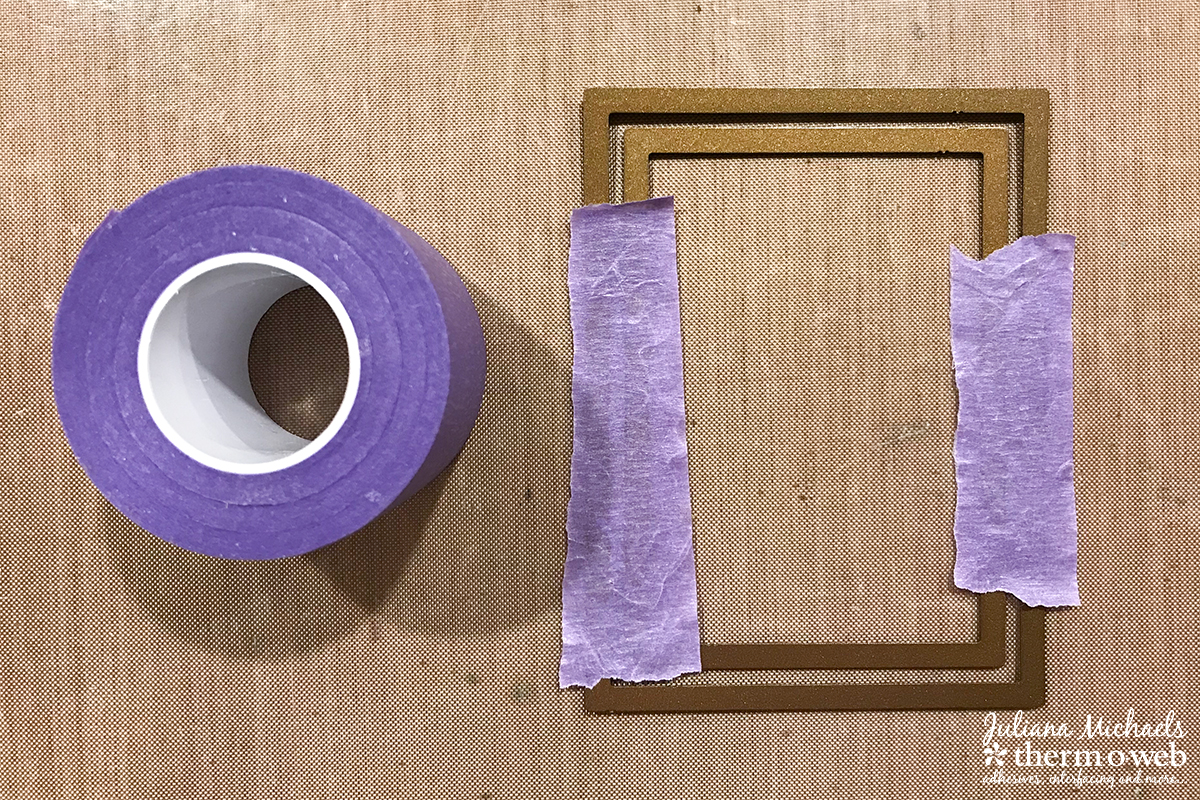
 To create the shaker frame, select 2 of the Gina K Designs Nested Single Stitched Rectangle Dies and nest them together. Use Therm O Web Purple Tape to hold the dies together.
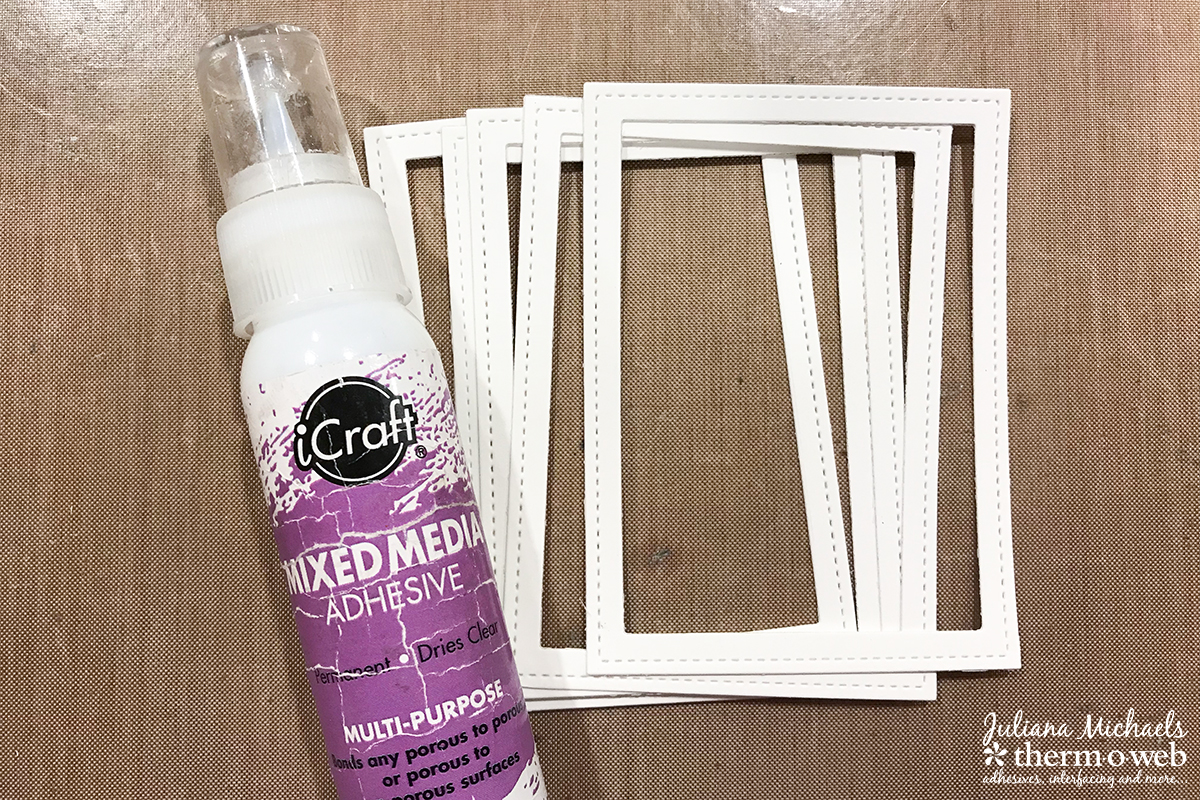
 Die cut the shaker frame 5 times from white cardstock. Use iCraft Mixed Media Adhesive to glue all 5 frames together to create the shaker frame box. Die cut one extra frame from a piece of blue cardstock to add to the top of the shaker once it is fully assembled.
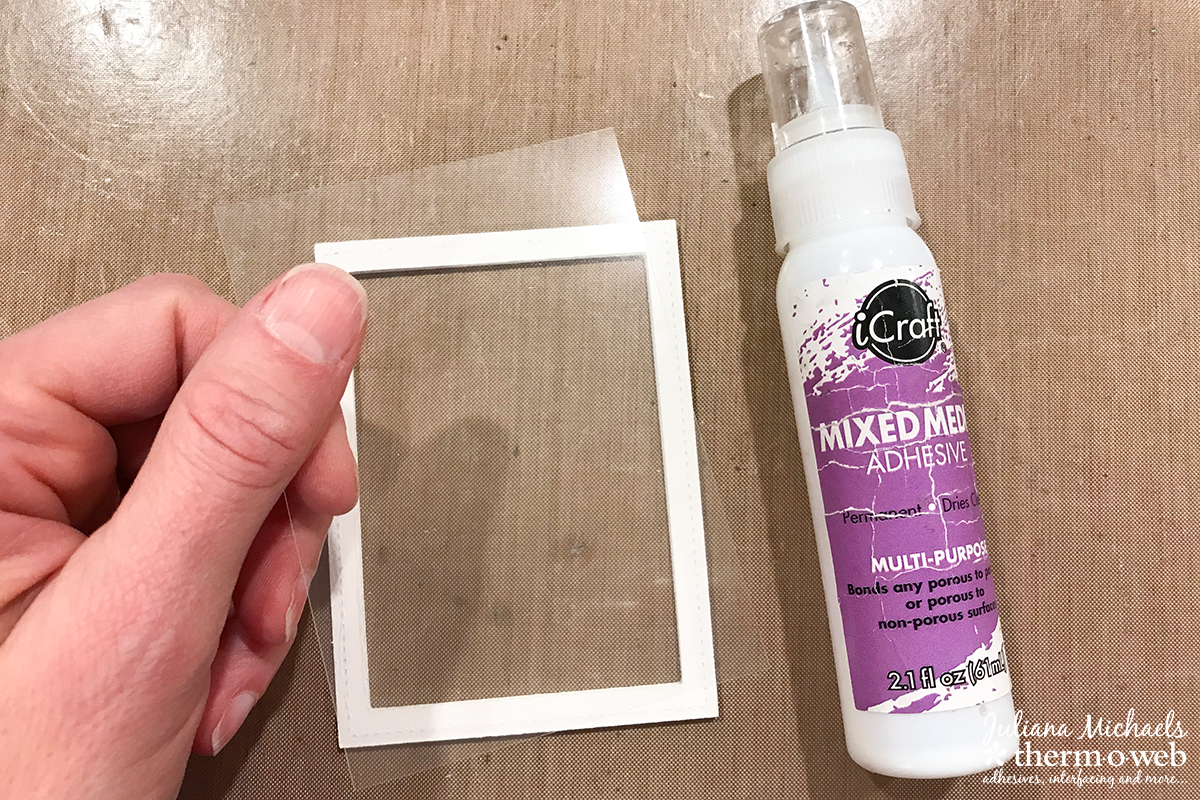
 Next, take the brand new iCraft Deco Foil Clear Toner Sheets and trim it down to the side of the frame. Adhere it to the frame using iCraft Mixed Media Adhesive.
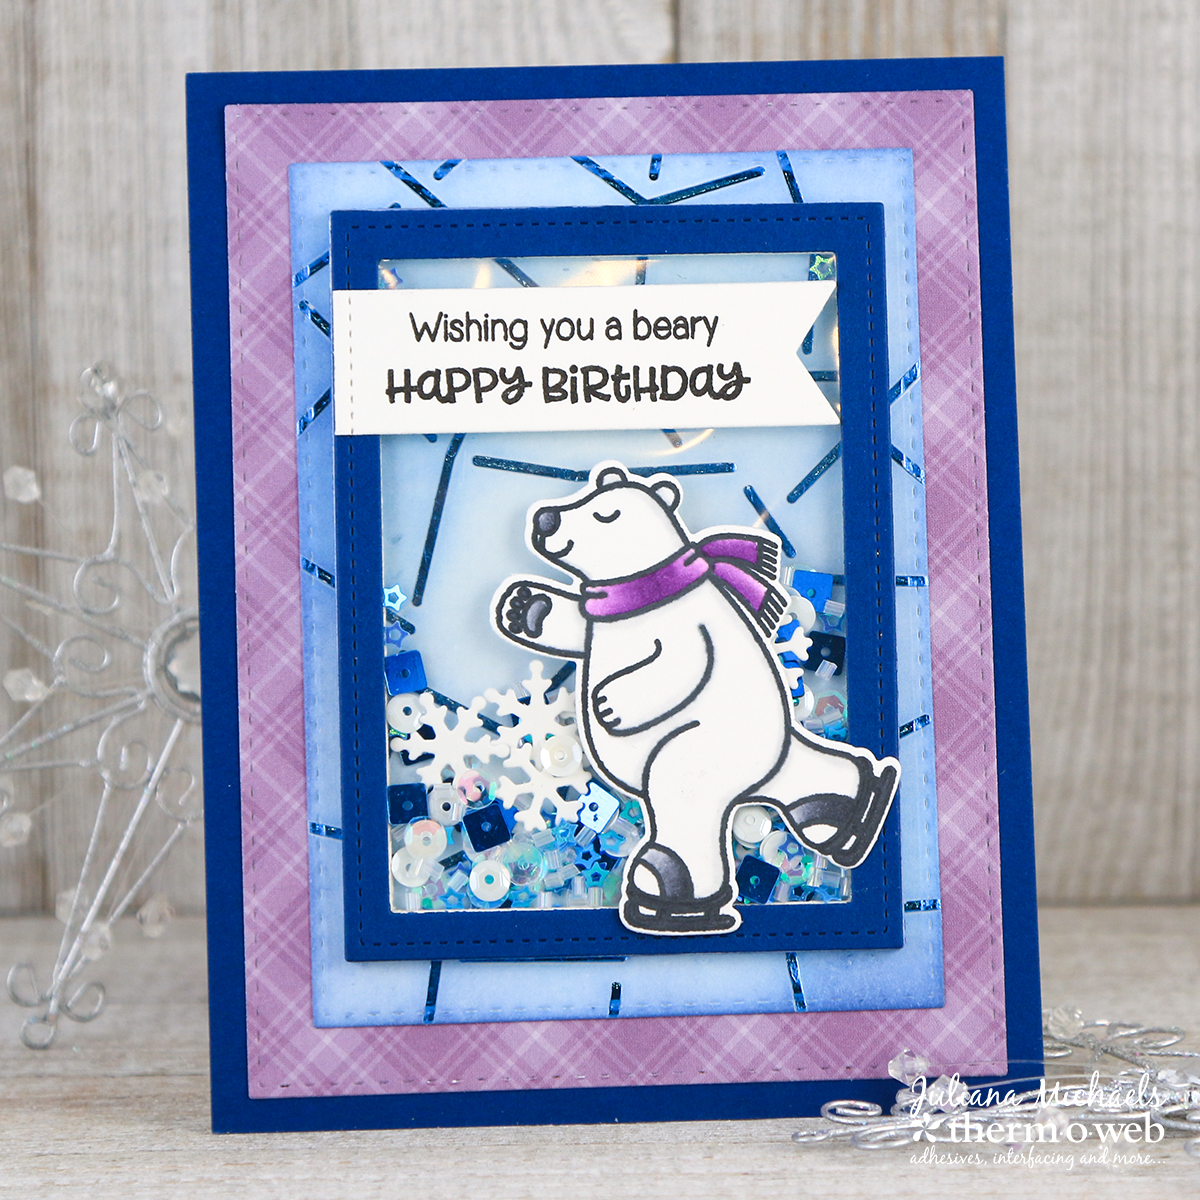
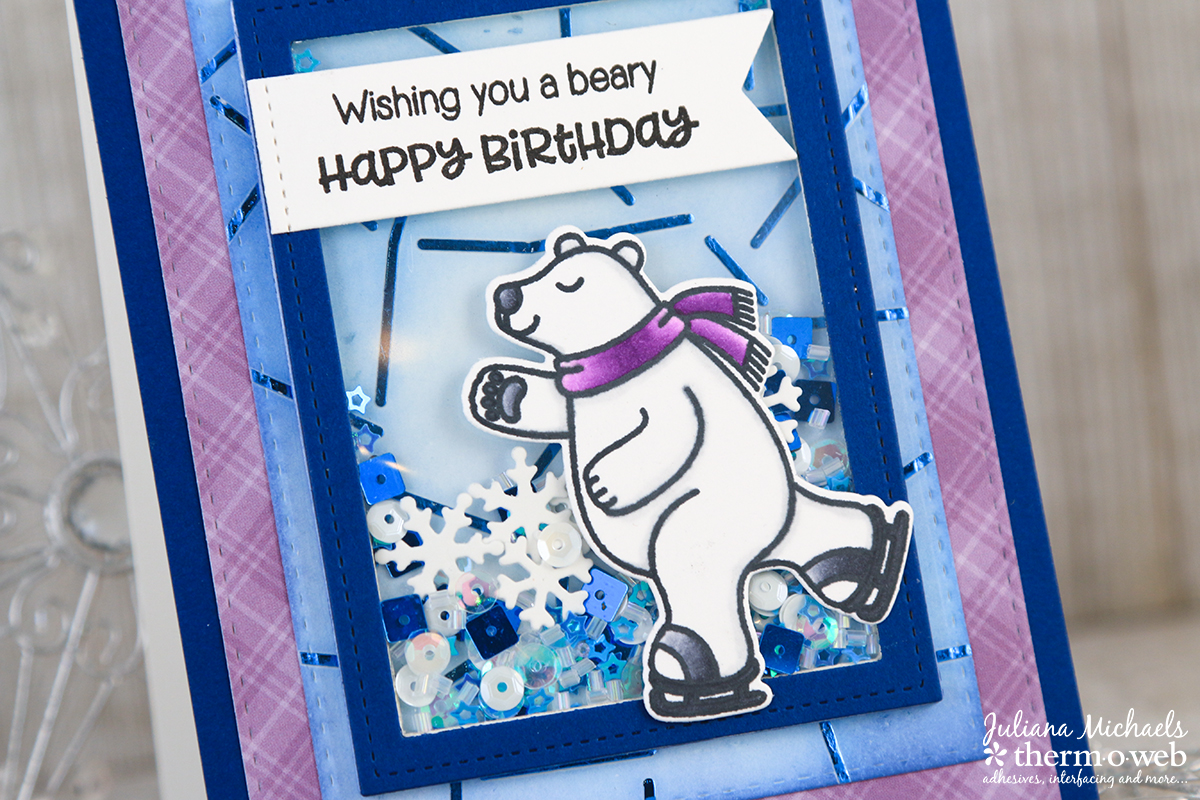
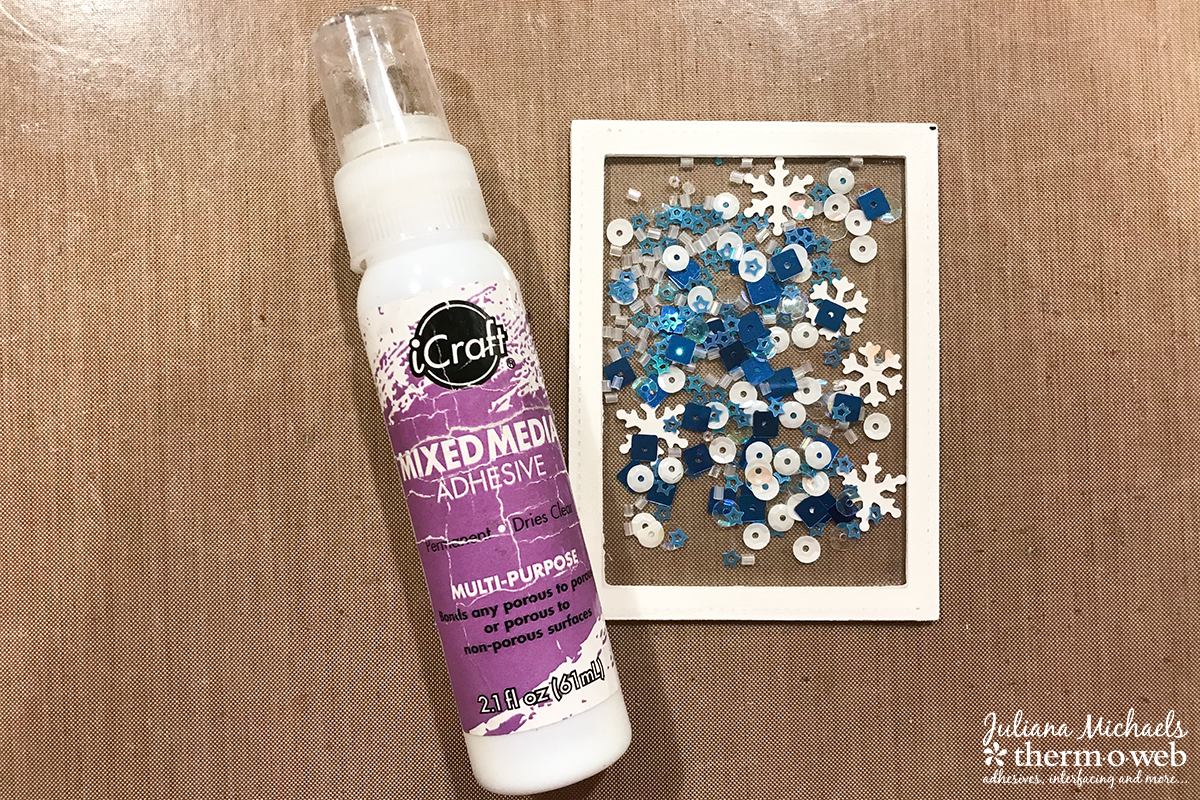
 Fill the shaker box with sequins, seed beads, and other small items. Adhere another piece of the Clear Toner Sheets to the top of the shaker box. It is now ready to adhere to your card front.
 Use the Therm O Web Memory Tape Runner XL to adhere the cardstock and patterned paper to your card base.
Next, adhere the blue die cut frame you made earlier to the front of the shaker box. Adhere your sentiment and other embellishments. Once you are finished embellishing the shaker box, adhere it to the card front using either the Memory Tape Runner XL or the iCraft Mixed Media Adhesive
Use the Therm O Web Memory Tape Runner XL to adhere the cardstock and patterned paper to your card base.
Next, adhere the blue die cut frame you made earlier to the front of the shaker box. Adhere your sentiment and other embellishments. Once you are finished embellishing the shaker box, adhere it to the card front using either the Memory Tape Runner XL or the iCraft Mixed Media Adhesive
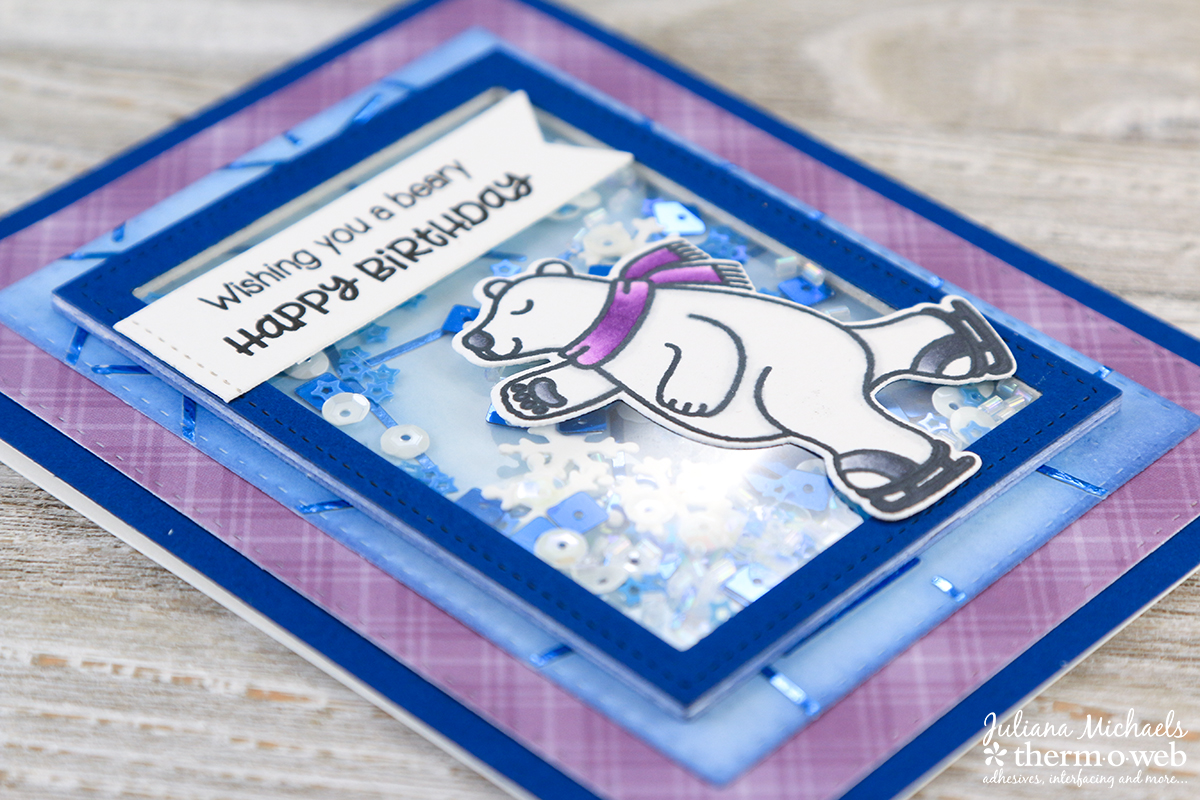 You are now ready to start creating your own Shaker Card with Deco Foil Clear Designer Toner Sheets and other great products from Therm O Web!