No Products in the Cart
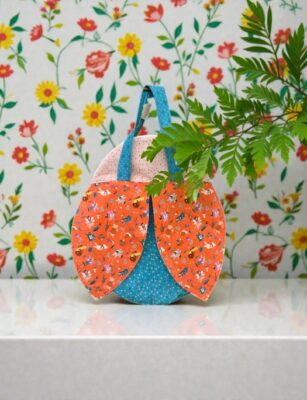
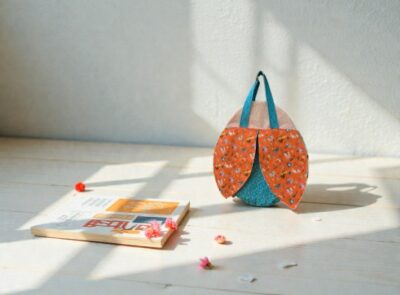
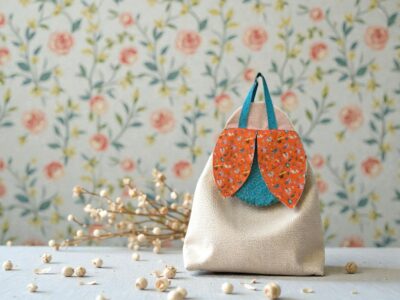
When I was designing the Flutterbug Bag, I imagined a child collecting treasures on a spring walk, carrying crayons to church, or tucking in a notebook and markers for quiet playtime. This bag is playful and practical, shaped like a little bug with fabric wings that open to reveal a zippered pouch. It’s a beautiful balance of function and fun.
With a sturdy shape, soft quilted texture, and just the right size for small hands, it’s perfect for creative children or as a charming handmade gift. I stitched mine in fabrics from the Thimbelina collection, but you can easily customize the colors and details to fit any theme. For construction, I leaned on two of my favorite Therm O Web products to give the Flutterbug Bag its structure, durability, and soft finish.


1. Prep and Fuse
Fuse HeatnBond Fusible Fleece to the wrong side of the body, head, and strap pieces. Fuse HeatnBond Craft Extra Firm Interfacing to the lining and wing pieces. This makes the finished bag soft and supportive, while holding its curved shape.
2. Make the Wings
Sew the outer and lining wing pieces together, clip curves, turn, and topstitch. Repeat to make four wings, two reversed for each side of the bag.
3. Assemble the Exterior
Sew the front and back body pieces together at the center. Topstitch, then place the wings so they meet at the seam. Baste them in place. Add the straps and stitch the head piece to the top.


4. Sew the Lining and Zipper
Create the divided lining with internal panels, then sandwich the zipper between the outer bag and the lining. Sew along the curved top edge and repeat for the other side.
5. Turn and Finish
Turn the bag right side out through the lining, close the opening, and press. You can add sparkle paste, a stitched name, or a charm to make it extra special.
Style It and Gift It
The Flutterbug Bag makes a thoughtful handmade gift for birthdays, Easter baskets, or just because. It’s small enough to tuck into a backpack and roomy enough for art supplies or little keepsakes. You can hang it on a hook in a playroom or use it as part of a story-themed space. It also makes a great sewing project for beginners or older children learning to sew with help.
Try the Pattern Club Free
Therm O Web readers can enjoy one free month in the Sew A Story Pattern Club. Each month includes one new craft pattern and one new quilt pattern, along with step-by-step tutorials, project inspiration, and sewing community support. If you loved the Flutterbug Bag, this month’s featured craft pattern inside the Pattern Club is this exact project.
Join here! Use code: FREEMONTH
You can also watch more about the Flutterbug Bag on our YouTube channel HERE
Let’s Sew Together
Making something sweet and useful for the children in your life is always time well spent. I hope this little bag becomes a favorite for your family or your classroom and inspires hours of play and creativity.