No Products in the Cart
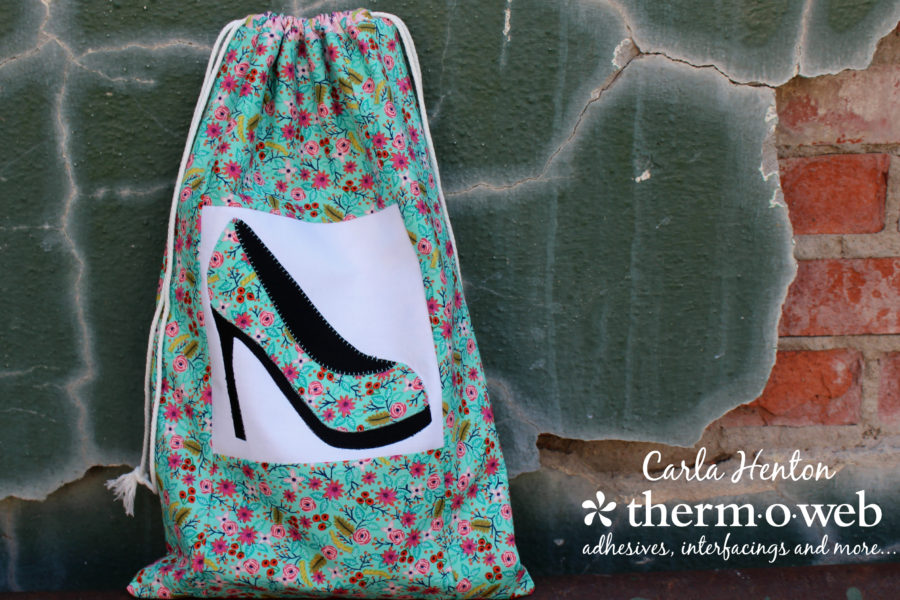
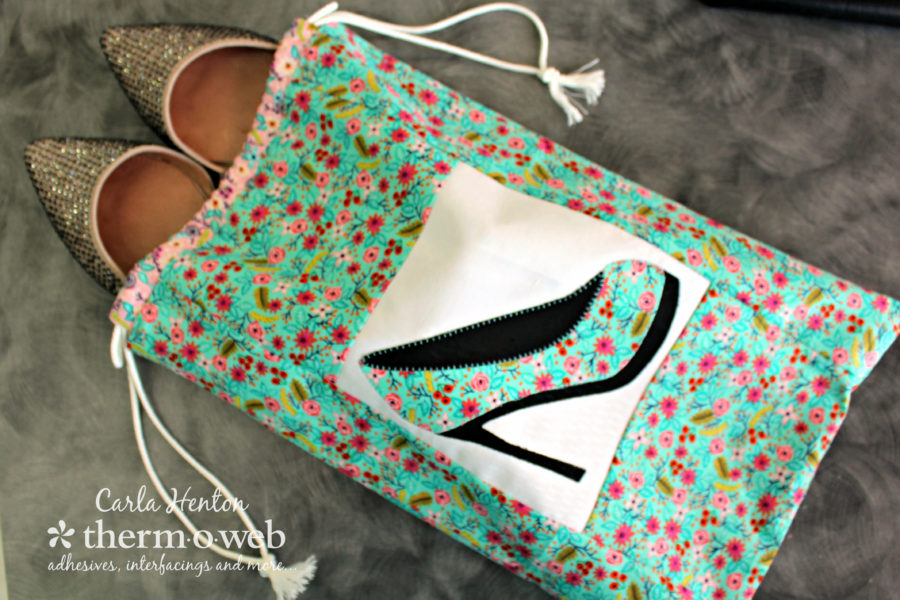 Carla here from Creatin’ in the Sticks and when I pack to travel, I’m always tucking my shoes into the bottom of my bag with the soles down, so they won’t touch the rest of my clothes. By putting my shoes in this bag, there are no worries about street dirt getting on my clothes and my friends all want it when they see it. This bag is made with 2 fat quarters and is so sweet in Windham fabric’s Meriwether. I want to make one in every color of the collection.
 Pattern – download here
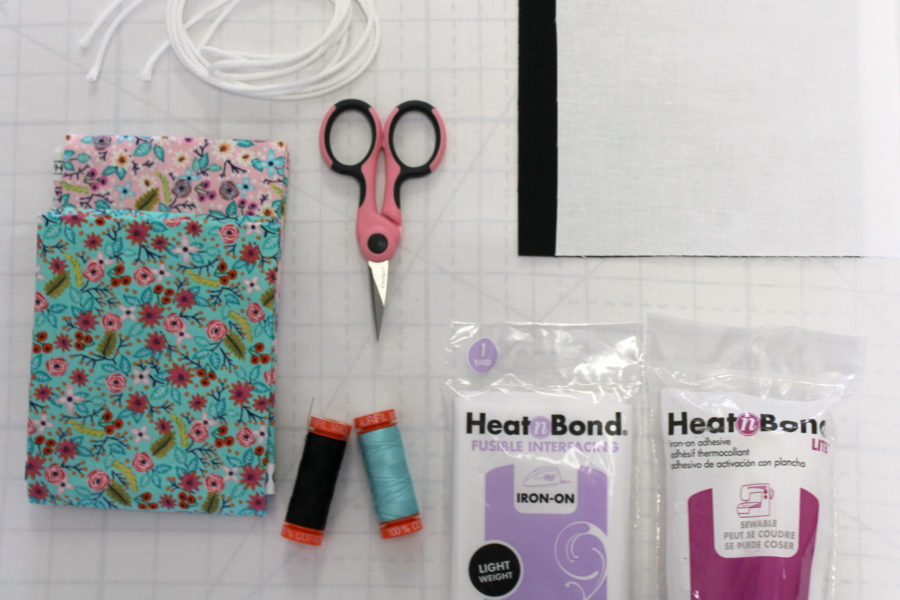
HeatnBond Lite Fusible Adhesive
HeatnBond Non-Woven Fusible Interfacing – Light Weight
white cotton fabric-6 ½” x 6 ½” square
black cotton fabric- 6 ½” x 6 ½” square
2 fat quarters – Windham fabric’s Meriwether
Aurifil thread: 50wt #2692, #5006
2 pieces of narrow cording for drawstring - each 40”
Iron, sewing machine, sharp scissors, permanent marker, safety pin, and other basic sewing supplies
Pattern – download here
HeatnBond Lite Fusible Adhesive
HeatnBond Non-Woven Fusible Interfacing – Light Weight
white cotton fabric-6 ½” x 6 ½” square
black cotton fabric- 6 ½” x 6 ½” square
2 fat quarters – Windham fabric’s Meriwether
Aurifil thread: 50wt #2692, #5006
2 pieces of narrow cording for drawstring - each 40”
Iron, sewing machine, sharp scissors, permanent marker, safety pin, and other basic sewing supplies
 White fabric: D – 6 ½” x 6 ½”
Black fabric: E – 6 ½” x 6 ½”
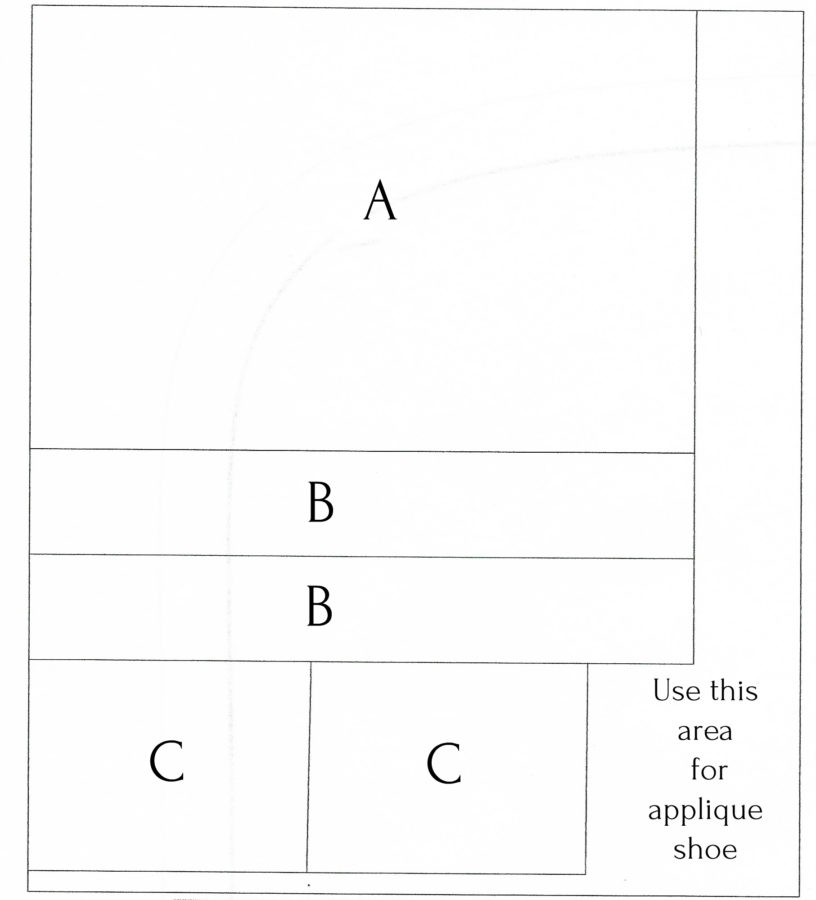
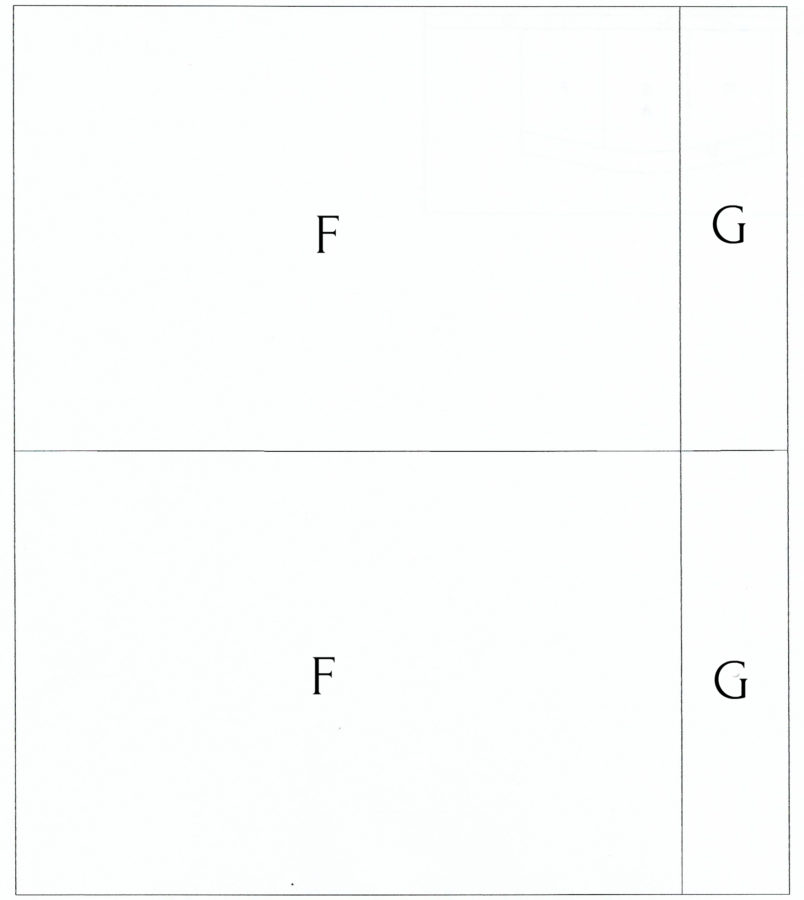
For lining of bag and casing cut one fat quarter according to the following diagram.
F (2) – 10 ½” x 15 ½”
G (2) – 2” x 10 ½”
White fabric: D – 6 ½” x 6 ½”
Black fabric: E – 6 ½” x 6 ½”
For lining of bag and casing cut one fat quarter according to the following diagram.
F (2) – 10 ½” x 15 ½”
G (2) – 2” x 10 ½”
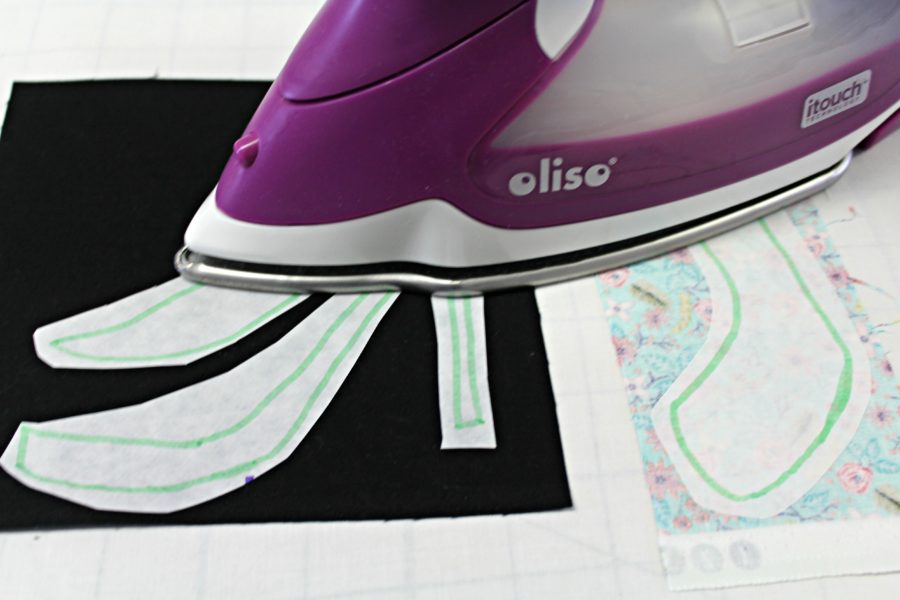 Cut all the pieces out on the dark line of the patterns. Now it's time to peel the backing paper off the back of the applique pieces and place them, adhesive side down, on the center of the right side of the white square of fabric using the key as a guide. Finally, use an iron to bond all the pieces at once to the white fabric following the manufacturer's instructions.
 The last step is to stitch around the edges of the shoe with Aurifil 50 wt. thread with a zigzag, straight, or blanket stitch.
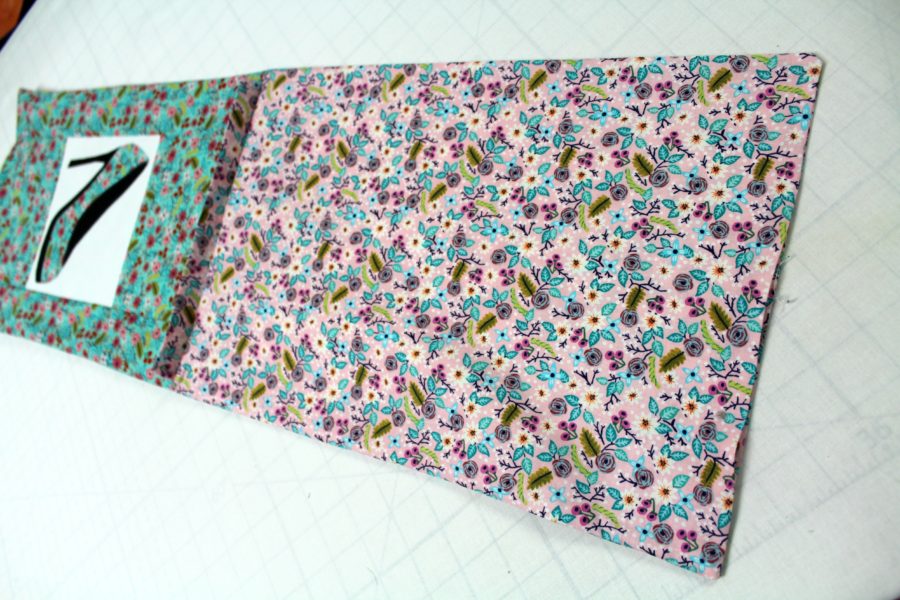
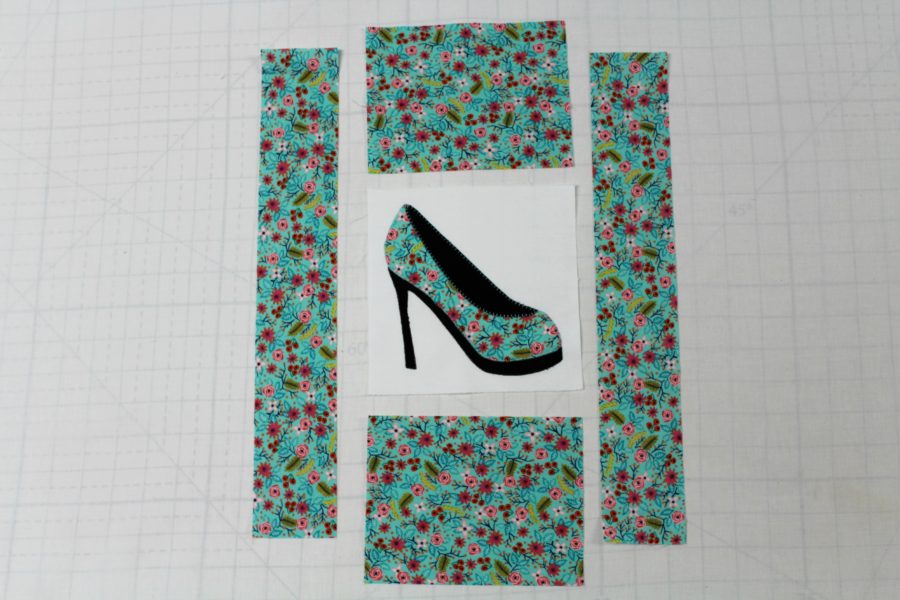 Stitch the pieces together with 1/4" seams as they are laid out. Stitch the C rectangles to the top and bottom of the shoe block. Once the middle unit is stitched, sew the outside B rectangles to the middle unit and press.
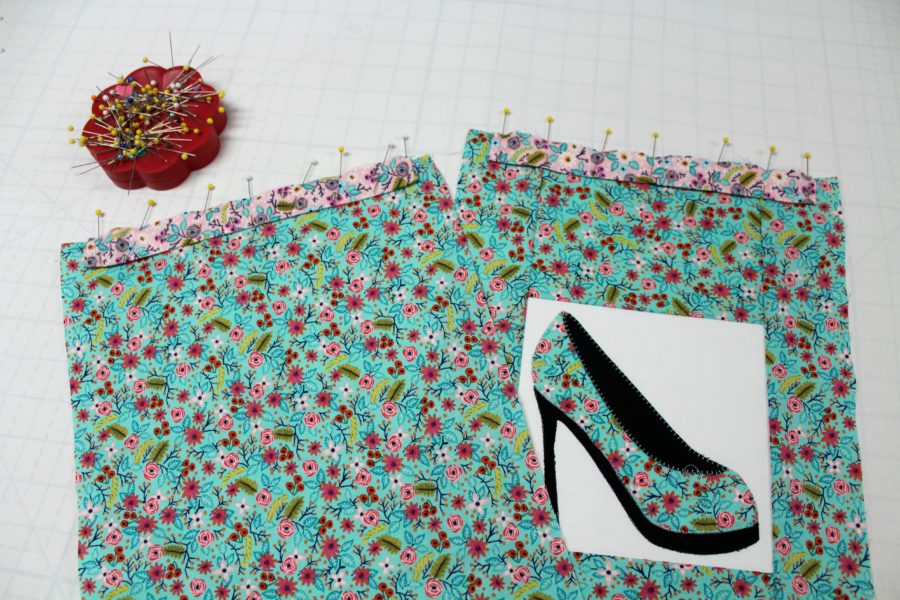
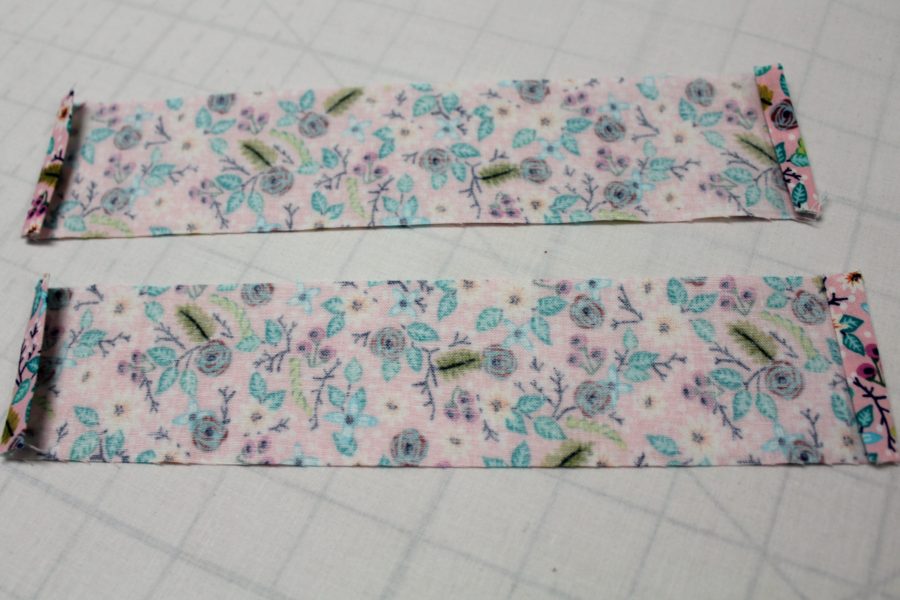 Do this to all four ends and then stitch the hems in place. Now, fold the strips in half lengthwise with wrong sides together and press. Pin both of the casing pieces to the top, right sides of the exterior pieces (A and the shoe unit).
 Machine baste 1/8" from the raw edges being careful to catch all the raw edges. Next, stitch the front exterior to the back exterior (A), with right sides together and a 1/4" seam. Stitch the sides and bottom, leaving the top open.
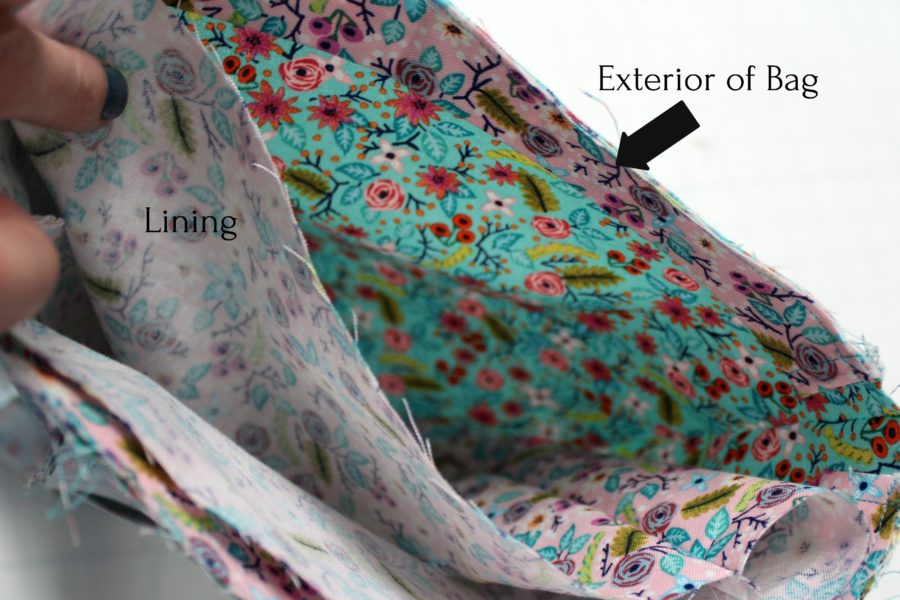
 After the seam is sewn, turn the lining right side out and slide it into the exterior of the bag with the right sides together.
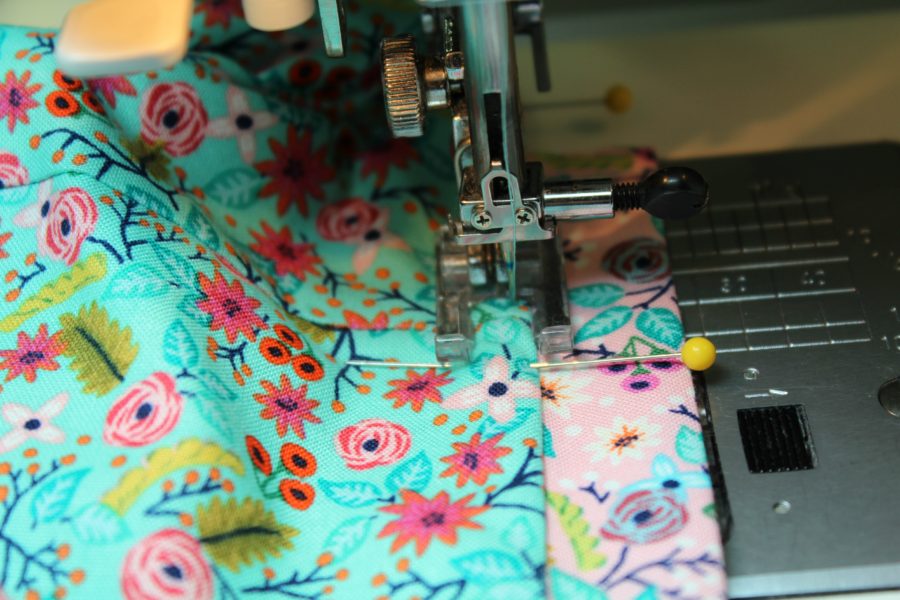
 Pin around the top of the bag, matching the side seams. The casings are sandwiched between the lining and the exterior of the bag. Now stitch the 1/4" seam around the top of the bag.
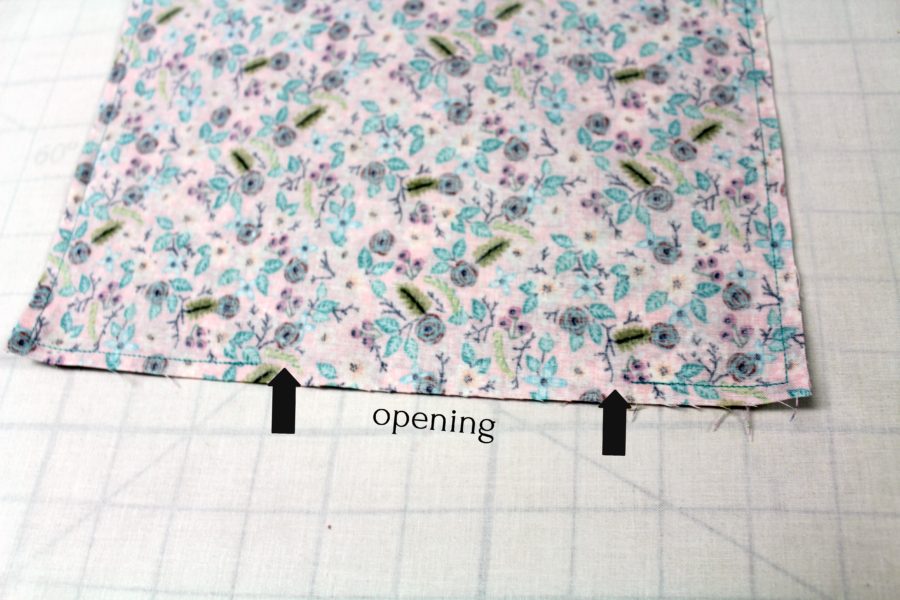
Turn the bag right side out through the opening in the lining.
Pin around the top of the bag, matching the side seams. The casings are sandwiched between the lining and the exterior of the bag. Now stitch the 1/4" seam around the top of the bag.
Turn the bag right side out through the opening in the lining.
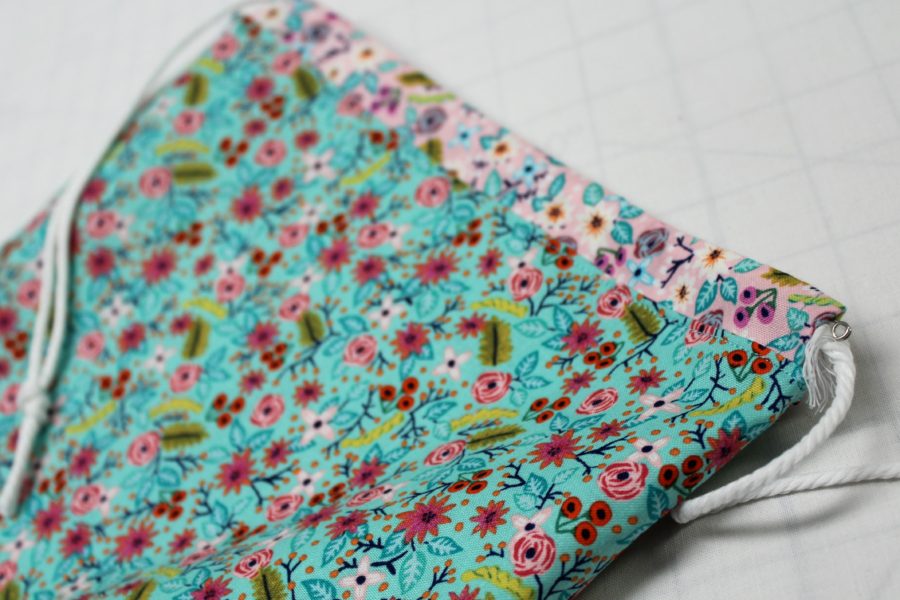
 Press the opening and stitch it closed. Finally, tuck the lining into the exterior of the bag, press, and pin around the top of the shoe bag. Top stitch around the top of the shoe bag.
 Now insert your favorite shoes and let them travel with style.
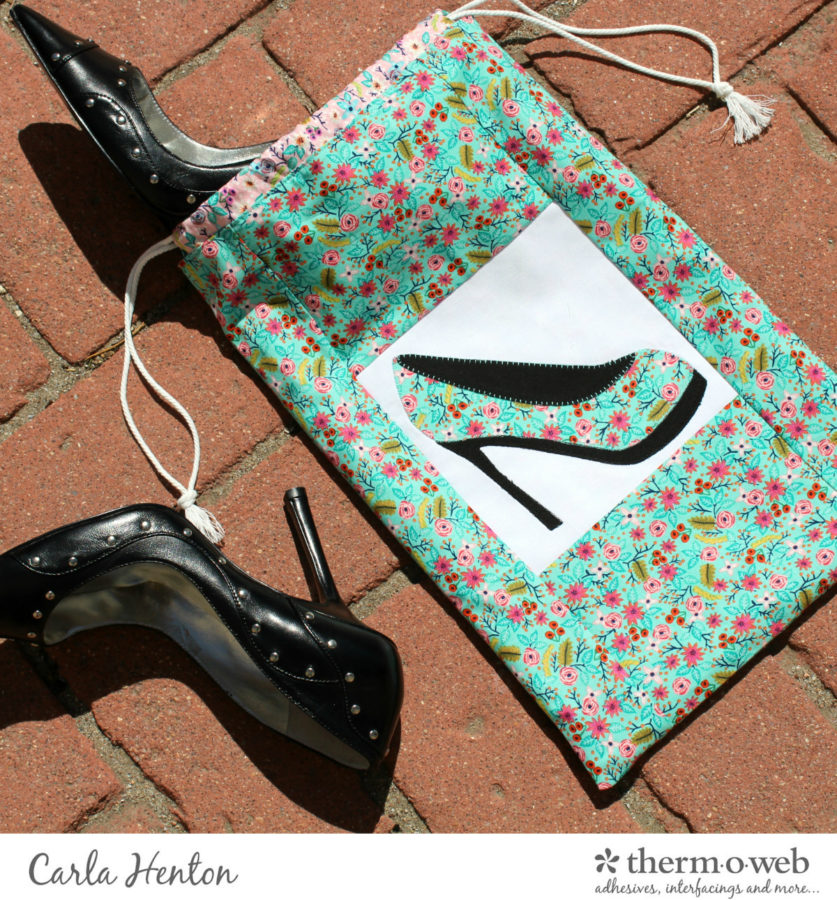 Be sure and make at least 2 shoe bags, one for you and one for a friend! Maybe one for everyone...and be sure to PIN THIS PROJECT
Carla
Be sure and make at least 2 shoe bags, one for you and one for a friend! Maybe one for everyone...and be sure to PIN THIS PROJECT
Carla