No Products in the Cart
 Sew Small Fashion with My Doll, My Style Patterns
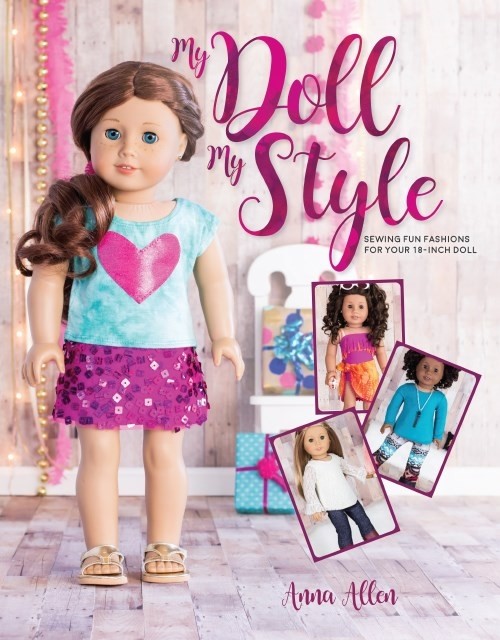 I chose the Athletic top and Athletic shorts patterns in the book My Doll, My Style (available for purchase at Wal-Mart and Barnes and Noble) and I have a couple of tips for using Therm O Web products to make them even easier to put together!
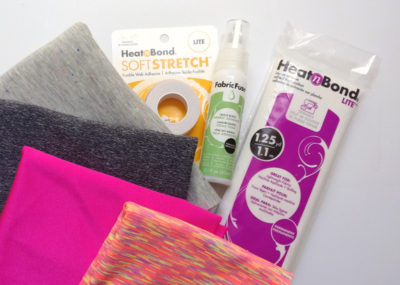
Doll Clothes Project Supplies:
HeatnBond Soft Stretch Lite Fusible Hem Tape
HeatnBond Lite Fusible Adhesive or HeatnBond EZ Print Sheets
Fabric Fuse Liquid Adhesive
Knits and fabrics of your choice
My Doll, My Style Book
I chose the Athletic top and Athletic shorts patterns in the book My Doll, My Style (available for purchase at Wal-Mart and Barnes and Noble) and I have a couple of tips for using Therm O Web products to make them even easier to put together!
Doll Clothes Project Supplies:
HeatnBond Soft Stretch Lite Fusible Hem Tape
HeatnBond Lite Fusible Adhesive or HeatnBond EZ Print Sheets
Fabric Fuse Liquid Adhesive
Knits and fabrics of your choice
My Doll, My Style Book
 Fabric Fuse liquid adhesive was perfect for adding a small ribbon embellishment, the Soft Stretch lite made folding over the hems on even the slipperiest fabric so much easier and the Heat n Bond lite is always a favorite for adding applique to projects.
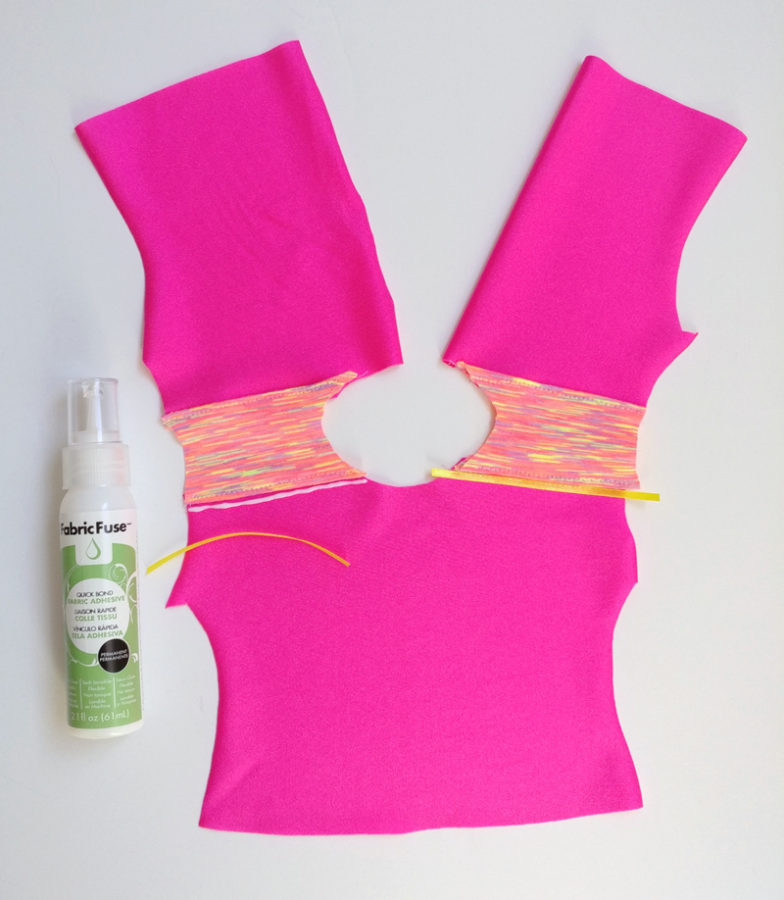 To add the ribbon embellishment to the front of the top I ran a thin line of Fabric Fuse to the shirt and then placed the ribbon on top. The narrow applicator makes it really easy to add just the right amount of glue. I glued the ribbon on both sides and then let the glue dry while I finished the shorts, then came back to the shirt later.
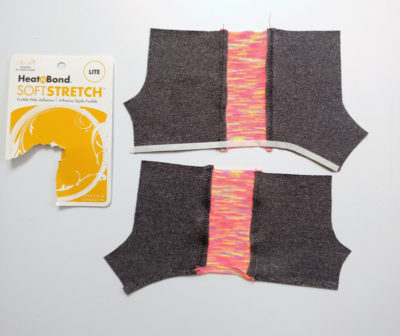 Because the HeatnBond Soft Stretch is 5/8" wide and the hem is only 1/4" I took a length of the Soft Stretch and cut it into scant 1/4" strips. There are curves you will have to be aware of, just adhere a short piece at a time and go slowly around the curves, the paper might fold over a bit, but there will be enough adhesive to finish folding over the hem.
Once you have added the Soft Stretch, remove the paper and fold up the hem, pressing in place. Finish with the suggested stitch- a narrow zig zag. I used the HeatnBond Soft Stretch Hem Tape in Lite for all the hems in both the short and the shirt patterns.
Because the HeatnBond Soft Stretch is 5/8" wide and the hem is only 1/4" I took a length of the Soft Stretch and cut it into scant 1/4" strips. There are curves you will have to be aware of, just adhere a short piece at a time and go slowly around the curves, the paper might fold over a bit, but there will be enough adhesive to finish folding over the hem.
Once you have added the Soft Stretch, remove the paper and fold up the hem, pressing in place. Finish with the suggested stitch- a narrow zig zag. I used the HeatnBond Soft Stretch Hem Tape in Lite for all the hems in both the short and the shirt patterns.
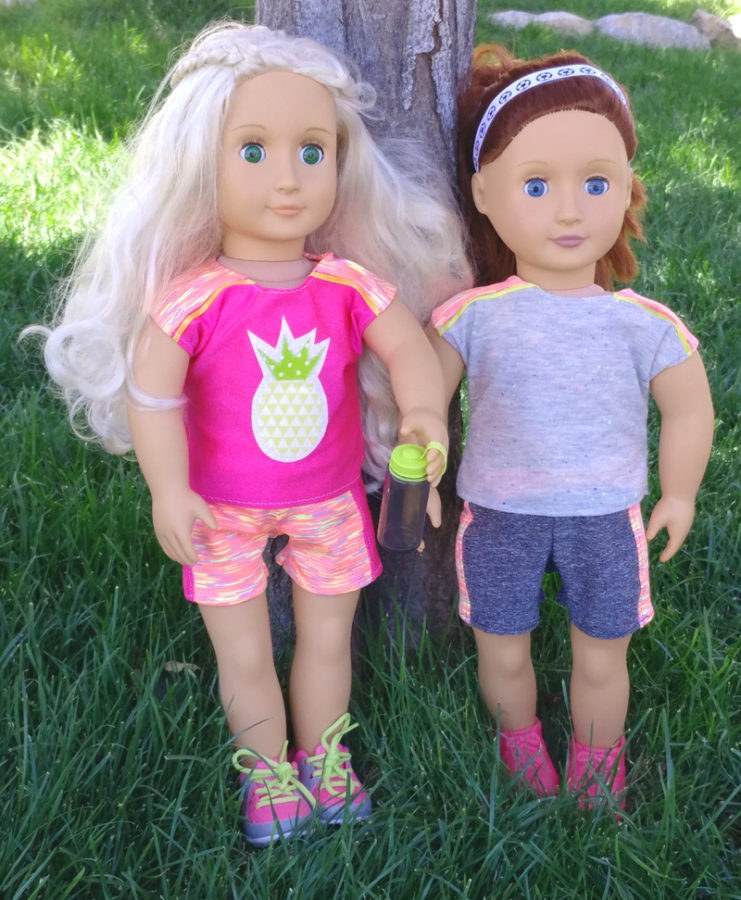
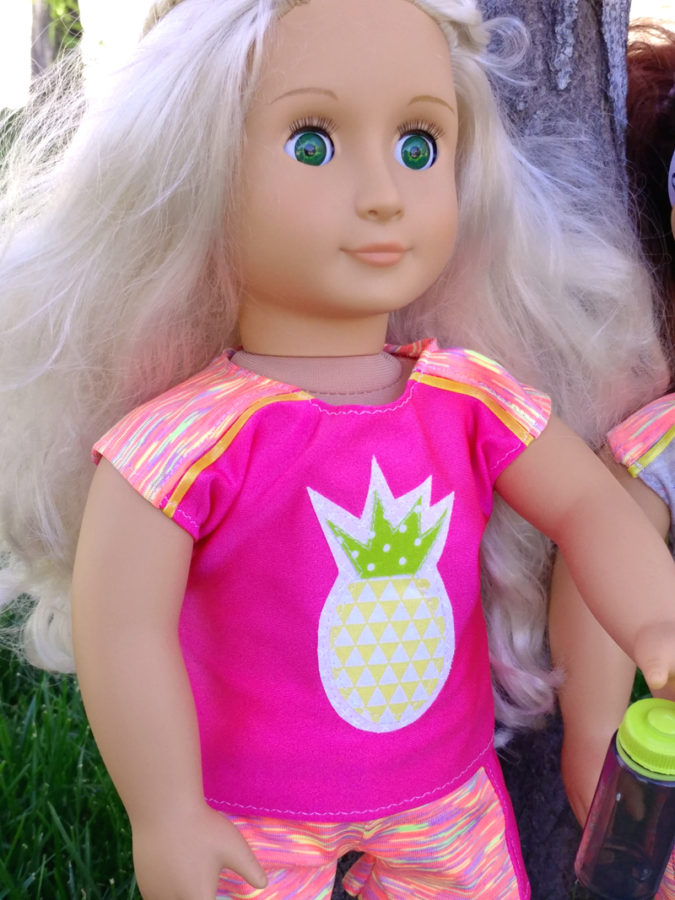 When I asked my daughter what she wanted on the front of her doll shirt she said "a pineapple!!" I decided it would be easy enough to create my own version so I put this one together. You can download the free .pdf file here.
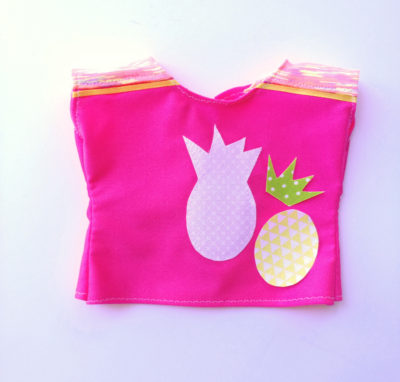 I just traced the pattern on the paper side of the HeatnBond, cut roughly around the traced shapes and then followed the directions to fuse the adhesive onto the back of scraps of white, yellow and green fabric. You could directly print the pattern onto HeatnBond EZ Print Sheets to save yourself a step too!
Next, cut out the shapes and layer them on the shirt. Start with the white piece, fuse and then stitch around the shape. Next, add the yellow and green pieces and then sew around them to finish your applique.
I just traced the pattern on the paper side of the HeatnBond, cut roughly around the traced shapes and then followed the directions to fuse the adhesive onto the back of scraps of white, yellow and green fabric. You could directly print the pattern onto HeatnBond EZ Print Sheets to save yourself a step too!
Next, cut out the shapes and layer them on the shirt. Start with the white piece, fuse and then stitch around the shape. Next, add the yellow and green pieces and then sew around them to finish your applique.
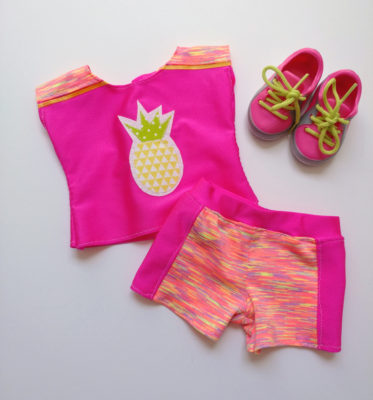 I just love the way the pineapple stands out on the pink fabric! I think you'll find that doll clothes become addicting once you get started. My daughters and I already have a couple more outfits planned out! Hopefully, these tips will help you get started creating your own one of a kind wardrobe for your dolls too!
 So we'd LOVE to give you a chance to win this incredible book so you too can sew small fashions! We have two copies to offer plus we'll send out an assortment of essential HeatnBond products that will make sewing small a snap!
Just follow the Rafflecopter to get yourself entered to win!
a Rafflecopter giveaway
https://widget-prime.rafflecopter.com/launch.j/p
So we'd LOVE to give you a chance to win this incredible book so you too can sew small fashions! We have two copies to offer plus we'll send out an assortment of essential HeatnBond products that will make sewing small a snap!
Just follow the Rafflecopter to get yourself entered to win!
a Rafflecopter giveaway
https://widget-prime.rafflecopter.com/launch.j/p