No Products in the Cart
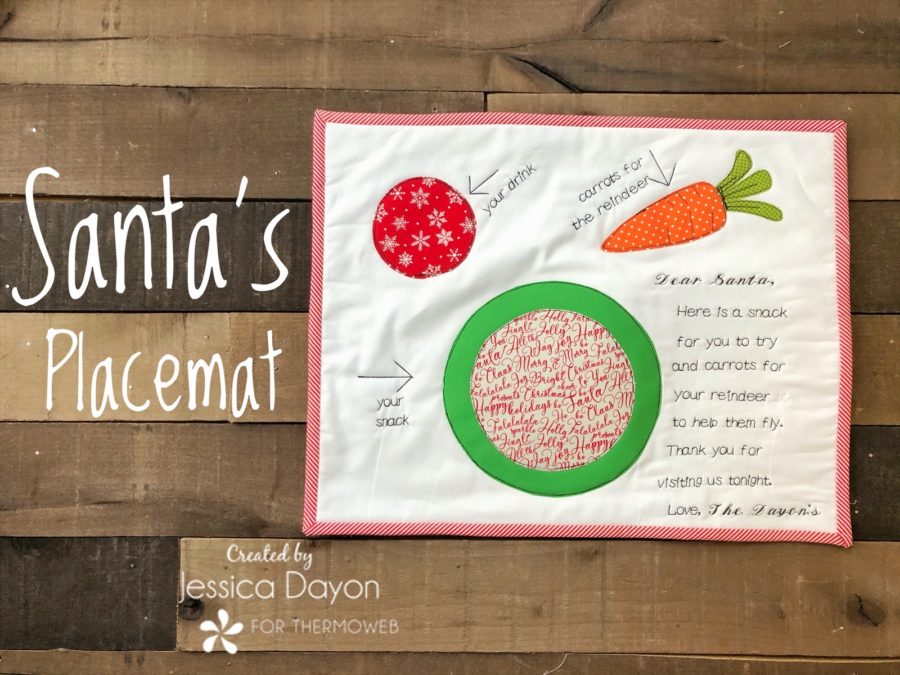 Hi, Everyone! My name is Jessica Dayon and today I am going to walk you through making a placemat for Santa's cookies! This is a really fun project and by changing the fabrics, you can customize the style of it to exactly how you'd like!
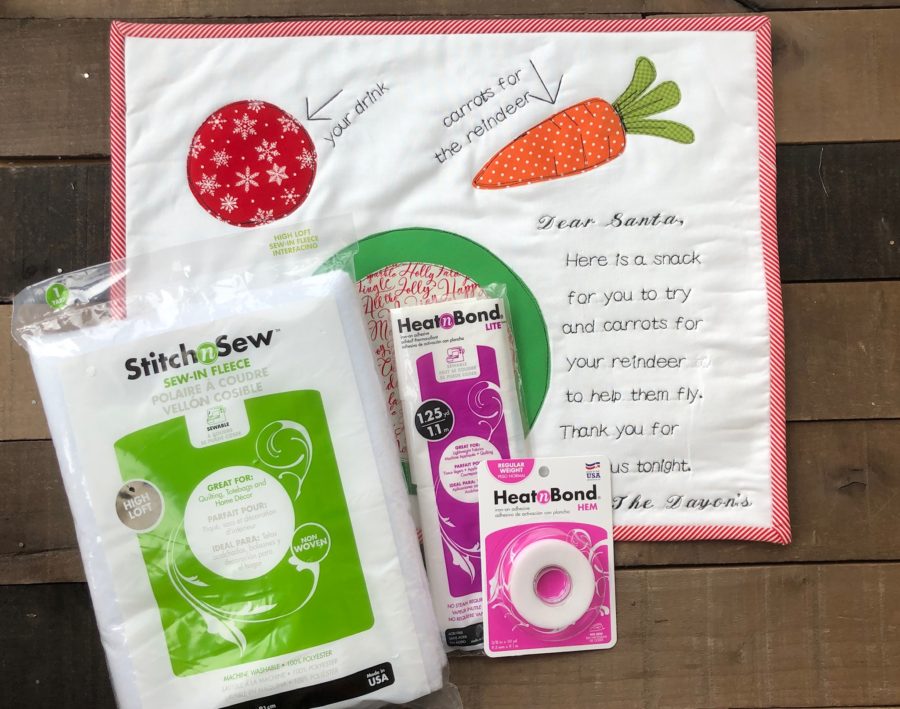 1/2 yard white fabric
1 fat quarter for binding
Fabric scraps for the carrot, drink circle, & 2 plate circles
Heat n Bond Lite Fusible Adhesive
Stitch n Sew Sew-In Fleece
Heat N Bond No Sew Hem Adhesive, 3/8"
Carrot, drink circle, and plate circle templates- Template 1 HERE and Template 2 HERE
1/2 yard white fabric
1 fat quarter for binding
Fabric scraps for the carrot, drink circle, & 2 plate circles
Heat n Bond Lite Fusible Adhesive
Stitch n Sew Sew-In Fleece
Heat N Bond No Sew Hem Adhesive, 3/8"
Carrot, drink circle, and plate circle templates- Template 1 HERE and Template 2 HERE
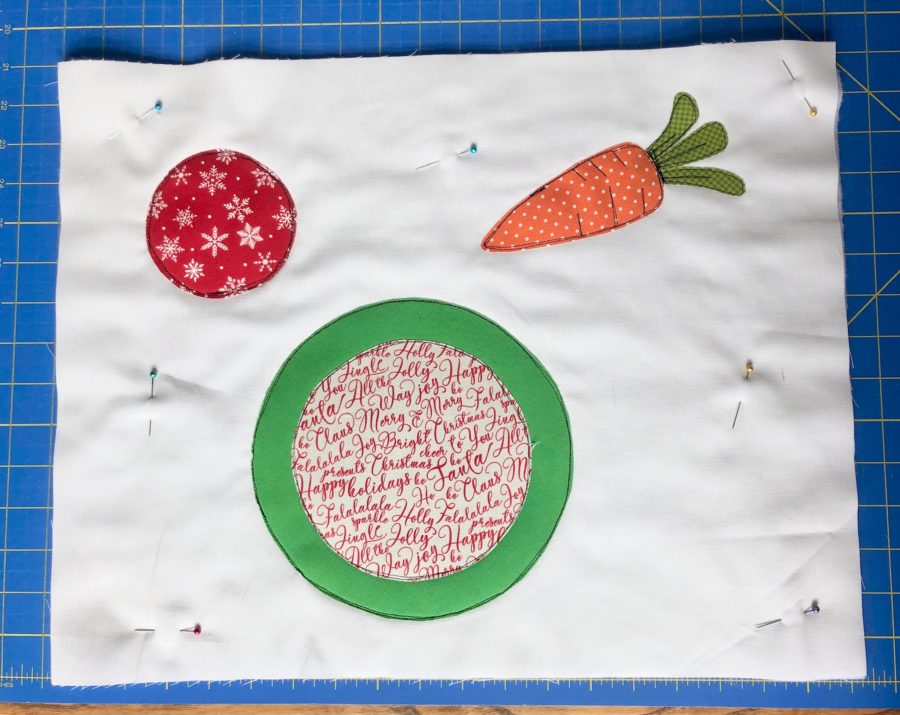
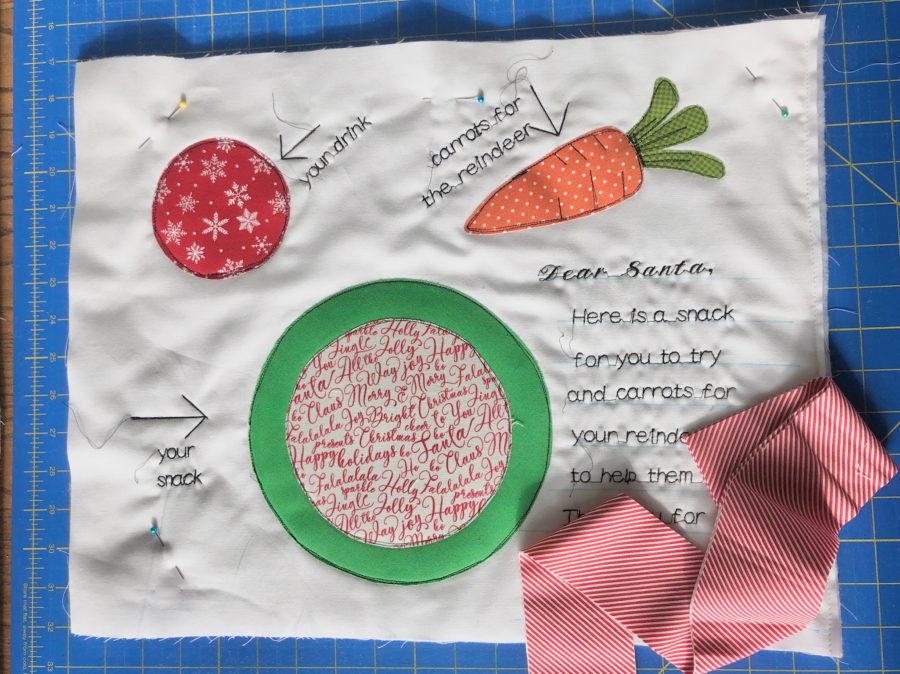
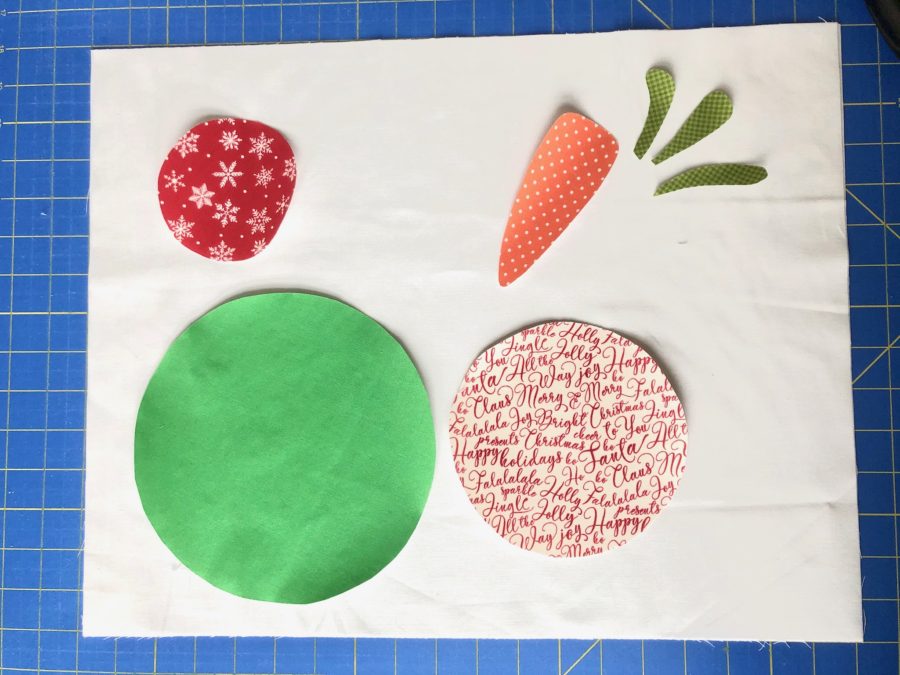 Decide on placement on the mat. Fuse the shapes to the solid white fabric. Pin the sew-in fleece to the wrong side of the top of the placemat. Sew the carrot, drink circle, and plate circles to the placemat to secure using the desired stitch. I've used a straight stitch and black thread.
 Next, embroider the placemat with any sayings you'd like. I used a water-soluble quilt marker to draw lines so I keep the embroidery straight and used machine embroidery to write the following-
Dear Santa,
Here is a snack for you to try and carrots for your reindeer to help them fly. Thank you for visiting us tonight.
Love, (your family's name)
I also added-
-"your drink" with an arrow to the small drink circle
-"your snack" with an arrow to the large plate circle
-"carrots for the reindeer" with an arrow to the carrot
Next, embroider the placemat with any sayings you'd like. I used a water-soluble quilt marker to draw lines so I keep the embroidery straight and used machine embroidery to write the following-
Dear Santa,
Here is a snack for you to try and carrots for your reindeer to help them fly. Thank you for visiting us tonight.
Love, (your family's name)
I also added-
-"your drink" with an arrow to the small drink circle
-"your snack" with an arrow to the large plate circle
-"carrots for the reindeer" with an arrow to the carrot
 You could use hand embroidery (instead of or in addition to machine embroidery) if desired.
Finally lay the piece of the white fabric for the back of the placemat on the workspace. Lay the top of the placemat directly on top of it, right side up. Pin the layers together. Sew the binding on to the front of the placemat. When you are attaching your binding, you are also sewing the placemat layers together. Remove the pins. Flip the placemat over. To secure the binding down, use the hem tape. Measure a length of hem tape and adhere it to the inside edge of the binding. Remove the paper, pull the binding around, and adhere the binding down to the pillow back. Repeat all the way around.
You could use hand embroidery (instead of or in addition to machine embroidery) if desired.
Finally lay the piece of the white fabric for the back of the placemat on the workspace. Lay the top of the placemat directly on top of it, right side up. Pin the layers together. Sew the binding on to the front of the placemat. When you are attaching your binding, you are also sewing the placemat layers together. Remove the pins. Flip the placemat over. To secure the binding down, use the hem tape. Measure a length of hem tape and adhere it to the inside edge of the binding. Remove the paper, pull the binding around, and adhere the binding down to the pillow back. Repeat all the way around.
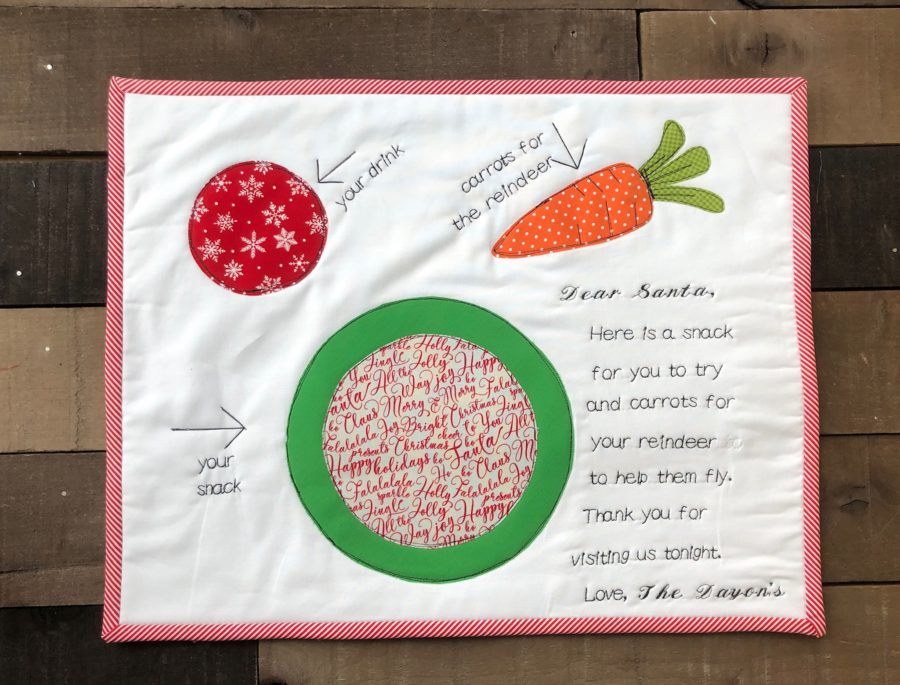 All set! Now you can have a special placemat for Santa when you are setting out the Christmas treats for him!
I hope you have enjoyed this tutorial and you found it easy to follow along with me! If you have any questions, please let me know! Don’t forget to follow me on Instagram so you can stay up to date with my latest free projects- @jessicadayon. Share what you made! I’d love to see your progress photos and finished pillow! Use the hashtags #rayquiltblockpattern #jessicadayonpatterns #thermoweb #heatnbond #spraynbond and tag me so I can see your version @jessicadayon
Also, you can find my blog HERE. On it, I share free quilt patterns and tutorials so go check it out! You can also find me on Instagram @jessicadayon where you can connect with me and see my daily work, current projects, inspiration, giveaways, quilt alongs, and all of my patterns.
Thanks for following along with me!
-Jessica
Blog- {Jessica Dayon}
Instagram {@jessicadayon)
All set! Now you can have a special placemat for Santa when you are setting out the Christmas treats for him!
I hope you have enjoyed this tutorial and you found it easy to follow along with me! If you have any questions, please let me know! Don’t forget to follow me on Instagram so you can stay up to date with my latest free projects- @jessicadayon. Share what you made! I’d love to see your progress photos and finished pillow! Use the hashtags #rayquiltblockpattern #jessicadayonpatterns #thermoweb #heatnbond #spraynbond and tag me so I can see your version @jessicadayon
Also, you can find my blog HERE. On it, I share free quilt patterns and tutorials so go check it out! You can also find me on Instagram @jessicadayon where you can connect with me and see my daily work, current projects, inspiration, giveaways, quilt alongs, and all of my patterns.
Thanks for following along with me!
-Jessica
Blog- {Jessica Dayon}
Instagram {@jessicadayon)