No Products in the Cart
 Well, hang onto your Christmas socks because do we have a week for YOU!
We've teamed up for the FIRST time with our friends at Reverse Confetti! WOHOO!
If you know how these collaborations week work that means ALL good things. Such as incredible projects to get your creativity in gear, a new idea for working with our two companies products and of course...a giveaway or two!
Join us all week here AND on the Reverse Confetti Blog for incredible ideas...and even better they just released a whole bunch of adorable new Stamps and Confetti Cuts that you're going to love! So let's get the fun started...
Well, hang onto your Christmas socks because do we have a week for YOU!
We've teamed up for the FIRST time with our friends at Reverse Confetti! WOHOO!
If you know how these collaborations week work that means ALL good things. Such as incredible projects to get your creativity in gear, a new idea for working with our two companies products and of course...a giveaway or two!
Join us all week here AND on the Reverse Confetti Blog for incredible ideas...and even better they just released a whole bunch of adorable new Stamps and Confetti Cuts that you're going to love! So let's get the fun started...
 Hi friends, welcome to Reverse Confetti week here on the Therm O Web blog! Today I have a pair of bright and happy cards to share featuring lots of beautiful stamps and die sets from Reverse Confetti mixed with Therm O Web's awesome iCraft Deco Foil Flock. So let's take a closer look!
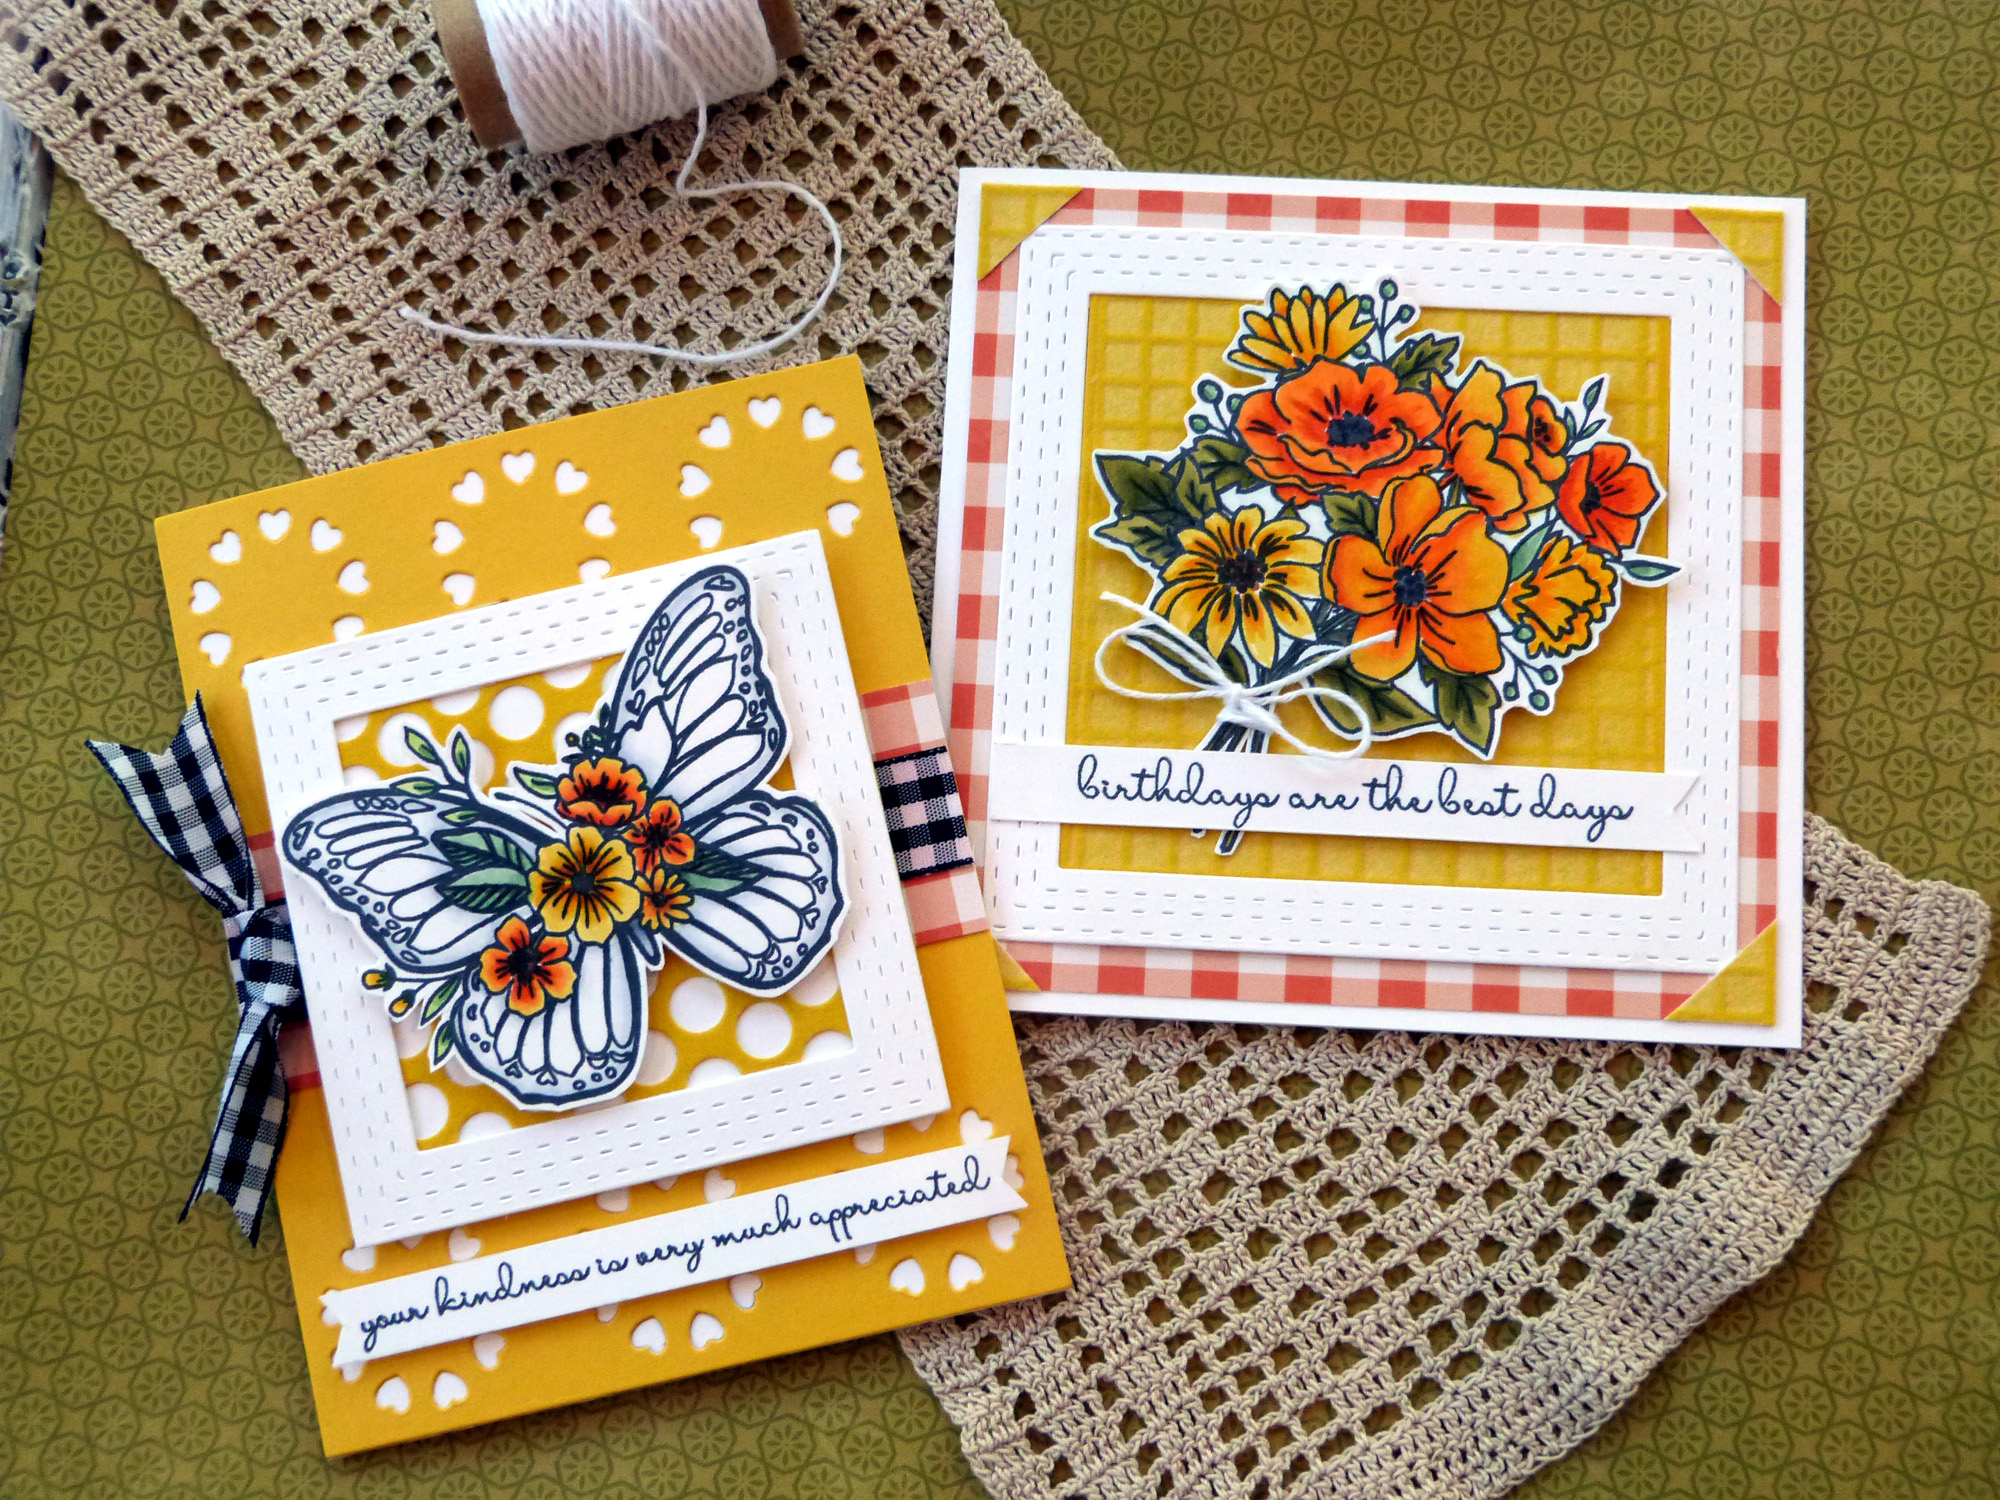
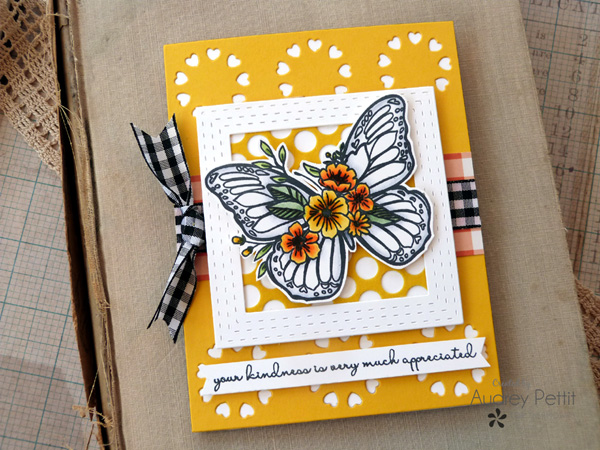 You can never have too many basic cards in your stash, such as thank you's and birthdays, so that's what I'm focusing on today starting with this sweet butterfly card. Love how the Sunshine Yellow flock matches perfectly with our Wild Dandelion cardstock!
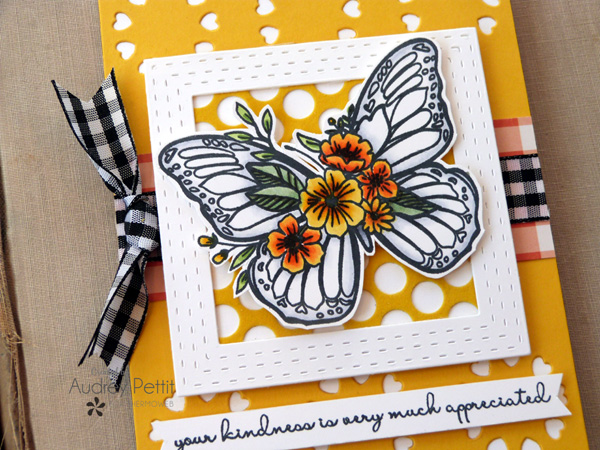
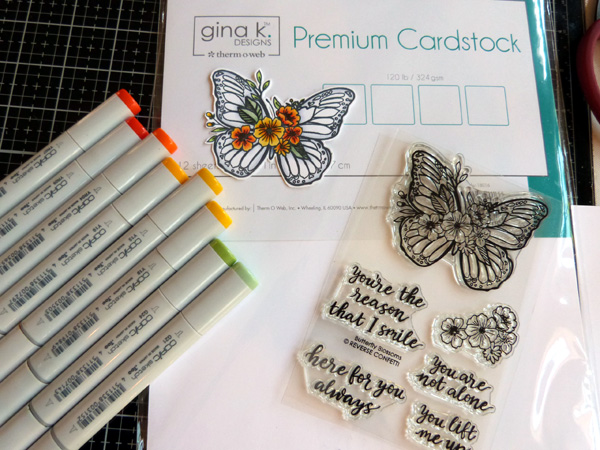 To begin, stamp the butterfly image onto Luxury White cardstock using Memento Tuxedo Black ink. Color just the flowers and leaves with Copic markers, and add shadows to the wings using a very light grey marker. Fussy cut the image.
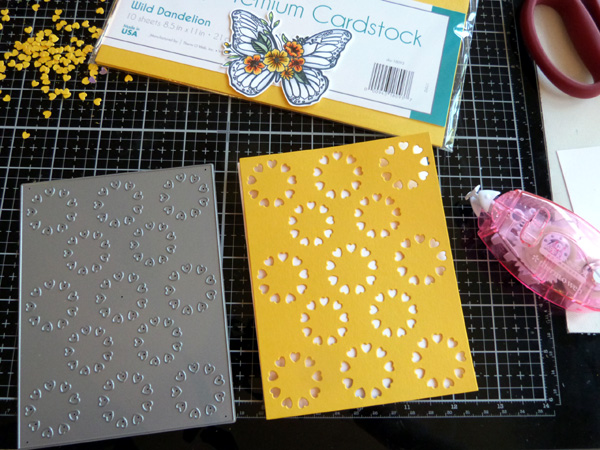 Create a standard A2 card base from Luxury White cardstock. Cut a 4.25x5.5" panel of Wild Dandelion cardstock, and die cut it with the Circle of Hearts cover panel. Adhere the cover panel to the card base using Memory Tape Runner XL.
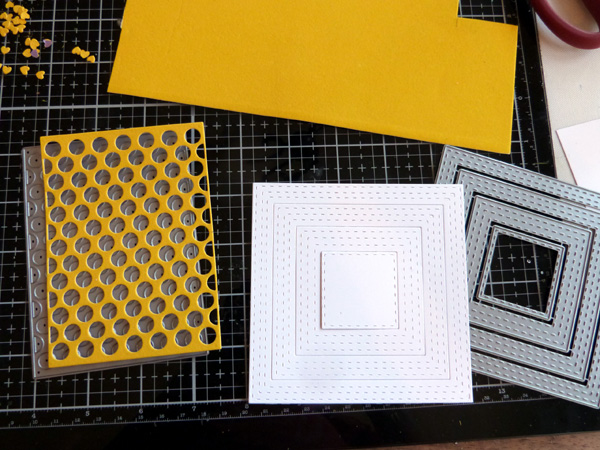 Die-cut the Stitched Squares dies from Luxury White cardstock. Select the second largest square, and set the rest aside for another project. Cut a panel of Sunshine Yellow deco foil flock sheet, and die cut it with the Polka Panel die.
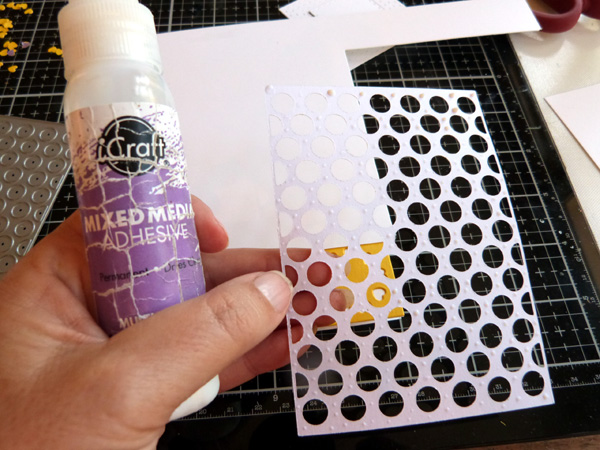 Add small dots of Mixed Media adhesive all over the backside of the flock panel. Adhere the panel to a piece of Luxury White cardstock, and trim the edges as needed.
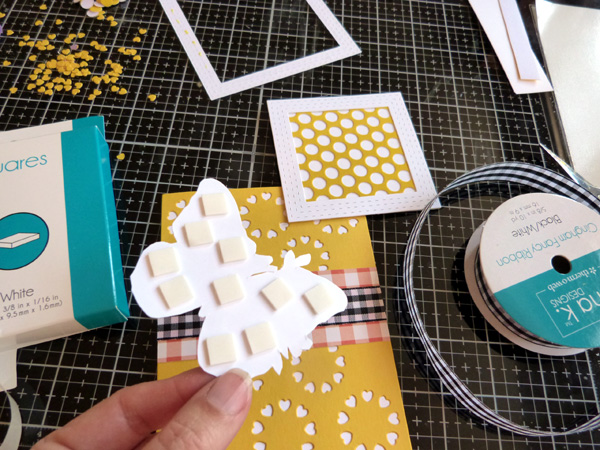 Adhere the stitched square to the flock panel, again trimming the edges. Add a strip of patterned paper and gingham ribbon to the center of the card using Memory Tape Runner XL. Place foam squares onto the back of the butterfly and the back of the stitched square frame.
 Place the square frame and butterfly onto the center of the card. Stamp a sentiment onto a thin strip of Luxury White cardstock, trimming both ends into a V-notch. Add foam squares to the back of the sentiment, and adhere it to the bottom of the card. Tie a knot into a small piece of gingham trim. Cut the ends into a V-notch, and then adhere the bow to the left side of the card using Mixed Media adhesive.
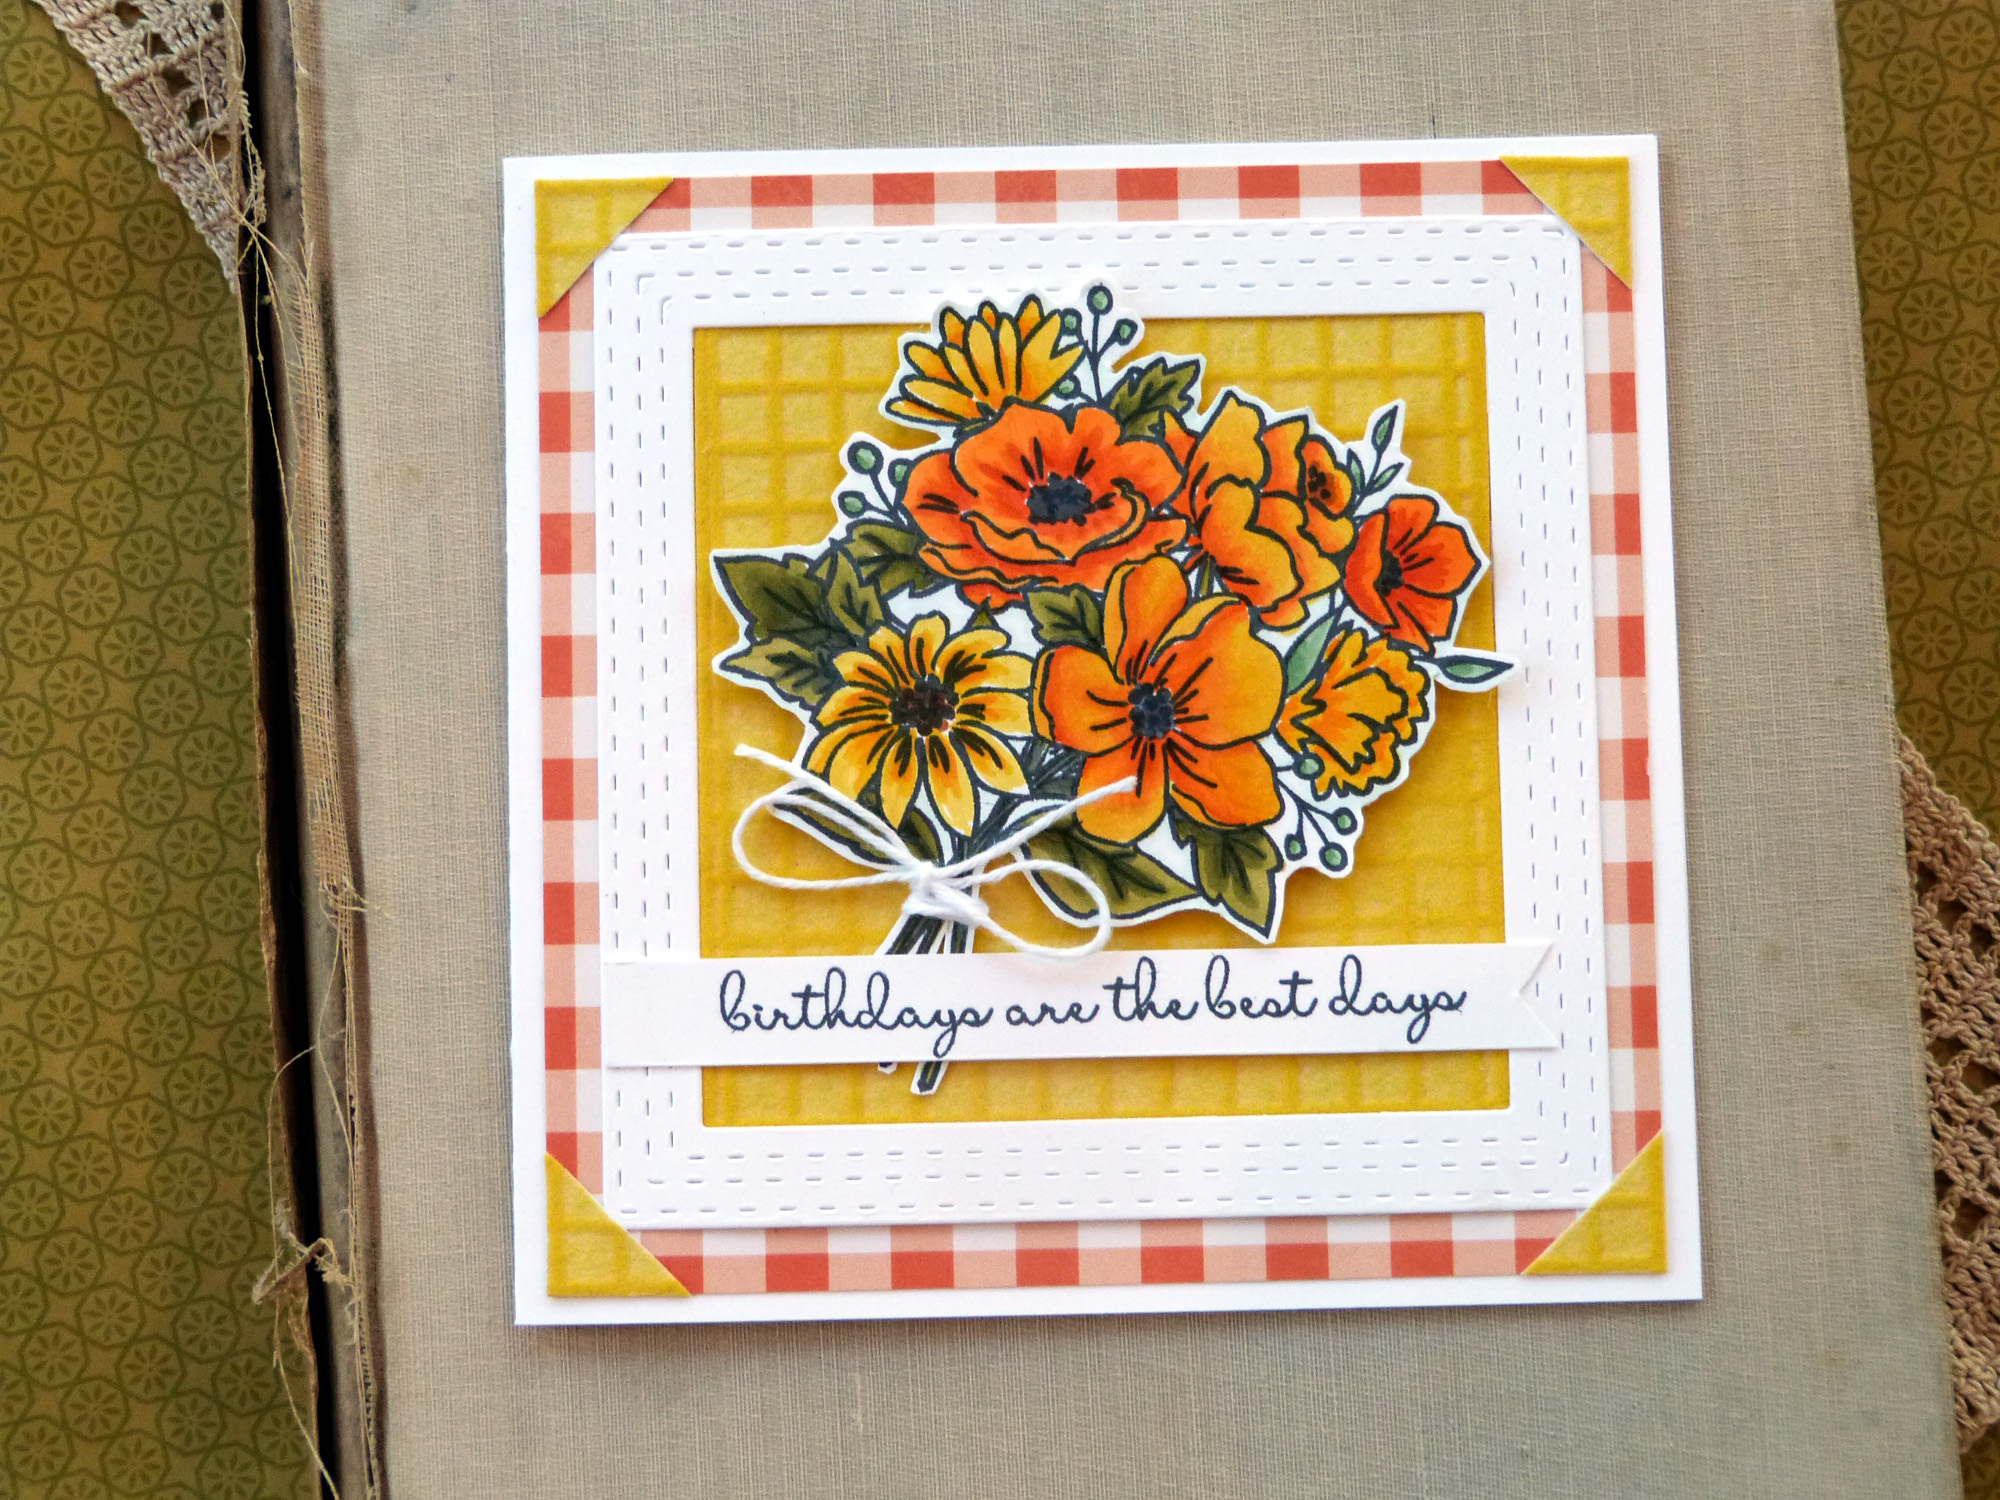
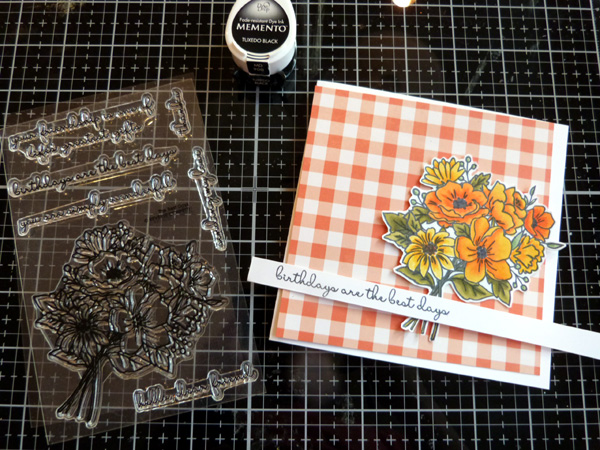 To begin, create a 5" square card base from Luxury White cardstock. Cut a small piece of patterned paper. Stamp the bouquet image onto Luxury White cardstock using Memento Tuxedo Black ink. Color the image with Copic markers, and fussy cut it out. Stamp a sentiment onto a thin strip of cardstock. Adhere the patterned paper to the card base.
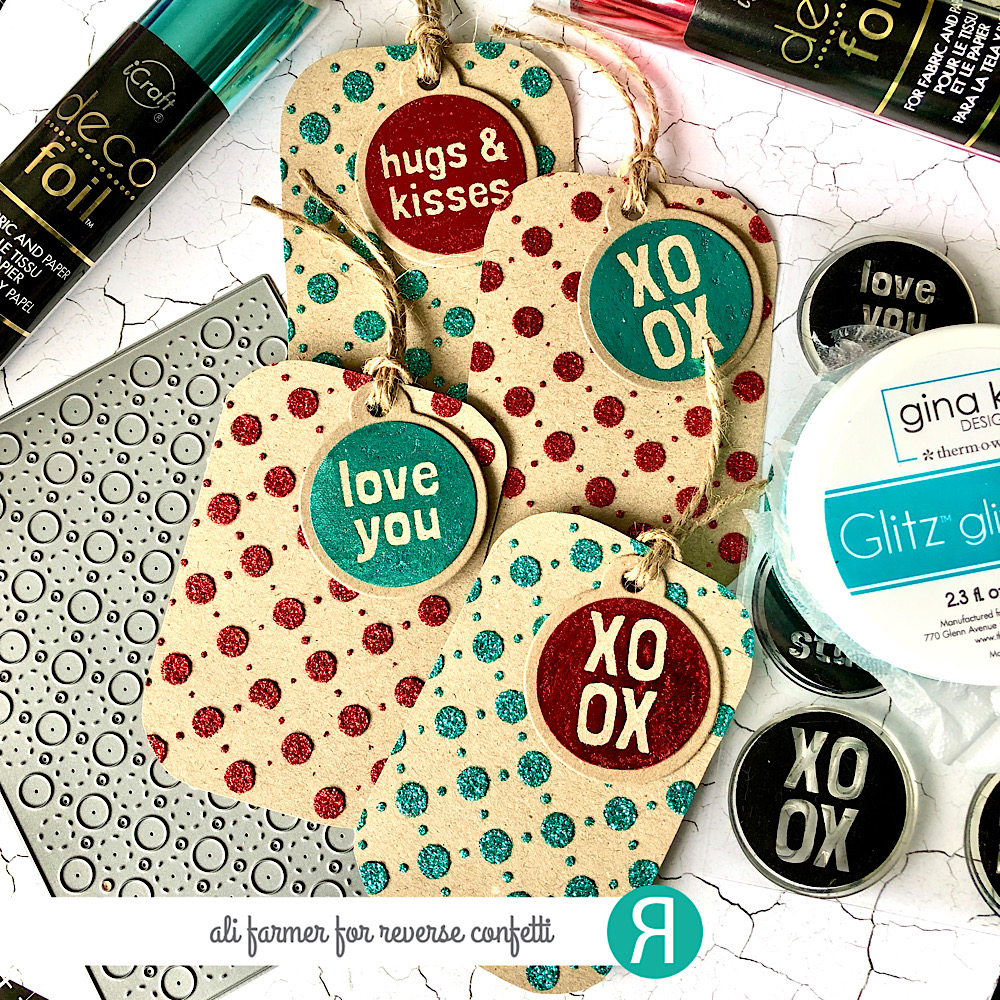
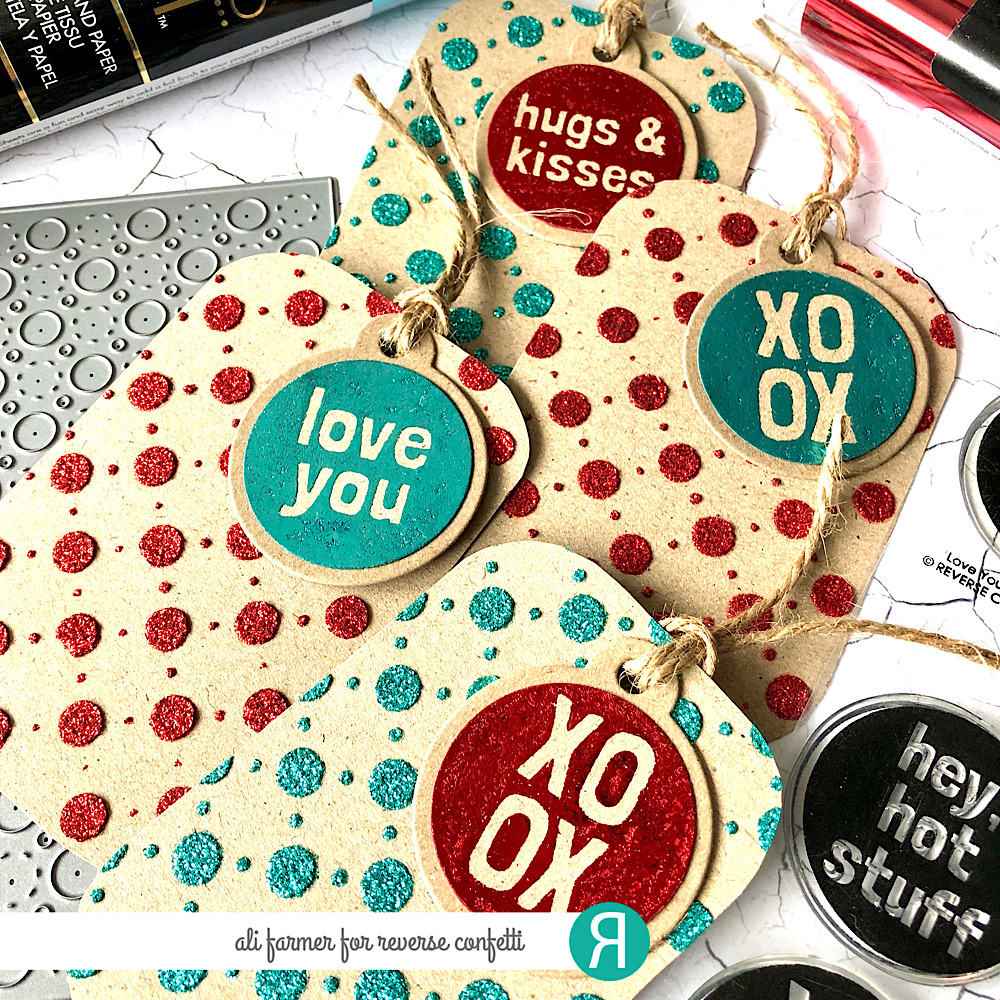
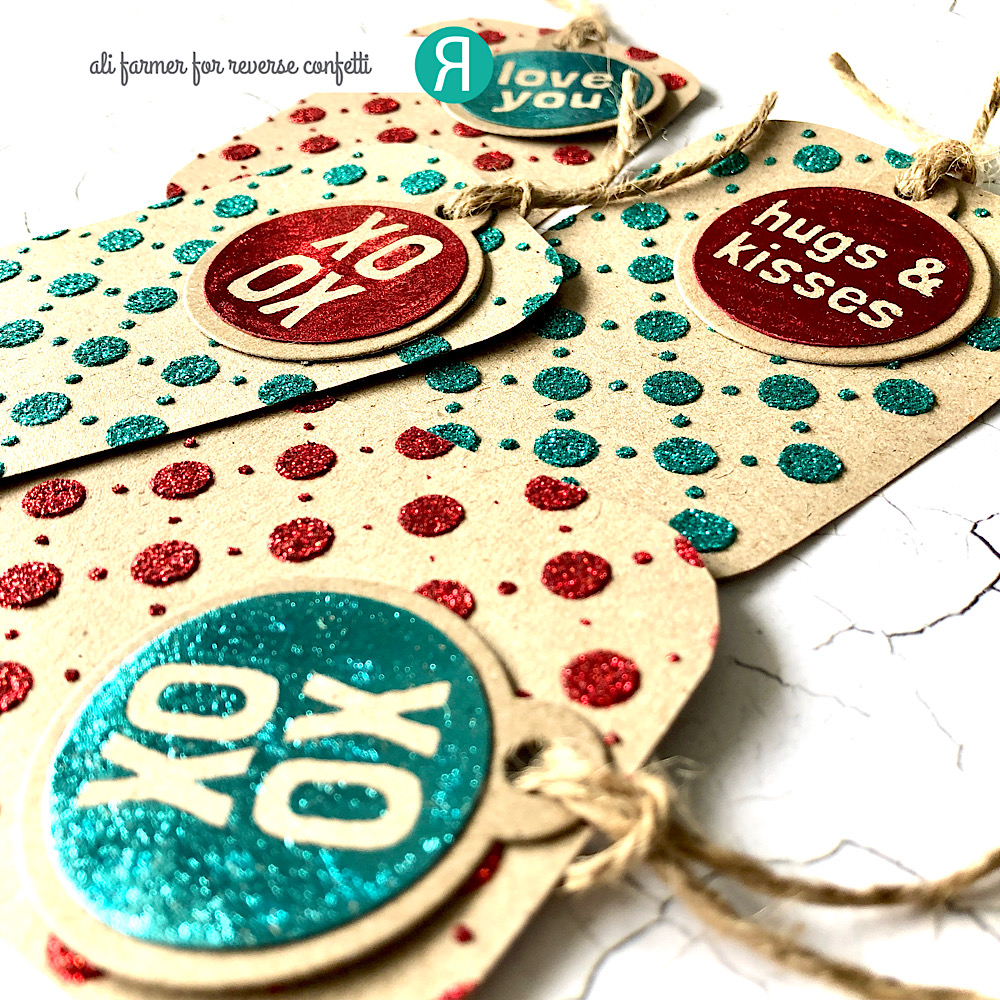
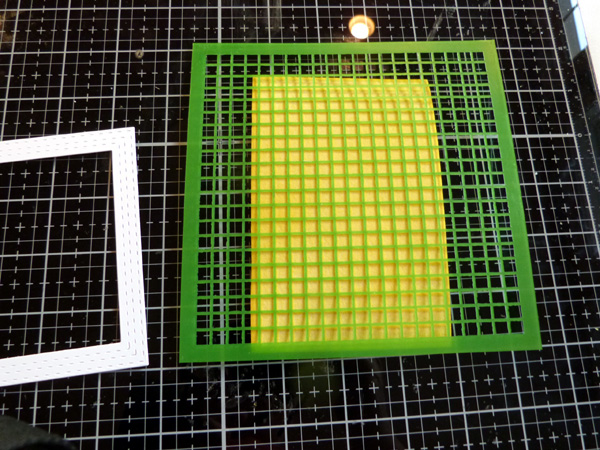 Select the largest stitched square frame, die-cut from the first card. Trim another panel of Sunshine Yellow deco foil flock sheet. I am using a leftover piece of the flock that has a waffle-weave pattern on it created using this stencil and our Deco Foil Transfer Gel. You can see all the how-to's for that technique on this post ( Deco Foil Flock Tags )
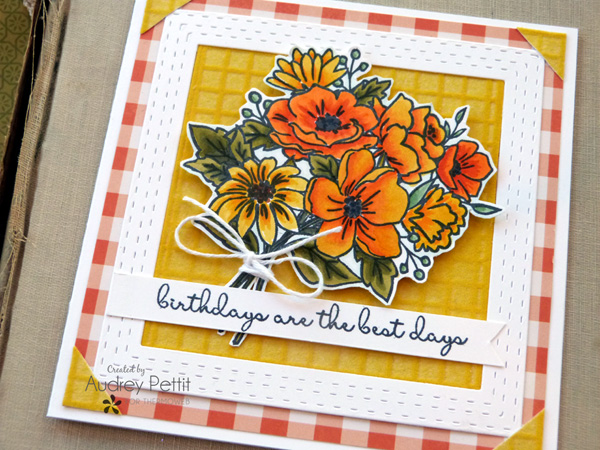 Adhere the flocked panel to the back of the stitched frame using Mixed Media adhesive, and then trim the edges as needed. Adhere the frame to the card base. Cut two small squares of flock leftovers, and cut them in half along the diagonal to create photo corners. Adhere the corners to the card with the Mixed Media adhesive. Wrap twine around the bouquet stems, tying the ends into a bow. Add dots of Mixed Media adhesive to the back of the stems, and add foam squares to the back of the flowers. Adhere the bouquet to the center of the frame. Cut a V-notch into the right end of the sentiment strip, and adhere the strip to the bottom of the bouquet.
[line]
Adhere the flocked panel to the back of the stitched frame using Mixed Media adhesive, and then trim the edges as needed. Adhere the frame to the card base. Cut two small squares of flock leftovers, and cut them in half along the diagonal to create photo corners. Adhere the corners to the card with the Mixed Media adhesive. Wrap twine around the bouquet stems, tying the ends into a bow. Add dots of Mixed Media adhesive to the back of the stems, and add foam squares to the back of the flowers. Adhere the bouquet to the center of the frame. Cut a V-notch into the right end of the sentiment strip, and adhere the strip to the bottom of the bouquet.
[line]
 Ali's Supply List: