No Products in the Cart
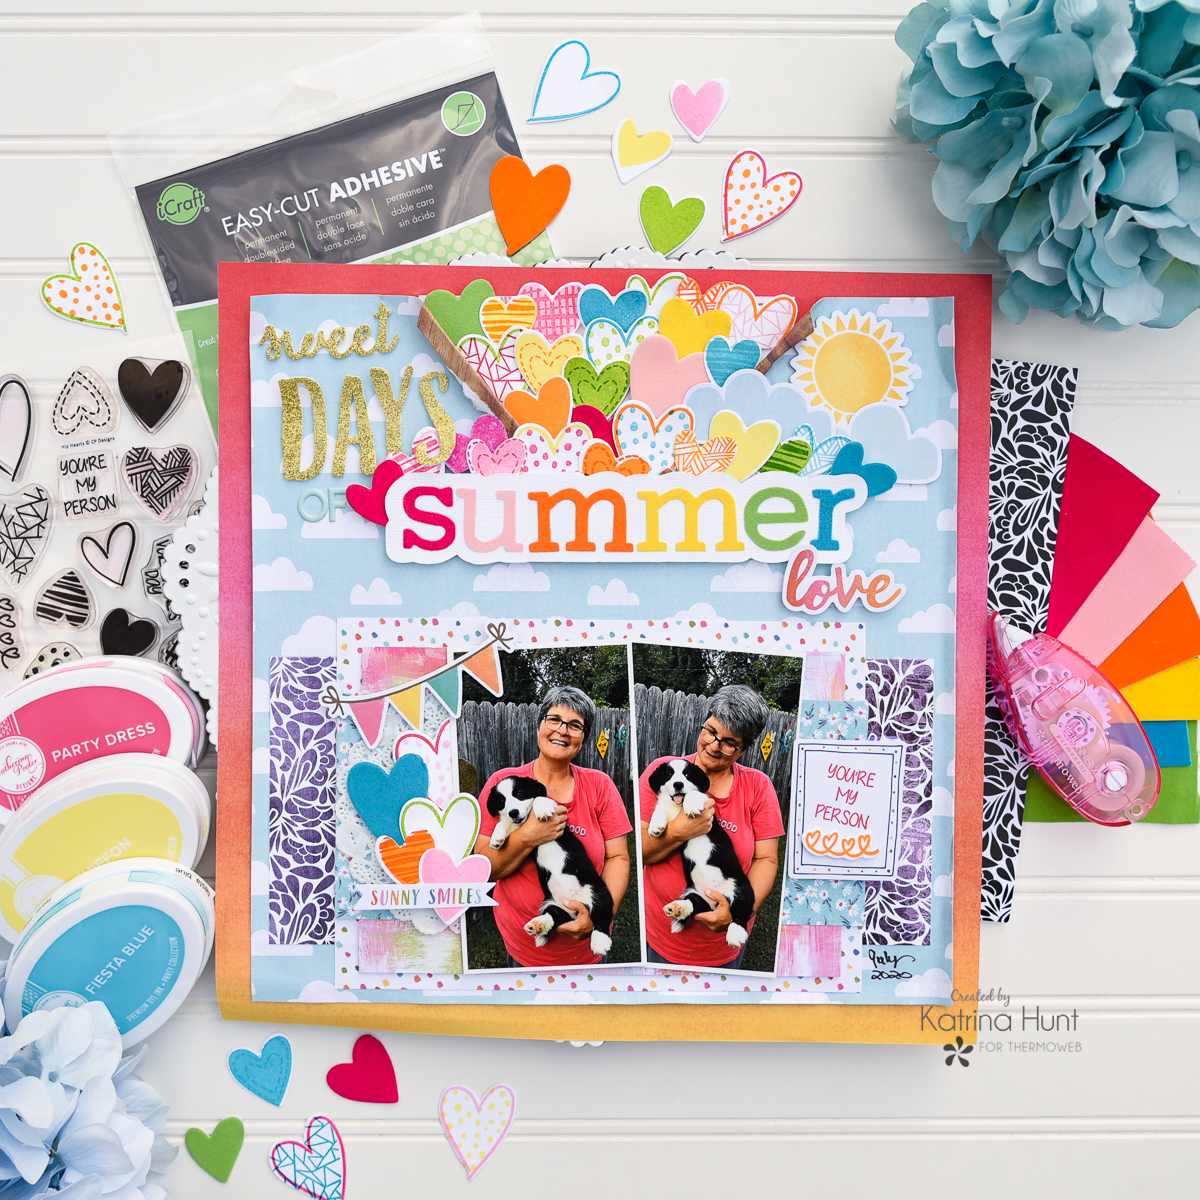
 Hi there!!! It's Katrina from Paper, Scissors, Glue and Hybrid Too sharing a fun rainbow inspired summer layout using DecoFoil Flock Transfer Sheets, some Cocoa Vanilla Studio papers and some Catherine Pooler stamps, dies and inks!
 Therm O Web Supplies Used
ALL NEW Deco Foil TONER SHEETS RELEASE
Memory Runner XL
Memory Runner XL Refill
3D Foam Squares – Combo Pack
Deco Foil Foam Adhesive Sheets-White
Easy Cut Adhesive Sheets
Deco Foil Slimline Card Front – Blossom Buddies
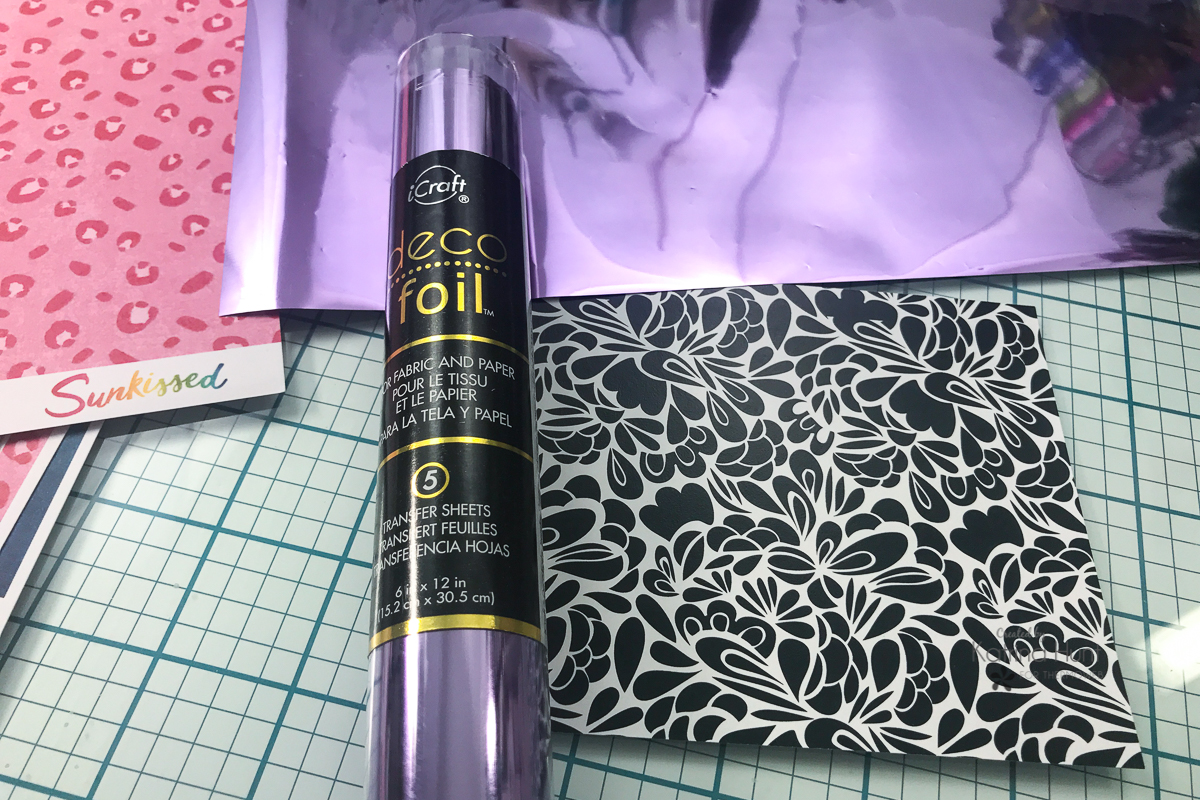
Deco Foil Transfer Sheets-Lilac
Deco Foil Flock Transfer Sheets
Deco Foil Flock Transfer Sheets – Think Pink
Deco Foil Flock Transfer Sheets-Pink Carnation
Deco Foil Foil Transfer Sheets-Orange Glow
Deco Foil Foil Flock Transfer Sheets-Sunshine Yellow
Deco Foil Foil Flock Transfer Sheets-Green Envy
Deco Foil Foil Flock Transfer Sheets-Blue Diamond
Easy Tear-Tape 1/2 inch
Purple Tape-1/2 inch
Ultra Bond Liquid Adhesive
Gina K Designs Foam Tape – White
Gina K Designs Foam Squares-White
Catherine Pooler Supplies Used:
Stamps and Dies
Hip Hearts Stamps
Hip Hearts Dies
Hip Hearts Bundle
Inks
Party Dress
It's A Girl
Tiki Torch
Chiffon
Lime Rickey
Fiesta Blue
Other Supplies Used:
Cocoa Vanilla Studios-Sunkissed Collection
Silhouette Cameo with a cut file
Therm O Web Supplies Used
ALL NEW Deco Foil TONER SHEETS RELEASE
Memory Runner XL
Memory Runner XL Refill
3D Foam Squares – Combo Pack
Deco Foil Foam Adhesive Sheets-White
Easy Cut Adhesive Sheets
Deco Foil Slimline Card Front – Blossom Buddies
Deco Foil Transfer Sheets-Lilac
Deco Foil Flock Transfer Sheets
Deco Foil Flock Transfer Sheets – Think Pink
Deco Foil Flock Transfer Sheets-Pink Carnation
Deco Foil Foil Transfer Sheets-Orange Glow
Deco Foil Foil Flock Transfer Sheets-Sunshine Yellow
Deco Foil Foil Flock Transfer Sheets-Green Envy
Deco Foil Foil Flock Transfer Sheets-Blue Diamond
Easy Tear-Tape 1/2 inch
Purple Tape-1/2 inch
Ultra Bond Liquid Adhesive
Gina K Designs Foam Tape – White
Gina K Designs Foam Squares-White
Catherine Pooler Supplies Used:
Stamps and Dies
Hip Hearts Stamps
Hip Hearts Dies
Hip Hearts Bundle
Inks
Party Dress
It's A Girl
Tiki Torch
Chiffon
Lime Rickey
Fiesta Blue
Other Supplies Used:
Cocoa Vanilla Studios-Sunkissed Collection
Silhouette Cameo with a cut file
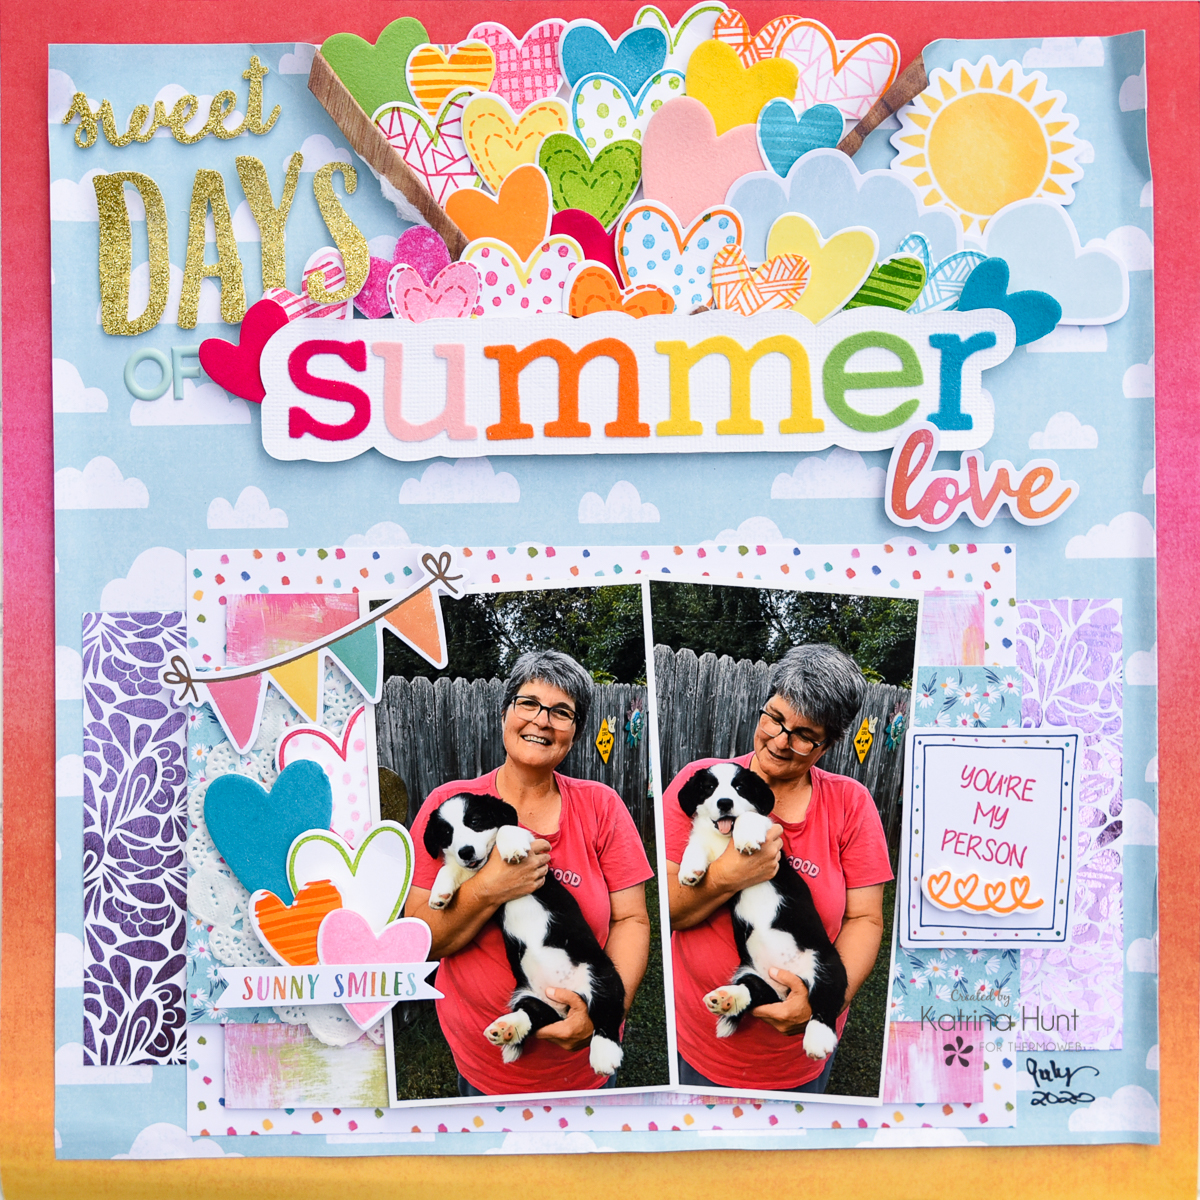 Once again, this layout is one that morphed from my original idea! I seem to be doing that a lot lately with my projects. I did know that I wanted to start with a rainbow theme for the flock and that would be how I did part of my title. Let's get started, I have a ton of step-out photos to share with you.
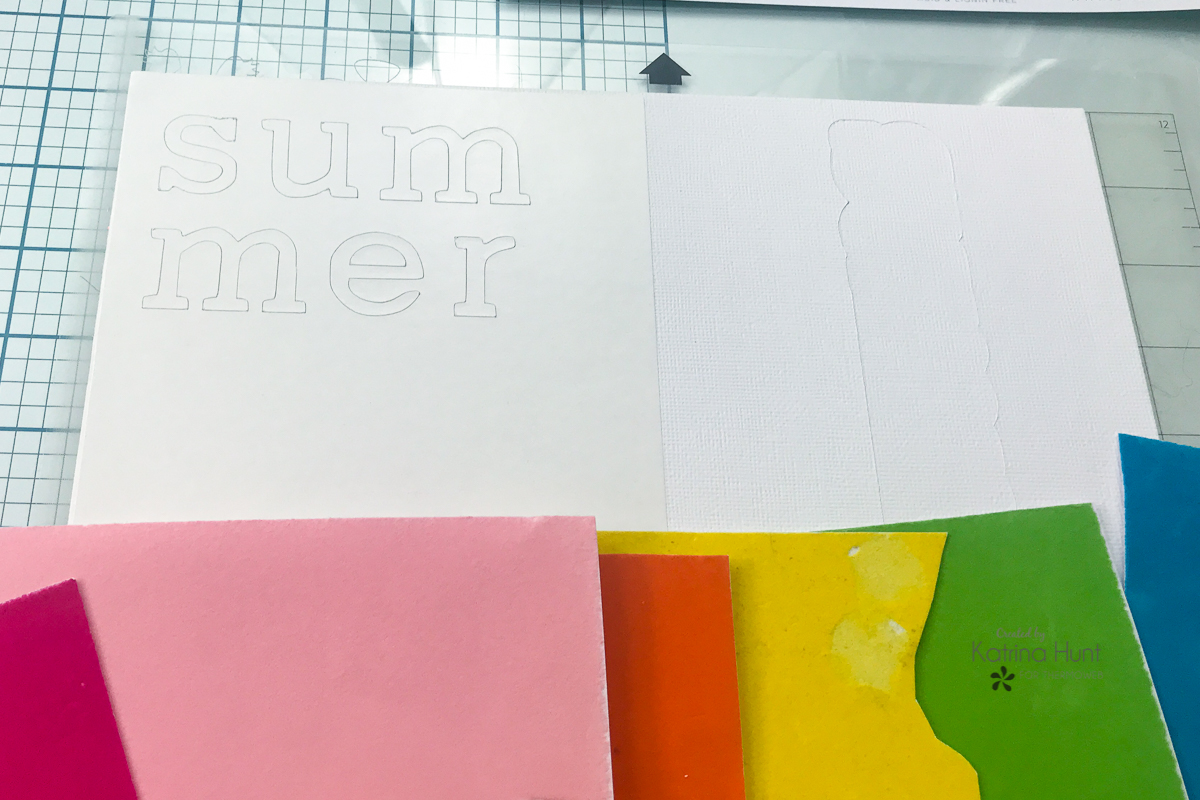
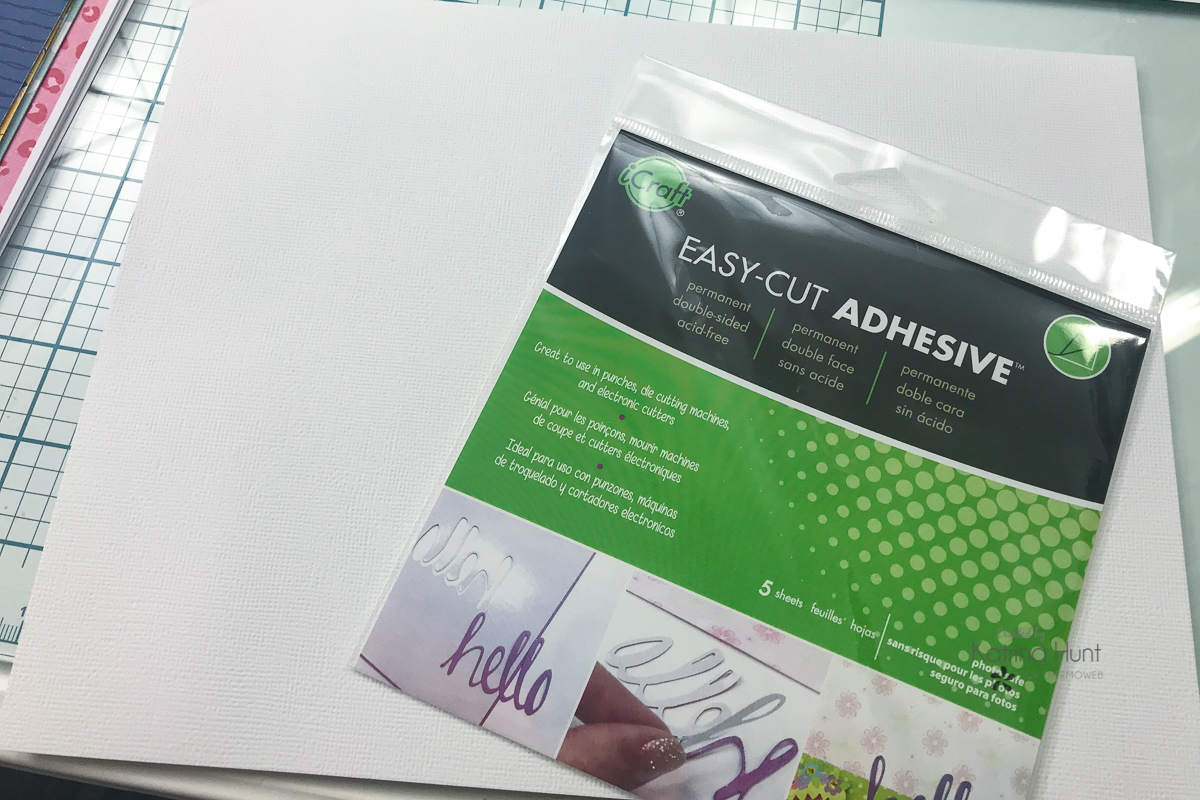 I started by applying some Easy Cut Adhesive to some cardstock to die-cut the "summer" part of my title out with my Cameo. If you want to do this, I used the auto blade setting for textured cardstock and then adjusted my blade depth by 2 higher. I also used the double cut feature. This was perfect to cut thru the Easy Cut Adhesive and cardstock combo.
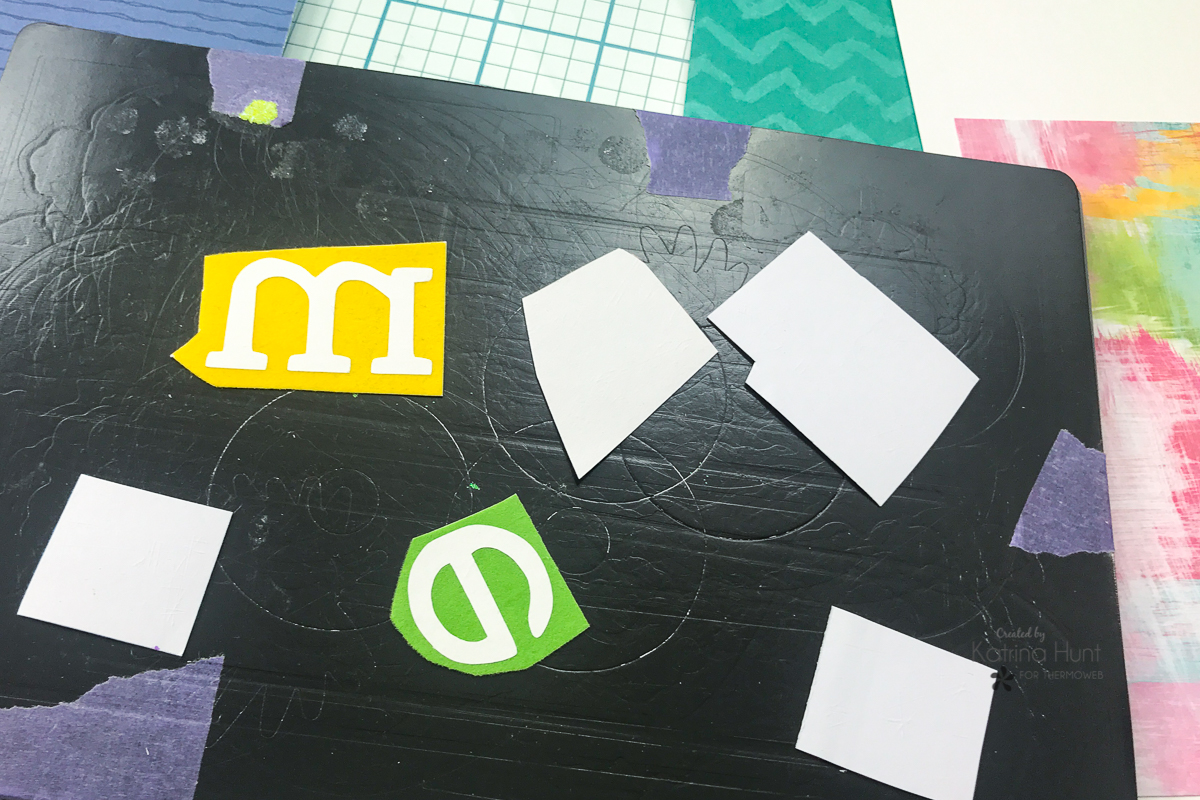
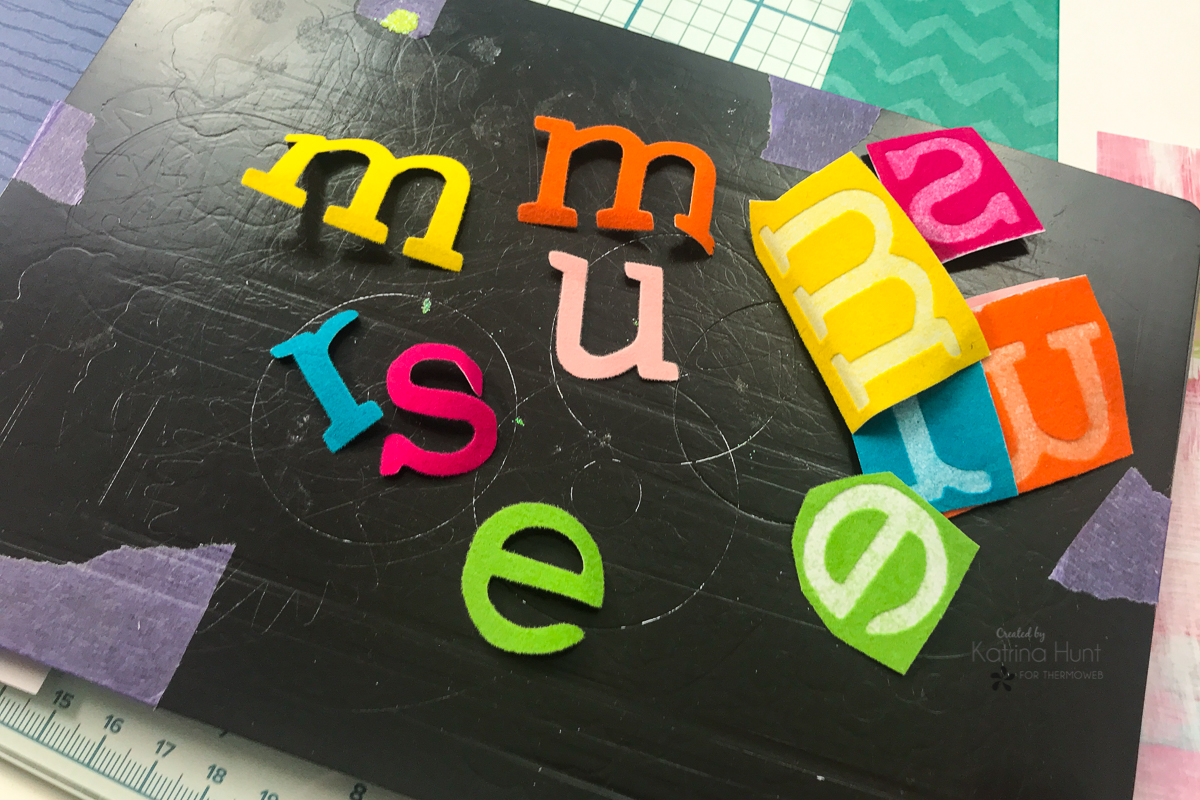
 Next, I cut small pieces of the Flock Transfer Sheets in each color to apply the flock onto the letters. I peel the protective backing off and placed the adhesive side down on the colored flock side. I ran thru my Gemini Jr. to adhere the flock and then pealed the letter from the flock sheet.
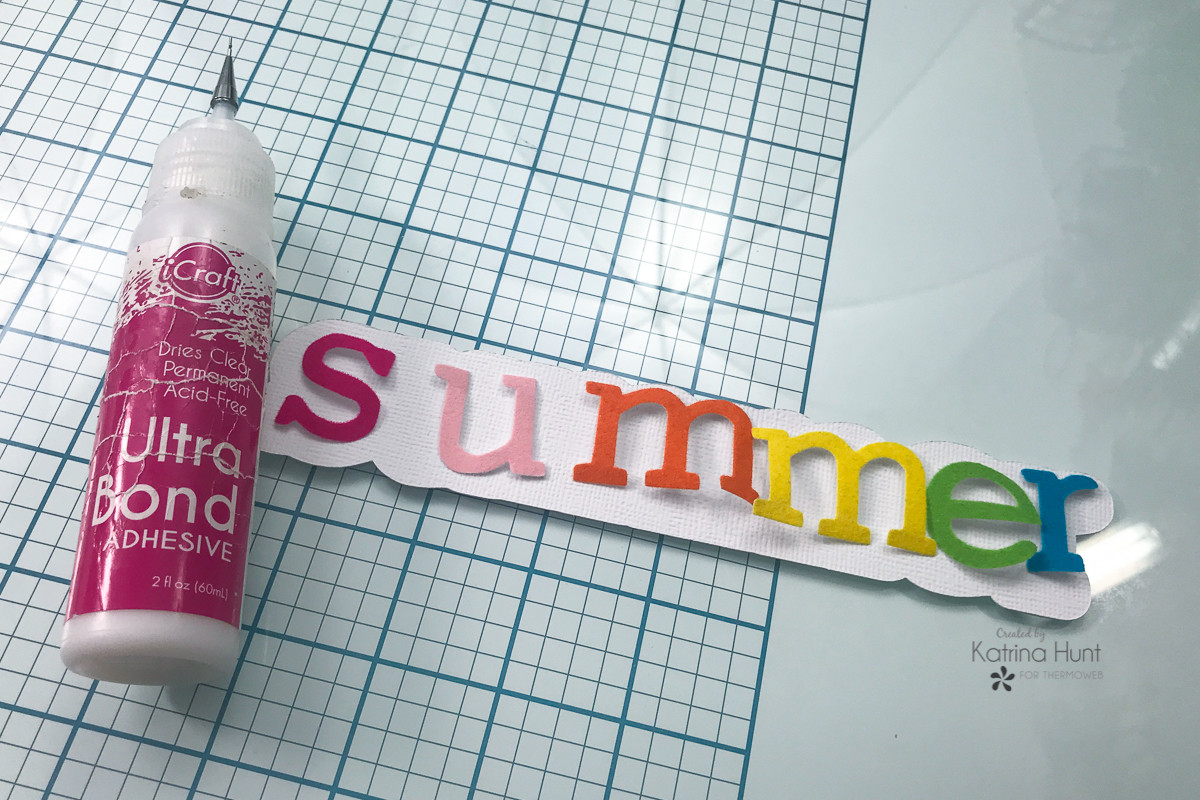
 When I created my title, I made an offset to adhere the letters to and make the title stand out. I used the Ultra Bond Liquid Adhesive to attach my letters to this offset.
 I cut a Blossom Buddies Slimline Toner Sheet in half and foiled it with the Deco Foil in Lilac to use as part of my layout. After foiled, I cut the toner sheet in half again and used each piece to tuck under another piece of paper as a layer.
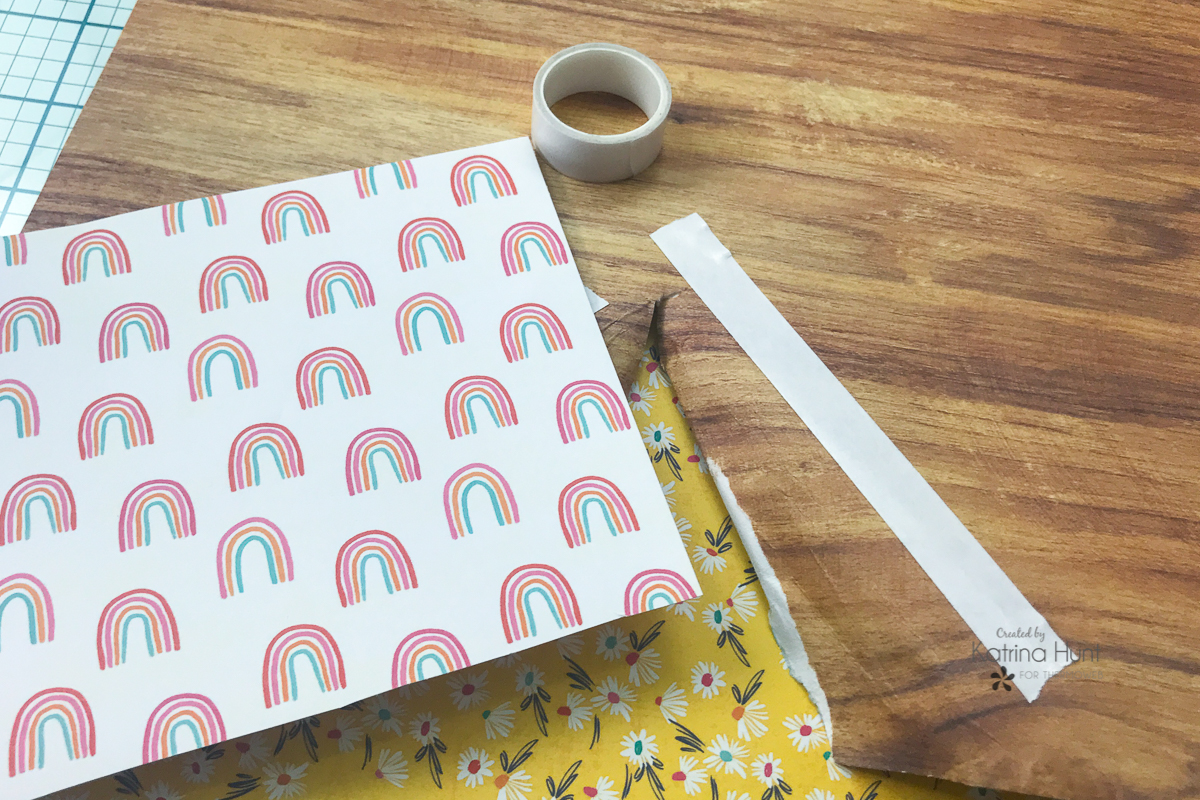
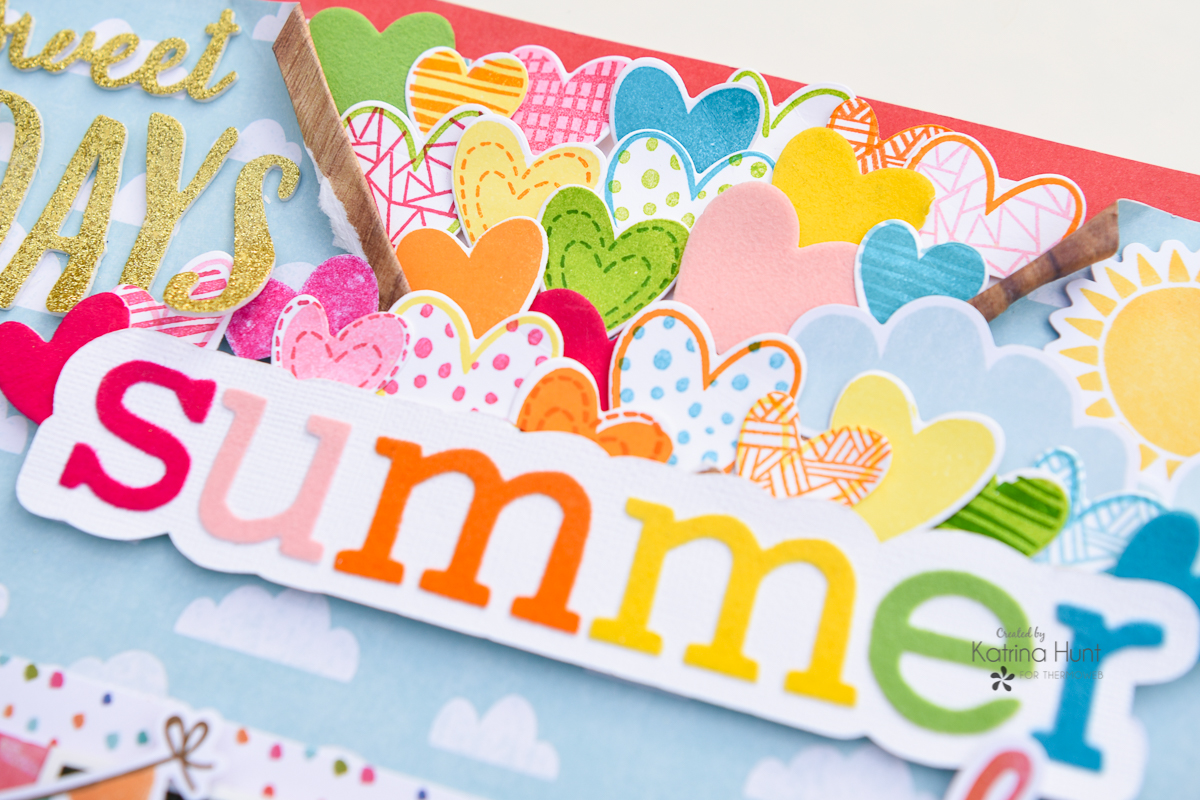
 After I had some of the basic prepping done, I started actually working on my background. The cloud paper is cut at 11x11 and then at 5.5 inches I cut and rolled back each side. I applied Easy Tear Tape and then adhered a different pattern paper to the opening.
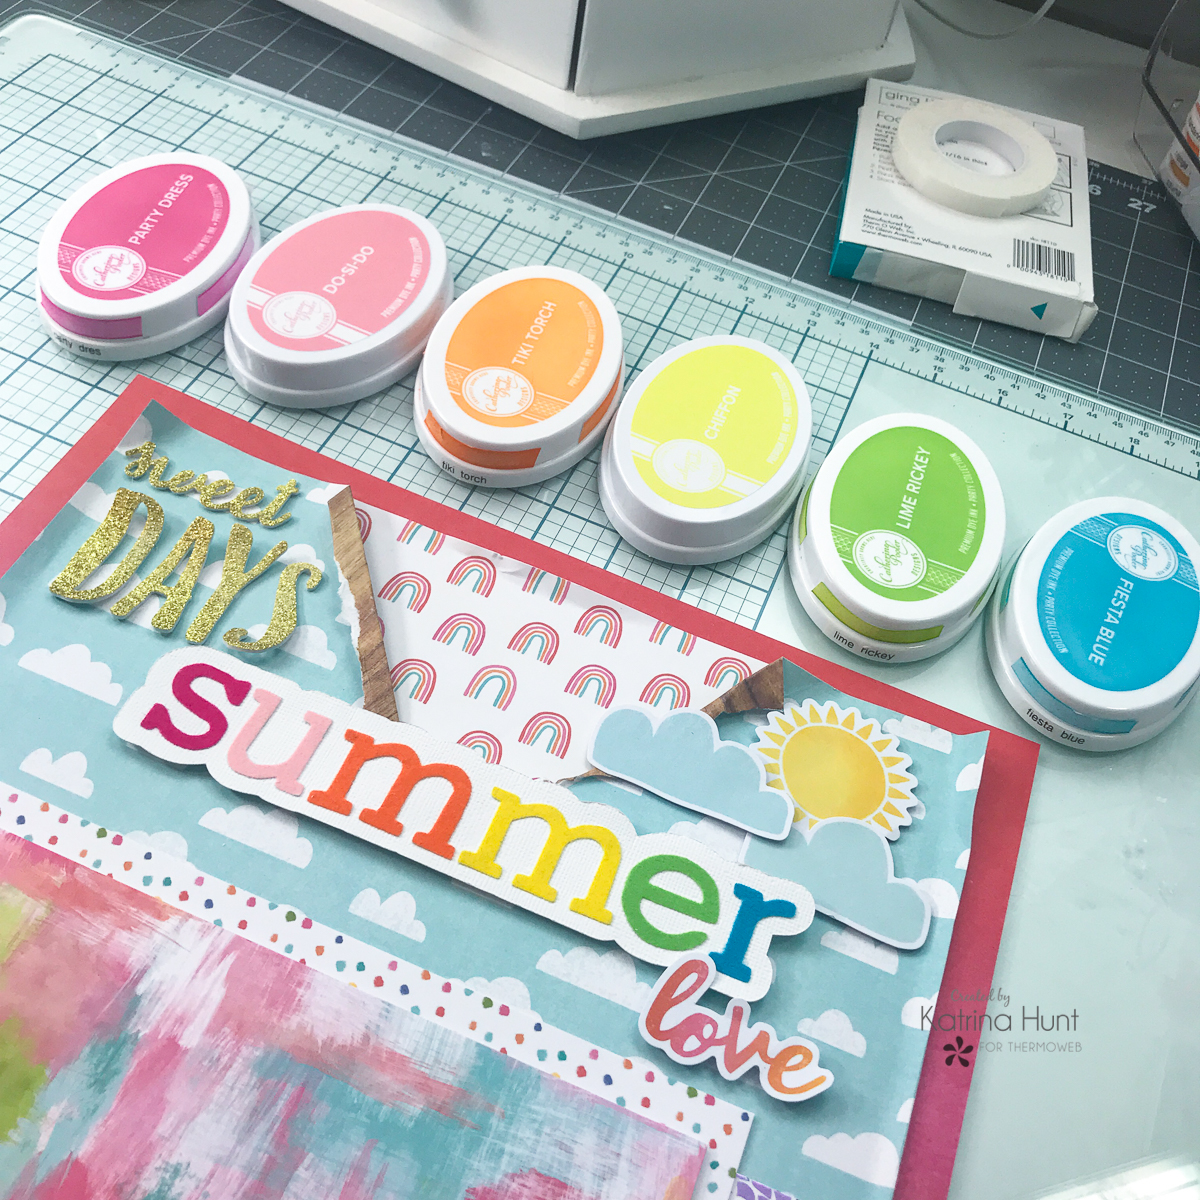
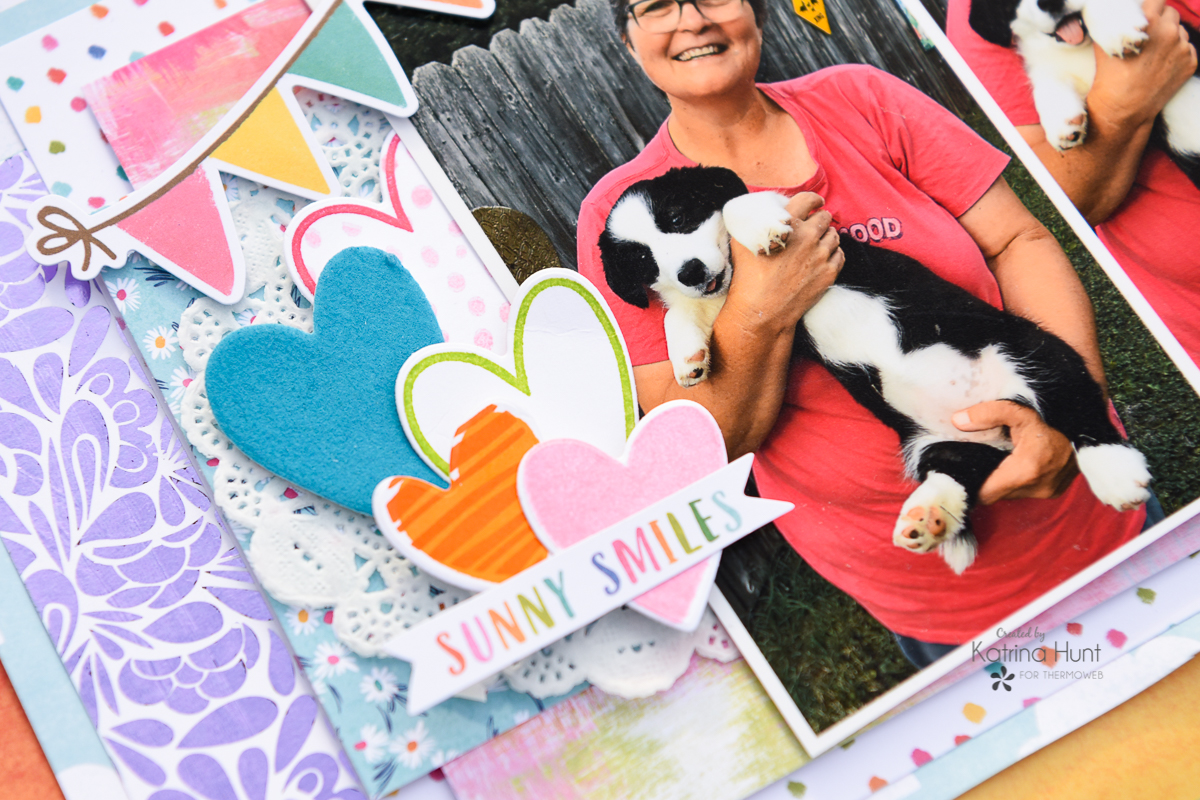
 Here is where my plan when astray! I was going to leave the opening with the rainbow paper, but decided to fill it with stamped and flocked hearts! I picked out Catherine Pooler ink colors that matched the flock colors and got busy! I also just die-cut some flock hearts with the same dies.
 To die-cut the flock, I attached a piece of cardstock to one side of the Deco Foil Foam Adhesive and then applied the flock to the other side. Then using my Gemini Jr. die cut all the hearts below.
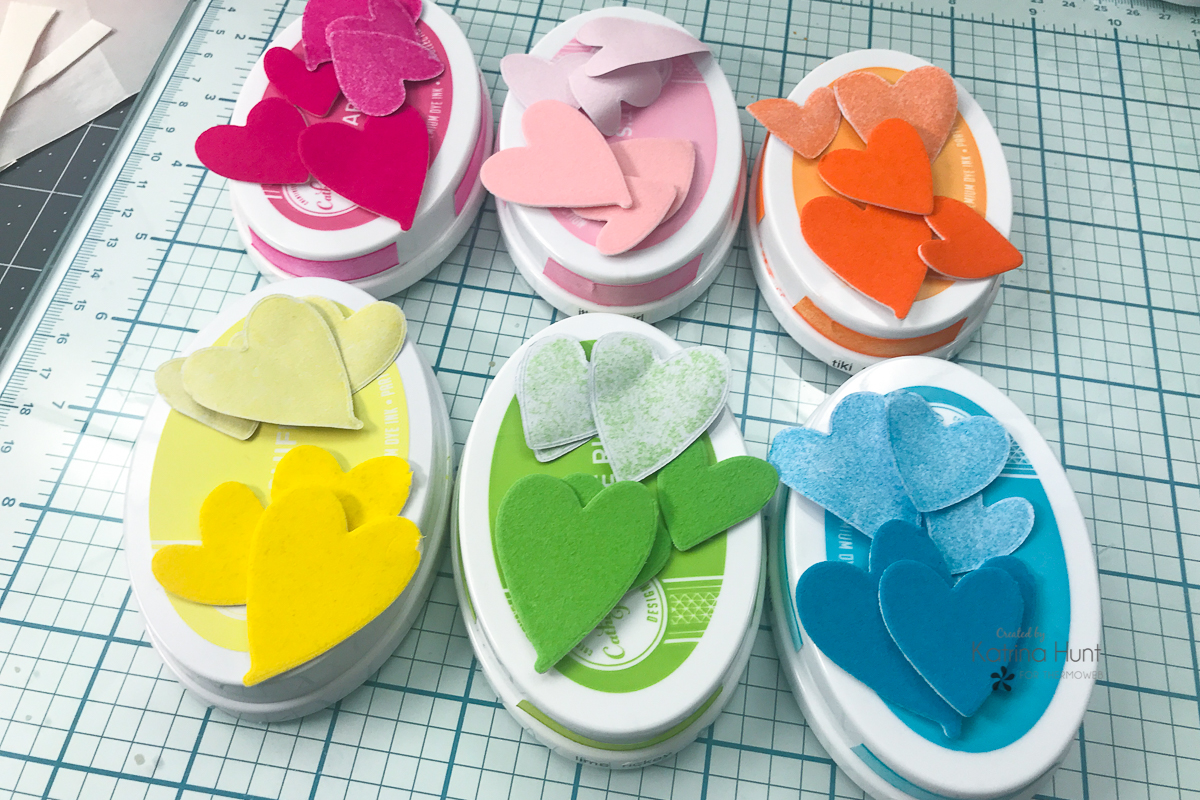 After cutting the flocked hearts, I then stamped and die-cut a bunch of different colored hearts, to fill the pocket up and also to use as accents.
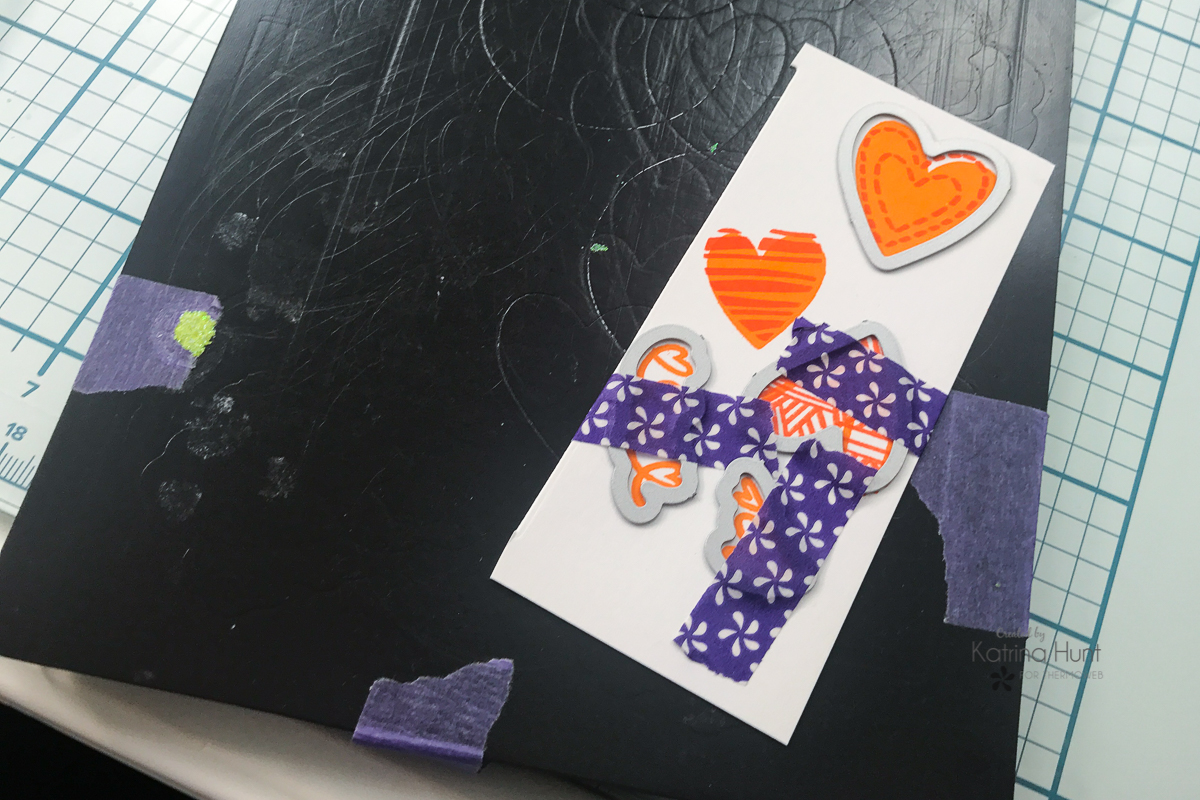
 And here is a tip! If you have a magnetic plate for your die cutting machine, position your dies over your stamped images on the magnetic plate. The plate will hold the dies in place so that you can get the die secured using Purple Tape!
 I used the different sizes of foam squares that Therm O Web has to attach a lot of my embellishments. These were great for stacking all those hearts into the pocket!
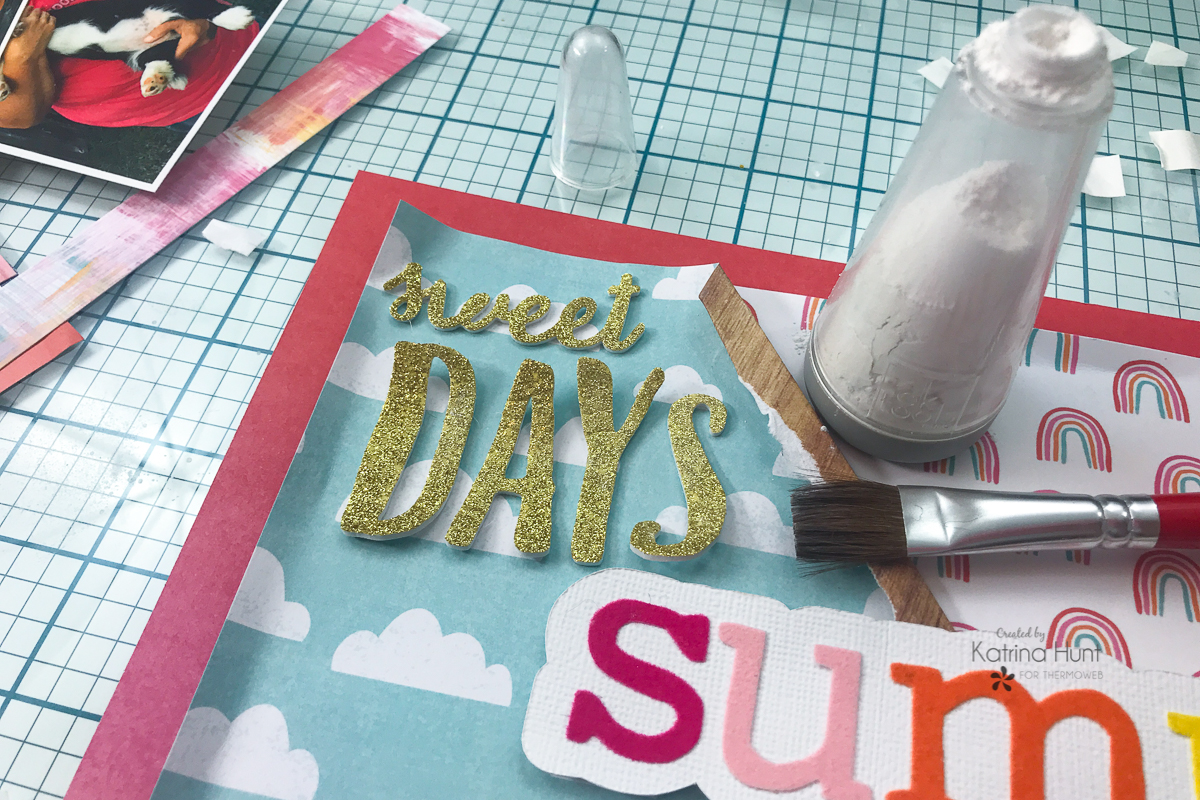
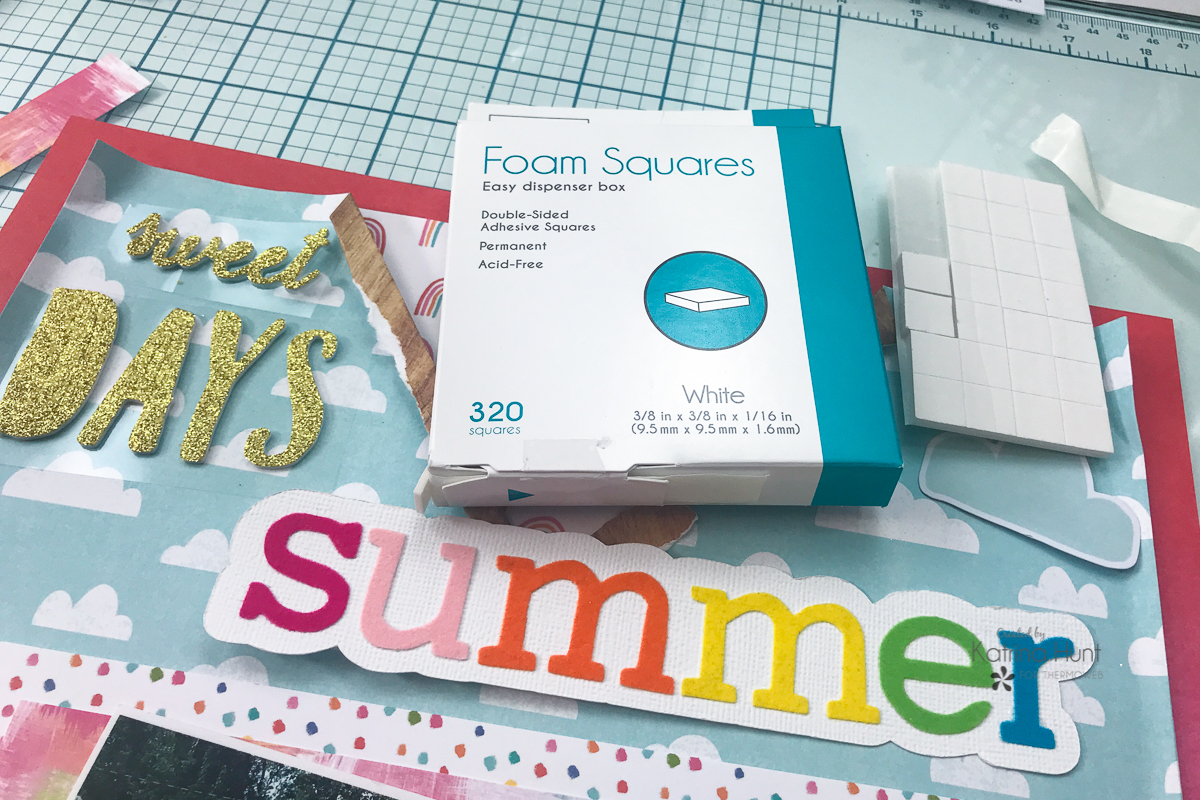 Title work is one of my favorite parts of scrapbooking. It can tell a story all on its own or draw you into the layout more. For this title, when I place the gold glitter letters of "days" down, they were a little bent and not laying flat. I really liked the way it looked, so I used the powder in my powered embossing tool with a paintbrush to cover the adhesive on parts of those letters so they would stick up!
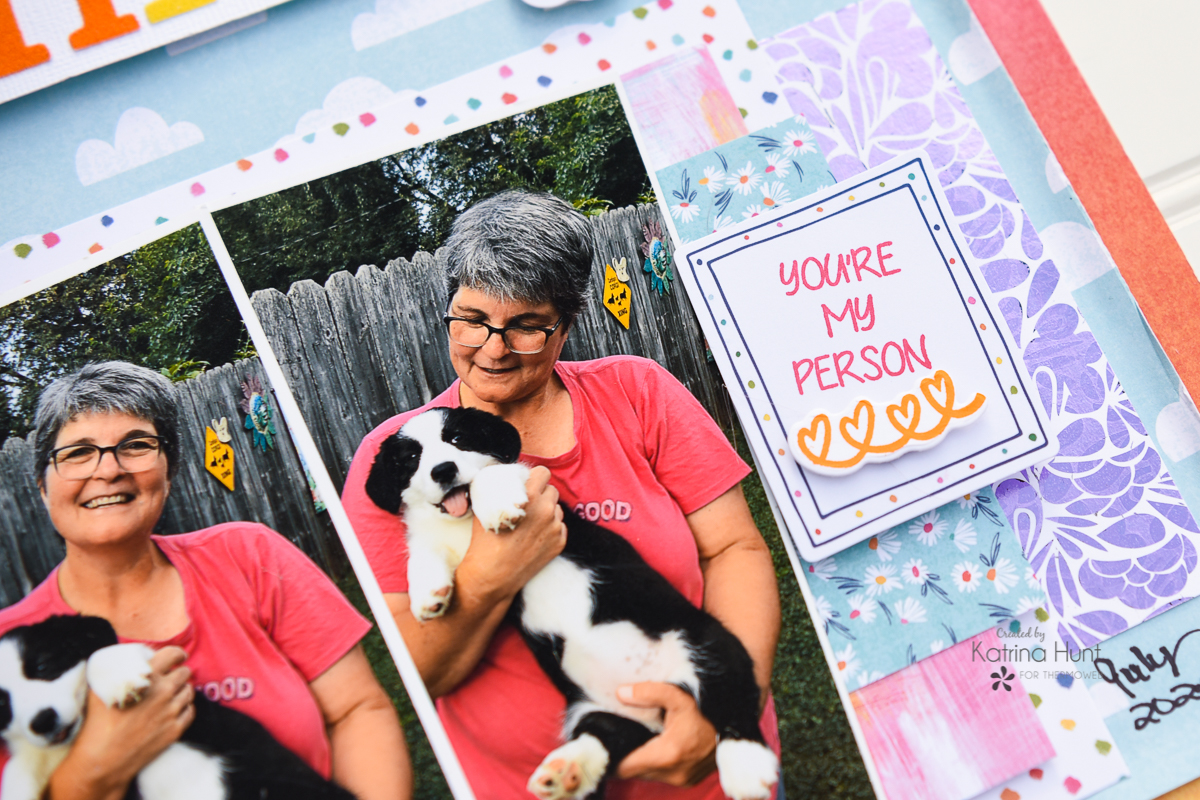
 I finished up by using some of the hearts I had leftover as an accent on the left side of the pictures. This layout took a long time, but the result was so worth it!
 Thanks for stopping by the Therm O Web blog today!!! Have a wonderful rainbow week!
This post contains affiliate links. For more information, see our disclosure HERE.
This post contains affiliate links. For more information, see our disclosure HERE.
Thanks for stopping by the Therm O Web blog today!!! Have a wonderful rainbow week!
This post contains affiliate links. For more information, see our disclosure HERE.
This post contains affiliate links. For more information, see our disclosure HERE.