No Products in the Cart
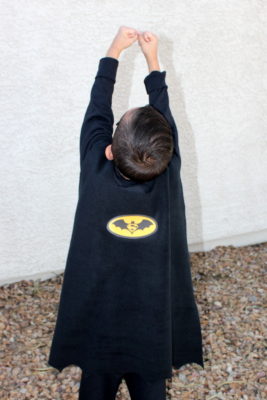
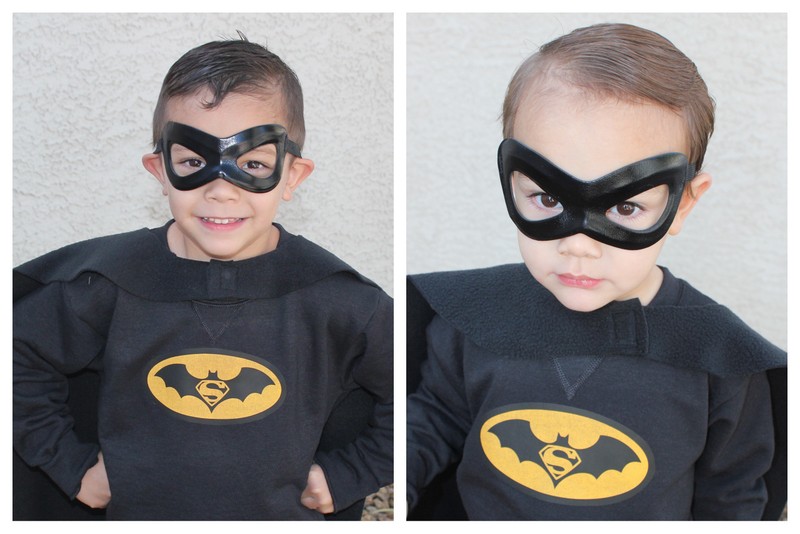
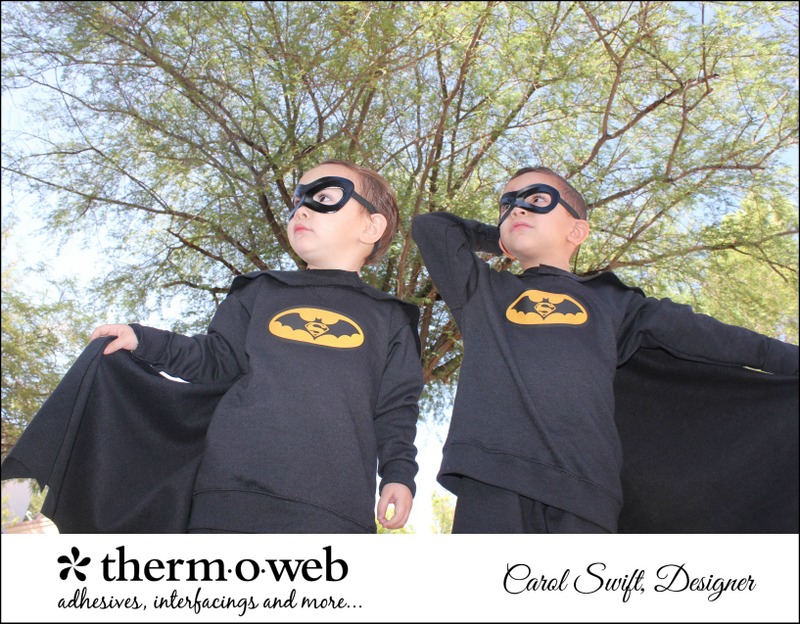 The cape is about 30" long and would easily work for a 2-6-year-old. Looks like he's ready to fly!
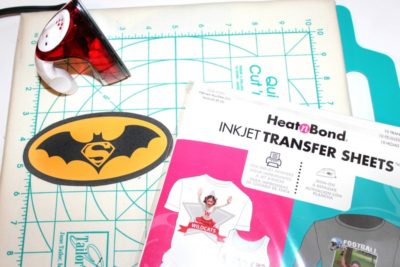
 Supplies:
ThermOWeb's HeatnBond Inkjet Transfer Sheets
Heat n Bond Fabric Fuse Liquid Adhesive
Iron/mini iron
1 yard Fleece or felt
T-shirt/sweatshirt
Hook and loop fastener
Supplies:
ThermOWeb's HeatnBond Inkjet Transfer Sheets
Heat n Bond Fabric Fuse Liquid Adhesive
Iron/mini iron
1 yard Fleece or felt
T-shirt/sweatshirt
Hook and loop fastener
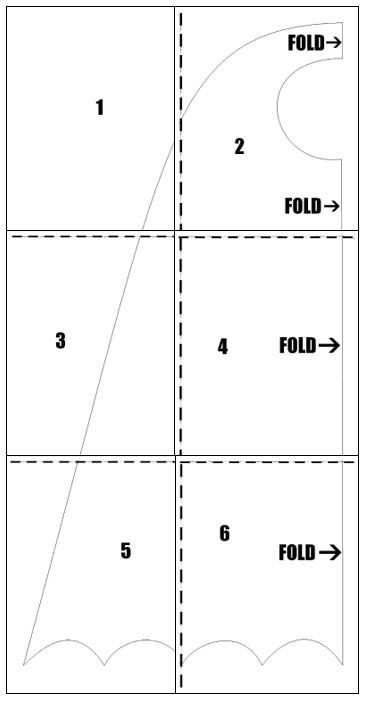 Step 2: Fold the fleece in half. Lay pattern on fleece matching fold and fold lines of the pattern. Pin pattern in place.
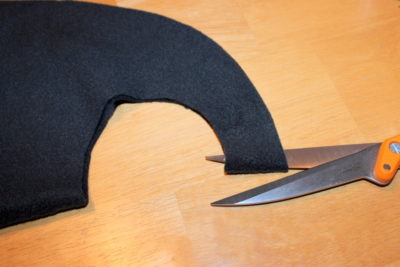
Step 3: Cut around outside pattern edges, but not on the fold line.
Step 4: Cut out neck circle along the fold.
Step 2: Fold the fleece in half. Lay pattern on fleece matching fold and fold lines of the pattern. Pin pattern in place.
Step 3: Cut around outside pattern edges, but not on the fold line.
Step 4: Cut out neck circle along the fold.
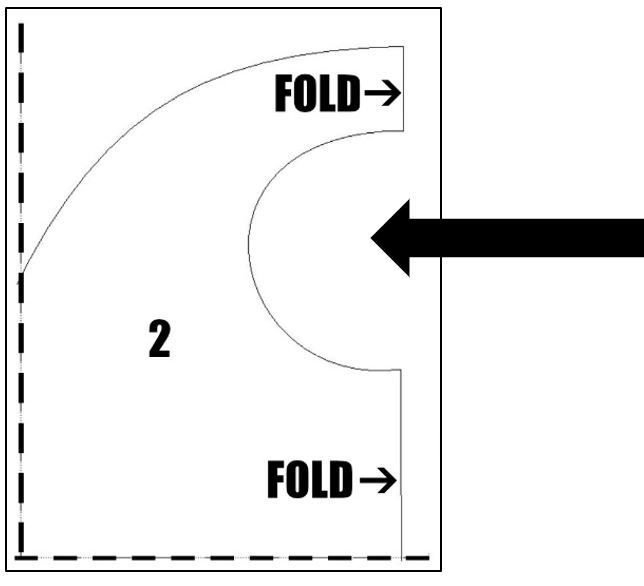 Step 5: Clip top fold on pattern piece #2.
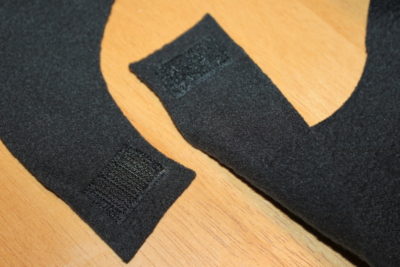
 Step 6: Using Fabric Fuse, glue 1" hook and loop fastener pieces to cape neck piece. Let dry. Sew around edges of Velcro to secure.

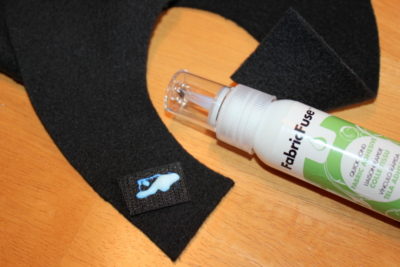 * Be sure to place Velcro on opposite sides of capes (inside/outside) so they meet up correctly.
 Step 7: Using your inkjet printer, print logo that is NOT reversed on ThermOWeb's HeatnBond Inkjet Transfer Sheets for dark fabrics following package directions.
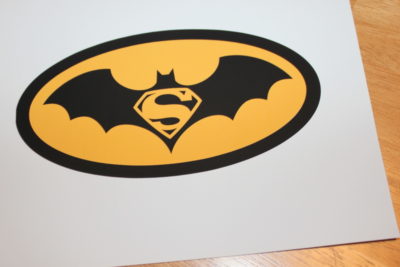 Step 8: When ironing on fleece or felt using the transfers, you must be careful not to press too hard or leave the iron in place too long because it will melt fleece and/or leave an iron impression. It is recommended for this small logo transfer that you use a very small iron to press in place. The small inexpensive iron used for this project was purchased at a craft store.
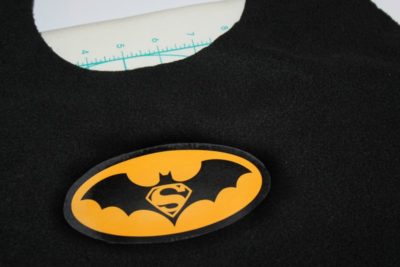
 Cut around logo without leaving any white showing (it will show on the cape if you don’t cut the white off.) Center logo face up on back of the cape. Cover with protective paper. Using the small iron, press around and on the logo, avoiding leaving the iron on fleece too long. Depending on the size of the iron-on, follow the transfer sheets directions for time amount. This project required about 45 seconds for the logo, moving the iron back and forth on all logo areas.
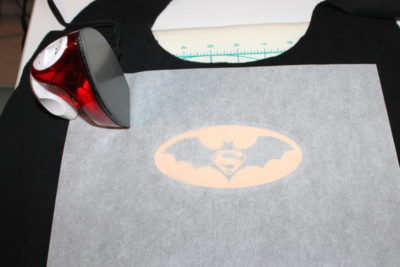 Lift protective paper to make sure logo is fully adhered. Let cool.
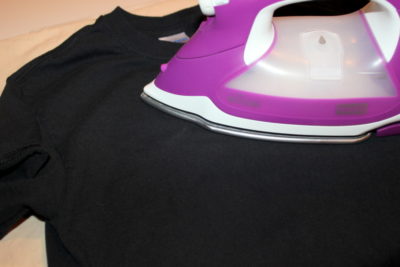
 Sweatshirt:
Step 1: Using your inkjet printer, print logo that is NOT reversed on ThermOWeb's HeatnBond Inkjet Transfer Sheets for dark fabrics following package directions.
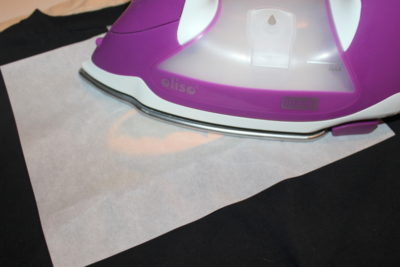
Step 2: Following package directions, iron sweatshirt to remove any excess moisture before applying the logo.
Sweatshirt:
Step 1: Using your inkjet printer, print logo that is NOT reversed on ThermOWeb's HeatnBond Inkjet Transfer Sheets for dark fabrics following package directions.
Step 2: Following package directions, iron sweatshirt to remove any excess moisture before applying the logo.
 Step 3: Cut around logo without any white showing (it will show on the sweatshirt if you don't cut the white off.) Center logo face up on the sweatshirt. Cover with protective paper and iron for the amount suggested on the package. Remove protective paper and let cool.
 Two amazing SUPERHEROES!
 You can find the logo and PDF instructions HERE.
Written by Carol Swift