No Products in the Cart
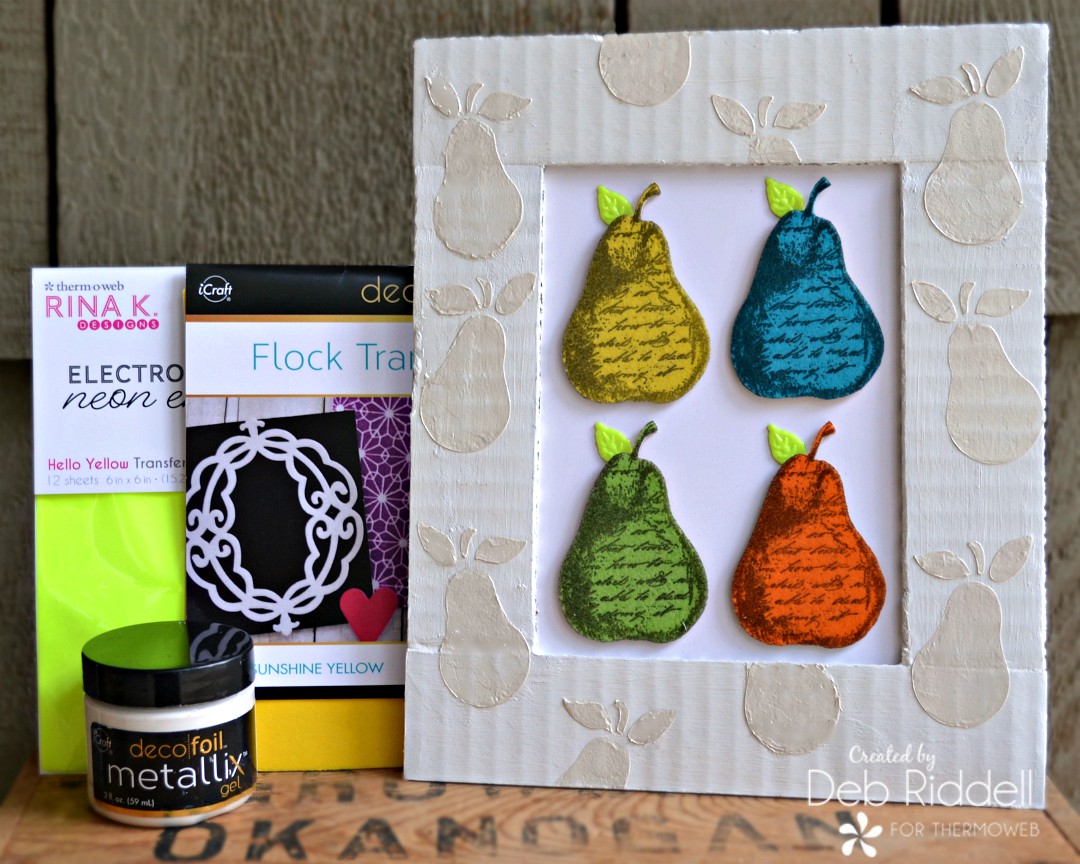 I used Therm O Web's Deco Foil Flock Transfer Sheets, Metallix Gel, and just a wee touch of Rina K. Designs Electro-Pop Neon Enamels along with an altered corrugated cardboard box 'frame'.
 Therm O Web Supplies Used:
Deco Foil Flock Transfer Sheets – Sunshine Yellow
Deco Foil Flock Transfer Sheets – Blue Diamond
Deco Foil Flock Transfer Sheets – Green Envy
Deco Foil Flock Transfer Sheets – Orange Glow
Deco Foil Metallix Gel – White Pearl
Rina K. Designs Neon Enamel Transfer Sheets, Hello Yellow
Deco Foil™ White Foam Adhesive
Gina K. Designs Premium Cardstock • Luxury White
Gina K. Designs Foam Squares White (320 squares)
iCraft Easy-Tear Adhesive™ Tape • 1/2 in
iCraft Ultra Bond Adhesive 2 fl oz
Purple Tape - 1.5"
Other supplies used:
Corrugated cardboard
Stampers Anonymous - Classics #16 stamp set
Sizzix - Tiny Tattered Florals die
Ranger Ink - Black Soot Distress Archival Ink
Miscellaneous - white gesso, white acrylic paint, paintbrush, fruit-themed stencil, palette knife, paper trimmer, die cutting machine, scissors, scrapbook paper, ruler
Therm O Web Supplies Used:
Deco Foil Flock Transfer Sheets – Sunshine Yellow
Deco Foil Flock Transfer Sheets – Blue Diamond
Deco Foil Flock Transfer Sheets – Green Envy
Deco Foil Flock Transfer Sheets – Orange Glow
Deco Foil Metallix Gel – White Pearl
Rina K. Designs Neon Enamel Transfer Sheets, Hello Yellow
Deco Foil™ White Foam Adhesive
Gina K. Designs Premium Cardstock • Luxury White
Gina K. Designs Foam Squares White (320 squares)
iCraft Easy-Tear Adhesive™ Tape • 1/2 in
iCraft Ultra Bond Adhesive 2 fl oz
Purple Tape - 1.5"
Other supplies used:
Corrugated cardboard
Stampers Anonymous - Classics #16 stamp set
Sizzix - Tiny Tattered Florals die
Ranger Ink - Black Soot Distress Archival Ink
Miscellaneous - white gesso, white acrylic paint, paintbrush, fruit-themed stencil, palette knife, paper trimmer, die cutting machine, scissors, scrapbook paper, ruler
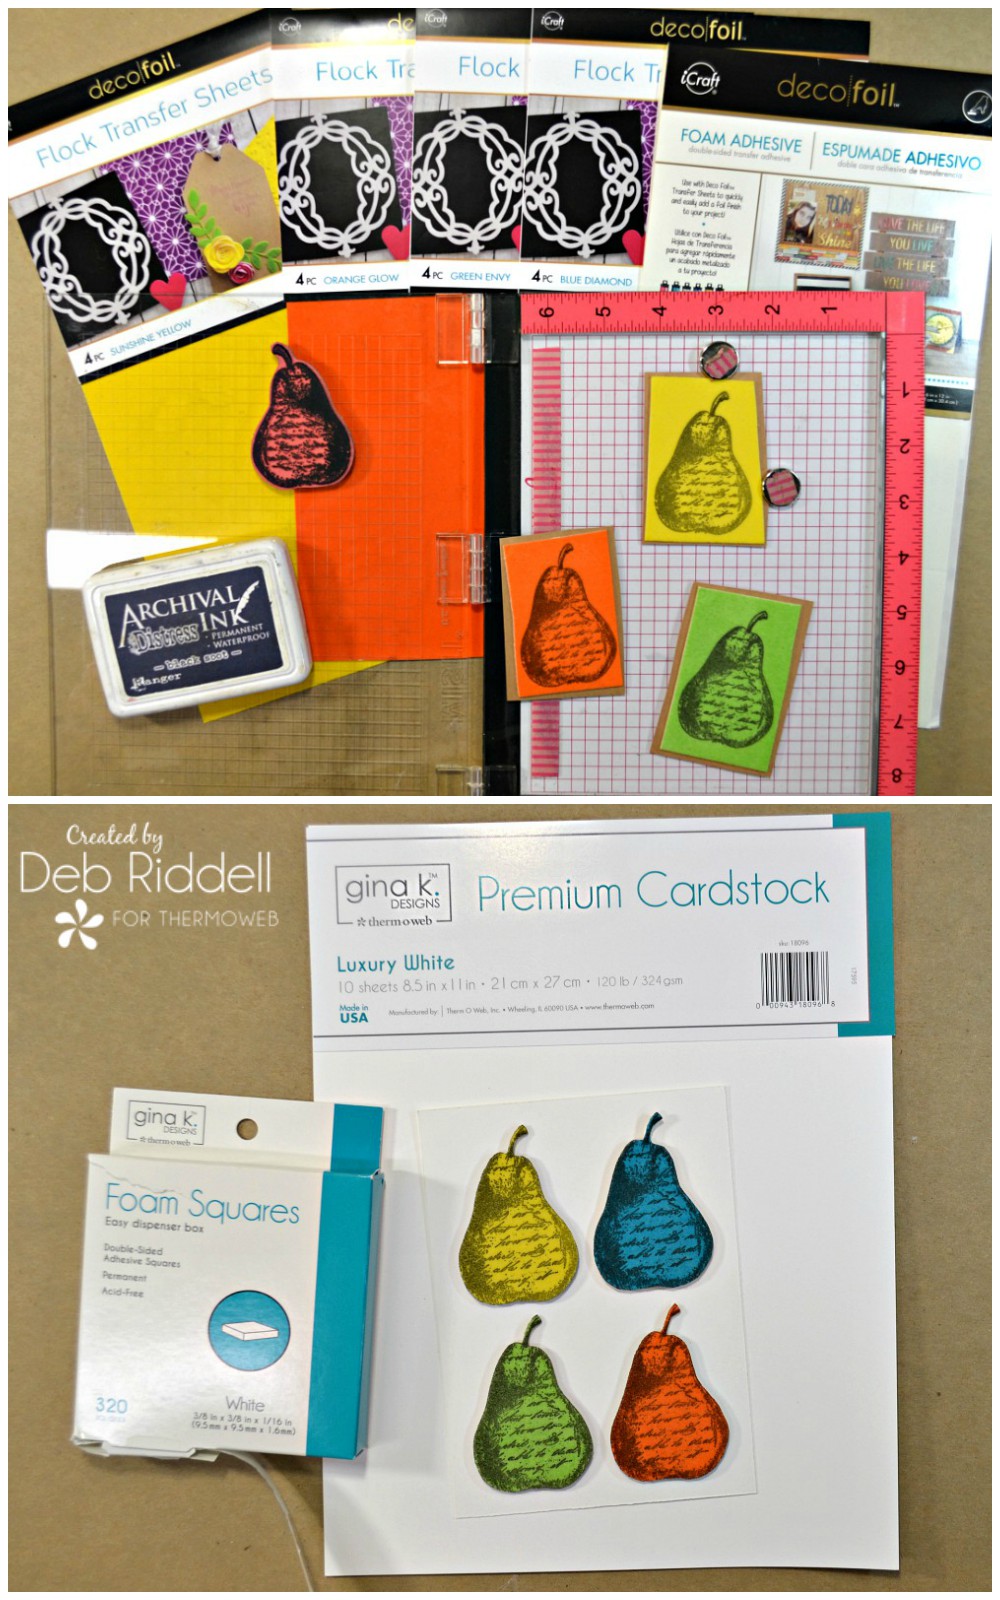 Cut a piece of Gina K. Designs Luxury White Premium cardstock (the size of your cardstock backing will depend upon the size of your stamped images) and mount the four fussy cut flocked images onto the cardstock with Gina K. Designs White Foam Squares for dimension. Leave about a 1/2" on all four sides of your mounted images for attaching it to the frame.
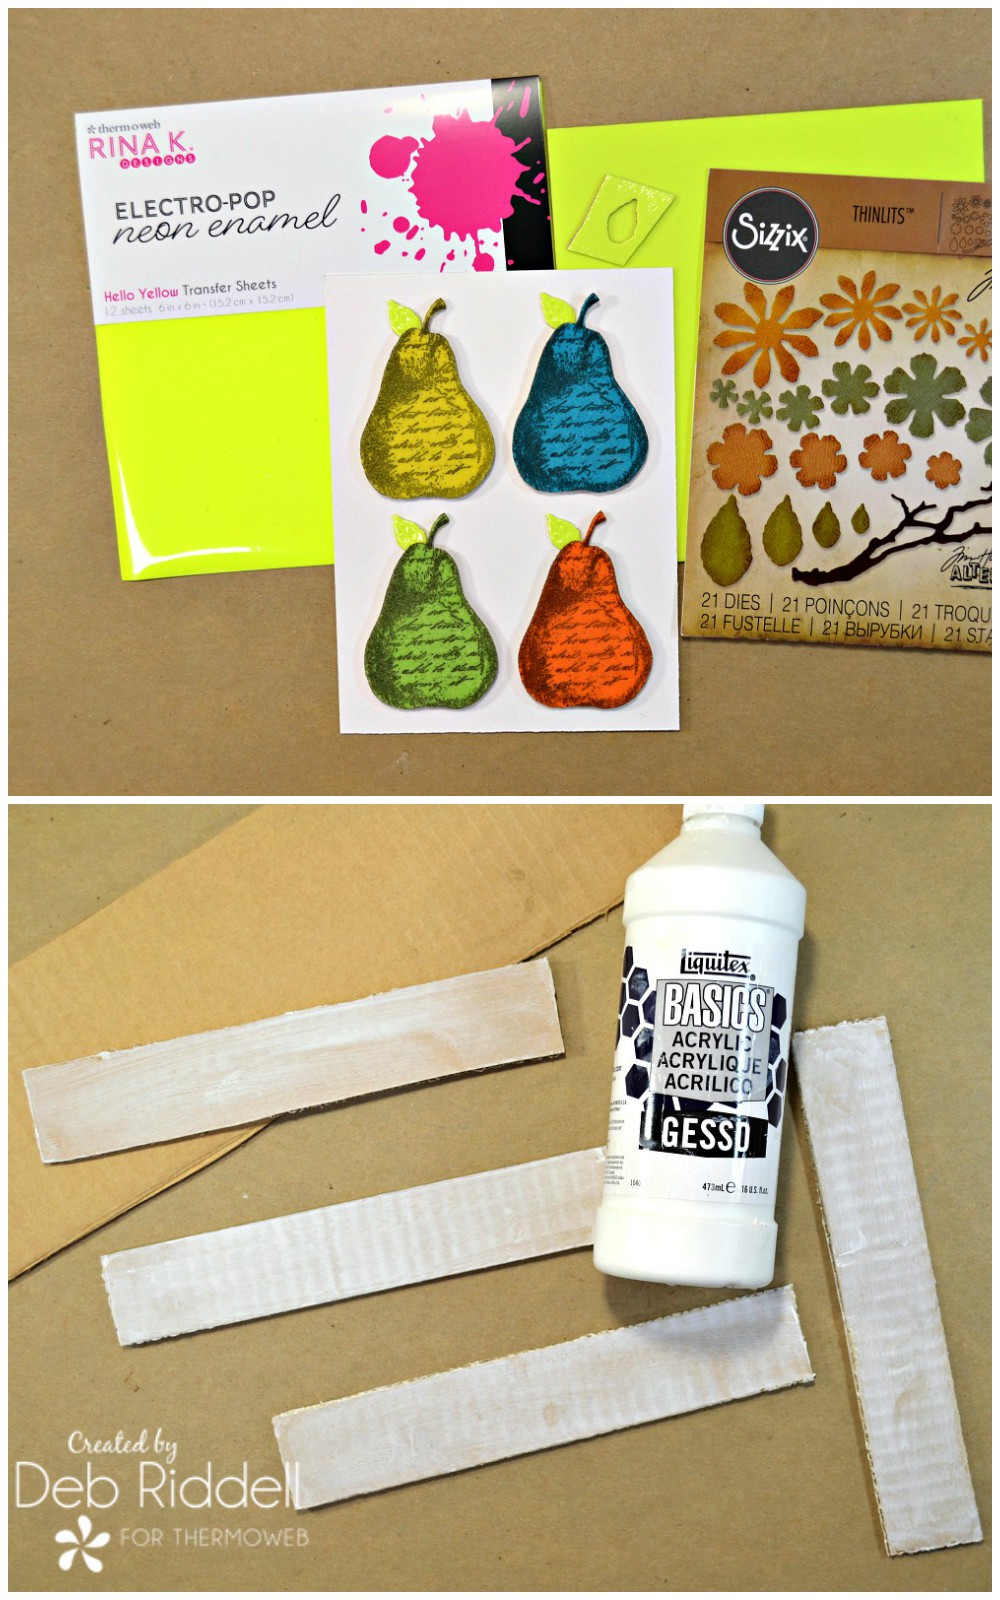 Next cut four strips of corrugated cardboard from a box for your frame and give them a coat of gesso front and back. The width of your frame strips will depend upon the size of the fruit images that you are going to stencil on them, mine ended up being about 1 1/2" wide.
Once the gesso has dried, dry fit your cardboard frame strips around your stamped flocked images, trimming them to size and temporarily holding them in place with some pieces of Purple Tape.
Next cut four strips of corrugated cardboard from a box for your frame and give them a coat of gesso front and back. The width of your frame strips will depend upon the size of the fruit images that you are going to stencil on them, mine ended up being about 1 1/2" wide.
Once the gesso has dried, dry fit your cardboard frame strips around your stamped flocked images, trimming them to size and temporarily holding them in place with some pieces of Purple Tape.
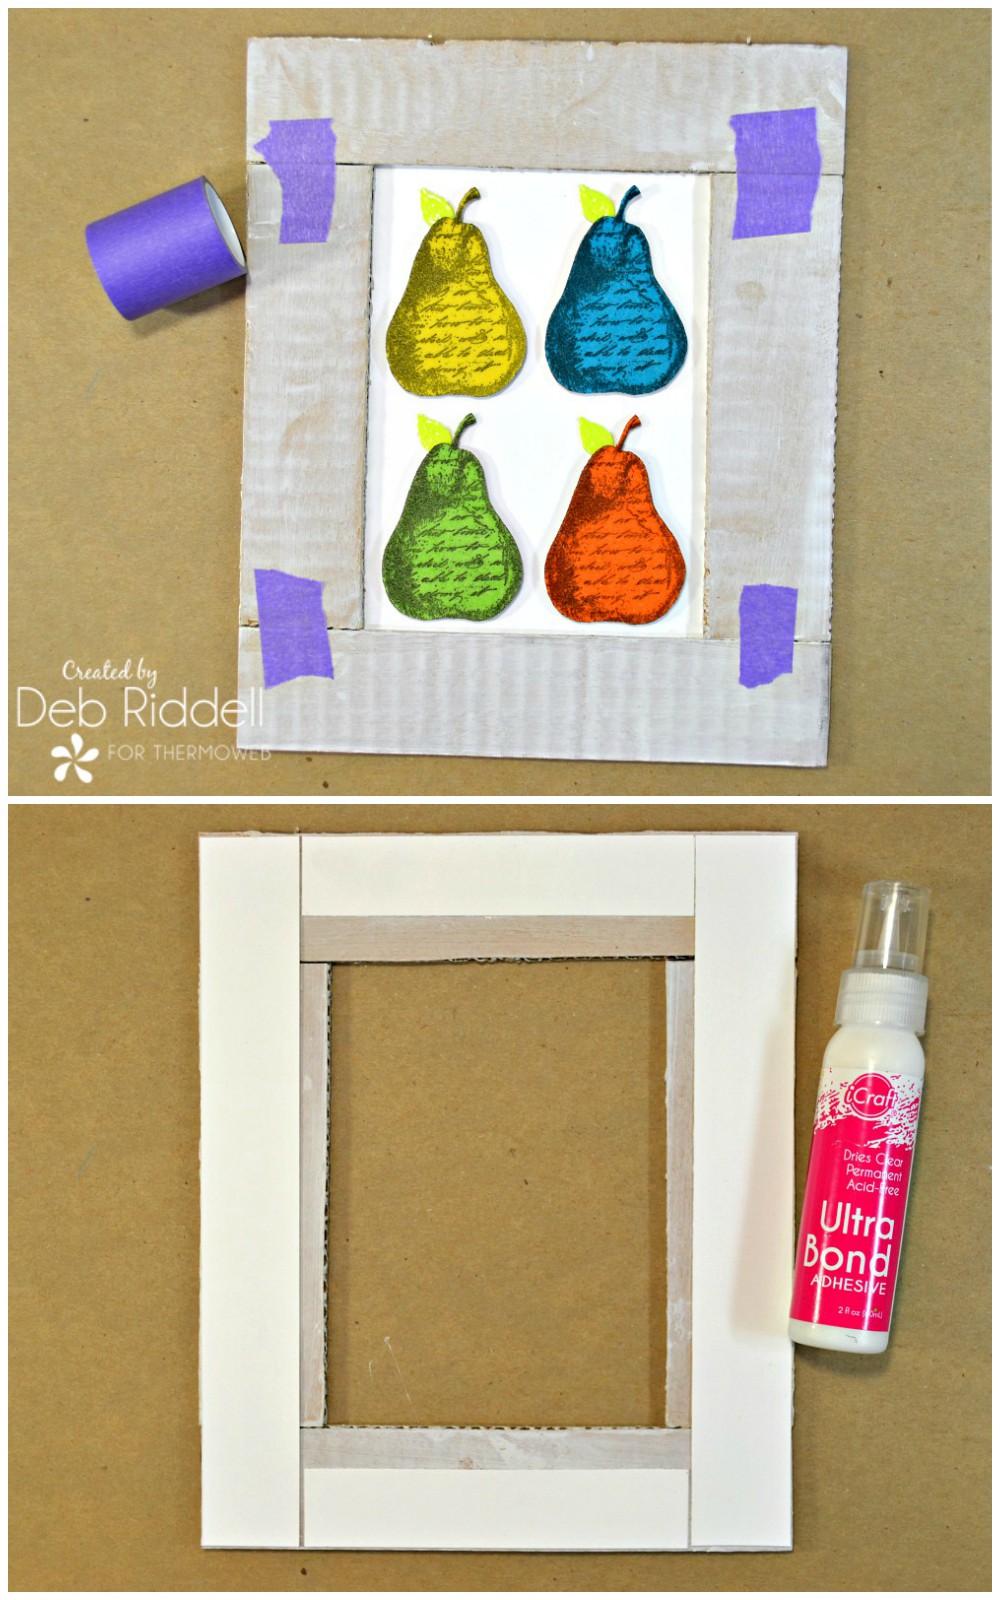 Remove your flocked images and gently turn the frame over. Secure the frame by gluing some strips of cardstock onto the back of the frame with iCraft Ultra Bond adhesive. Don't worry about what it looks like as we will be covering the back of the frame with some scrapbook paper.
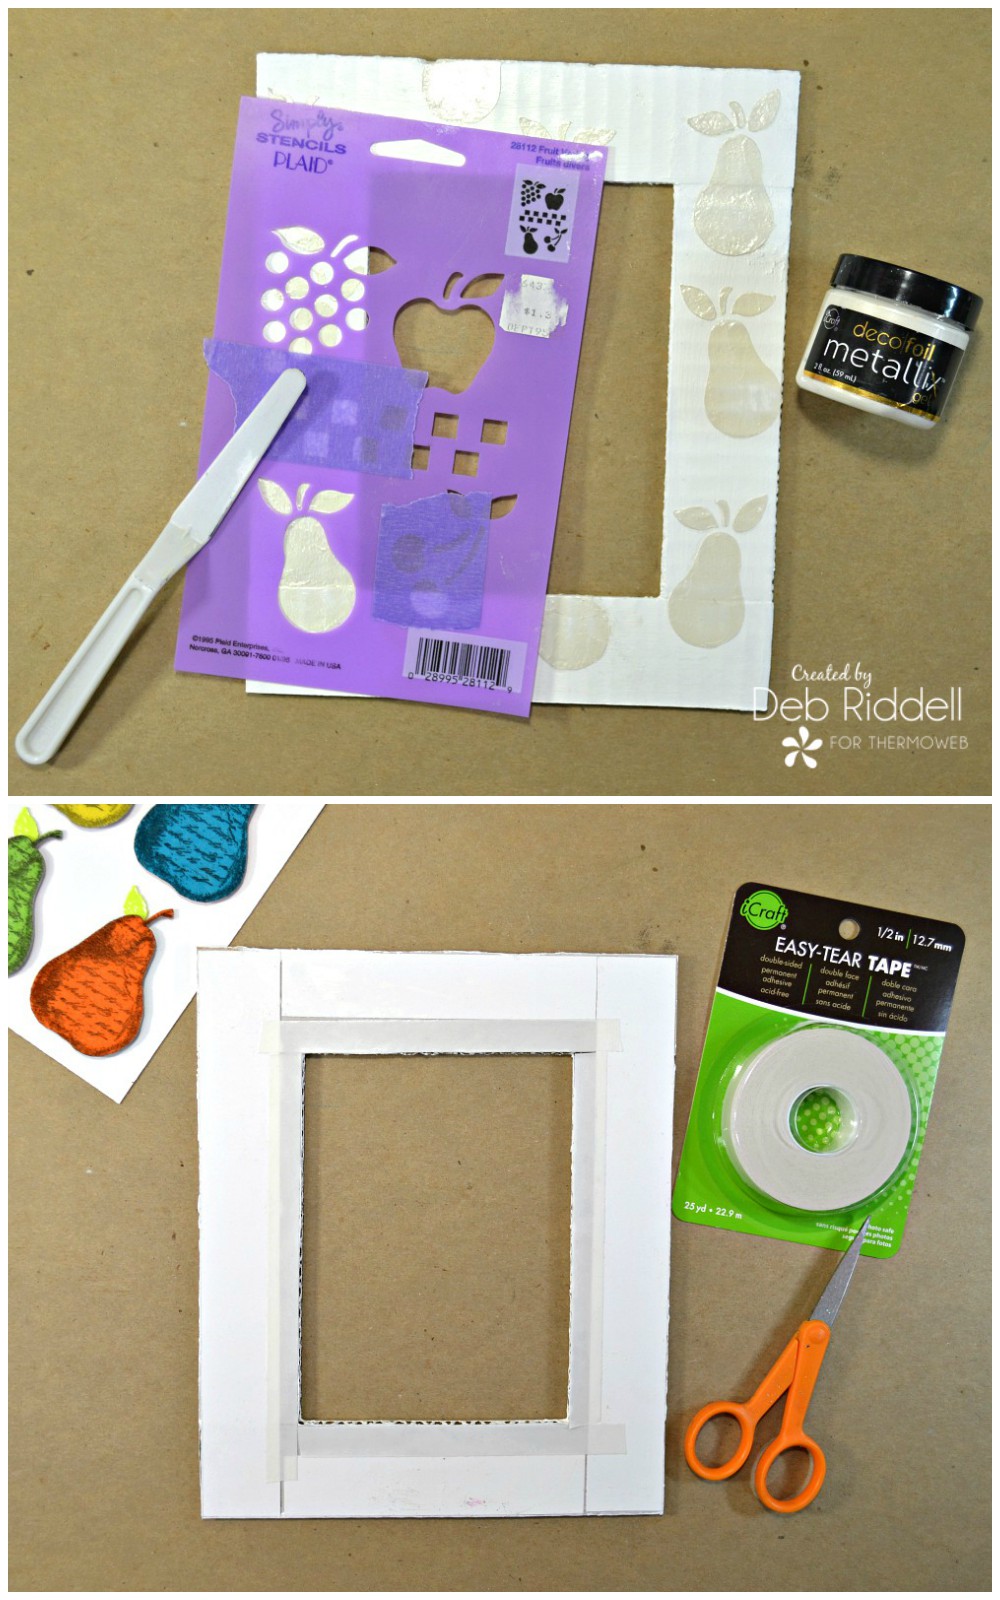 When the Metallix Gel has dried turn the frame over and apply 1/2" Easy-Tear tape around the edges of the frame opening.
Remove the backing strips from the Easy-Tear tape and center the frame on your flocked stamped images. Press firmly to affix the frame onto the cardstock backing.
When the Metallix Gel has dried turn the frame over and apply 1/2" Easy-Tear tape around the edges of the frame opening.
Remove the backing strips from the Easy-Tear tape and center the frame on your flocked stamped images. Press firmly to affix the frame onto the cardstock backing.
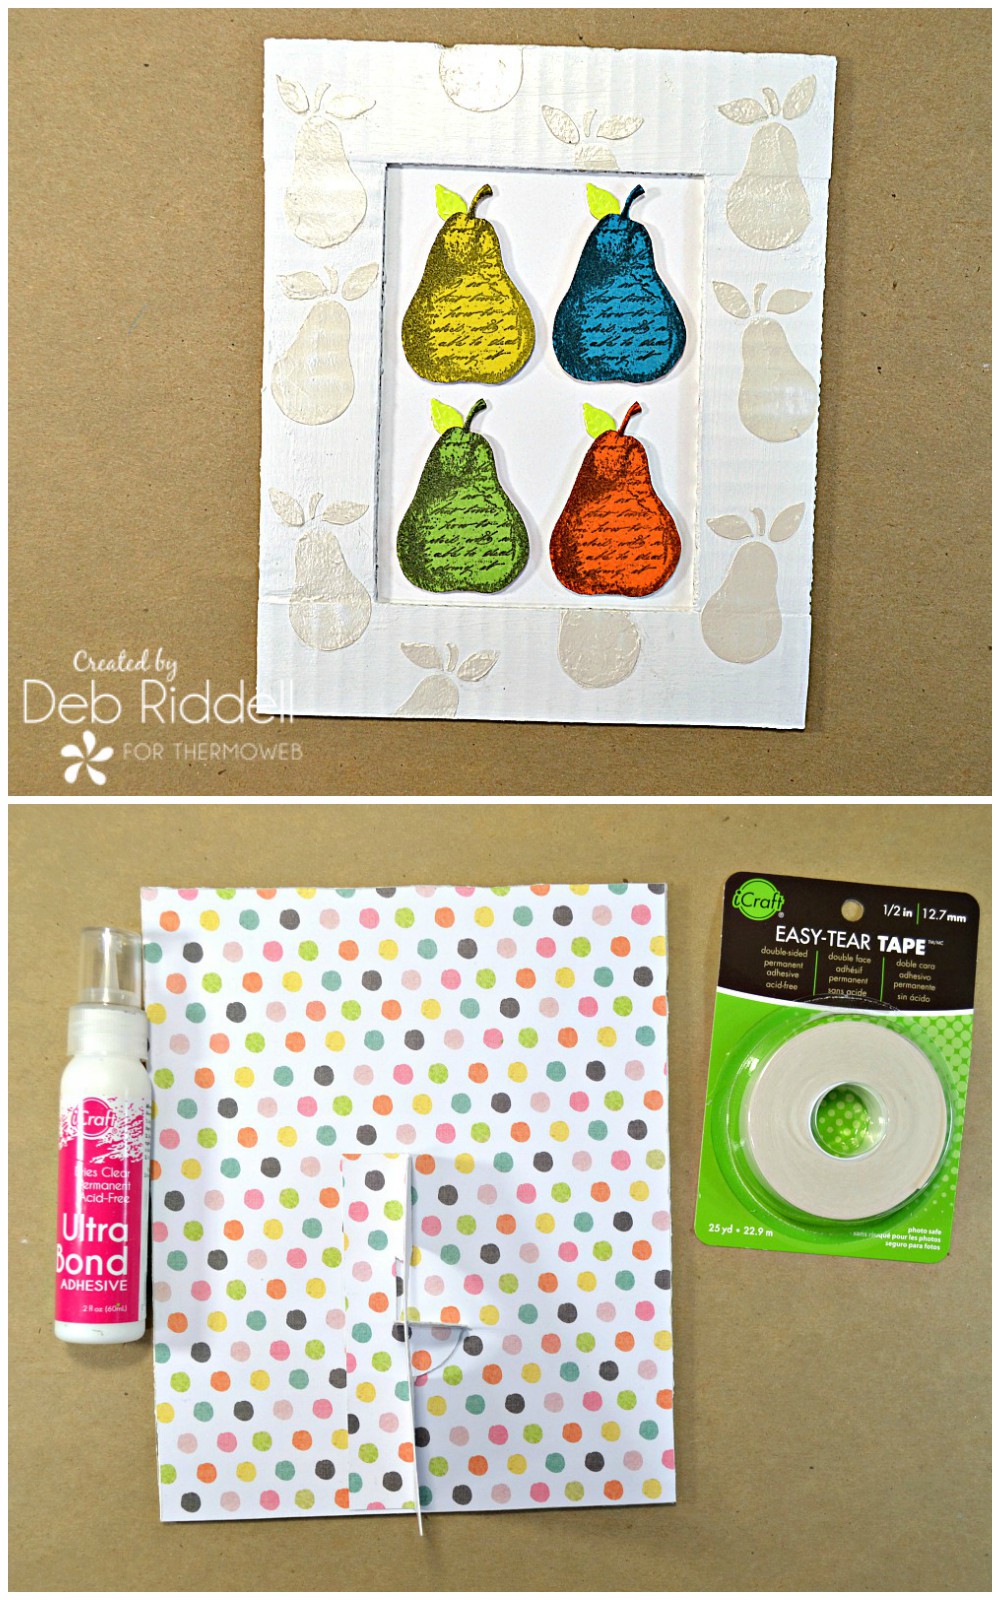 Turn the frame back over again and apply a piece of sturdy scrapbook paper to the back of the frame to cover up all of your 'mechanics'. Add an easel die-cut for displaying it or a hanger so you can put it up on the wall and your pop art-inspired fruity frame is done!
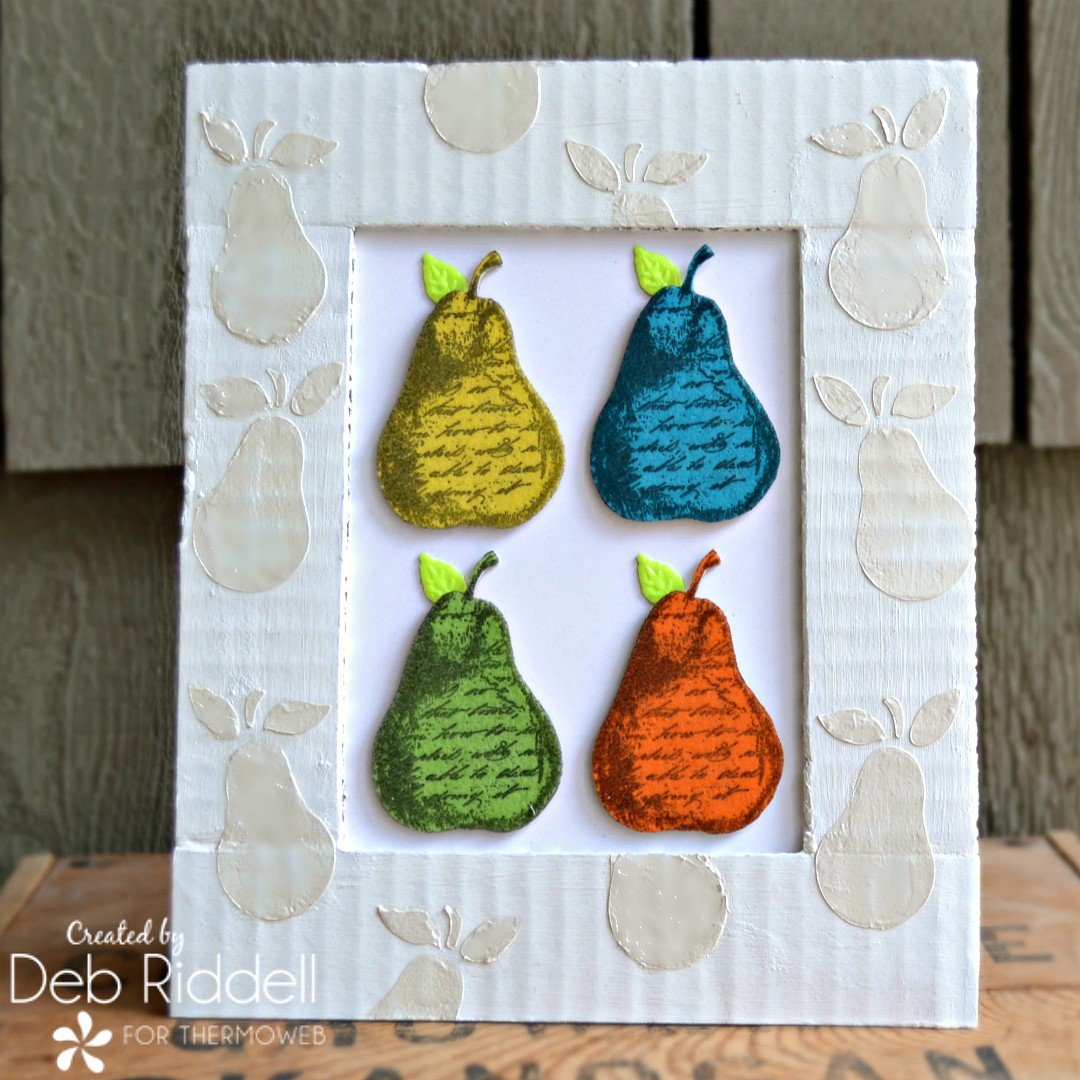
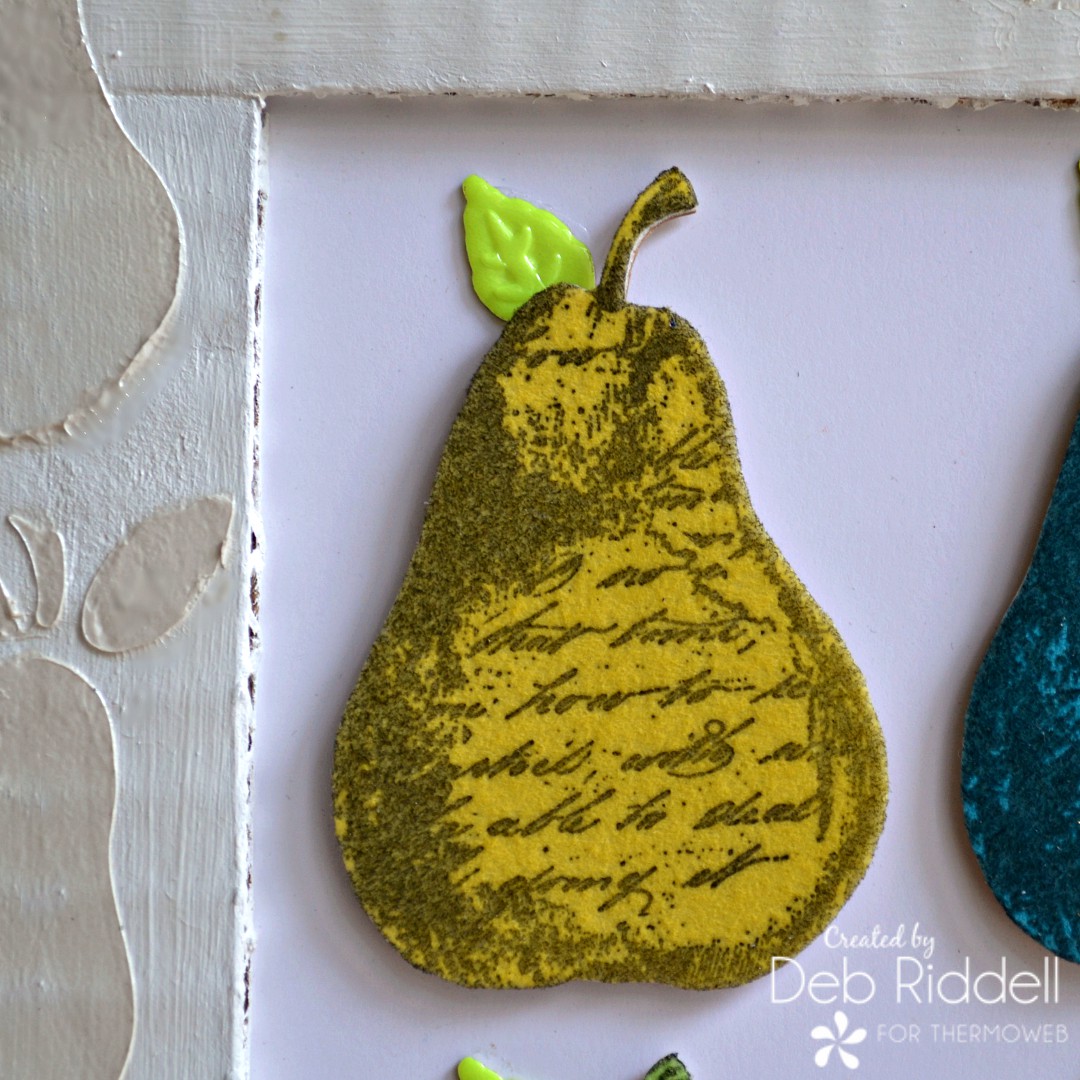
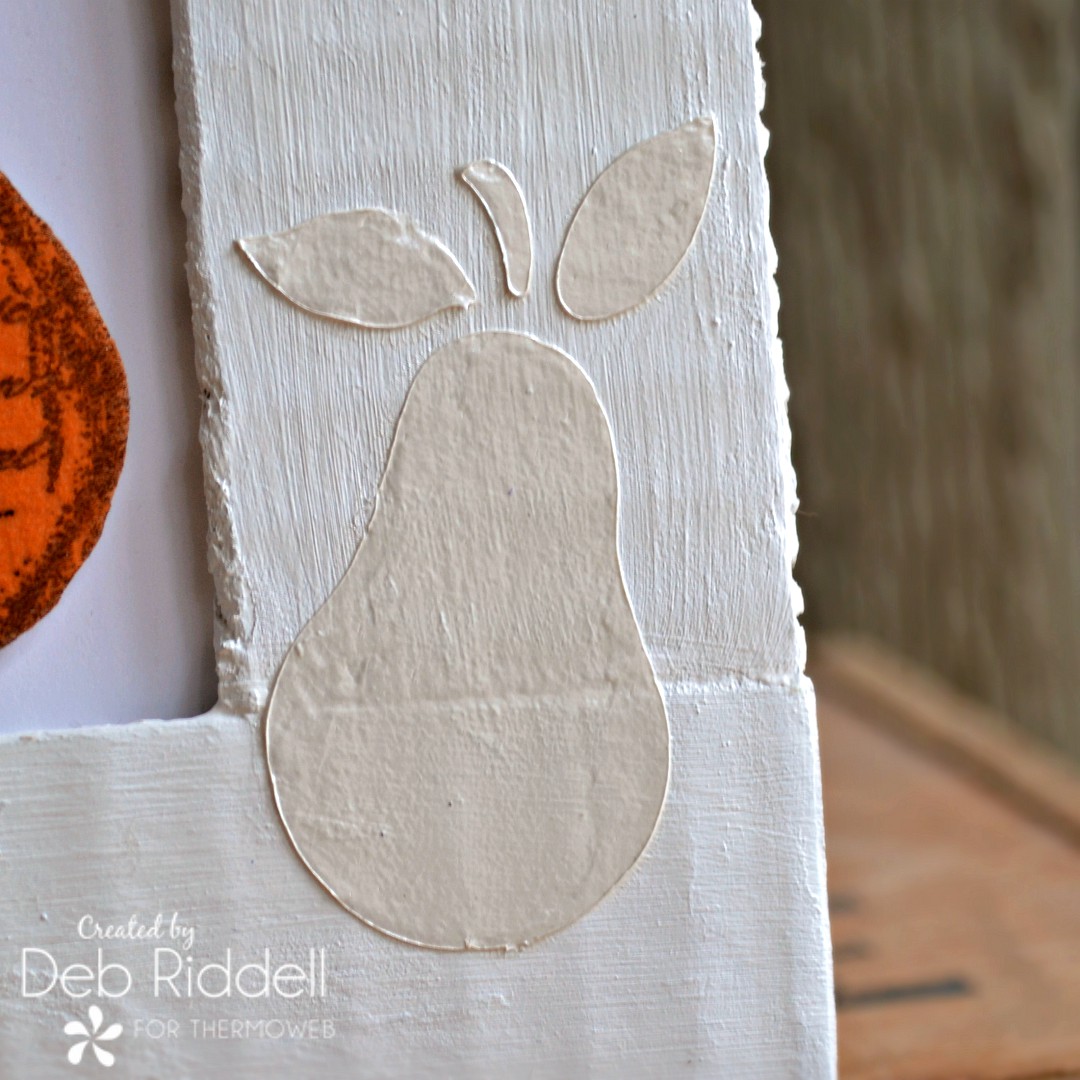
Here are a few closeups of the finished pear frame.
Turn the frame back over again and apply a piece of sturdy scrapbook paper to the back of the frame to cover up all of your 'mechanics'. Add an easel die-cut for displaying it or a hanger so you can put it up on the wall and your pop art-inspired fruity frame is done!
Here are a few closeups of the finished pear frame.
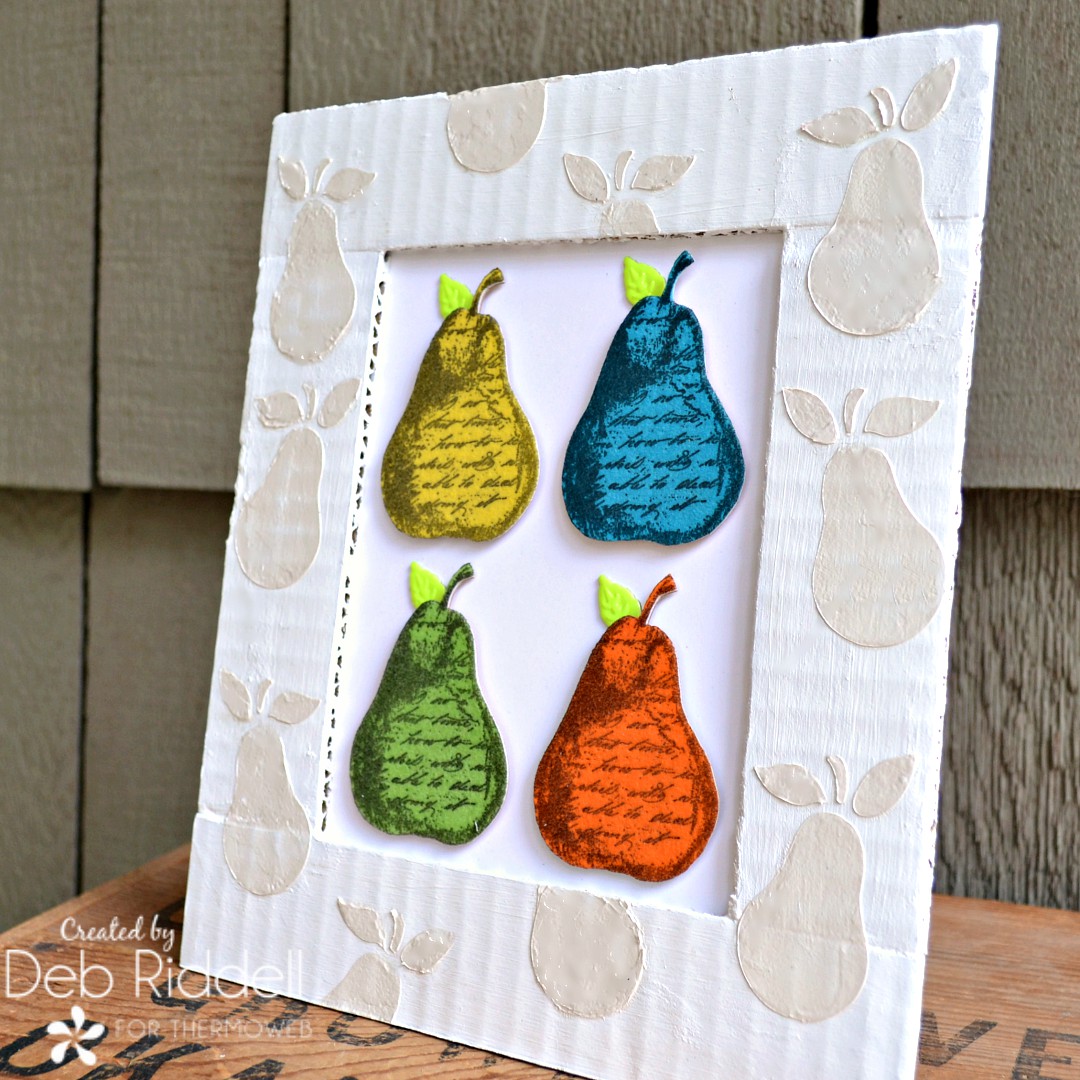 I hope that you've enjoyed seeing how my frame came together and that you've been inspired to make a piece of your own with some of the wonderful products to be found here at Therm O Web. Keep safe and well everyone and make some beautiful art!
Deb xo
I hope that you've enjoyed seeing how my frame came together and that you've been inspired to make a piece of your own with some of the wonderful products to be found here at Therm O Web. Keep safe and well everyone and make some beautiful art!
Deb xo