No Products in the Cart
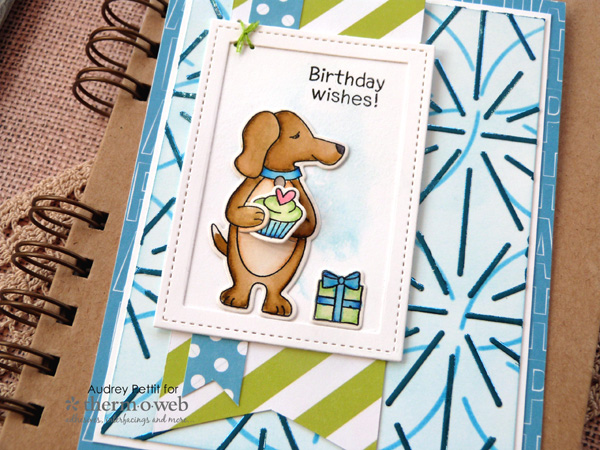
 This week, the team at Therm O Web is excited to join up with our friends from Newton's Nook to share lots of fun projects featuring Newton's great stamps and dies along with Therm O Web's fabulous line-up of products. I have several cards to share today, starting with this birthday card made with Newton's Sending Hugs stamp set and dies.

 Birthday Wishes Card Instructions:
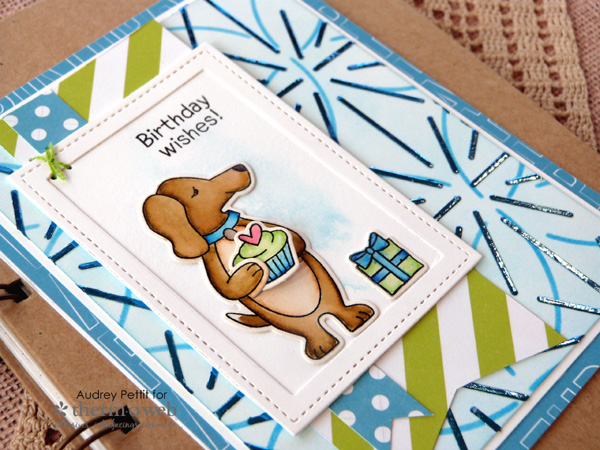
This cute little pup with his birthday gifts is nestled in his frame (created with GinaK Designs' large Stitched Rectangles die set), and looks awesome against that background made with brand new Therm O Web Designer Stencils and the new Denim Deco Foil. I layered two of the stencil designs to create interest in the background, topping it off with a layer of shiny Deco Foil. Here's a closer look.
Birthday Wishes Card Instructions:
This cute little pup with his birthday gifts is nestled in his frame (created with GinaK Designs' large Stitched Rectangles die set), and looks awesome against that background made with brand new Therm O Web Designer Stencils and the new Denim Deco Foil. I layered two of the stencil designs to create interest in the background, topping it off with a layer of shiny Deco Foil. Here's a closer look.
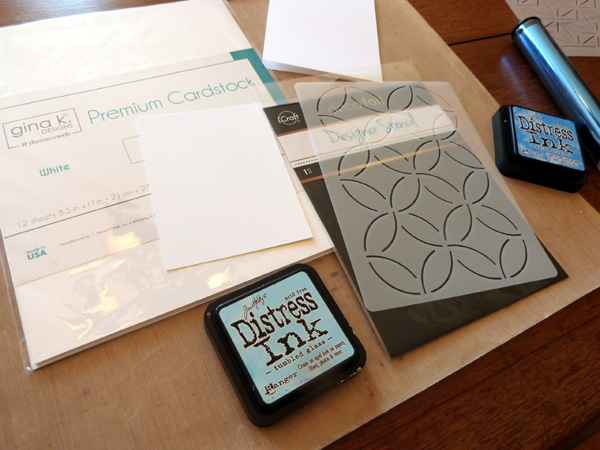 To begin, trim a panel of white cardstock that is slightly smaller than a standard A2 sized card base. Ink the entire panel with light blue ink using an ink blending tool.
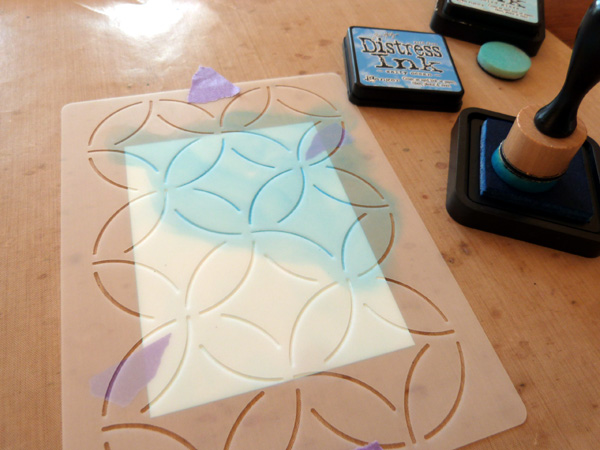 Place the Abstract Circles stencil over the inked panel, strategically holding both the paper and stencil in place with a bit of Therm O Web Purple Tape. Ink through the stencil using a darker shade of blue ink. Remove the stencil and wash it clean with soap and water.
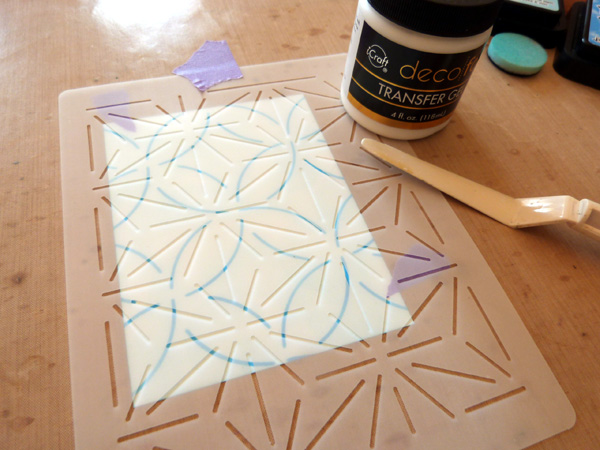 Layer a second stencil over the paper, once again securing both paper and stencil with Purple Tape. Spread iCraft Deco Foil Transfer Gel evenly over the stencil using a palette knife. Be sure to cover the entire paper. Scrape away any excess gel and return it to the jar. Remove the stencil, and wash it and the palette knife immediately with soap and water. All the Transfer Gel to dry completely. The gel will turn from a milky white color to completely clear when dried.
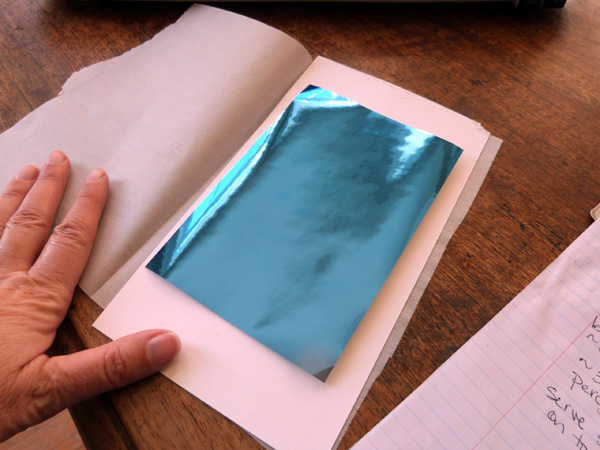 Place a piece of scrap cardstock between the sheets of a folded piece of parchment paper. Place the gelled panel on top of the cardstock, with the gel side facing up. Trim a piece of Denim Transfer Foil Sheet that is slightly larger than the panel, and place it on the gelled surface with the colored side up and the silver side down.
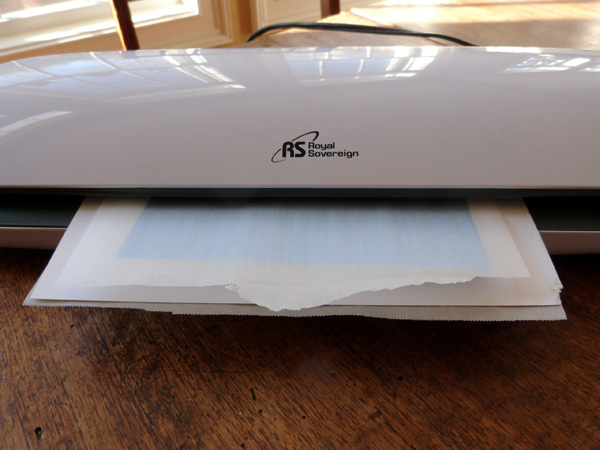 Cover the foil with the parchment paper, and then run this sandwich through a heated laminator.
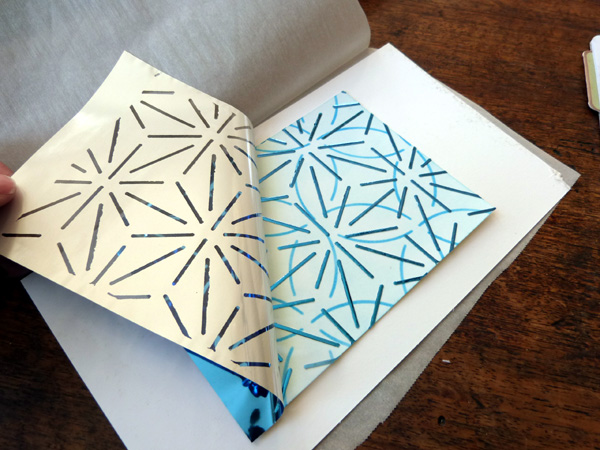 Let the foil cool for a moment, and then peel it back to reveal that awesome foiled design.
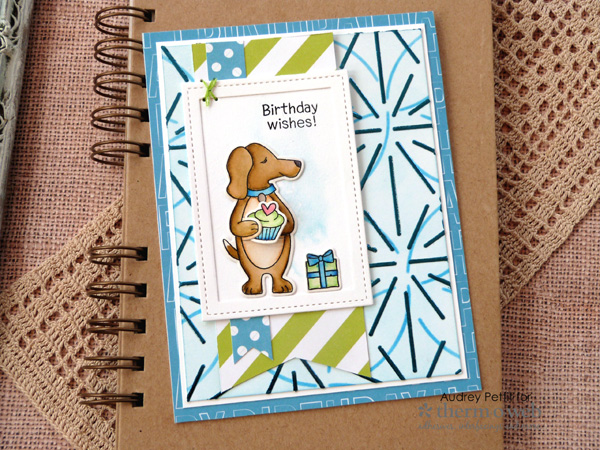 Add the foiled background to a card base, and embellish with banner strips cut from patterned paper. Die cut a frame and background for the images using the rectangle dies. Stamp, die cut, and color the images before adding to the frame. Stamp a matching sentiment, and add a small hand-stitched X to the top of the frame for a simple and postal-friendly embellishment.
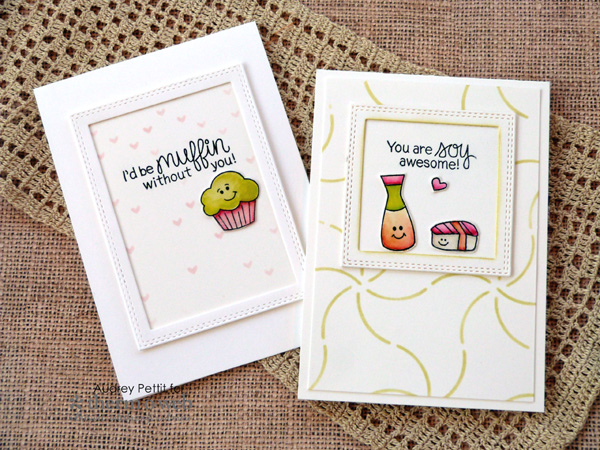
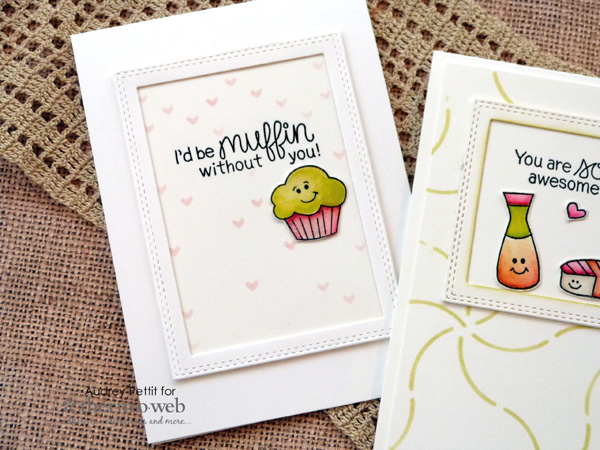
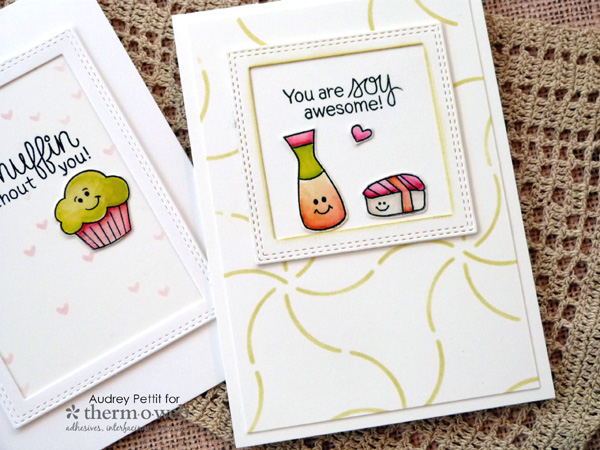 If it's a CAS look that you prefer, try adding cardstock frames to simple stenciled backgrounds, like I've done with this second set of cards. Use a one-layer white card base, or add a second layer for a slightly elevated design. Add stenciled patterns onto the card base, the frame, or both. And then add in your favorite stamped images and greetings. Seriously, what could be cuter than the little smiley face icons from Newton's Love Bites set?
 Thanks so much for stopping by! And huge thanks to Newton's Nook for the fun supplies used here! Enjoy!