No Products in the Cart
 Therm O Web Supplies Used:
Therm O Web Memory Runner XL
Therm O Web Memory Runner XL Refill
Zots – Medium
3D Foam Squares-1/2 inch
3D Foam Squares-1/4 inch
Foam Sticky Strips
iCraft Adhesive Tape 1/8th inch
iCraft Adhesive Tape 1/2 inch
iCraft Purple Tape 1.5 inch
iCraft Purple Tape .5 inch
iCraft Stencil Pal
SuperTape Roll 1/8th inch
SuperTape Roll 1/4th inch
SuperTape 1/2 inch
Rina K Glitz Neon Glitter Gel - Hello Yellow
Rina K Glitz Neon Glitter Gel - Orange Glow
Rina K Glitz Neon Glitter Gel - Screamin' Green
Gina K Glitz Glitter Gel - Iridescent
Other Supplies:
American Crafts Cardstock-White
PinkFresh Noteworthy Collection
PinkFresh Studio Noteworthy 12x12 Paper Collection Pack
PinkFresh Studio Noteworthy 6x6 Paper Collection Pack
PinkFresh Studio Noteworthy Self Adhesive Enamel Dots
PinkFresh Studio Noteworthy Stationery Pack
PinkFresh Studio Ephemera Pack
Scrapbook.com Stencil-Mod Circles 6x8
WeR Memory Keepers Glass Mat
Catherine Pooler Ink-Coral Cabana
Paper Issues Free Cut File-Heart Waterfall
Windham Fabrics Daisy Chain Fat Quarter Collection
Therm O Web Supplies Used:
Therm O Web Memory Runner XL
Therm O Web Memory Runner XL Refill
Zots – Medium
3D Foam Squares-1/2 inch
3D Foam Squares-1/4 inch
Foam Sticky Strips
iCraft Adhesive Tape 1/8th inch
iCraft Adhesive Tape 1/2 inch
iCraft Purple Tape 1.5 inch
iCraft Purple Tape .5 inch
iCraft Stencil Pal
SuperTape Roll 1/8th inch
SuperTape Roll 1/4th inch
SuperTape 1/2 inch
Rina K Glitz Neon Glitter Gel - Hello Yellow
Rina K Glitz Neon Glitter Gel - Orange Glow
Rina K Glitz Neon Glitter Gel - Screamin' Green
Gina K Glitz Glitter Gel - Iridescent
Other Supplies:
American Crafts Cardstock-White
PinkFresh Noteworthy Collection
PinkFresh Studio Noteworthy 12x12 Paper Collection Pack
PinkFresh Studio Noteworthy 6x6 Paper Collection Pack
PinkFresh Studio Noteworthy Self Adhesive Enamel Dots
PinkFresh Studio Noteworthy Stationery Pack
PinkFresh Studio Ephemera Pack
Scrapbook.com Stencil-Mod Circles 6x8
WeR Memory Keepers Glass Mat
Catherine Pooler Ink-Coral Cabana
Paper Issues Free Cut File-Heart Waterfall
Windham Fabrics Daisy Chain Fat Quarter Collection
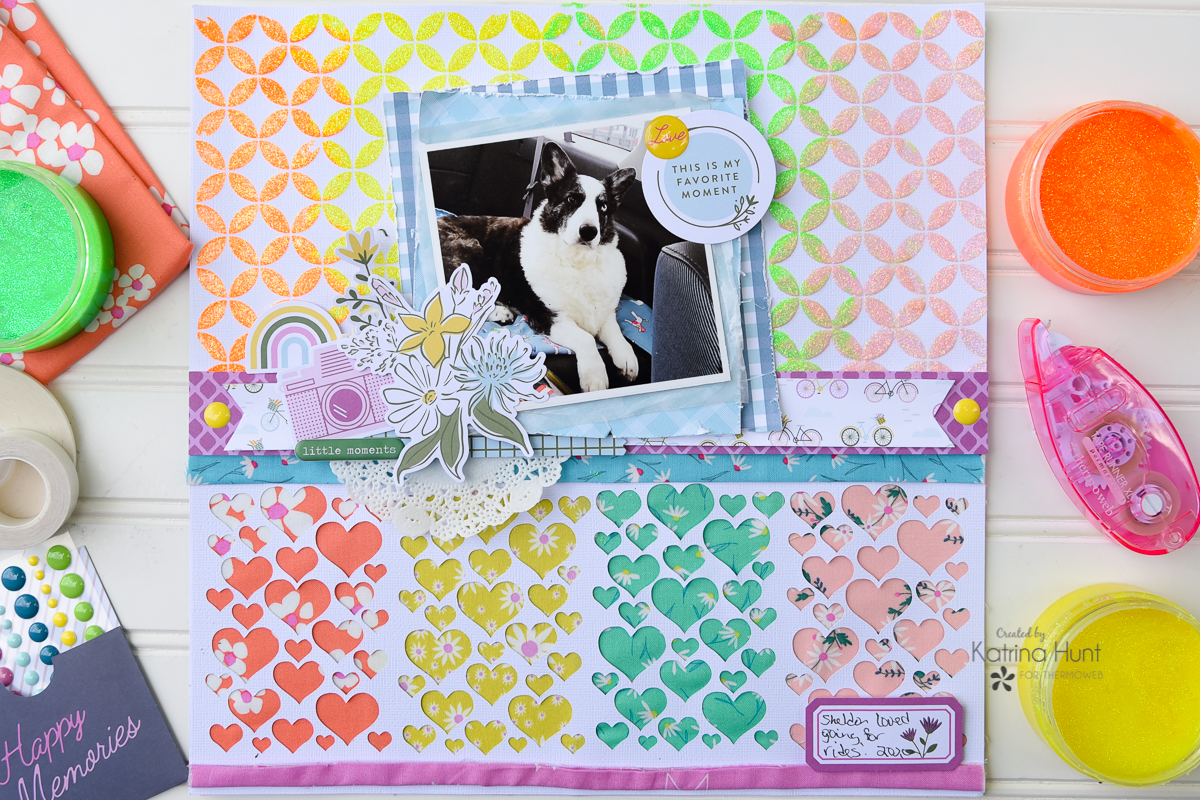
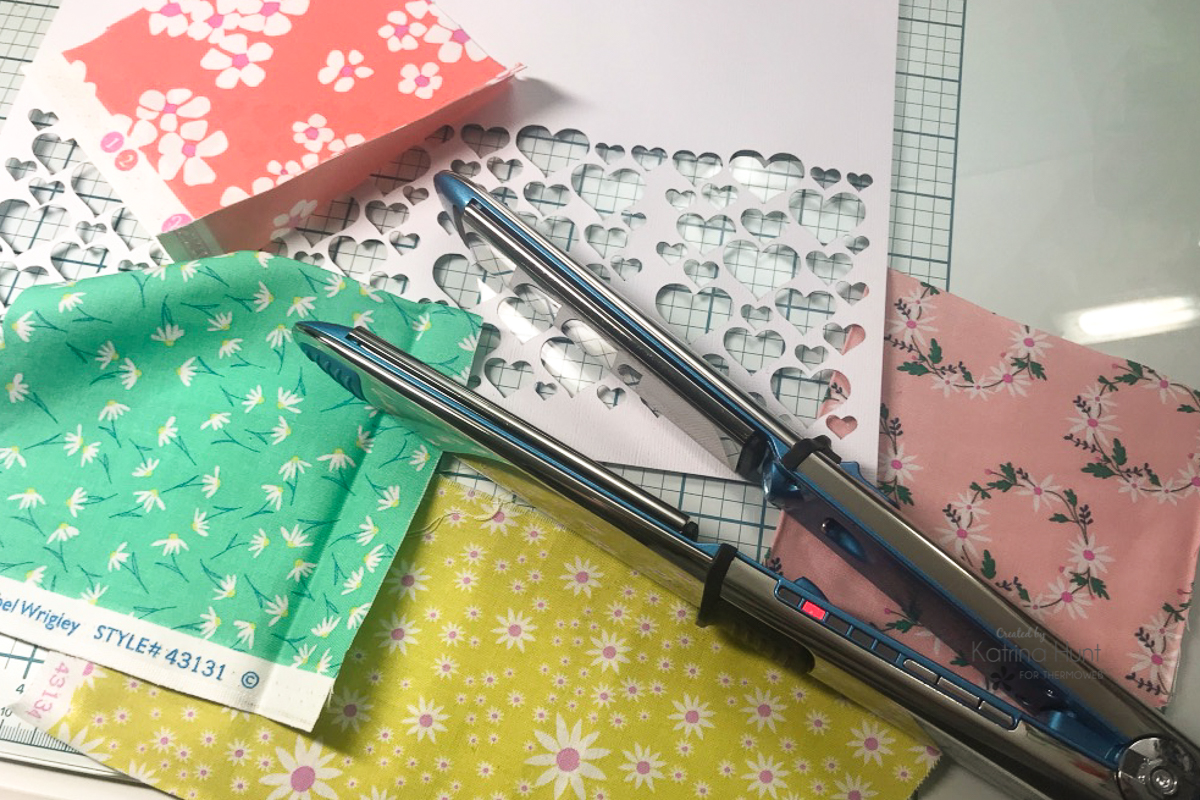
 I am always looking for fun ways to use cut files, so why not back them with fabric?! I had fun Daisy Chain fat quarters from Windham Fabrics and they matched PinkFresh Studios Noteworthy collection, so I decided to combine them on a layout.
The first step was to decide which cut file and fabrics to use. I adapted the cut file by cutting part of it off and then repeating the cut file across the bottom of my page. The second step was to iron those fat quarters since they had some wrinkles. I didn't want to drag the iron out, so it was a water mister and my flat iron to the rescue!
I am always looking for fun ways to use cut files, so why not back them with fabric?! I had fun Daisy Chain fat quarters from Windham Fabrics and they matched PinkFresh Studios Noteworthy collection, so I decided to combine them on a layout.
The first step was to decide which cut file and fabrics to use. I adapted the cut file by cutting part of it off and then repeating the cut file across the bottom of my page. The second step was to iron those fat quarters since they had some wrinkles. I didn't want to drag the iron out, so it was a water mister and my flat iron to the rescue!
 Consequently, when I was getting ready to adhere to the fabric, I tried to decide what my best option was. I thought about the Ultra Bond Liquid Adhesive, but I didn't want to wait for it to dry. Furthermore, I wasn't sure if my die-cut areas that were adhered to the fabric would dry completely flat. ThermOWeb has a variety of adhesive sheets and tapes that come in various widths, and I decided that was the way I wanted to go.
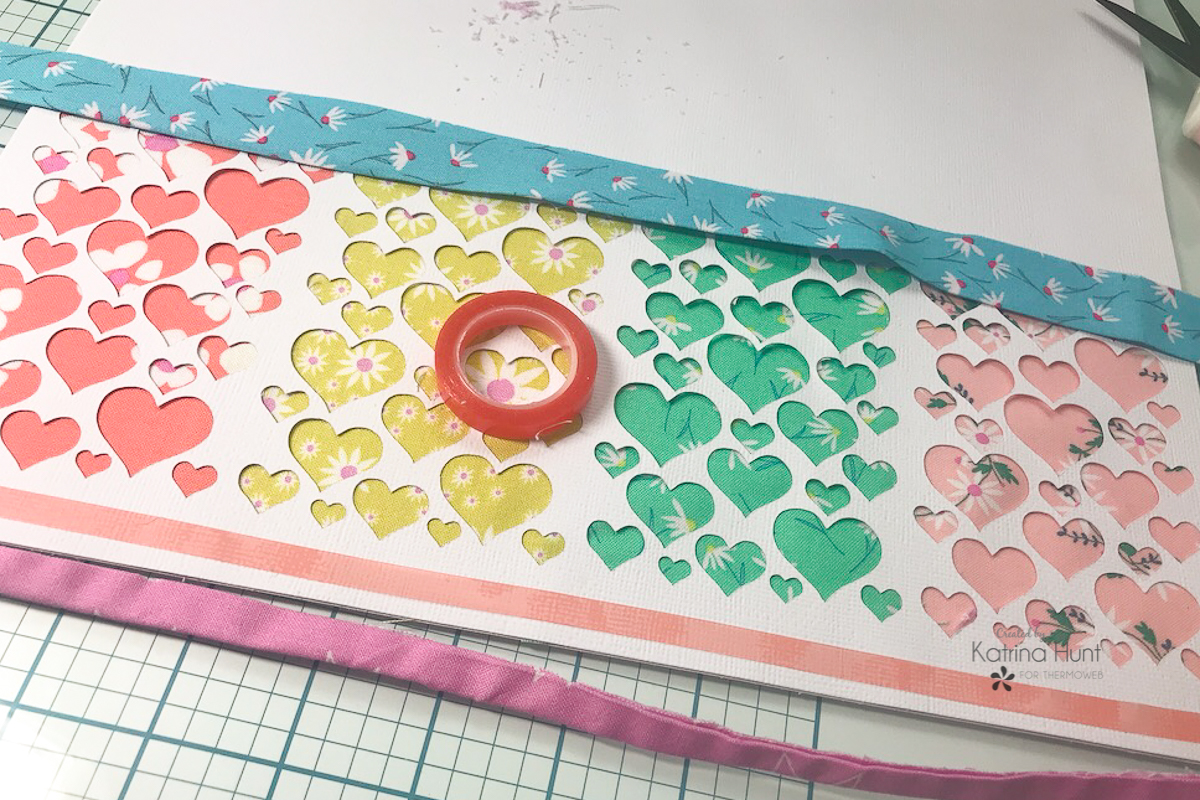
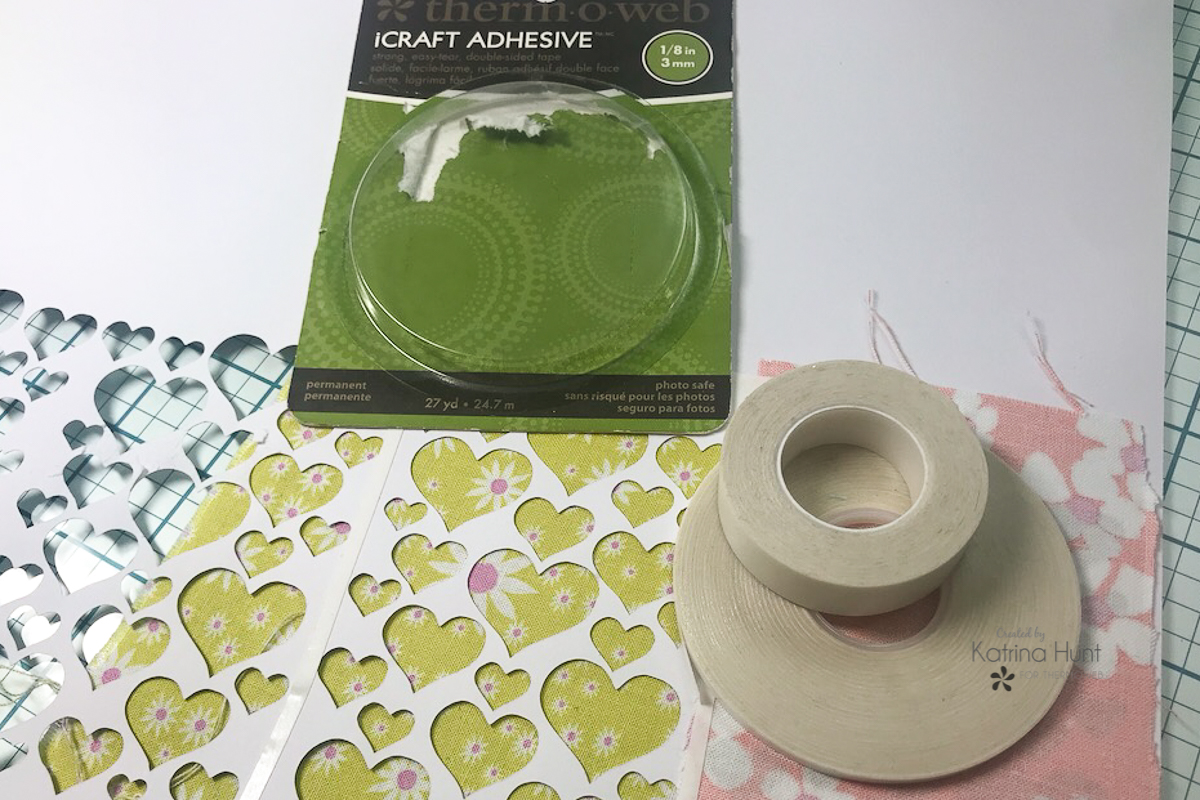 For the purpose of backing the cut file, I used the 1/8th and 1/2 inch iCraft Adhesive Tapes. Specifically, the smaller size was perfect for those little areas and then the bigger size I used at the top and bottom. Primarily, I applied the tapes on the four sides surrounding my sections of color. When I adhered to the fabric, I made sure to tightly pull it and layer it against the cut file. Once I did a section, I trimmed any extra fabric as close to the tapes as I could so that it wouldn't overlap and show thru.
In addition, I used another 12x12 sheet of white cardstock behind my original one. This gives the fabric a little more stability and also helps keep the warping to a minimum with the gel.
Don't you just love how this looks? I have all kinds of ideas now!
For the purpose of backing the cut file, I used the 1/8th and 1/2 inch iCraft Adhesive Tapes. Specifically, the smaller size was perfect for those little areas and then the bigger size I used at the top and bottom. Primarily, I applied the tapes on the four sides surrounding my sections of color. When I adhered to the fabric, I made sure to tightly pull it and layer it against the cut file. Once I did a section, I trimmed any extra fabric as close to the tapes as I could so that it wouldn't overlap and show thru.
In addition, I used another 12x12 sheet of white cardstock behind my original one. This gives the fabric a little more stability and also helps keep the warping to a minimum with the gel.
Don't you just love how this looks? I have all kinds of ideas now!
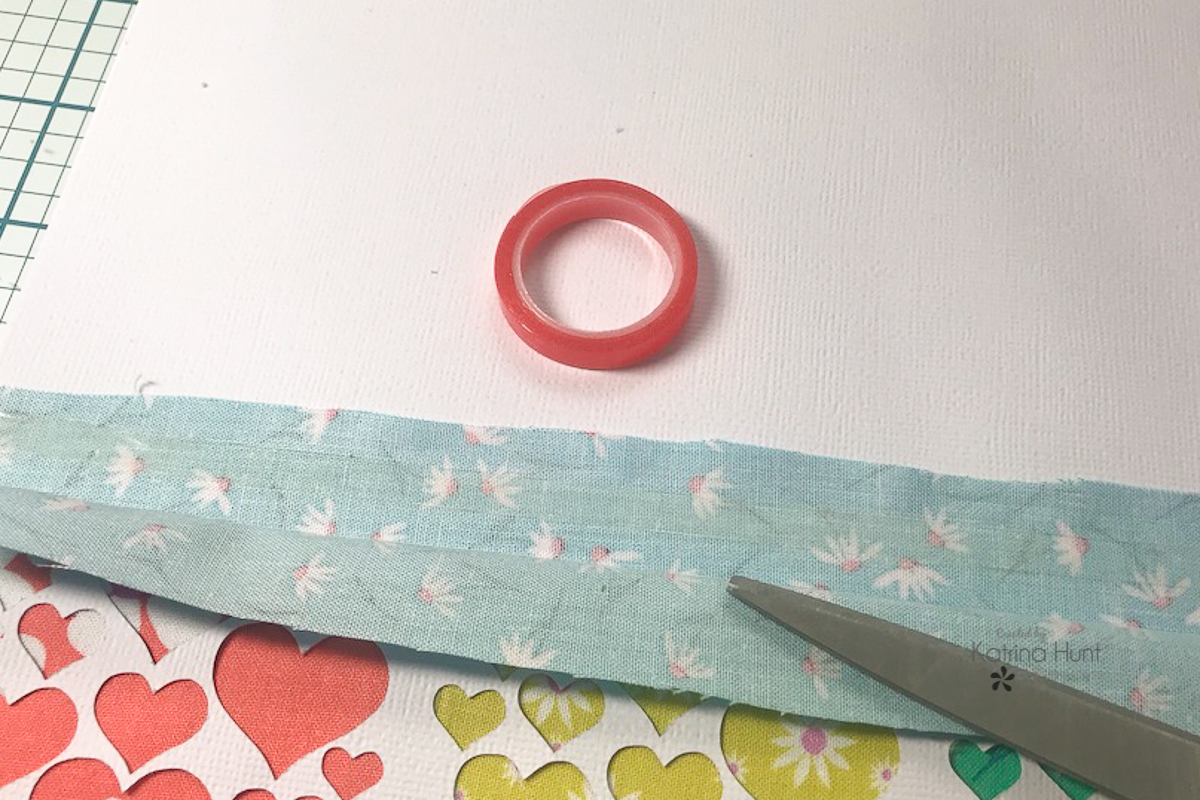
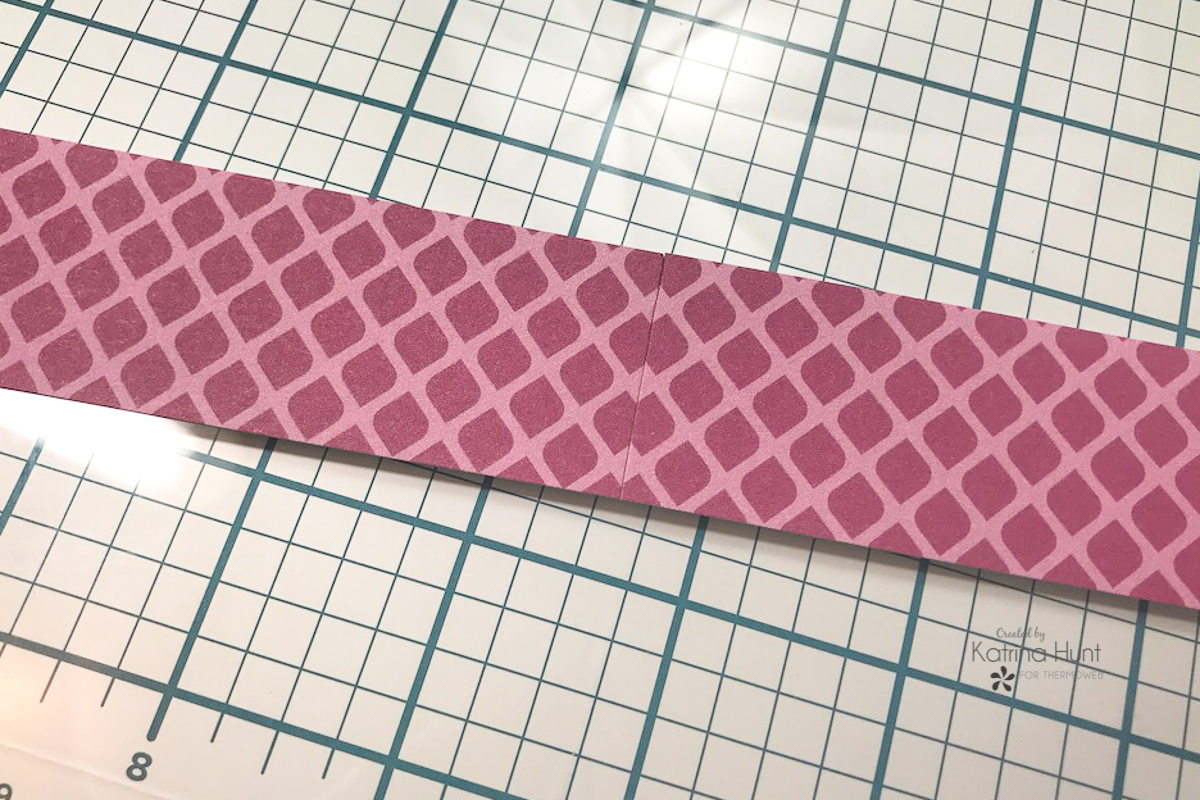
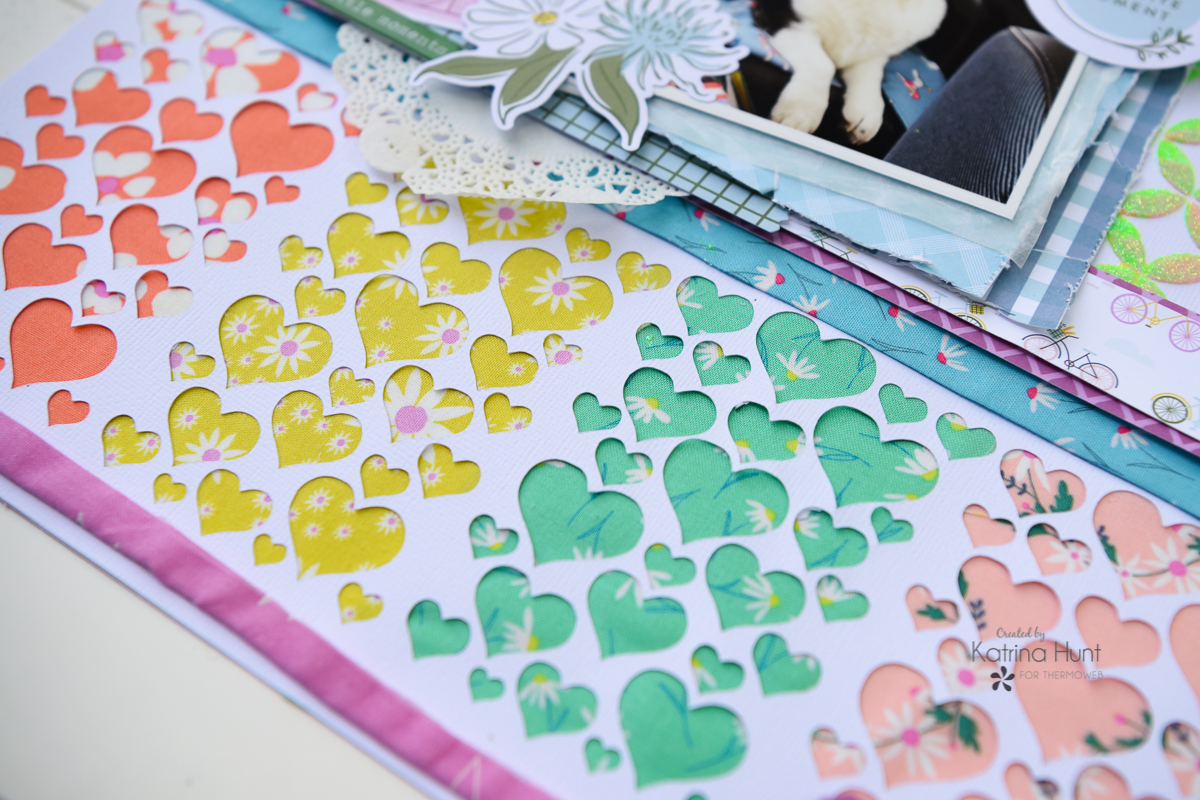 Additionally, my original idea was to use 6 colors, but I couldn't make it work the way I wanted it to. Nevertheless, I still wanted that purple and blue fabric on my layout. For that reason, I made strips, flat ironing again, and adhered them to the cardstock with the red SuperTapes in 1/8th and 1/4 inch. Since the SuperTape has a slightly stronger hold, I choose it for these two strips.
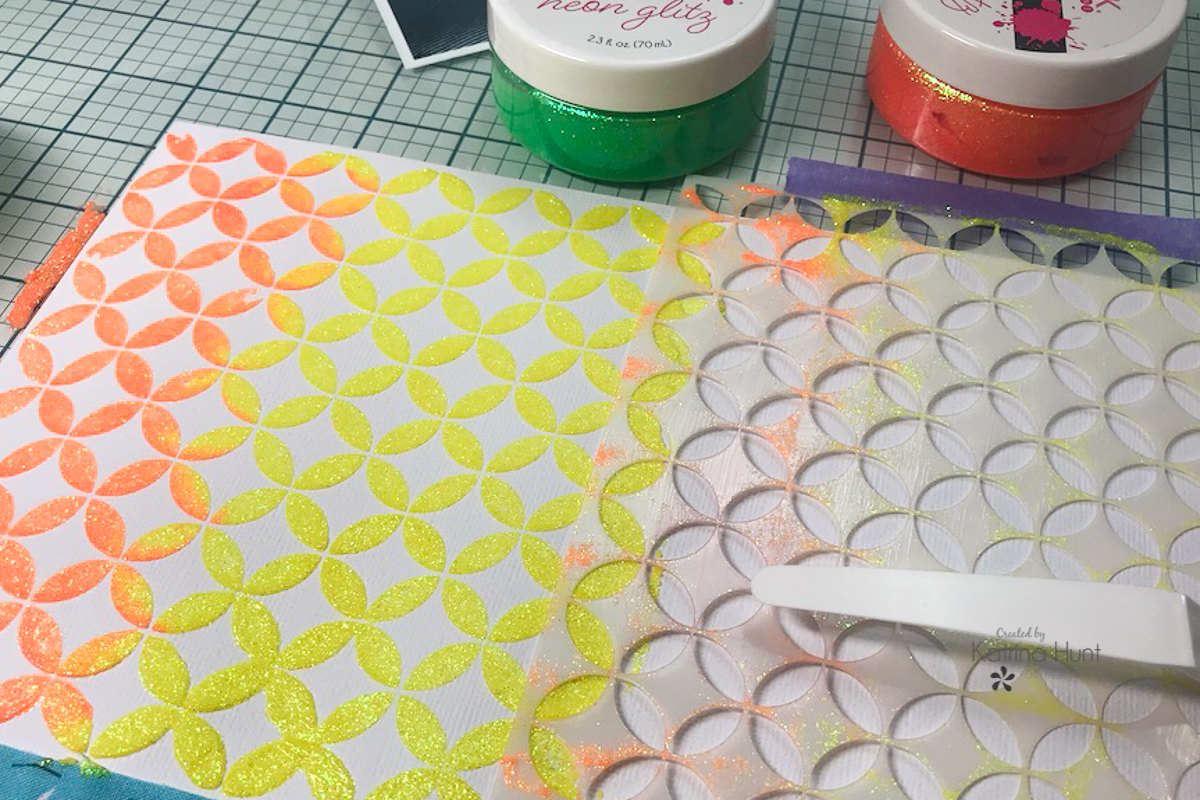
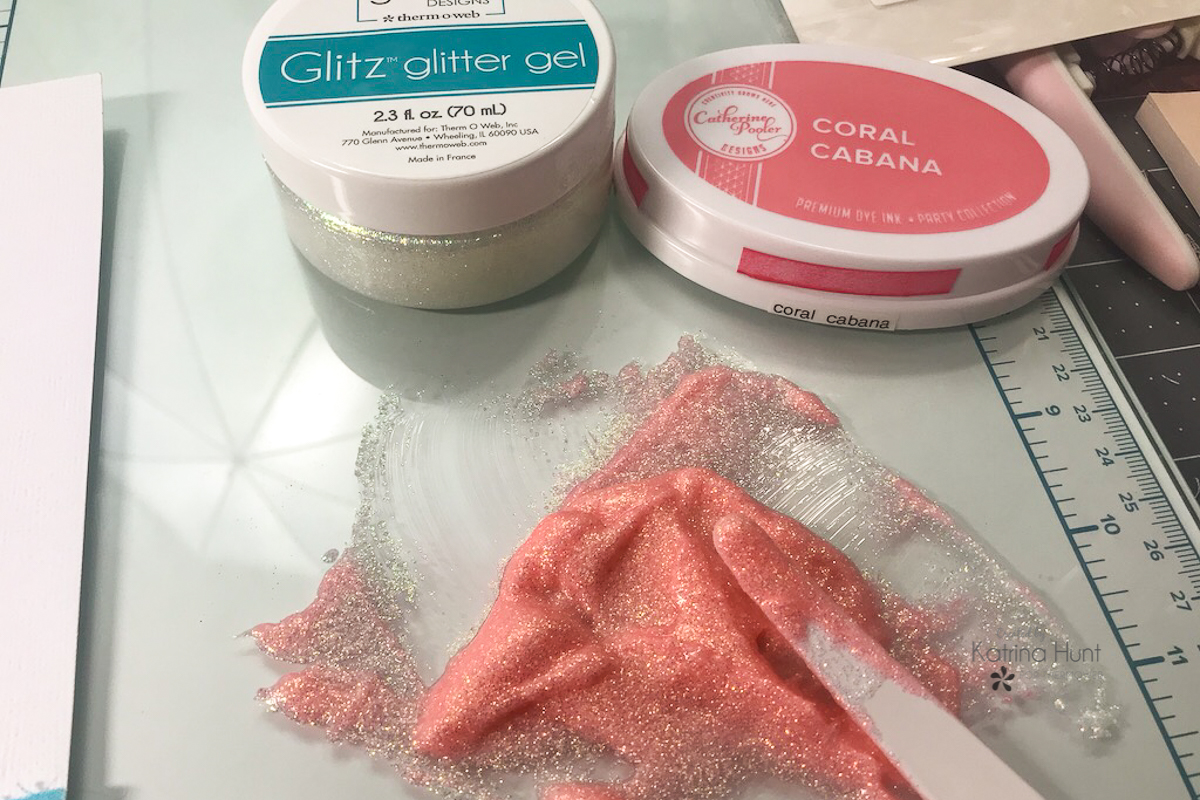 If you do the technique below, you will want to mix any custom colors first. This will allow you to blend the colors of glitter gel easily and have smooth transitions from one color to another.
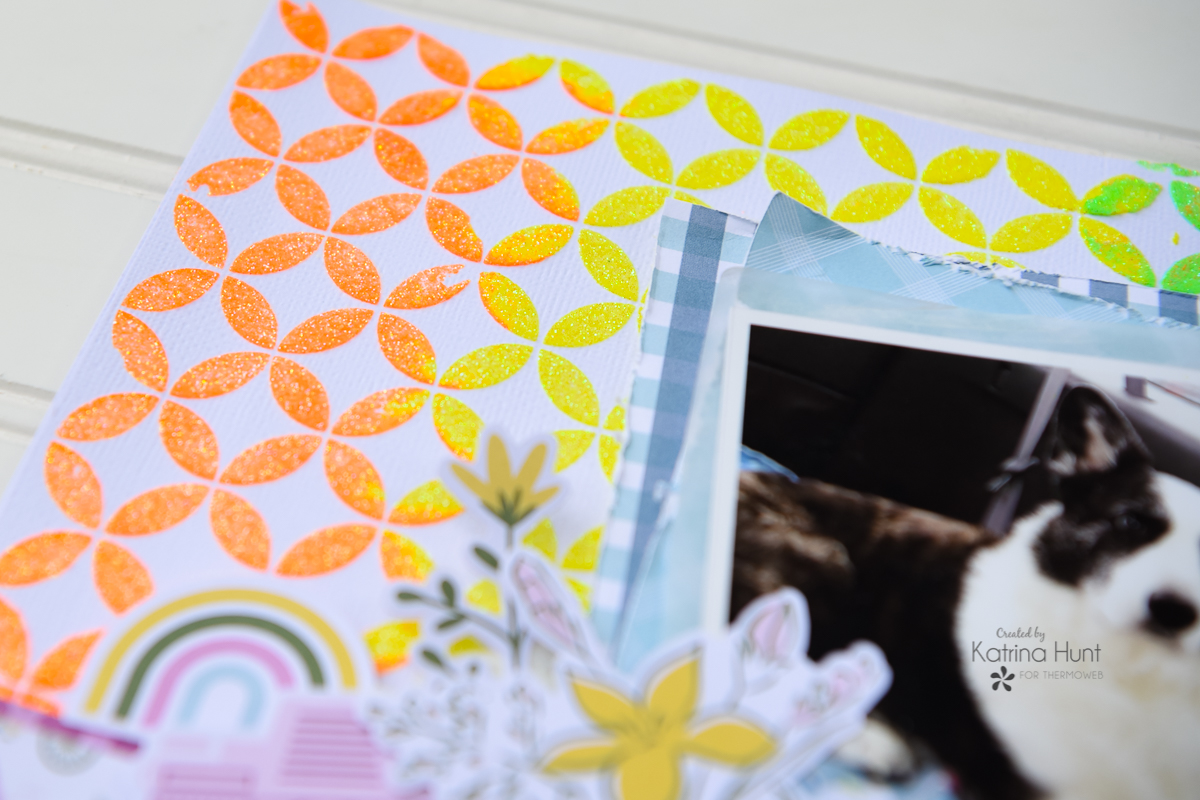 Start by laying down your first color, then carefully lift the stencil and move it over. When doing this you will want to line up the open areas so that your stenciled pattern stays the same. Continue to do this until all your colors are used.
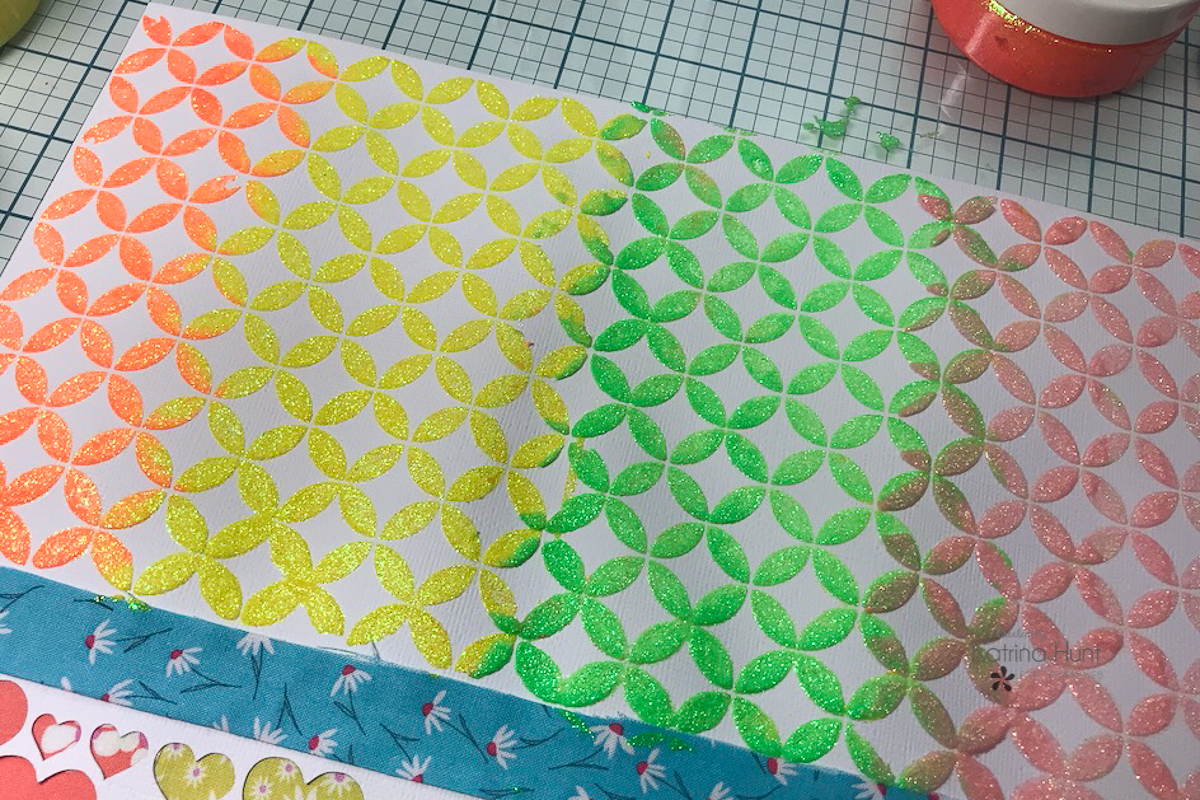
 And here is the background after being completed. The extra piece of cardstock really helped with the warping. This area was warped after I completed it, as you can see below. Once I let it dry overnight, it was flat again. So, I will definitely be using that little trick more! I hate warped paper and this could be a good solution.
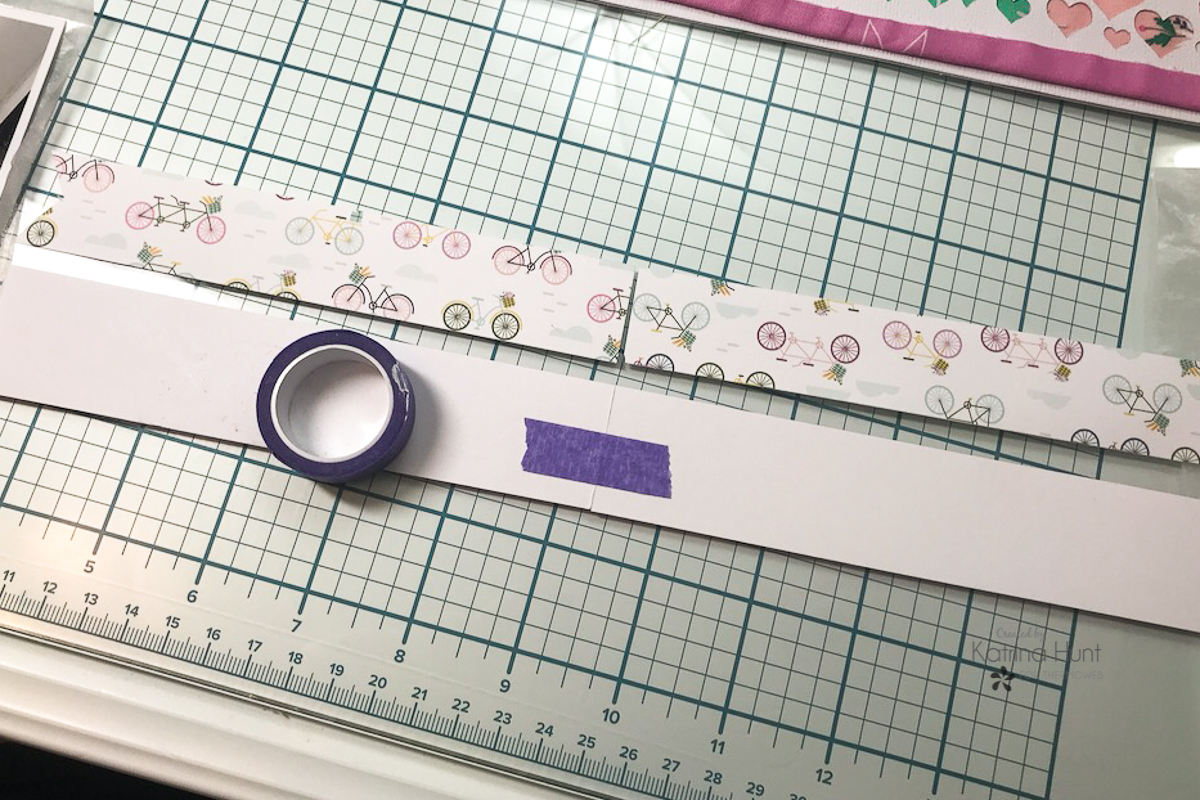
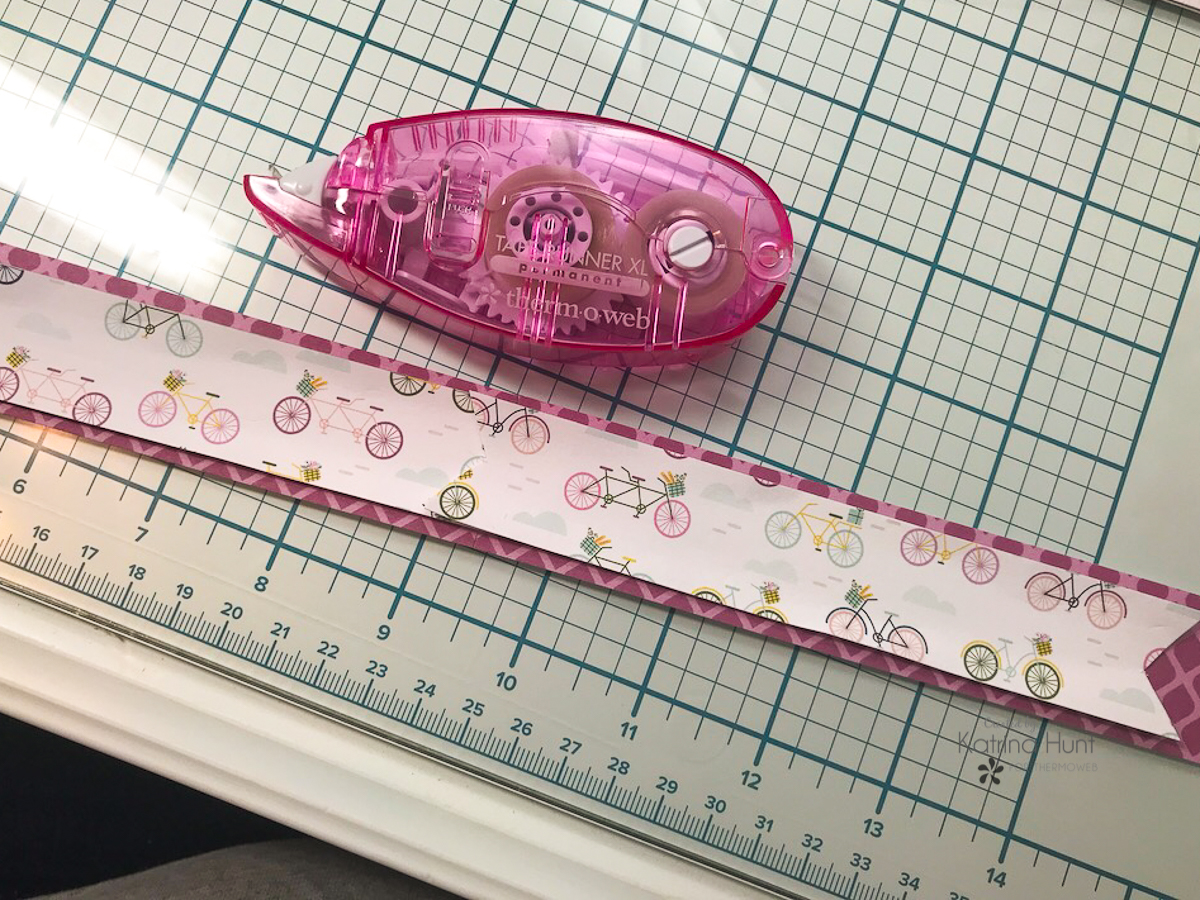
 Lastly, it was time to add Sheldon's picture and some embellishments. I started to not use any pattern paper, but my love of it got the best of me! I wanted smaller patterns, so the 6x6 paper pad was the perfect option to grab a paper from. To solve the issue of the strips not being long enough I just taped them with Purple Tape on the back, matching the patterns on the front. This won't work for all patterns, but the ones I choose it did, as you can see below.
 Using the Memory Runner XL, I adhered my two strips on top of each other and then adhered them to my layout. This step also covered my raw edge of the fabric.
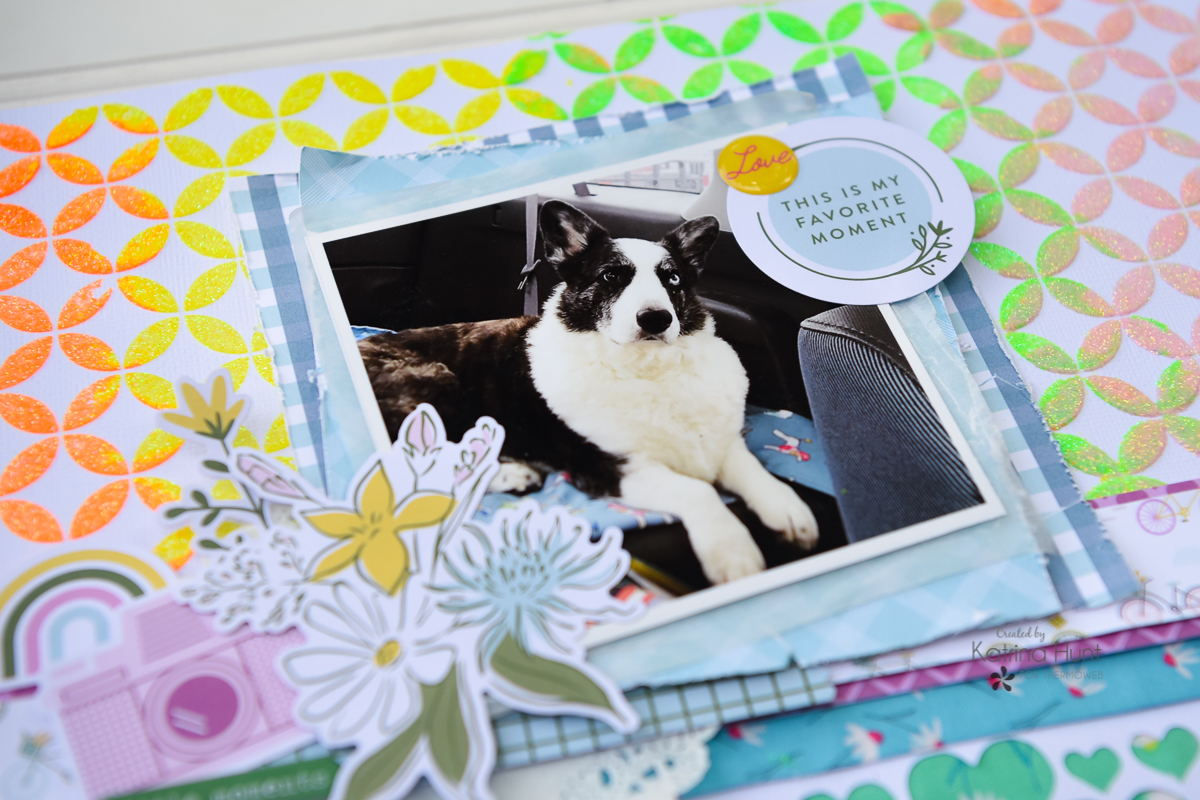
 Using Foam Strips, I created dimension for my picture, by layering different pattern papers, pulling some more blue color into the layout.
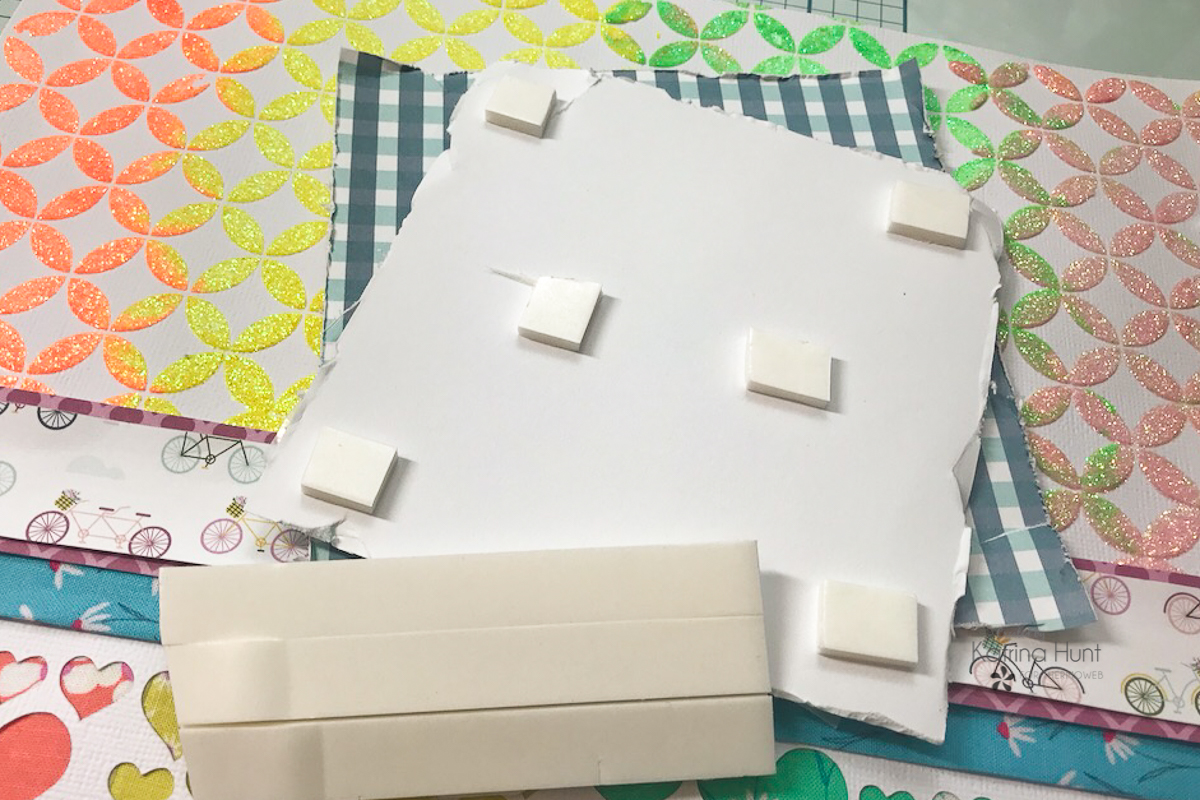 I added a few embellishments around my picture as accents and called my layout done!
 So, if you have some fabric laying around, try this! I will definitely be doing this again! Thanks for stopping by the ThermOWeb blog today! Happy Crafting!
This post contains affiliate links. For more information, see our disclosure HERE.
So, if you have some fabric laying around, try this! I will definitely be doing this again! Thanks for stopping by the ThermOWeb blog today! Happy Crafting!
This post contains affiliate links. For more information, see our disclosure HERE.