No Products in the Cart
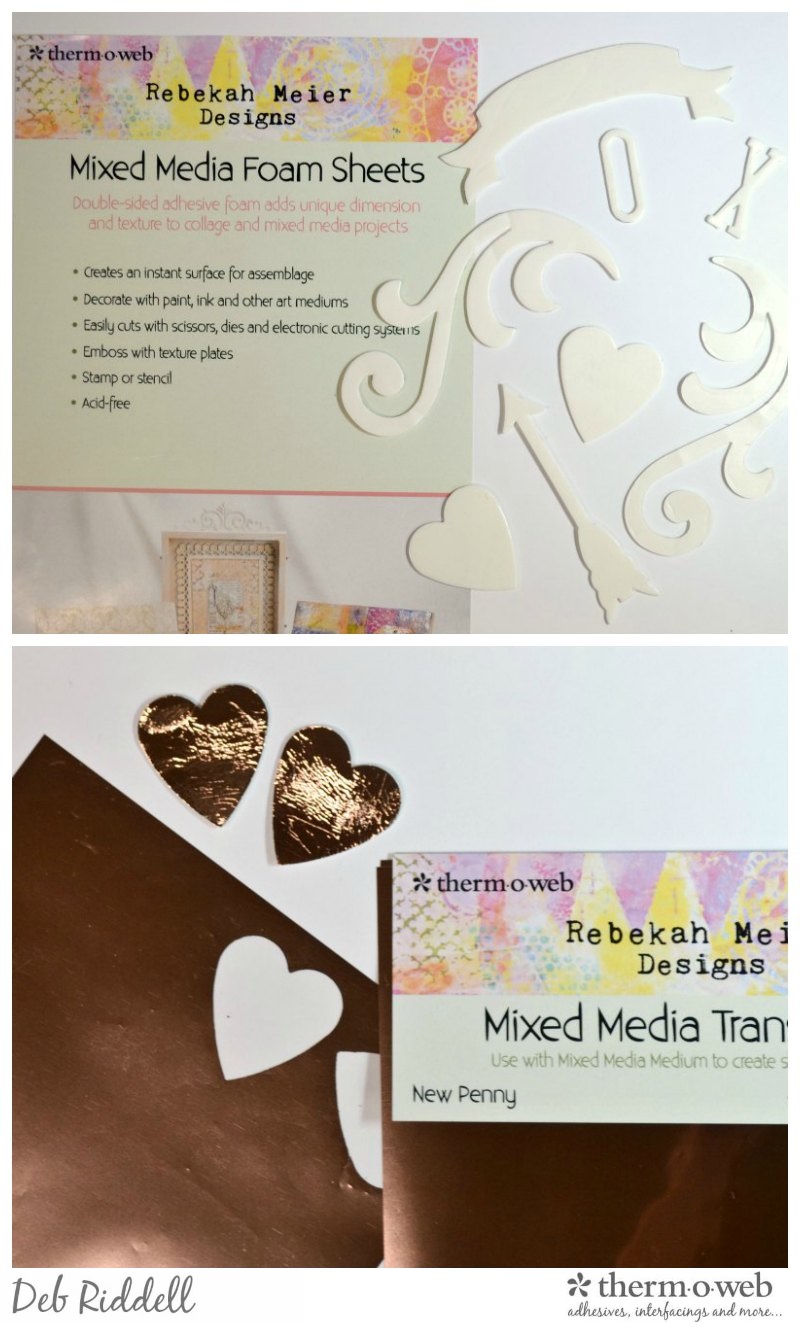 Remove the backing paper from one side of the die cut Foam Sheet hearts and apply New Penny Mixed Media Transfer Foil to both hearts, laying the Transfer Foil over the adhesive (New Penny side up!) and burnishing with your finger to transfer the foil.
Repeat this process, using Old Gold Mixed Media Transfer Foil on the die cut flourishes;
Remove the backing paper from one side of the die cut Foam Sheet hearts and apply New Penny Mixed Media Transfer Foil to both hearts, laying the Transfer Foil over the adhesive (New Penny side up!) and burnishing with your finger to transfer the foil.
Repeat this process, using Old Gold Mixed Media Transfer Foil on the die cut flourishes;
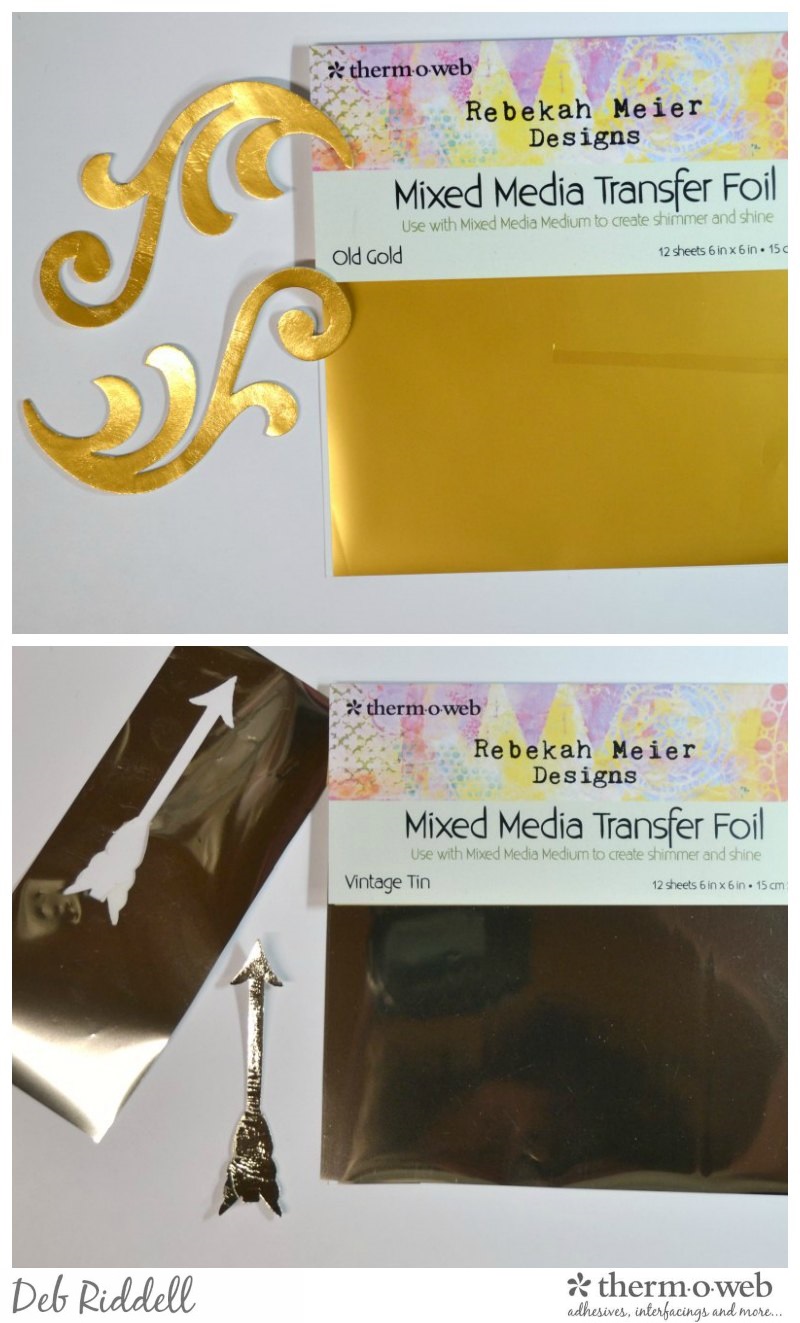 and Vintage Tin Mixed Media Transfer Foil on the die cut arrow.
Remove the backing paper from the opposite side of the foiled die cuts and adhere them onto a 5" x 7" stretched artists canvas.
and Vintage Tin Mixed Media Transfer Foil on the die cut arrow.
Remove the backing paper from the opposite side of the foiled die cuts and adhere them onto a 5" x 7" stretched artists canvas.
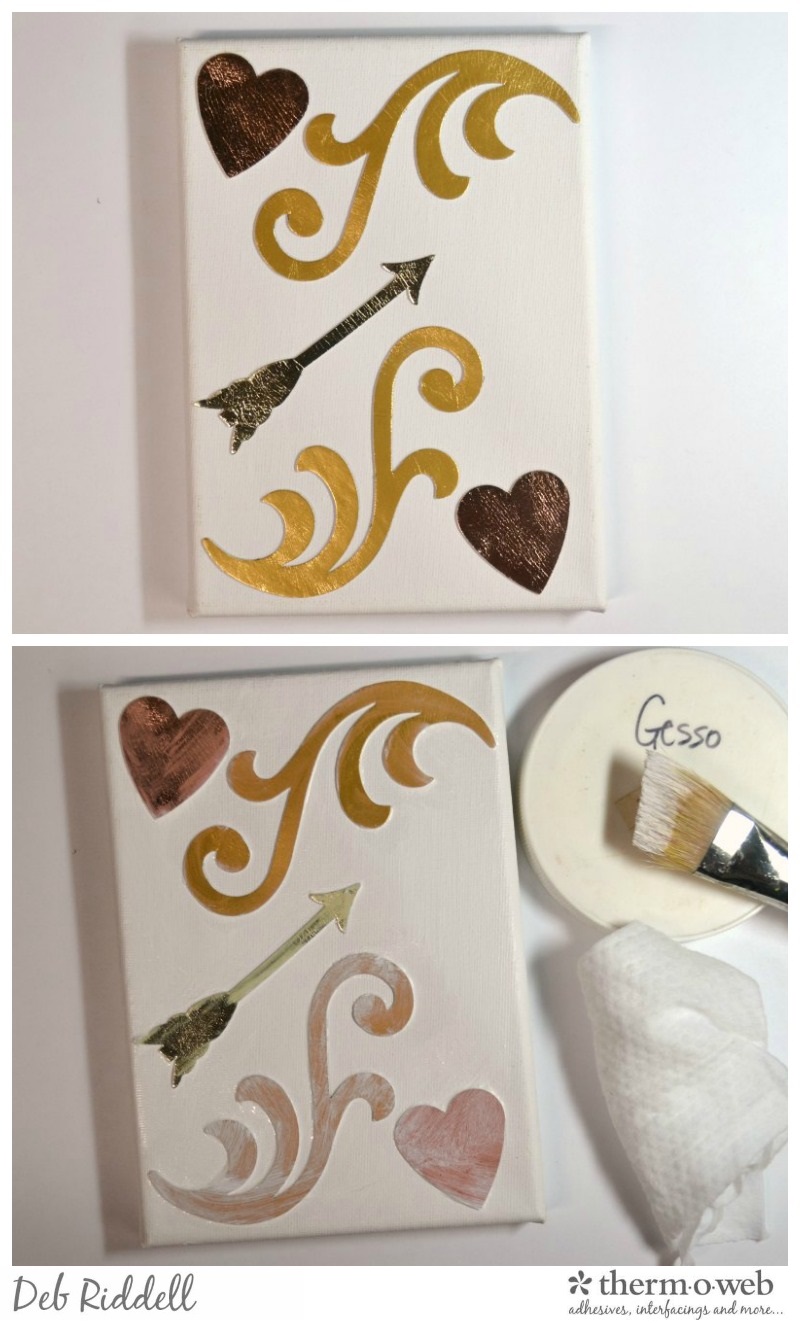 Paint white gesso over the entire canvas, including the foiled die cuts, and then gently wipe the gesso off of the die cuts with a damp baby wipe before it dries completely. It's OK if there is a bit of a gesso 'haze' left on the foiled die cuts after you wipe them off. Let the canvas dry thoroughly.
Cover the entire canvas with several shades of pink water based stains (Tattered Rose, Worn Lipstick and Victorian Velvet Distress Stains were used here), including the foiled die cuts. Once the stains have dried, cover the entire canvas with a water based satin or gloss varnish to seal it and let it dry completely. The varnish will reactivate the water based stains and move them around but don't worry, that's OK!
Paint white gesso over the entire canvas, including the foiled die cuts, and then gently wipe the gesso off of the die cuts with a damp baby wipe before it dries completely. It's OK if there is a bit of a gesso 'haze' left on the foiled die cuts after you wipe them off. Let the canvas dry thoroughly.
Cover the entire canvas with several shades of pink water based stains (Tattered Rose, Worn Lipstick and Victorian Velvet Distress Stains were used here), including the foiled die cuts. Once the stains have dried, cover the entire canvas with a water based satin or gloss varnish to seal it and let it dry completely. The varnish will reactivate the water based stains and move them around but don't worry, that's OK!
 Stamp the canvas with a fine script stamp (this is Ledger Script) with a permanent dark brown coloured ink. Wipe the stamping off of the foiled embellishments while the ink is still wet, leaving some of the script visible here and there on the foiled die cuts.
Splatter the canvas with thinned white and gold metallic acrylic paints.
Stamp the canvas with a fine script stamp (this is Ledger Script) with a permanent dark brown coloured ink. Wipe the stamping off of the foiled embellishments while the ink is still wet, leaving some of the script visible here and there on the foiled die cuts.
Splatter the canvas with thinned white and gold metallic acrylic paints.
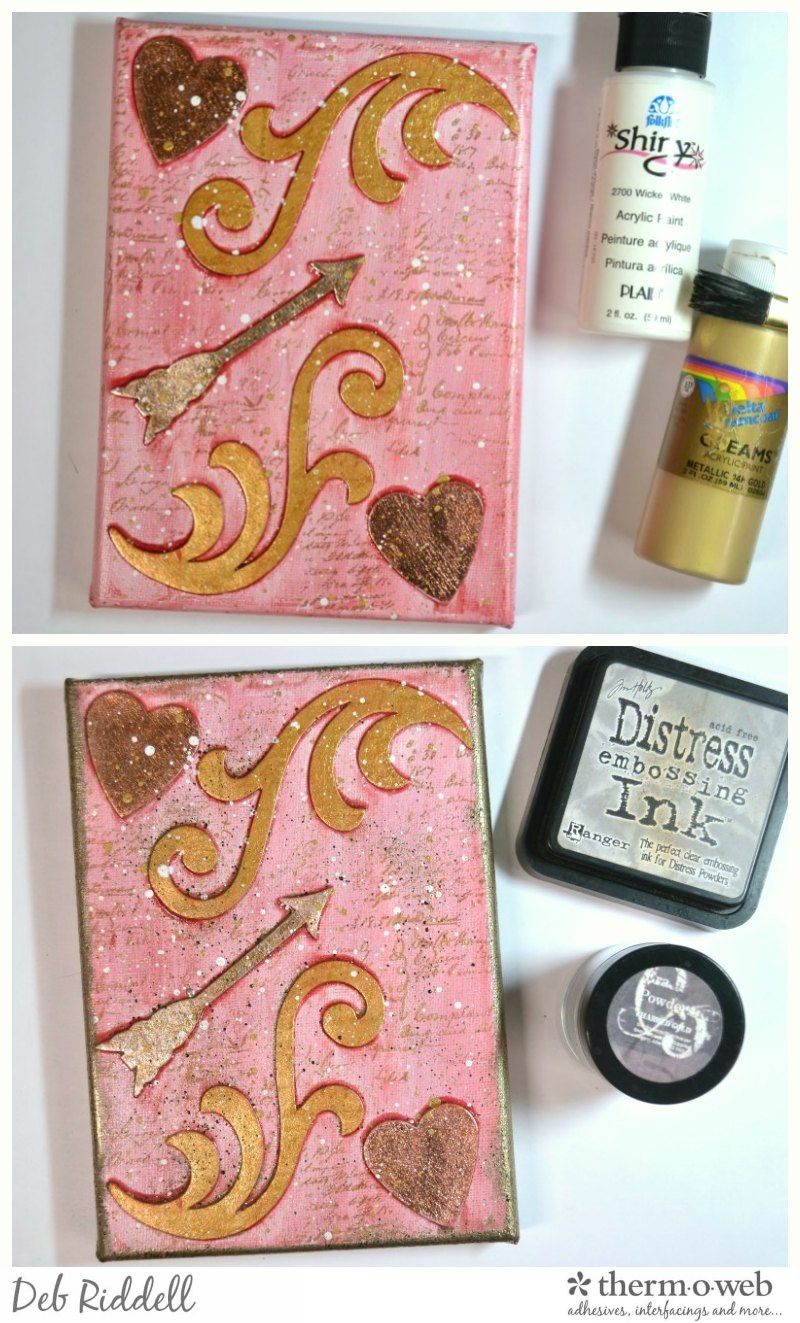 Ink the edges of the canvas with embossing ink and, working in sections, emboss the sides with a gold embossing powder (this is Charred Gold embossing powder). Take 'pinches' of the embossing powder and sprinkle it lightly over the surface of the canvas, heating the canvas from below to activate and melt the sprinkles of embossing powder on the surface of the canvas (watch you don't burn your fingers!).
Love the texture from the embossing powder and paint splatters! The Charred Gold embossing powder has flecks of black in it as well as the gold to add another layer of interest.
Ink the edges of the canvas with embossing ink and, working in sections, emboss the sides with a gold embossing powder (this is Charred Gold embossing powder). Take 'pinches' of the embossing powder and sprinkle it lightly over the surface of the canvas, heating the canvas from below to activate and melt the sprinkles of embossing powder on the surface of the canvas (watch you don't burn your fingers!).
Love the texture from the embossing powder and paint splatters! The Charred Gold embossing powder has flecks of black in it as well as the gold to add another layer of interest.
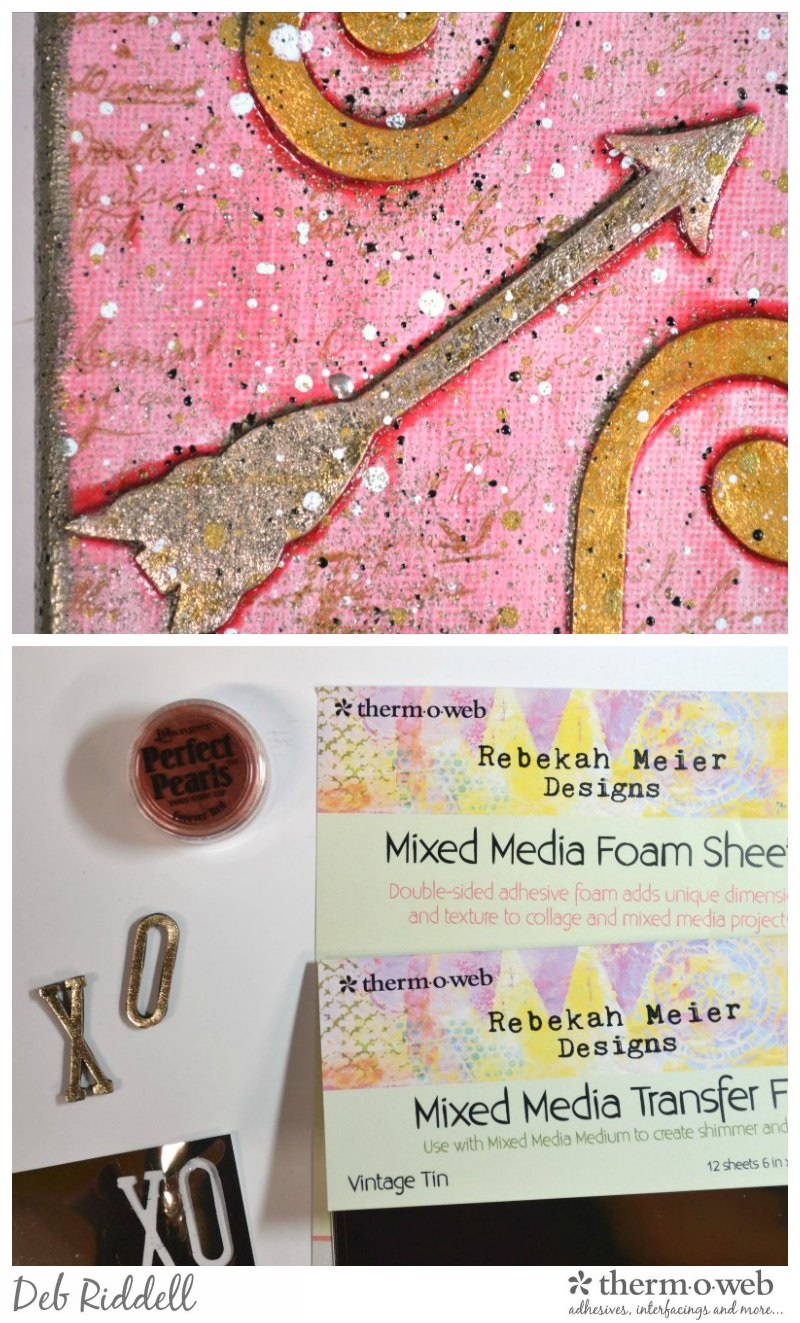 Cover the die cut Mixed Media Foam Sheet 'XO' letters with Vintage Tin Mixed Media Transfer Foil and dust them with a red mica powder to cover any areas of the foam sheet that may not have taken the foil completely (this is Forever Red Perfect Pearls powder). Die cut the 'XO' letters again from some black fun foam and layer the foiled foam sheet letters on top.
Adhere the layered 'XO' letters onto the canvas with Rebekah Meier Designs Mixed Media Medium.
Cover the die cut Mixed Media Foam Sheet 'XO' letters with Vintage Tin Mixed Media Transfer Foil and dust them with a red mica powder to cover any areas of the foam sheet that may not have taken the foil completely (this is Forever Red Perfect Pearls powder). Die cut the 'XO' letters again from some black fun foam and layer the foiled foam sheet letters on top.
Adhere the layered 'XO' letters onto the canvas with Rebekah Meier Designs Mixed Media Medium.
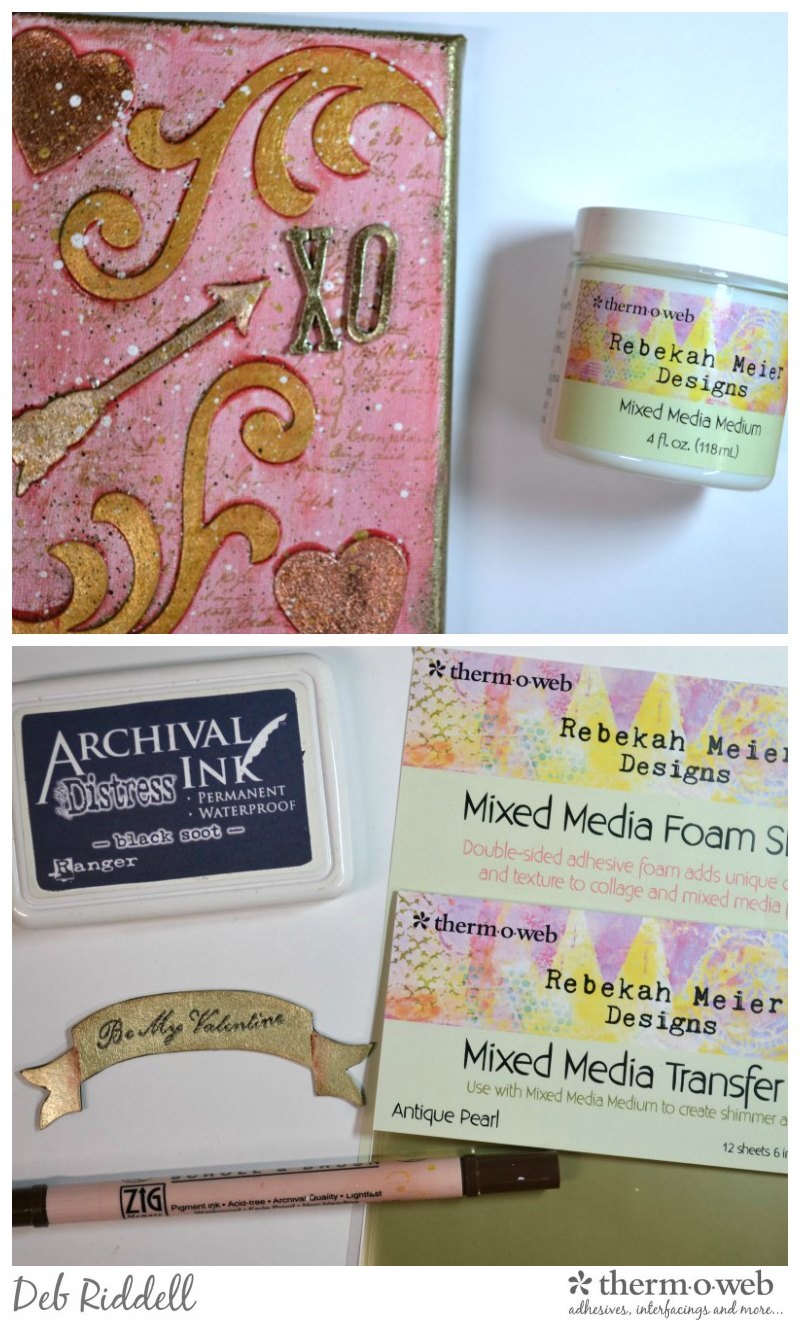 Cover the die cut Mixed Media Foam Sheet banner with Antique Pearl Mixed Media Transfer Foil. Stamp a Valentine sentiment onto the foiled banner with a black permanent ink. Hint: use a stamp positioning tool to stamp the sentiment onto the foiled foam as it may take a few tries to get a clear impression. With a permanent brown ink pen, add some shadow lines onto the banner die cut.
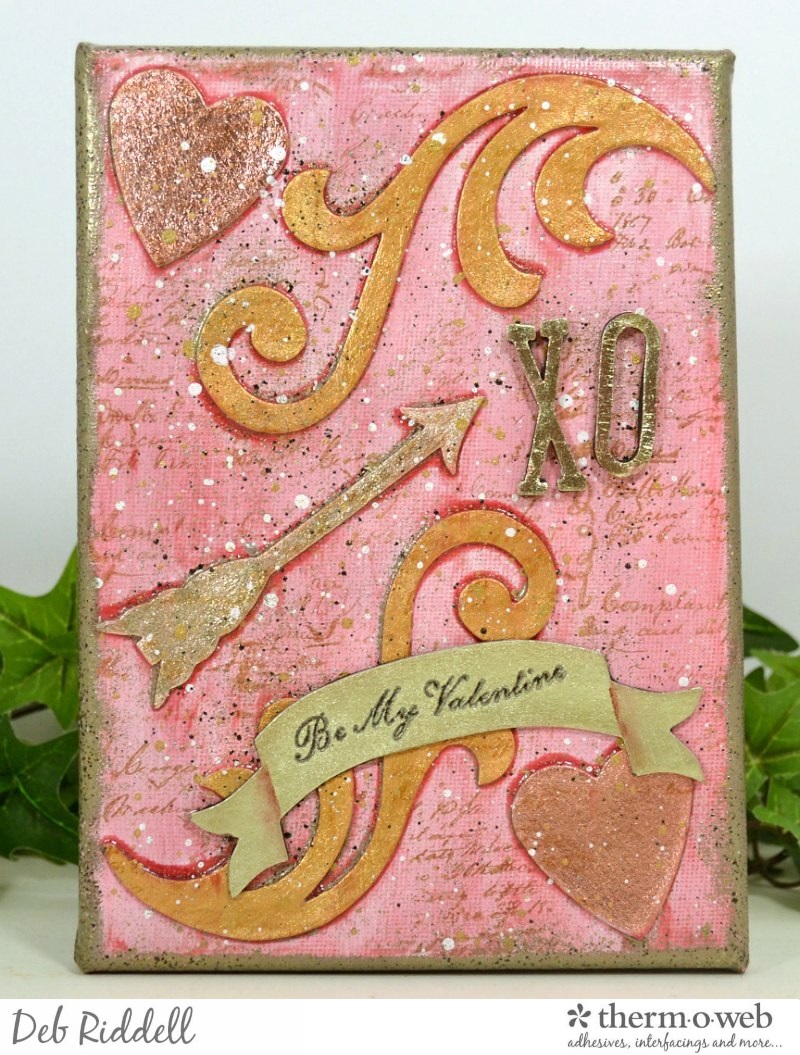
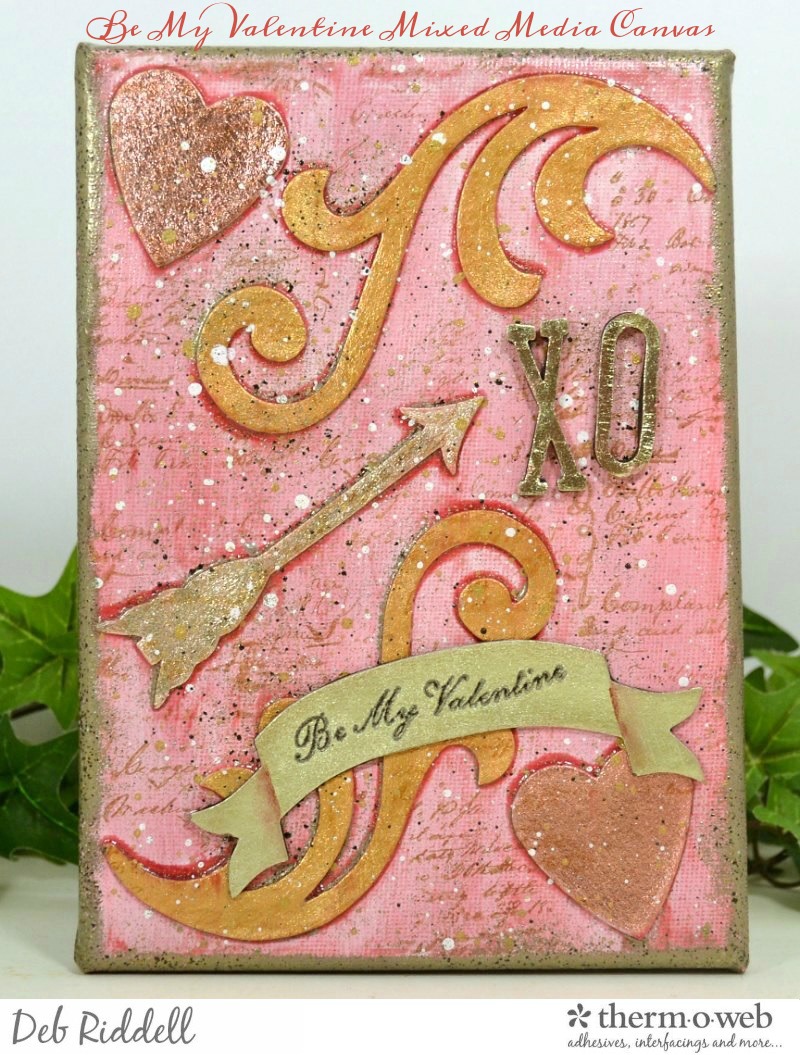
Adhere the foiled and stamped banner onto your canvas and your Valentine project is complete, ready to be gifted to the one you love!
Cover the die cut Mixed Media Foam Sheet banner with Antique Pearl Mixed Media Transfer Foil. Stamp a Valentine sentiment onto the foiled banner with a black permanent ink. Hint: use a stamp positioning tool to stamp the sentiment onto the foiled foam as it may take a few tries to get a clear impression. With a permanent brown ink pen, add some shadow lines onto the banner die cut.
Adhere the foiled and stamped banner onto your canvas and your Valentine project is complete, ready to be gifted to the one you love!
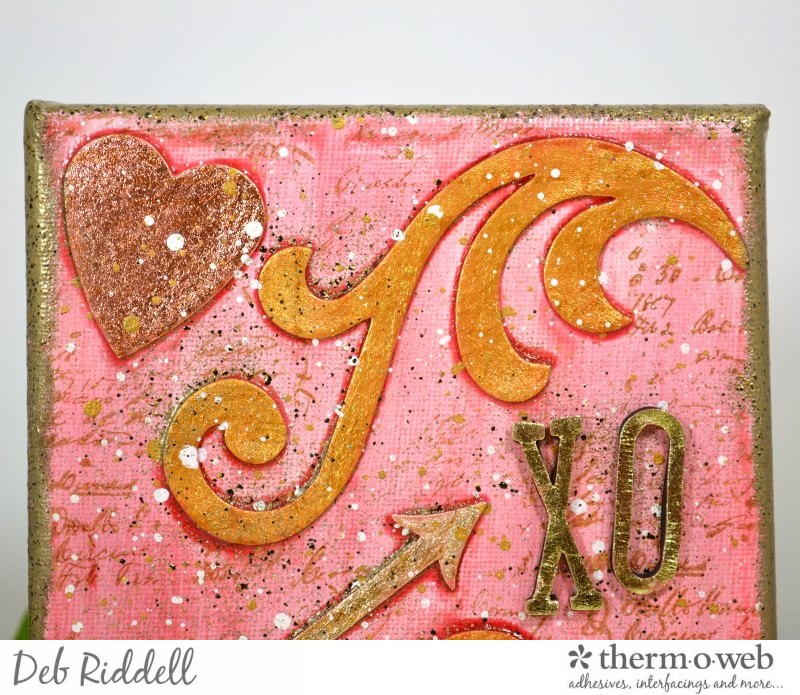
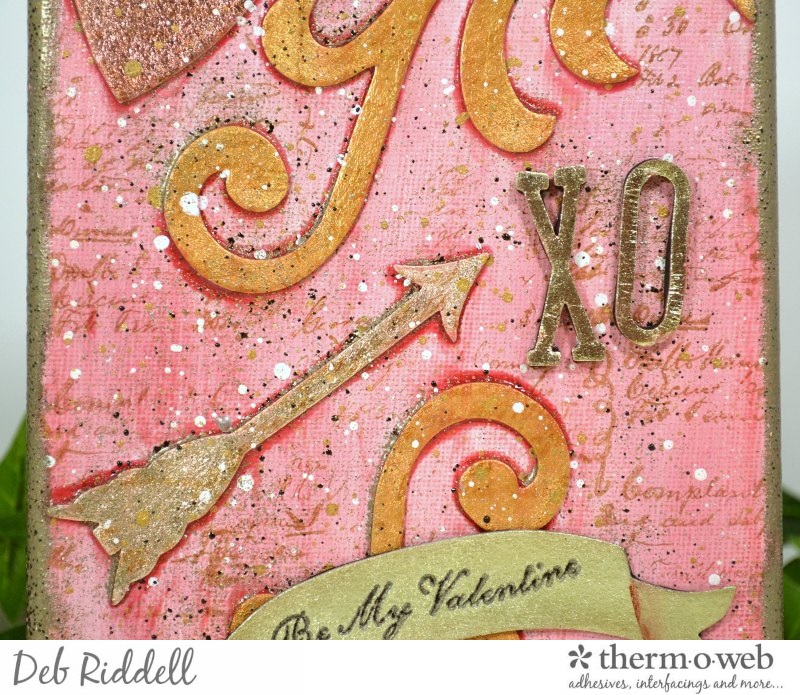
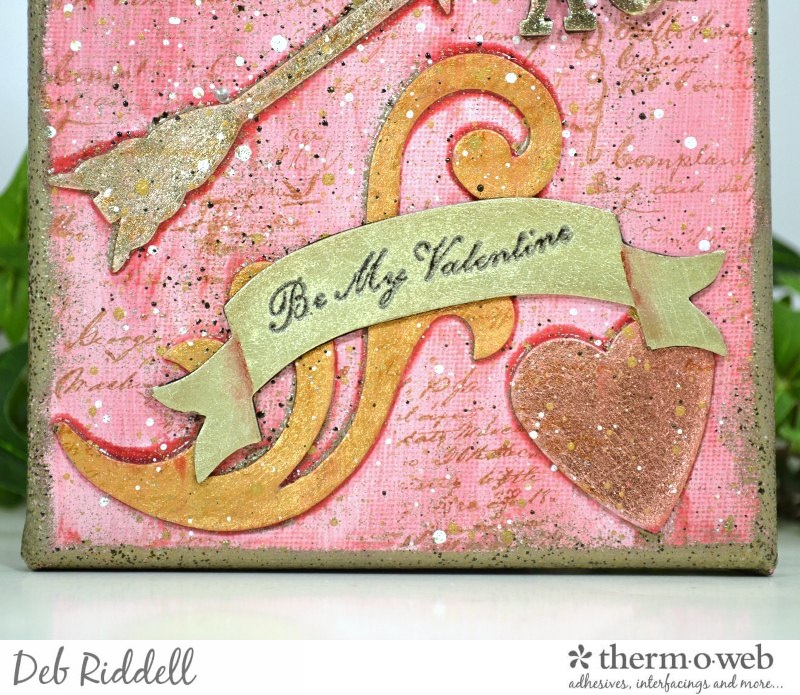 Here are a couple more closeups of the completed canvas.
 I hope that you've enjoyed seeing how my 'Be My Valentine' mixed media canvas came together and that you've been inspired to make one of your own. Rebekah Meier's Mixed Media Foam Sheets and Transfer Foils make it easy to create lovely Valentine's Day gifts.
 Thank you as always for stopping by today and happy creating!
Deb xo
Thank you as always for stopping by today and happy creating!
Deb xo