No Products in the Cart
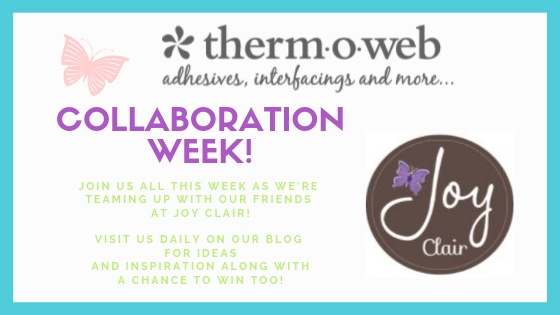
 It's a new week and that means we have something fun in store for you! We're teaming back up (we have done this once prior and loved it) with our friends at Joy Clair for another Collaboration Week.
If you're new to these here's what that means....all week long we'll share ideas and projects using both our two companies products. From cards, paper crafts and home decor and more we hope to inspire you to create with Joy Clair Stamps and ThermOWeb Products! We think it's a brilliant idea!
And speaking of brilliant ideas...wait till you see this incredible Halloween Shadow Box from Joy Clair Trick or Treat stamps and our Metallix Gel!
It's a new week and that means we have something fun in store for you! We're teaming back up (we have done this once prior and loved it) with our friends at Joy Clair for another Collaboration Week.
If you're new to these here's what that means....all week long we'll share ideas and projects using both our two companies products. From cards, paper crafts and home decor and more we hope to inspire you to create with Joy Clair Stamps and ThermOWeb Products! We think it's a brilliant idea!
And speaking of brilliant ideas...wait till you see this incredible Halloween Shadow Box from Joy Clair Trick or Treat stamps and our Metallix Gel!
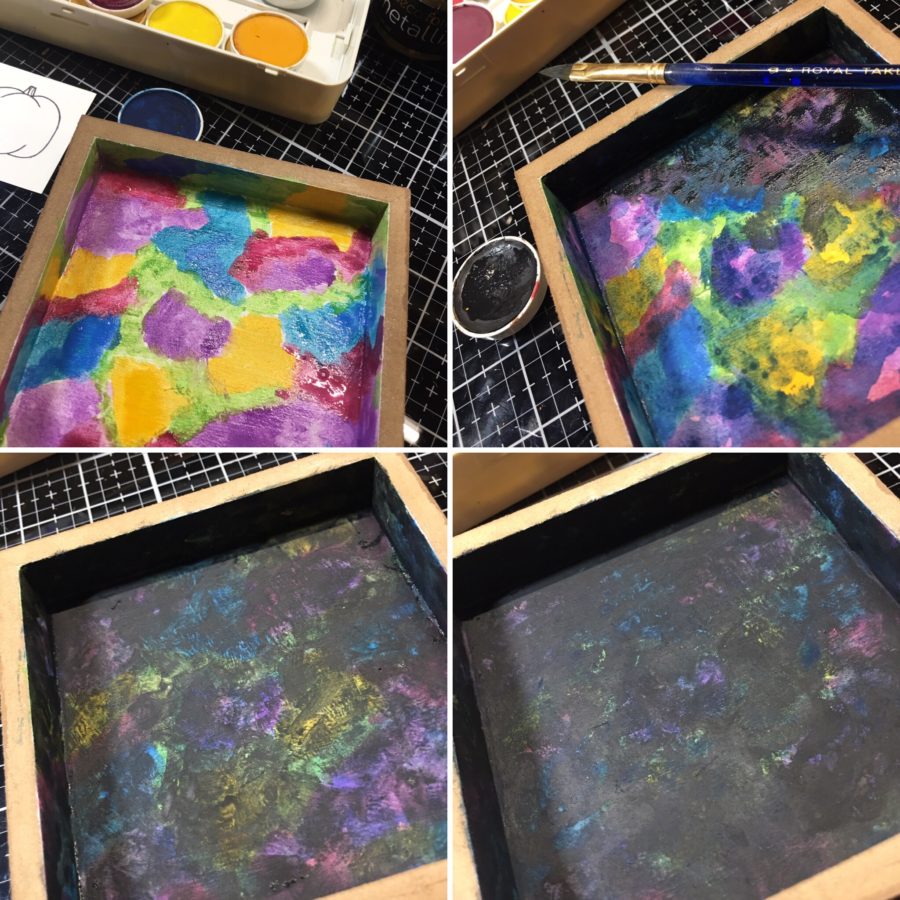
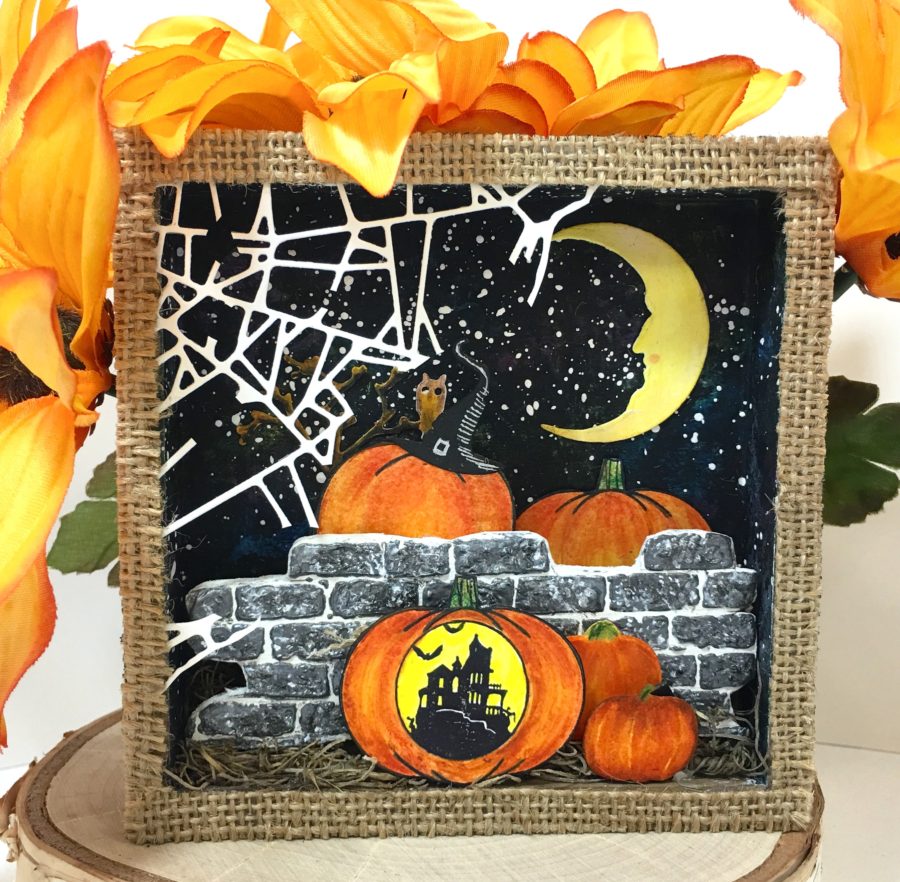 Hi all, Wendy here with an early Halloween project to kick off the season. While the air is still muggy and the temperatures high, I can't help but look to fall, my favorite season. I hope you enjoy this mini shadow box.
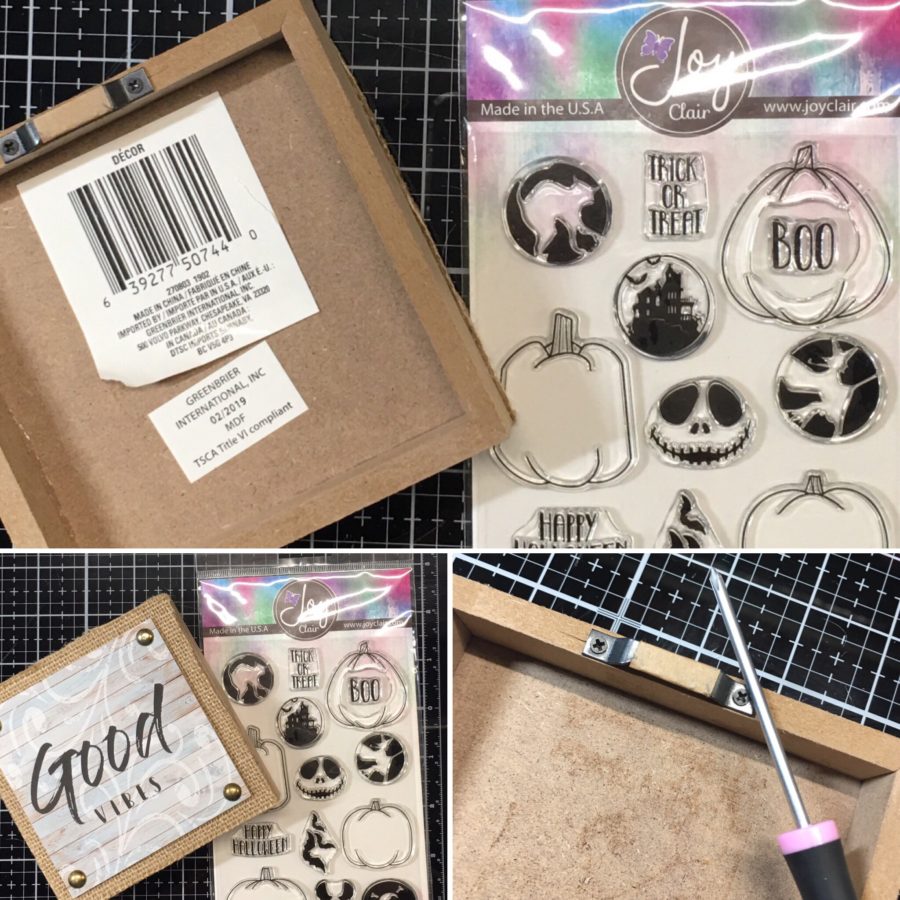
Mixed Media Mini Shadow Box Supplies:
Metallix - Black Ice and White Pearl
iCraft UltraBond Liquid Adhesive
Stencil Pal
Joy Clair Clear Stamps - Trick or Trick
Hi all, Wendy here with an early Halloween project to kick off the season. While the air is still muggy and the temperatures high, I can't help but look to fall, my favorite season. I hope you enjoy this mini shadow box.
Mixed Media Mini Shadow Box Supplies:
Metallix - Black Ice and White Pearl
iCraft UltraBond Liquid Adhesive
Stencil Pal
Joy Clair Clear Stamps - Trick or Trick
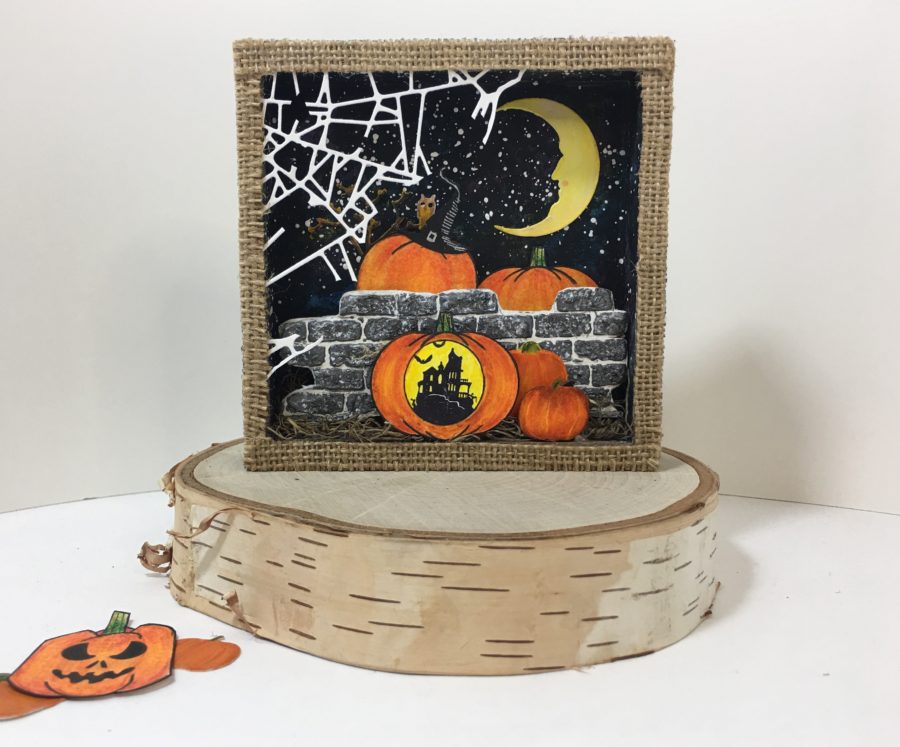 Other Supplies: Wood box, cardstock, black ink, watercolor paints and/or colored pencils, chipboard, acrylic paints, brick stencil, scissors, Halloween die-cuts, and burlap.
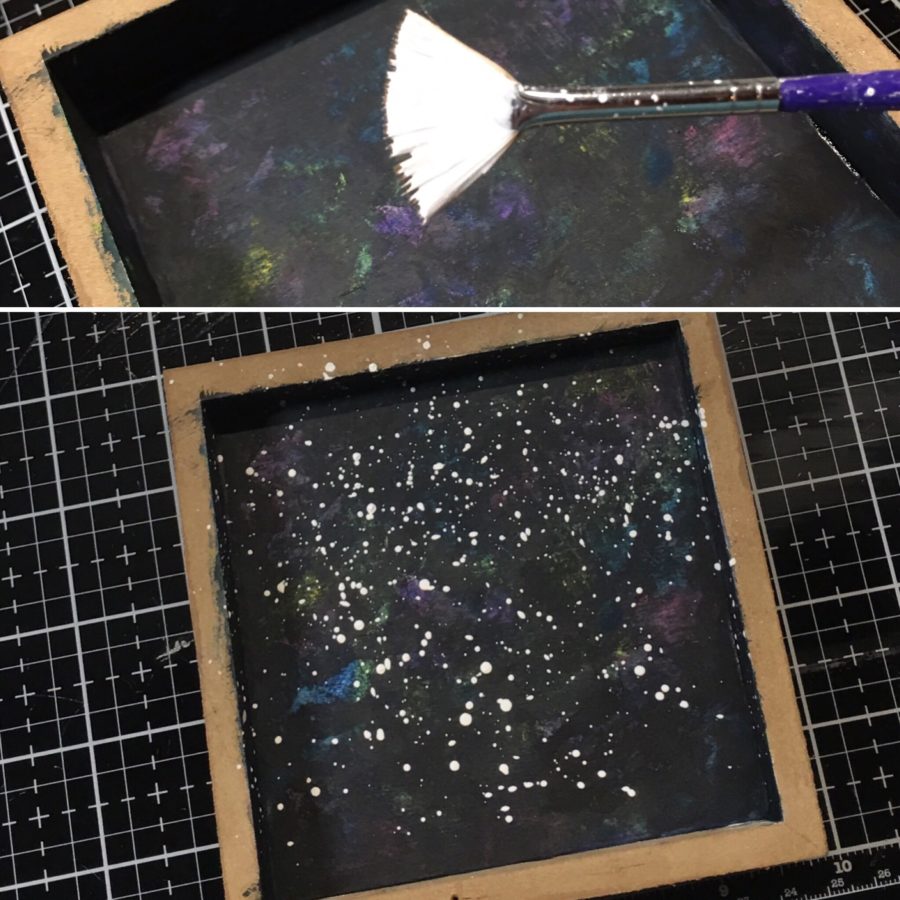
 STEP TWO:
Once the black paint is completely dry, splatter a bit of watered down white paint onto the night sky to give the appearance stars. Set aside the shadow box to dry.
STEP TWO:
Once the black paint is completely dry, splatter a bit of watered down white paint onto the night sky to give the appearance stars. Set aside the shadow box to dry.
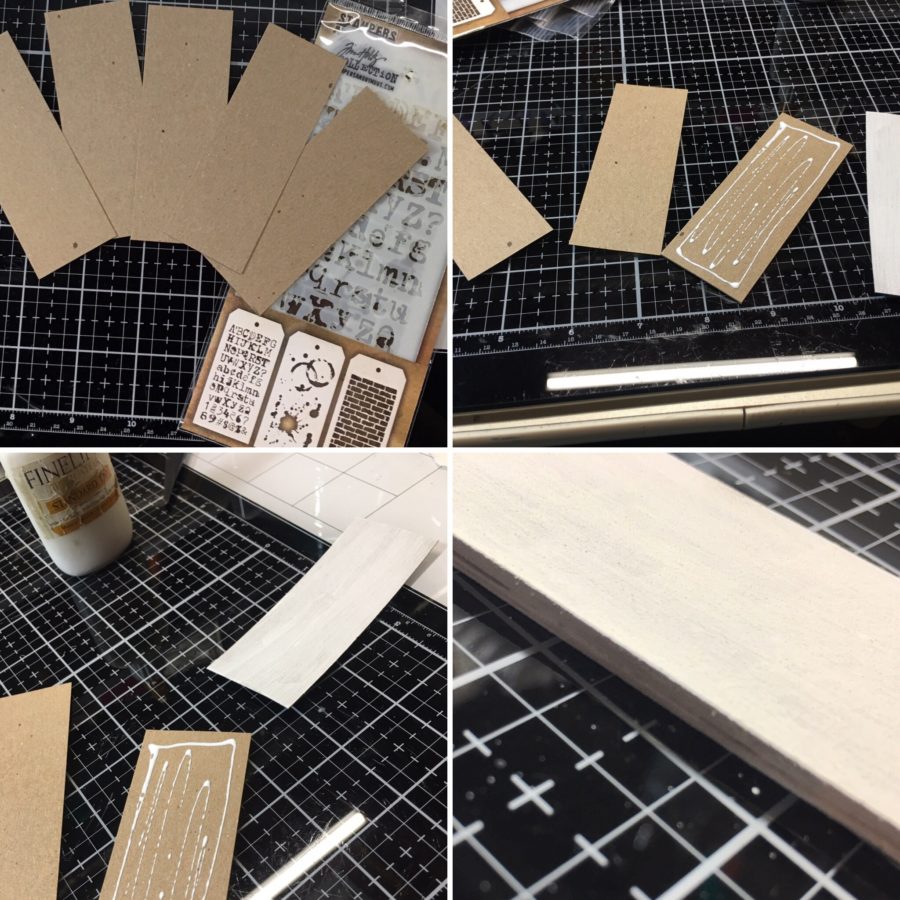
 STEP THREE:
Measure the inside of your shadow box and cut strips of chipboard to length. I cut my strips 1 1/2" high. Glue the layers together and paint the top layer white.
Hint: I keep a fine tip container filled with slightly watered down Ultrabond Liquid Adhesive.
STEP THREE:
Measure the inside of your shadow box and cut strips of chipboard to length. I cut my strips 1 1/2" high. Glue the layers together and paint the top layer white.
Hint: I keep a fine tip container filled with slightly watered down Ultrabond Liquid Adhesive.
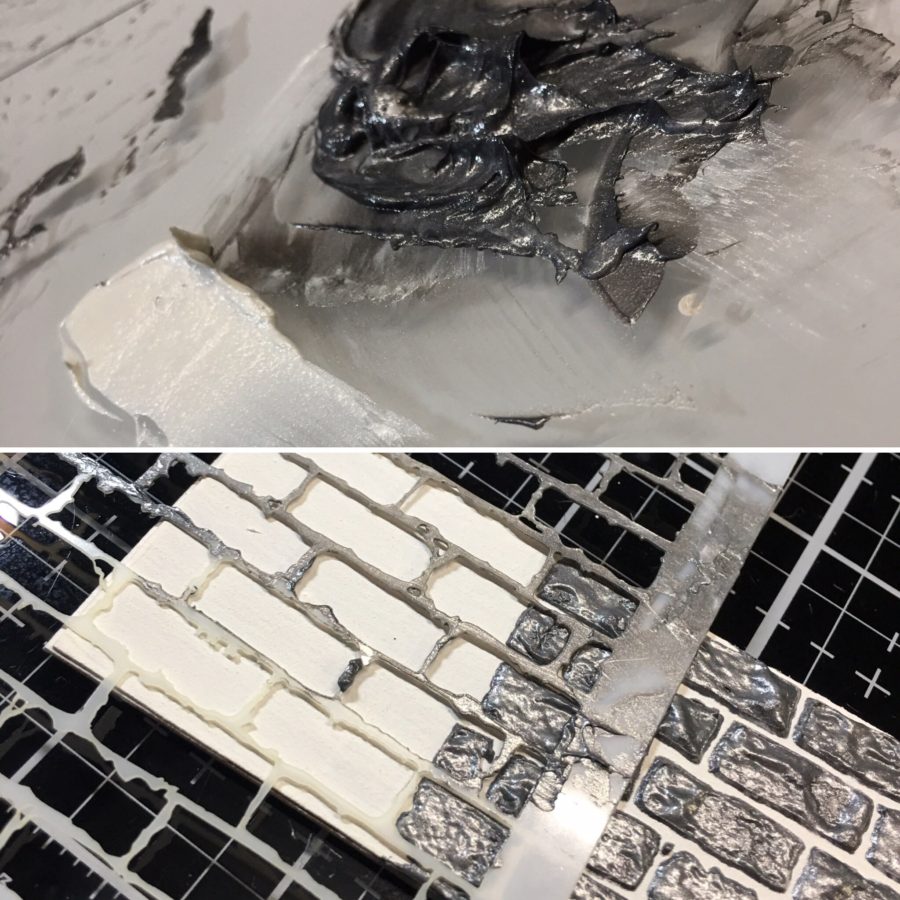
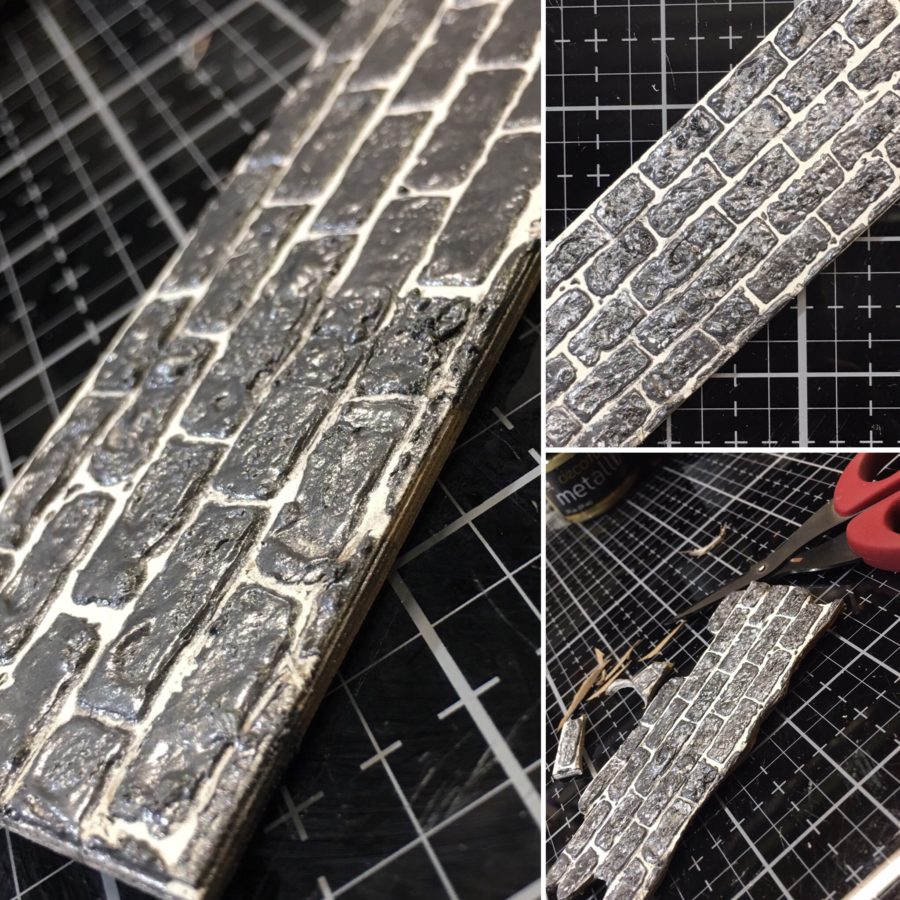
 STEP FOUR:
Mix a small amount of Black Ice Metallix and White Pearl Metallix to create a dark gray tone. Using your Stencil Pal and a brick stencil create a brick wall by stenciling onto the stack of chipboard strips. Using scissors, cut some of the bricks off the "wall" to create an old worn wall appearance.
Hint: Use a heat tool to dry the Metallix which will cause it to puff up. Once it puffs up, pat the bricks to create a craggy stone look.
STEP FOUR:
Mix a small amount of Black Ice Metallix and White Pearl Metallix to create a dark gray tone. Using your Stencil Pal and a brick stencil create a brick wall by stenciling onto the stack of chipboard strips. Using scissors, cut some of the bricks off the "wall" to create an old worn wall appearance.
Hint: Use a heat tool to dry the Metallix which will cause it to puff up. Once it puffs up, pat the bricks to create a craggy stone look.
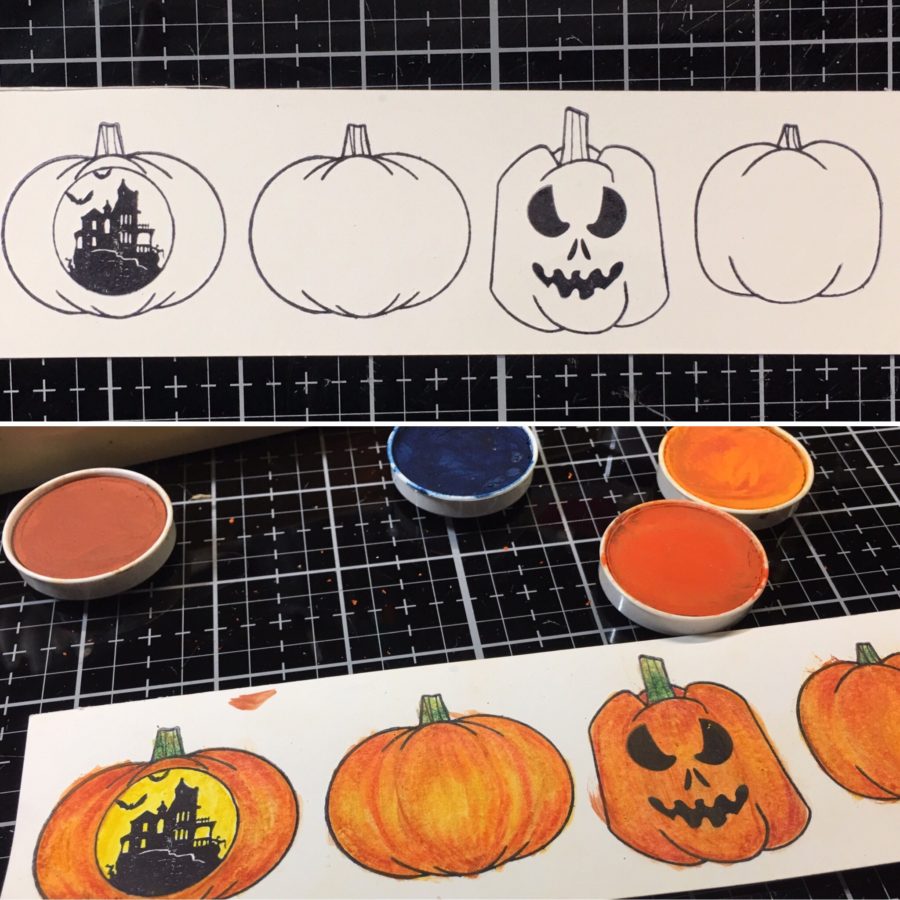
 STEP FIVE:
Stamp your Halloween pumpkins using waterproof ink and watercolor the images.
Hint: Use colored pencils to add tone to the images once the watercolors dry.
STEP FIVE:
Stamp your Halloween pumpkins using waterproof ink and watercolor the images.
Hint: Use colored pencils to add tone to the images once the watercolors dry.
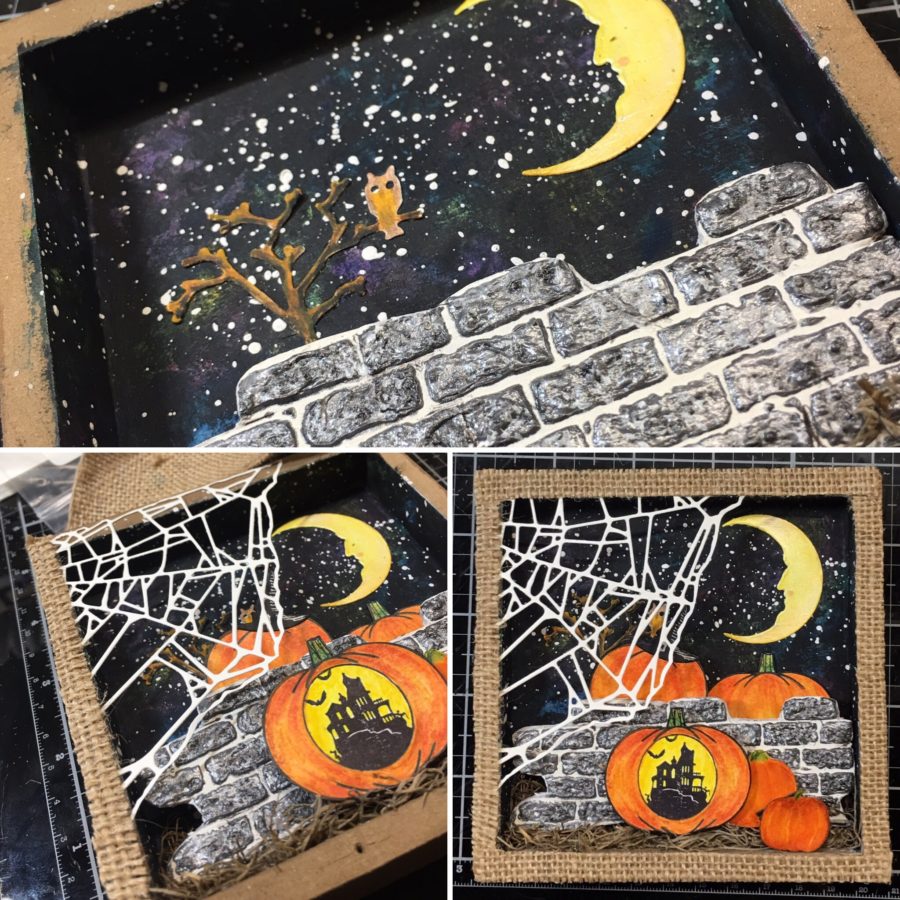
 STEP SIX:
Adhere a bit of moss at the bottom of the shadow box and using hot glue, add your brick wall, leaving some space behind the wall. Add in any Halloween die-cuts or stickers you want to use and then cover the frame of the shadow box with burlap. I used the burlap from the front side of the plaque.
Hint: Snip off some of the spider web stands to reveal more of the background.
STEP SIX:
Adhere a bit of moss at the bottom of the shadow box and using hot glue, add your brick wall, leaving some space behind the wall. Add in any Halloween die-cuts or stickers you want to use and then cover the frame of the shadow box with burlap. I used the burlap from the front side of the plaque.
Hint: Snip off some of the spider web stands to reveal more of the background.
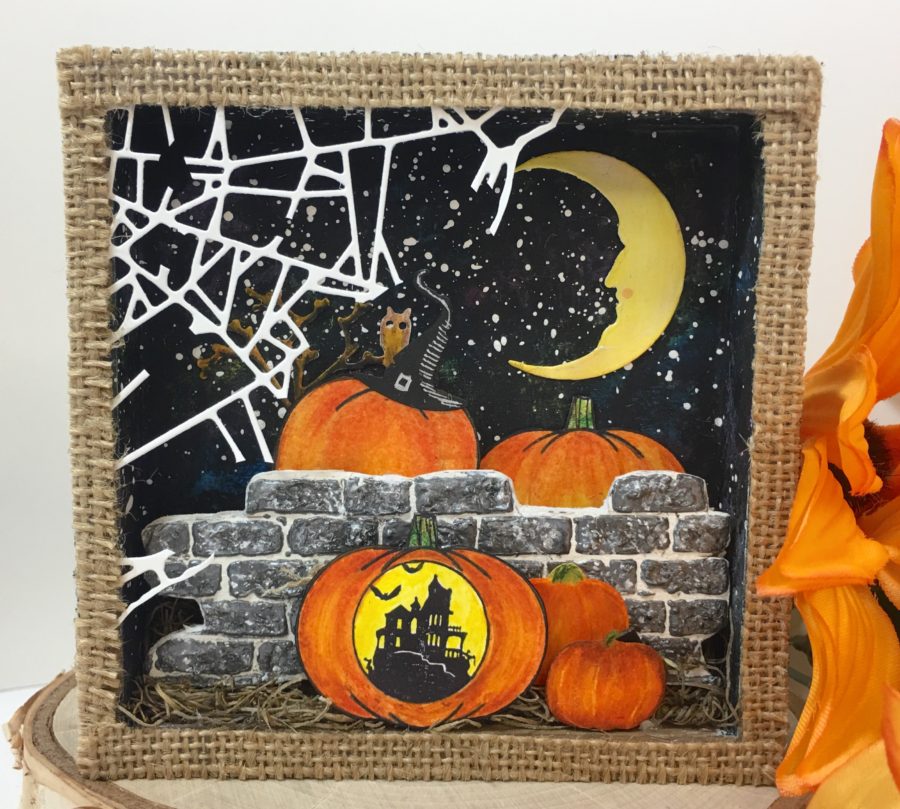
 Now you're ready to start the season!
 It's not a collaboration if we don't offer up a chance for you to win some of these same supplies are designers are using. So follow the Rafflecopter for a chance to get yourself entered to win. Then visit our friends at Joy Clair for more ideas and giveaways as well!
Don't miss the Birthday sale happening now at Joy Clair! Save 25% off your entire order!
It's not a collaboration if we don't offer up a chance for you to win some of these same supplies are designers are using. So follow the Rafflecopter for a chance to get yourself entered to win. Then visit our friends at Joy Clair for more ideas and giveaways as well!
Don't miss the Birthday sale happening now at Joy Clair! Save 25% off your entire order!
 a Rafflecopter giveaway