No Products in the Cart
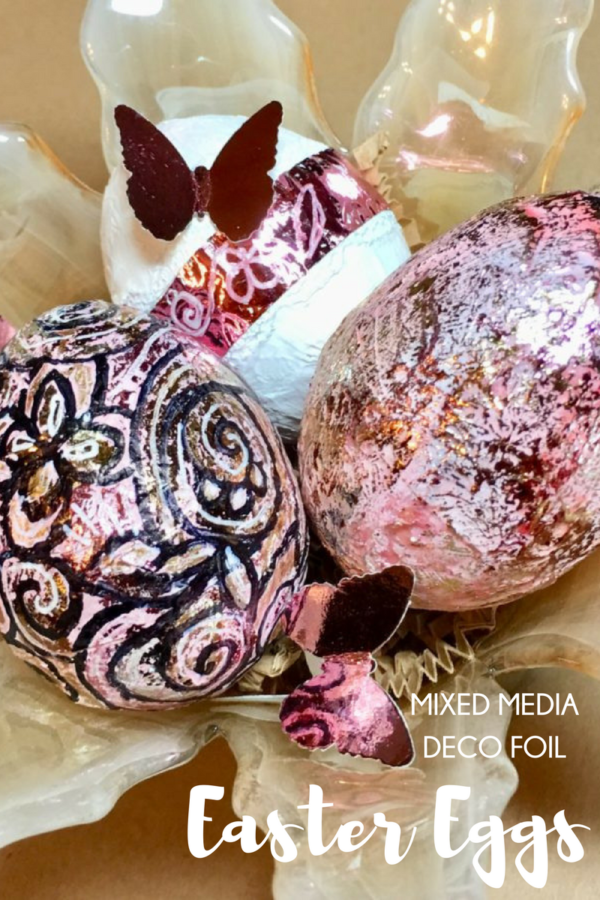 Mixed Media Foiled Easter Eggs
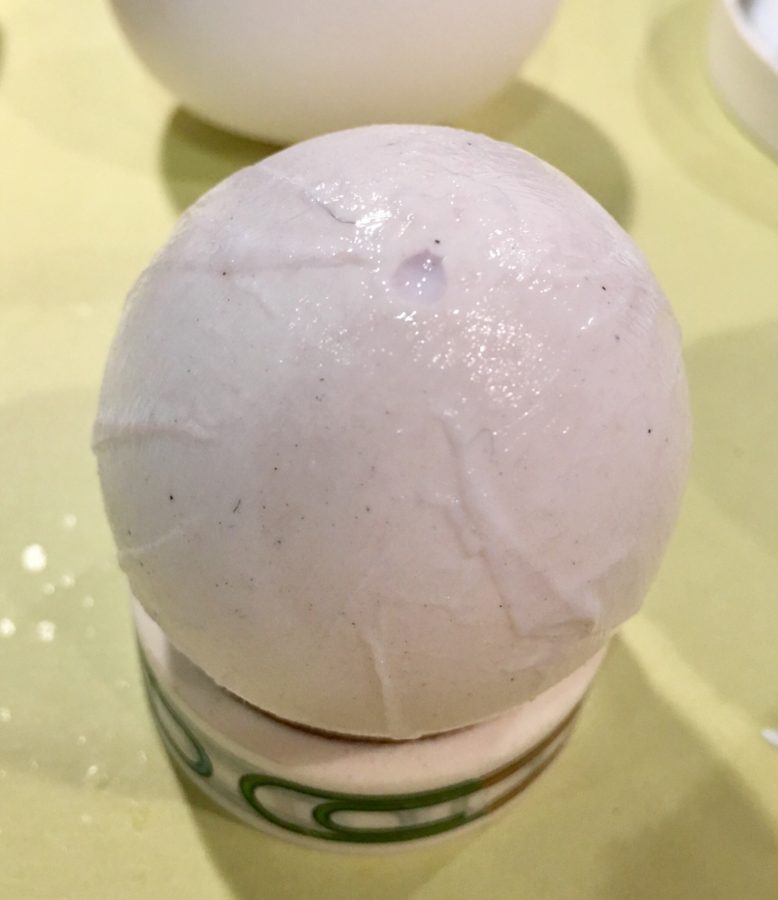
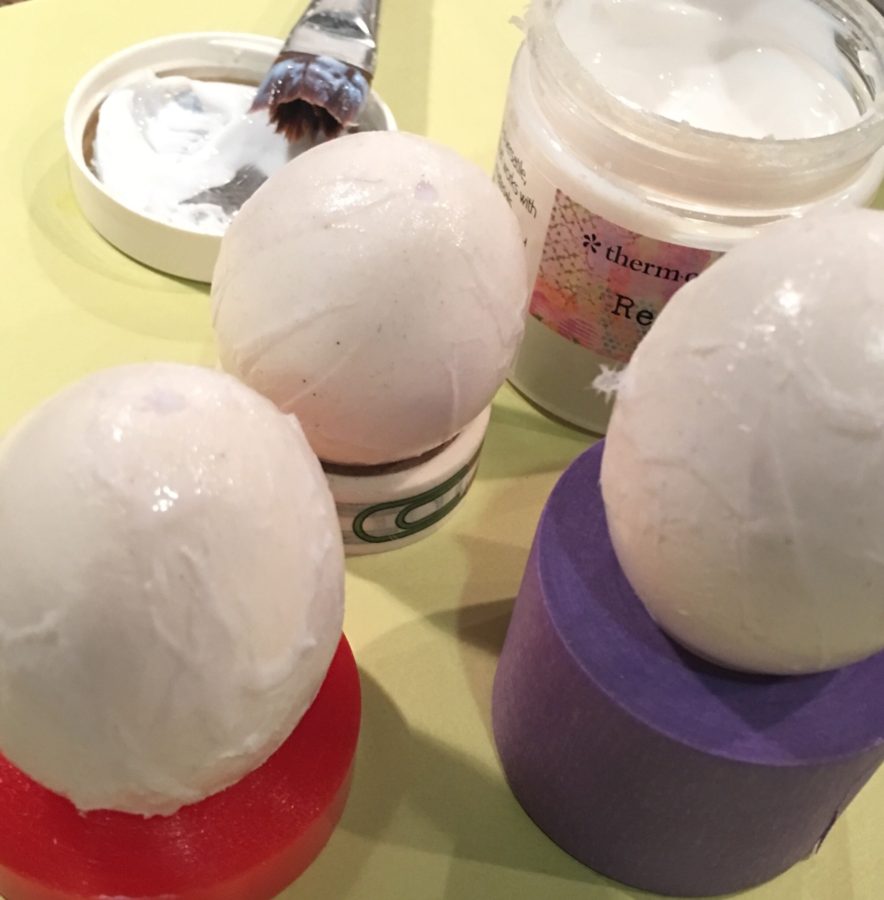
 Step Two - Strengthen the Eggs
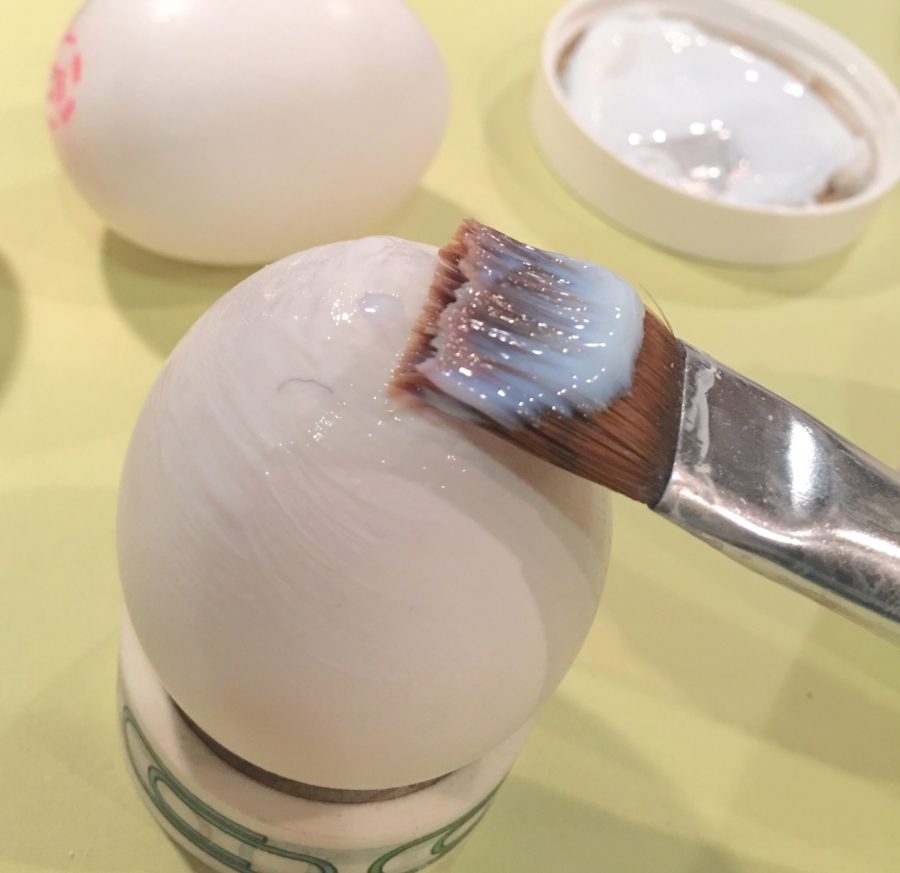
In order to ensure that the eggs don't easily break, you will need to reinforce them. To do this, apply a layer of Rebekah Meier Mixed Media Medium to the surface of the egg and cover with tissue paper (add an extra layer or two over the holes) and allow to dry completely.
Tip: If you don't have tissue paper, book pages would add another interesting layer.
Tip 2: Use your Purple Tape and Super Tape to keep your eggs from rolling around.
Step Two - Strengthen the Eggs
In order to ensure that the eggs don't easily break, you will need to reinforce them. To do this, apply a layer of Rebekah Meier Mixed Media Medium to the surface of the egg and cover with tissue paper (add an extra layer or two over the holes) and allow to dry completely.
Tip: If you don't have tissue paper, book pages would add another interesting layer.
Tip 2: Use your Purple Tape and Super Tape to keep your eggs from rolling around.

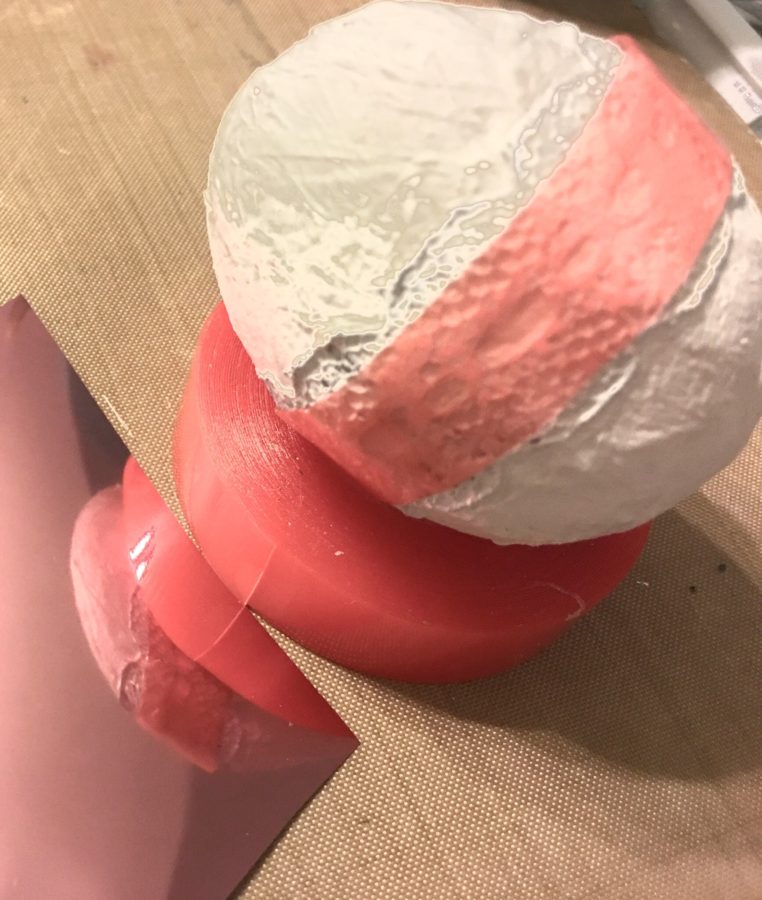
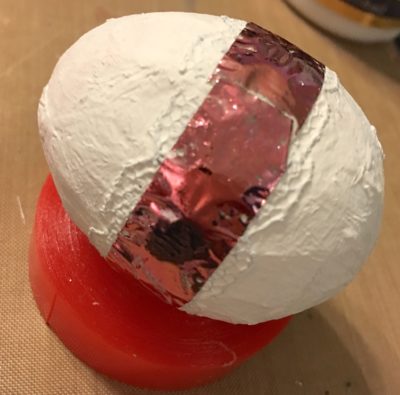
 Step Three - Decorate the Eggs
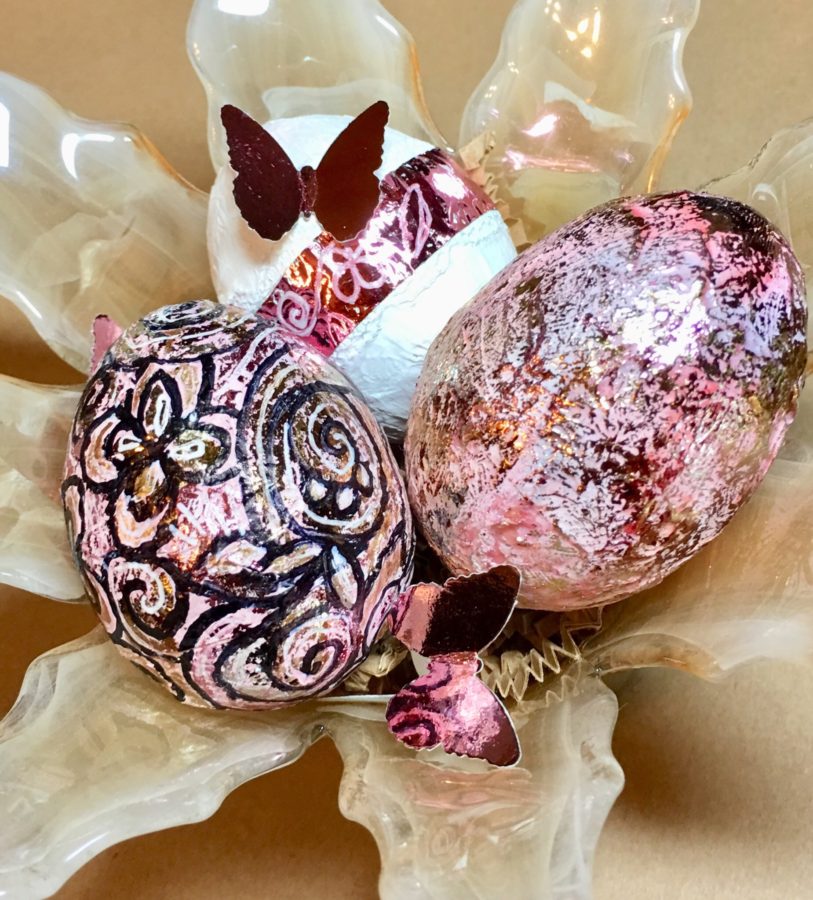
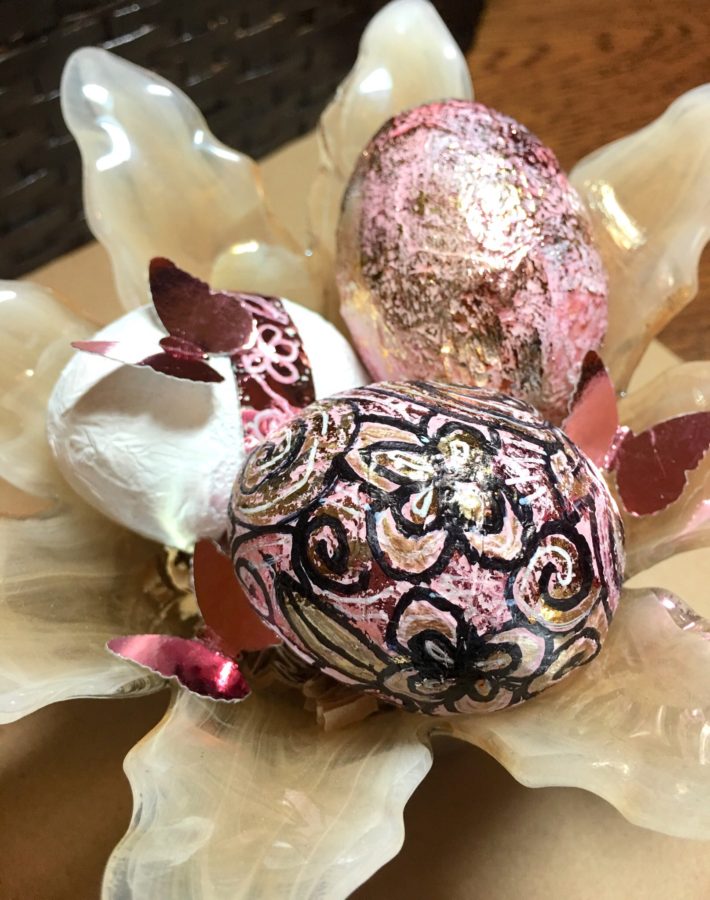
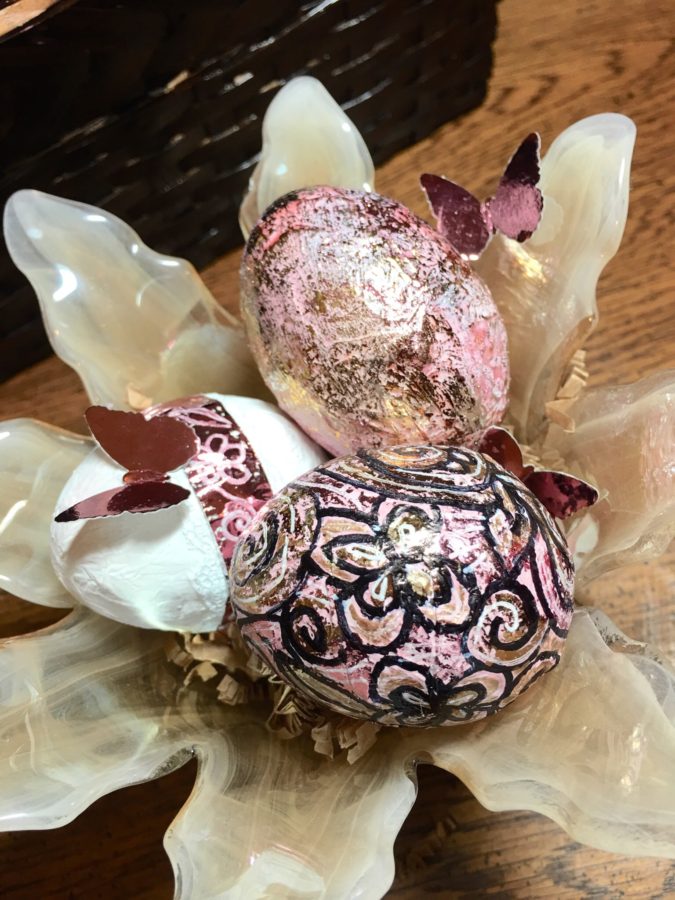
Once the eggs are completely dry, paint them with a layer of white craft paint and allow to dry again. Each of the eggs were treated with a different process in order to find a favorite technique.
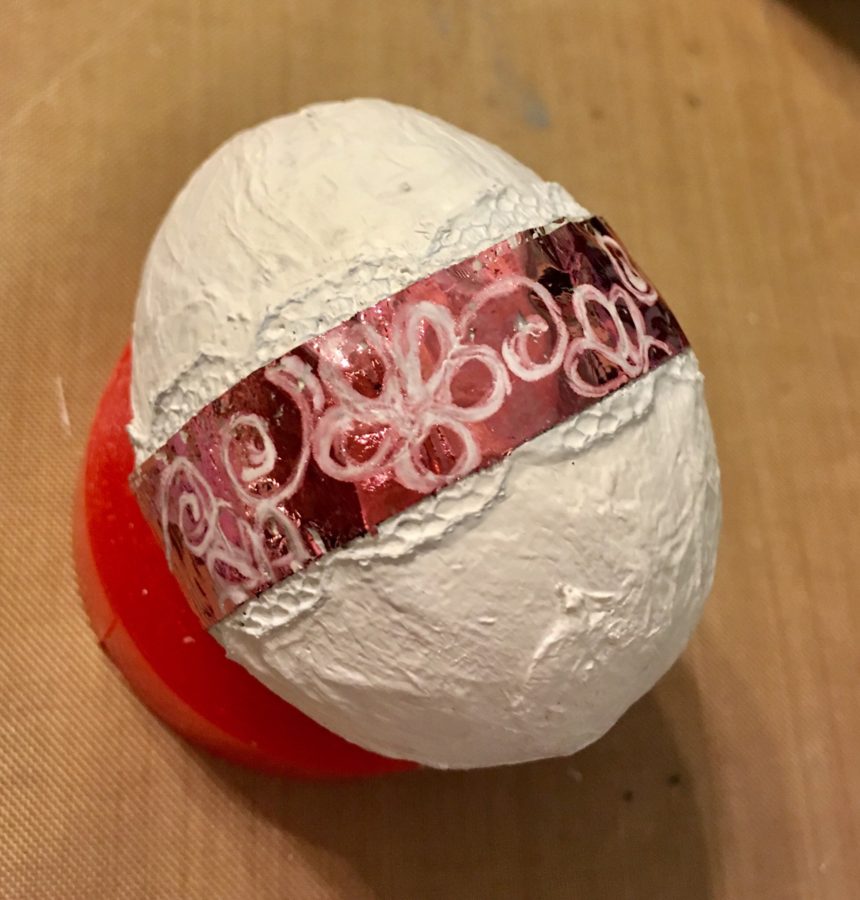
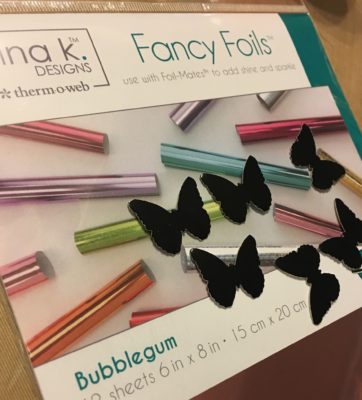
Egg number one was very simply decorated by adding a strip of SuperTape around the center, removing the release paper and adding Bubble Gum Fancy Foil by Gina K. Designs. After foiling, a white doodle detail was added along the foil stripe.
[tooltip text="TooltipText"]Tip: This technique would work better on a smooth egg that was not reinforced (this was the least favorite of the techniques).[/tooltip]
Step Three - Decorate the Eggs
Once the eggs are completely dry, paint them with a layer of white craft paint and allow to dry again. Each of the eggs were treated with a different process in order to find a favorite technique.
Egg number one was very simply decorated by adding a strip of SuperTape around the center, removing the release paper and adding Bubble Gum Fancy Foil by Gina K. Designs. After foiling, a white doodle detail was added along the foil stripe.
[tooltip text="TooltipText"]Tip: This technique would work better on a smooth egg that was not reinforced (this was the least favorite of the techniques).[/tooltip]
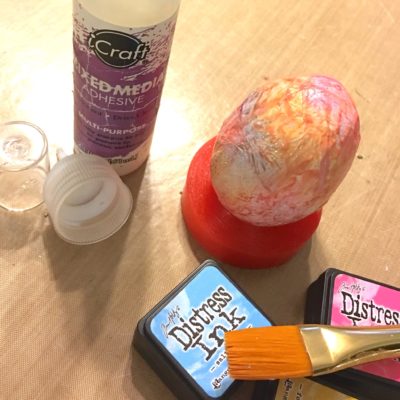
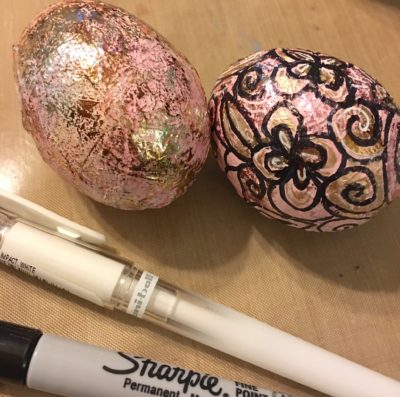
 Egg number two received a layer of Distress Inks applied randomly to the surface before adding a layer of Rebekah Meier Mixed Media Medium to seal the ink. The Medium was allowed to dry until it was tacky to the touch and then foil was added randomly (Gold, Champagne and Bubble Gum).
[tooltip text="TooltipText"]Tip: Don't apply the foil until the Medium is almost dry and just barely tacky to keep the foil from removing the medium rather than adhering to it.[/tooltip]
This technique turned out to be the favorite (scroll down to see egg #2 in its finished state).
Egg number two received a layer of Distress Inks applied randomly to the surface before adding a layer of Rebekah Meier Mixed Media Medium to seal the ink. The Medium was allowed to dry until it was tacky to the touch and then foil was added randomly (Gold, Champagne and Bubble Gum).
[tooltip text="TooltipText"]Tip: Don't apply the foil until the Medium is almost dry and just barely tacky to keep the foil from removing the medium rather than adhering to it.[/tooltip]
This technique turned out to be the favorite (scroll down to see egg #2 in its finished state).
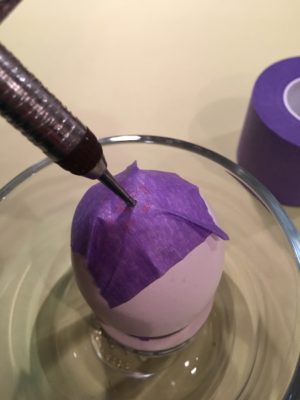
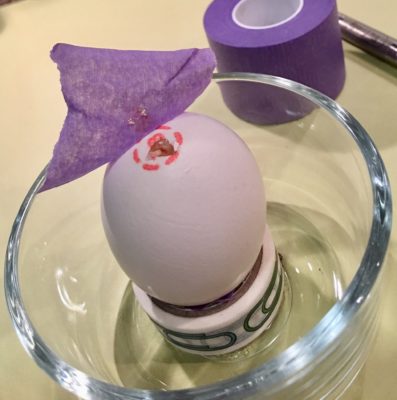
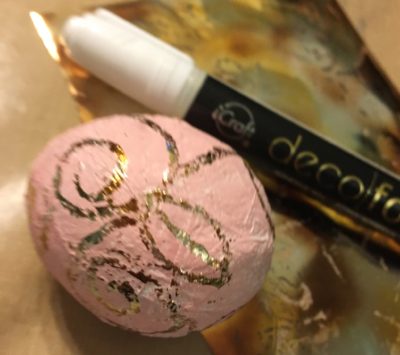
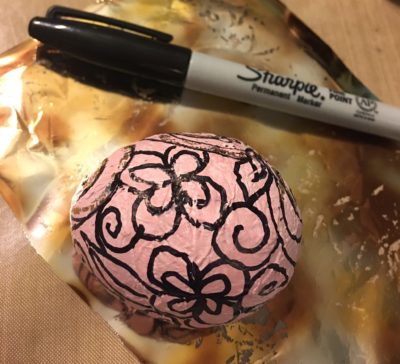
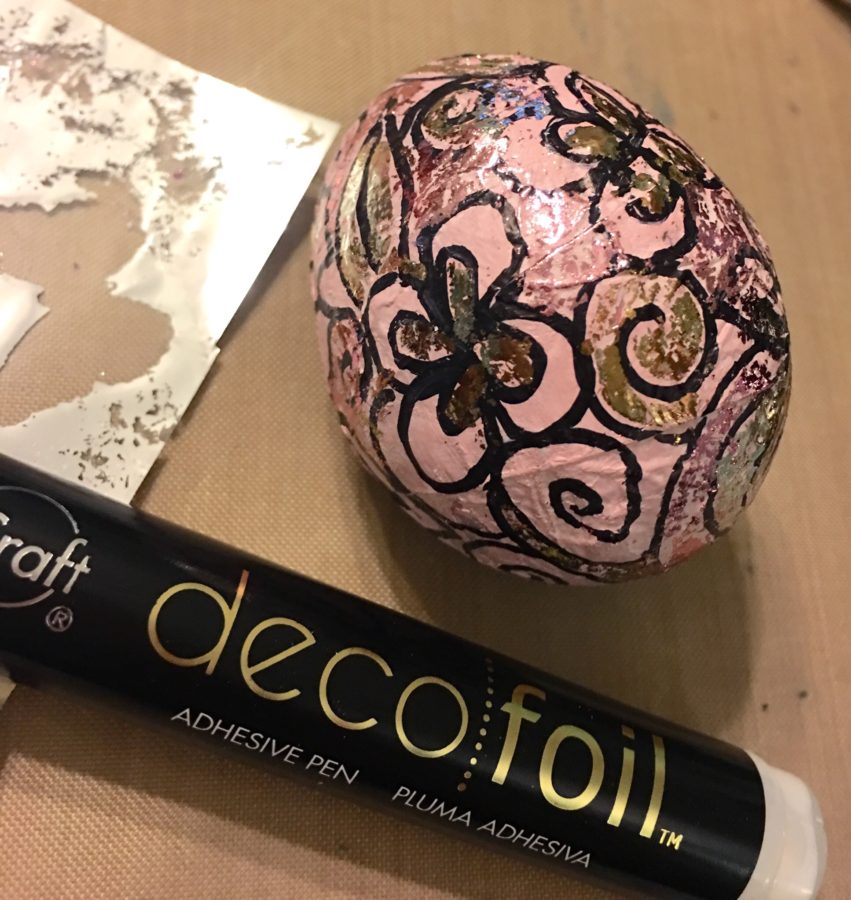
 Egg number three was the most time consuming and with some practice could possibly take over as the favorite technique. A layer of pink Distress Ink was applied to the surface of the dry, painted egg. Once the Distress Ink was dry, a design was doodled using the Deco Foil Glue Pen and then Deco Foioil added in Champagne.
After foiling, the doodling was reinforced using a black permanent marker, followed by another layer of Glue Pen and foiling (Bubble Gum). A third layer of Glue Pen and Deco Foil (Gold) was used to fill any remaining blank areas. To finish the design, white doodling was added.
Egg number three was the most time consuming and with some practice could possibly take over as the favorite technique. A layer of pink Distress Ink was applied to the surface of the dry, painted egg. Once the Distress Ink was dry, a design was doodled using the Deco Foil Glue Pen and then Deco Foioil added in Champagne.
After foiling, the doodling was reinforced using a black permanent marker, followed by another layer of Glue Pen and foiling (Bubble Gum). A third layer of Glue Pen and Deco Foil (Gold) was used to fill any remaining blank areas. To finish the design, white doodling was added.
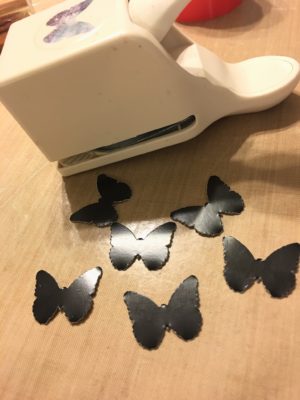
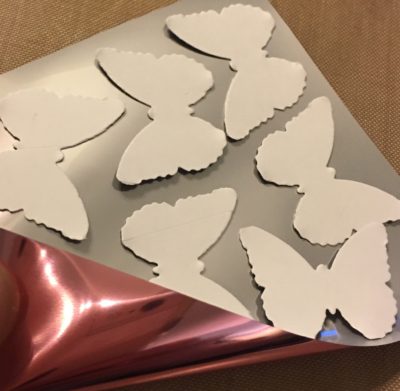
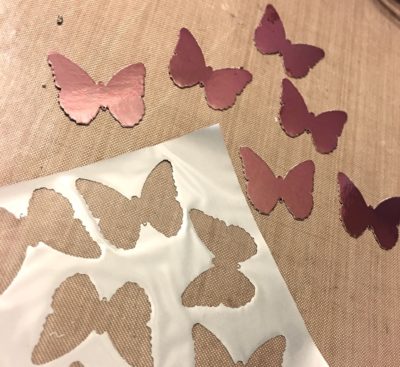
 Step Four - Butterflies
This step is a bit superfluous as the butterflies were only used to style the final photo. However, since the butterflies were a fun addition, here's how you create them:
Butterfly shapes were punched from Deco Foil PeelnStick Toner Sheets and foiled by running them through the foiling machine . . . that's it . . . easy peasy.
Step Four - Butterflies
This step is a bit superfluous as the butterflies were only used to style the final photo. However, since the butterflies were a fun addition, here's how you create them:
Butterfly shapes were punched from Deco Foil PeelnStick Toner Sheets and foiled by running them through the foiling machine . . . that's it . . . easy peasy.
 Thanks for stopping by to check out my Mixed Media Easter Eggs; I hope you create your own . . . the possibilities are endless.