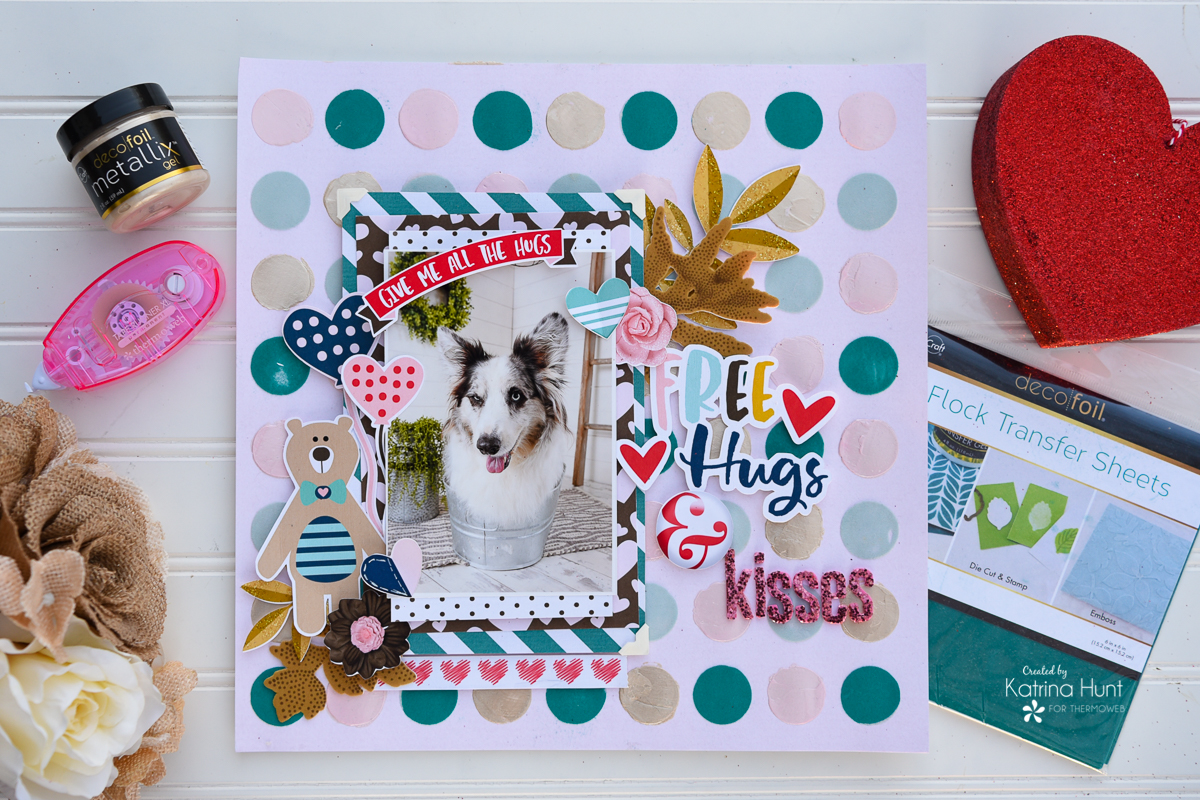
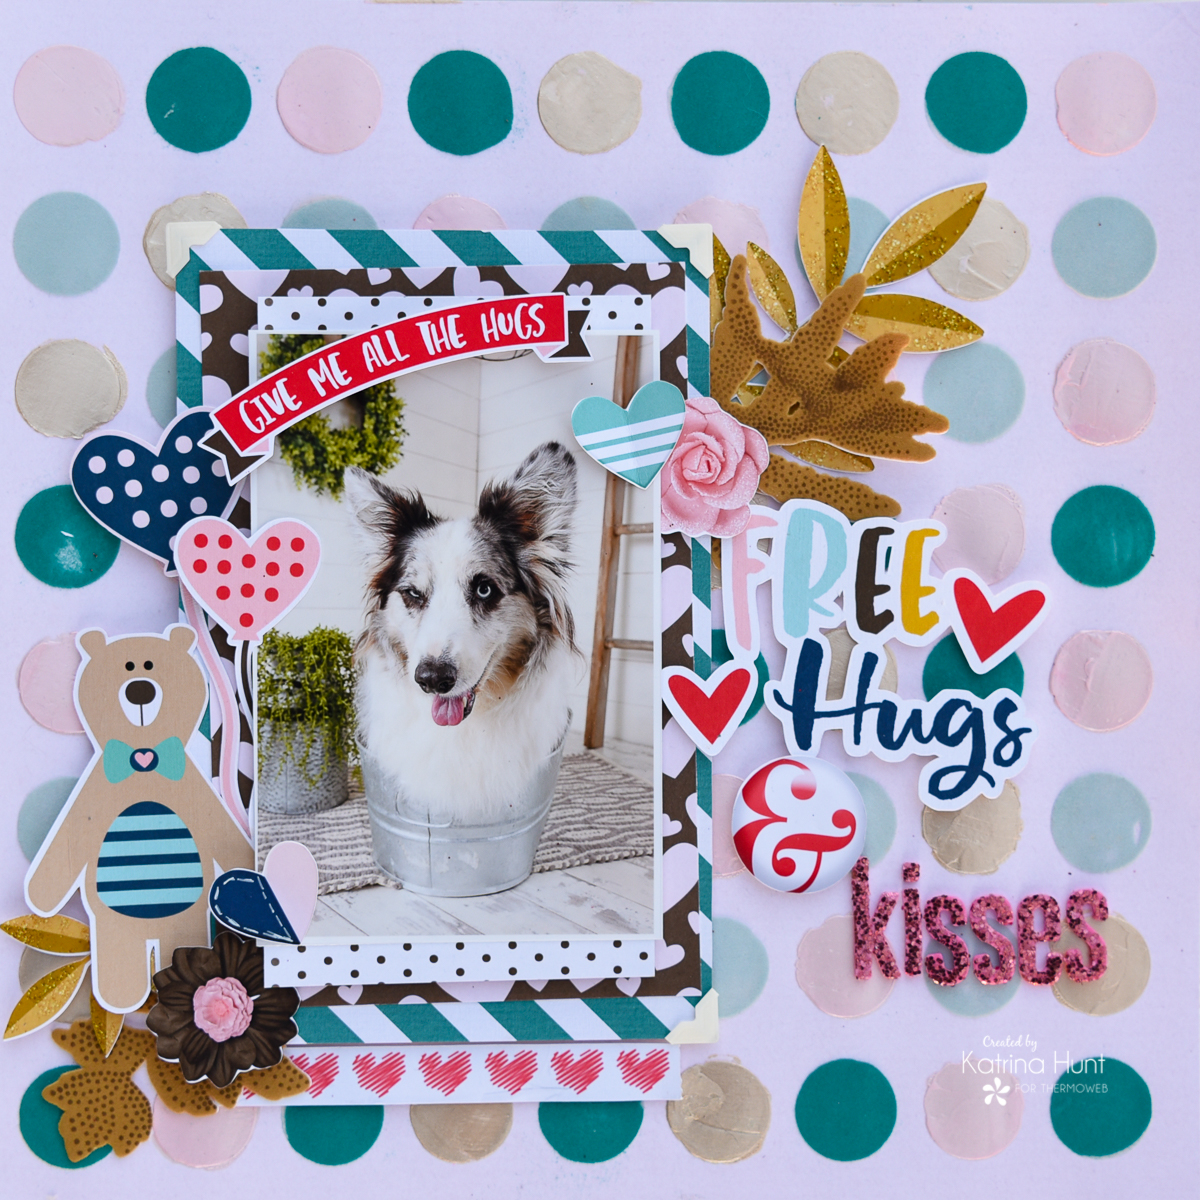
Hey hey!!! I am still carrying over the love from Valentine's Day in my project post today. It's Katrina from Paper, Scissors, Glue and Hybrid sharing a hybrid layout mixing Deco Foil Flock and Metallix products for a fun background technique.
Mix Up Your Scrapbook Page
 Therm O Web Supplies Used:
Therm O Web Memory Runner XL
Zots - Medium
3D Foam Squares – 1/2 inch
3D Foam Square – 1/4 inch
Deco Foil Foil Foam Adhesive Sheets
Purple Tape .5 inch
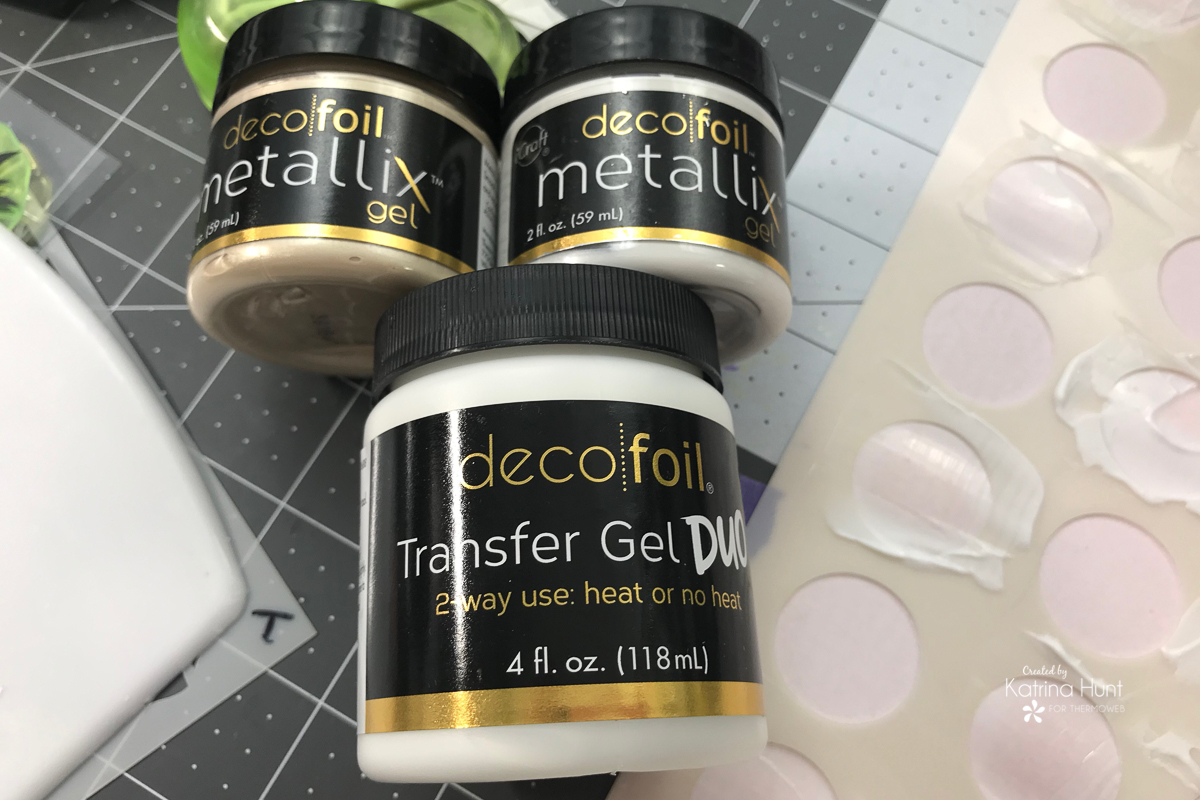
Deco Foil Flock Transfer Sheets – Teal Waters
Deco Foil Flock Transfer Sheets - Tuscan Gold
Deco Foil Flock Transfer Sheets - Blue Sky
Deco Foil Metallix – White Pearl
Deco Foil Metallix - Champagne Mist
Deco Foil Transfer Gel DUO
Therm O Web Supplies Used:
Therm O Web Memory Runner XL
Zots - Medium
3D Foam Squares – 1/2 inch
3D Foam Square – 1/4 inch
Deco Foil Foil Foam Adhesive Sheets
Purple Tape .5 inch
Deco Foil Flock Transfer Sheets – Teal Waters
Deco Foil Flock Transfer Sheets - Tuscan Gold
Deco Foil Flock Transfer Sheets - Blue Sky
Deco Foil Metallix – White Pearl
Deco Foil Metallix - Champagne Mist
Deco Foil Transfer Gel DUO
Laminator
Other Supplies Used:
Digital Kit from Becca Bonneville at The Lilypad Digital Store
The Crafters Workshop Script Dots 12x12 Stencil
note: not the exact stencil I used, but similar
Altenew Dot Botanicals Stamp and Die Bundle
LAYOUT INSTRUCTIONS
Deco Foil Flock
Begin your layout by preparing your stenciled background using a combination of
Deco Foil Flock, Metallix and
Transfer Gel Duo.
Use Purple Tape
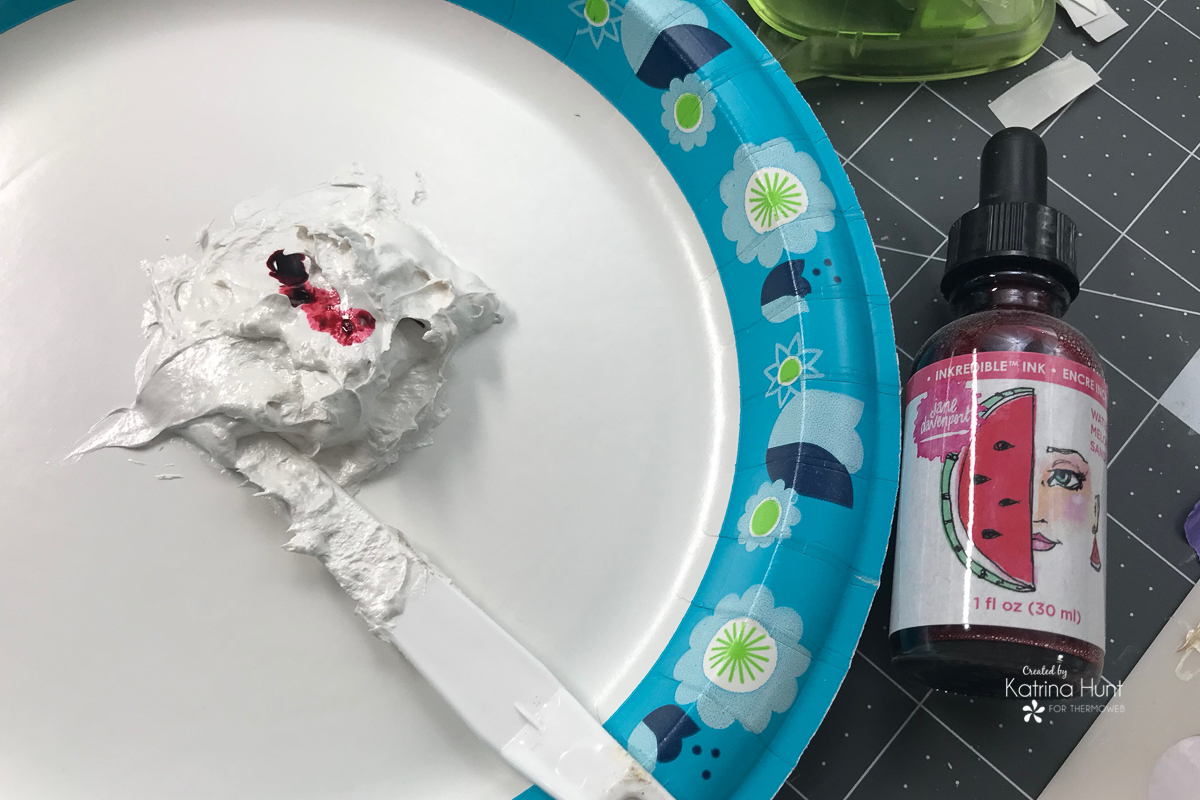
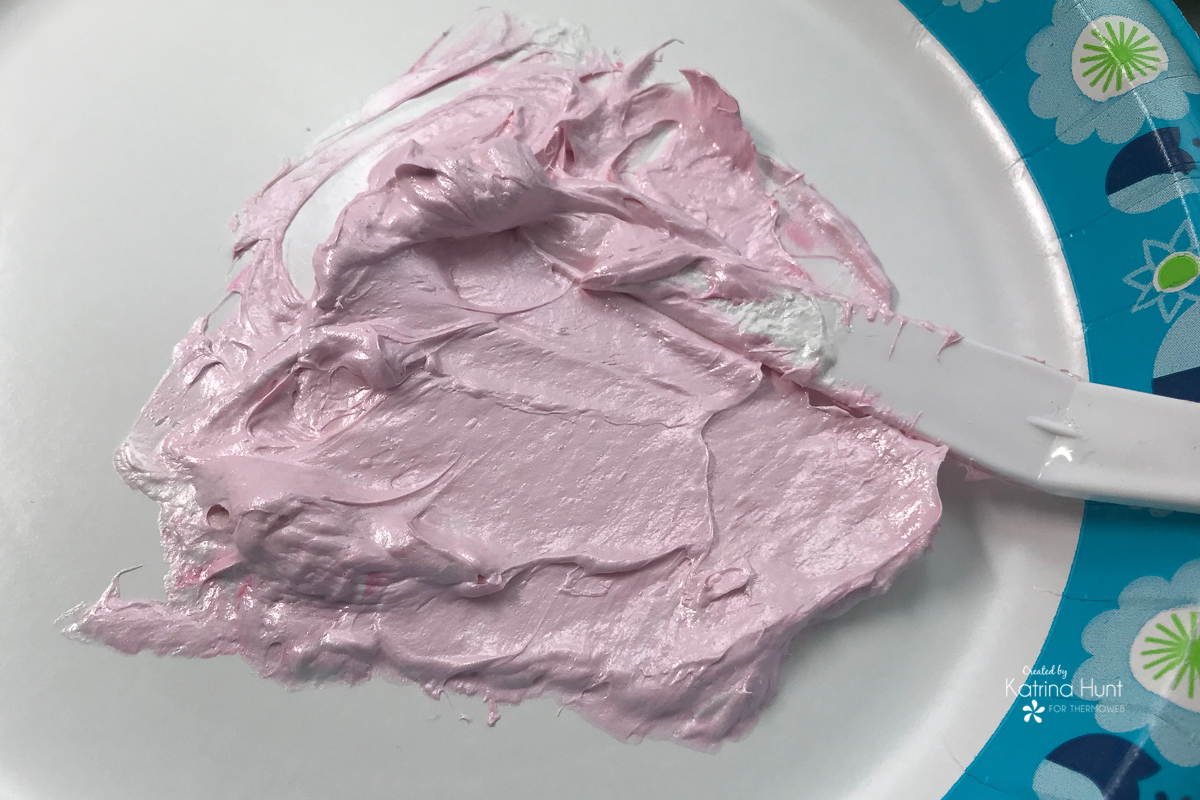
Hold your stencil in place by using Purple Tape or Pixie Spray. Apply Transfer Gel Duo first using the Stencil Pal or palette knife. Place the gel in random circles over the stencil. Once you have the gel down, you can begin applying the Metallix gel in different colors in a random pattern. I mixed my White Pearl Metallix with some liquid mist I had to make a pink color that would work with my layout. This is one of my favorite things to do with Metallix. If you have leftovers, just place in an airtight container to use later.
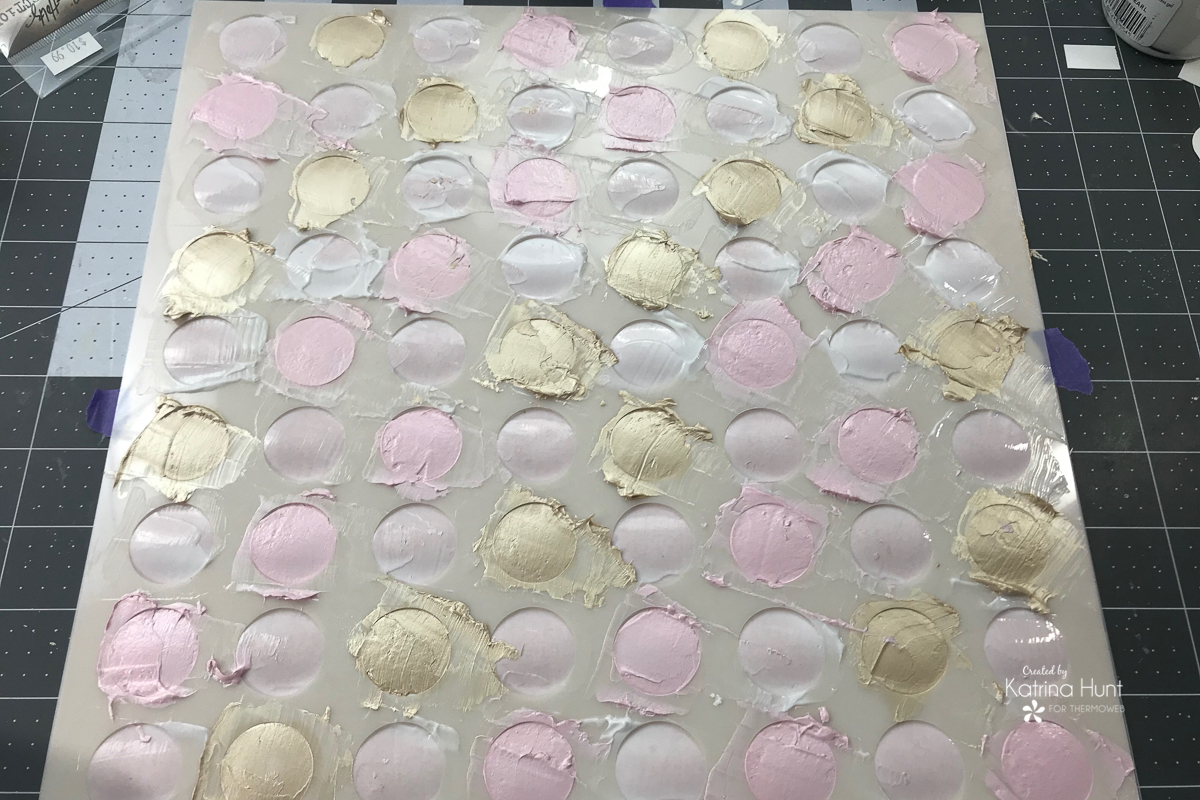
Let the Metallix Dry
While the Metallix and Duo Gel are drying, you will want to heat up your laminator. The drying time will vary with your household temperature and climate. Mine took about an hour or so to completely dry to where I could continue on with my project.
Cut pieces of the flock that will fit over the circled areas that have the Deco Foil Transfer Gel Duo. You can use one or several colors of flock. I used two,
Blue Sky and
Teal Waters. I first placed the flock color side up to get a pattern I liked, then I flipped over the flock before running through the laminator to transfer the flock to the gel.
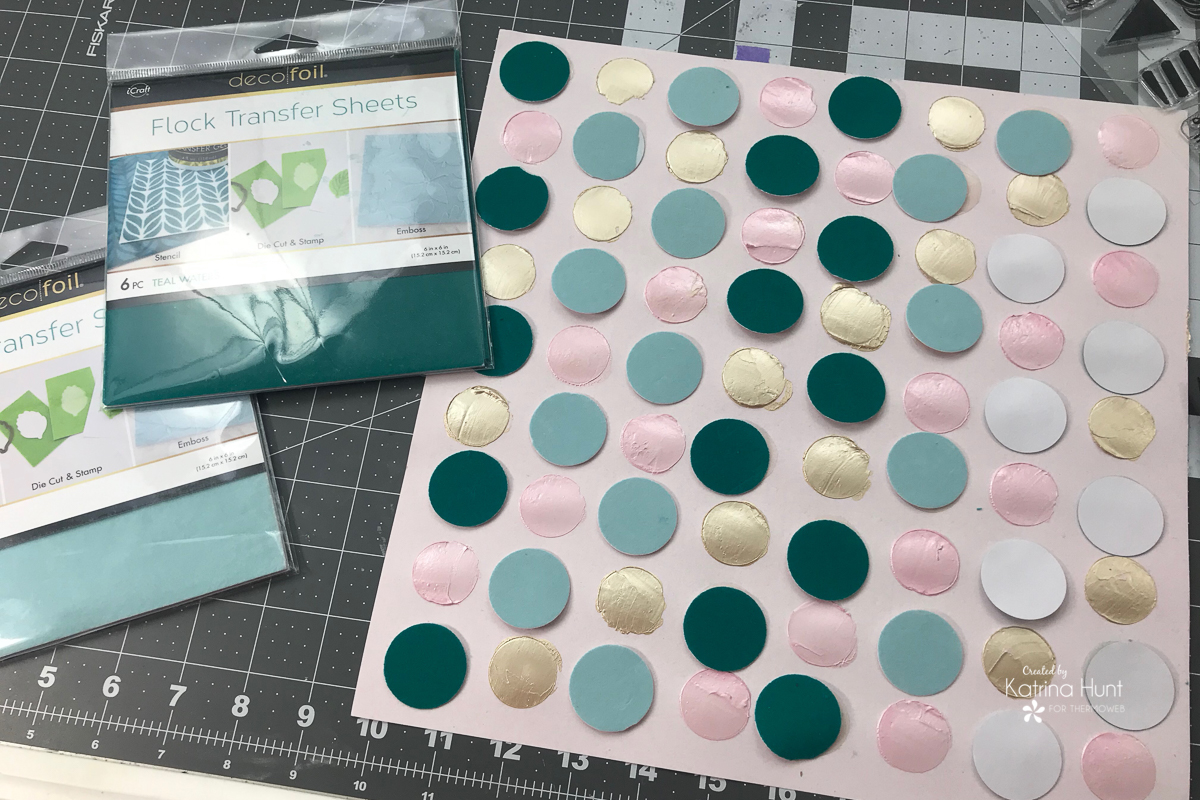
You can see below how fun that background is.
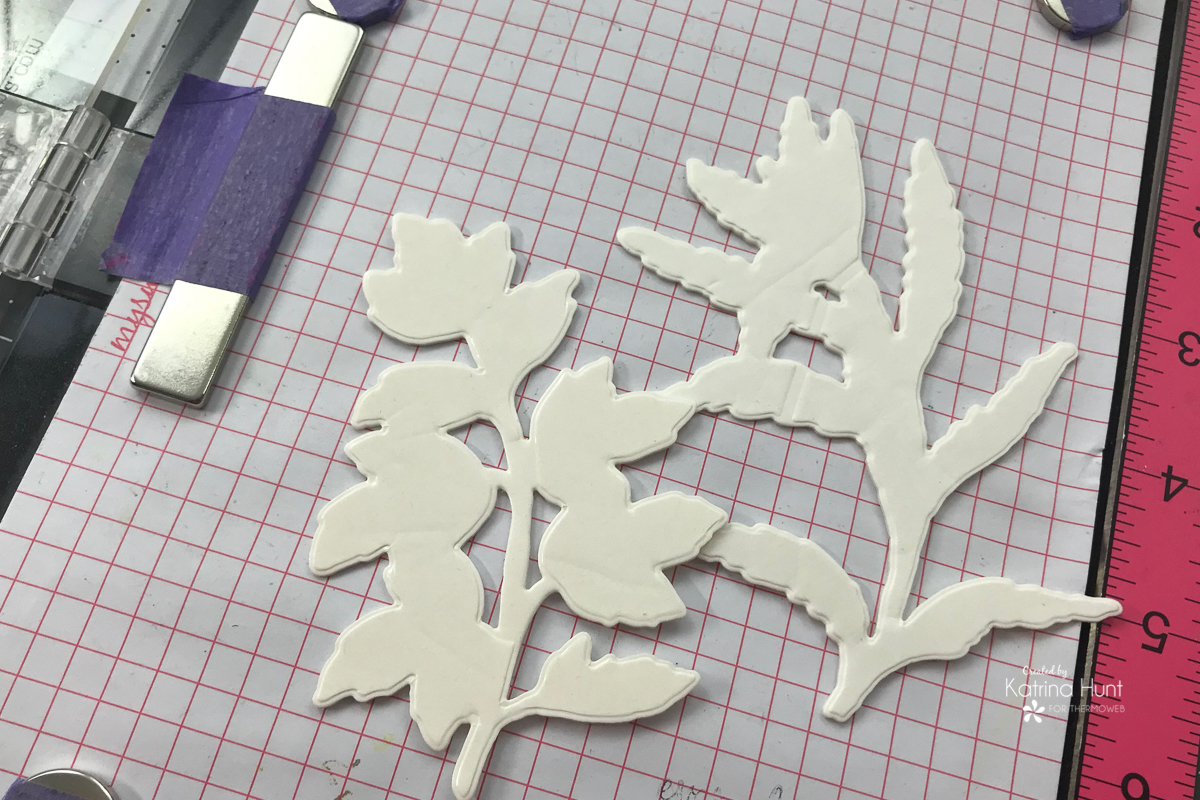
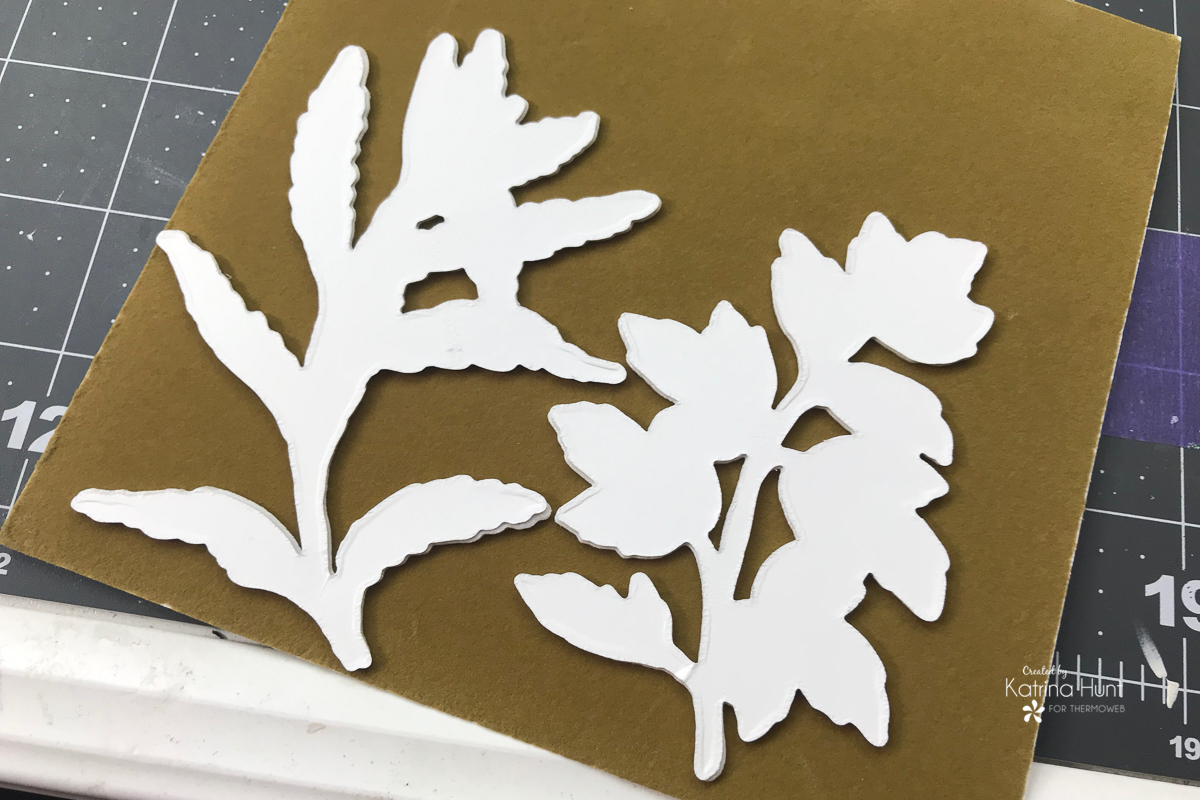
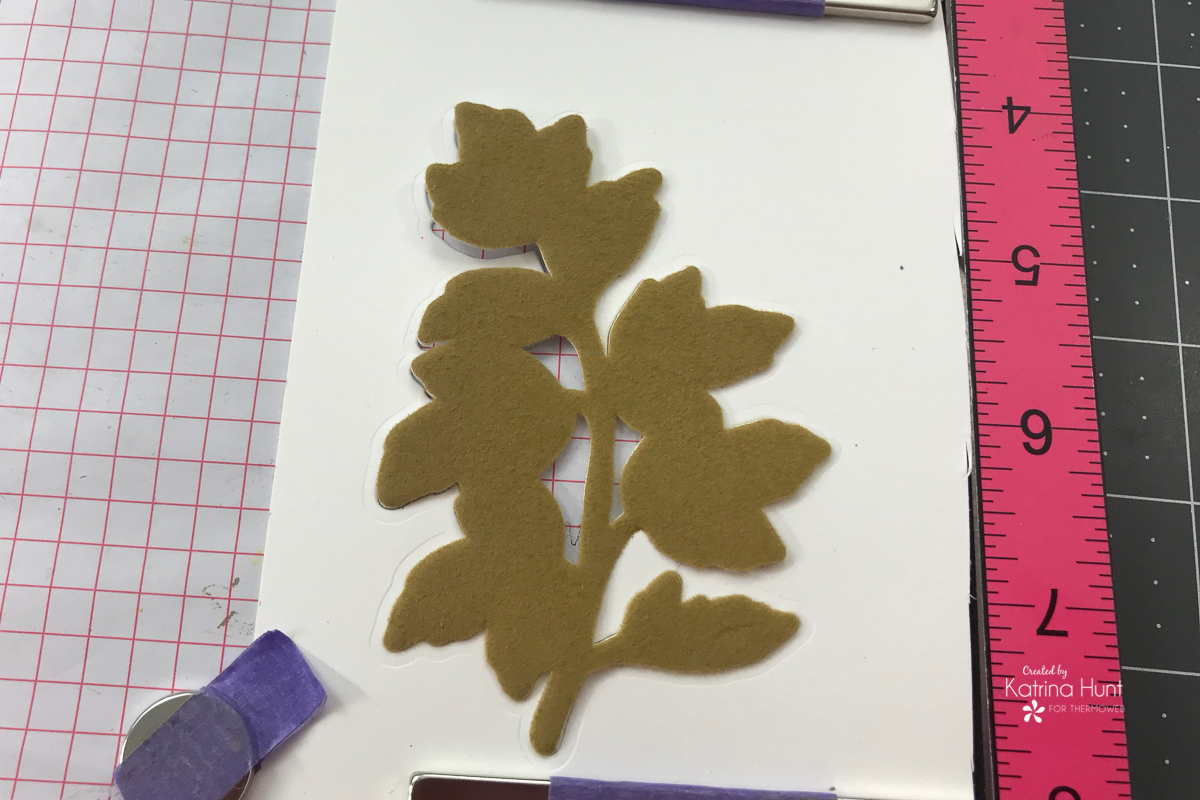
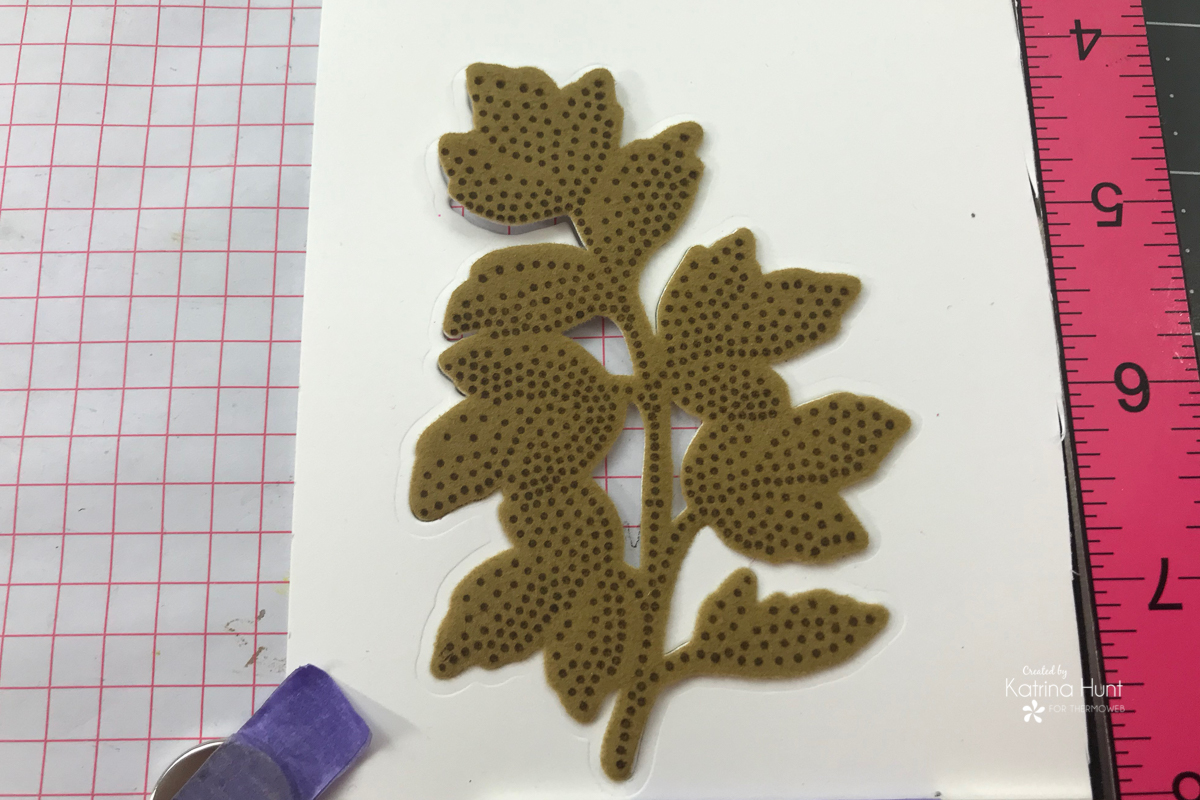
Next, I die cut leaves from an Altenew stamp and die set using Deco Foil Foam Adhesive. Once the leaves were cut, I used the Deco Foil Flock in Tuscan Gold to cover my foam die cuts. The color matched perfectly with one of the colors in the collection I used.
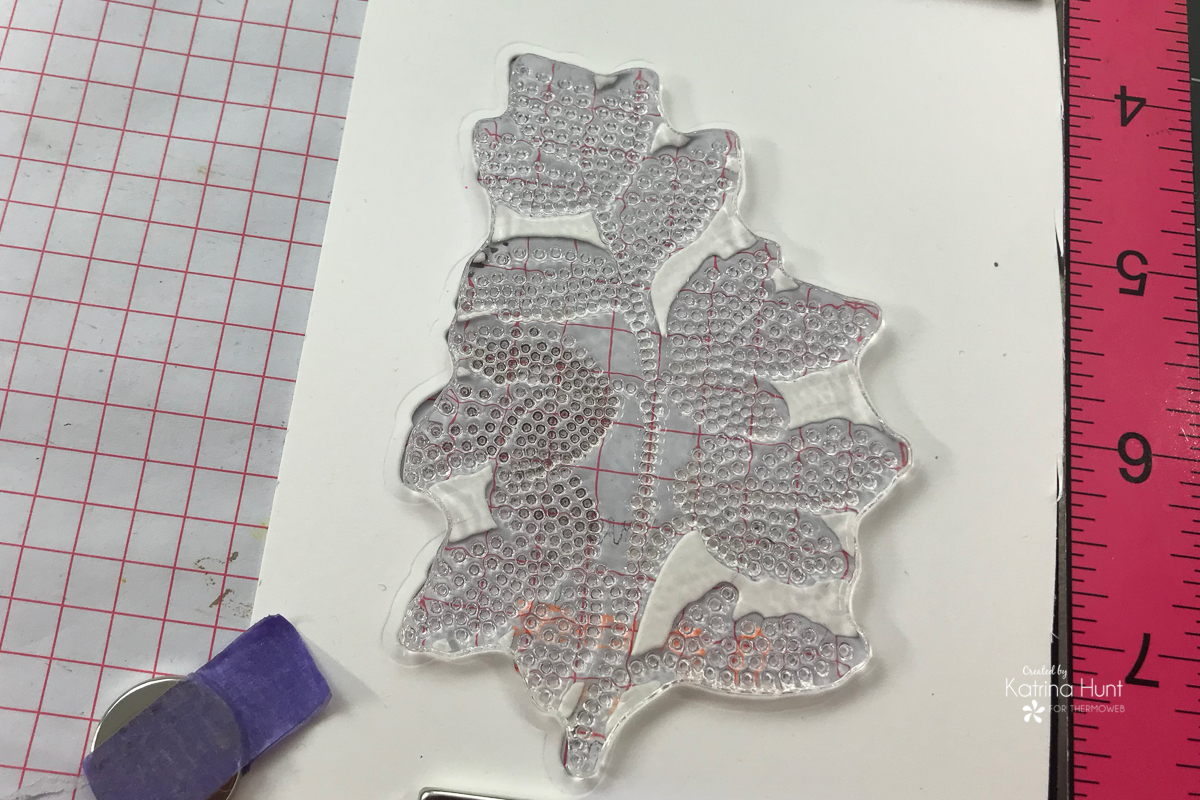
Using the leftover cut out as a jig, I placed the flocked piece back into the cutout and then used my Misti to stamp with the coordinating stamp.
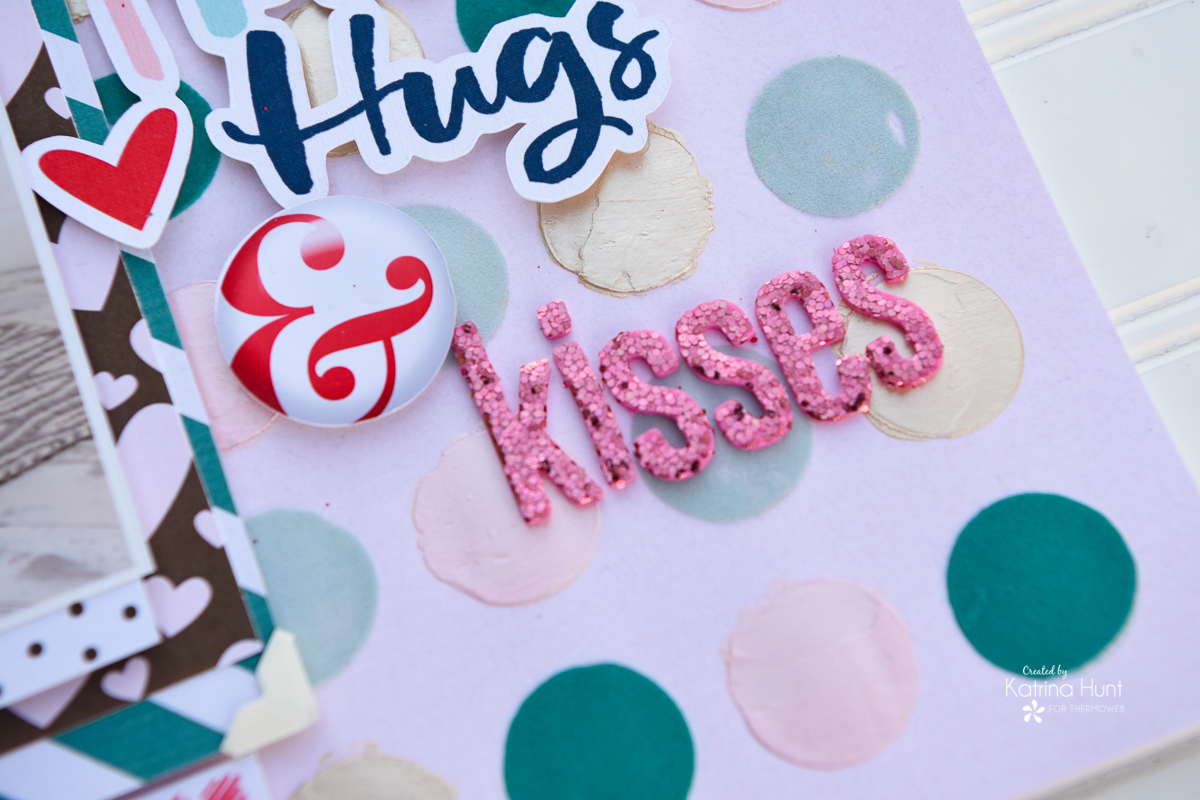
And that is basically all the steps to this layout for the Deco Foil Flock and Metallix. You can go on to embellish your project with anything you like!
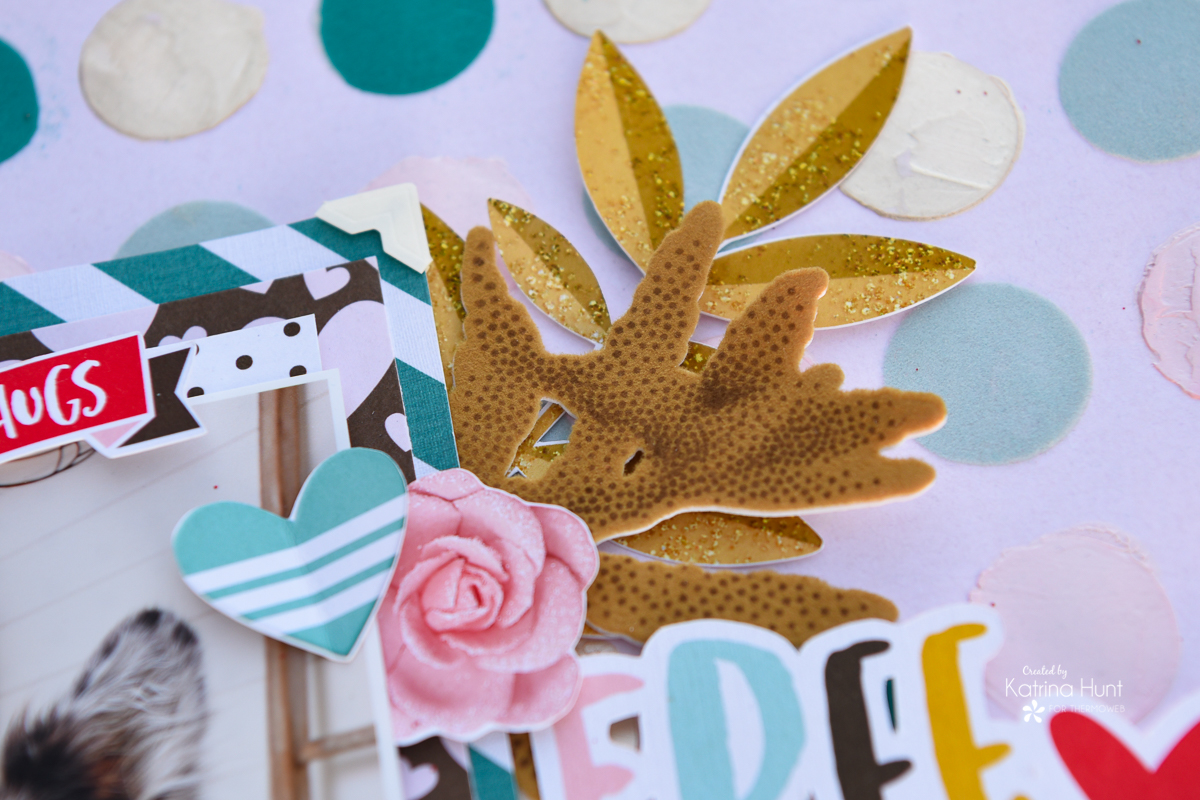
See, that flock color is perfect with the other colors in the collection!!!
Thanks for stopping by today!! Have a great rest of your week!