No Products in the Cart



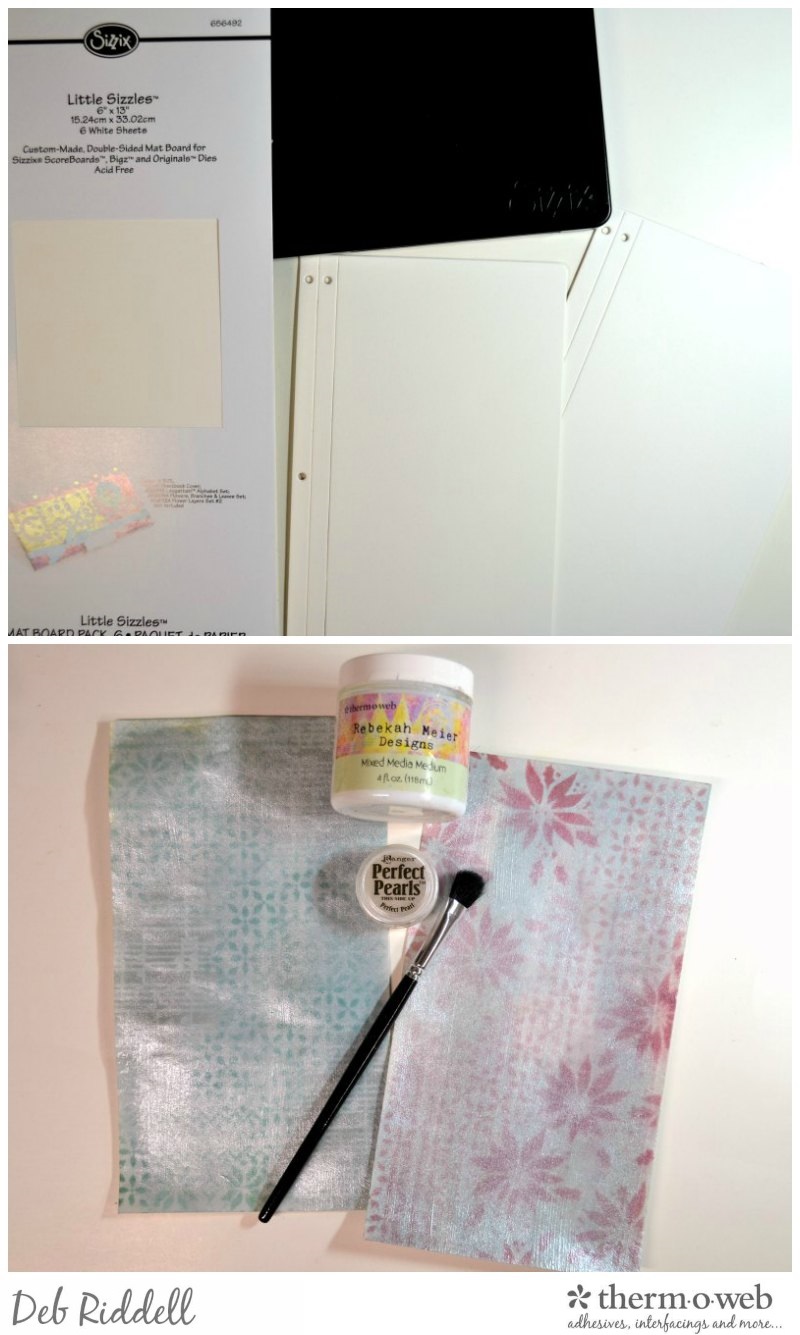 Cut two pieces of Rebekah Meier Designs Mixed Media Art Paper to approximately 5" x 9" and ink completely with green Distress ink (Iced Spruce was used here). Stencil holiday/Christmas designs randomly on both pieces of Art Paper, using green colored inks on one and red on the other (design tip: keep the backgrounds feeling cohesive by using each stencil two or three times and by using at least one of the stencils on both pieces). Cover each piece of stenciled Art Paper with Rebekah Meier Designs Mixed Media Medium and once dry brush mica powder over top for a shimmery finish.
Peel the backing paper off of each piece of stenciled Art Paper and adhere to the die cut journal covers, wrapping the Art Paper around the sides to cover the edges. Ink the edges and spine with brown Distress Ink.
Cut two pieces of Rebekah Meier Designs Mixed Media Art Paper to approximately 5" x 9" and ink completely with green Distress ink (Iced Spruce was used here). Stencil holiday/Christmas designs randomly on both pieces of Art Paper, using green colored inks on one and red on the other (design tip: keep the backgrounds feeling cohesive by using each stencil two or three times and by using at least one of the stencils on both pieces). Cover each piece of stenciled Art Paper with Rebekah Meier Designs Mixed Media Medium and once dry brush mica powder over top for a shimmery finish.
Peel the backing paper off of each piece of stenciled Art Paper and adhere to the die cut journal covers, wrapping the Art Paper around the sides to cover the edges. Ink the edges and spine with brown Distress Ink.
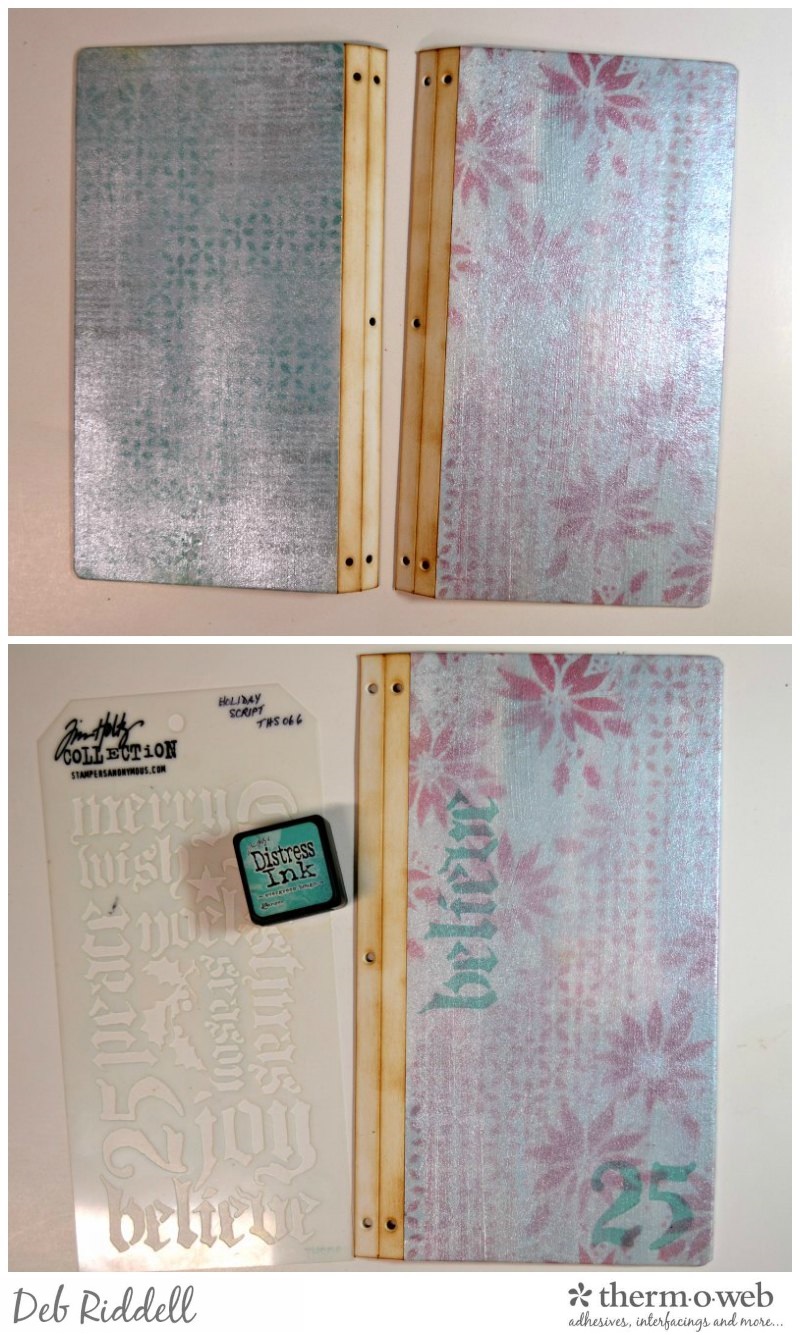 Stencil some Christmas words/sentiments randomly onto the front cover with a contrasting color of Distress Ink.
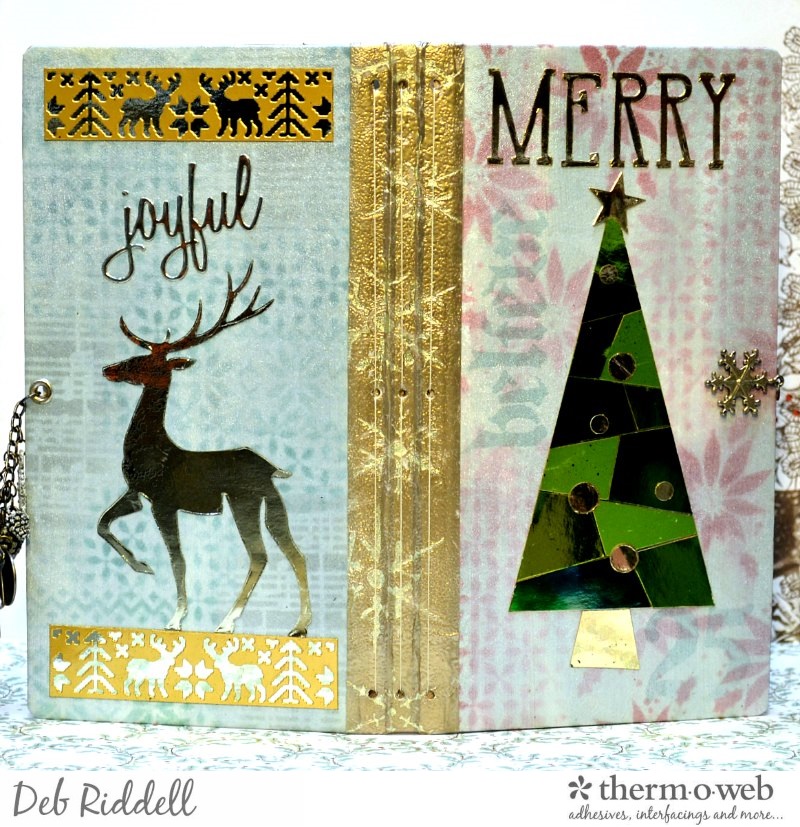
Cut a piece of Rebekah Meier Designs Mixed Media Art Tape long enough to cover the spine of the journal (approximately 9" long) and remove the backing paper from the tape. Position a snowflake stencil overtop the sticky side of the tape, place a piece of Rebekah Meier Designs Transfer Foil in Vintage Tin over top of the stencil and use a stylus to transfer the snowflake images to the Art Tape (click here for a step by step tutorial on this technique). Sprinkle Vintage Platinum embossing powder over the sticky side of the tape once the foiled snowflakes have been transferred and heat to activate.
Stencil some Christmas words/sentiments randomly onto the front cover with a contrasting color of Distress Ink.
Cut a piece of Rebekah Meier Designs Mixed Media Art Tape long enough to cover the spine of the journal (approximately 9" long) and remove the backing paper from the tape. Position a snowflake stencil overtop the sticky side of the tape, place a piece of Rebekah Meier Designs Transfer Foil in Vintage Tin over top of the stencil and use a stylus to transfer the snowflake images to the Art Tape (click here for a step by step tutorial on this technique). Sprinkle Vintage Platinum embossing powder over the sticky side of the tape once the foiled snowflakes have been transferred and heat to activate.
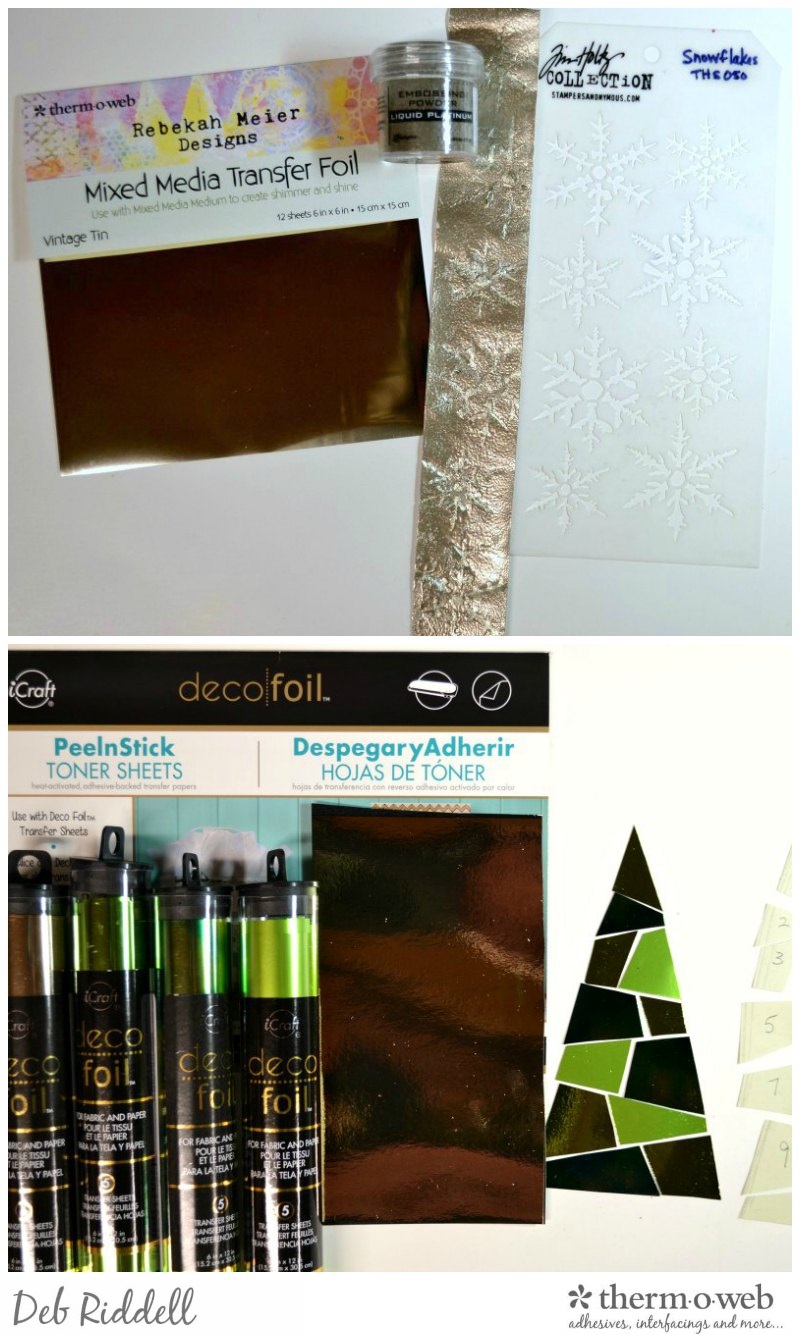 Cut a paper template for a simple Christmas tree shape (also known as a triangle!) and cut the paper triangle up into random mosaic pieces, numbering them if you like to keep track of where they go. Heat up your foil laminator and cover pieces of Deco Foil PeelnStick Toner Sheet with several colors of green Deco Foil (Emerald Watercolour, Spring Green and Lime Green were used here). Cover another piece of PeelnStick Toner Sheet with Champagne Deco Foil, making sure the piece is large enough to back the entire mosaic Christmas tree plus a couple of inches extra for a die cut sentiment. Use the paper pattern to cut out random mosaic pieces from the three colors of green Deco Foil covered Toner Sheet.
Peel off the backing paper from your green mosaic pieces and apply them to the Champagne Deco Foil covered backing piece to recreate your Christmas tree, allowing a bit of the Champagne Deco Foil to show between the mosaic pieces. Trim the Christmas tree to shape and cut a tree stand from the Champagne Deco Foil covered PeelnStick Toner sheet.
Cut a paper template for a simple Christmas tree shape (also known as a triangle!) and cut the paper triangle up into random mosaic pieces, numbering them if you like to keep track of where they go. Heat up your foil laminator and cover pieces of Deco Foil PeelnStick Toner Sheet with several colors of green Deco Foil (Emerald Watercolour, Spring Green and Lime Green were used here). Cover another piece of PeelnStick Toner Sheet with Champagne Deco Foil, making sure the piece is large enough to back the entire mosaic Christmas tree plus a couple of inches extra for a die cut sentiment. Use the paper pattern to cut out random mosaic pieces from the three colors of green Deco Foil covered Toner Sheet.
Peel off the backing paper from your green mosaic pieces and apply them to the Champagne Deco Foil covered backing piece to recreate your Christmas tree, allowing a bit of the Champagne Deco Foil to show between the mosaic pieces. Trim the Christmas tree to shape and cut a tree stand from the Champagne Deco Foil covered PeelnStick Toner sheet.
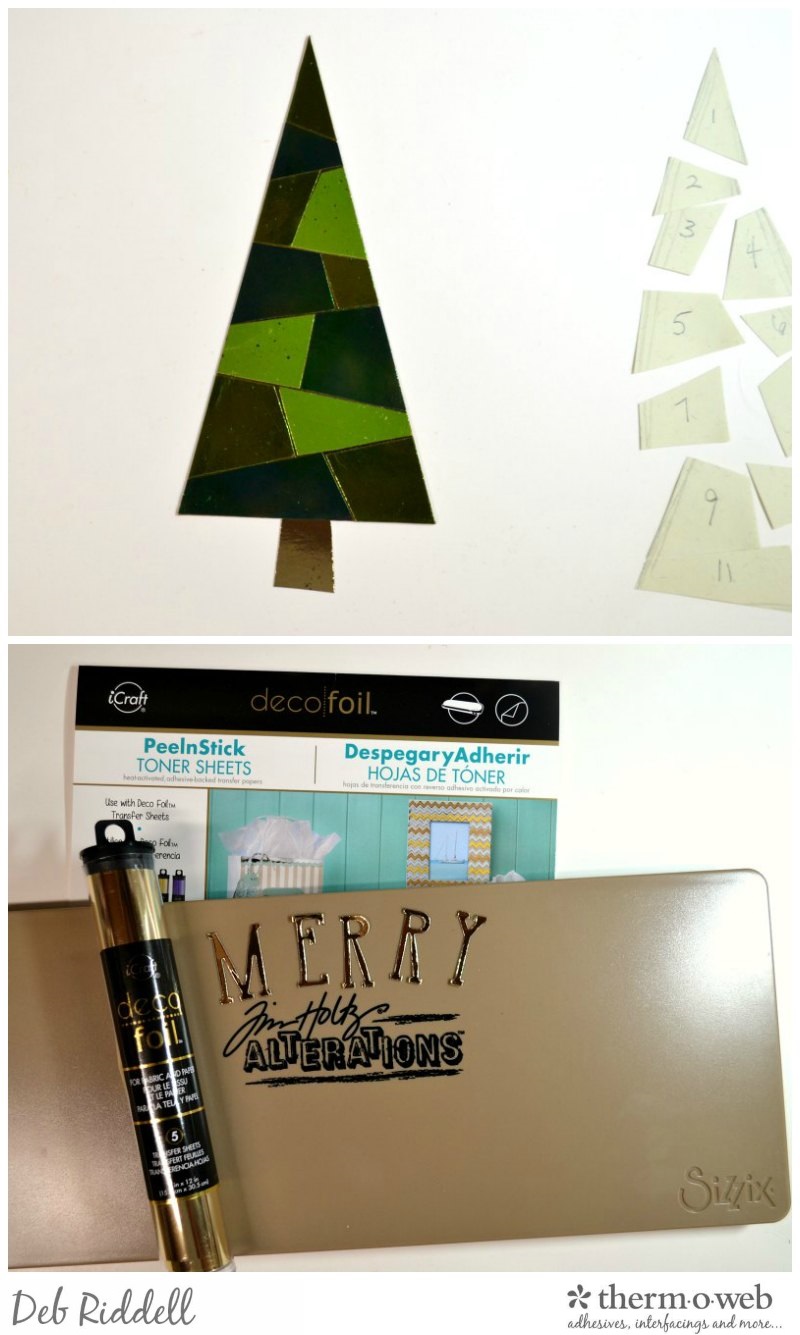 Die cut the word Merry from the Champagne Deco Foiled PeelnStick Toner sheet (this is the Broadway Alphabet die).
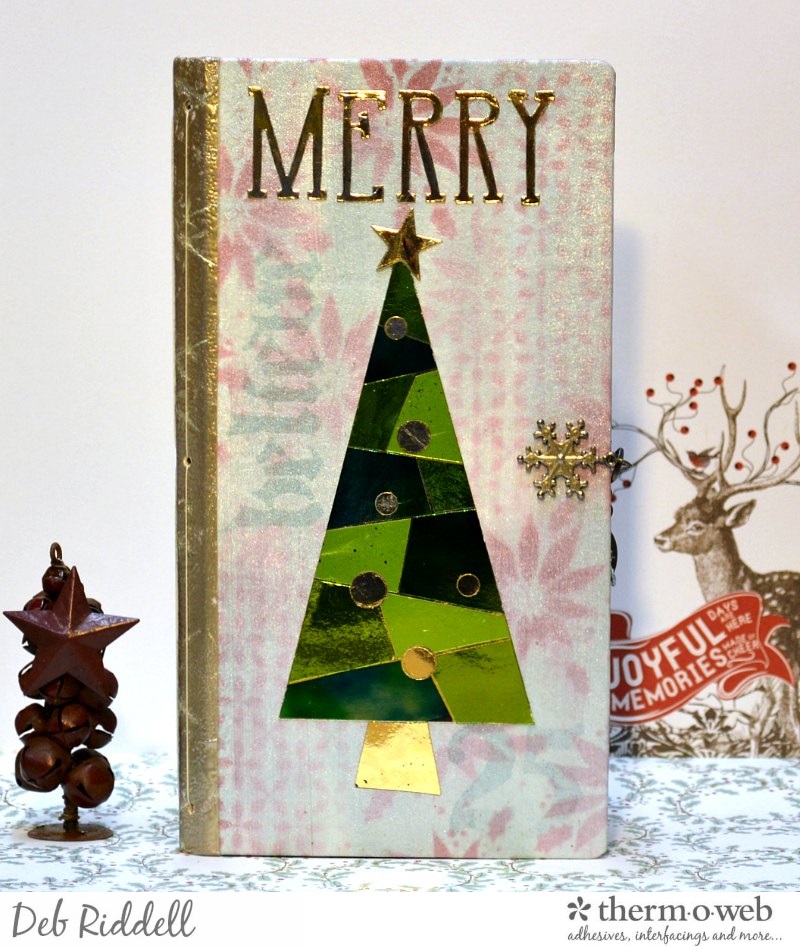
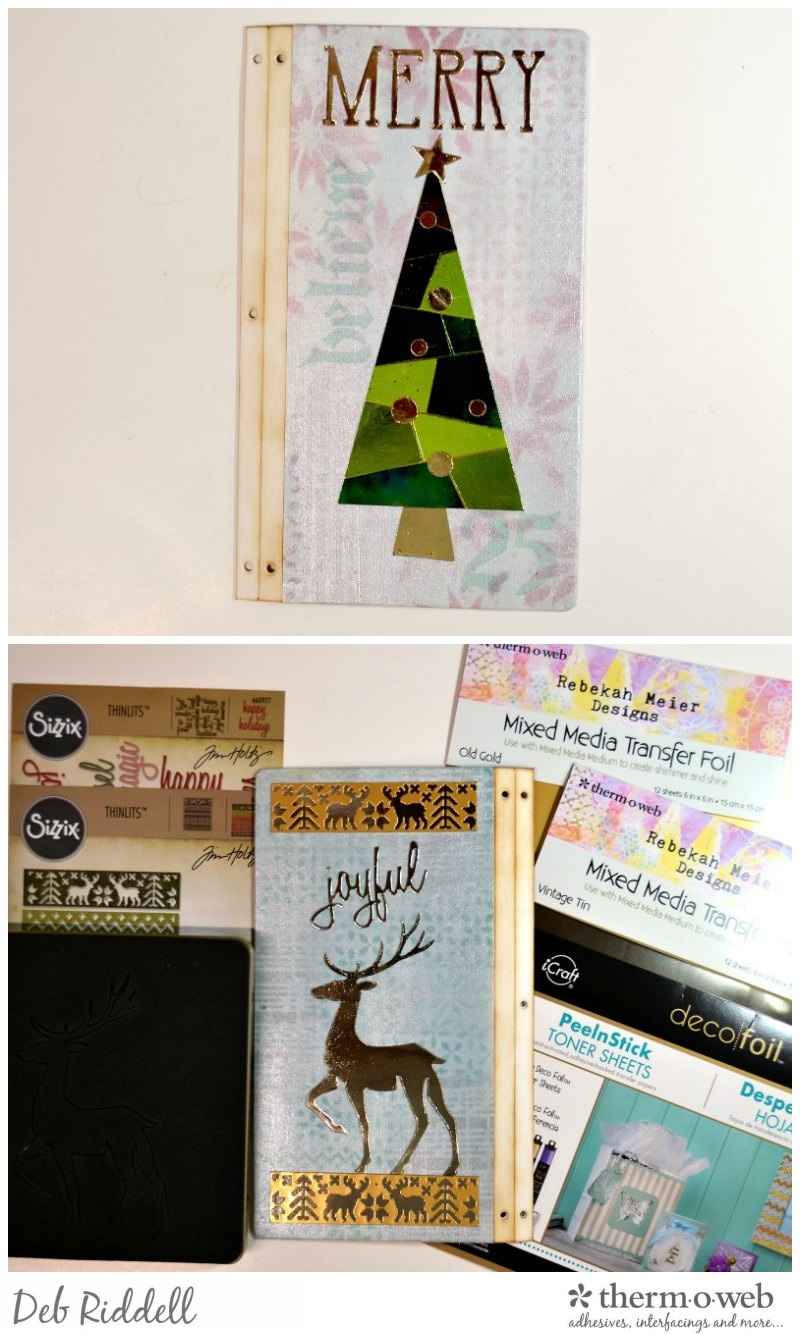
Remove the backing paper from the mosaic Christmas tree and stand and adhere them to the front cover. Remove the backing paper from the die cut Merry sentiment and adhere it to the top of the front cover. Use a hole punch to cut some 'ornaments' for your tree from the Champagne Deco Foiled Toner Sheet. Die cut a star from the same Toner Sheet and add it to the top of your tree.
Die cut the word Merry from the Champagne Deco Foiled PeelnStick Toner sheet (this is the Broadway Alphabet die).
Remove the backing paper from the mosaic Christmas tree and stand and adhere them to the front cover. Remove the backing paper from the die cut Merry sentiment and adhere it to the top of the front cover. Use a hole punch to cut some 'ornaments' for your tree from the Champagne Deco Foiled Toner Sheet. Die cut a star from the same Toner Sheet and add it to the top of your tree.
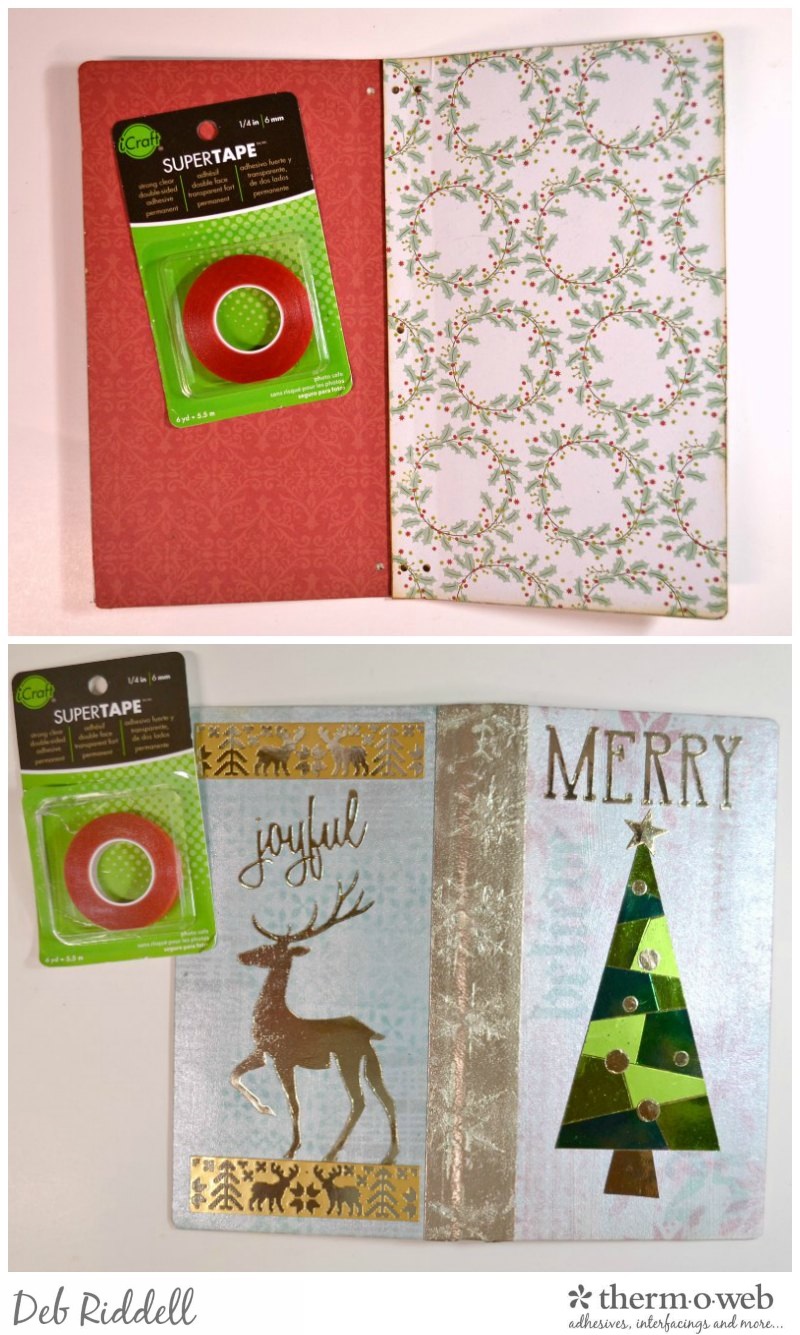 Use more SuperTape to cover the spine of your journal with the foil stenciled Art Tape, wrapping the ends of the tape around the edges to the inside. Use a CropADile or a hole punch to open up the holes already punched in your journal die through the Art Tape covered spine.
Add a pocket created from scrapbook paper to the inside of the front and back covers and embellish as desired with some Christmas themed ephemera and washi tapes. Add some Christmas gift tags to the pocket on the front cover (you can download these tags on my blog if you'd like or even better, use Gina K Designs' Holiday Release 2017 to create your own tags!);
Use more SuperTape to cover the spine of your journal with the foil stenciled Art Tape, wrapping the ends of the tape around the edges to the inside. Use a CropADile or a hole punch to open up the holes already punched in your journal die through the Art Tape covered spine.
Add a pocket created from scrapbook paper to the inside of the front and back covers and embellish as desired with some Christmas themed ephemera and washi tapes. Add some Christmas gift tags to the pocket on the front cover (you can download these tags on my blog if you'd like or even better, use Gina K Designs' Holiday Release 2017 to create your own tags!);
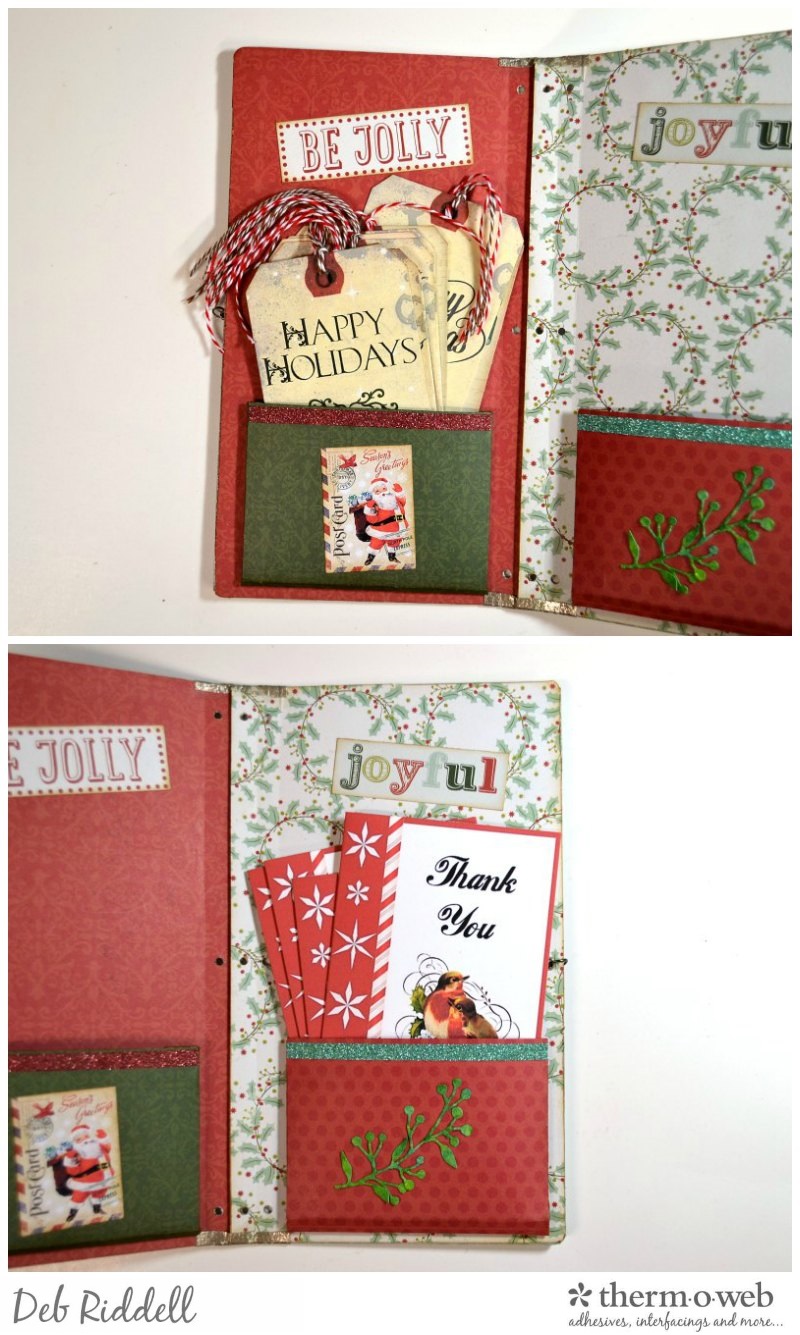 And add some thank you cards in the back pocket to send out after the holidays.
Create a closure for your December daily journal by embossing a snowflake charm with Vintage Platinum embossing powder and adhering it to the front cover, adding a jump ring through the charm hanger. Punch a hole in the back cover and insert an eyelet. Attach a Swivel Clasp to the eyelet with another jump ring and then attach some charms to the Swivel Clasp, embossing some of them with Fresh Fallen Snow embossing powder.
And add some thank you cards in the back pocket to send out after the holidays.
Create a closure for your December daily journal by embossing a snowflake charm with Vintage Platinum embossing powder and adhering it to the front cover, adding a jump ring through the charm hanger. Punch a hole in the back cover and insert an eyelet. Attach a Swivel Clasp to the eyelet with another jump ring and then attach some charms to the Swivel Clasp, embossing some of them with Fresh Fallen Snow embossing powder.
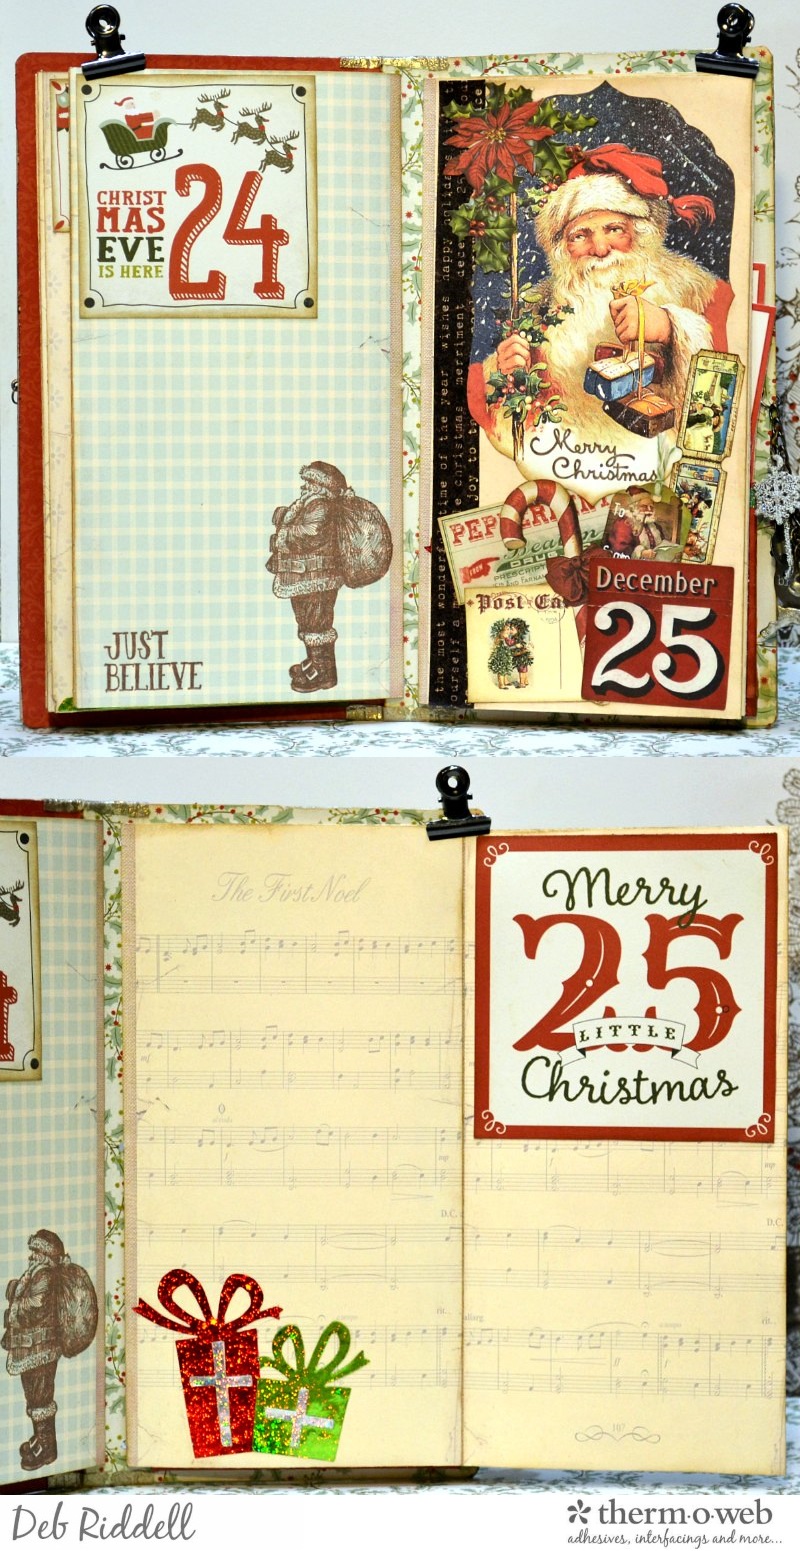
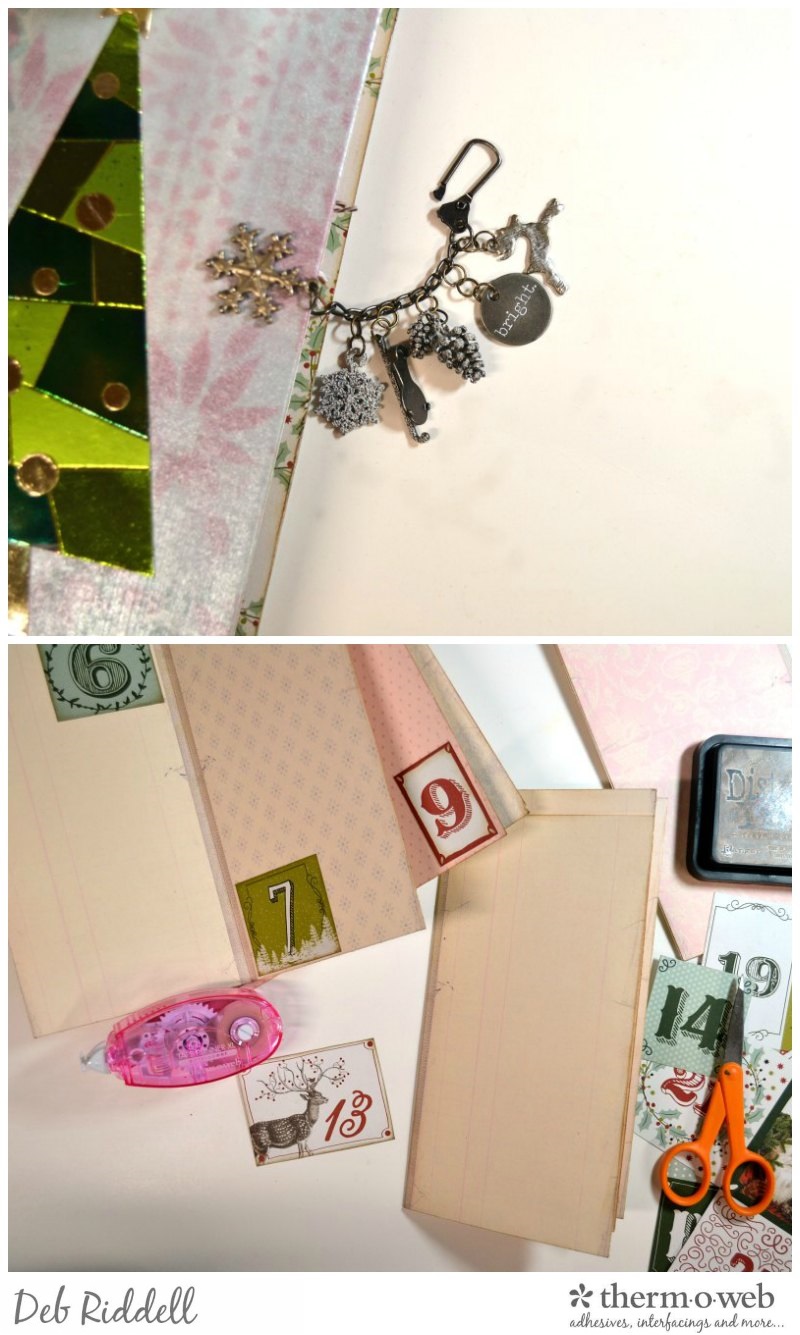 Create signatures for your December daily journal from scrapbook paper. Number each page with scrapbook paper embellishments or die cuts from the 1st of December through to the first of January. I created three signatures for my December daily, the first two signatures had three pages each and the third signature had two pages with a fold out page for December 25th.
Sew the three signatures into your journal with a pamphlet stitch (click here for an easy how-to tutorial). Embellish the front of the fold-out page for December 25th with your favourite Christmas ephemera and images.
Create signatures for your December daily journal from scrapbook paper. Number each page with scrapbook paper embellishments or die cuts from the 1st of December through to the first of January. I created three signatures for my December daily, the first two signatures had three pages each and the third signature had two pages with a fold out page for December 25th.
Sew the three signatures into your journal with a pamphlet stitch (click here for an easy how-to tutorial). Embellish the front of the fold-out page for December 25th with your favourite Christmas ephemera and images.
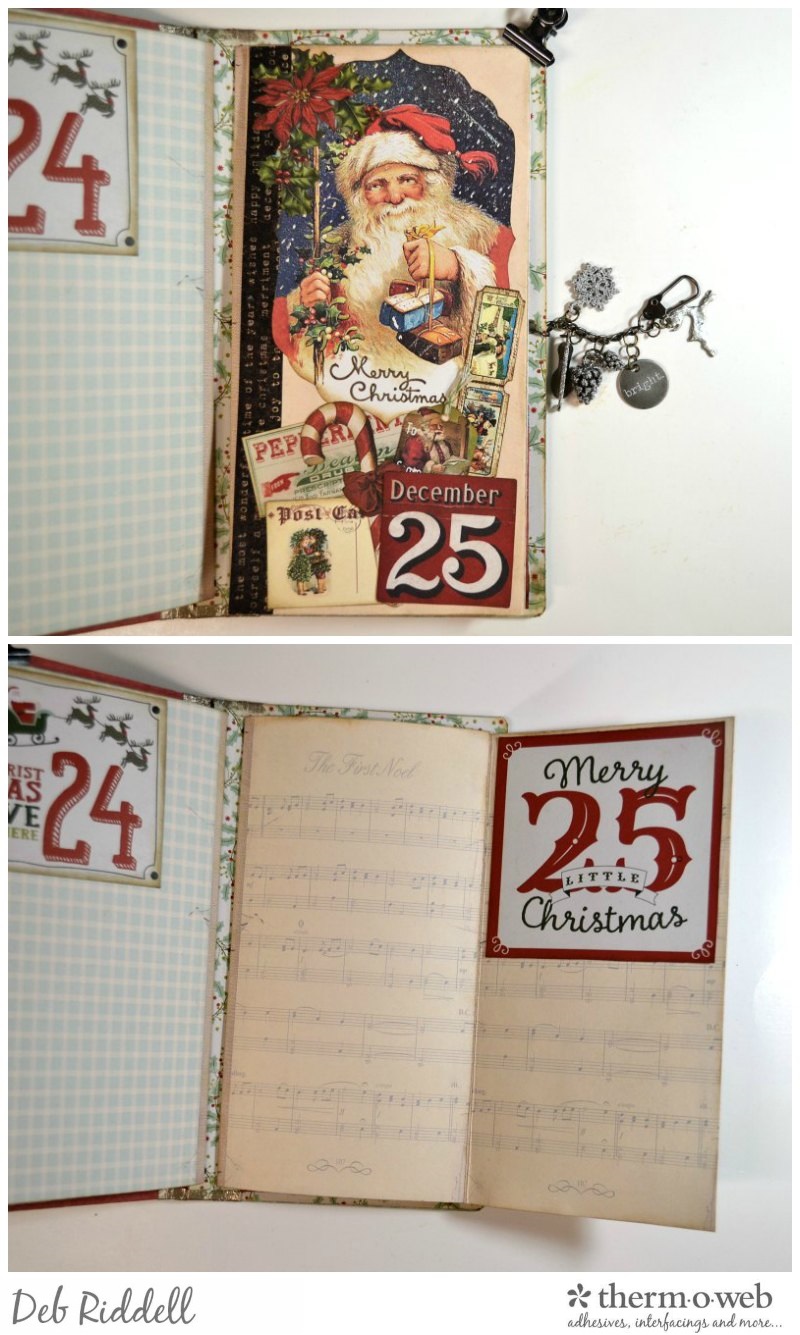 The double fold out page will give you lots of room to record all of your Christmas day memories!
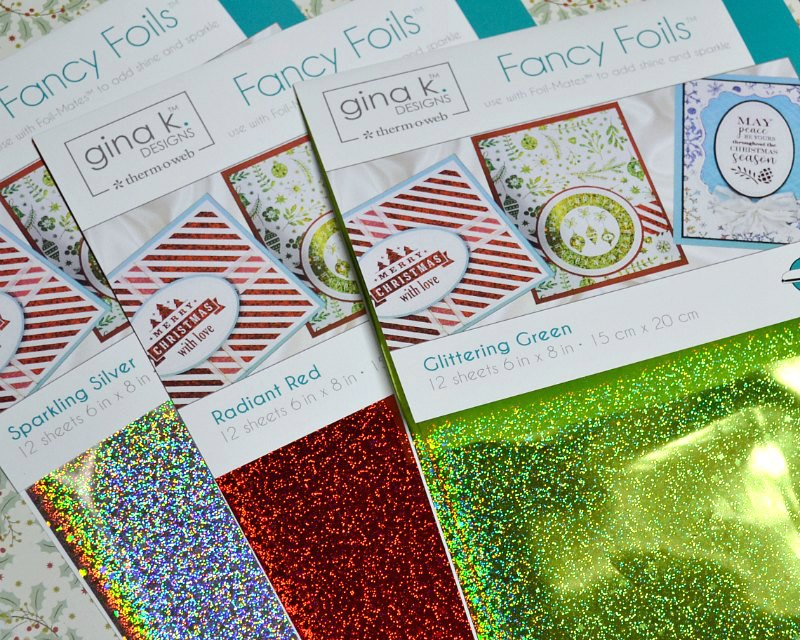
Continue to decorate the pages of your December daily as you'd like, I made a start by die cutting some holiday images from PeelnStick Toner Sheet covered with Gina K. Designs new Holiday 2017 Fancy Foils.
The double fold out page will give you lots of room to record all of your Christmas day memories!
Continue to decorate the pages of your December daily as you'd like, I made a start by die cutting some holiday images from PeelnStick Toner Sheet covered with Gina K. Designs new Holiday 2017 Fancy Foils.
 A wreath and bow for December 1st.
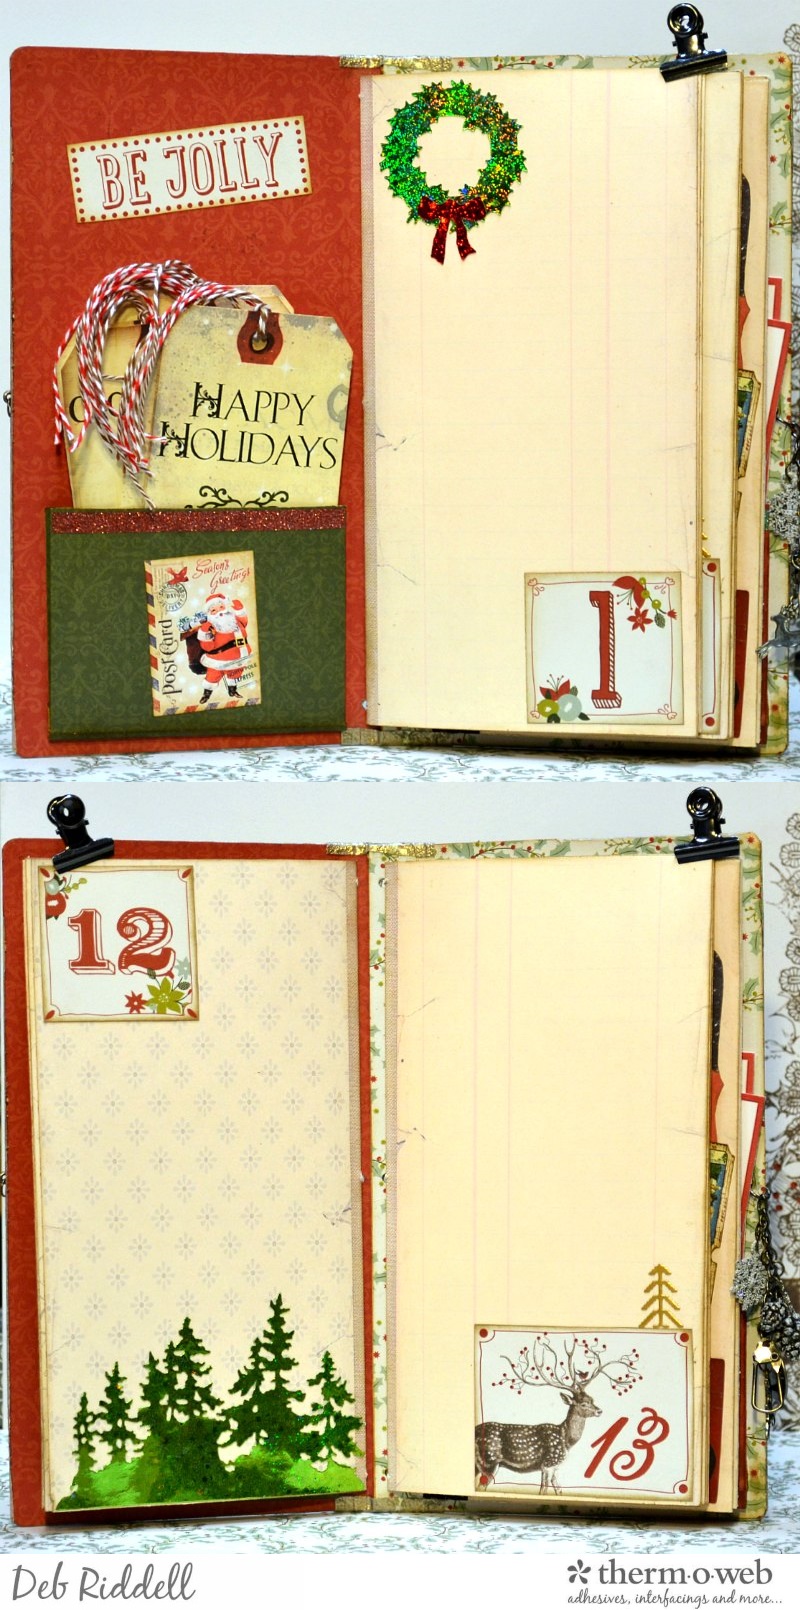 and a Glittering Green tree line for December 12th.
Add some stamping here and there as well, the Santa and sentiment stamped on December 24th are from Tim Holtz's Holiday Drawings stamp set.
and a Glittering Green tree line for December 12th.
Add some stamping here and there as well, the Santa and sentiment stamped on December 24th are from Tim Holtz's Holiday Drawings stamp set.
 And here are more Gina K Designs Fancy Foils die cuts, so sparkly!
I hope that you have enjoyed seeing my Merry December daily journal, can't wait till December 1st to start recording all of our Christmas preparations and traditions in it.
And here are more Gina K Designs Fancy Foils die cuts, so sparkly!
I hope that you have enjoyed seeing my Merry December daily journal, can't wait till December 1st to start recording all of our Christmas preparations and traditions in it.
 Thank you so much for stopping by today and as always, happy creating!
Deb xo
Save
Save
Save
Thank you so much for stopping by today and as always, happy creating!
Deb xo
Save
Save
Save
