No Products in the Cart
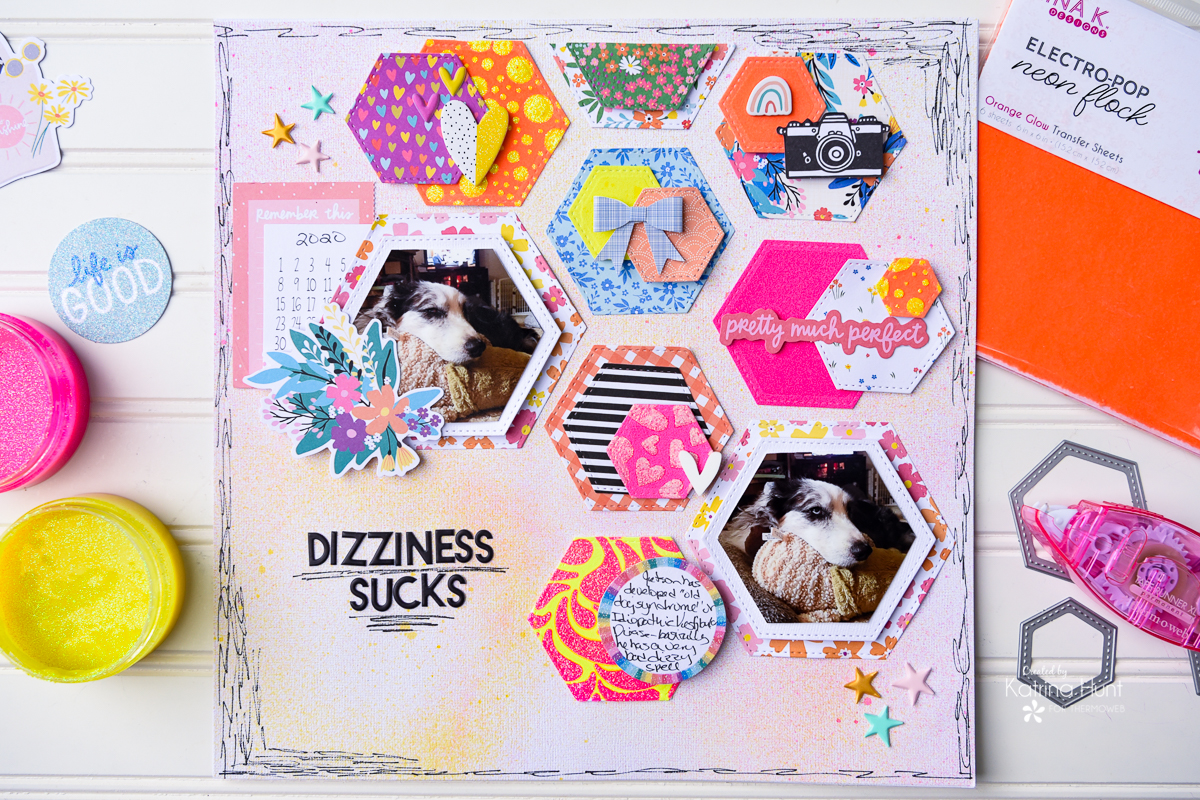
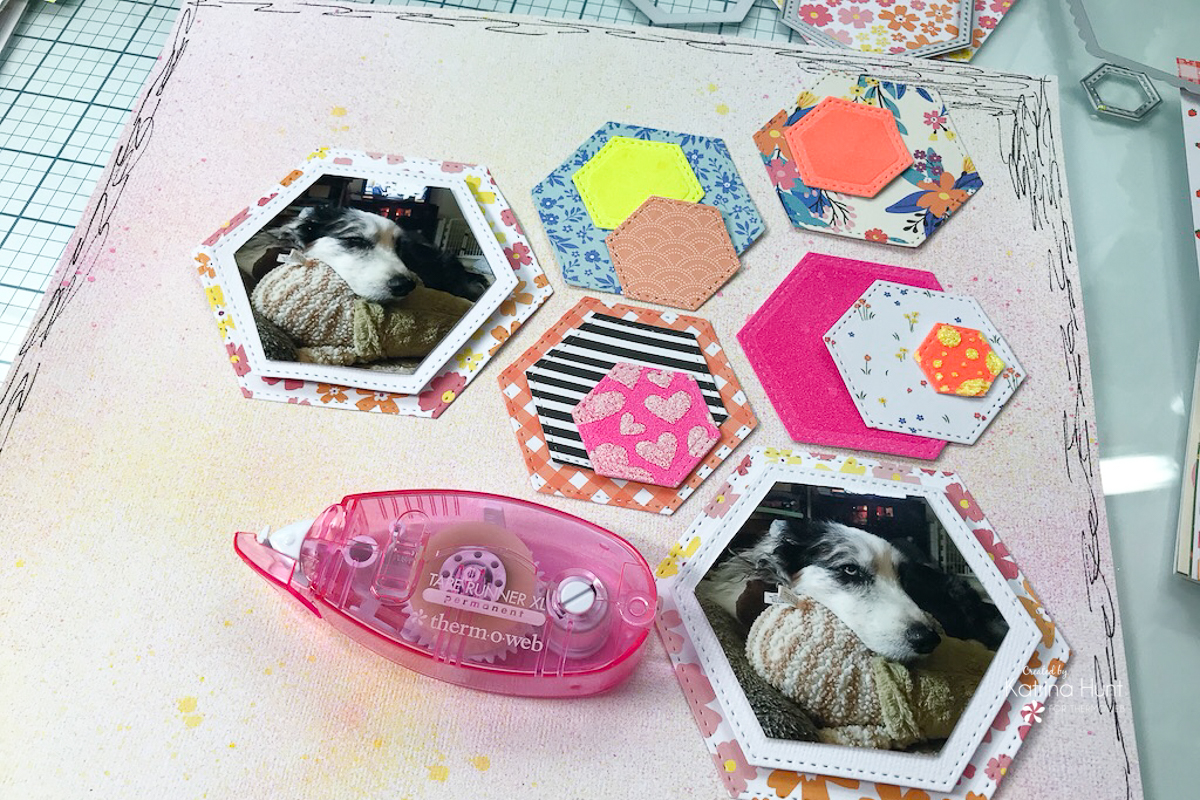
 Hey Hey!! Katrina from Paper, Scissors, Glue and Hybrid Too back with a layout for our Whimsy Stamps swap. Now, I didn't use any stamps, but I did use their fun Nested Hexagon dies set for my project today. I paired those dies with a lot of fun Rina K Designs products.
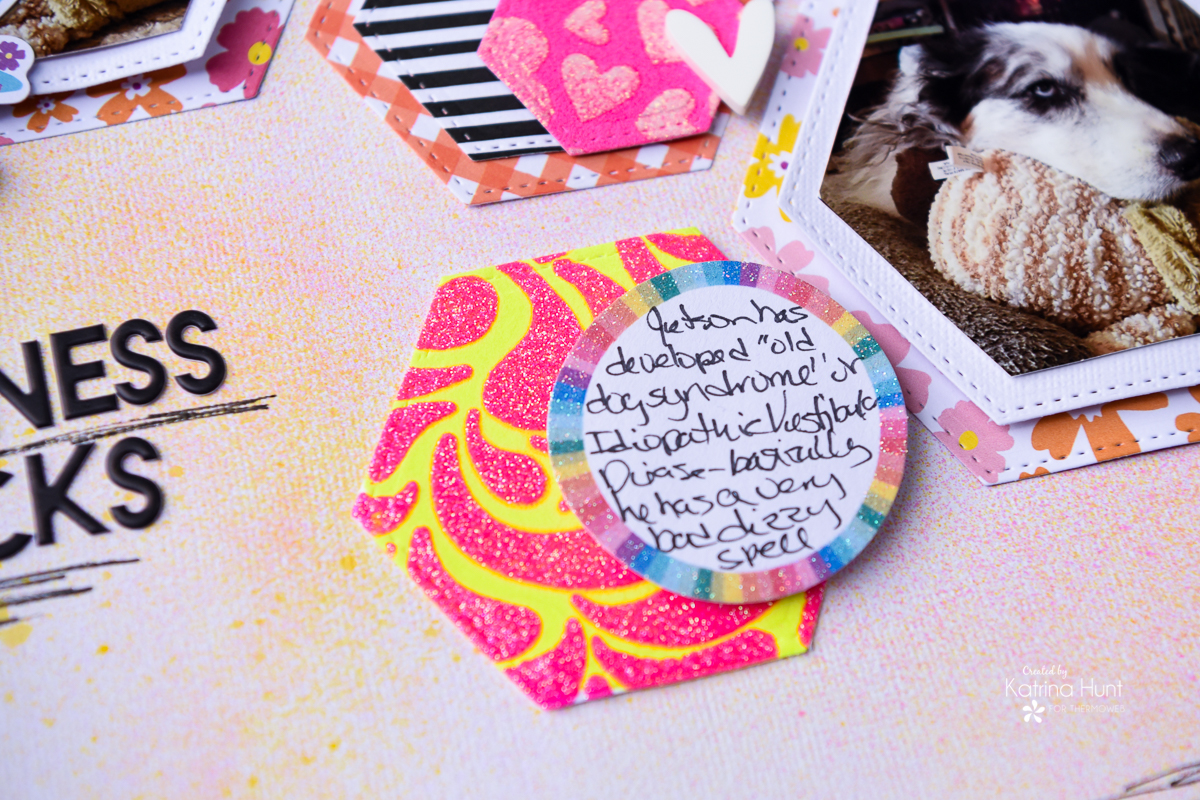
A little backstory, since the journaling is hard to read. Jetson has been diagnosed with Idiopathic Vestibular Disease. It's basically like vertigo in humans and has to do with his inner ear. I took these pictures while he was recovering from an episode of it and wanted to document it. Some dogs only have one episode and never have it again, but sadly he has had them for the past year since the first one. We have figured out they are brought on by barometric pressures changes, like when a storm is coming in. There isn't a lot you can do, except supportive care and making sure they do drink and eat.
Hey Hey!! Katrina from Paper, Scissors, Glue and Hybrid Too back with a layout for our Whimsy Stamps swap. Now, I didn't use any stamps, but I did use their fun Nested Hexagon dies set for my project today. I paired those dies with a lot of fun Rina K Designs products.
A little backstory, since the journaling is hard to read. Jetson has been diagnosed with Idiopathic Vestibular Disease. It's basically like vertigo in humans and has to do with his inner ear. I took these pictures while he was recovering from an episode of it and wanted to document it. Some dogs only have one episode and never have it again, but sadly he has had them for the past year since the first one. We have figured out they are brought on by barometric pressures changes, like when a storm is coming in. There isn't a lot you can do, except supportive care and making sure they do drink and eat.
 Therm O Web Supplies Used:
Therm O Web Memory Runner XL
Therm O Web Memory Runner XL Refill
Zots – Medium
3D Foam Squares-1/2 inch
3D Foam Squares-1/4 inch
Eileen Hull Easy Adhesive Sheets- 6in x 12in
iCraft Adhesive Tape 1/8th inch
iCraft Adhesive Tape 1/2 inch
iCraft Purple Tape 1.5 inch
iCraft Purple Tape .5 inch
iCraft Stencil Pal
iCraft Ultra Bond Liquid Adhesive
iCraft Deco Foil Foam Adhesive
Rina K StampnStencil Detail Stencil-Sending Sunshine
Rina K Electro Pop Neon Flock-Hello Yellow
Rina K Electro Pop Neon Flock-Poppin' Pink
Rina K Electro Pop Neon Flock-Orange Glow
Rina K Glitz Neon Glitter Gel – Hello Yellow
Rina K Glitz Neon Glitter Gel – Poppin' Pink
Gina K Glitz Glitter Gel – Iridescent
Gina K Designs Foam Squares
Other Supplies Used
American Crafts Picnic In The Park Collection
American Crafts Cardstock White
Dina Wakely Media Gloss Spray-Mageneta
Dina Wakely Media Gloss Spray-Lemon
Dina Wakely Media Gloss Spray-White
Sharpie Pen
Whimsy Stamps Nested Hexagon Die Set
Freckled Fawn Puffy Stars
Therm O Web Supplies Used:
Therm O Web Memory Runner XL
Therm O Web Memory Runner XL Refill
Zots – Medium
3D Foam Squares-1/2 inch
3D Foam Squares-1/4 inch
Eileen Hull Easy Adhesive Sheets- 6in x 12in
iCraft Adhesive Tape 1/8th inch
iCraft Adhesive Tape 1/2 inch
iCraft Purple Tape 1.5 inch
iCraft Purple Tape .5 inch
iCraft Stencil Pal
iCraft Ultra Bond Liquid Adhesive
iCraft Deco Foil Foam Adhesive
Rina K StampnStencil Detail Stencil-Sending Sunshine
Rina K Electro Pop Neon Flock-Hello Yellow
Rina K Electro Pop Neon Flock-Poppin' Pink
Rina K Electro Pop Neon Flock-Orange Glow
Rina K Glitz Neon Glitter Gel – Hello Yellow
Rina K Glitz Neon Glitter Gel – Poppin' Pink
Gina K Glitz Glitter Gel – Iridescent
Gina K Designs Foam Squares
Other Supplies Used
American Crafts Picnic In The Park Collection
American Crafts Cardstock White
Dina Wakely Media Gloss Spray-Mageneta
Dina Wakely Media Gloss Spray-Lemon
Dina Wakely Media Gloss Spray-White
Sharpie Pen
Whimsy Stamps Nested Hexagon Die Set
Freckled Fawn Puffy Stars
 I am going to tell you upfront, I was all over the place while making this layout! Lucky for you, now that it's done, I can break it down in easy steps for you to recreate it if you want!
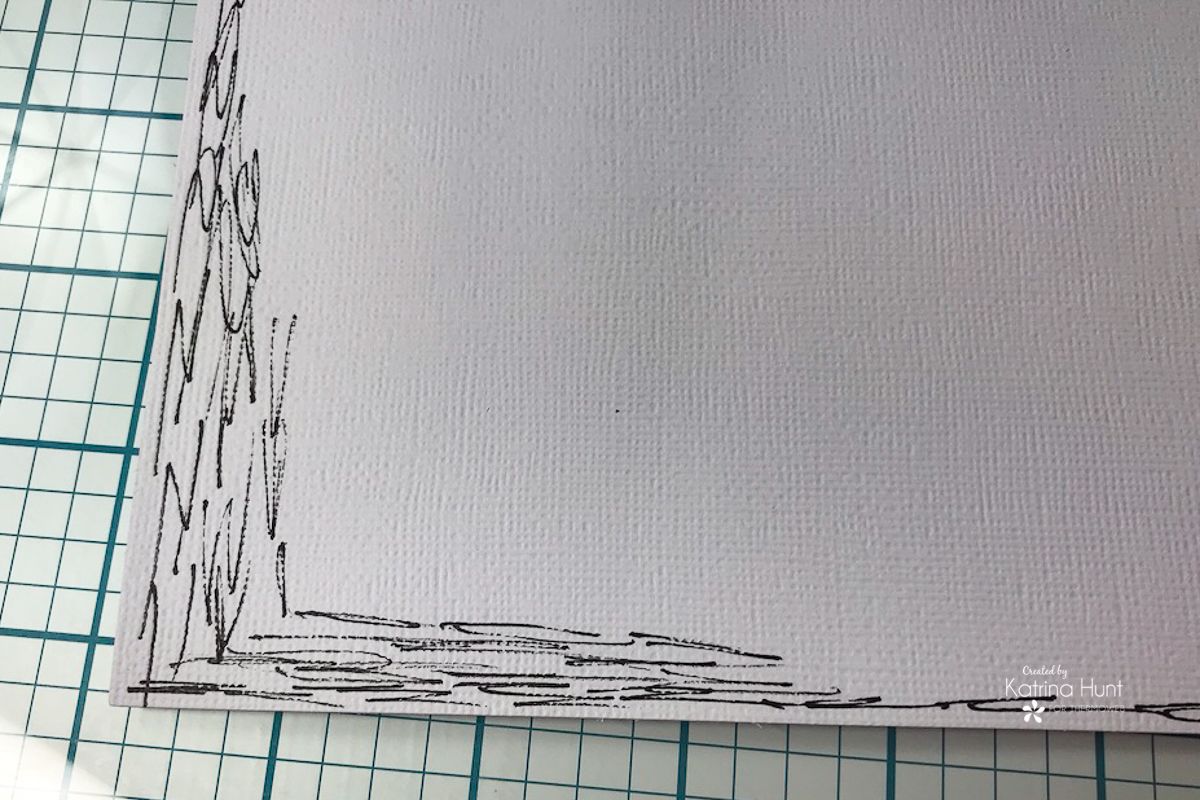
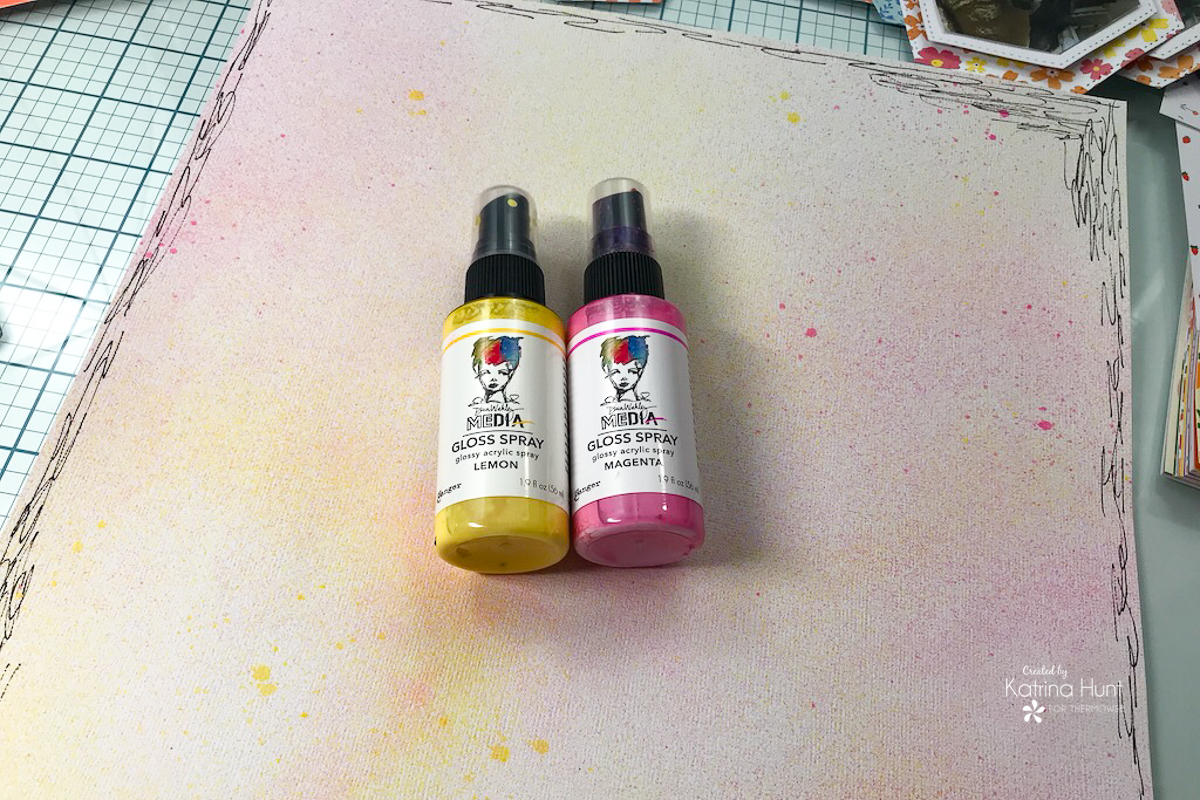
First, you want to start by making your background. I chose to use some white cardstock, black Sharpie and a pink and yellow mist. I drew lines, actually more like z's around the edges of my cardstock, adding in extra doodling in opposite corners. Once that was done, I misted, spraying each mist a couple of different times and rotating them. By doing this, when the mists mixed, they created the light orange color.
I am going to tell you upfront, I was all over the place while making this layout! Lucky for you, now that it's done, I can break it down in easy steps for you to recreate it if you want!
First, you want to start by making your background. I chose to use some white cardstock, black Sharpie and a pink and yellow mist. I drew lines, actually more like z's around the edges of my cardstock, adding in extra doodling in opposite corners. Once that was done, I misted, spraying each mist a couple of different times and rotating them. By doing this, when the mists mixed, they created the light orange color.
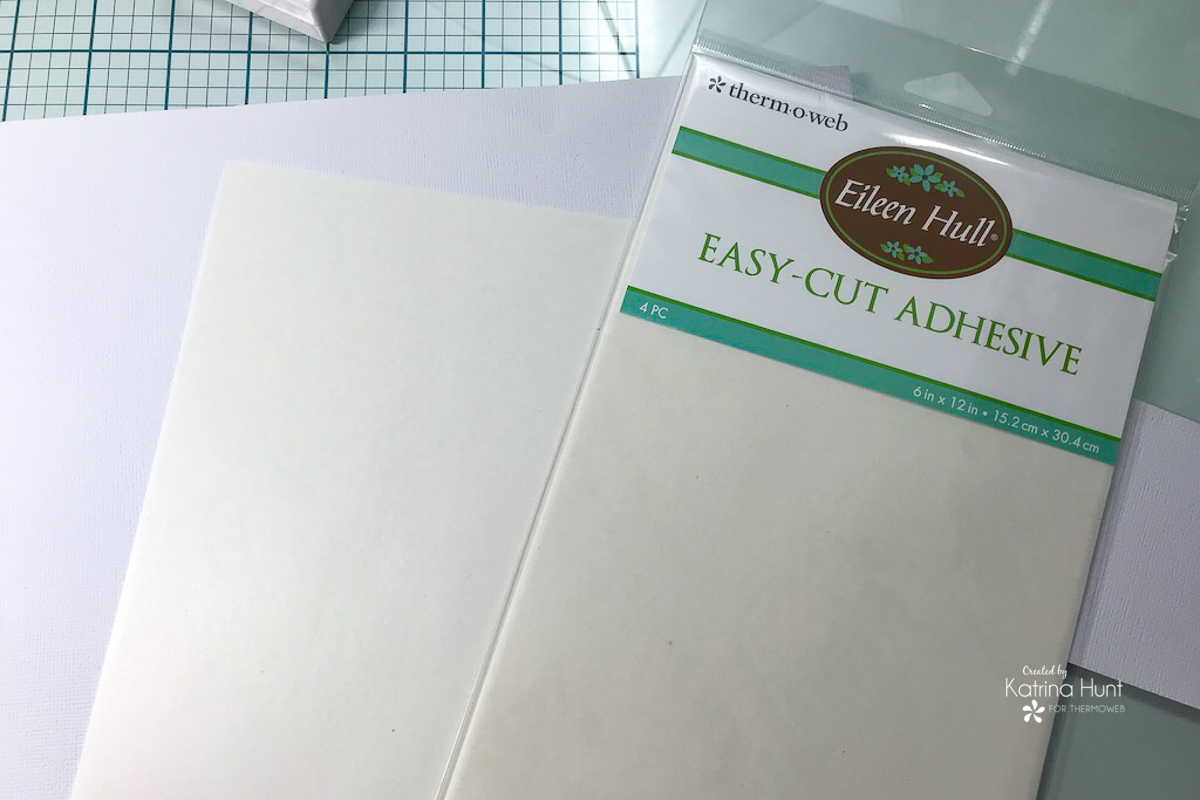
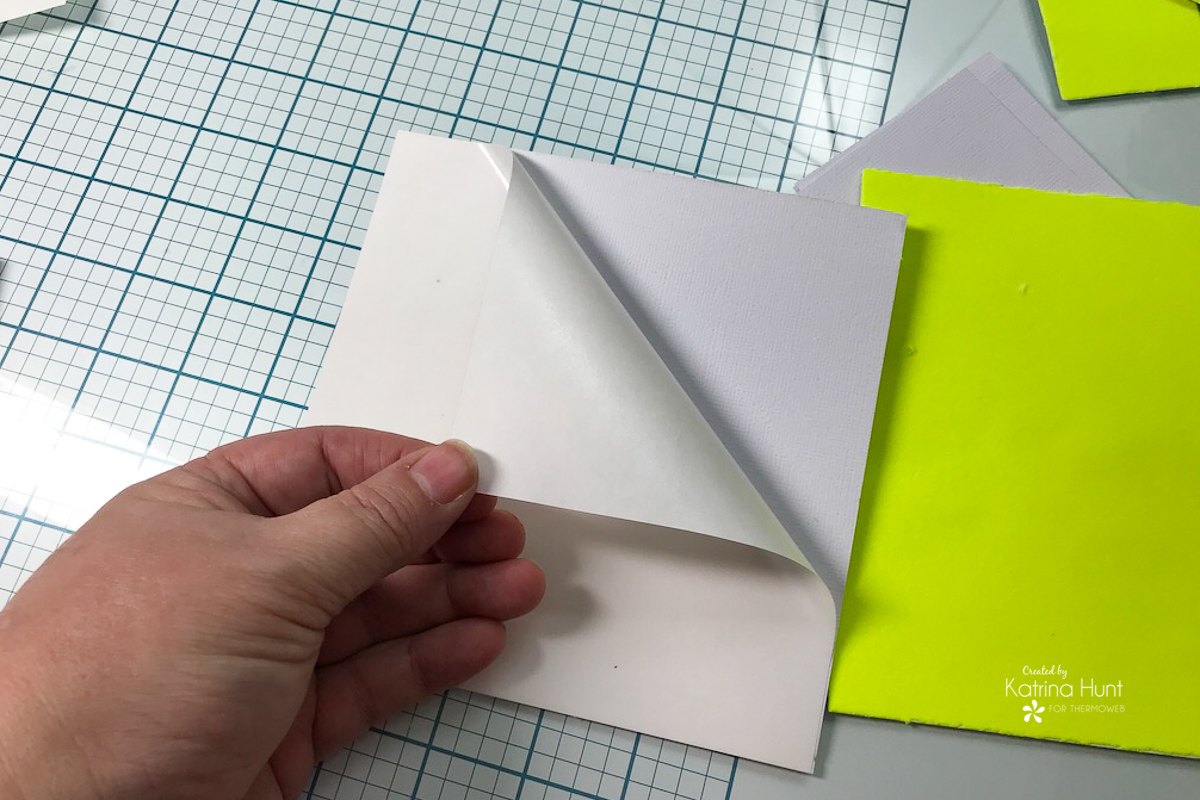
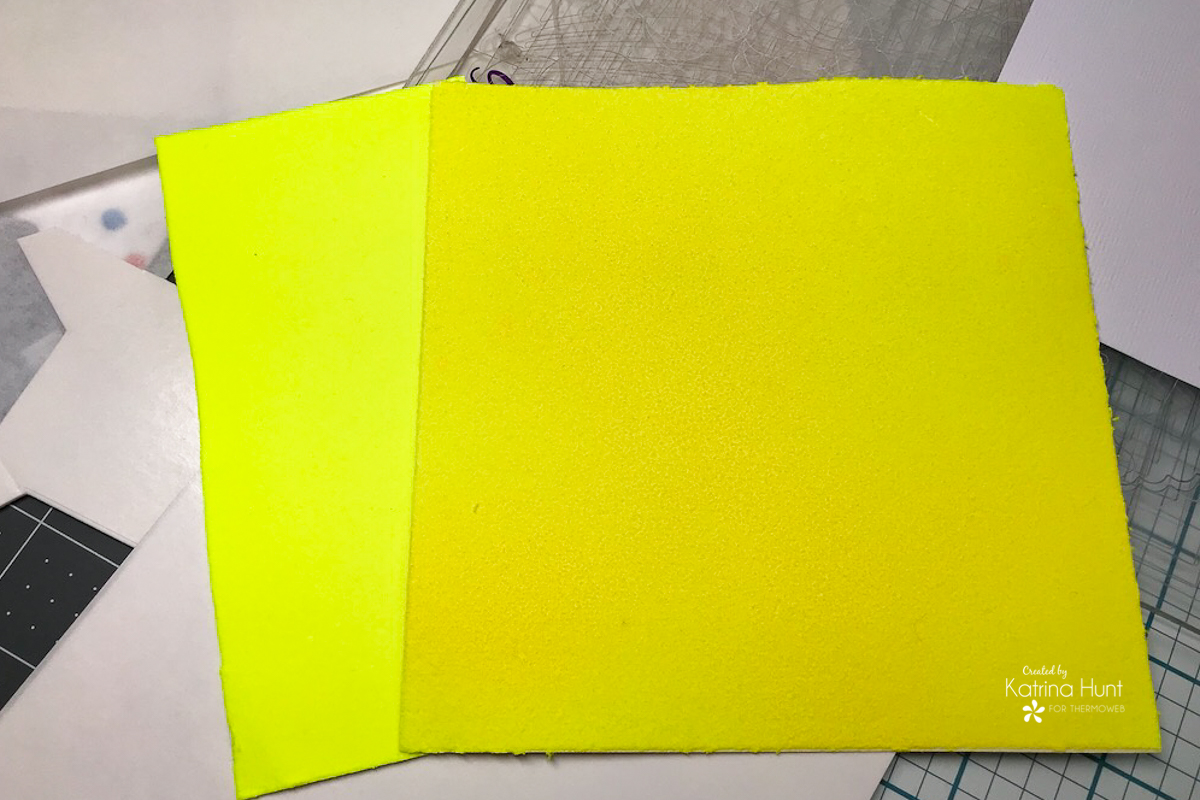
 I adhered a sheet of the Eileen Hull Easy Adhesive to a 6x12 piece of white cardstock. Once the adhesive was attached, I trimmed in half and then adhere the flock to the 6x6 pieces, by running thru my die cutting machine.
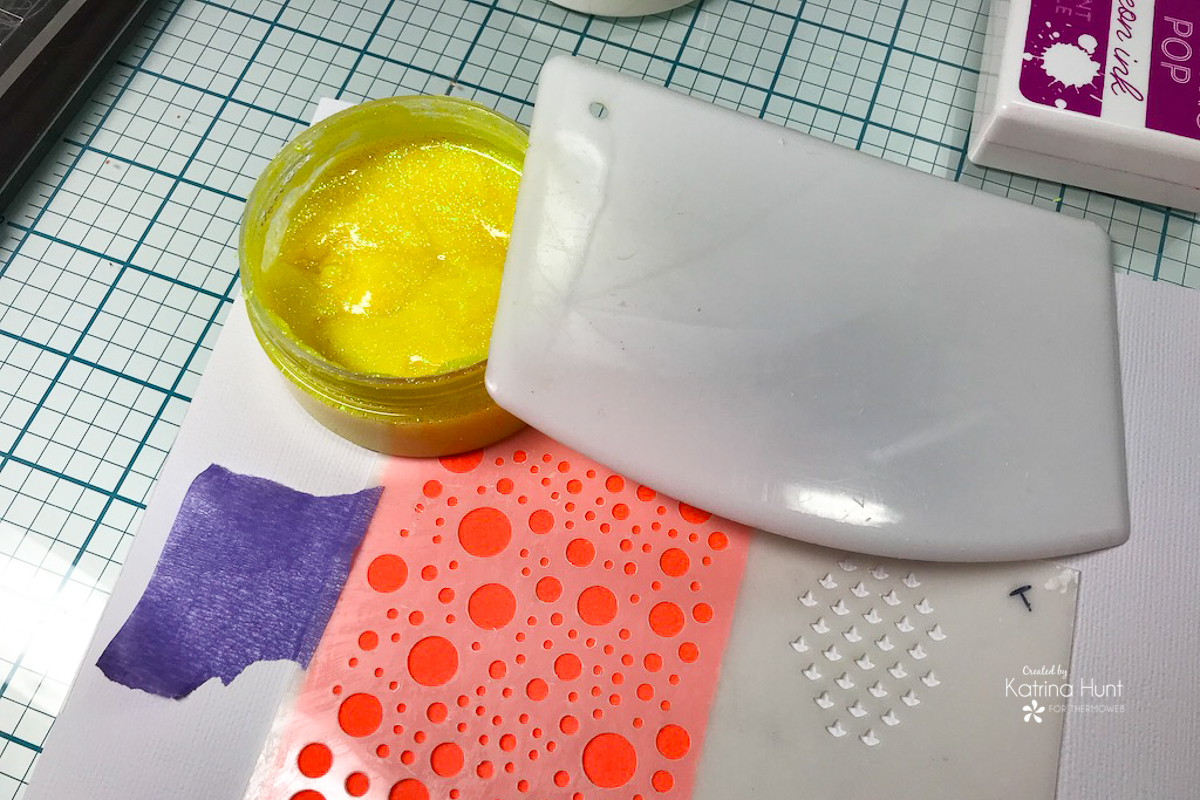
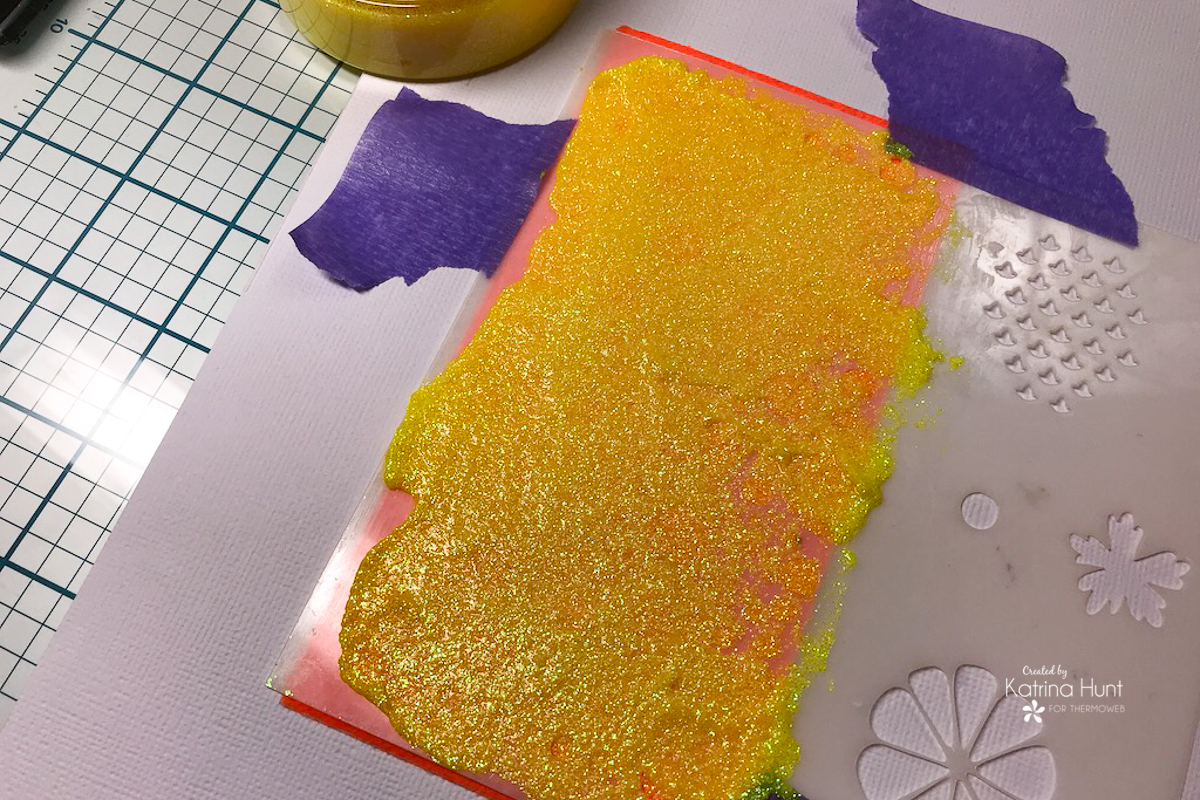
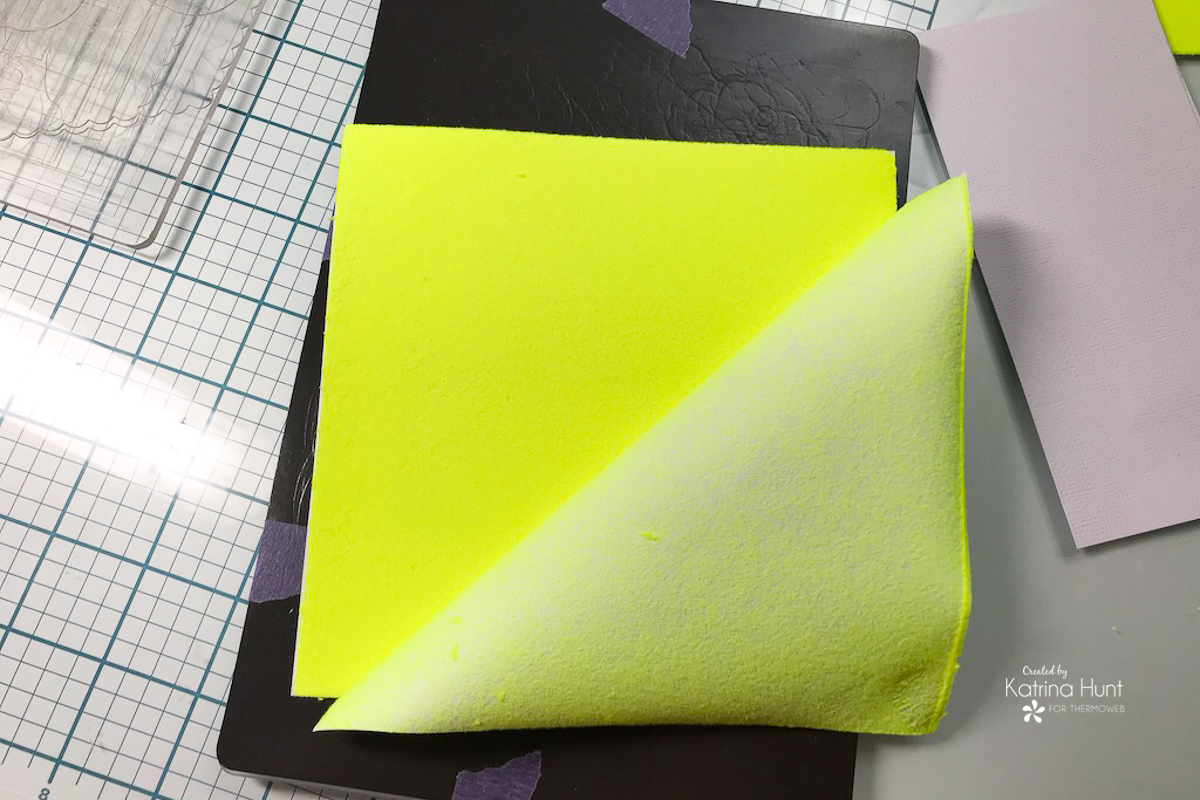 The next step was figuring out what I wanted to do with the Electro Pop Flock that I had chosen to use. I decided to leave some of it plain, and then add some of the Glitz Glitter Gel onto it, using some stencils. Both the Poppin' Pink and Hello Yellow didn't match my paper collection, so I altered them using the mists, I used the Lemon on the Hello Yellow and the White on the Poppin' Pink Flock. Big difference on the yellow flock, a slight difference in the pink.
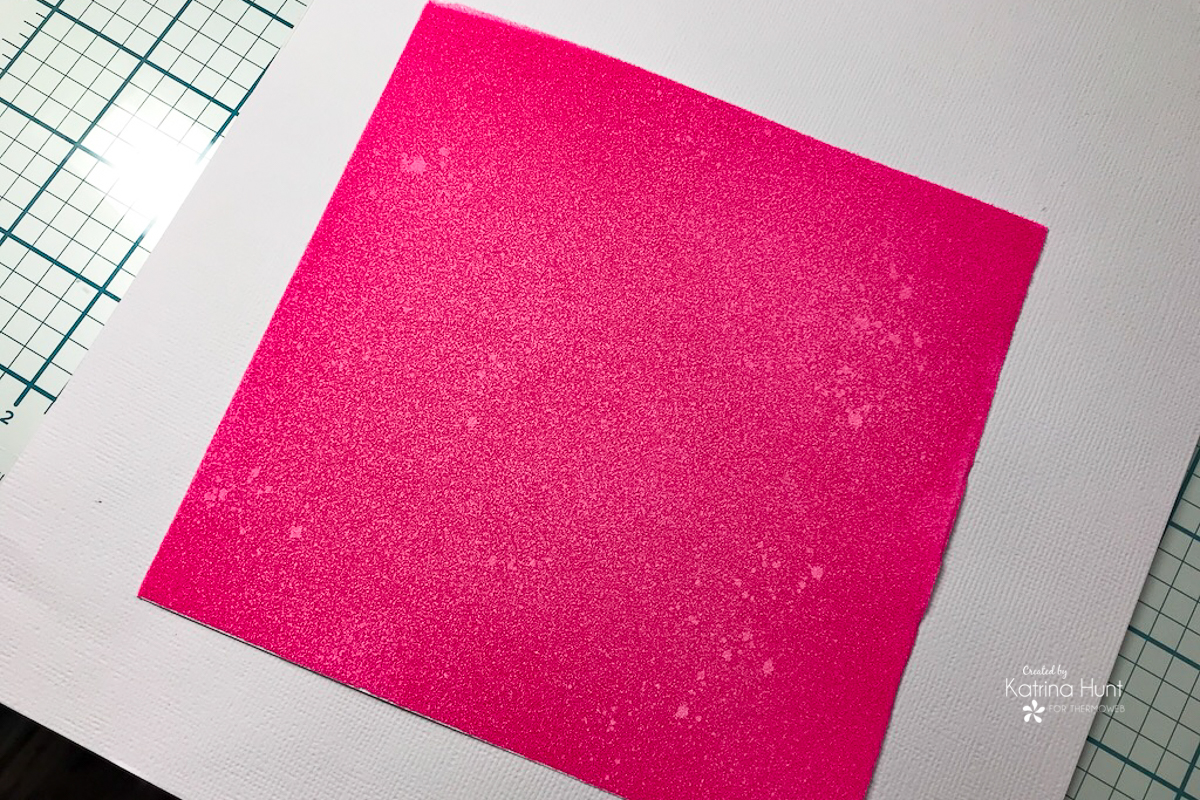
 I accidentally applied the gel too thin on my pink flock and didn't realize it until after it dried and I could "see" thru it. You can see below, not good!
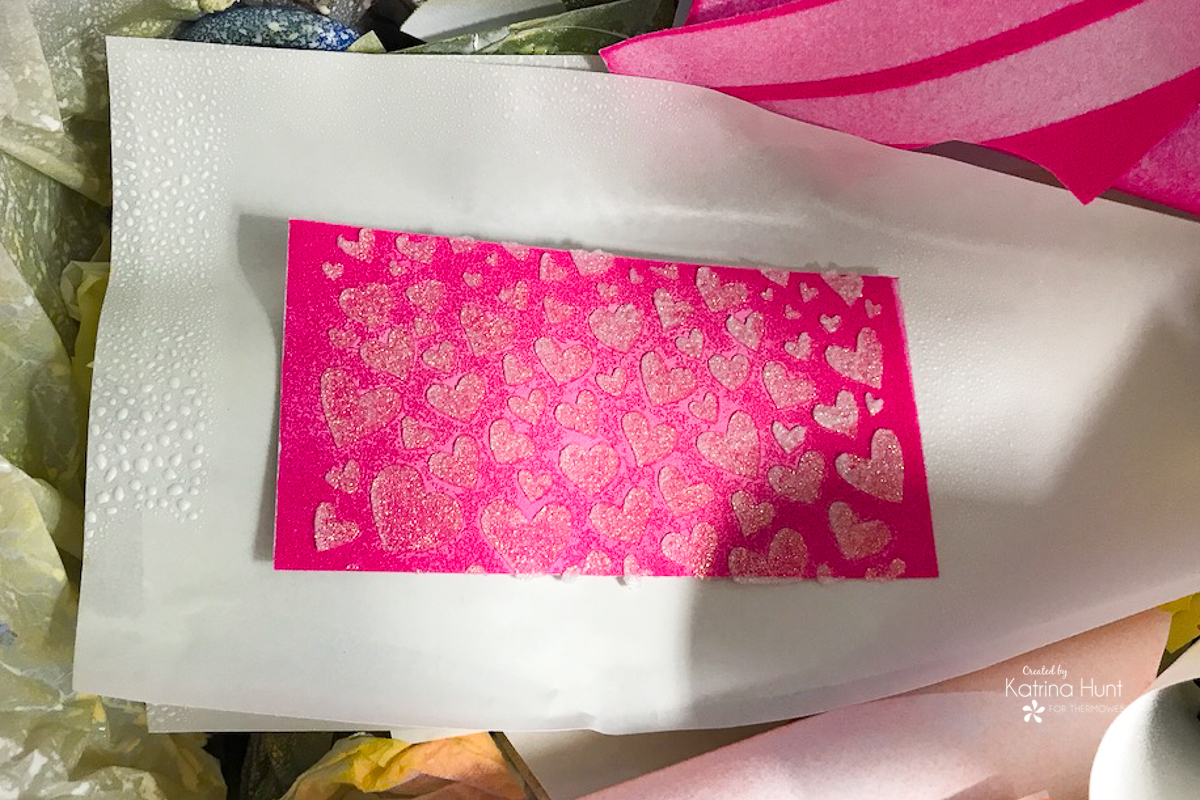 After realizing this, I decided to add more white mist on top of the entire stenciled piece of the flock and then I liked it!


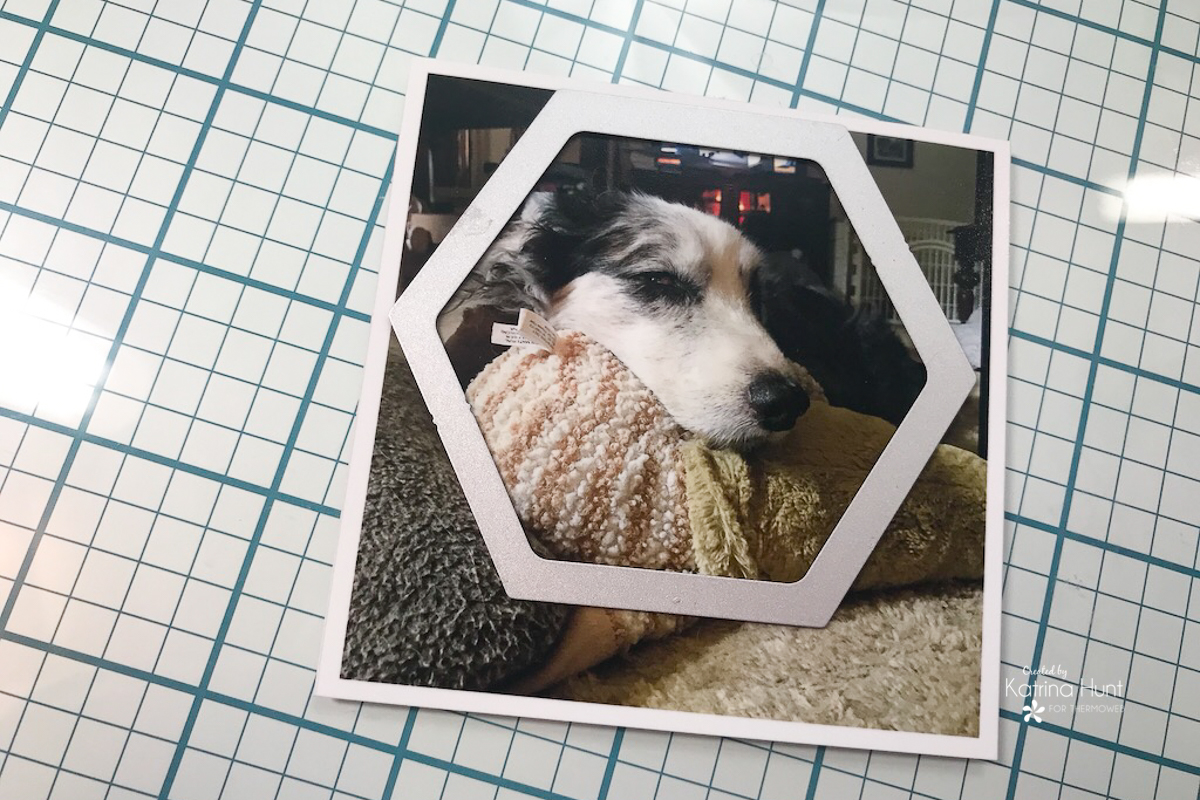
 Next, I die cut a white hexagon one size bigger than my pictures and mounters the picture onto the bigger shape with a die-cut piece of Deco Foil Foam Adhesive. I cut the foam with the next smaller die compared to the die I used for my picture.
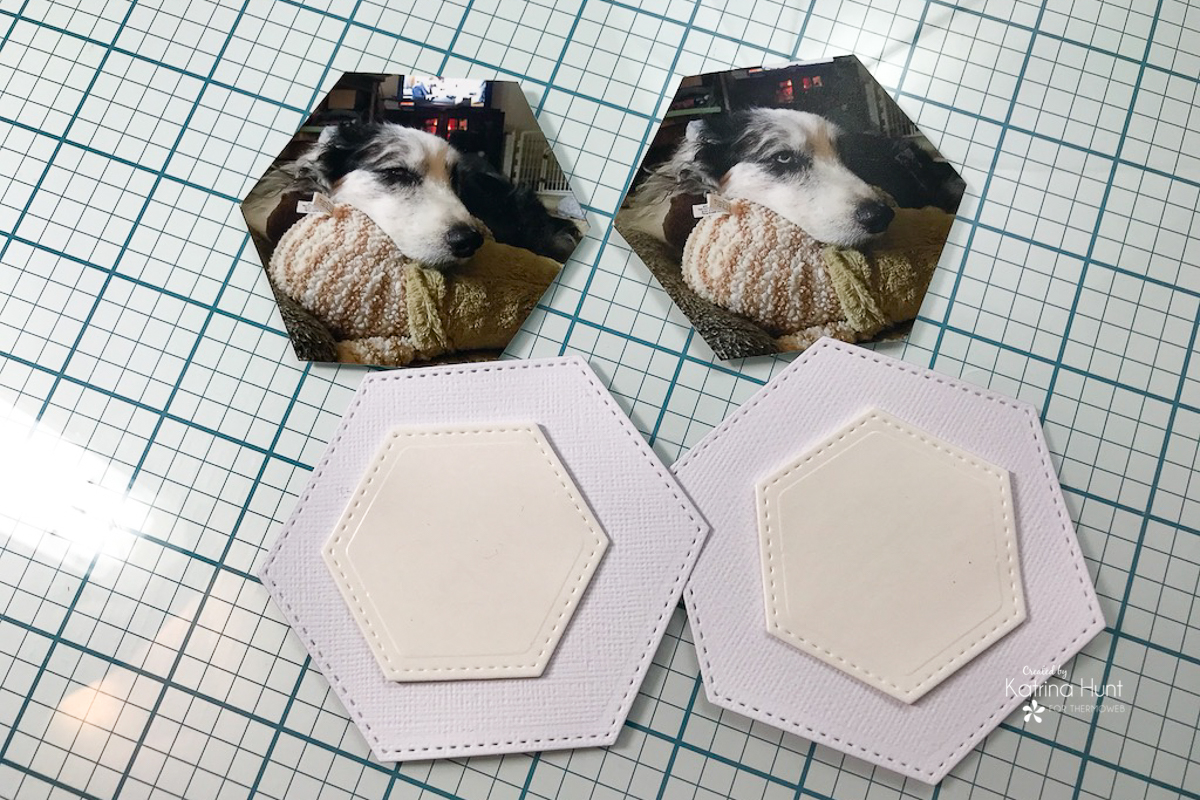
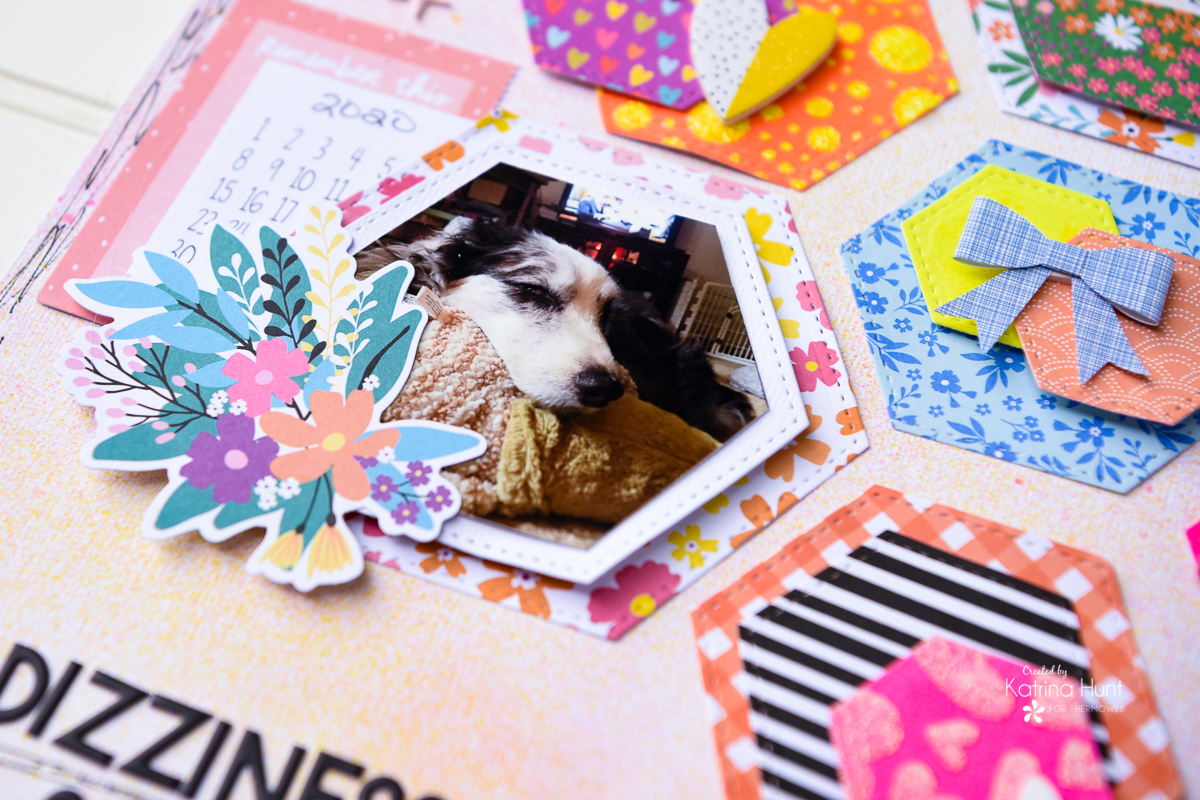 Now, it's time for the fun to begin and start cutting pattern paper and flock into hexagons to place onto my layout. I used the combo of foam adhesive and the Memory Runner XL to attach my hexagons together and to the background paper.
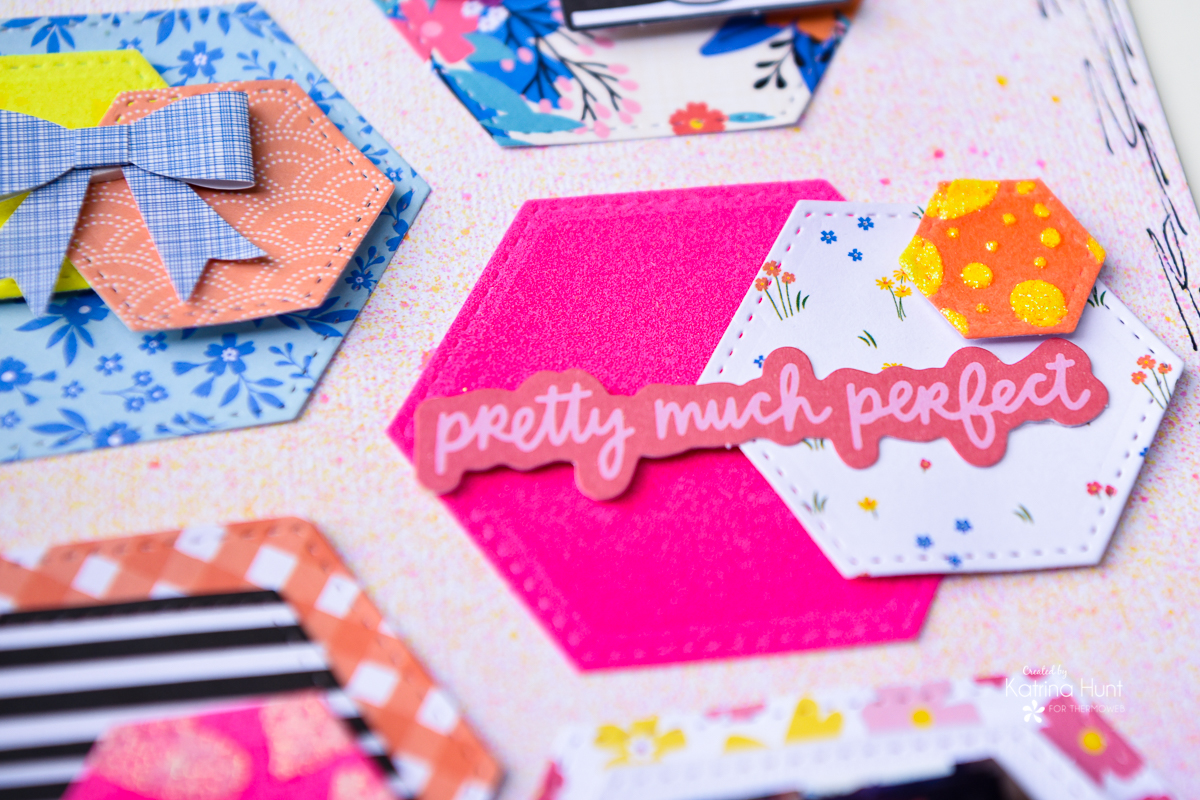 All that was left to do was add some embellishments to the different areas, a little journaling, and a title! I love it when I have no idea where a layout is going, but then I end up loving the result!
Have a fun and crafty rest of your week! Be sure to share your creations on social media with us.
Thank you so much for stopping by today! Don't forget to enter to win the drawing!
All that was left to do was add some embellishments to the different areas, a little journaling, and a title! I love it when I have no idea where a layout is going, but then I end up loving the result!
Have a fun and crafty rest of your week! Be sure to share your creations on social media with us.
Thank you so much for stopping by today! Don't forget to enter to win the drawing!
 It would NOT be a collaboration if we didn't have a Giveaway! After all...it's hard to see all these amazing ideas and not have the goodies to create! So BOTH ThermOWeb AND Whimsy Stamps are giving away $25 Gift Cards on BOTH of our sites. That's double the chance to win! We'll pick one winner here and they'll select a winner as well! So be sure to visit both blogs and enter!
a Rafflecopter giveaway
This post contains affiliate links. For more information, see our disclosure HERE.
This post contains affiliate links. For more information, see our disclosure HERE.
It would NOT be a collaboration if we didn't have a Giveaway! After all...it's hard to see all these amazing ideas and not have the goodies to create! So BOTH ThermOWeb AND Whimsy Stamps are giving away $25 Gift Cards on BOTH of our sites. That's double the chance to win! We'll pick one winner here and they'll select a winner as well! So be sure to visit both blogs and enter!
a Rafflecopter giveaway
This post contains affiliate links. For more information, see our disclosure HERE.
This post contains affiliate links. For more information, see our disclosure HERE.