No Products in the Cart
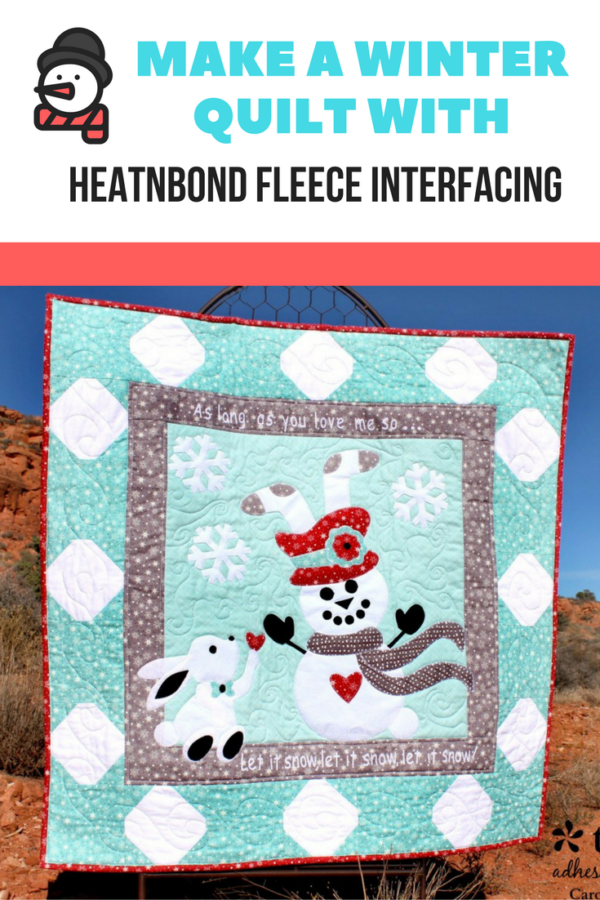
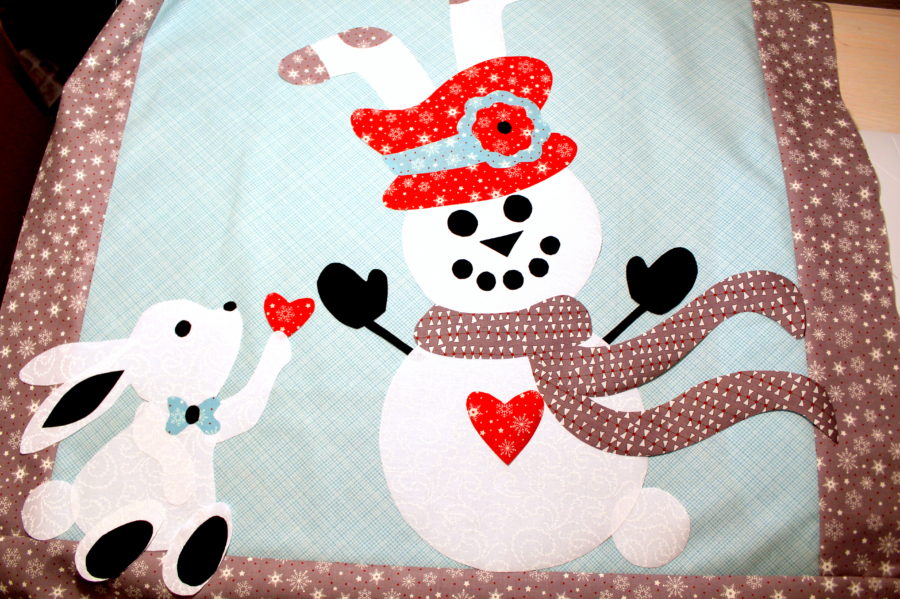
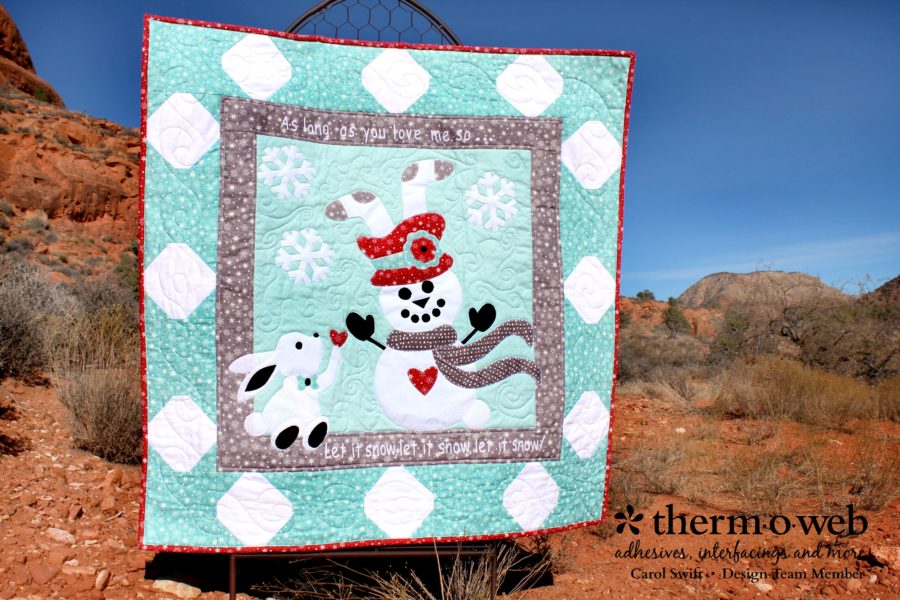 Building a snowman shaped like a lady bunny seems to have attracted a lovelorn rabbit. It looks as though he’s being ignored by the snow lady, doesn’t it? Maybe the little red heart he’s holding will catch her attention or he could sing, “As long as you love me so…” to melt her heart. Oh wait…melting would not be good for the snow lady! Hopefully, the gift of a red heart will bring the love he desires.
 Sewing instructions:
Step 1: Sew 3” x 20½” left and right center border strips to 20½” center square.
Step 2: Sew 3” x 25½” top and bottom strips to center block and borders.
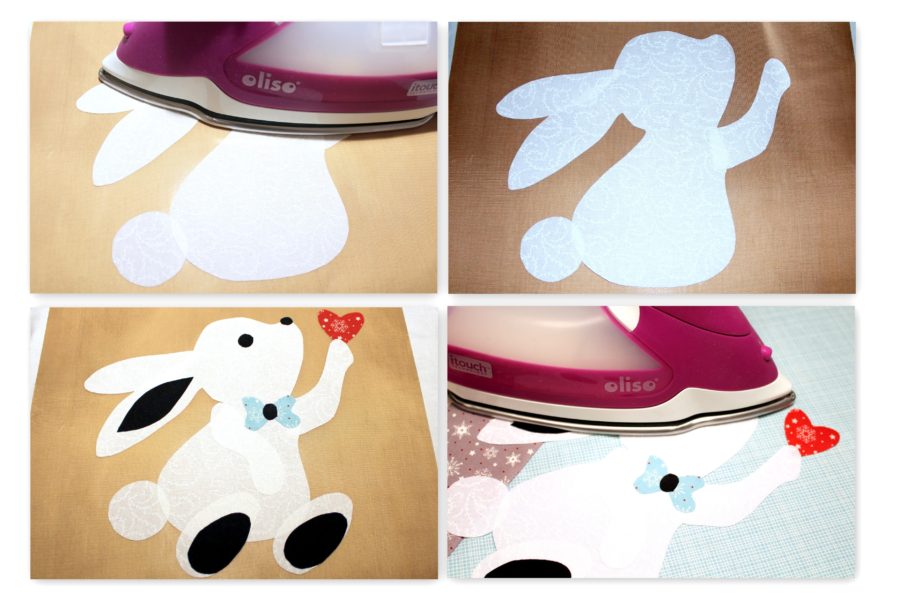
Step 3: Fuse applique pieces to center block by following the directions below:
Sewing instructions:
Step 1: Sew 3” x 20½” left and right center border strips to 20½” center square.
Step 2: Sew 3” x 25½” top and bottom strips to center block and borders.
Step 3: Fuse applique pieces to center block by following the directions below:
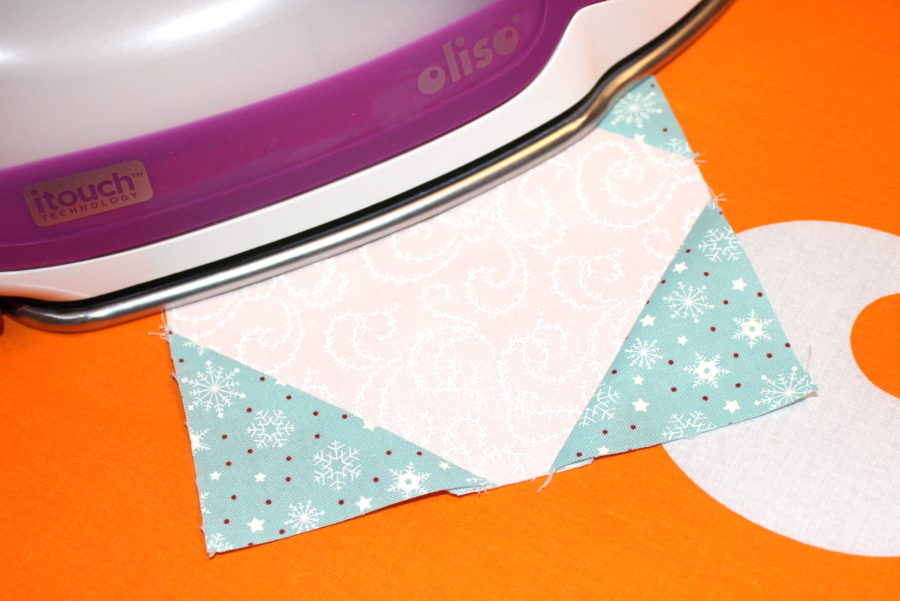
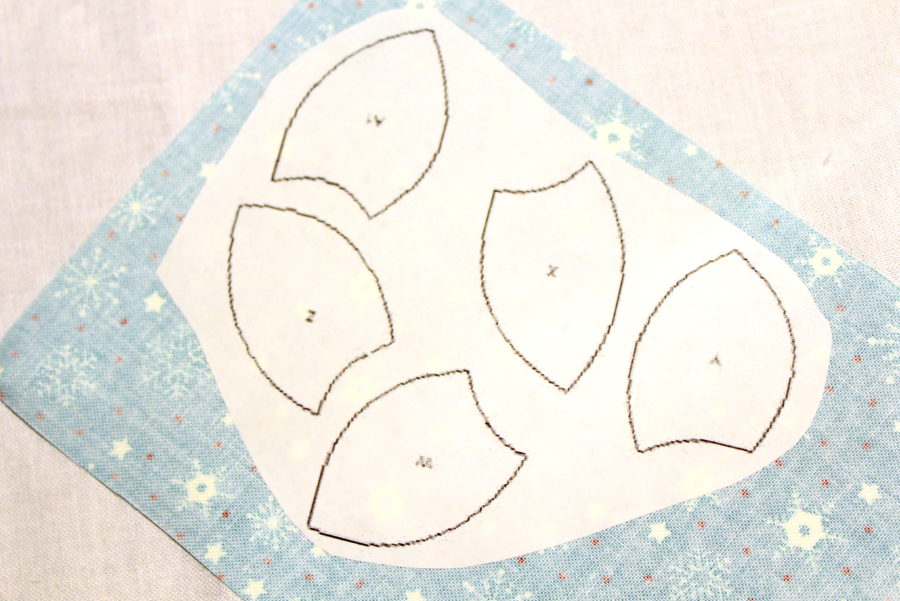 Cut out applique pieces. Peel off paper liner. Place applique shape, adhesive side down, on top of project. Press and hold iron for 6 seconds on each section until entire piece is bonded. Stitch around edges of applique pieces by hand or machine using a blanket stitch, zig-zag stitch, or straight stitch.
 [tooltip text="TooltipText"]*Tip: Using a heat-proof applique sheet helps to put pieces together before placing on fabric. Lightly press the pieces together, let cool, and remove from the heat-proof applique sheet. Position on fabric and iron.[/tooltip]
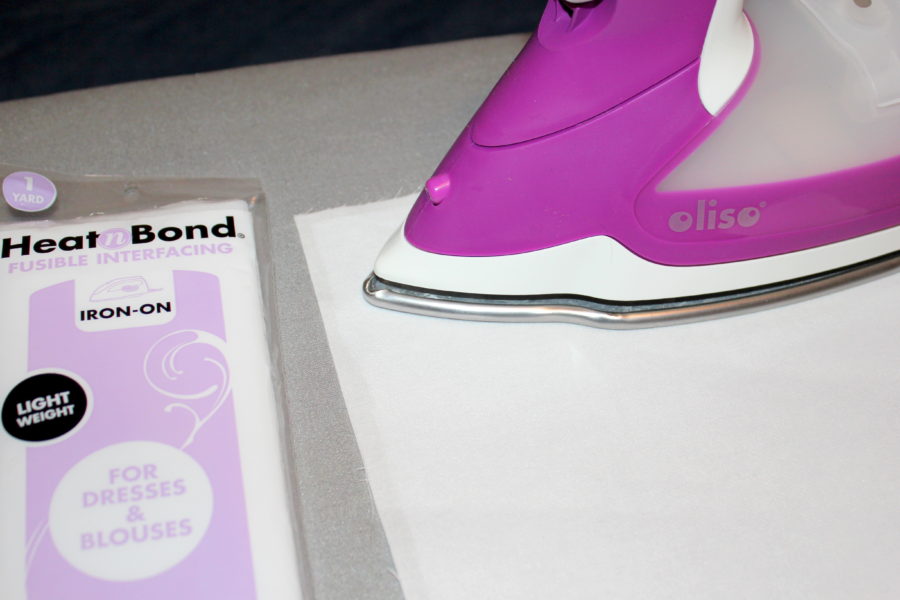
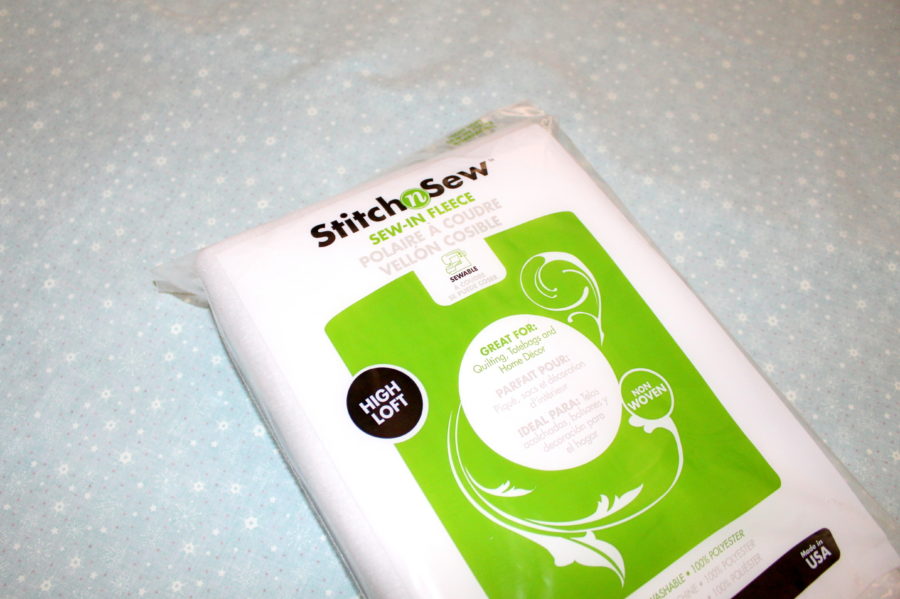
 [tooltip text="TooltipText"]*Tip: Ironing Heat n Bond Fusible Interfacing – Light Weight to the back of fabric helps stabilize the fabric when sewing on applique pieces, keeps threads from showing through, and helps maintain fabric size. This works really well behind lettering.[/tooltip]
 Step 4: Create each of the snowball blocks by sewing a 2½” x 2½” square to each corner of a 5½” x 5½” white square. Draw a line or fold to create a diagonal line on each 2½” x 2½” square. Sew on the lines. Clip seam a quarter inch from each sewn line.
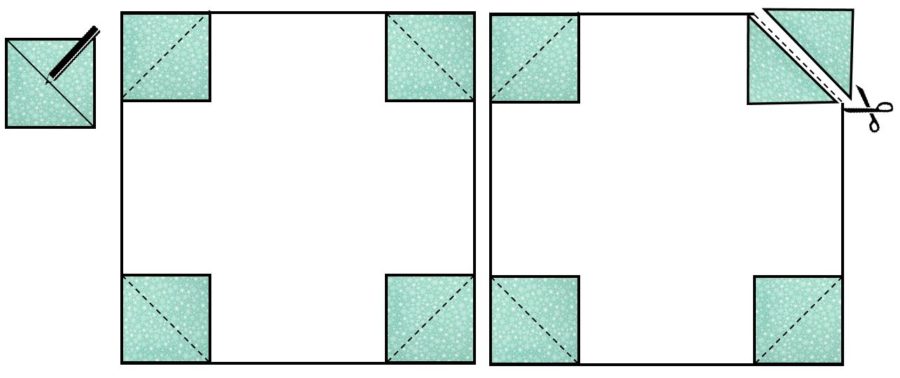 Press corners open.
 Step 5: Left and right snowball rows - Sew two rows with three snowballs and two 5½” x 5½” squares.
Step 6: Top and bottom snowball rows - Sew two rows with three snowballs and four 5½” x 5½” squares.
Step 7: Sew Step 5’s rows to left and right of center block. Press towards center.
Step 8: Sew Step 6’s rows to top and bottom of center block; match seams. Press towards center.
Step 5: Left and right snowball rows - Sew two rows with three snowballs and two 5½” x 5½” squares.
Step 6: Top and bottom snowball rows - Sew two rows with three snowballs and four 5½” x 5½” squares.
Step 7: Sew Step 5’s rows to left and right of center block. Press towards center.
Step 8: Sew Step 6’s rows to top and bottom of center block; match seams. Press towards center.

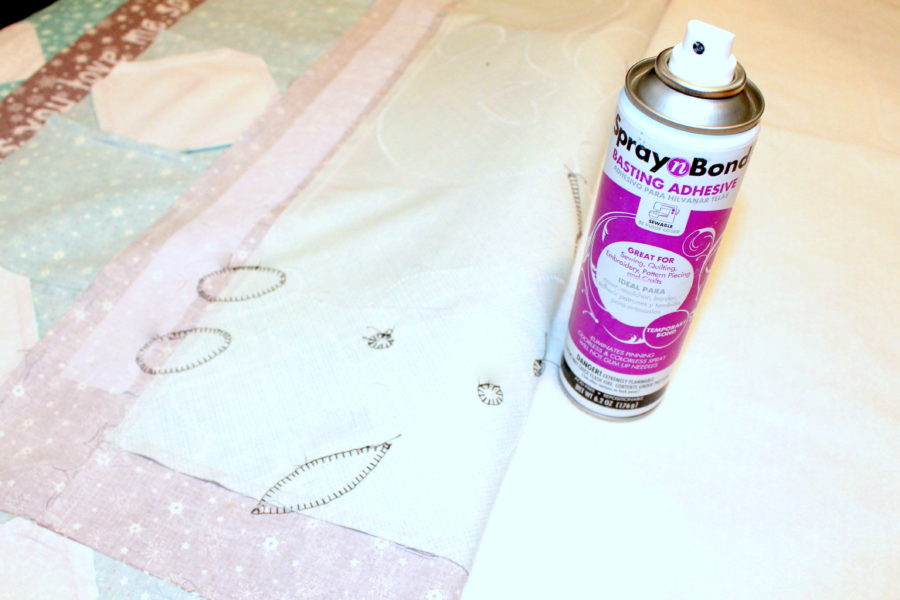
 Spray batting with Therm O Web Spray n Bond® Basting Adhesive. Lay quilt top, wrong side down, on sprayed batting. Smooth to remove wrinkles and creases. *Tip: Working in small amounts, about 12” x WOF, helps to keep quilt smooth.
 Allow to dry completely and then quilt as desired. Add binding using your favorite method.
That's it! Soooo...is it snowing, yet?
Allow to dry completely and then quilt as desired. Add binding using your favorite method.
That's it! Soooo...is it snowing, yet?
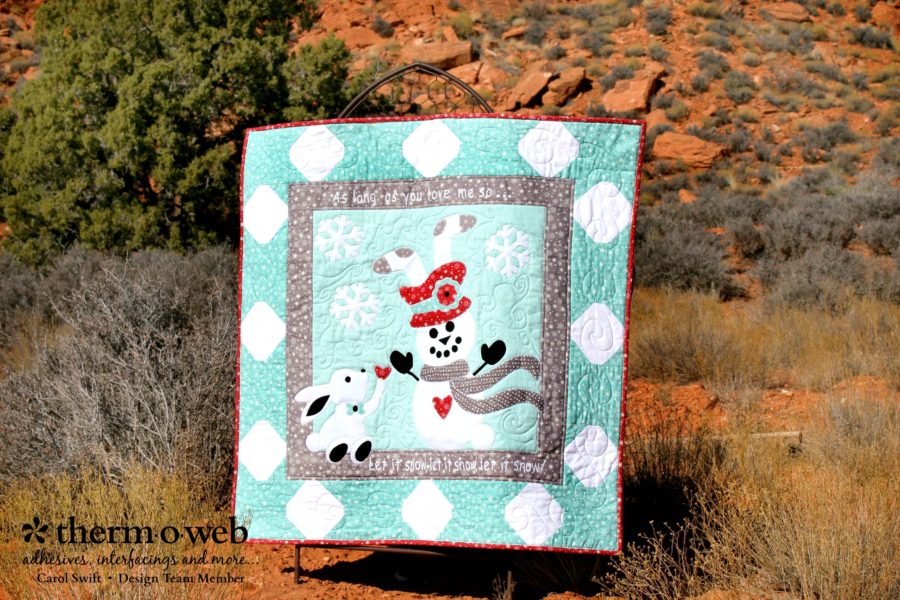 You can find Let It Snow’s PDF pattern and applique templates at Just Carol’s Etsy store HERE.
Written by Carol Swift