No Products in the Cart
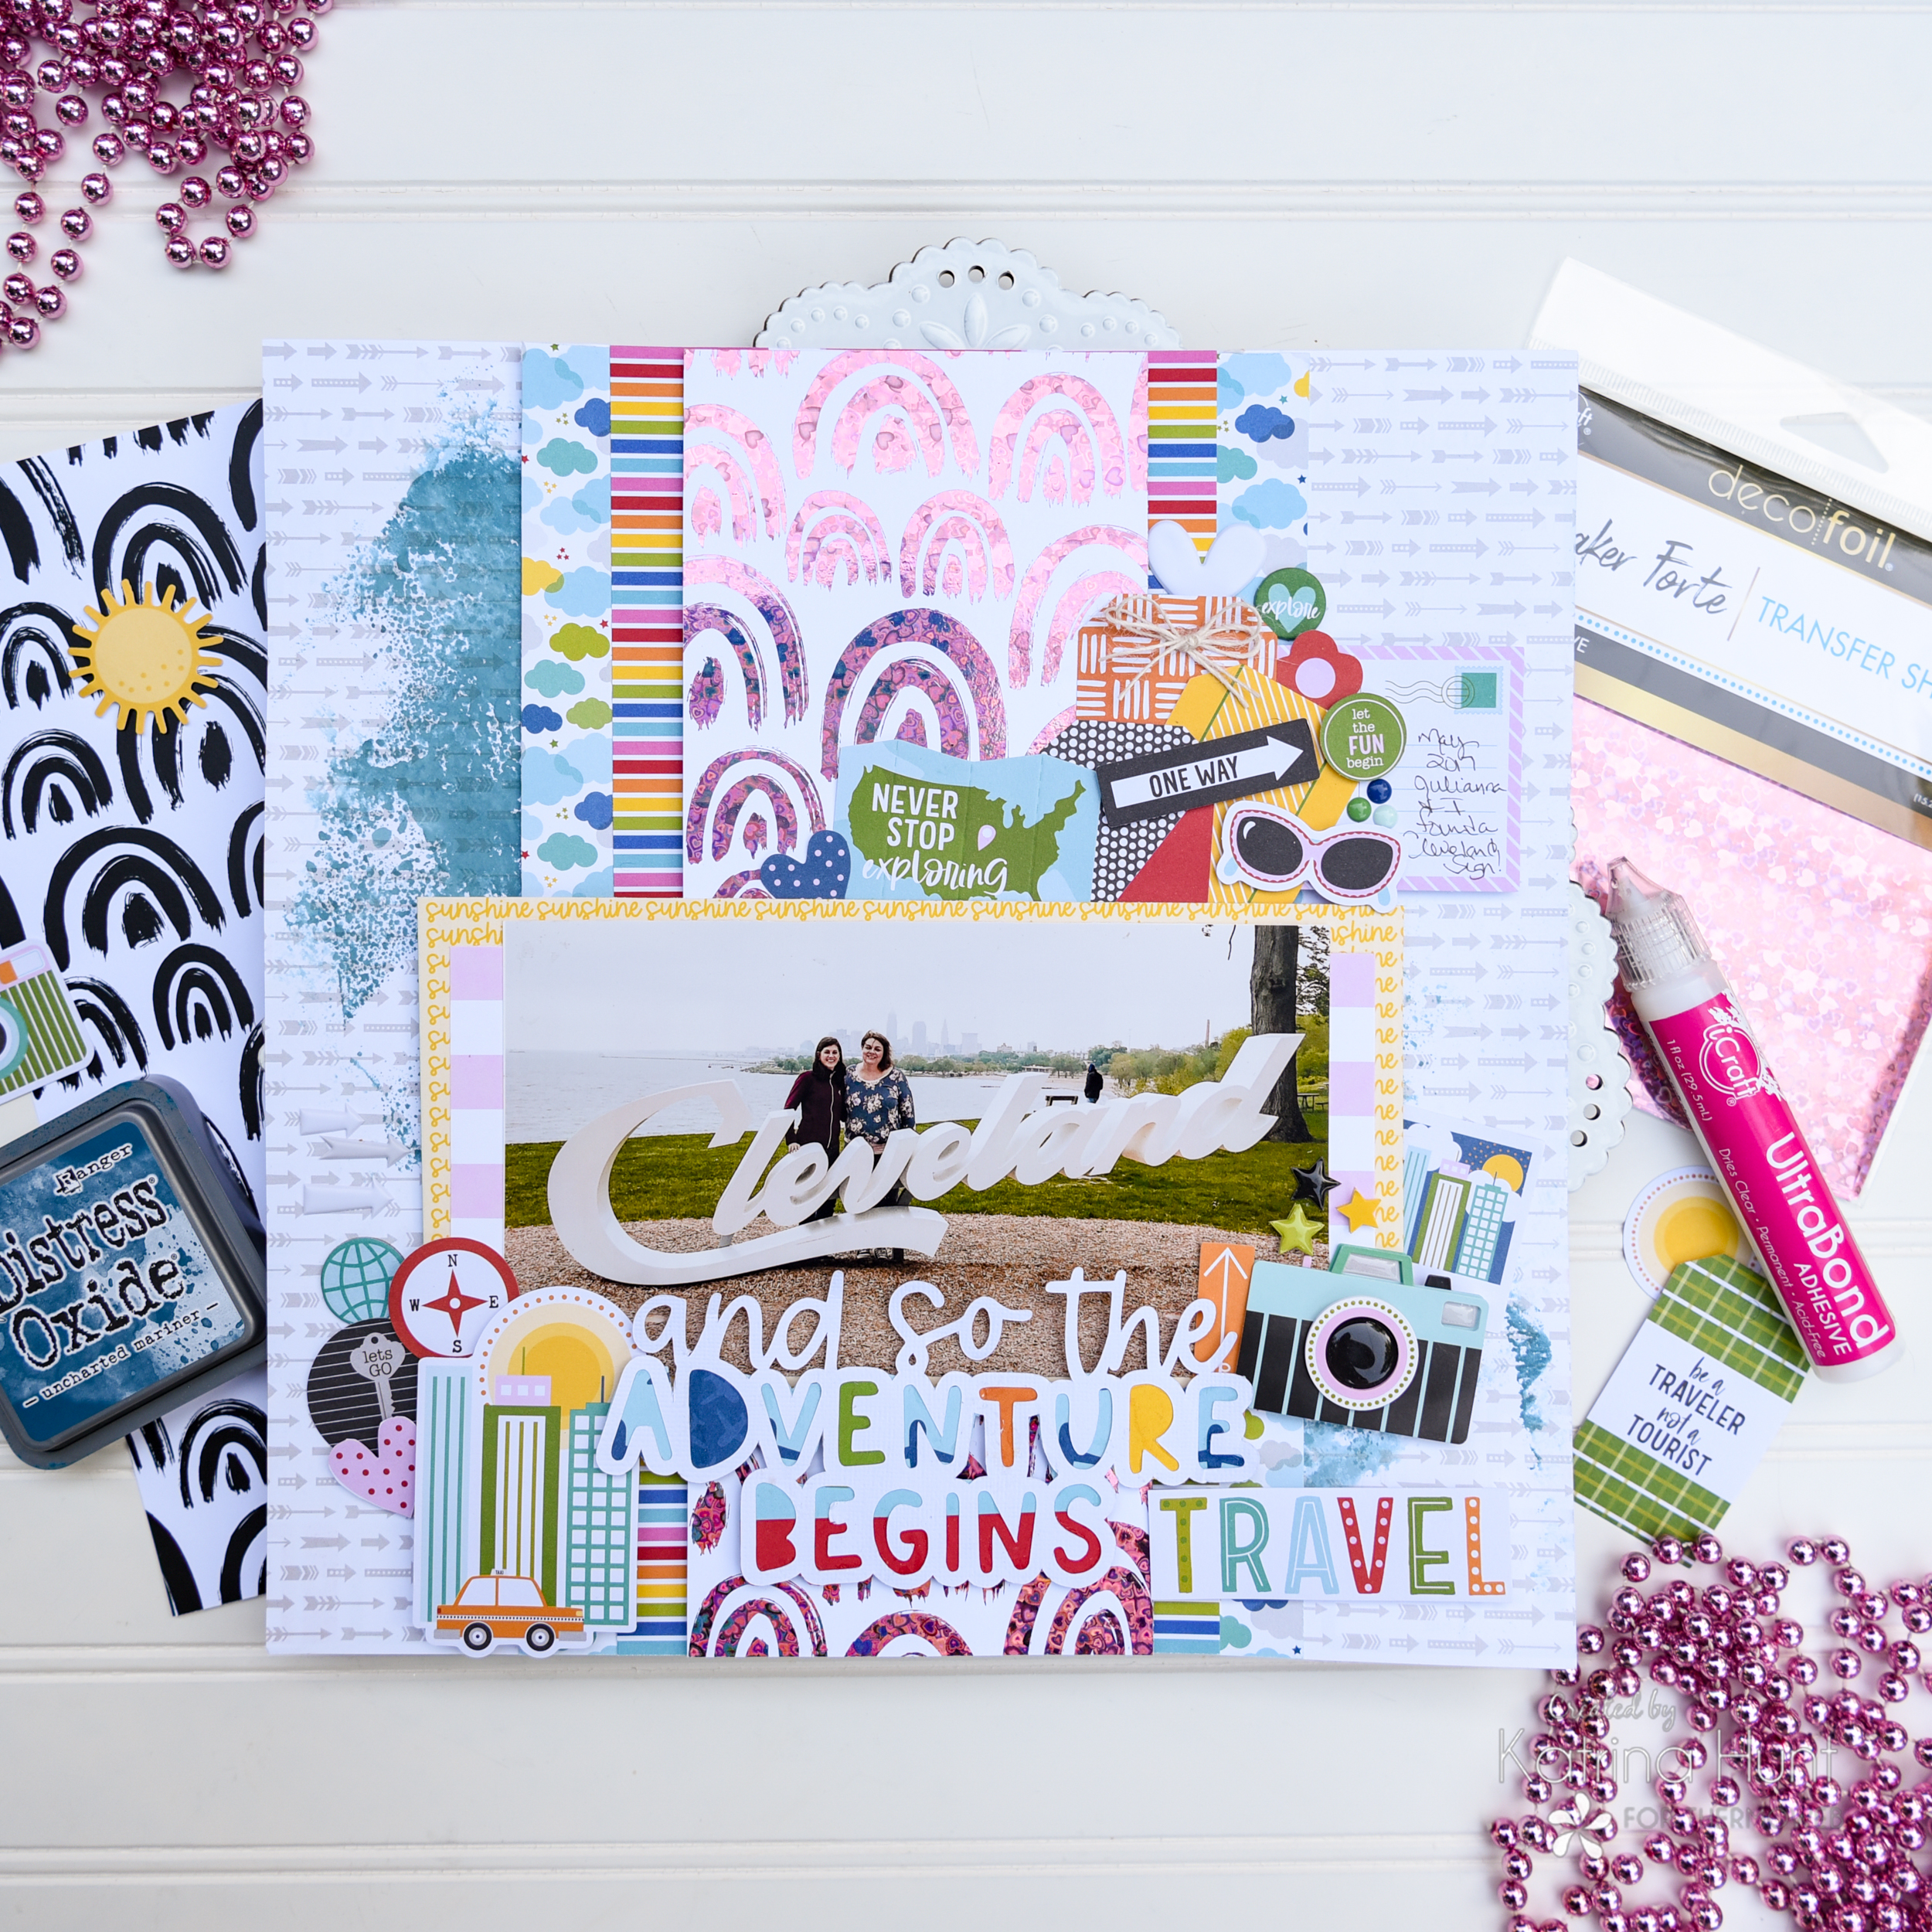
 Hi there!! It's Katrina from Paper, Scissors, Glue and Hybrid Too on the blog today. Do you ever have vacation pictures that are overcast and cloudy? Well, I am here to show you that you can brighten those up with some rainbows and pretty foil! And while you are at it create a fun layout!
 Therm O Web Supplies Used
Deco Foil/Maker Forte Transfer Sheets-Hearts of Love
Deco Foil/Brutus Monroe Toner Sheet Mixables-Really Radiant
Memory Runner XL
Memory Runner XL Refill
iCraft Easy Tear Tape 1/2 inch
3D Foam Squares – Combo Pack
3D FOAM SQUARES BOX
NEW 3D FOAM TAPE ROLL 1/16
NEW 3D FOAM TAPE ROLL 1/8
Deco Foil Craft Carrier Sheets-NEW
Ultra Bond Liquid Adhesive
Pixie Tape
NEW Pixie Dots
Other Supplies Used
Bella Blvd-Time To Travel Collection
White Cardstock
Bella Blvd Cut File-And So The Adventure Begins
Distress Ink Oxide-Uncharted Mariner
Therm O Web Supplies Used
Deco Foil/Maker Forte Transfer Sheets-Hearts of Love
Deco Foil/Brutus Monroe Toner Sheet Mixables-Really Radiant
Memory Runner XL
Memory Runner XL Refill
iCraft Easy Tear Tape 1/2 inch
3D Foam Squares – Combo Pack
3D FOAM SQUARES BOX
NEW 3D FOAM TAPE ROLL 1/16
NEW 3D FOAM TAPE ROLL 1/8
Deco Foil Craft Carrier Sheets-NEW
Ultra Bond Liquid Adhesive
Pixie Tape
NEW Pixie Dots
Other Supplies Used
Bella Blvd-Time To Travel Collection
White Cardstock
Bella Blvd Cut File-And So The Adventure Begins
Distress Ink Oxide-Uncharted Mariner
 This layout came together so quickly, even with all the bits and bobs! I wanted to add some pink into the mix because my shirt has pink in it and so do some of the embellishments. Brutus Monroe Toner Sheet and Maker Forte Foil to the rescue!!
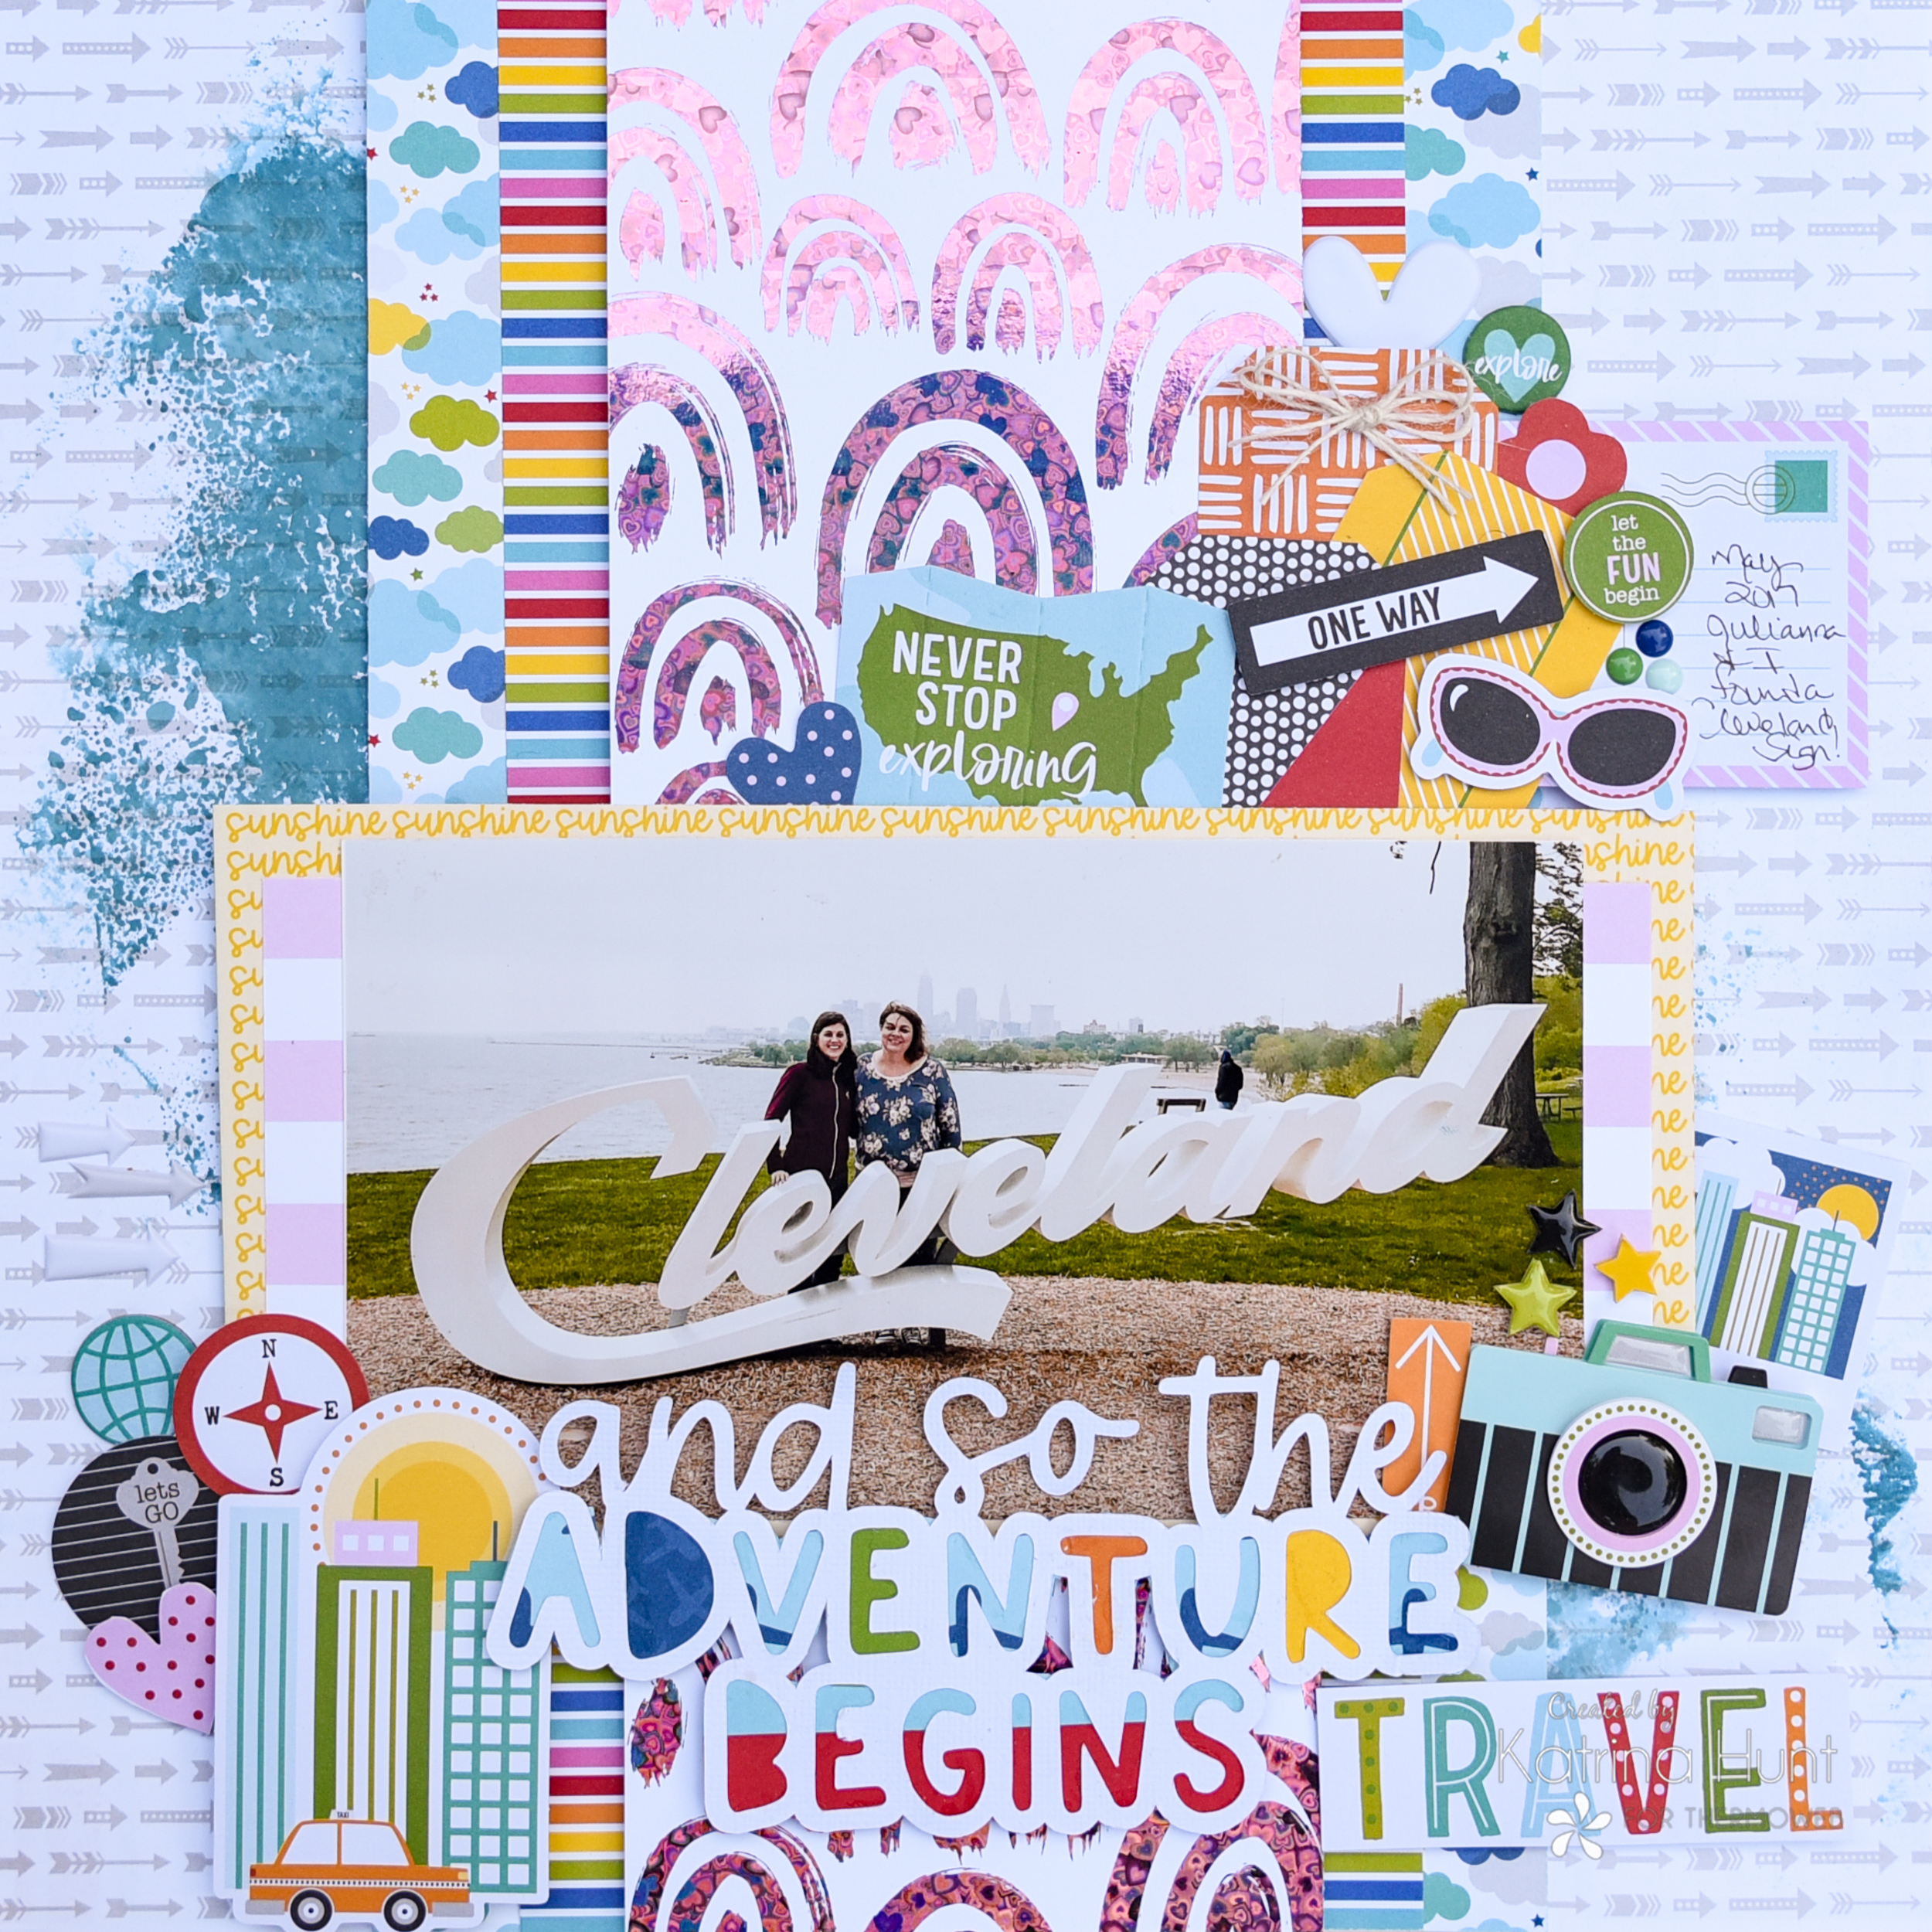
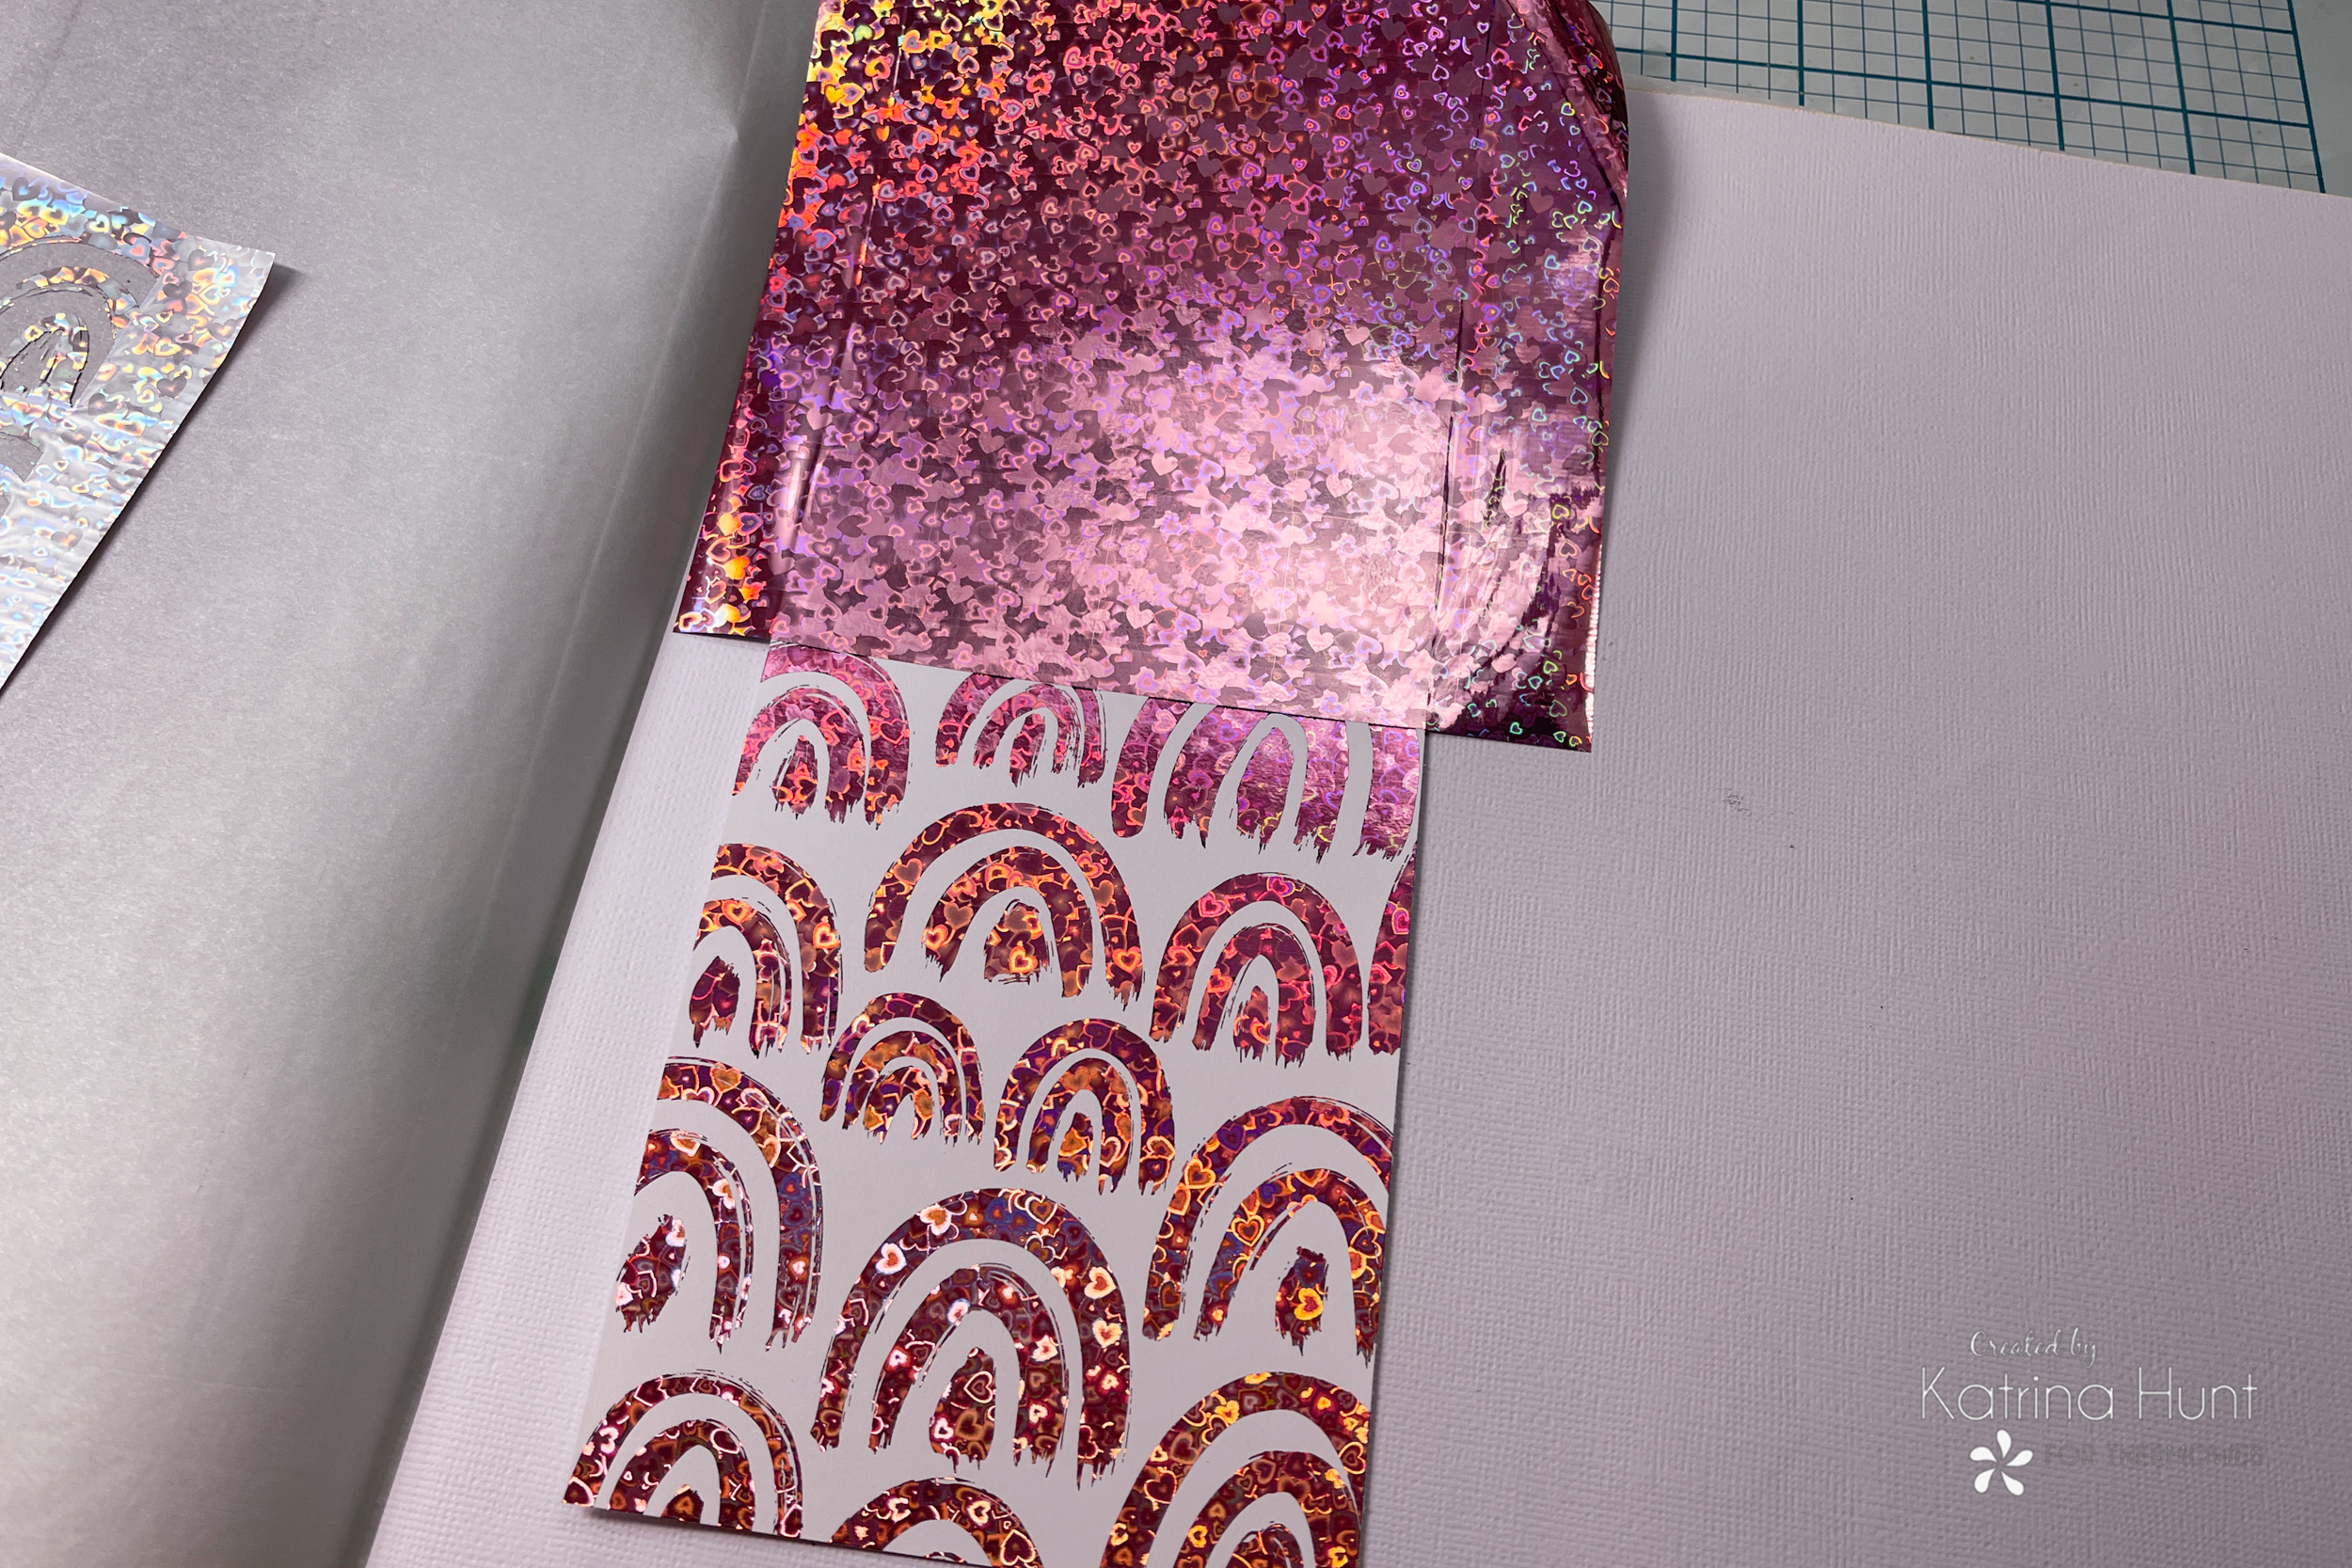
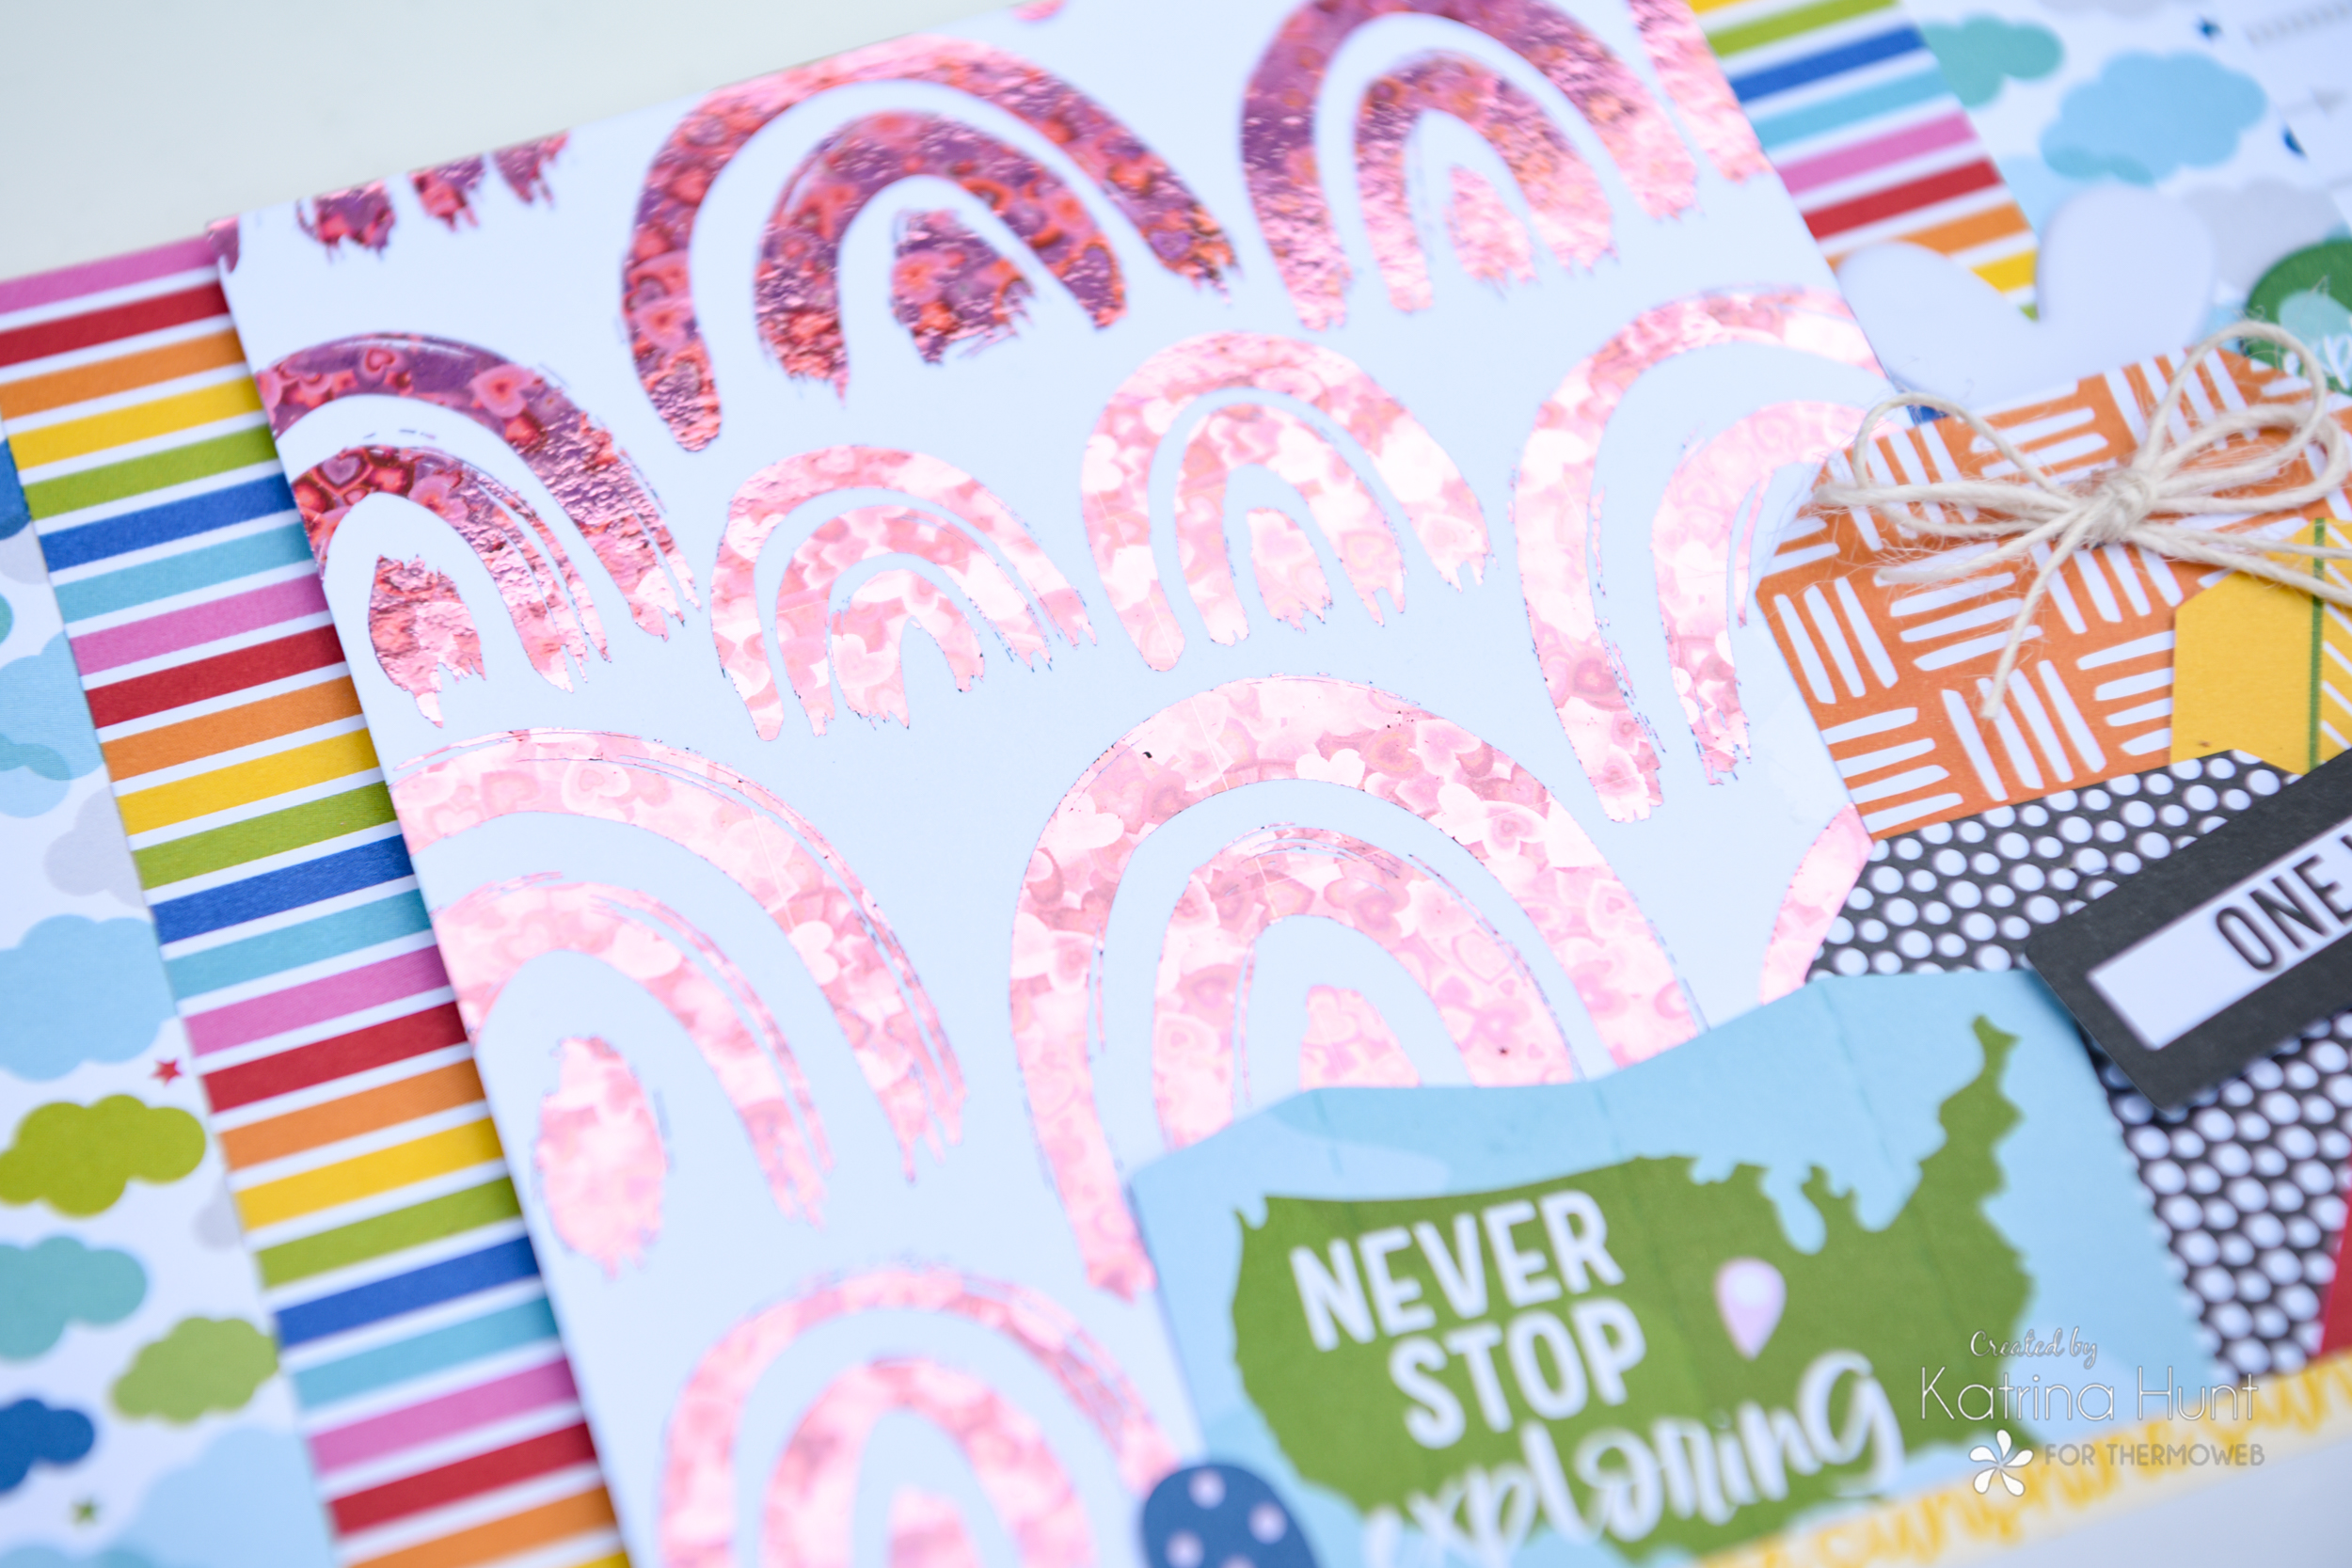
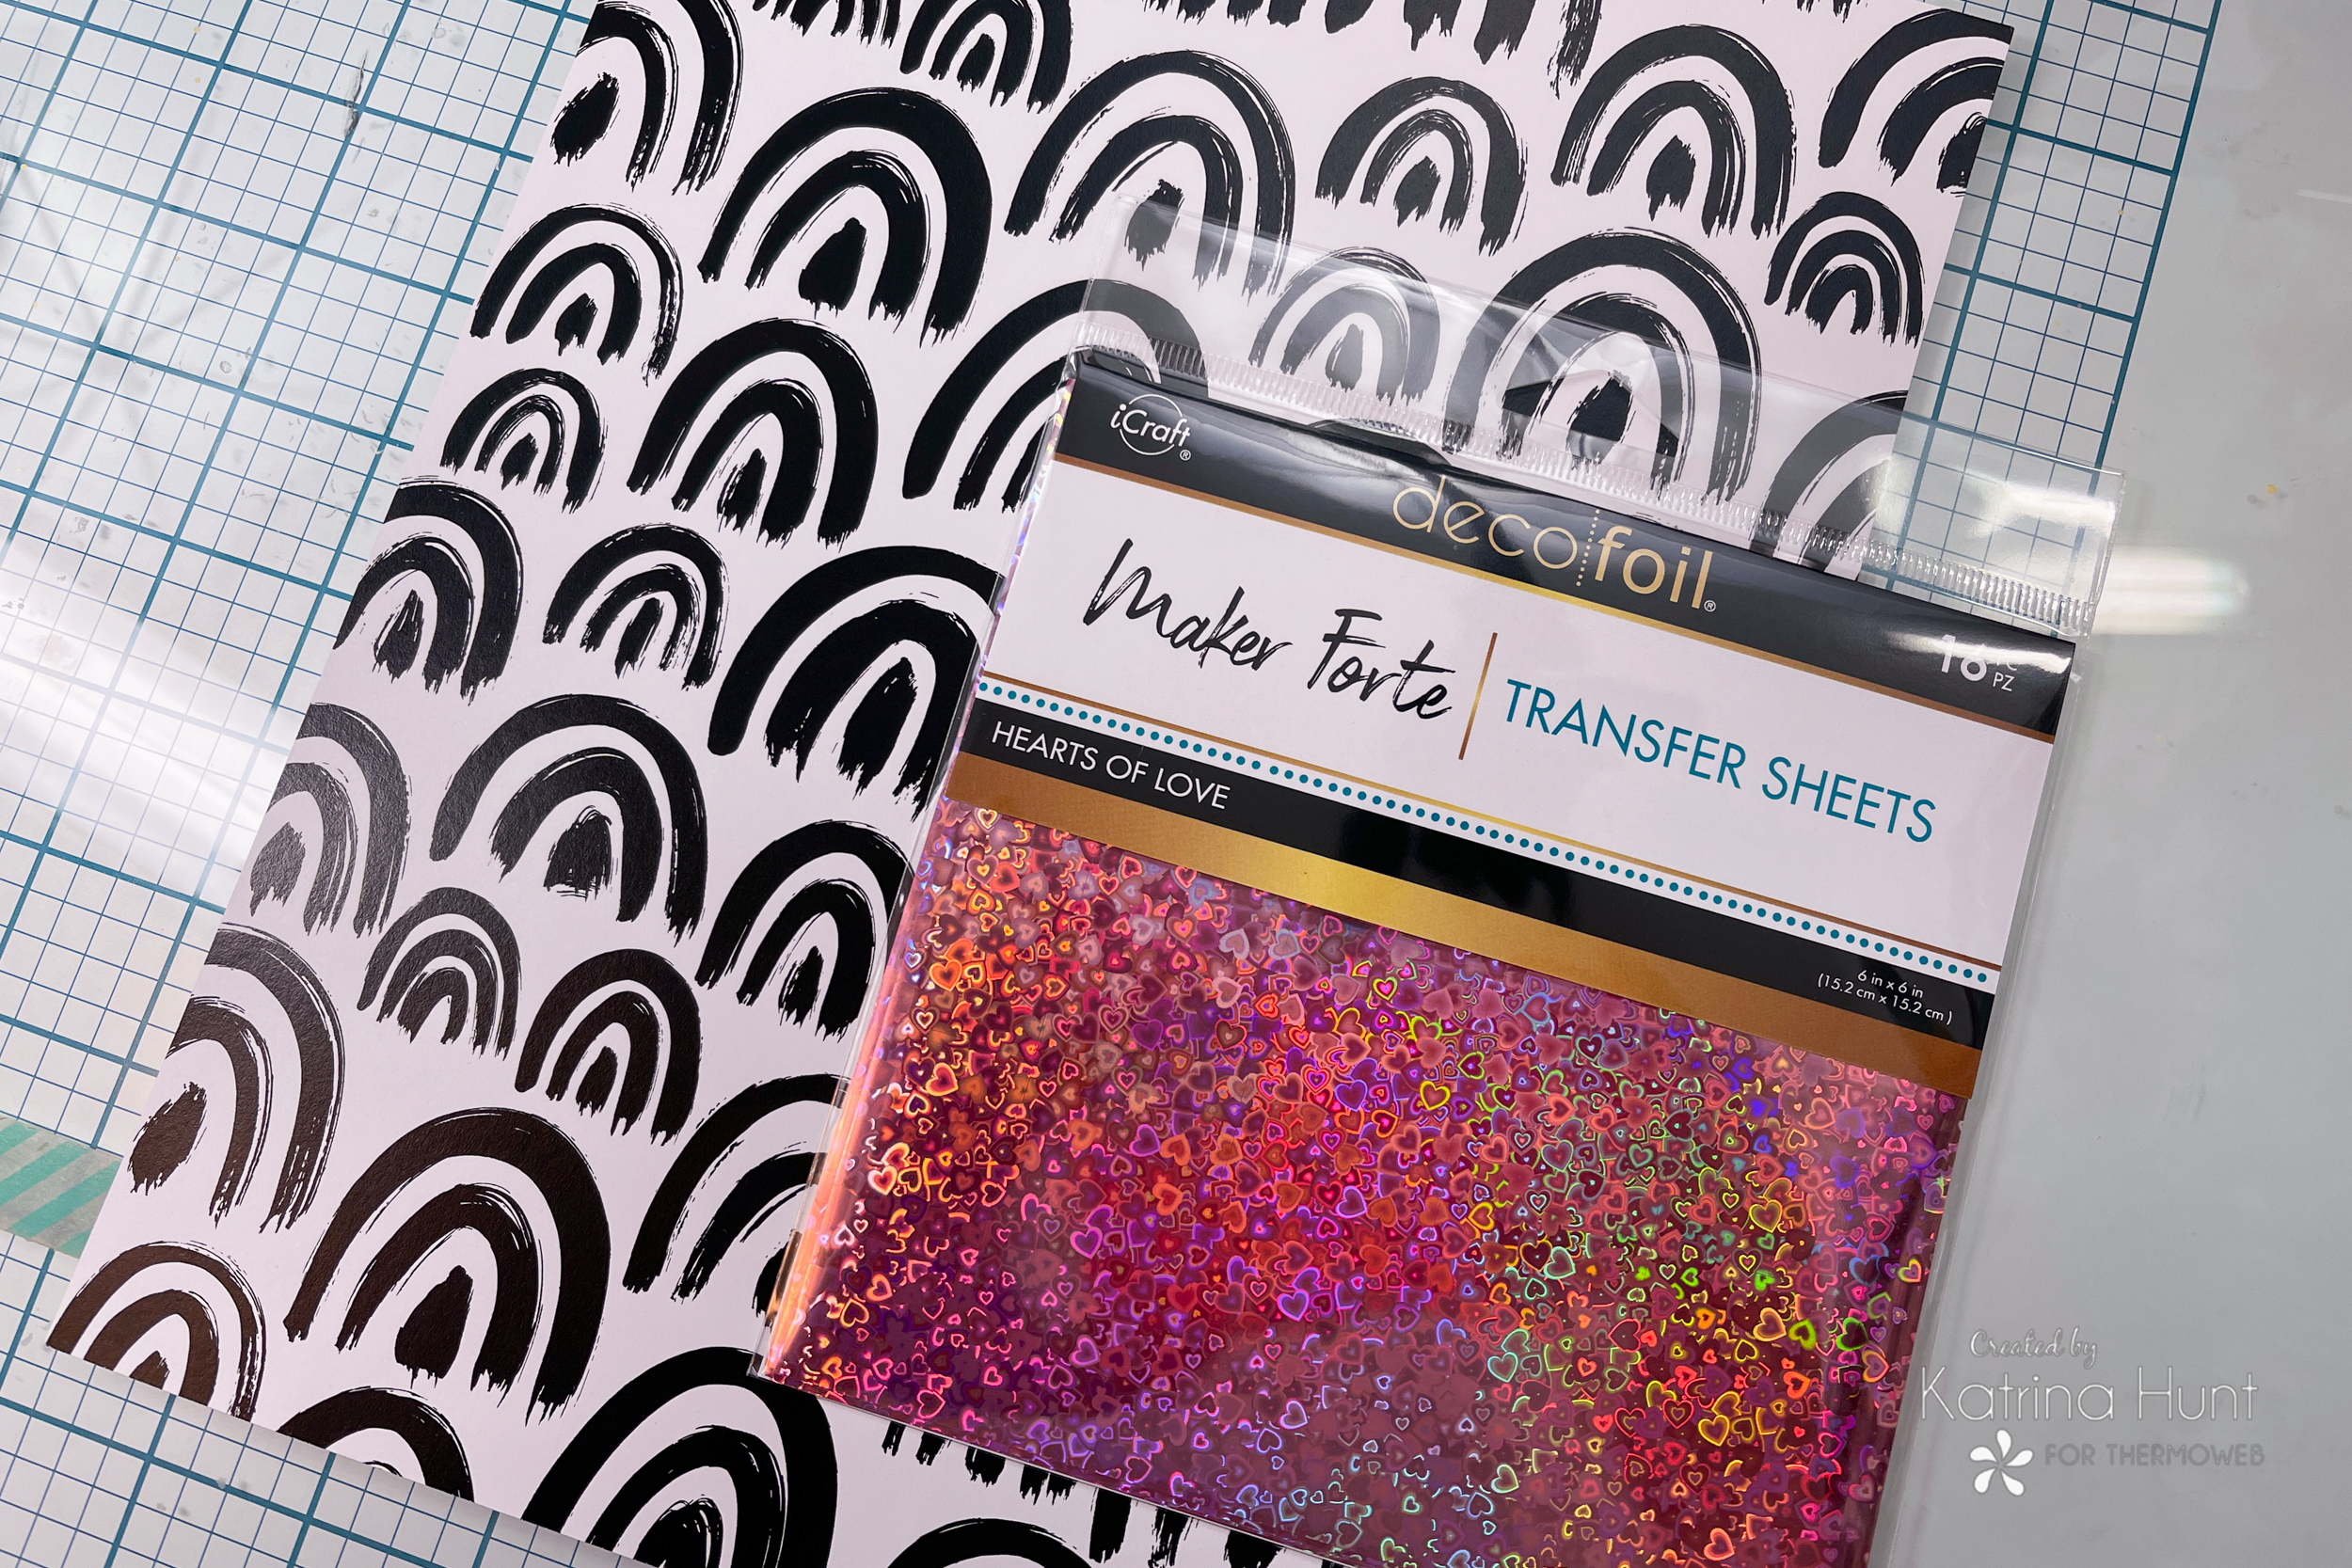 The Brutus Monroe Really Radiant Mixables come in an 8.5 x 11 size and that's what I wanted to work with. I didn't want to overwhelm my entire layout with rainbows, but I wanted to give it a happy feel by putting some rainbows down the middle. And well, pink heart foil!
I cut the toner sheet in half lengthwise and then foiled using two sheets of the Maker Forte foil. I slightly overlapped one sheet over the other. After covering the toner sheet with foil, I ran the Craft Carrier sheet sandwich thru my laminator, and then, voila! Pretty pink rainbows!
The Brutus Monroe Really Radiant Mixables come in an 8.5 x 11 size and that's what I wanted to work with. I didn't want to overwhelm my entire layout with rainbows, but I wanted to give it a happy feel by putting some rainbows down the middle. And well, pink heart foil!
I cut the toner sheet in half lengthwise and then foiled using two sheets of the Maker Forte foil. I slightly overlapped one sheet over the other. After covering the toner sheet with foil, I ran the Craft Carrier sheet sandwich thru my laminator, and then, voila! Pretty pink rainbows!
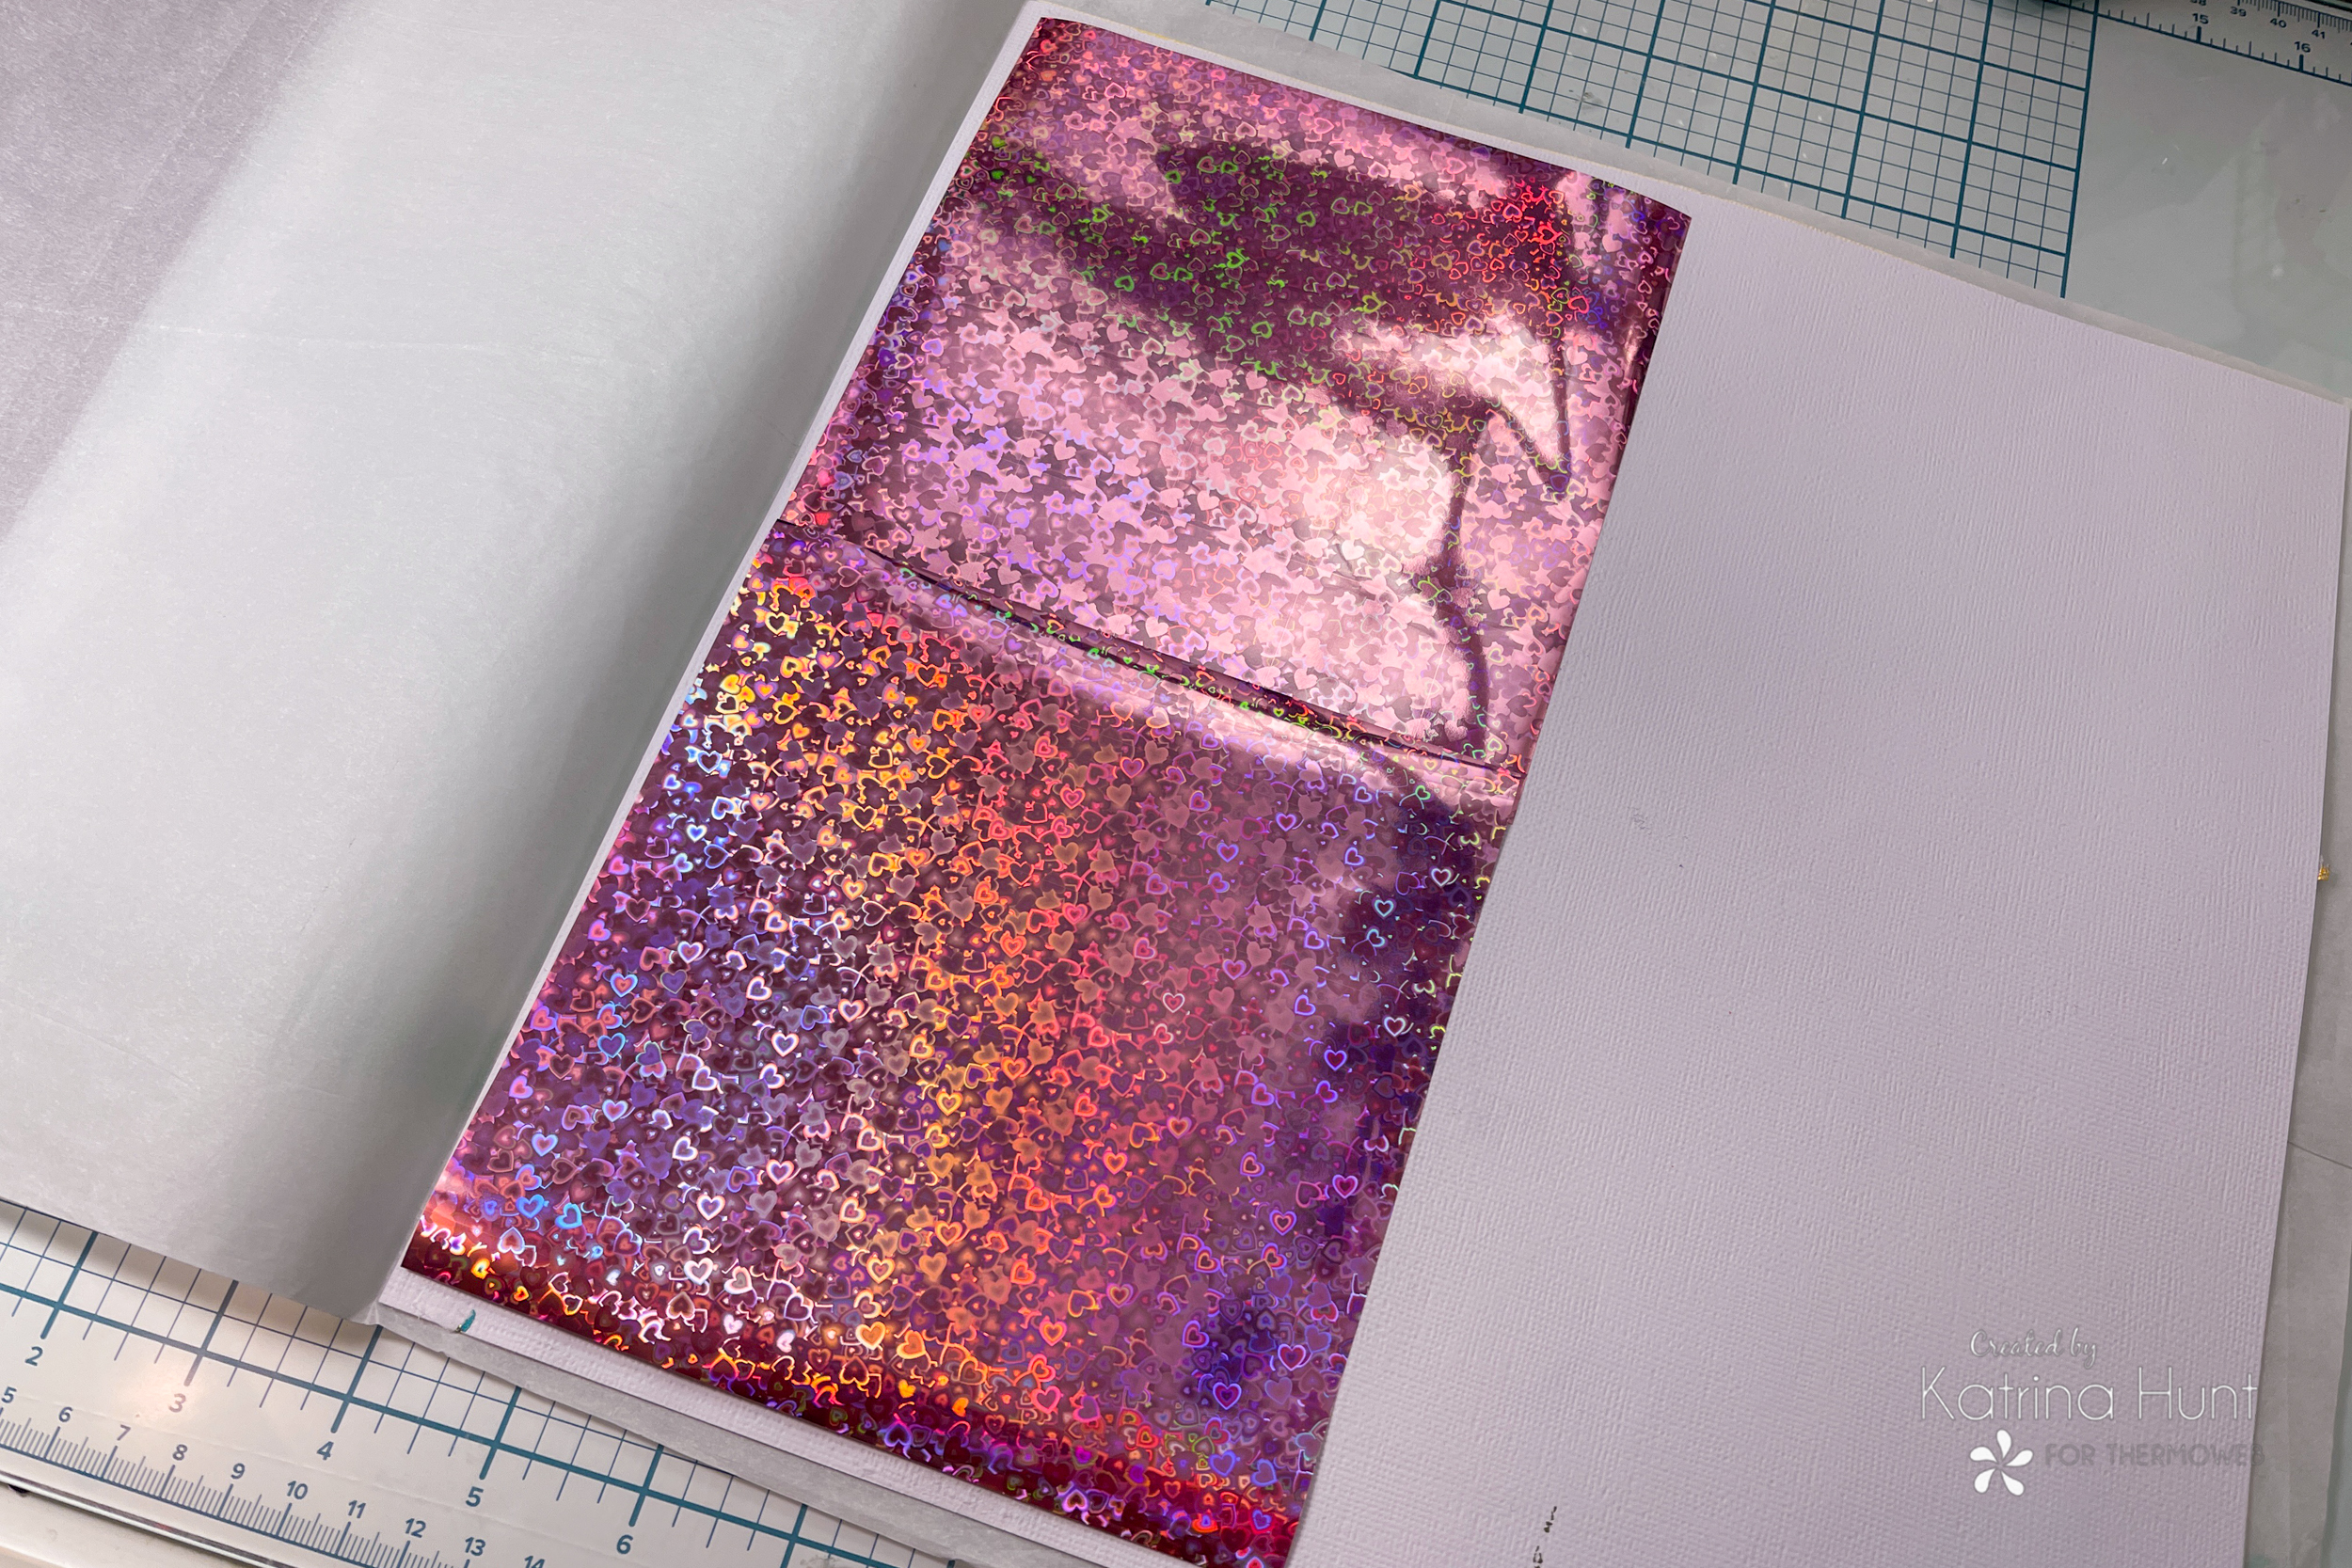 Ekk, so pretty right?!!! See the rainbow in the foil above? And there is a peachy quality to the foil also!
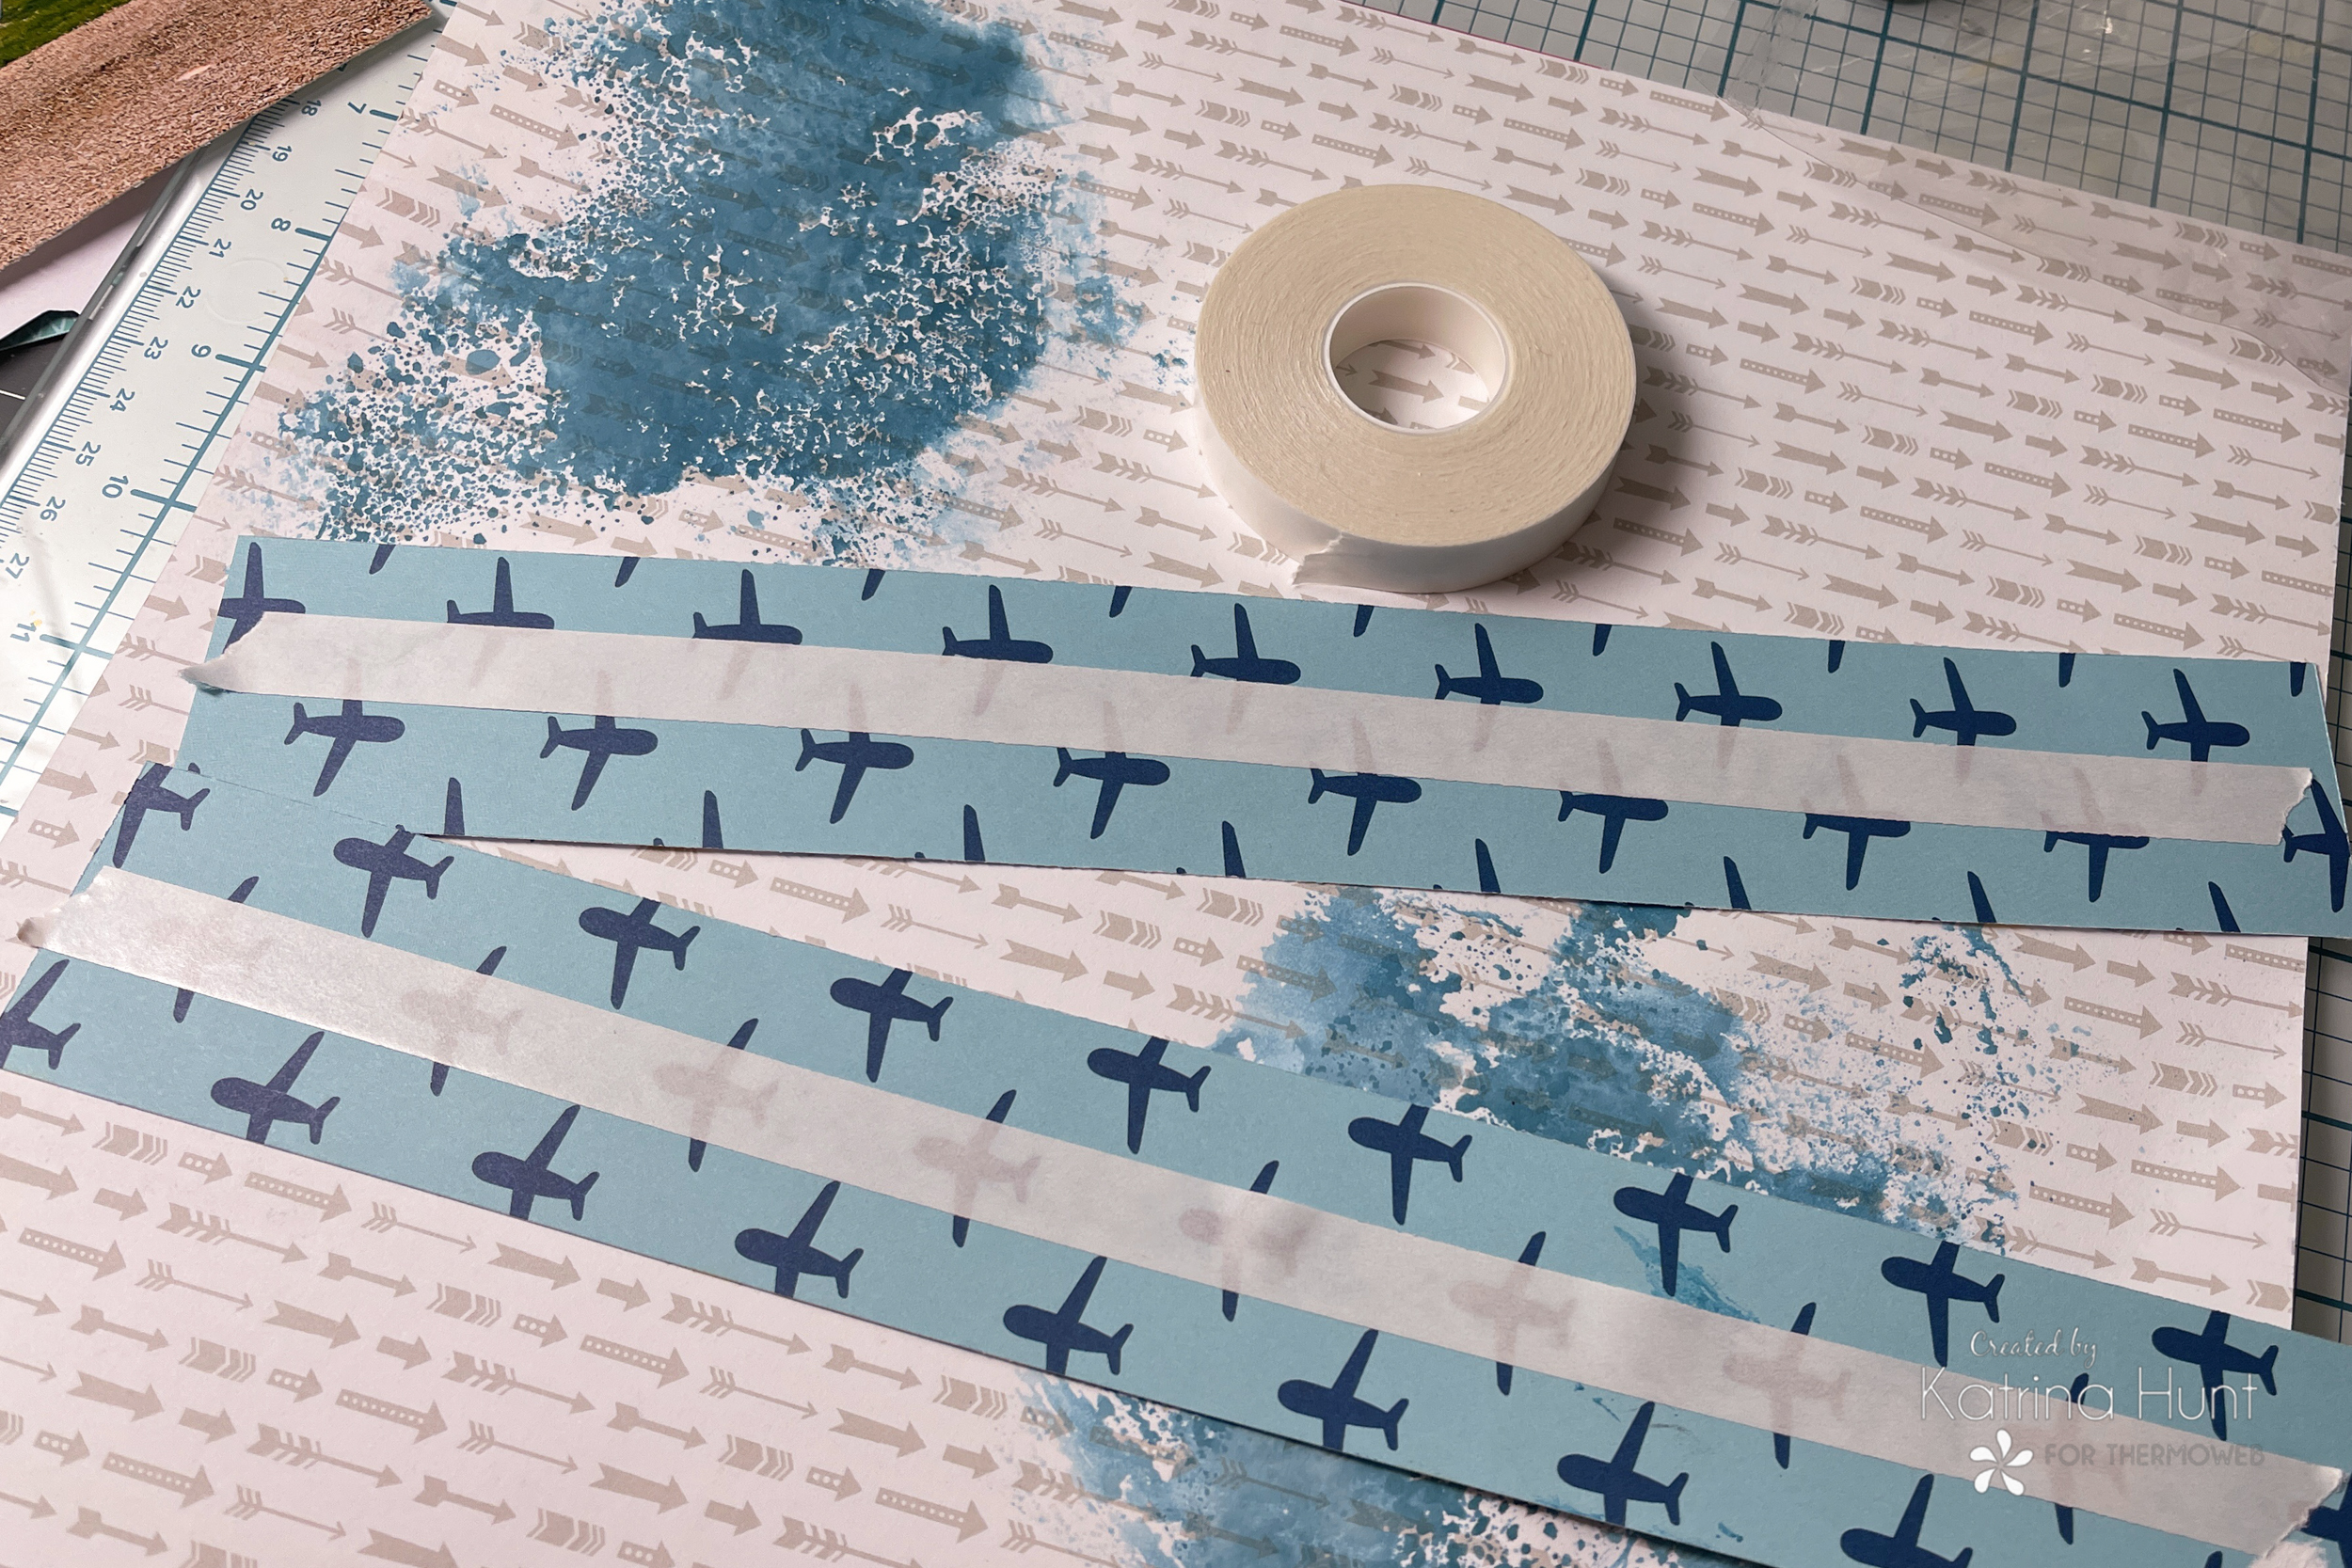
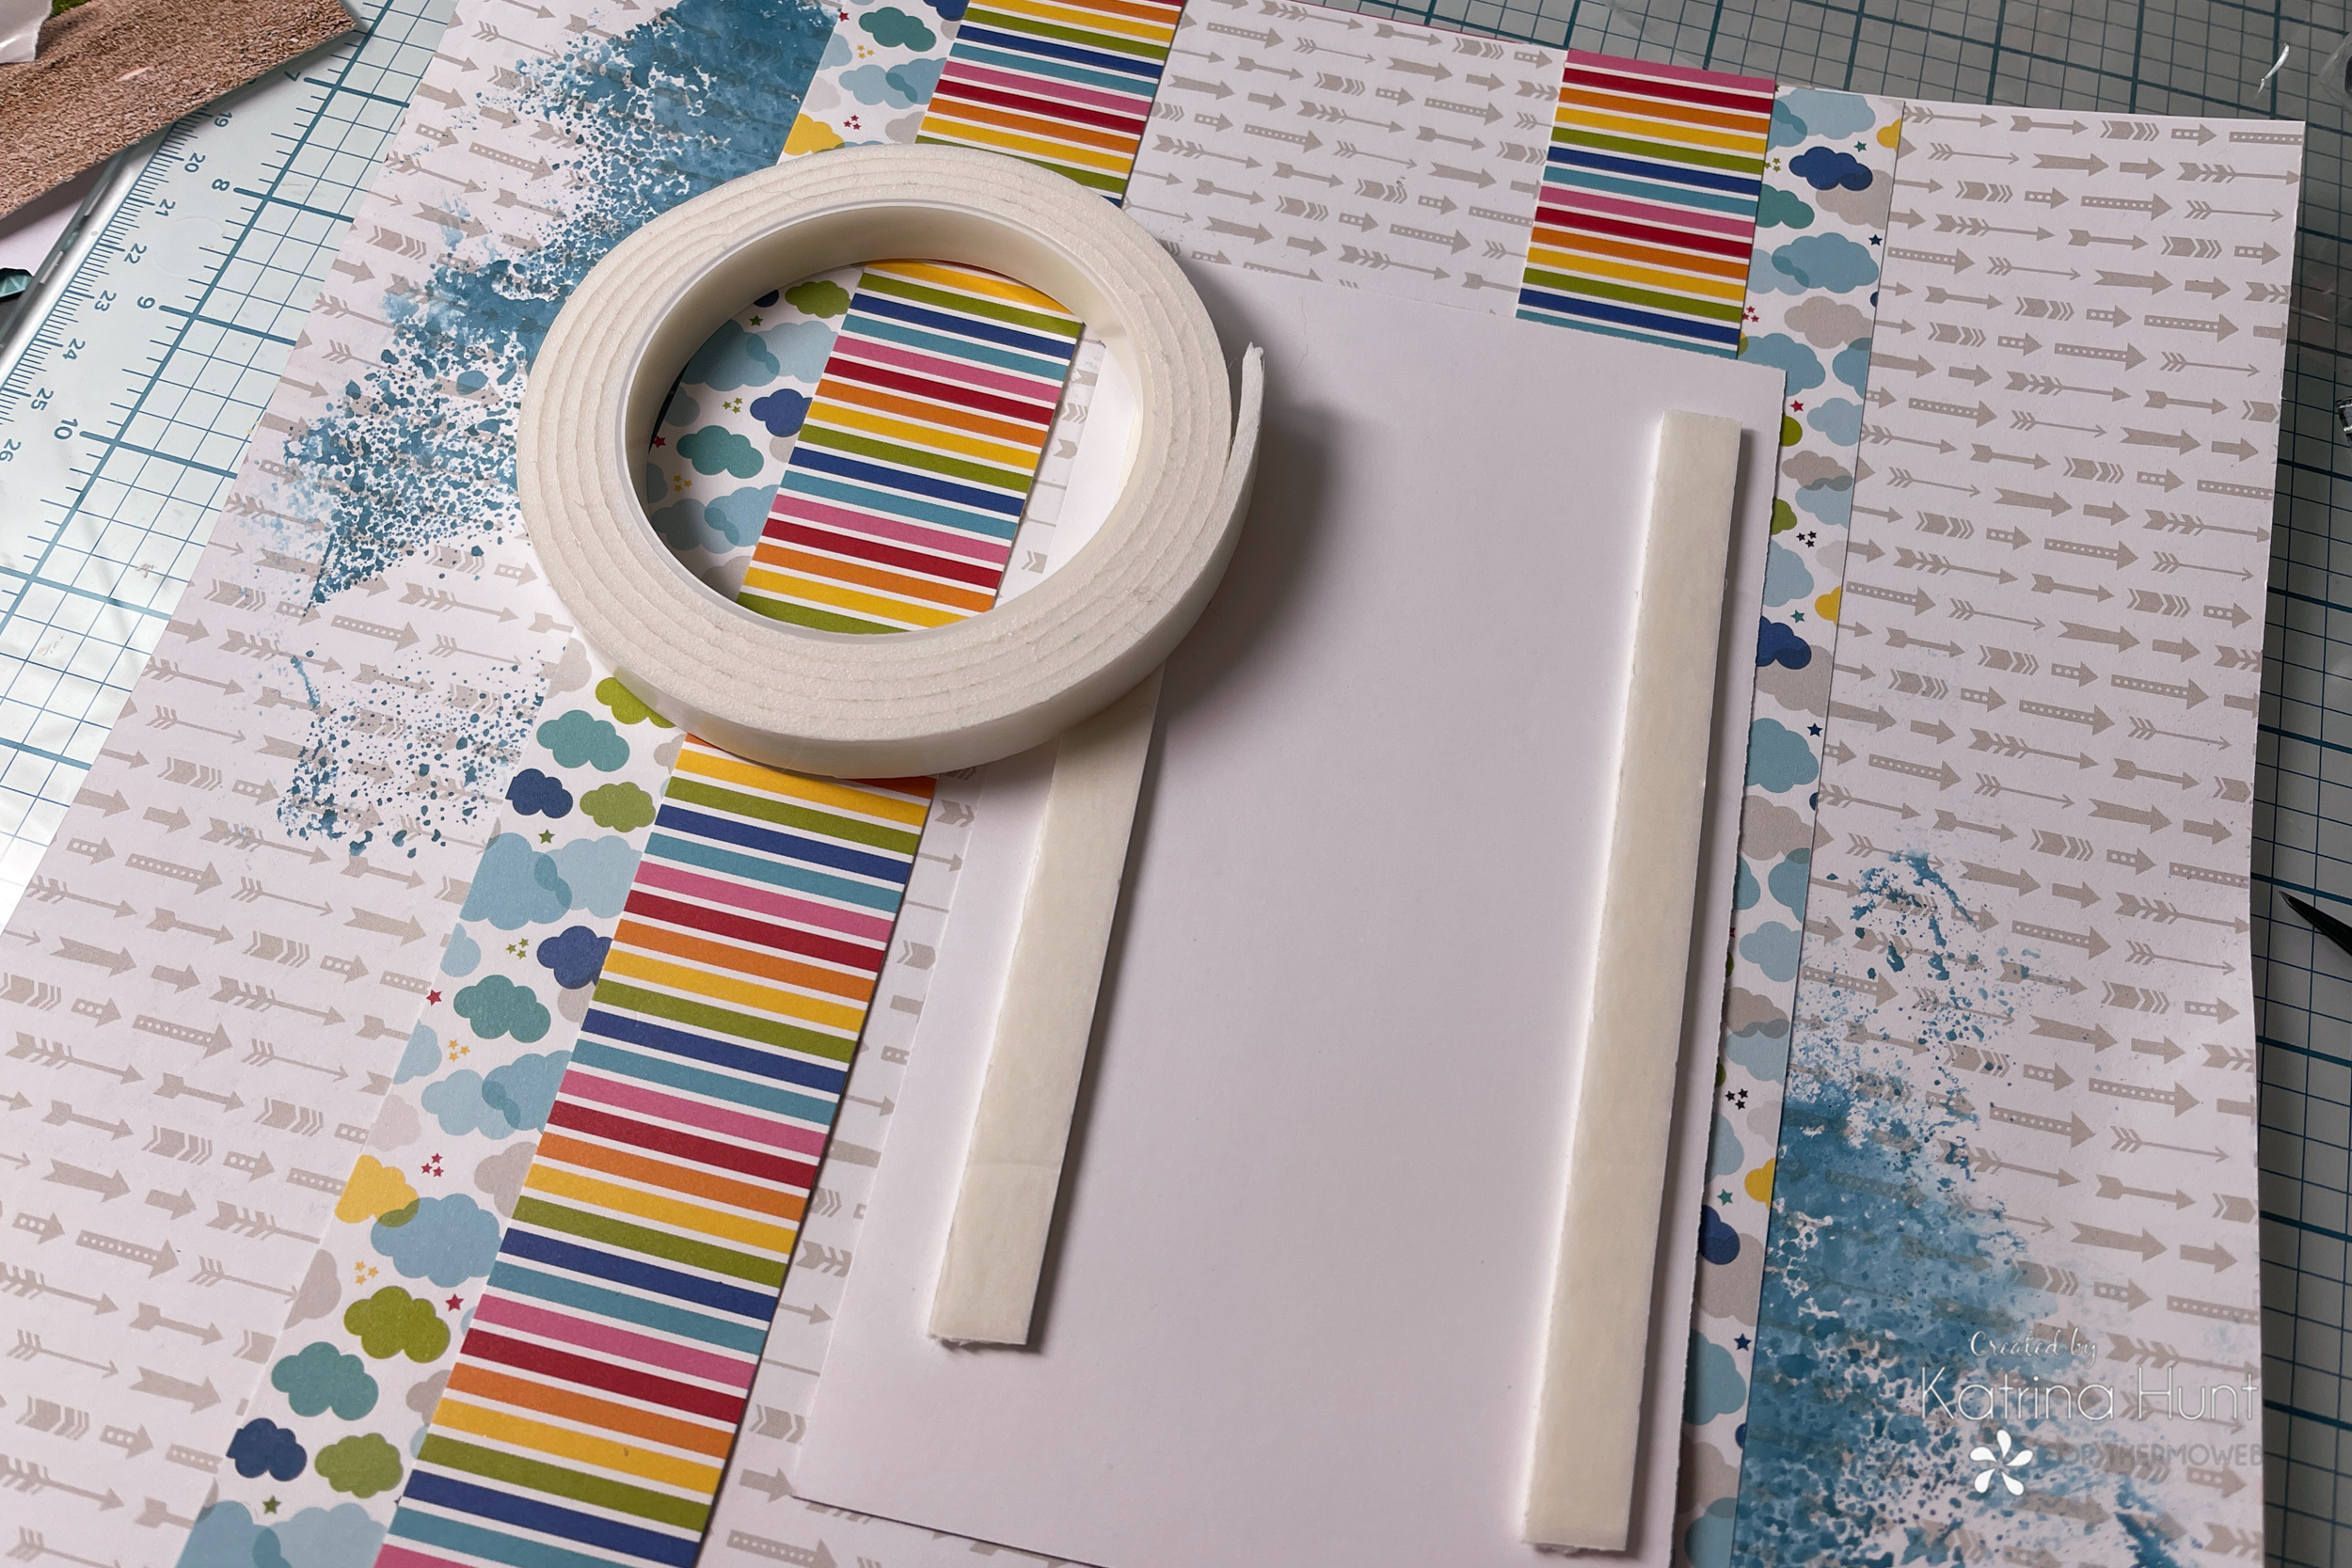
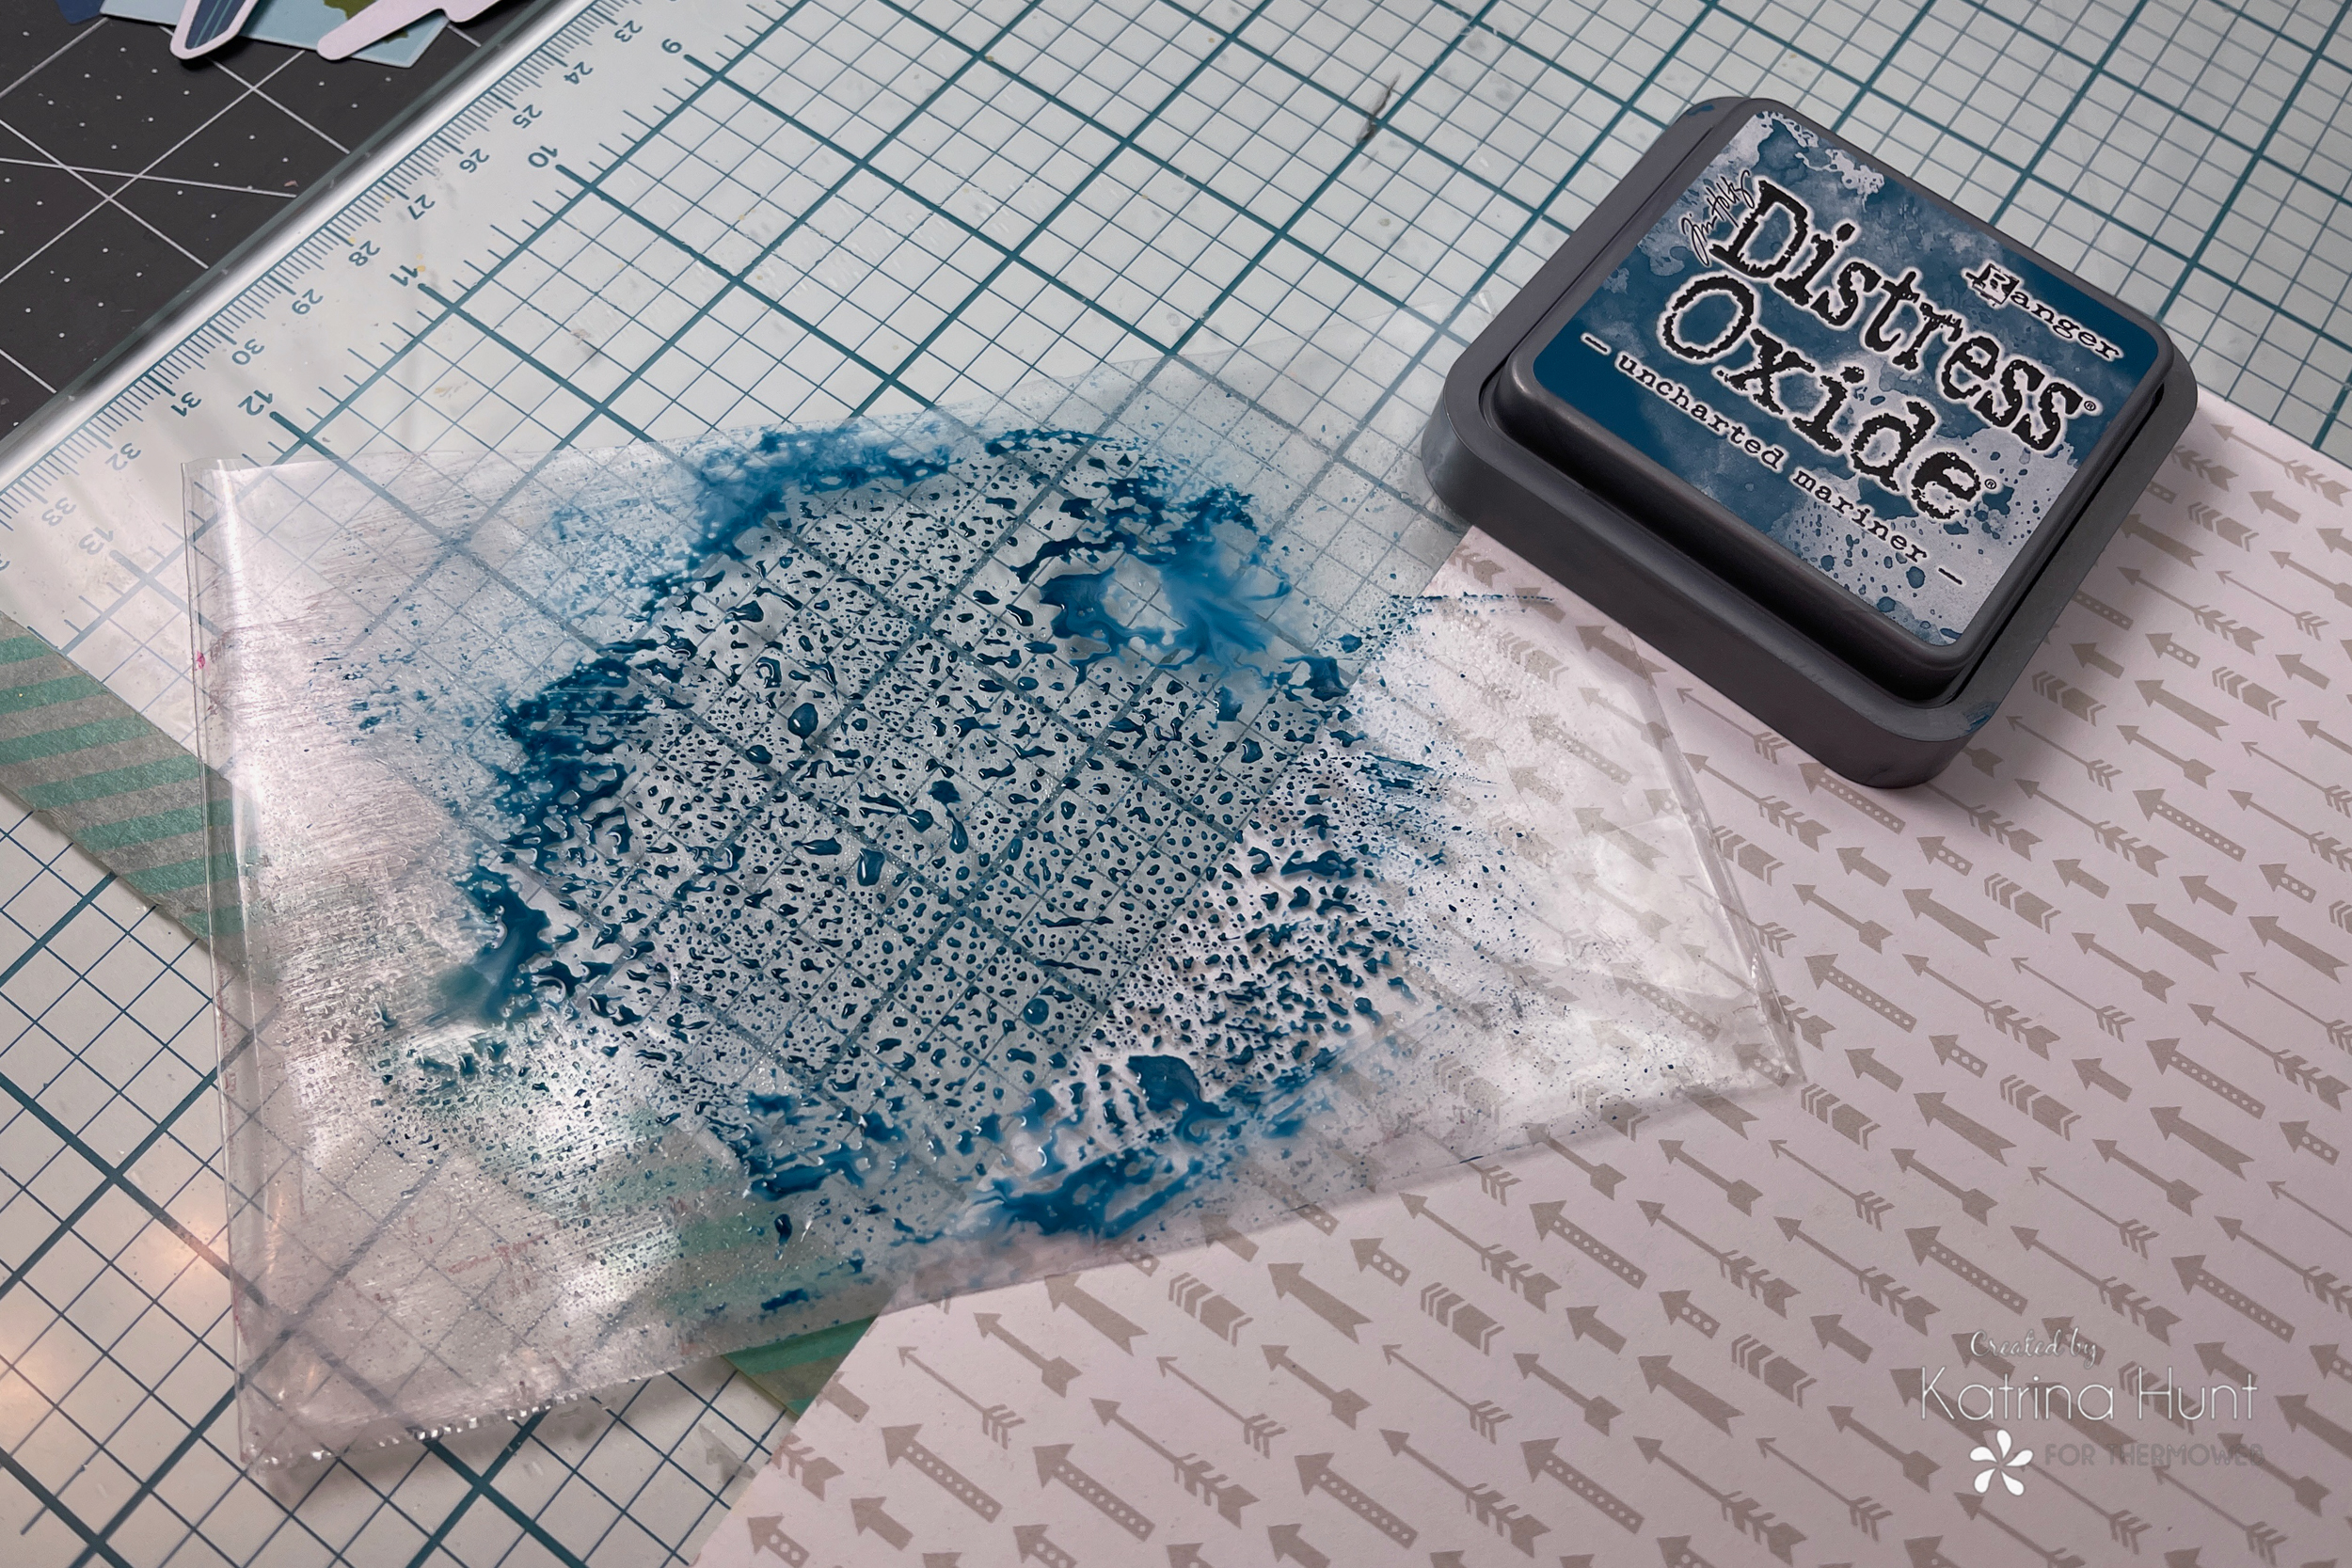 Can I say I love the Easy Tear Tape enough? I don't think so! This tape is my GO-TO for long strips and bigger pieces of paper. No scissors are required, just place them on your paper, tear them, remove the backing and then adhere them to your area! I used this tape for all the long strips on this layout. And you can see my uncovered messy areas below too!
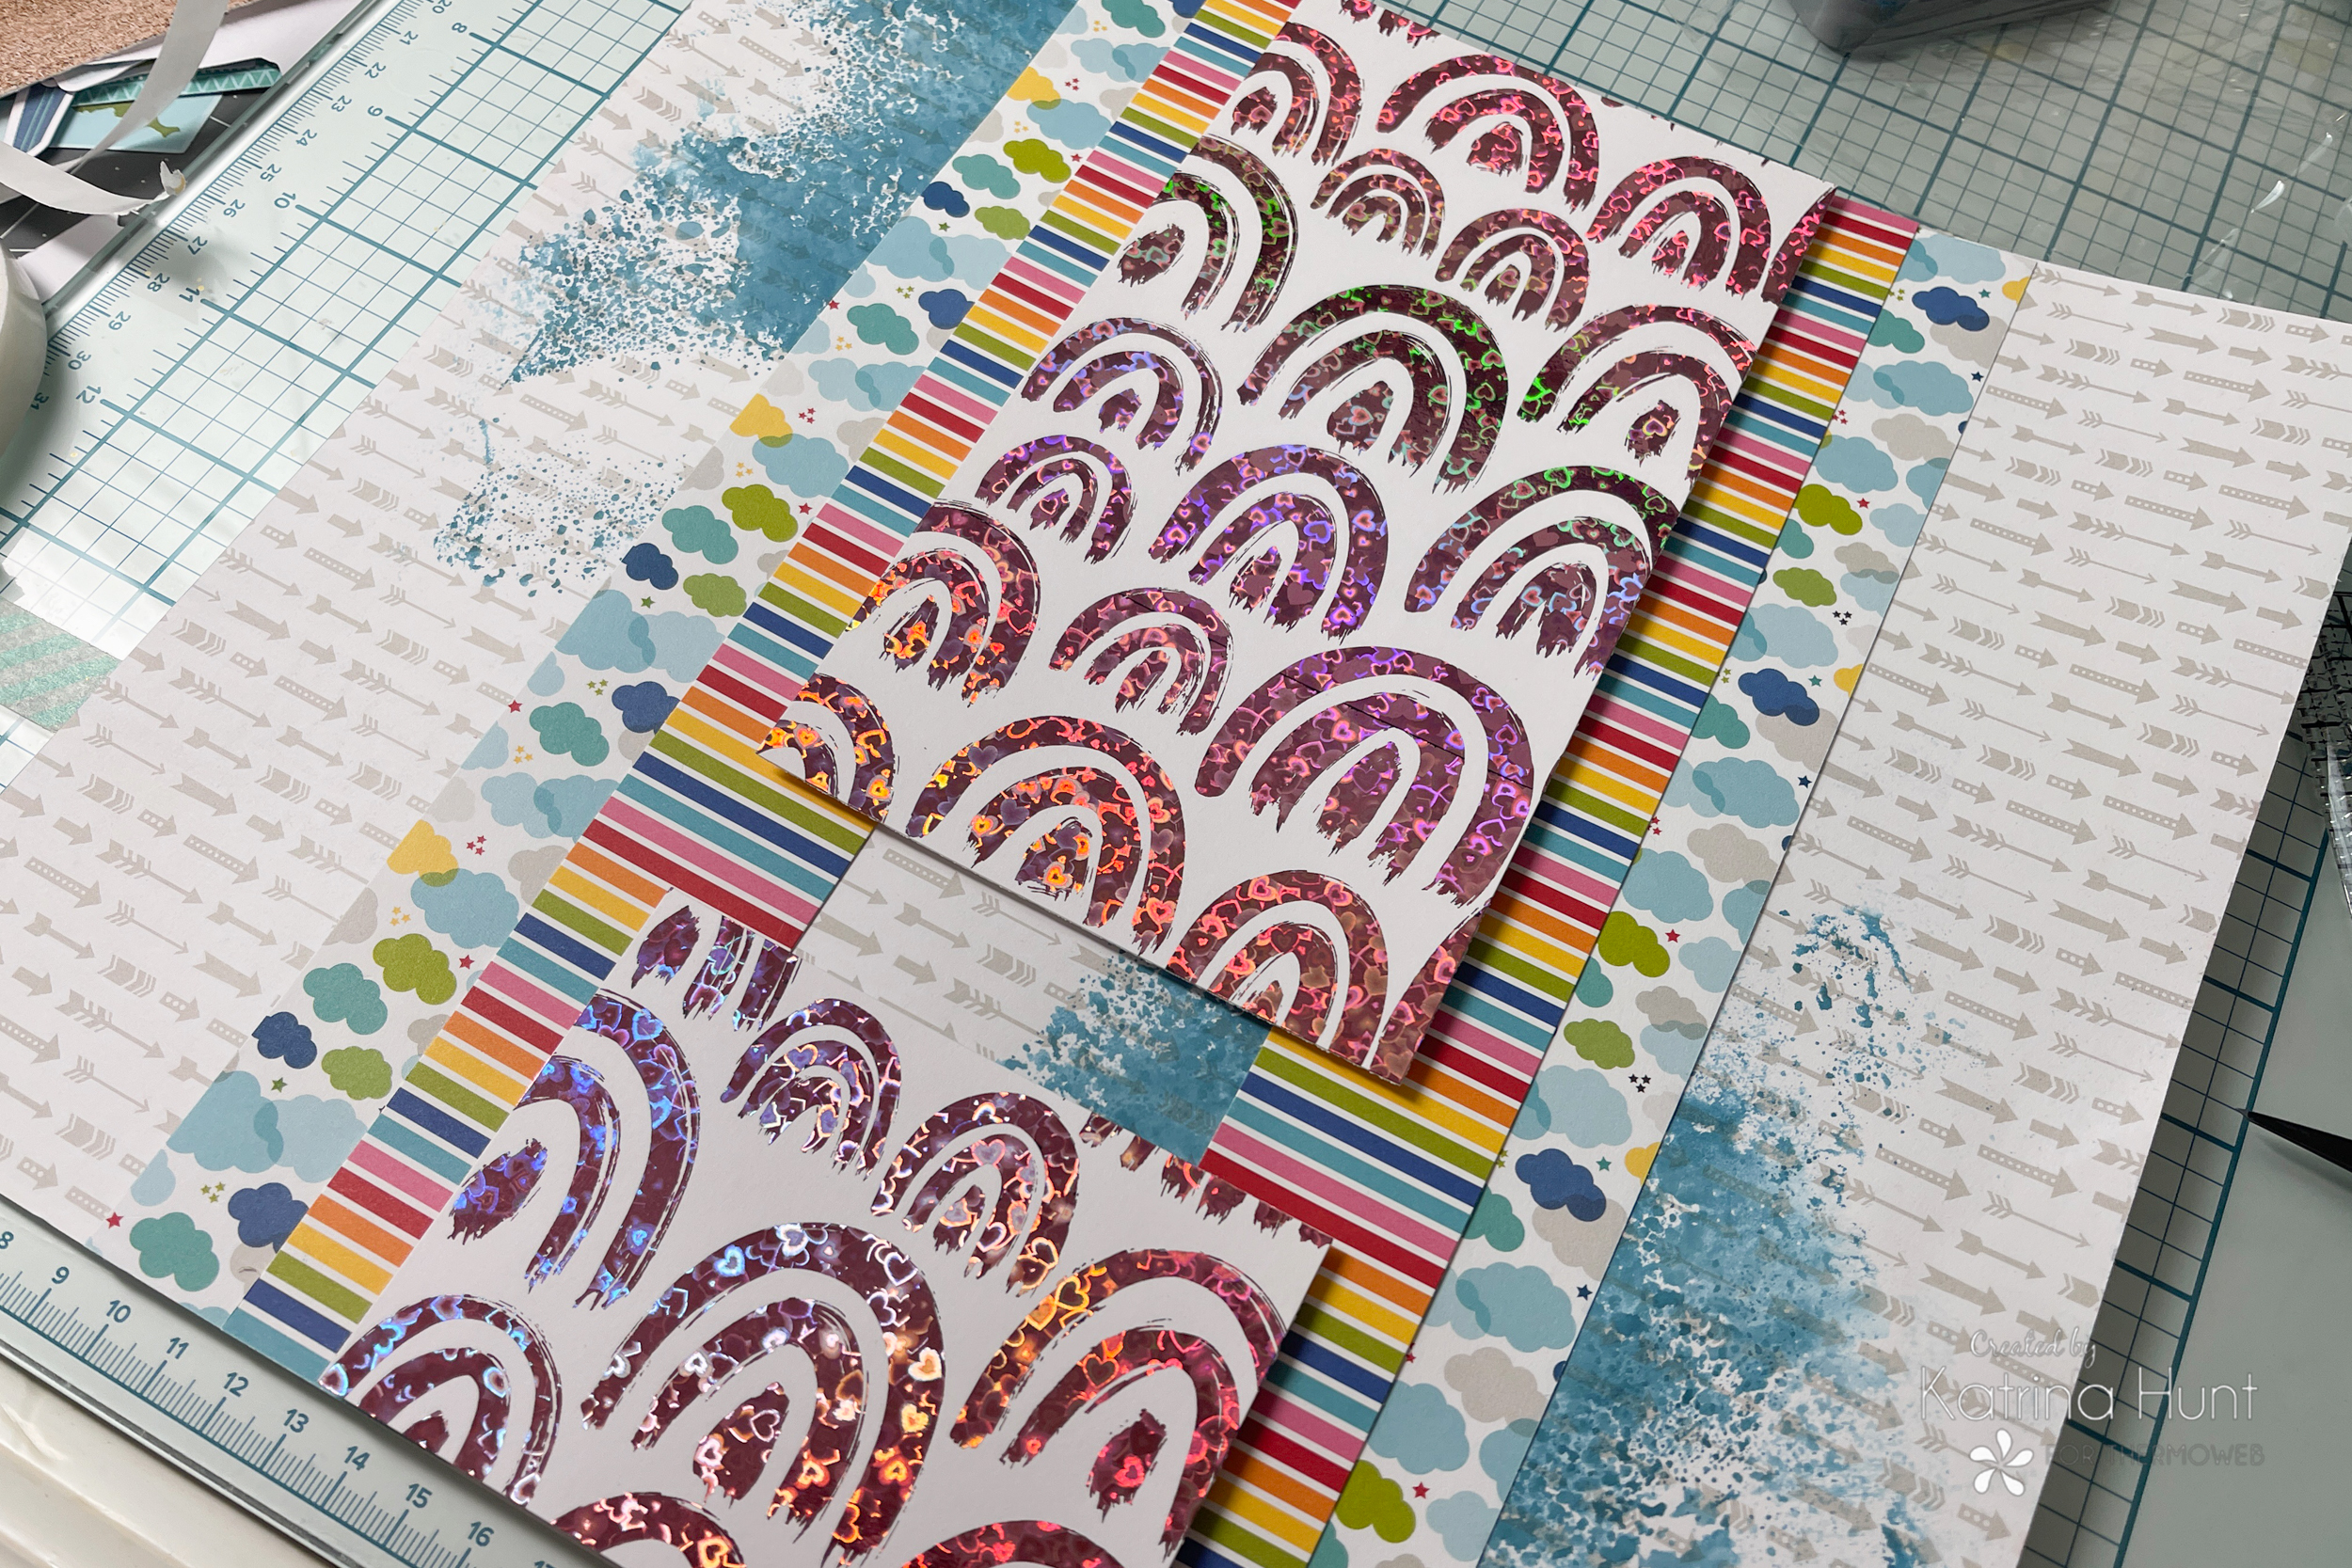
 Now it was time to get that gorgeous rainbow toner sheet placed on the layout center. I knew it wasn't going to fit the full length, so I cut part of it off and then covered the cut area with my picture! Easy peasy! No one will ever know!!
 Once the center section was completed and adhered down, it was time to start embellishing, my favorite part! Also, if you feel like clustering is hard, it just takes practice and playing around to see what looks and feels right to you. I went thru so many little bits for this area and finally landed on a look I liked. I try to keep in mind, have things touching other things to ground them. The more you do it, the easier it gets! I used my Memory Runner XL and Foam Tape 1/16th for adhering to all of these.
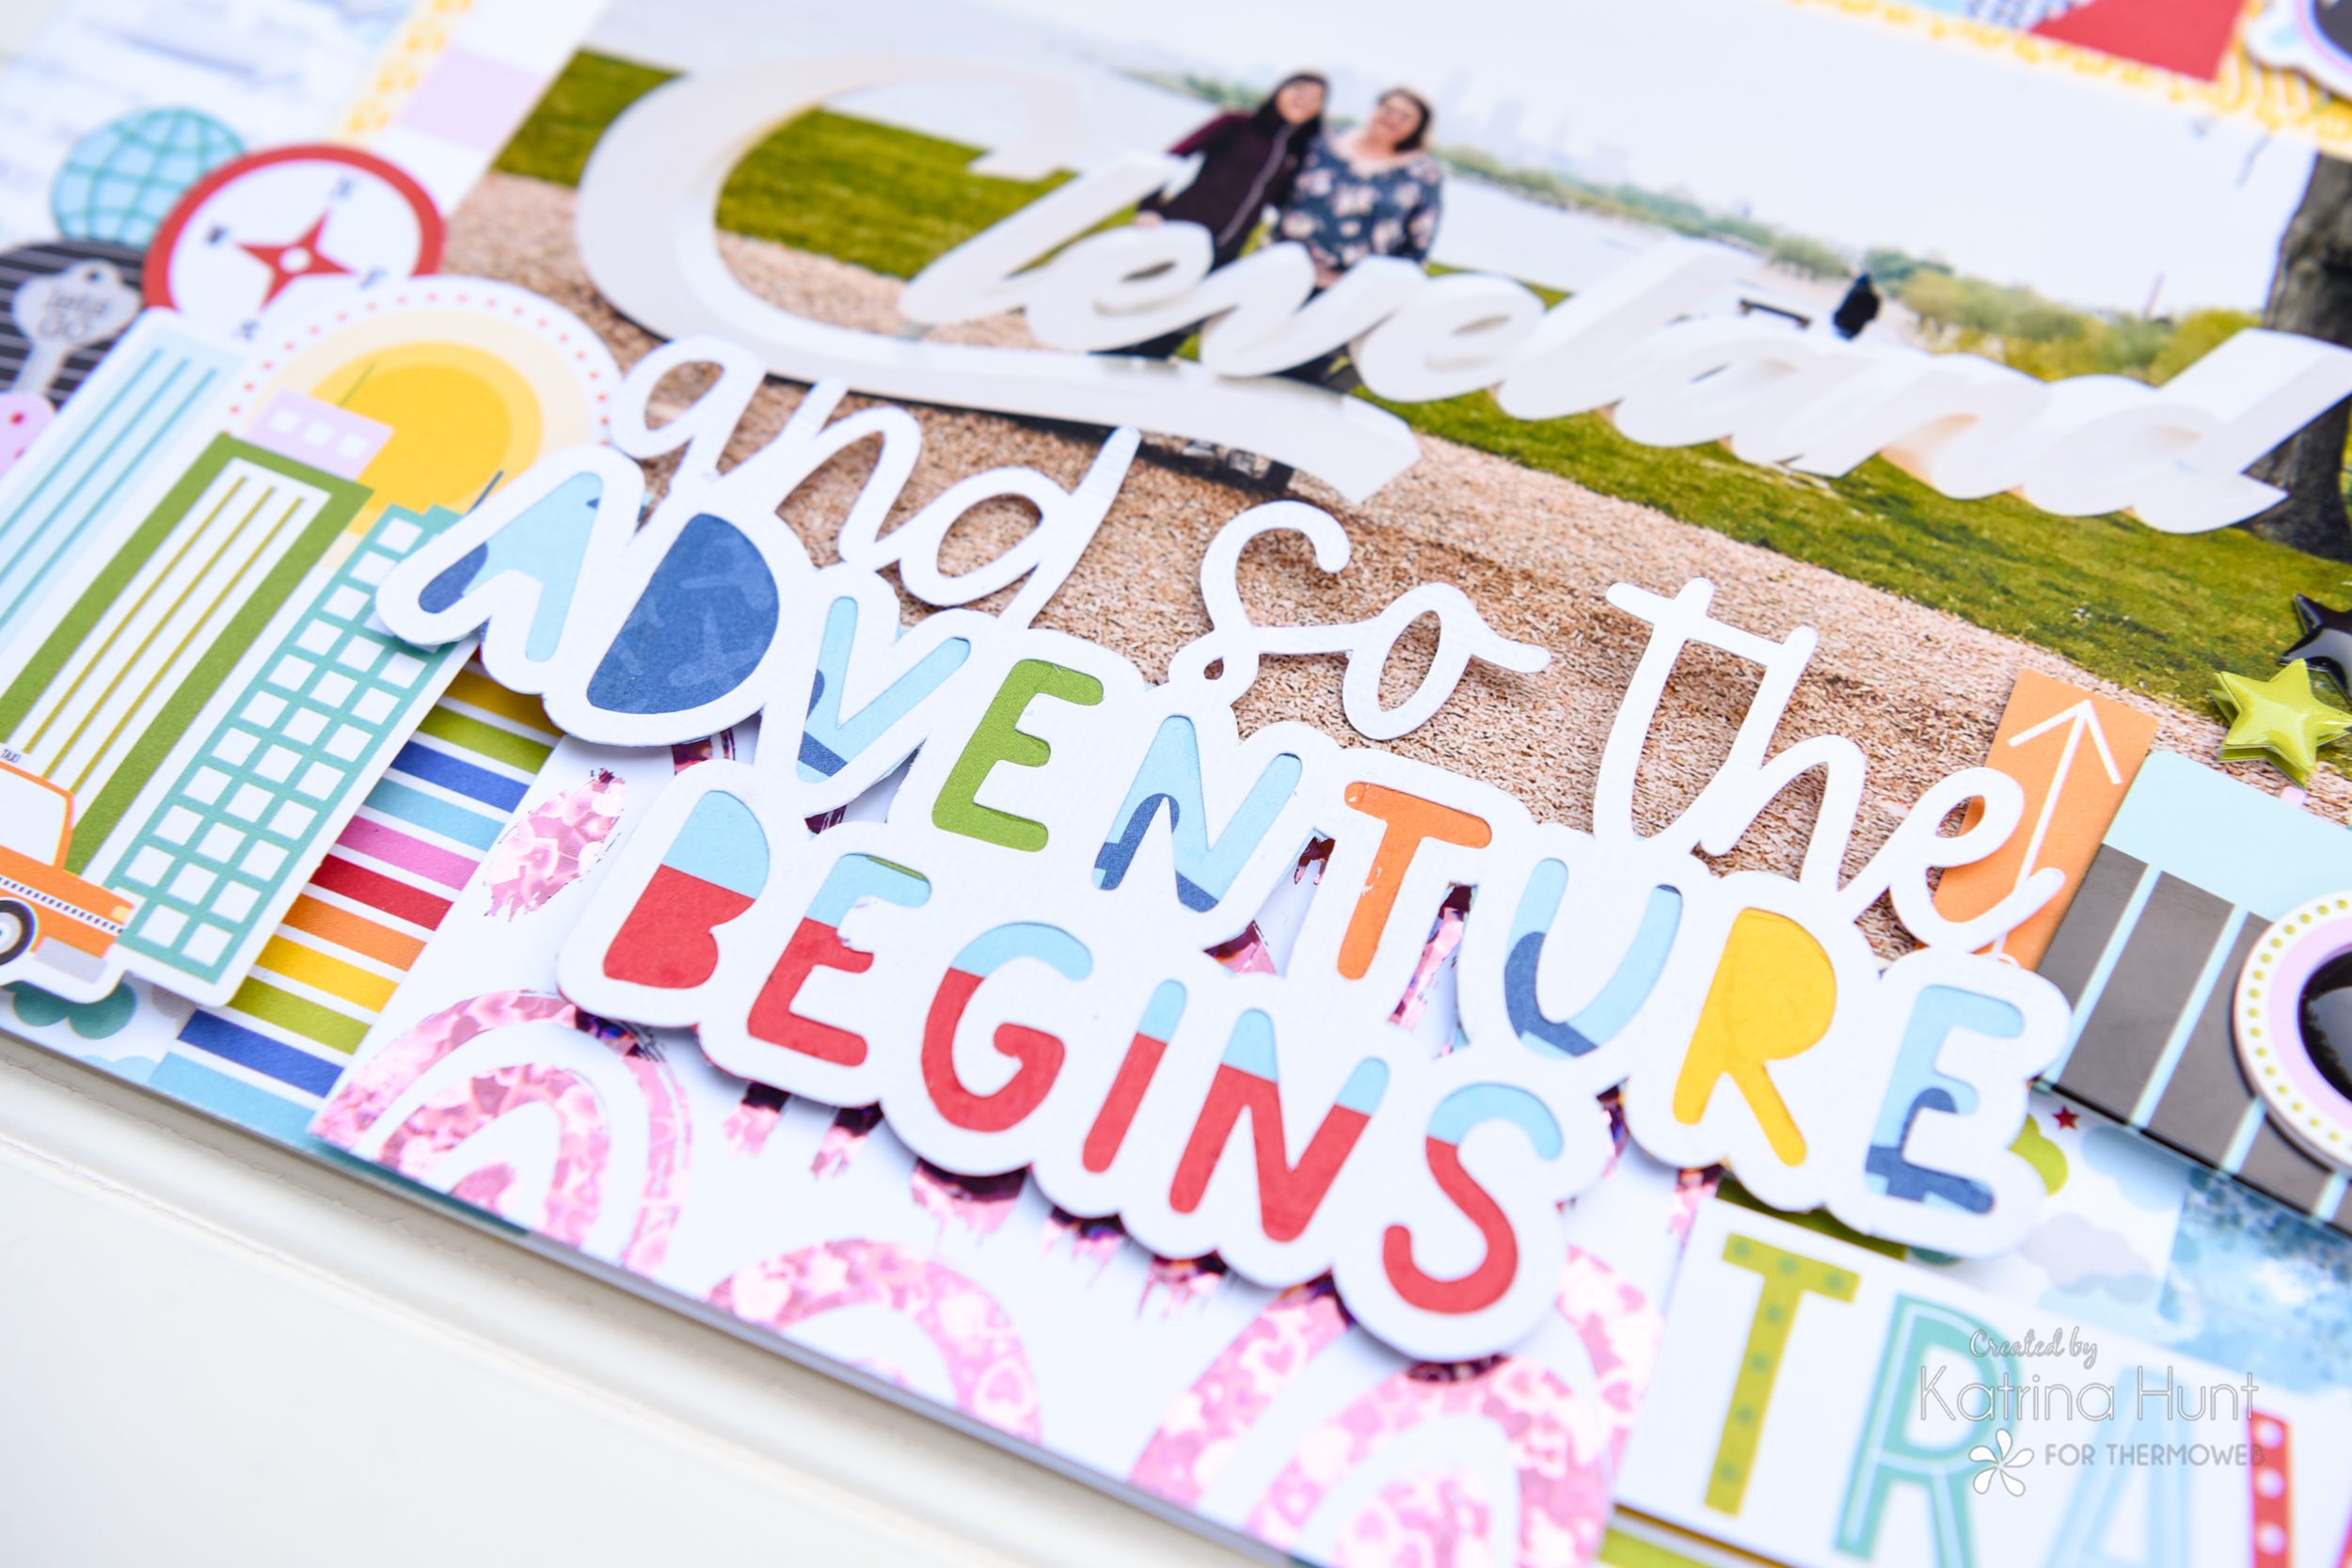
 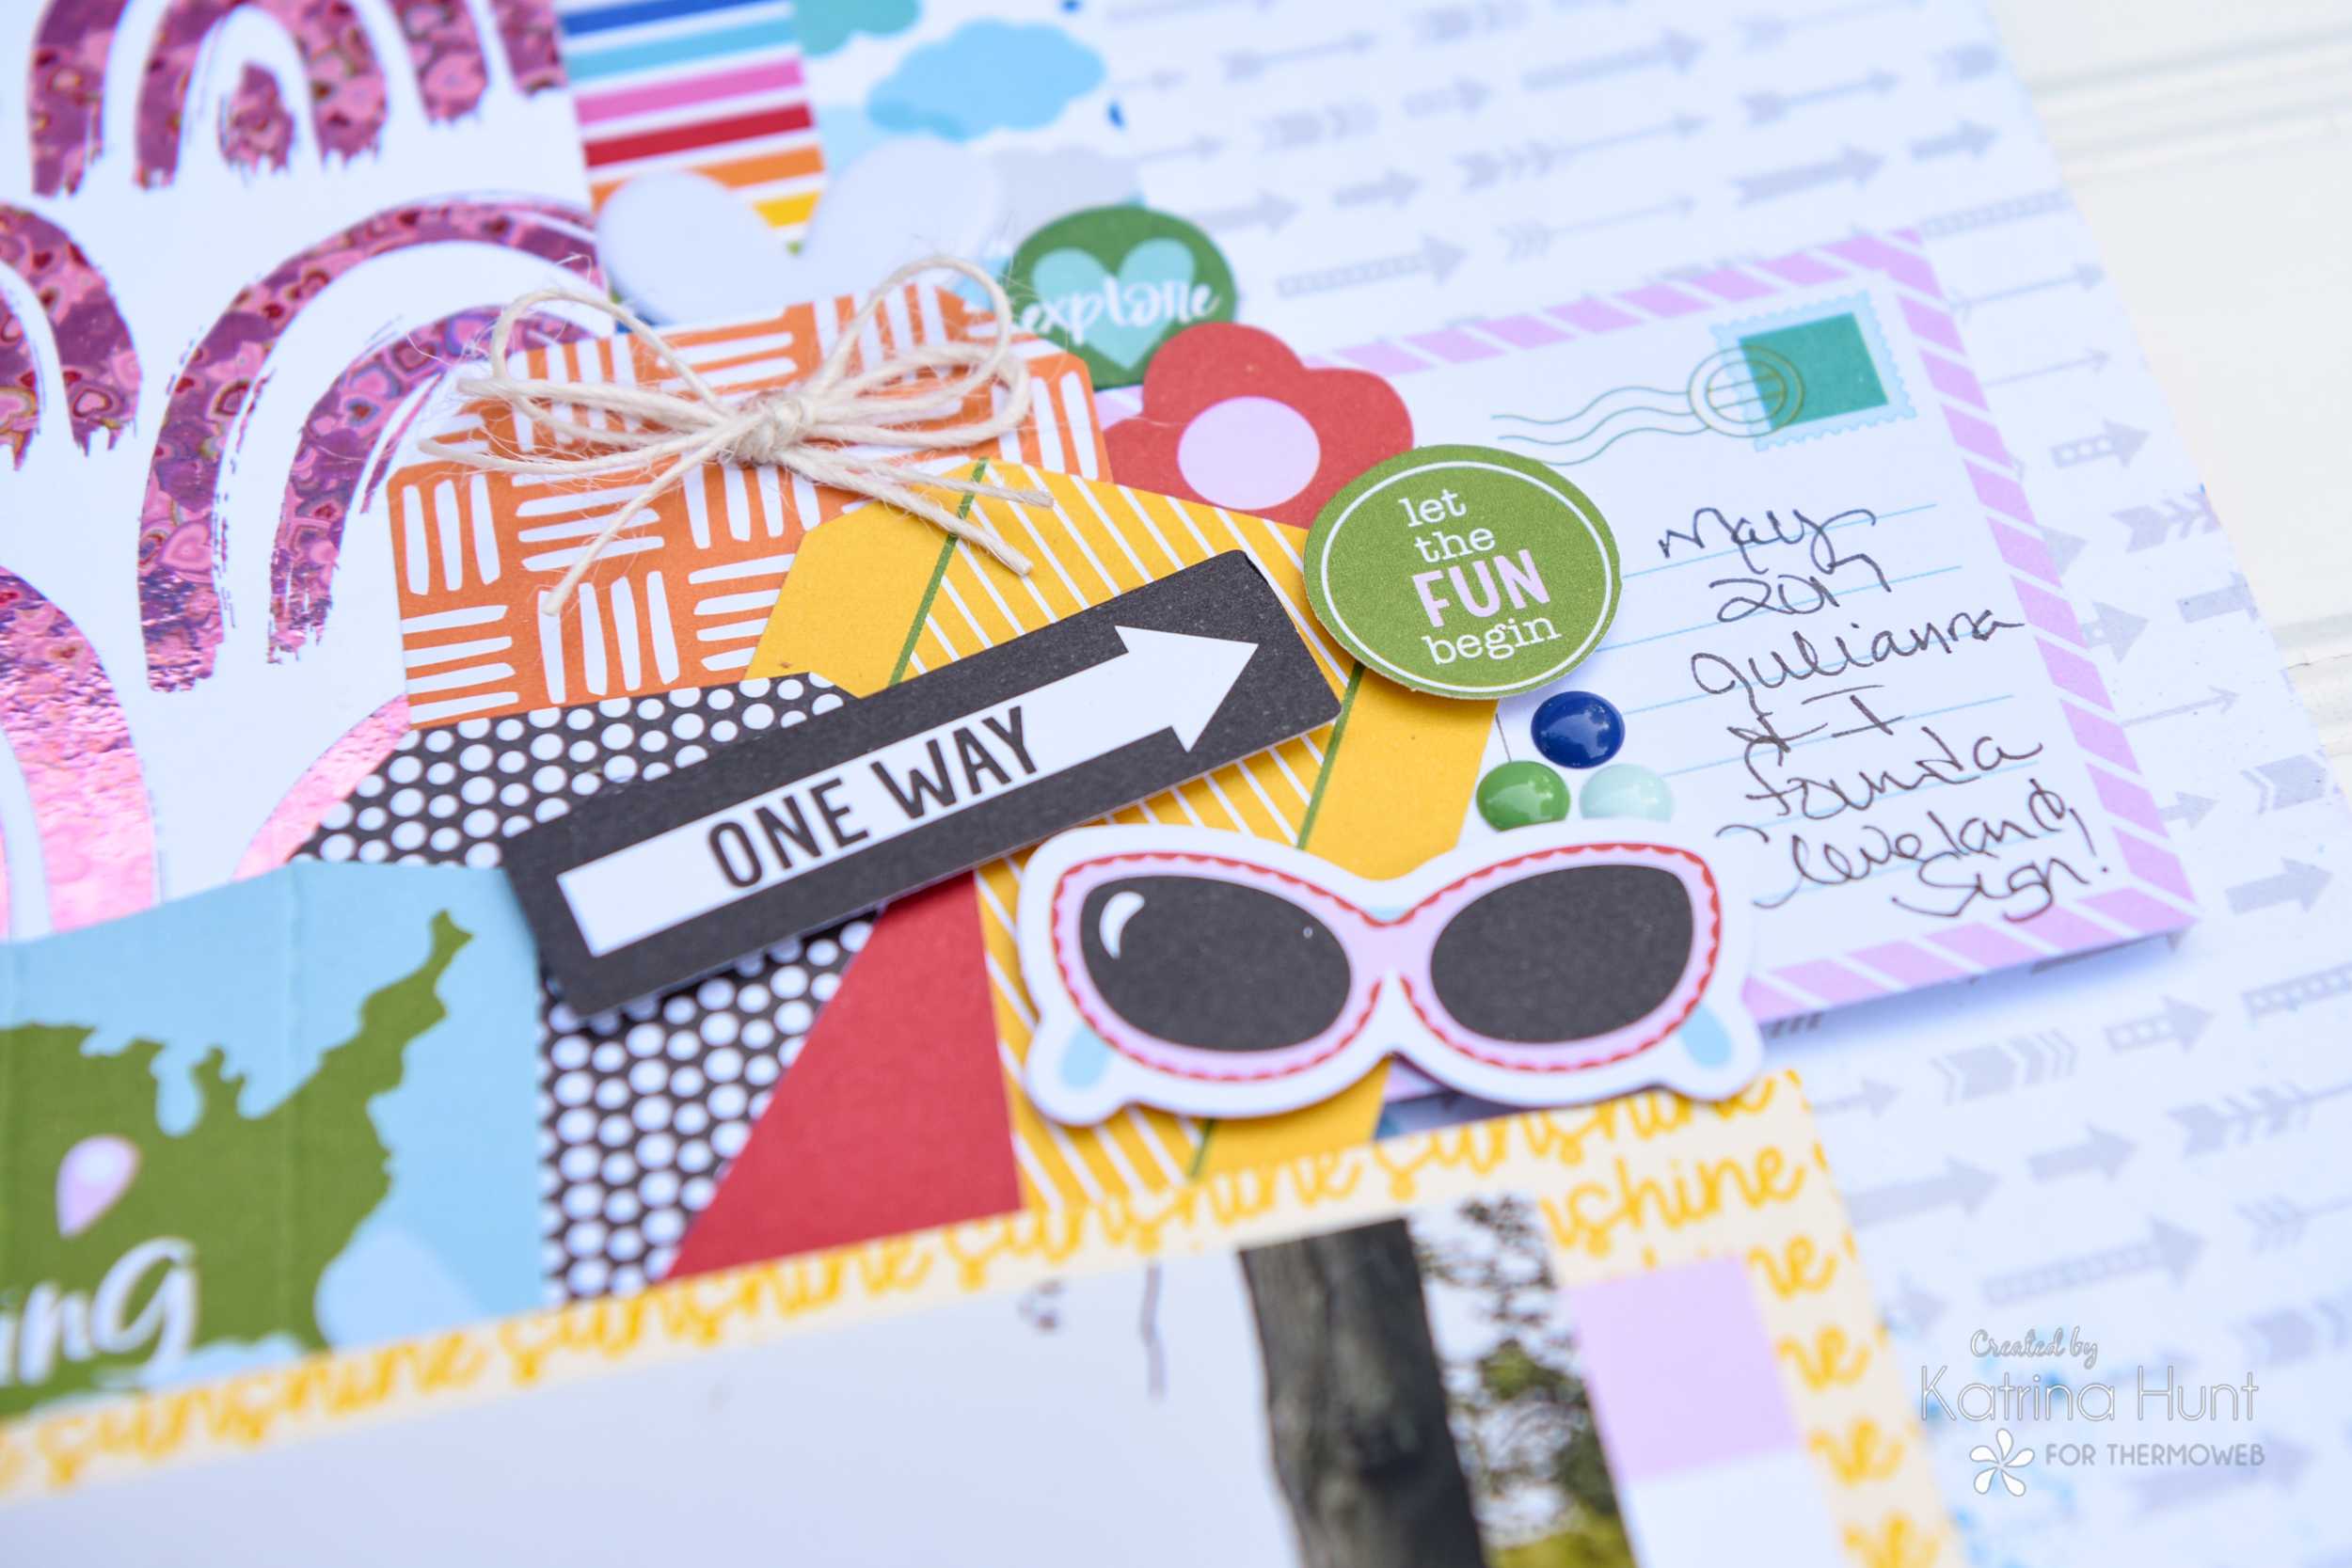 Last was my title! Bella Blvd has cut files that go with their collections in the Silhouette Design Store and I thought this one was super cute and wanted to use it.
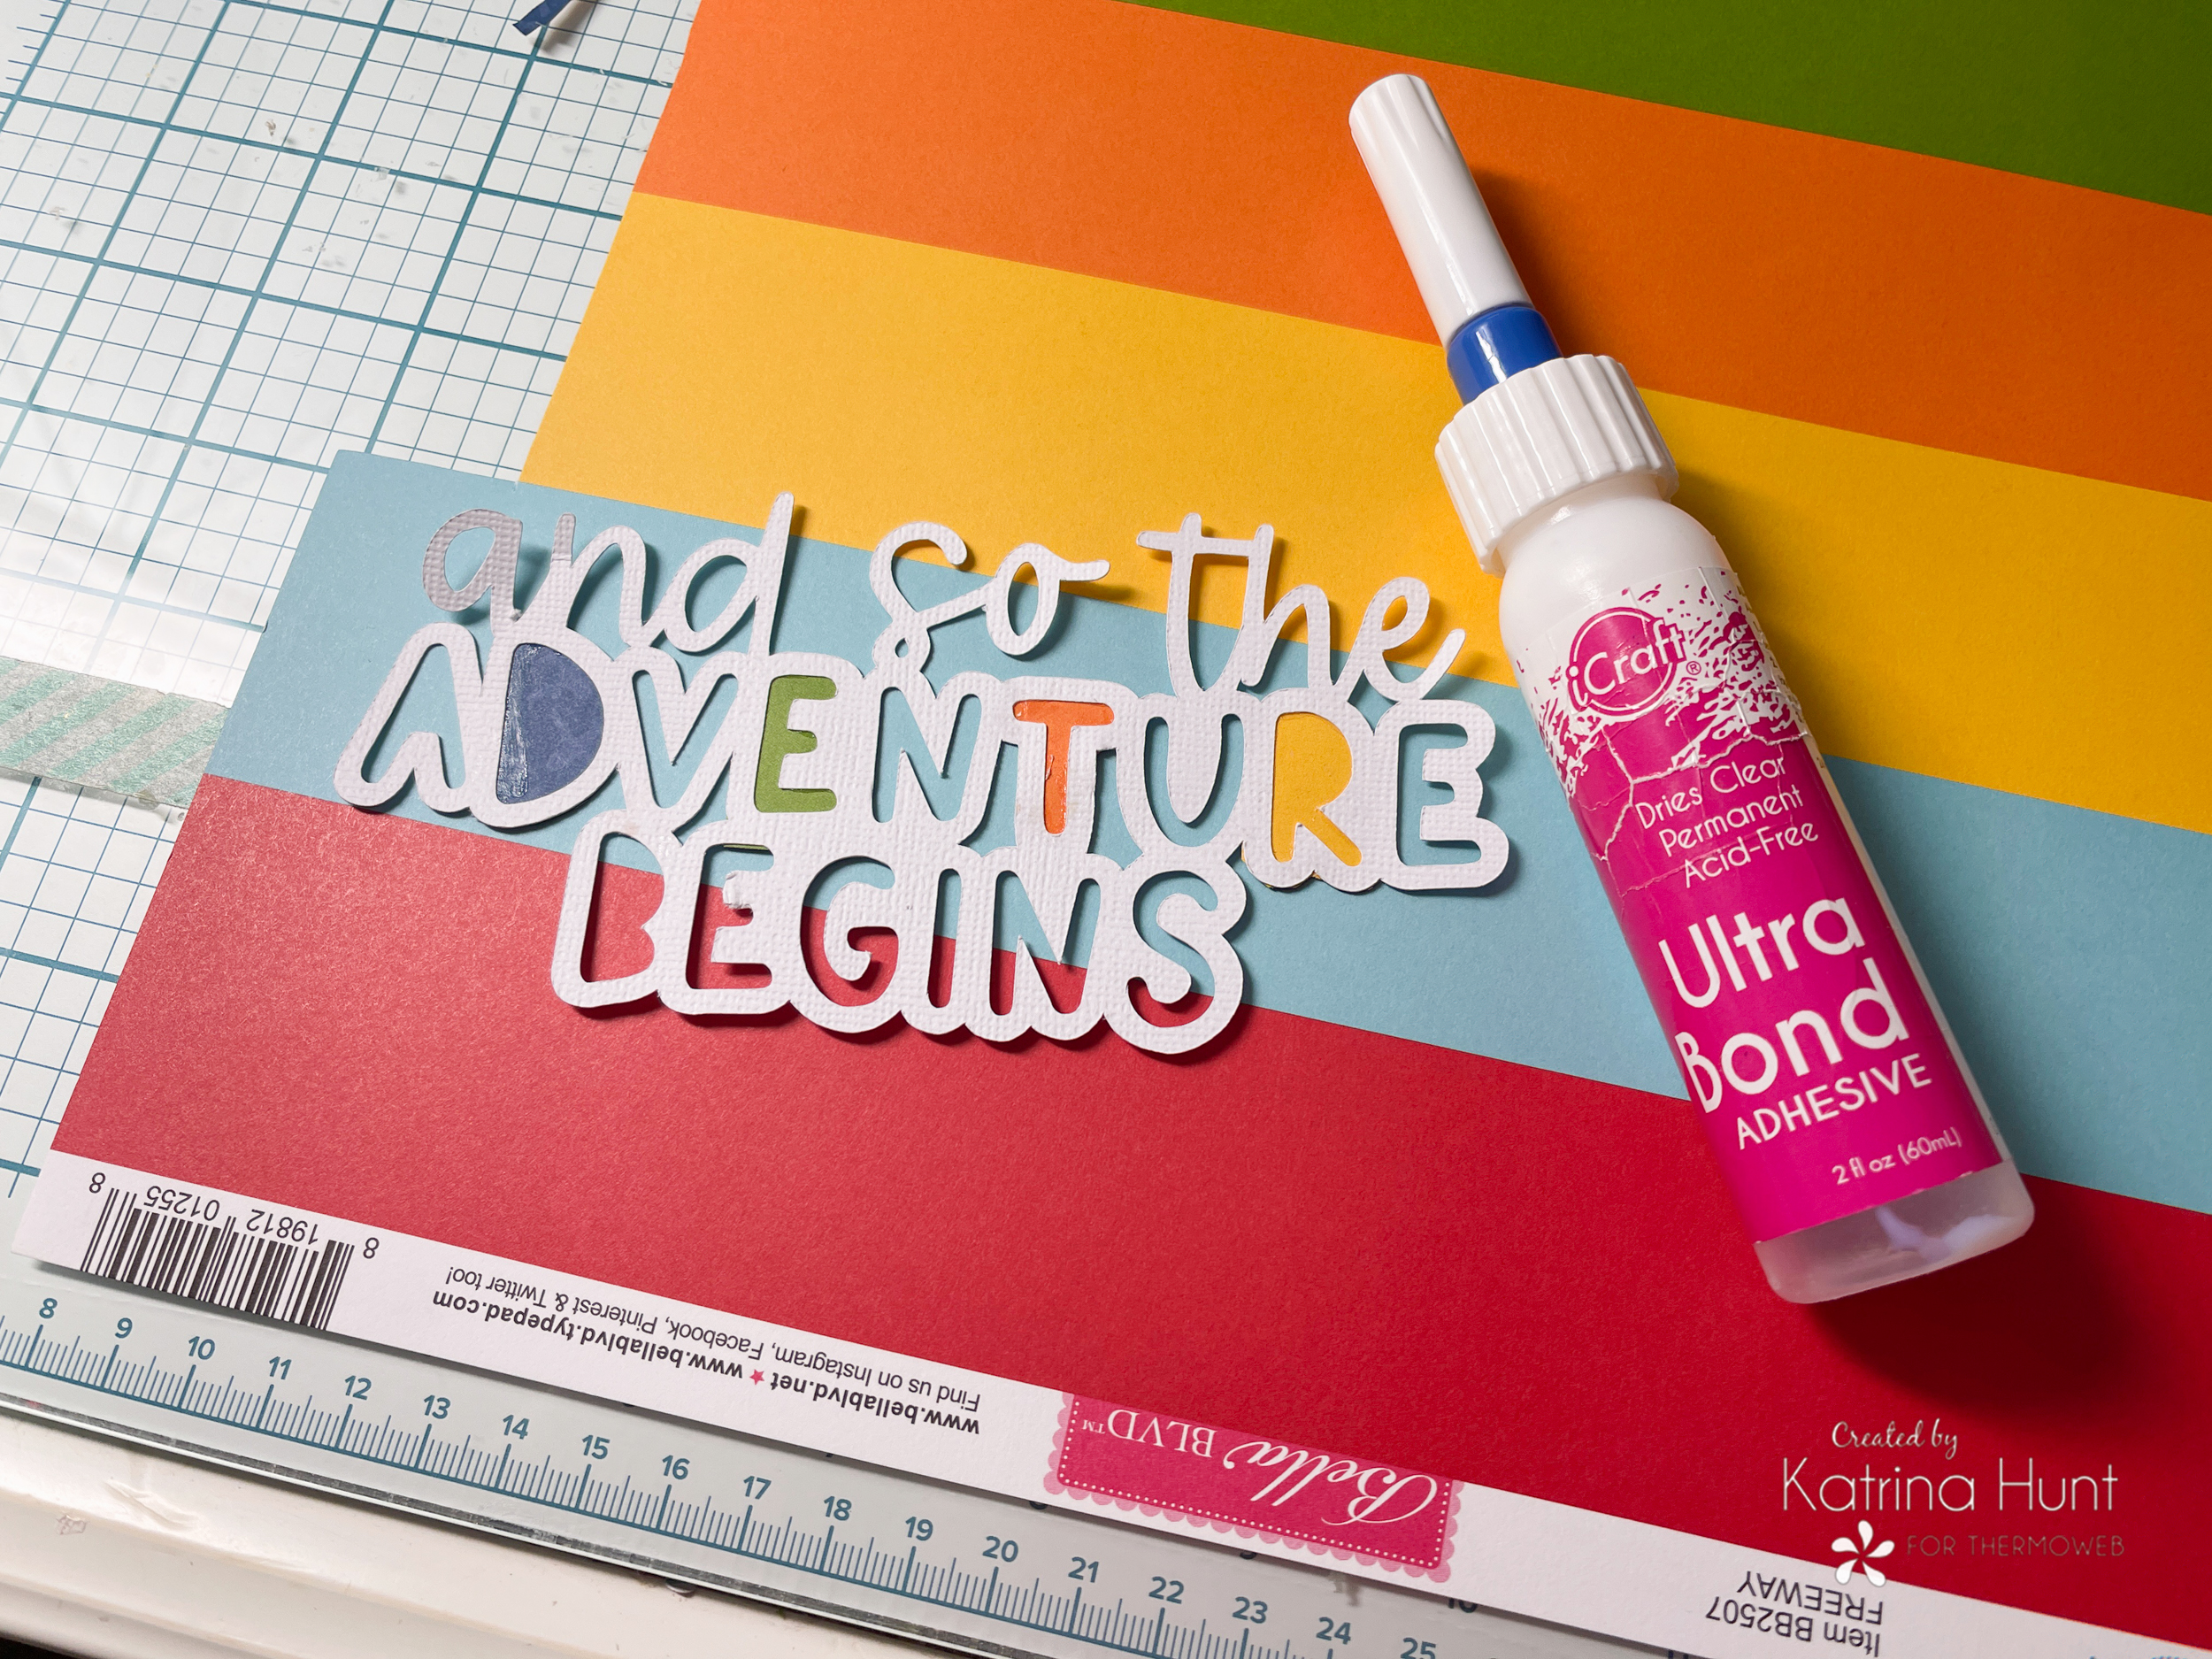 I used my Ultra Bond Liquid to back the open letter areas. I started to not back them, but it was too much white! This adhesive is great because it dries pretty quick, but not so quick that you cannot adjust if you need to! When I adhered to this title to my layout I used foam tape behind the Adventure Begins part for dimension. This raised the "and so the" up and over my picture bottom. I love how it turned out.
 And there you have it!!! Make a gloomy picture bright by adding some foiled rainbows to your layout! Thanks for stopping by the blog today!!! Happy Travels!!