No Products in the Cart
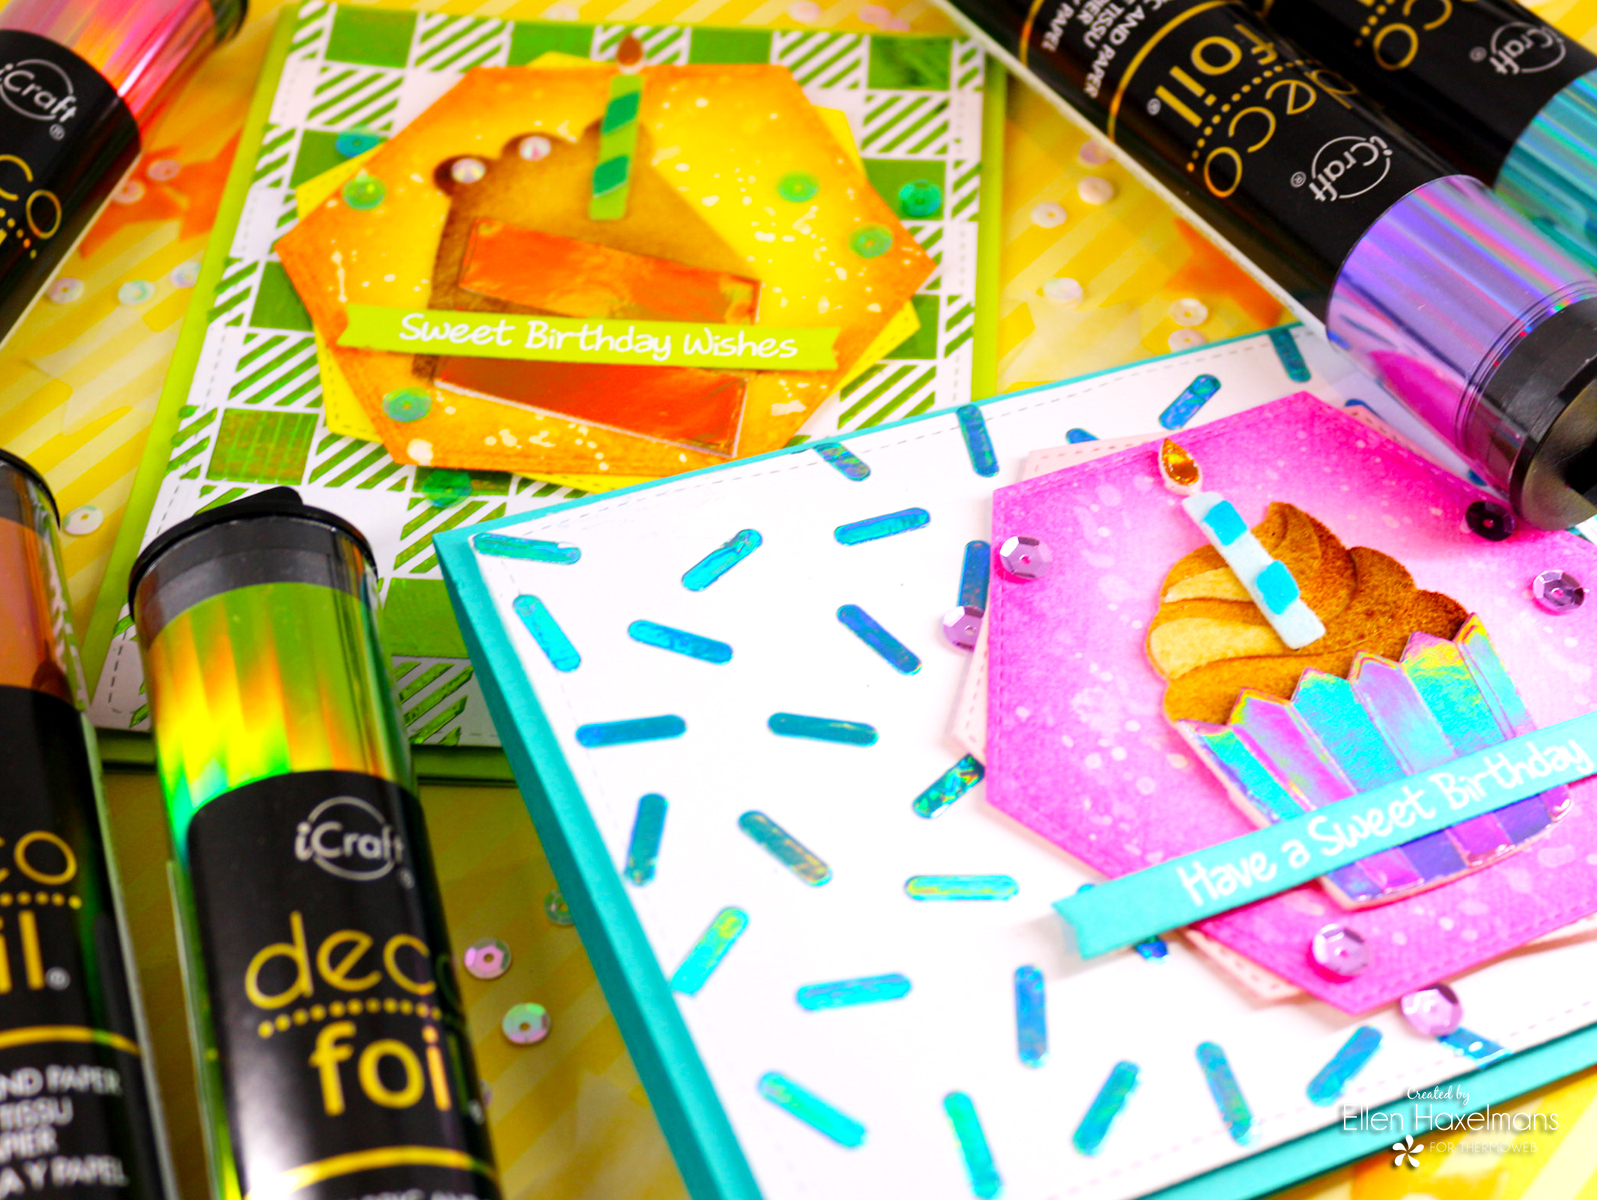 I received the Deco Foil Fairytale foils and I couldn't wait to create some birthday cards with them. Let me show you step by step how I made these colorful birthday cards.
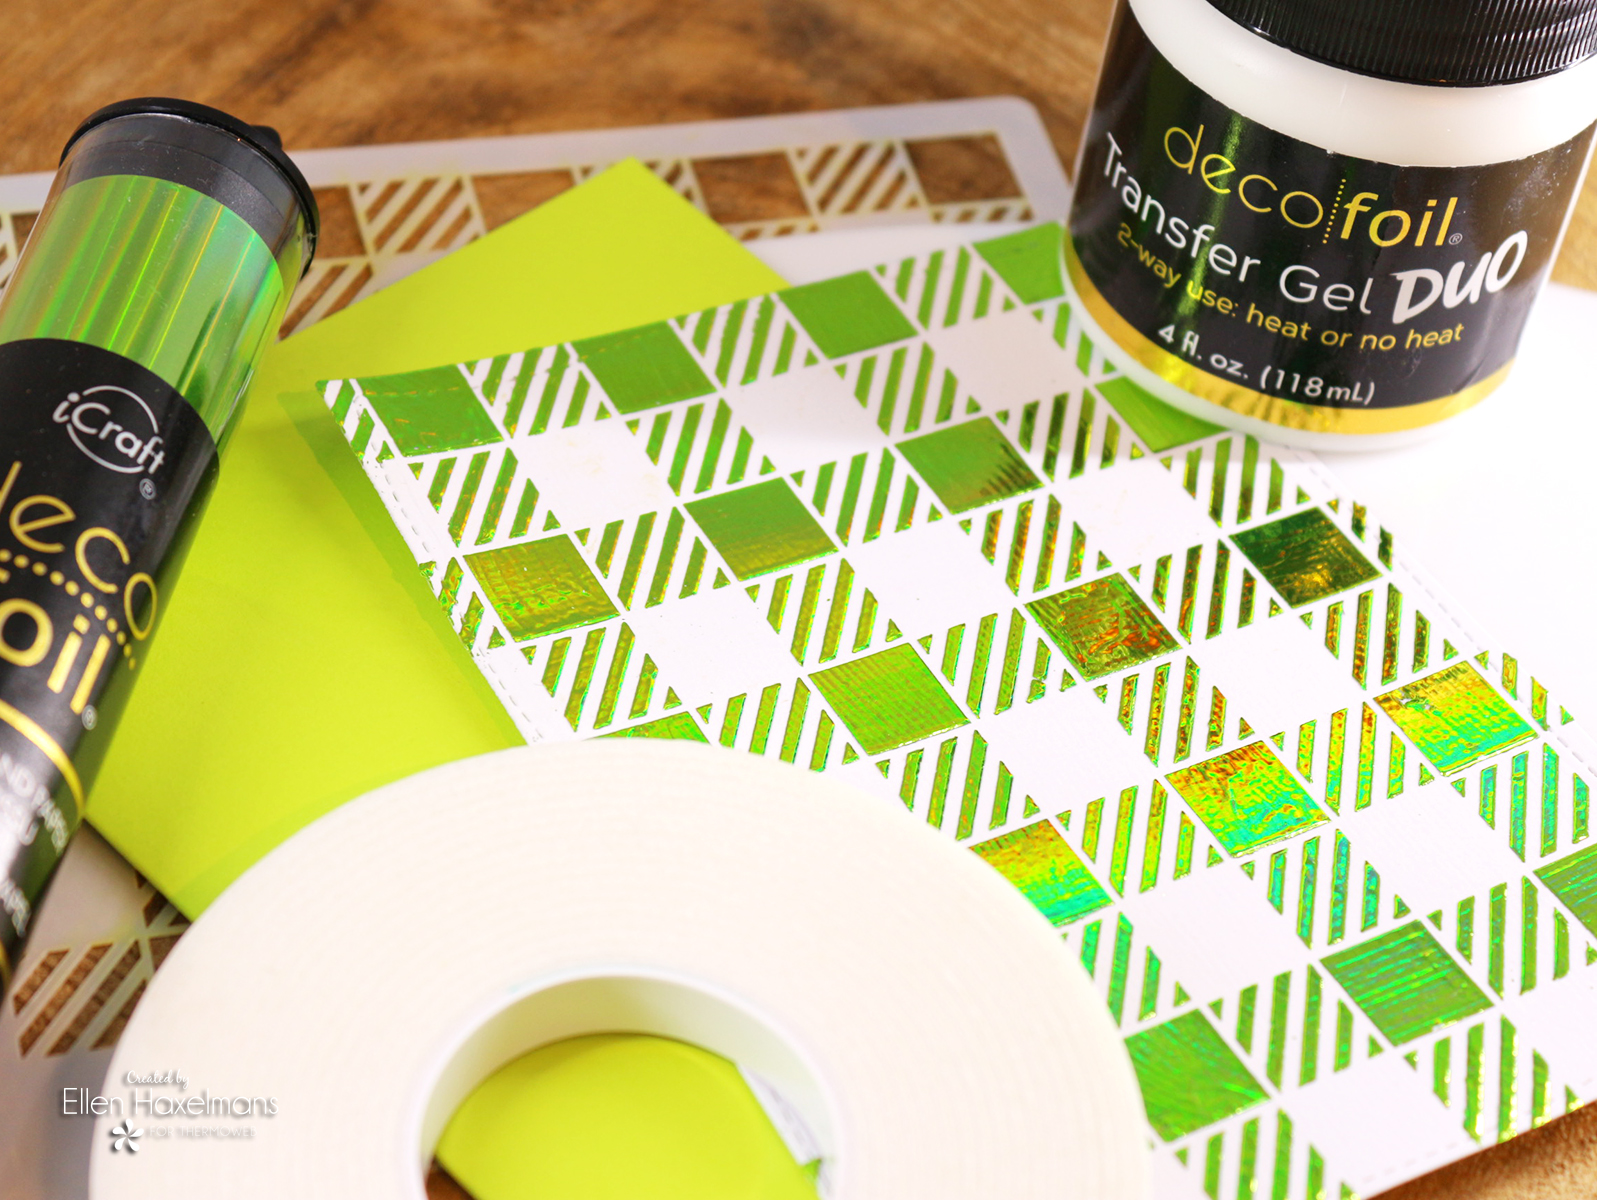
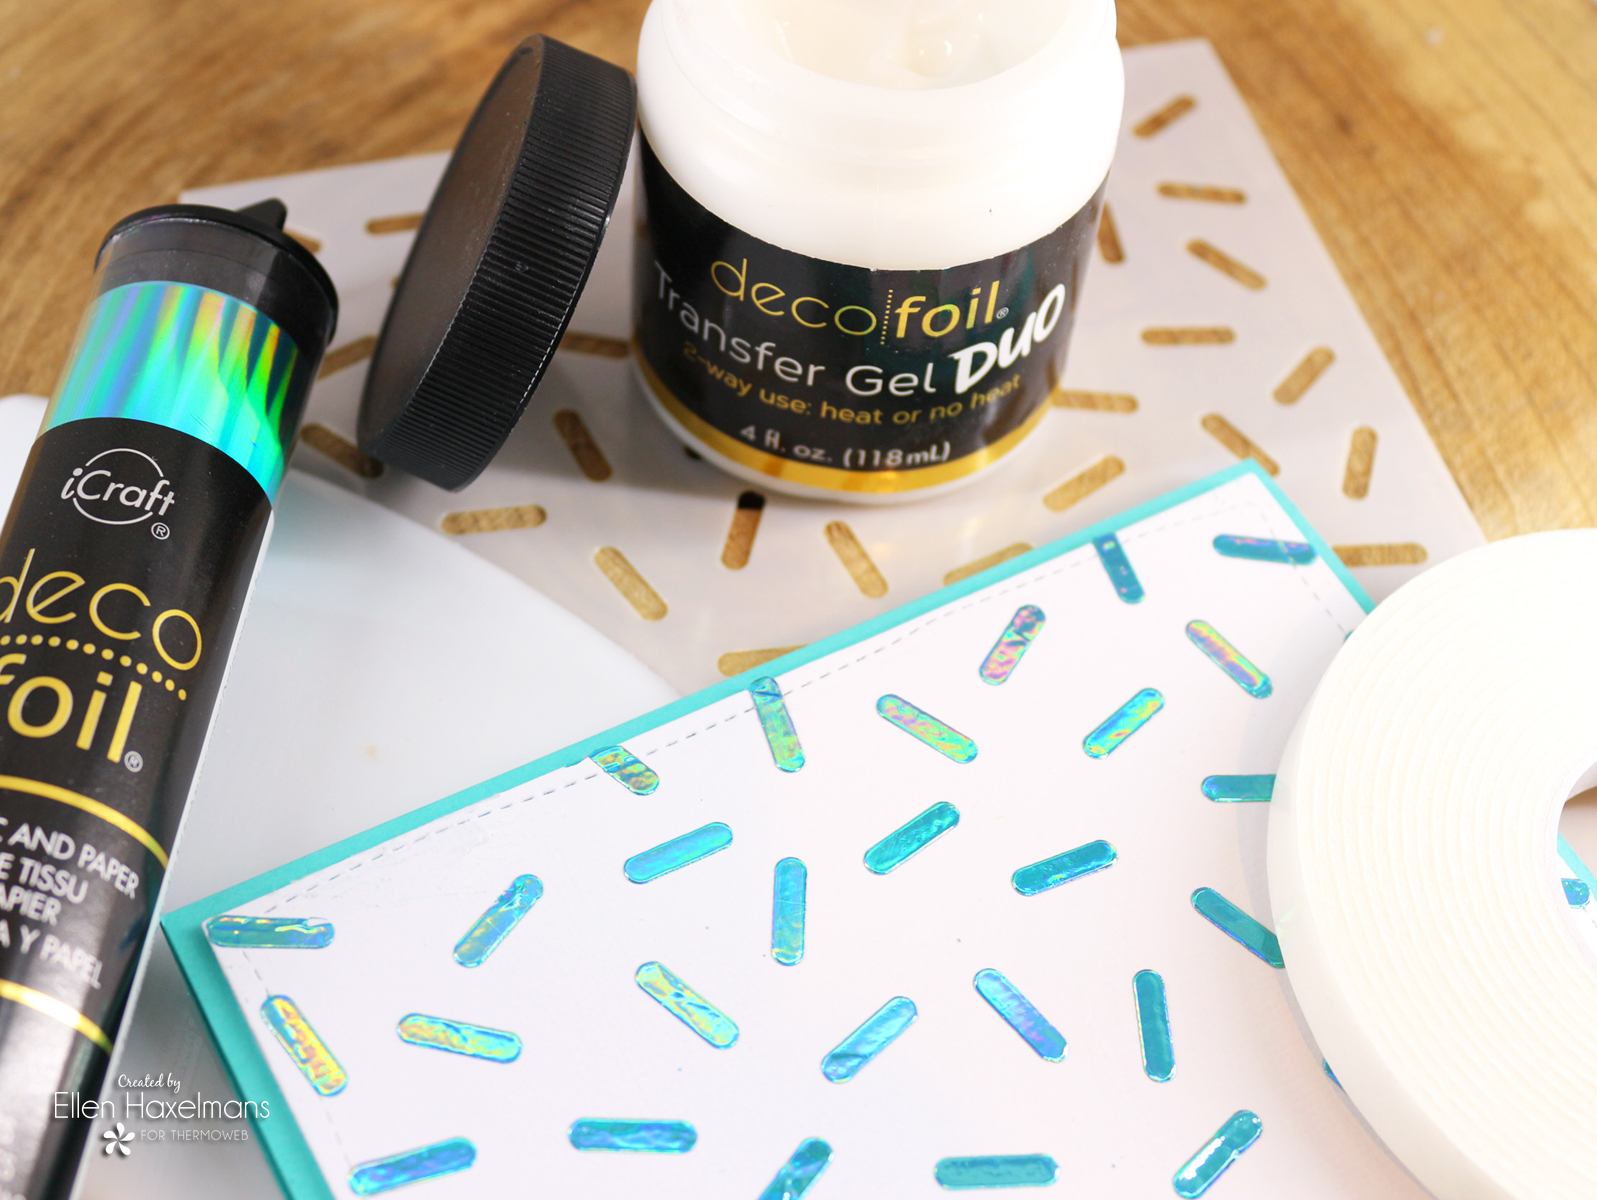 I sprayed Pixy Spray on top of my stencil and attached it to a rectangular piece of paper and applied the Transfer Gel Duo on top with the help of the Stencil Pal. When the gel was dry I put the Deco Foil "Glass Slipper" on top and run it through the laminator. I glued the panel down with double-adhesive foam on the card base.
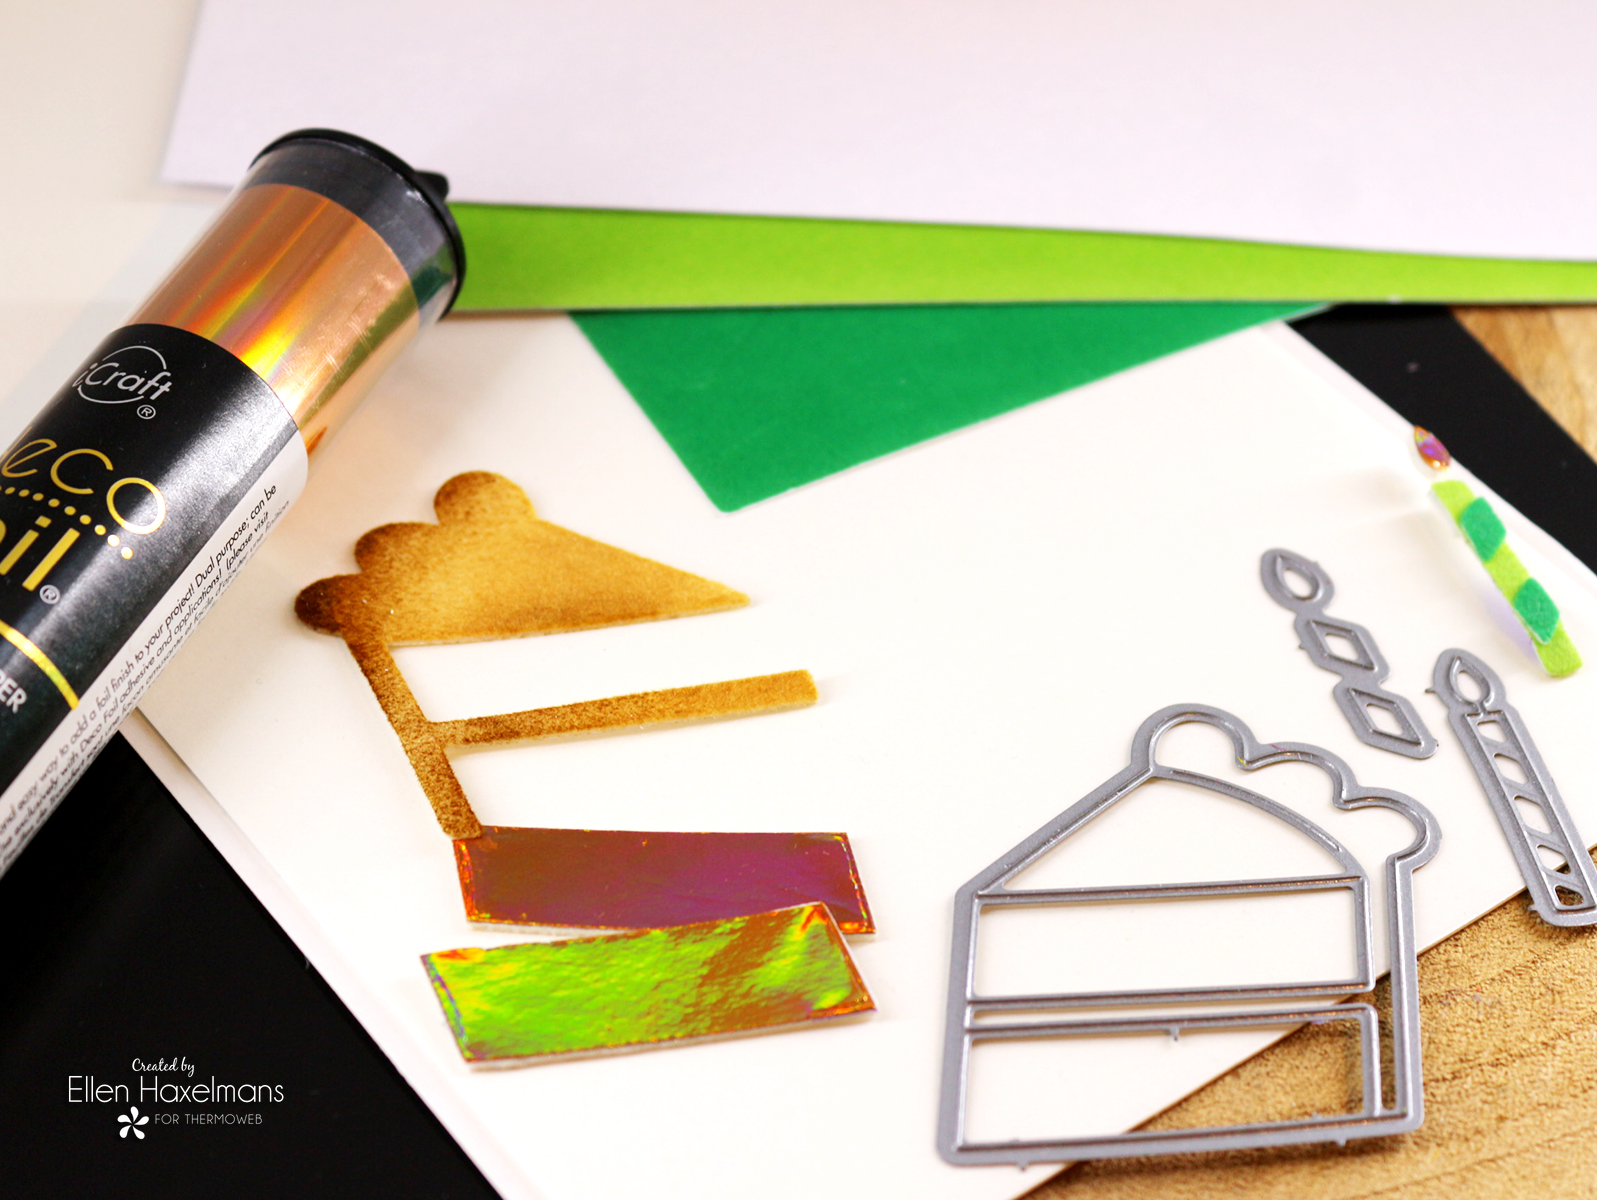
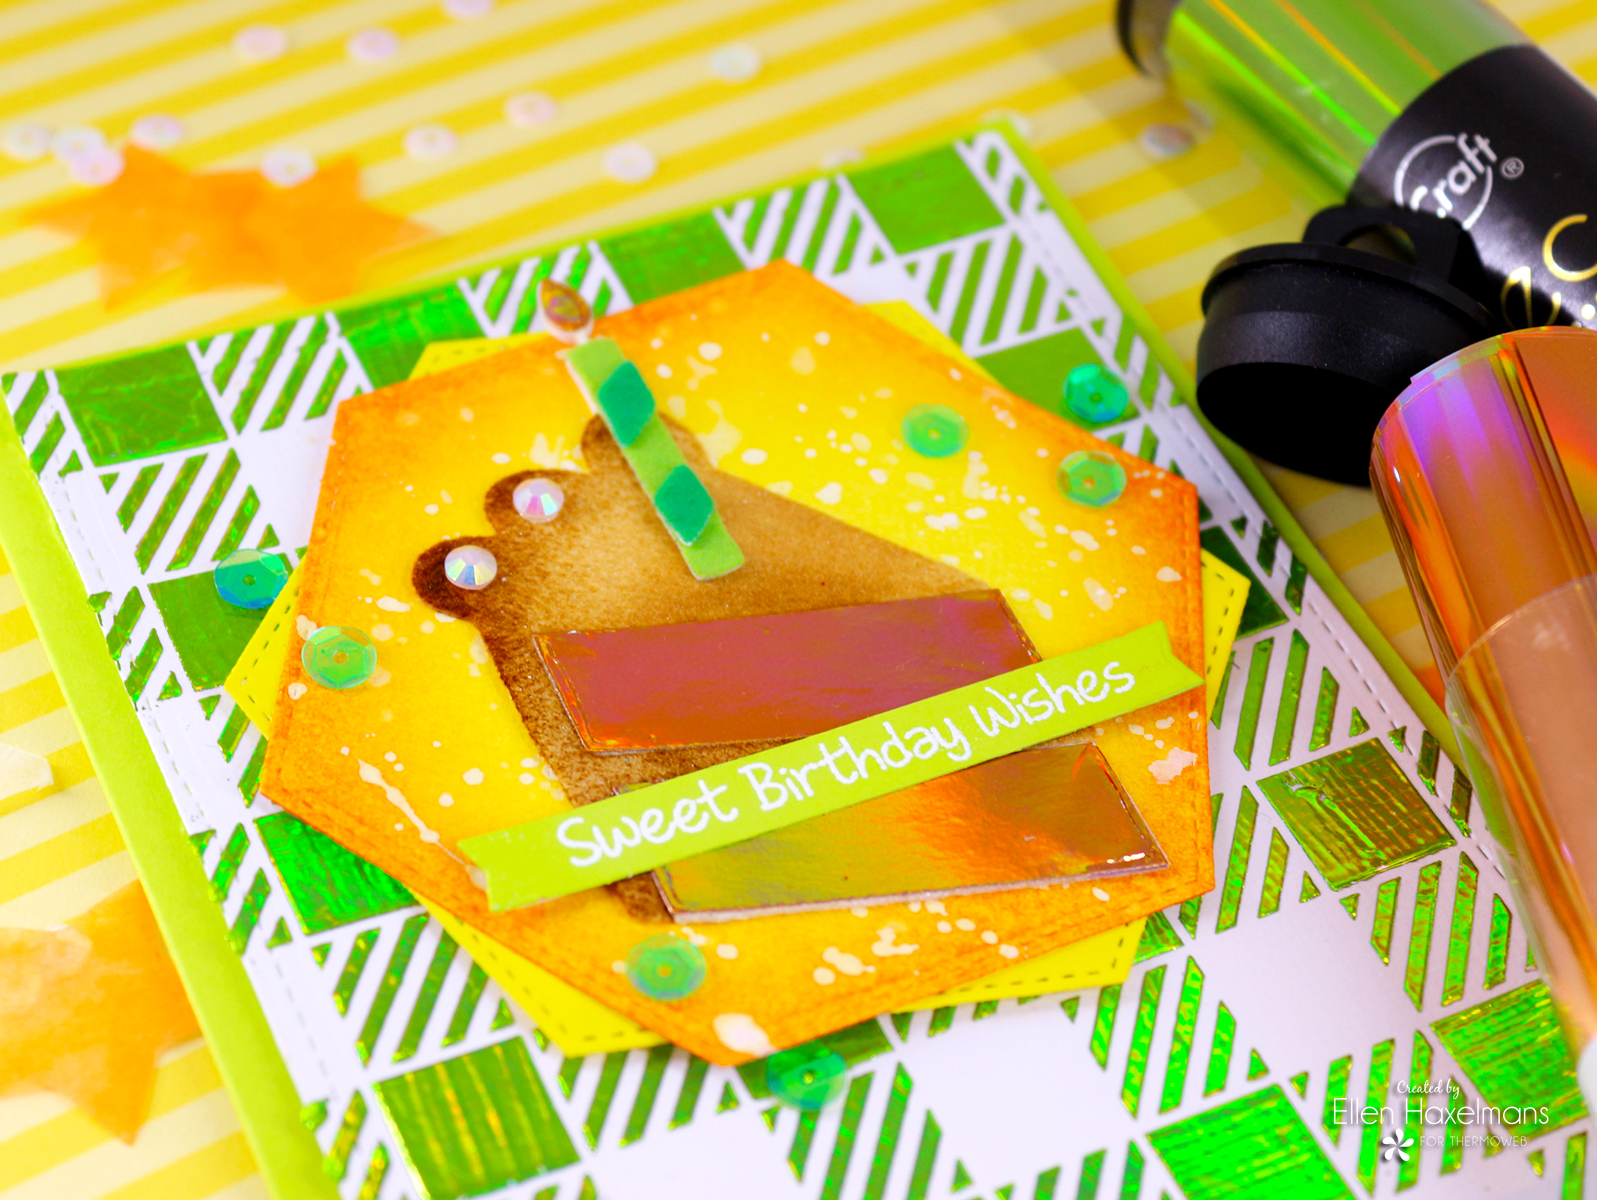
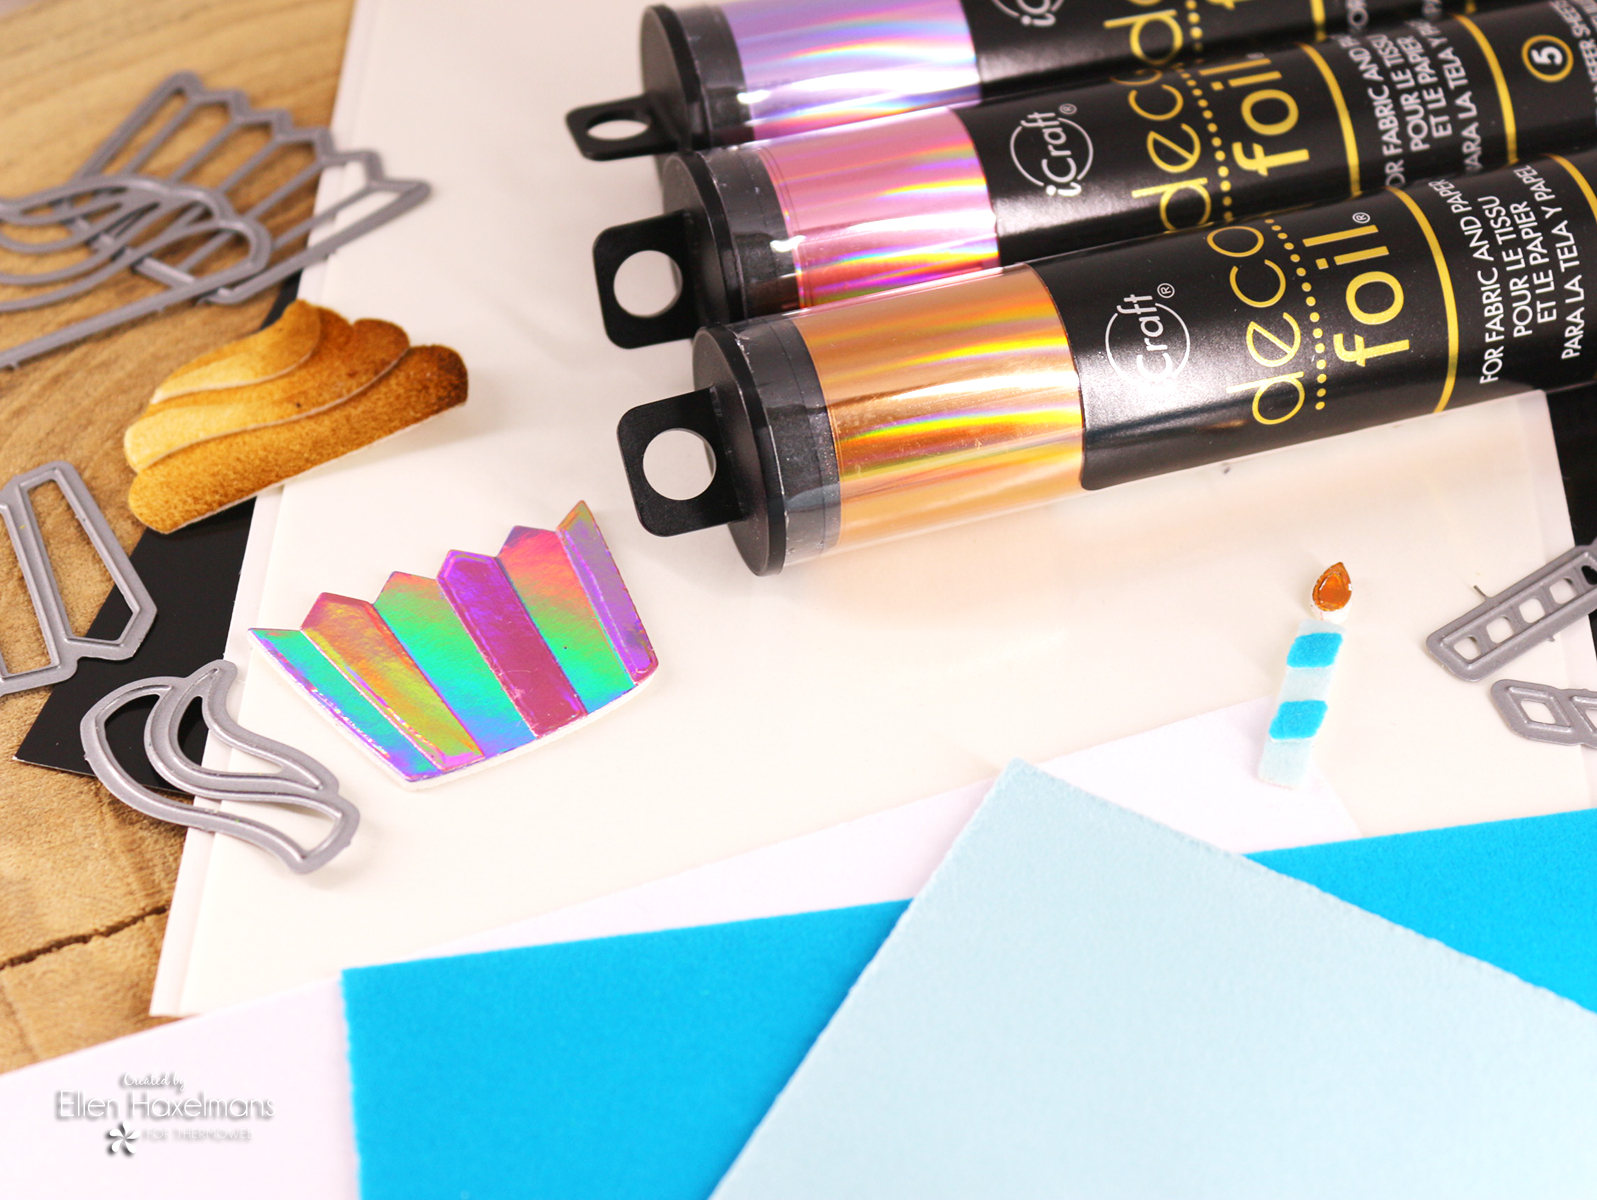 I used several products to make the cupcake. First I made the cupcake topper with White Latte flock. I attached it to the double-sided adhesive. Then I did cut out the pieces that I needed and blended brown ink on top. The cupcake liner was made by using "Enchanted Rose" and "Prince Periwinkle" Deco Foils. I transferred them to the Toner Sheets. How you do that? You take a piece of Toner Sheet and foil (facing upwards) between parchment paper and push it true the laminator. Afterwards, you cut the foiled piece with your dies.
As the last step, the candle was made by using both techniques.
I used several products to make the cupcake. First I made the cupcake topper with White Latte flock. I attached it to the double-sided adhesive. Then I did cut out the pieces that I needed and blended brown ink on top. The cupcake liner was made by using "Enchanted Rose" and "Prince Periwinkle" Deco Foils. I transferred them to the Toner Sheets. How you do that? You take a piece of Toner Sheet and foil (facing upwards) between parchment paper and push it true the laminator. Afterwards, you cut the foiled piece with your dies.
As the last step, the candle was made by using both techniques.
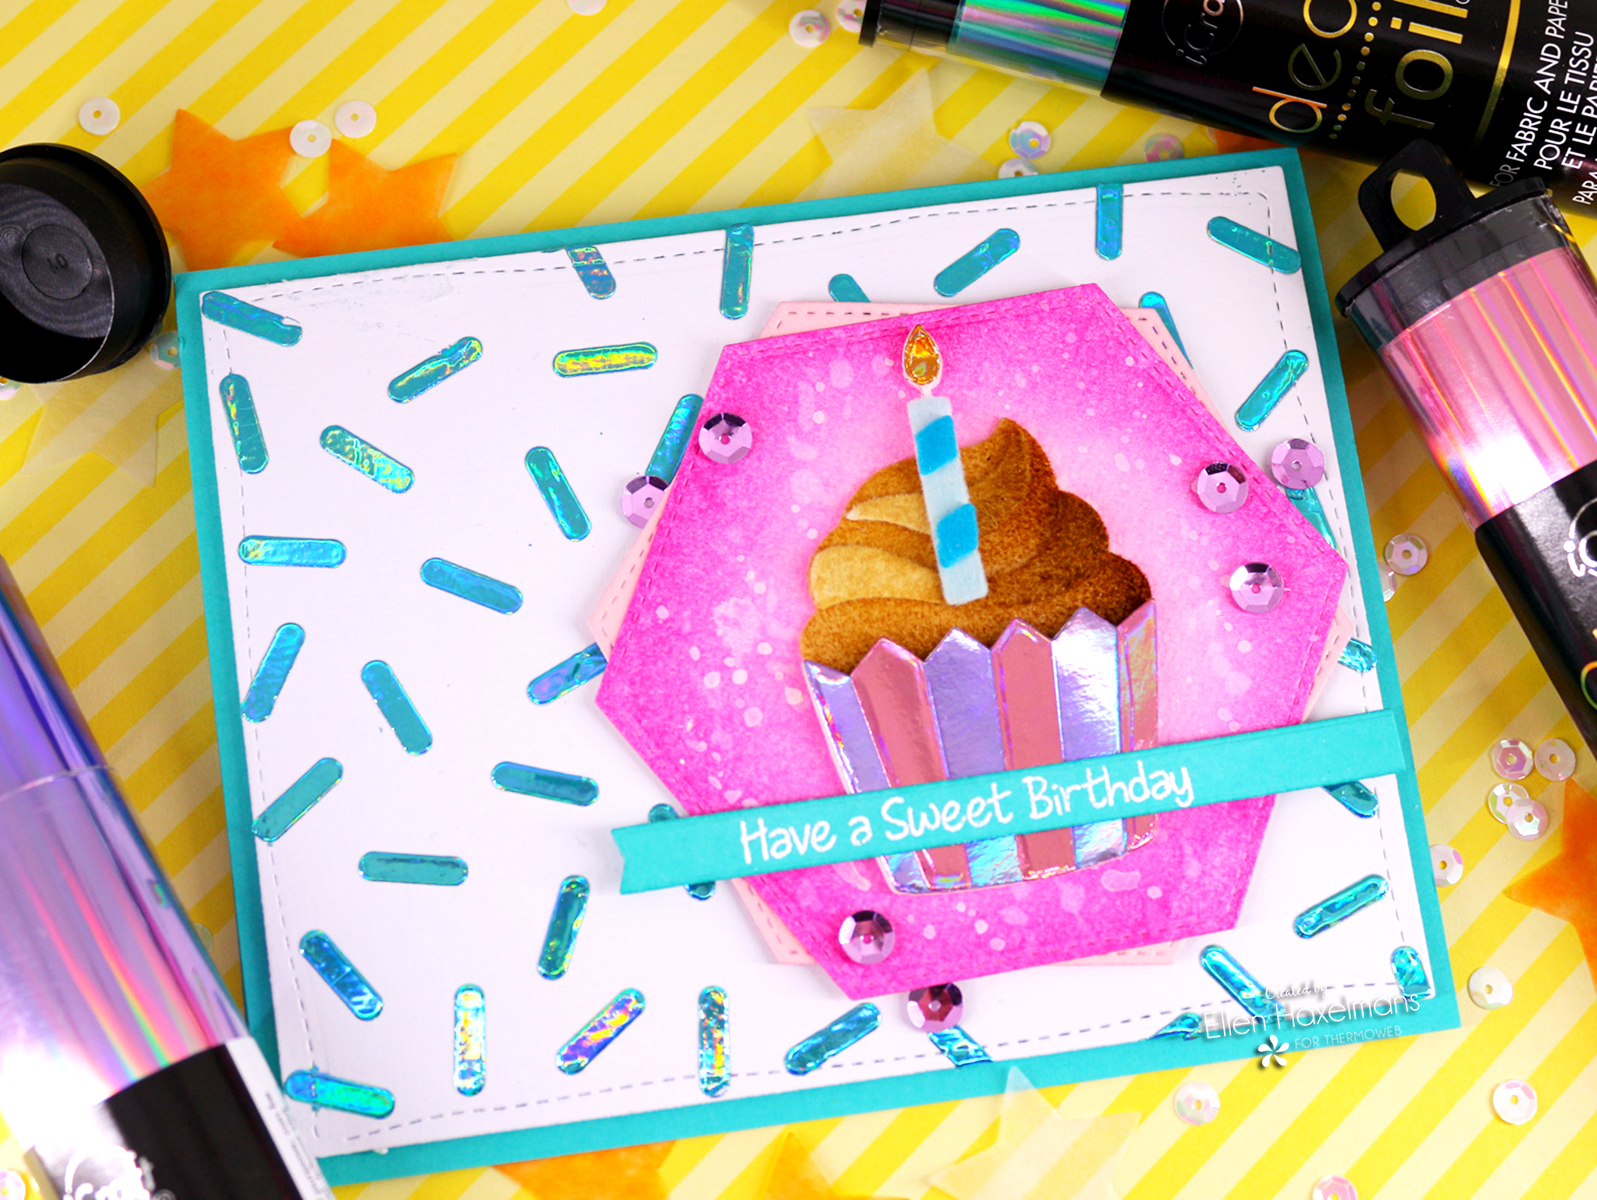 I did cut out two hexagon shapes to ground the cupcake. Then I used Zots Bling Adhesive Dots to attach the sequins on the card.
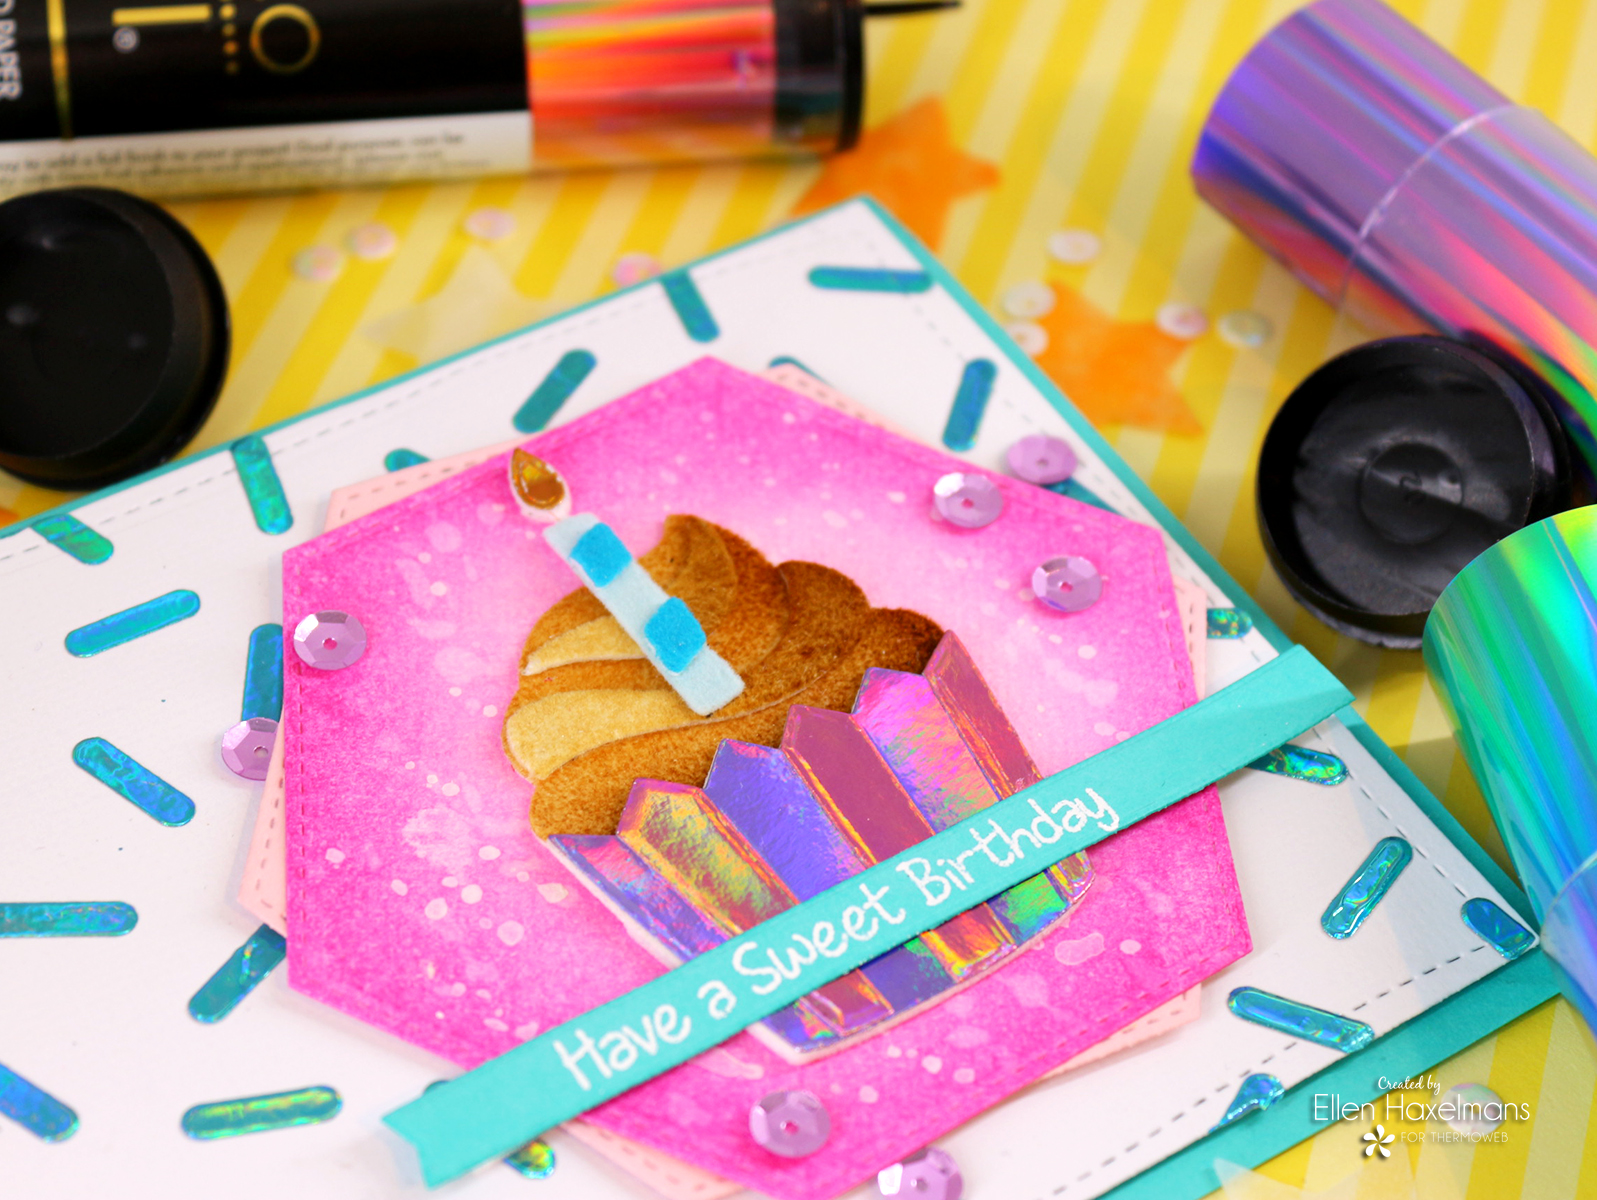 I just love the card, it really shines like a diamond!
 Just as above I started by creating the card panel. This time I used the "Lily Pad" Foil.
 You can probably already guess that I also used the same method as above for the cake. This time I used the "Peach Princess" foil (eek, what a pretty name for a product).
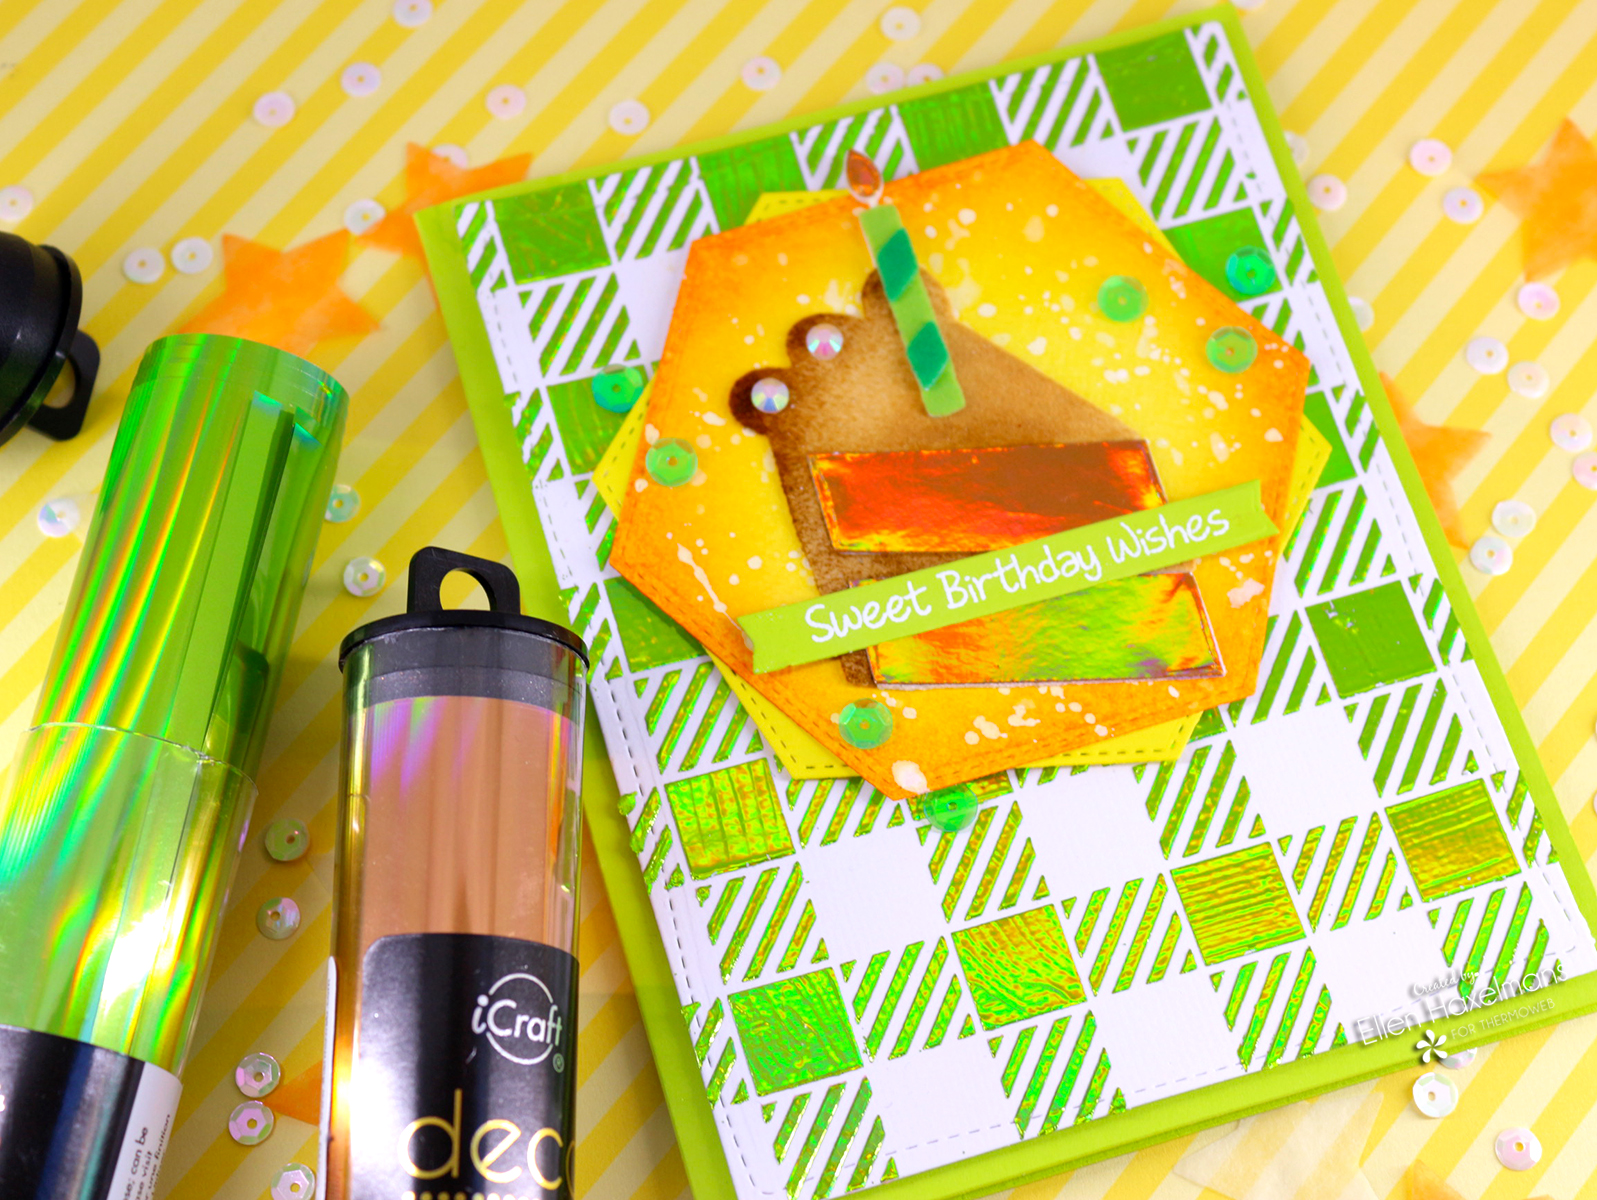 On this card, you have totally different colors, but it looks just as bright as the first card!
 I really am in love with these foils, both cards just scream happiness. It's perfect to celebrates someone's birthday.