No Products in the Cart
 Therm O Web Products Used:
Deco Foil Flock Transfer Sheets – Tuscan Gold
Deco Foil Flock Transfer Sheets – Pink Carnation
Deco Foil Flock Transfer Sheets – Ruby Red
Deco Foil Metallix Gel – Pure Gold
Deco Foil Metallix Gel – White Pearl
Deco Foil Metallix Gel – Champagne Mist
Deco Foil Metallix Gel – Aged Copper
Deco Foil Metallix Gel – Glazed Pewter
Deco Foil Stencil Pal
iCraft Easy Cut Adhesive™ Sheets • Sm
iCraft Ultra Bond Adhesive 2 fl oz
Purple Tape - 1.5"
iCraft Adhesive™ Tape • 1/2 in
Gina K. Designs Premium Cardstock • Luxury White
Gina K. Designs Foam Squares White (320 squares)
Other supplies used:
5" x 7" flat artists canvas
Kaiser Craft - Love die
Ranger Ink - Ground Espresso Distress Archival Ink; Platinum Stickles; Vintage Photo Distress Marker and Distress Ink
Simon Says Stamp - Large Holiday Shapes dies (hearts)
Sizzix - Flourish Texture Fades embossing folder
Southern Ridge Trading Company - Heart stencil
Stampers Anonymous - Papillon stamp
We R Memory Keepers - Scripts embossing folder
Acrylic paints - white; pink; rust; brown
Miscellaneous - vintage key; kraft cardstock; pink patterned scrapbook paper; script patterned scrapbook paper; paint texture comb; button thread; computer printer or alphabet stamps; die cutting machine
Therm O Web Products Used:
Deco Foil Flock Transfer Sheets – Tuscan Gold
Deco Foil Flock Transfer Sheets – Pink Carnation
Deco Foil Flock Transfer Sheets – Ruby Red
Deco Foil Metallix Gel – Pure Gold
Deco Foil Metallix Gel – White Pearl
Deco Foil Metallix Gel – Champagne Mist
Deco Foil Metallix Gel – Aged Copper
Deco Foil Metallix Gel – Glazed Pewter
Deco Foil Stencil Pal
iCraft Easy Cut Adhesive™ Sheets • Sm
iCraft Ultra Bond Adhesive 2 fl oz
Purple Tape - 1.5"
iCraft Adhesive™ Tape • 1/2 in
Gina K. Designs Premium Cardstock • Luxury White
Gina K. Designs Foam Squares White (320 squares)
Other supplies used:
5" x 7" flat artists canvas
Kaiser Craft - Love die
Ranger Ink - Ground Espresso Distress Archival Ink; Platinum Stickles; Vintage Photo Distress Marker and Distress Ink
Simon Says Stamp - Large Holiday Shapes dies (hearts)
Sizzix - Flourish Texture Fades embossing folder
Southern Ridge Trading Company - Heart stencil
Stampers Anonymous - Papillon stamp
We R Memory Keepers - Scripts embossing folder
Acrylic paints - white; pink; rust; brown
Miscellaneous - vintage key; kraft cardstock; pink patterned scrapbook paper; script patterned scrapbook paper; paint texture comb; button thread; computer printer or alphabet stamps; die cutting machine
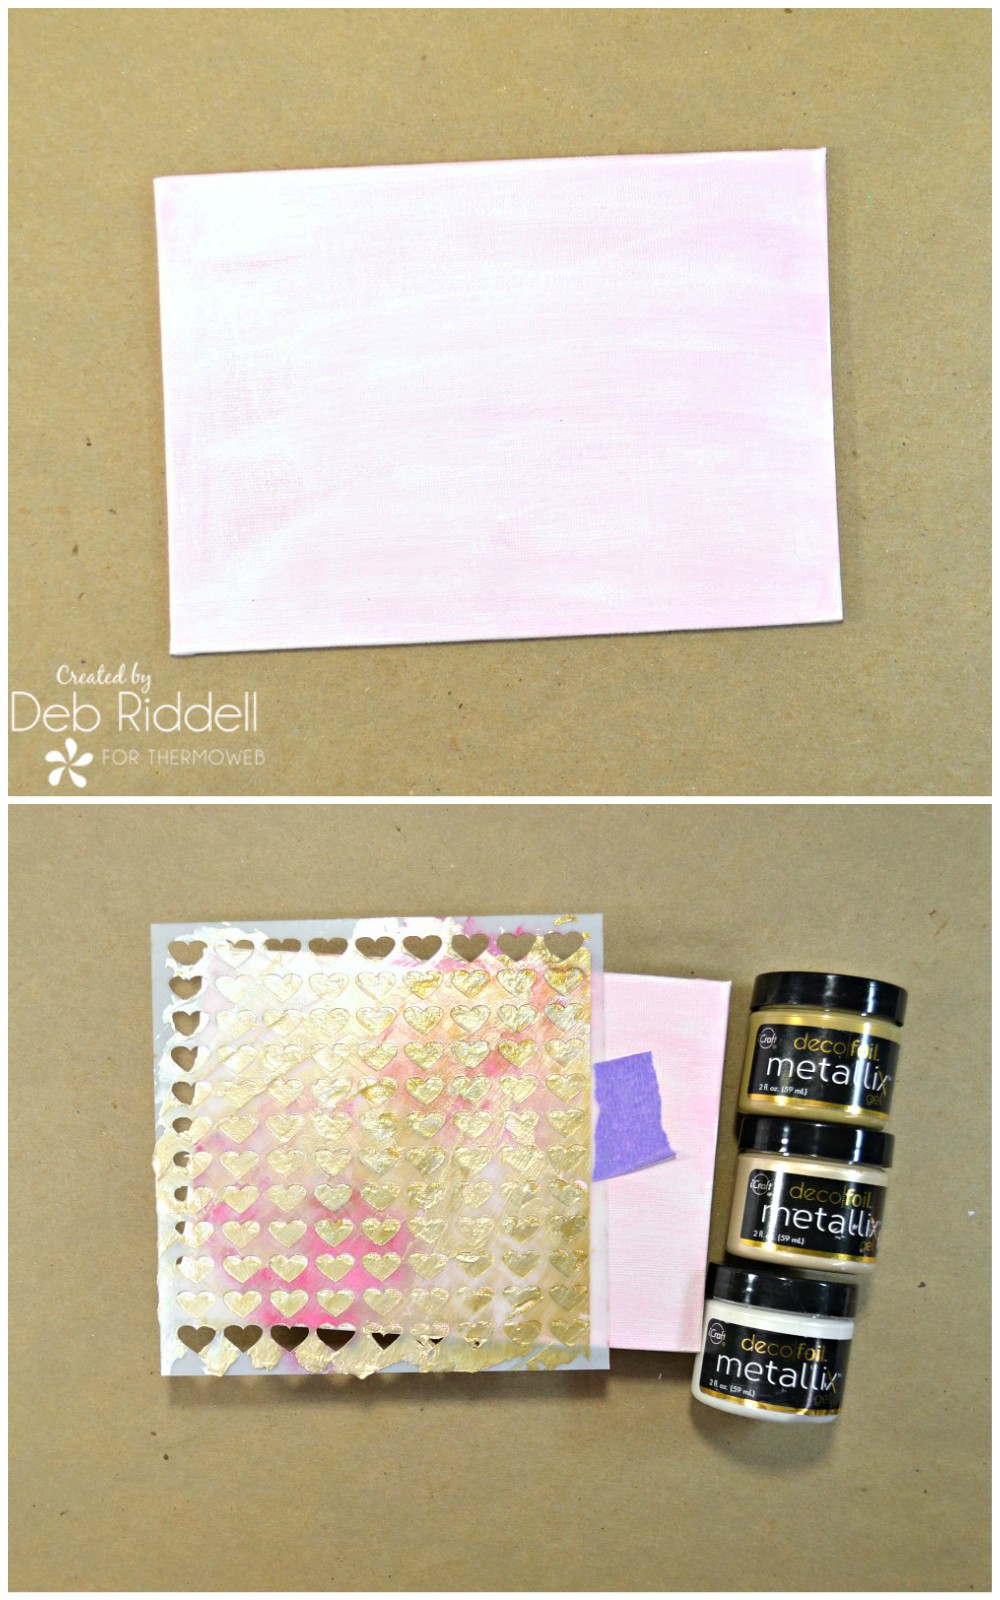
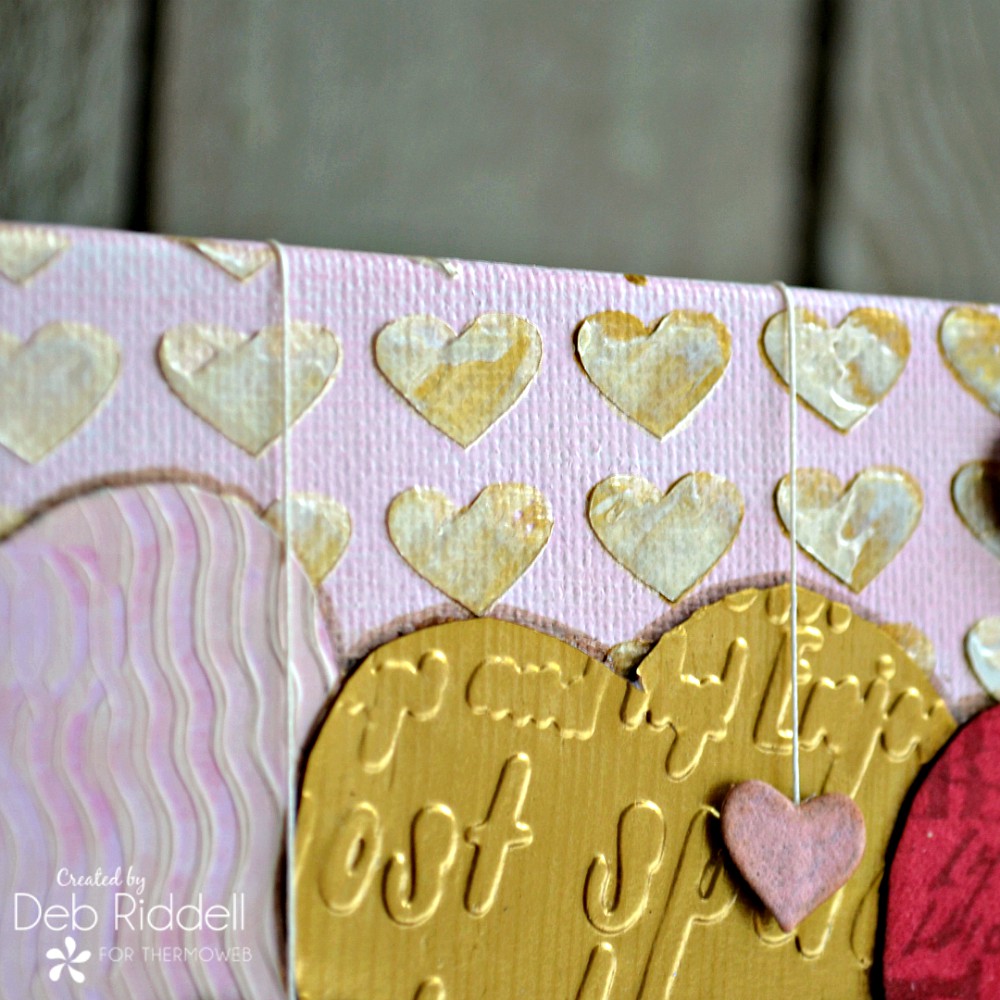
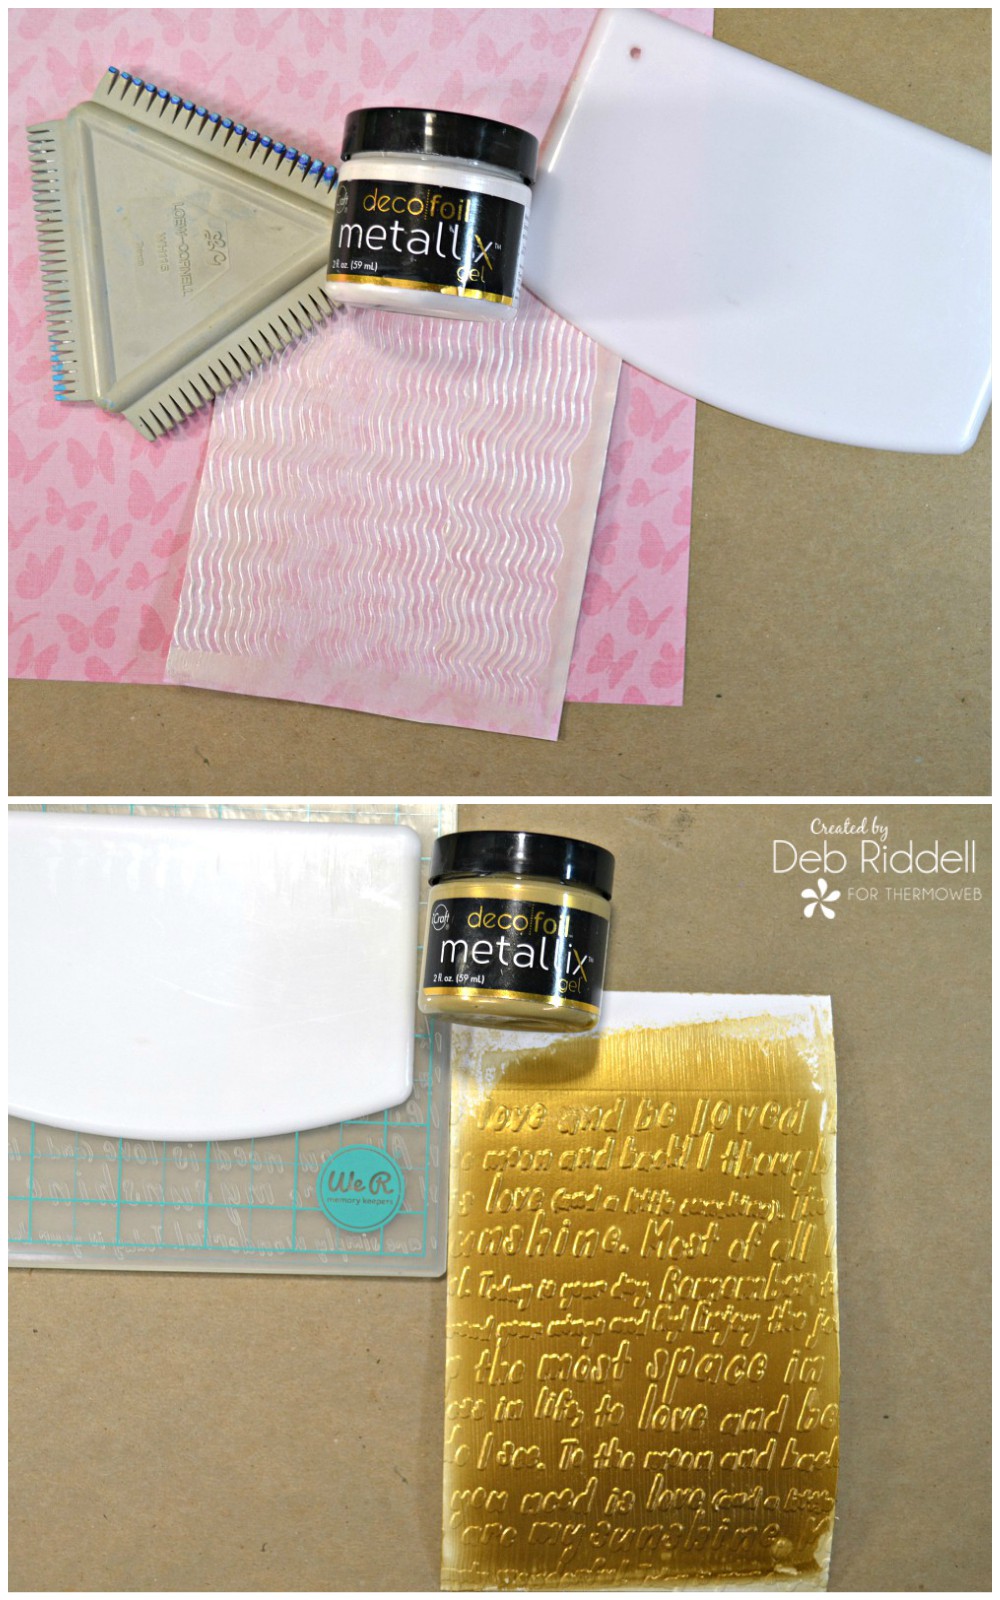 Apply Pure Gold Metallix Gel to another piece of Gina K. Designs Luxury White Premium cardstock with your Deco Foil Stencil Pal in a smooth thick coat. Allow to dry thoroughly (I left it overnight) and then emboss the Metallix coated cardstock with a script embossing folder for the second large heart on our canvas.
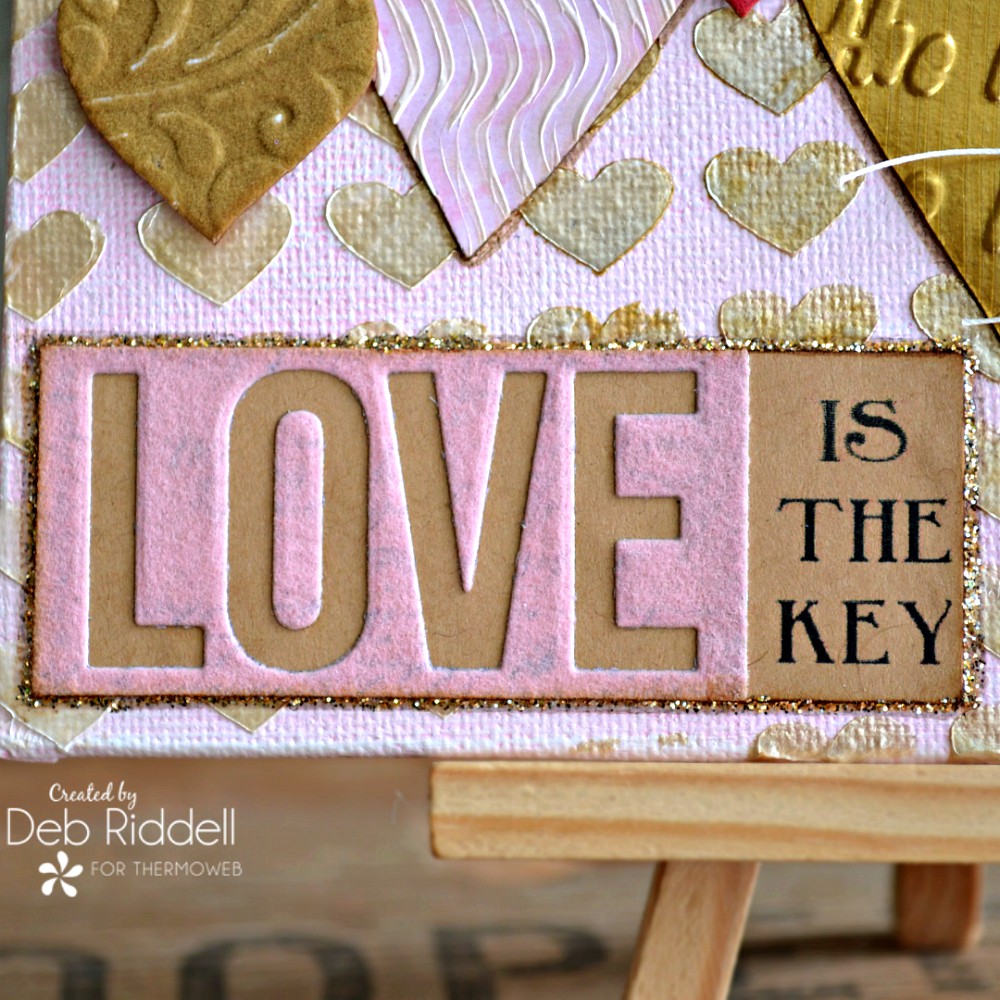
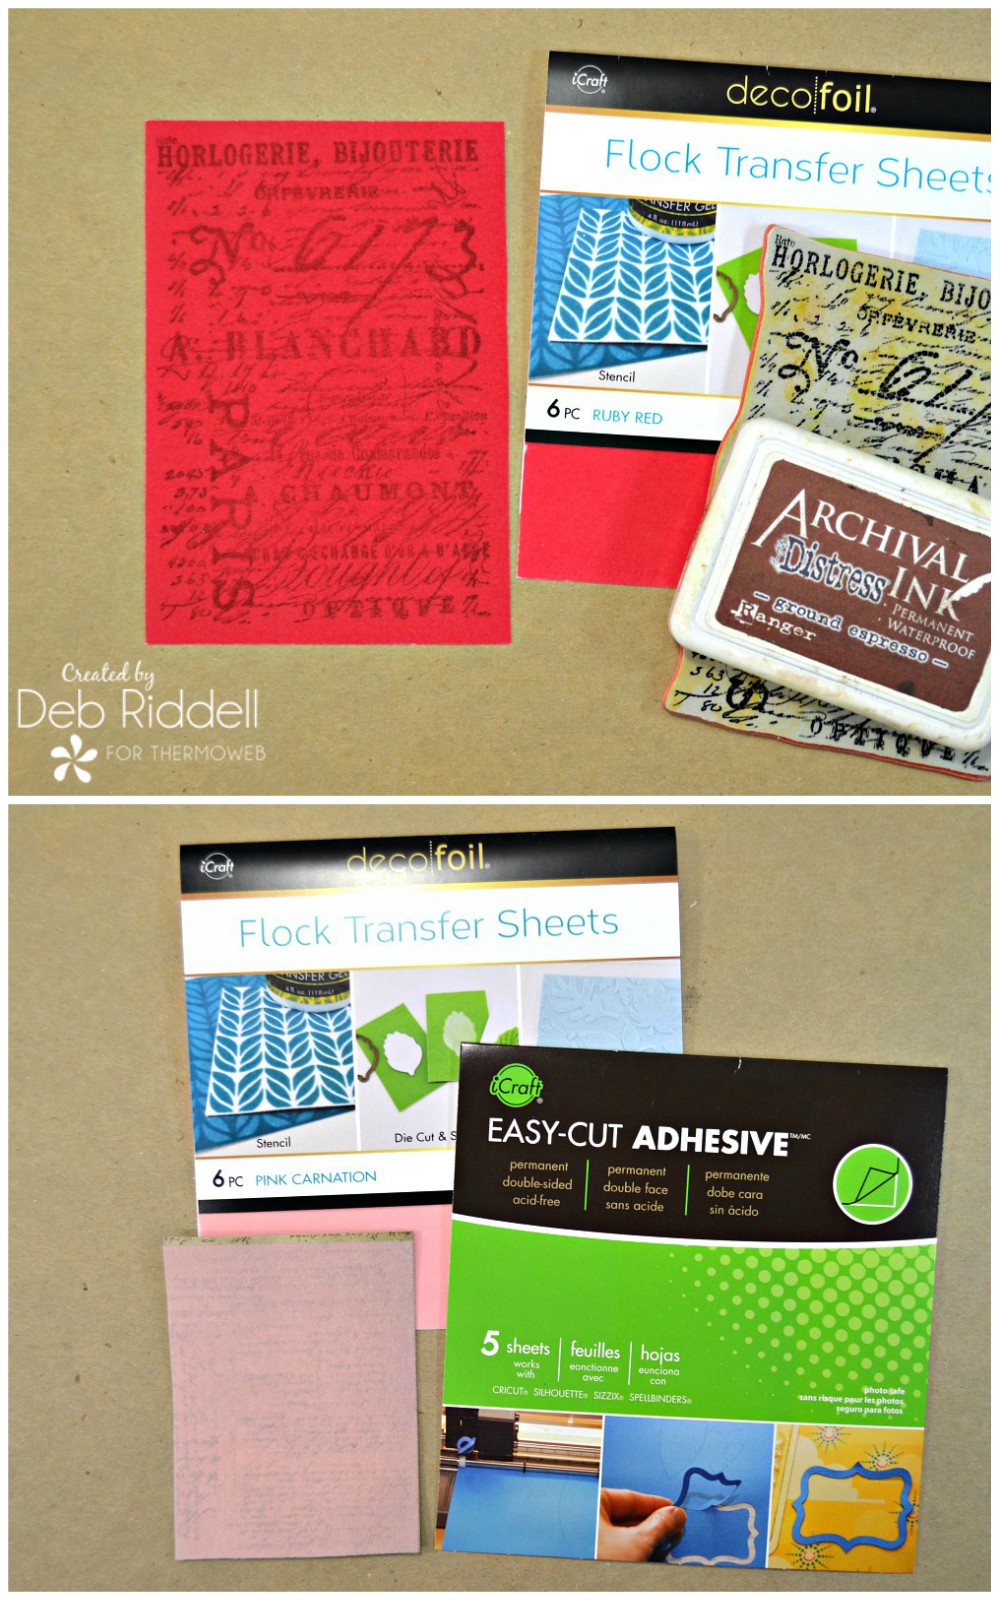 For the sentiment and some of the smaller die cut hearts, cover a piece of script patterned scrapbook paper with iCraft Easy-Cut Adhesive. Remove the adhesive backing paper and apply a piece of Deco Foil Pink Carnation Flock Transfer Sheet over top (remember, fuzzy side down!). Run the flock and cardstock through your die cutting machine or foil laminator on the cold setting to ensure good contact and remove the flock backing paper. I love how you can see the pattern of the scrapbook paper through the flock!
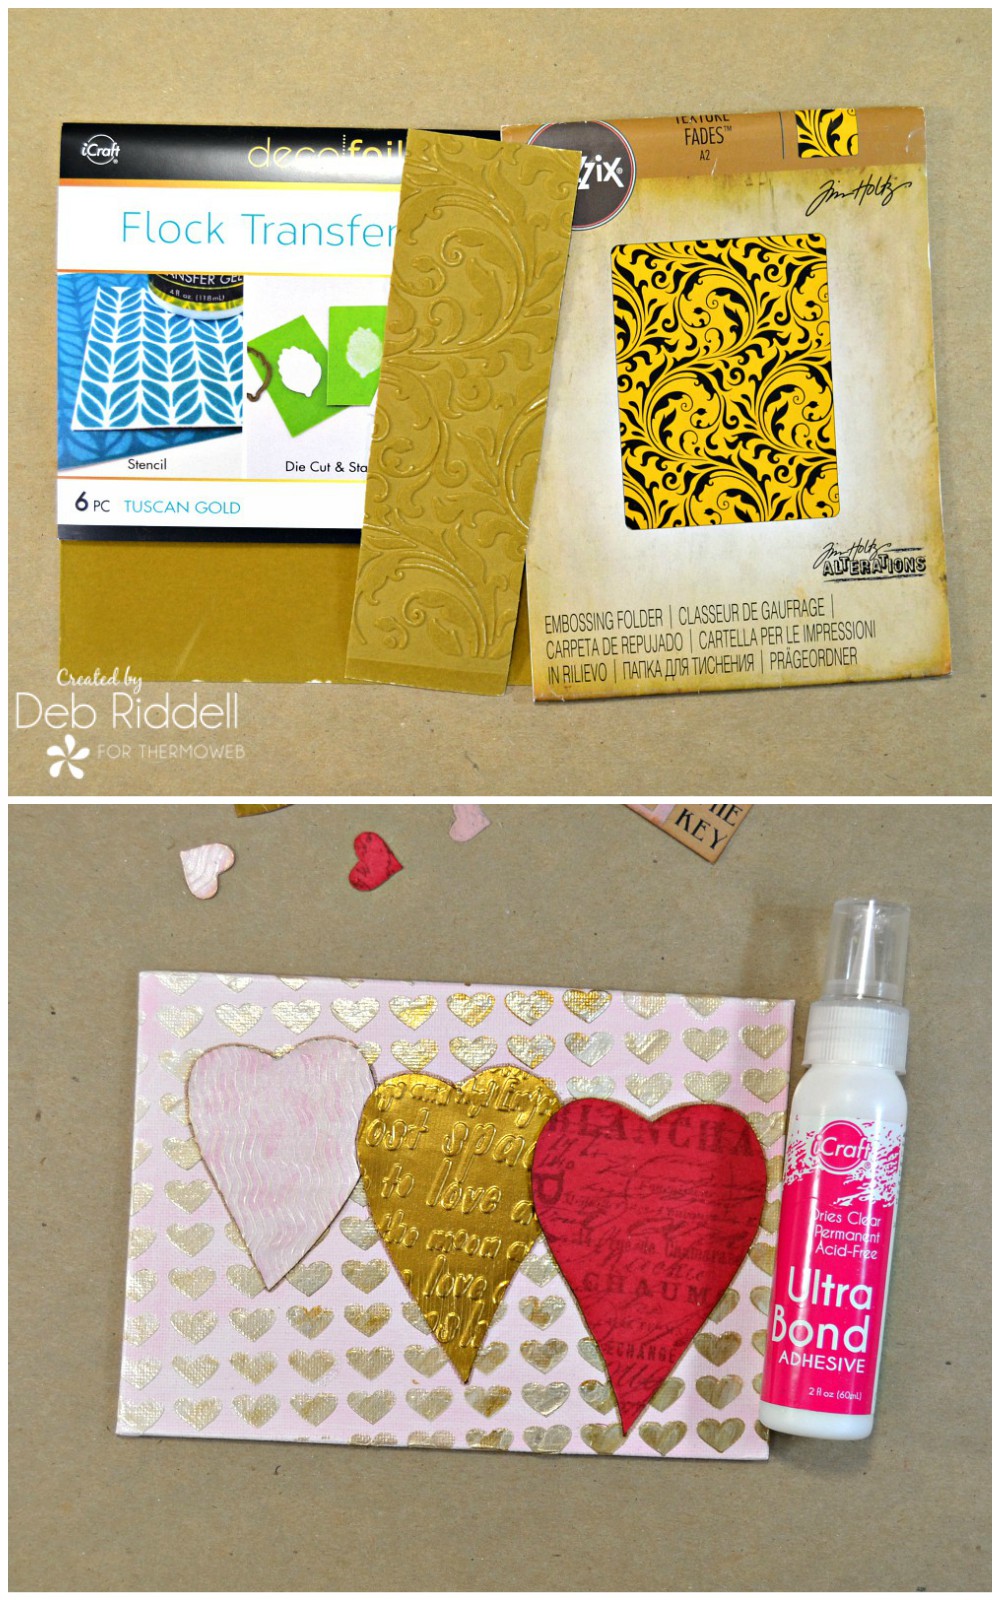
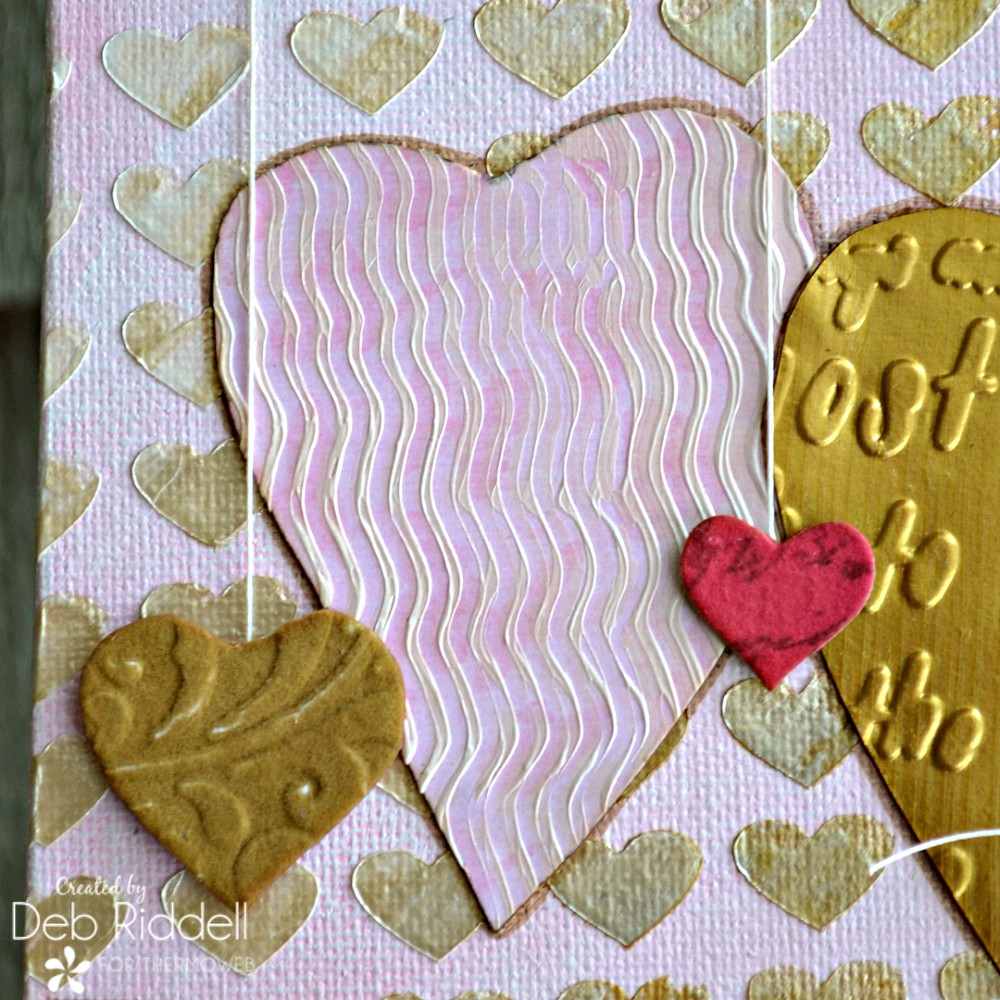
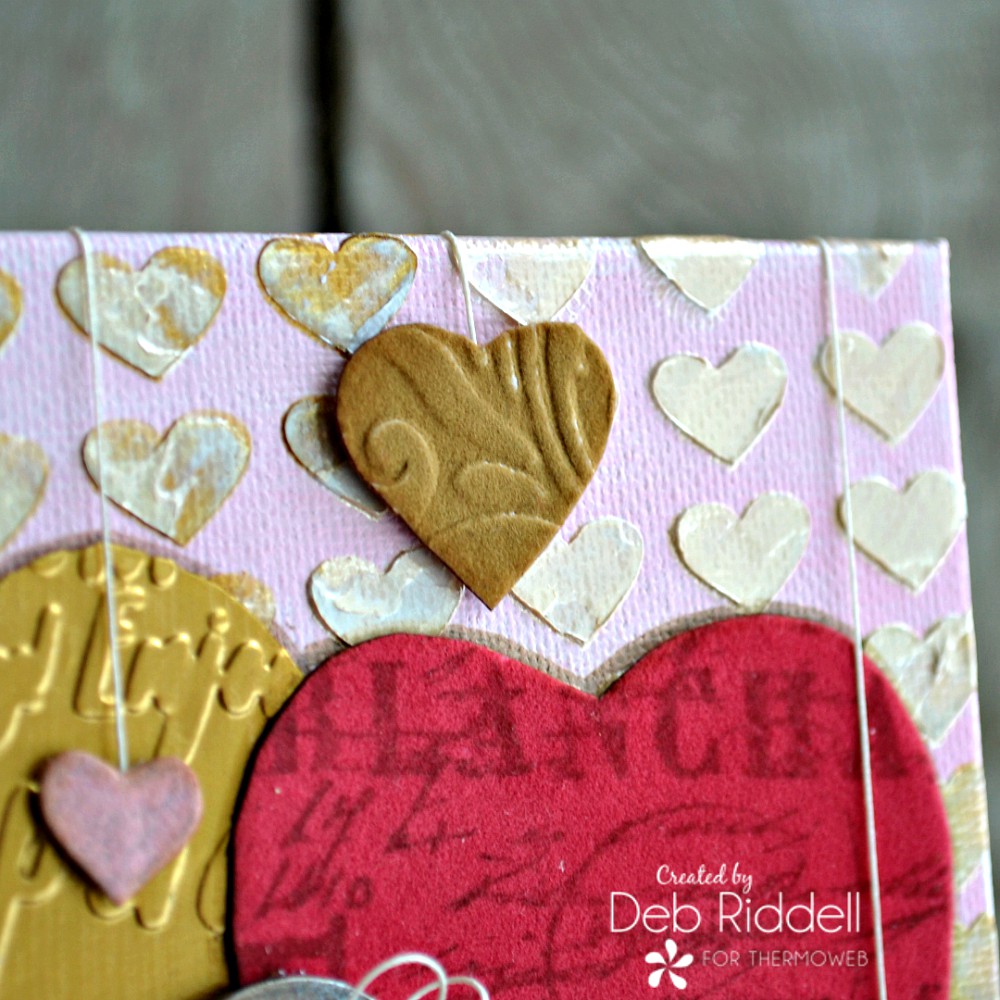
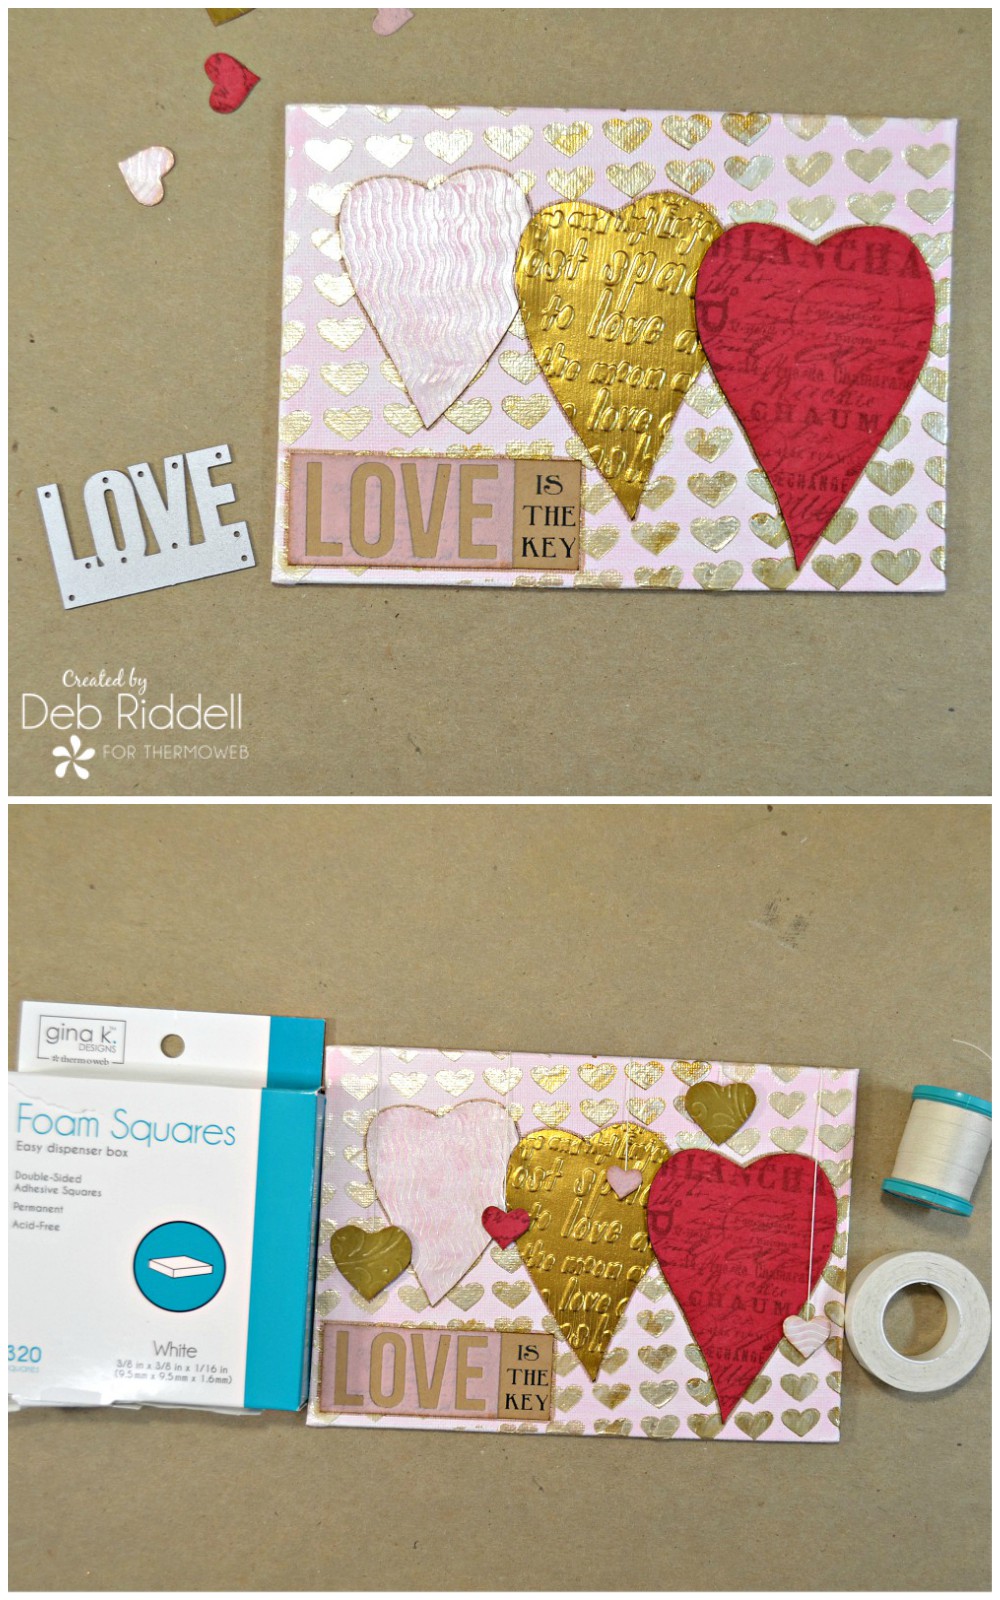 Die-cut a couple of smaller hearts from the Tuscan Gold Flock embossed cardstock and then die cut a few more hearts from some of the other flocked and gelled cardstock remnants that you have leftover. Adhere a length of button string to the back of the small die-cut hearts and then pop them up on Gina K. Designs White Foam Squares, scattering them around the canvas. Pull the lengths of button string taut and straight over to the backside of the canvas and hold them in place with a piece of iCraft 1/2" Adhesive Tape. Cover the back of the canvas with a piece of pink patterned scrapbook paper to cover up the mechanics!
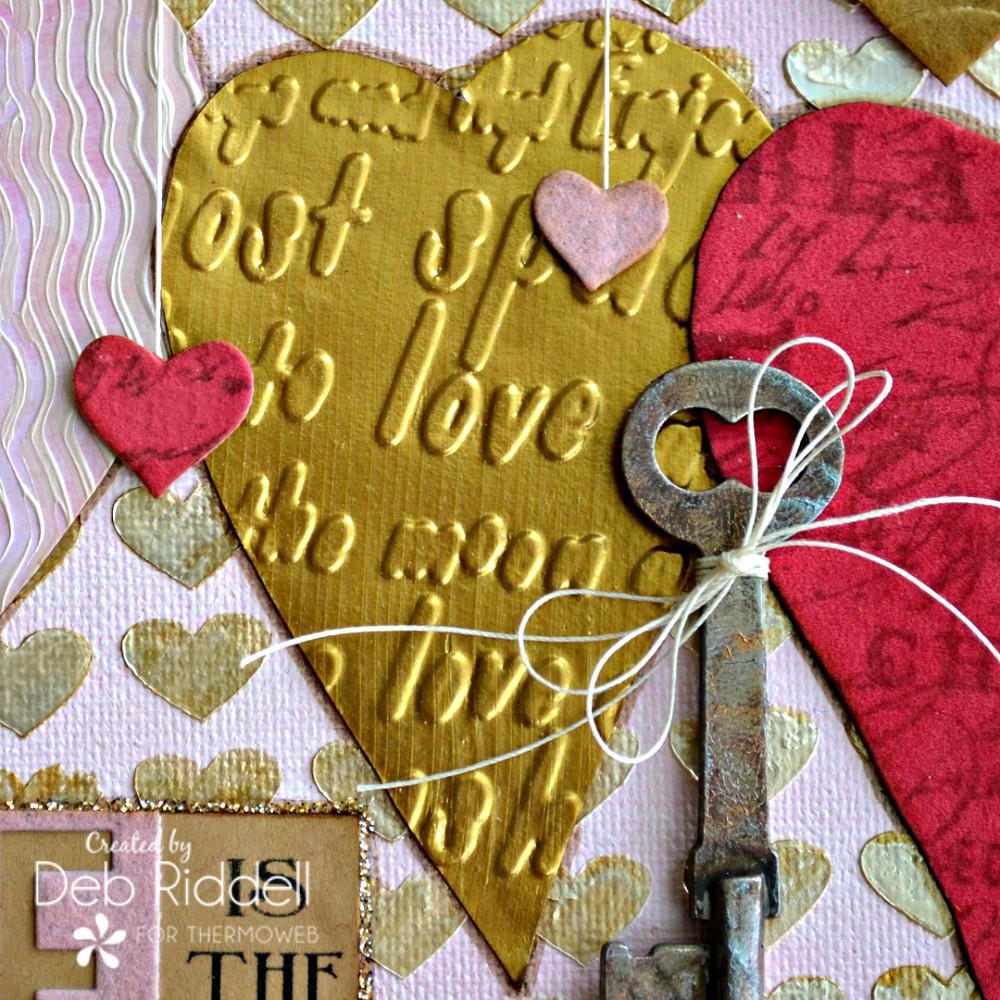
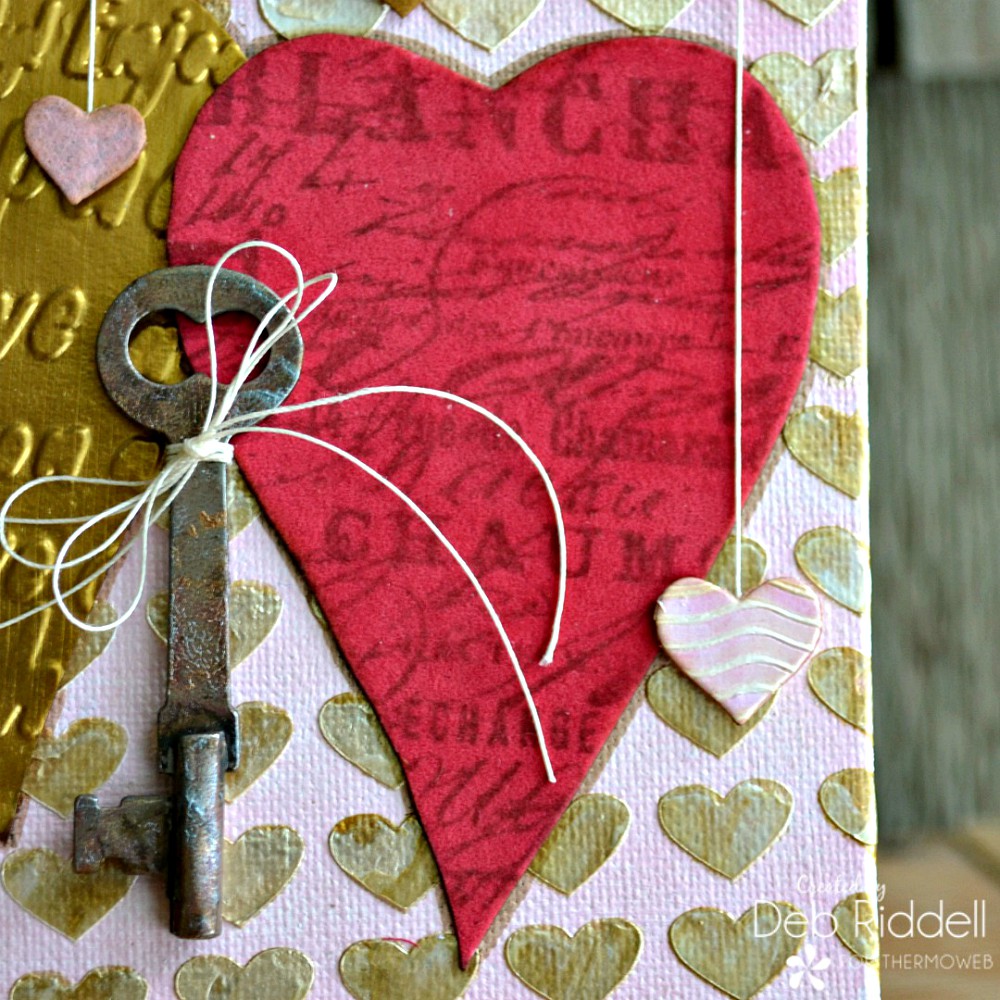
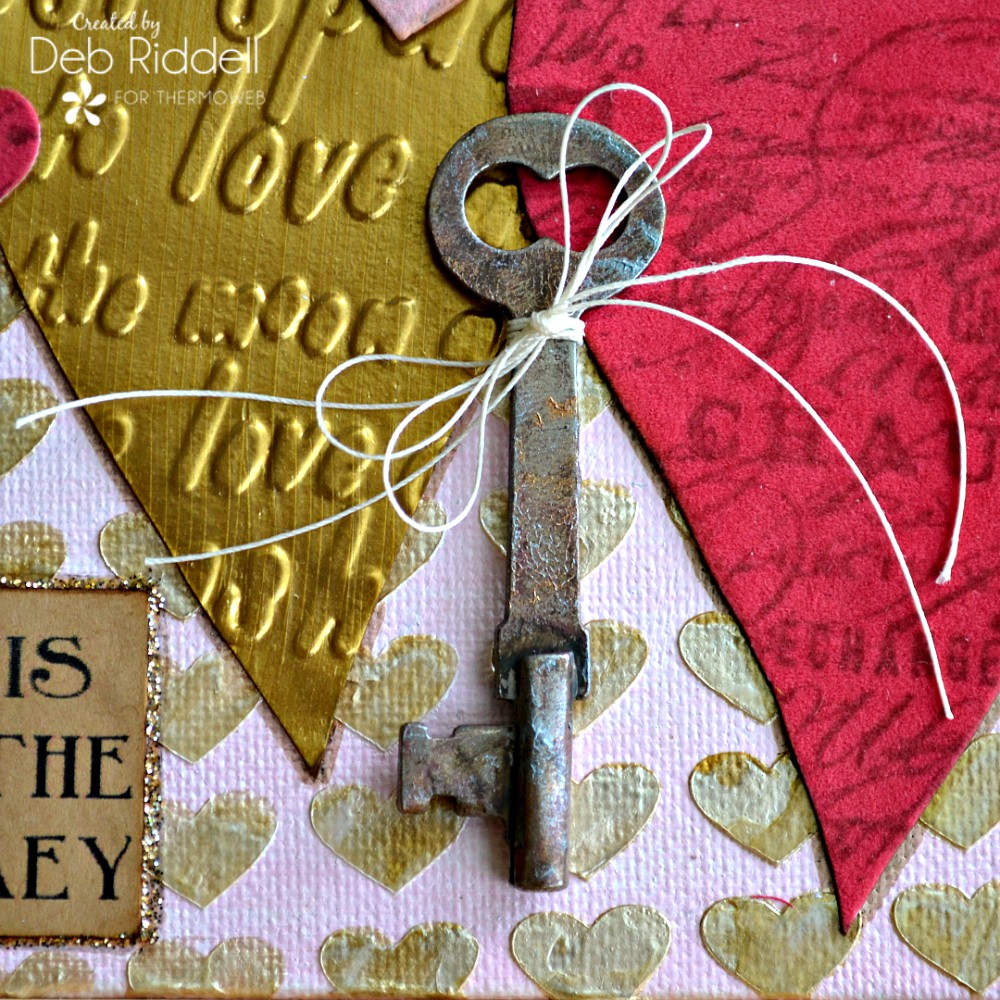
Finger paint your vintage key with acrylic paint in shades of rust and brown. Let dry thoroughly and then dip your fingertip in the Aged Copper Metallix Gel and lightly pounce it here and there over the key. Repeat the process with the Glazed Pewter Metallix Gel. This is my favorite new way to make a piece look old and distressed, love the patina!
Die-cut a couple of smaller hearts from the Tuscan Gold Flock embossed cardstock and then die cut a few more hearts from some of the other flocked and gelled cardstock remnants that you have leftover. Adhere a length of button string to the back of the small die-cut hearts and then pop them up on Gina K. Designs White Foam Squares, scattering them around the canvas. Pull the lengths of button string taut and straight over to the backside of the canvas and hold them in place with a piece of iCraft 1/2" Adhesive Tape. Cover the back of the canvas with a piece of pink patterned scrapbook paper to cover up the mechanics!
Finger paint your vintage key with acrylic paint in shades of rust and brown. Let dry thoroughly and then dip your fingertip in the Aged Copper Metallix Gel and lightly pounce it here and there over the key. Repeat the process with the Glazed Pewter Metallix Gel. This is my favorite new way to make a piece look old and distressed, love the patina!
 Tie a bow around the Metallix Gel aged key with a couple of lengths of button string and adhere it in place between the two largest hearts with iCraft Ultra Bond Adhesive. Outline the sentiment with a thin bead of Platinum Stickles and your canvas is complete.
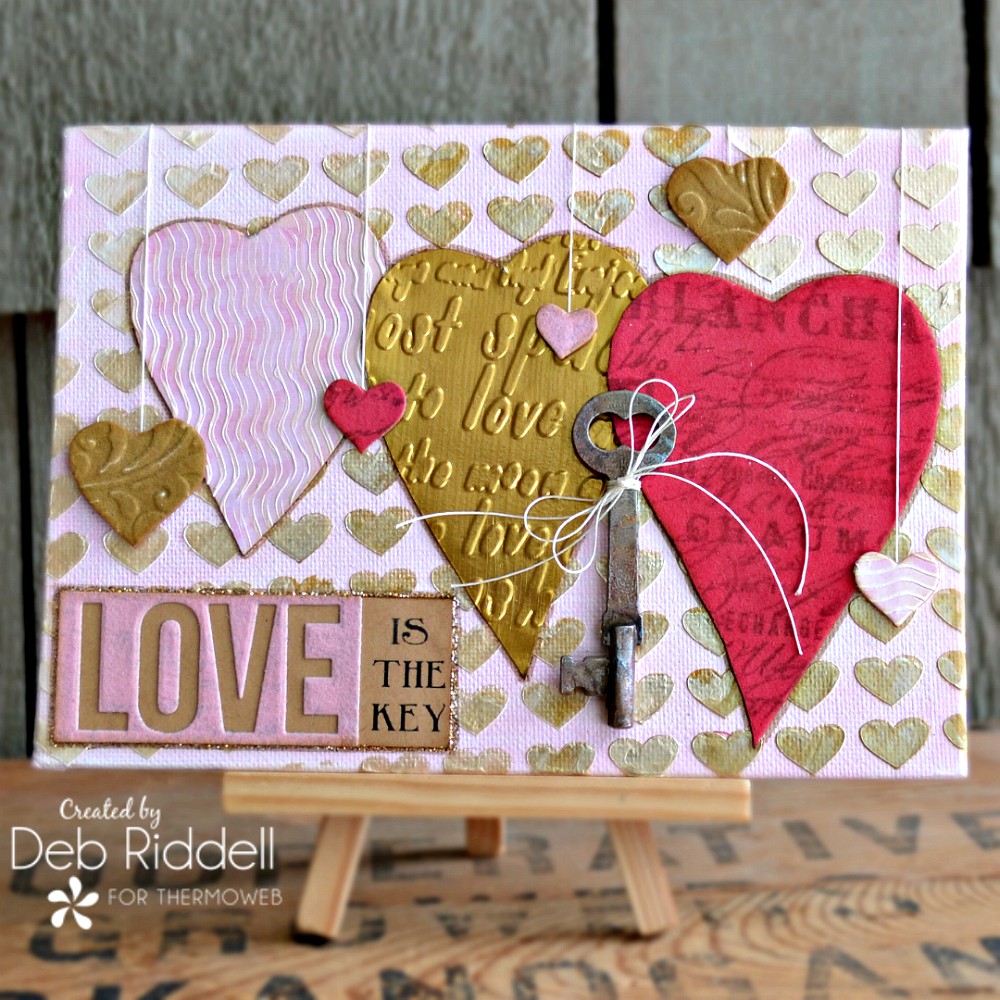
Here are a few pictures of the completed canvas.
Tie a bow around the Metallix Gel aged key with a couple of lengths of button string and adhere it in place between the two largest hearts with iCraft Ultra Bond Adhesive. Outline the sentiment with a thin bead of Platinum Stickles and your canvas is complete.
Here are a few pictures of the completed canvas.
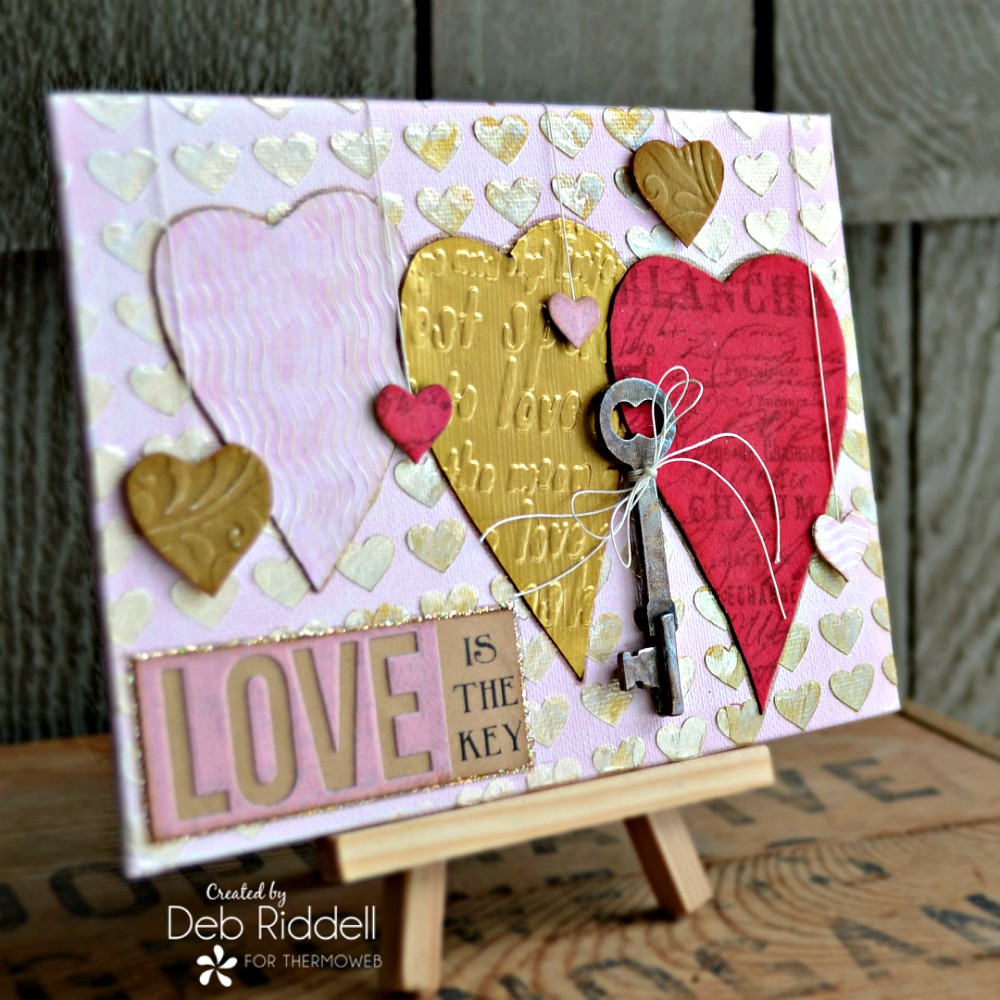 Hope that you've enjoyed seeing how my Love Is The Key mixed media canvas came together and be sure to pop by all this week to see what the rest of the design team made for Creativation 2020, lots of eye candy coming your way showcasing Therm O Web's wonderful new products! Thanks again for stopping by and happy creating,
Deb xo
Hope that you've enjoyed seeing how my Love Is The Key mixed media canvas came together and be sure to pop by all this week to see what the rest of the design team made for Creativation 2020, lots of eye candy coming your way showcasing Therm O Web's wonderful new products! Thanks again for stopping by and happy creating,
Deb xo