No Products in the Cart
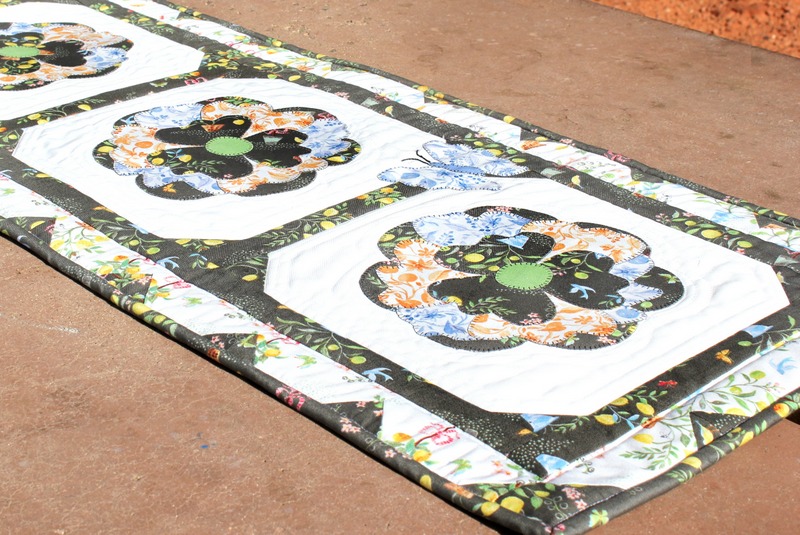
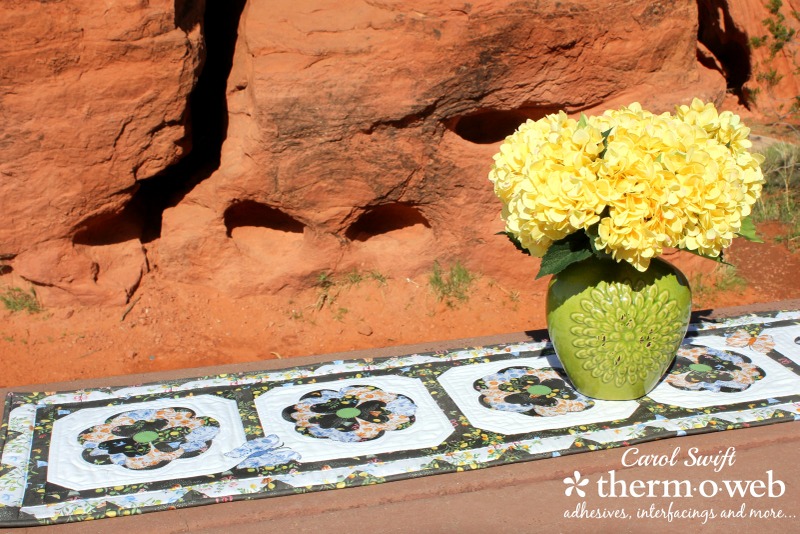 Blend’s Limonella fabric line by designer Brenda Walton was such a pleasure to sew with. The fabric made my room and my day a lot happier with all the butterflies, flowers, and birds, and of course, lemons and limes…so sweet!
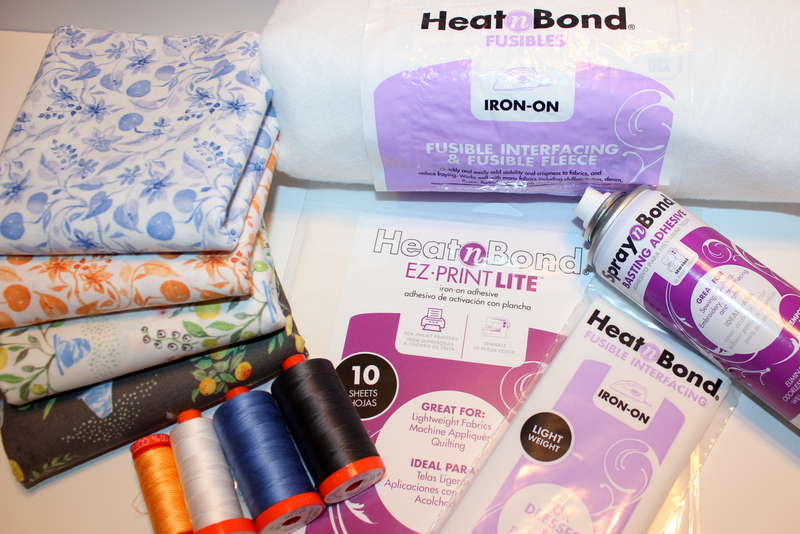
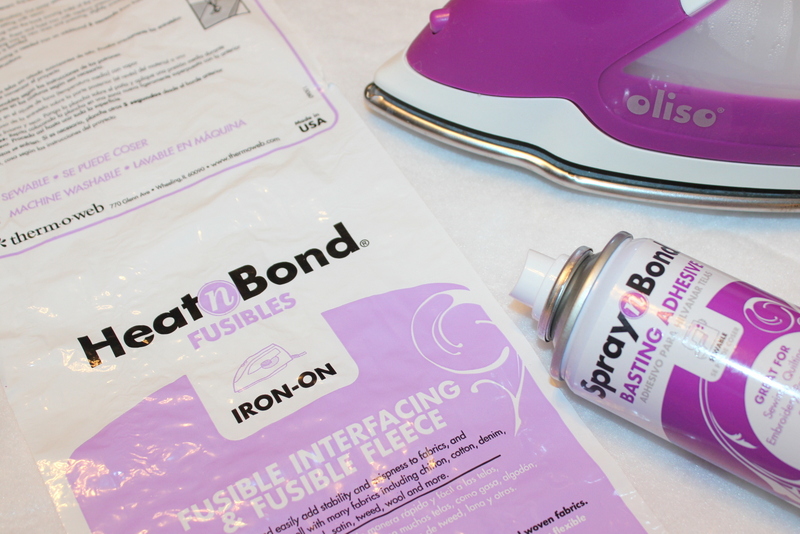
 Supplies you’ll need to make the Scalloped Runner:
Heat n Bond EZ Print Lite Sheets or Heat n Bond Lite
Therm O Web Spray n Bond Basting Adhesive
Therm O Web Stitch n Sew Fleece Sew-in High Loft/Batting
Heat N Bond Fusible Interfacing – Light Weight
Blend Limonella fabrics or fabrics of your choice
Aurifil Thread, 50 wt.
Oliso Purple Iron
Embroidery thread
Scalloped Runner Pattern
Supplies you’ll need to make the Scalloped Runner:
Heat n Bond EZ Print Lite Sheets or Heat n Bond Lite
Therm O Web Spray n Bond Basting Adhesive
Therm O Web Stitch n Sew Fleece Sew-in High Loft/Batting
Heat N Bond Fusible Interfacing – Light Weight
Blend Limonella fabrics or fabrics of your choice
Aurifil Thread, 50 wt.
Oliso Purple Iron
Embroidery thread
Scalloped Runner Pattern
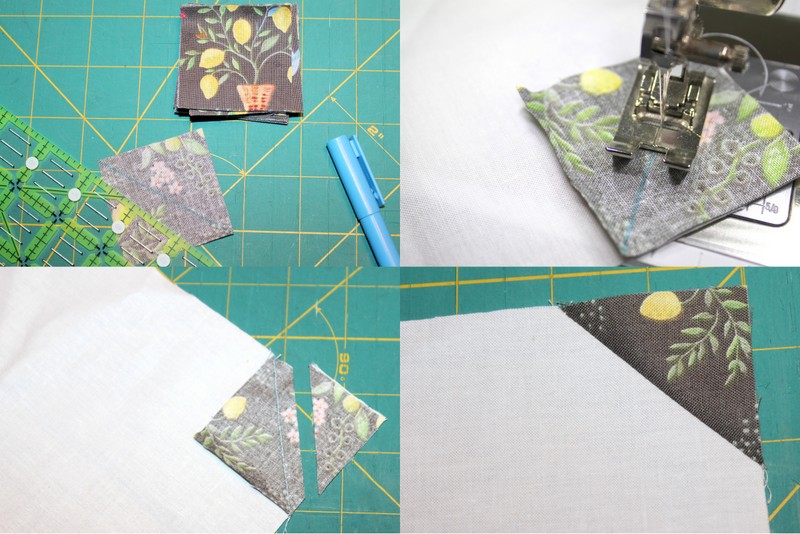 Step 2: Prepare Applique Designs using method A or B.
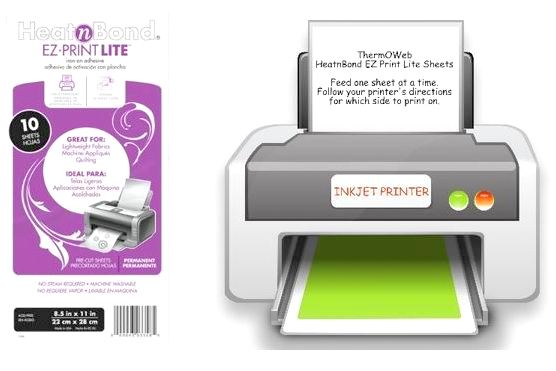
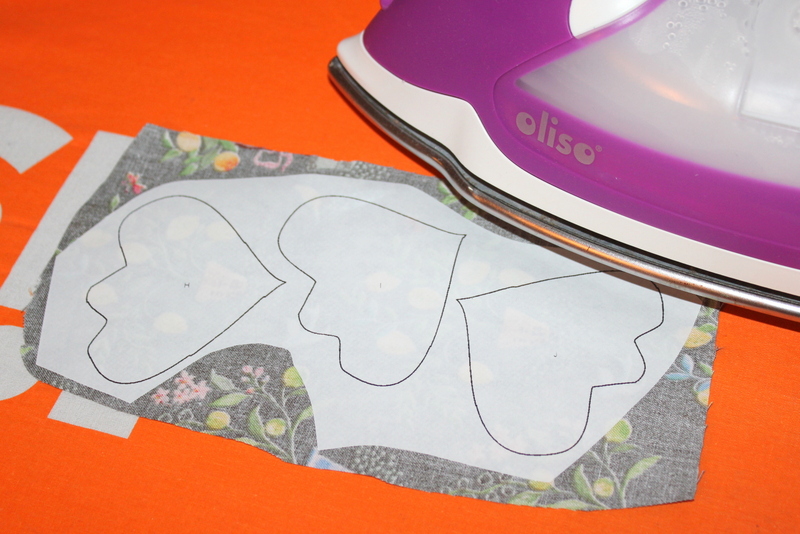
A. Applique with printable HeatnBond EZ Print Lite sheets: Using your inkjet printer, print out applique pattern pieces using Heat n Bond EZ Print Lite sheets. Load one sheet at a time into the paper tray. The sheet should be placed so printing is on the smooth side of the paper. Print quality at the normal setting and for plain paper. Allow 5-10 seconds for ink to dry.
Step 2: Prepare Applique Designs using method A or B.
A. Applique with printable HeatnBond EZ Print Lite sheets: Using your inkjet printer, print out applique pattern pieces using Heat n Bond EZ Print Lite sheets. Load one sheet at a time into the paper tray. The sheet should be placed so printing is on the smooth side of the paper. Print quality at the normal setting and for plain paper. Allow 5-10 seconds for ink to dry.
 B. Applique with HeatnBond Lite: Trace applique designs on the smooth side of Heat n Bond Lite.
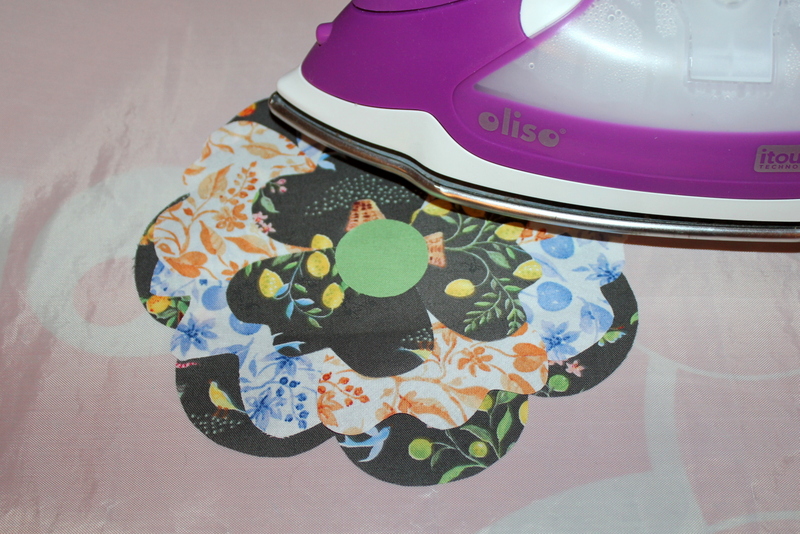
 Step 4: Cut out applique pieces. Peel off paper liner. Place applique shape, adhesive side down, on the right side of the fabric. Press and hold iron for 6 seconds on each section until the entire piece is bonded. Let cool.
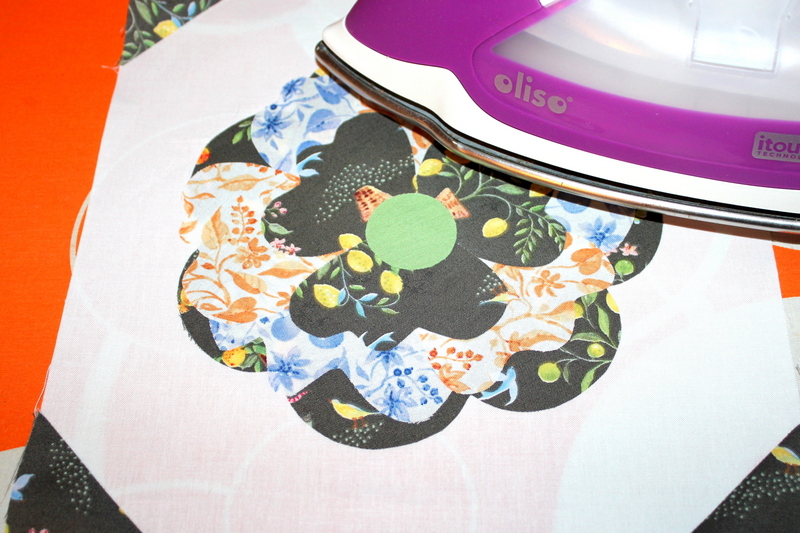 Tips: Ironing Heat N Bond Fusible Interfacing – Light Weight to the wrong side of fabric block helps stabilize the fabric when sewing on applique pieces, keeps threads from showing through and helps maintain fabric size. Also using a heatproof applique sheet to assemble your pieces is very helpful.
 Step 5: Sew around edges using a straight, zig-zag, or blanket stitch.
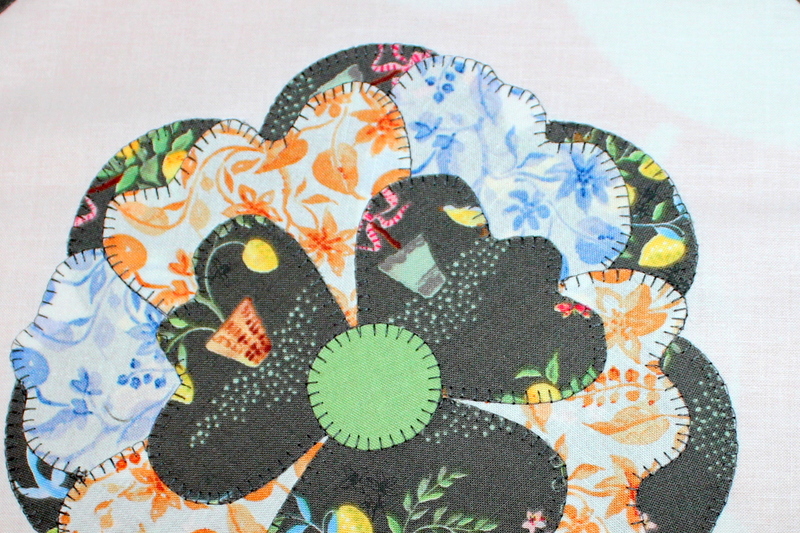 Step 6: Embroider butterfly antennas using your favorite stitch.
Step 7: Sew 1½” x 10½” sashing strips between 10½” x 10½” blocks.
Step 8: Sew 1½” x 54½” strips to the left and right of center blocks.
Step 9: Sew 1½” x 12½” strips to the top and bottom of center blocks.
Step 10: Sew 2 - 1” x 1” squares to each corner of 1 - 1½” x 4½” rectangle. Trim ¼” from sewn diagonal seam and press towards the corner. Repeat to make a total of 34 scalloped rectangles.
Step 11: Sew two sets of three rectangles with corners together; match seams. Press seams open.
Step 12: Sew two sets of fourteen rectangles with corners together; match seams. Press seams open. Sew 2” squares to ends of strips. Press seams open.
Step 13: Sew the three-piece rectangles to top and bottom of center blocks. Press seams towards inner borders.
Step 14: Sew the fourteen pieces (with corners) to the left and right of center blocks. Press seams towards inner borders.
Step 15: Finish runner using your favorite method of quilting and binding.
Step 6: Embroider butterfly antennas using your favorite stitch.
Step 7: Sew 1½” x 10½” sashing strips between 10½” x 10½” blocks.
Step 8: Sew 1½” x 54½” strips to the left and right of center blocks.
Step 9: Sew 1½” x 12½” strips to the top and bottom of center blocks.
Step 10: Sew 2 - 1” x 1” squares to each corner of 1 - 1½” x 4½” rectangle. Trim ¼” from sewn diagonal seam and press towards the corner. Repeat to make a total of 34 scalloped rectangles.
Step 11: Sew two sets of three rectangles with corners together; match seams. Press seams open.
Step 12: Sew two sets of fourteen rectangles with corners together; match seams. Press seams open. Sew 2” squares to ends of strips. Press seams open.
Step 13: Sew the three-piece rectangles to top and bottom of center blocks. Press seams towards inner borders.
Step 14: Sew the fourteen pieces (with corners) to the left and right of center blocks. Press seams towards inner borders.
Step 15: Finish runner using your favorite method of quilting and binding.
 An optional method of finishing runner:
Lay runner backing with the wrong side up on protective cloth or paper (to prevent overspray.) Spray the wrong side of backing with Therm O Web Spray n Bond Basting Adhesive following manufacturer’s directions. Lay Therm O Web Stitch n Sew Fleece Sew-in High Loft/Batting on backing and smooth to remove wrinkles and creases. Spray fleece/batting with adhesive. Lay runner top, wrong side down, on sprayed batting. Smooth to remove wrinkles and creases. Quilt as desired. Add binding using your favorite method.
An optional method of finishing runner:
Lay runner backing with the wrong side up on protective cloth or paper (to prevent overspray.) Spray the wrong side of backing with Therm O Web Spray n Bond Basting Adhesive following manufacturer’s directions. Lay Therm O Web Stitch n Sew Fleece Sew-in High Loft/Batting on backing and smooth to remove wrinkles and creases. Spray fleece/batting with adhesive. Lay runner top, wrong side down, on sprayed batting. Smooth to remove wrinkles and creases. Quilt as desired. Add binding using your favorite method.
 You can find the PDF pattern and templates HERE.

Written by Carol Swift