No Products in the Cart
 We hope you heard the news we shared yesterday about our first collaboration with our friends at Sunny Studio! It's been something we've been looking forward to for some time. We hope you'll find some new tips and tricks to use after seeing all the projects this week! Speaking of projects...be sure to visit Sunny Studio on their social media so you too can see more on how Juliana Michaels created this incredible card with our Deco Foil Flock Transfer Sheets! (click the image to go to the Sunny Studio Stamps Blog!)
We hope you heard the news we shared yesterday about our first collaboration with our friends at
We hope you heard the news we shared yesterday about our first collaboration with our friends at Sunny Studio! It's been something we've been looking forward to for some time. We hope you'll find some new tips and tricks to use after seeing all the projects this week! Speaking of projects...be sure to visit Sunny Studio on their social media so you too can see more on how Juliana Michaels created this incredible card with our Deco Foil Flock Transfer Sheets! (click the image to go to the Sunny Studio Stamps Blog!)
We hope you heard the news we shared yesterday about our first collaboration with our friends at 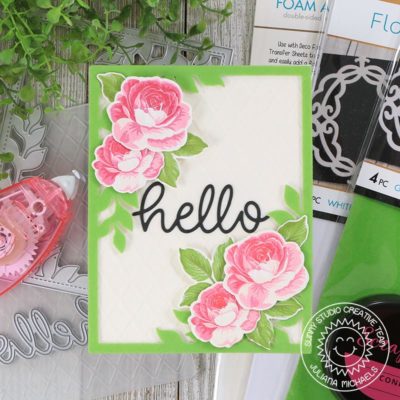
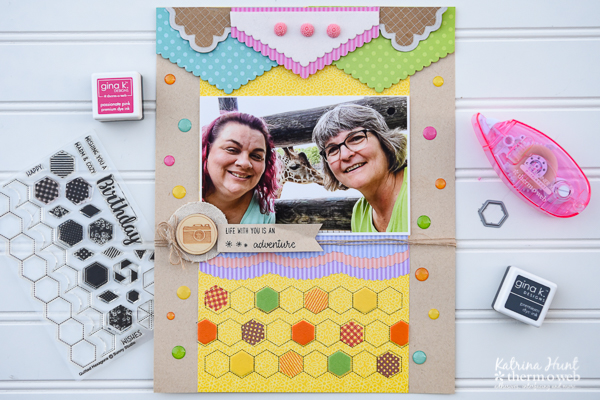 Therm O Web Supplies Used:
Deco Foil Foam Adhesive Sheets
Therm O Web Memory Runner XL
Therm O Web iCraft Purple Tape .5 inch
Therm O Web Zots Singles-Medium
Therm O Web iCraft Ultra Bond Liquid Adhesive
Deco Foil Flock Transfer Sheets-Sunshine Yellow, Green Envy, Orange Glow, White Latte
Gina K Designs Foam Squares
Gina K Designs Masking Magic Sheets
Sunny Studio Supplies: Paper: Flirty Flowers, Dots and Stripes Pastels Stamps: Critter Campout Stamps and Dies: Quilted Hexagons Stamps Dies Fishtail Banner II Dies
Other Supplies: Cardstock, Twine, Gina K Design Inks, Wood Veneer/Canvas Button/Pink Flowers/Kraft Tags-Maya Road; Enamel Dots-Simple Stories
Therm O Web Supplies Used:
Deco Foil Foam Adhesive Sheets
Therm O Web Memory Runner XL
Therm O Web iCraft Purple Tape .5 inch
Therm O Web Zots Singles-Medium
Therm O Web iCraft Ultra Bond Liquid Adhesive
Deco Foil Flock Transfer Sheets-Sunshine Yellow, Green Envy, Orange Glow, White Latte
Gina K Designs Foam Squares
Gina K Designs Masking Magic Sheets
Sunny Studio Supplies: Paper: Flirty Flowers, Dots and Stripes Pastels Stamps: Critter Campout Stamps and Dies: Quilted Hexagons Stamps Dies Fishtail Banner II Dies
Other Supplies: Cardstock, Twine, Gina K Design Inks, Wood Veneer/Canvas Button/Pink Flowers/Kraft Tags-Maya Road; Enamel Dots-Simple Stories
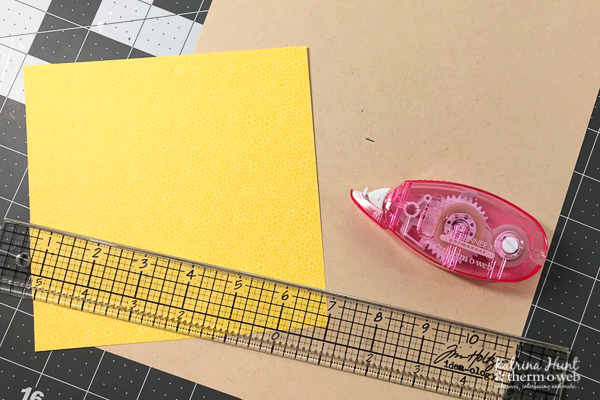
 Start with a background that is 8.5 x 11 inches, then center the two 6x6 papers on the background. You can use a ruler or just eyeball it. Next, attach the 6x6 pieces of paper with the Memory XL taper runner. You will cover the seam of the two 6x6 paper meeting with your picture. Trim off the excess 6x6 paper even with the top of the background paper.
 Once you have your 6x6 papers place on your background, you can start working on your banners for the top of the layout. Pick three different 6x6 papers and trim to 4.25 in x 6 in width. Next, die cut using the Fishtail Banner II set and Purple Tape to hold the die in place.
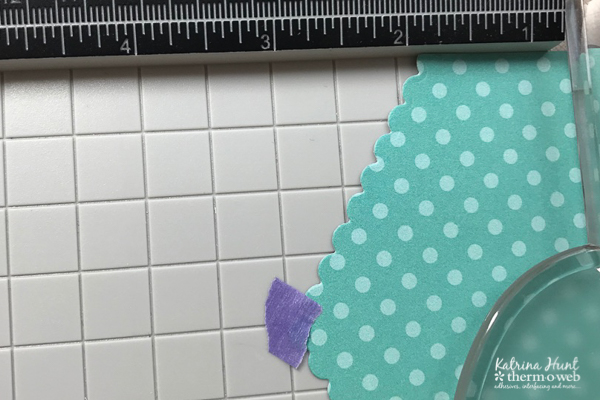
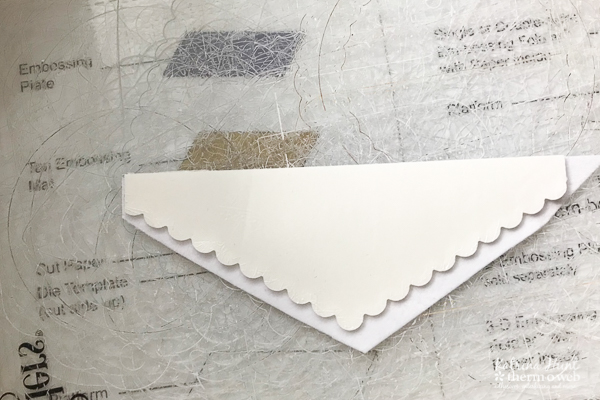
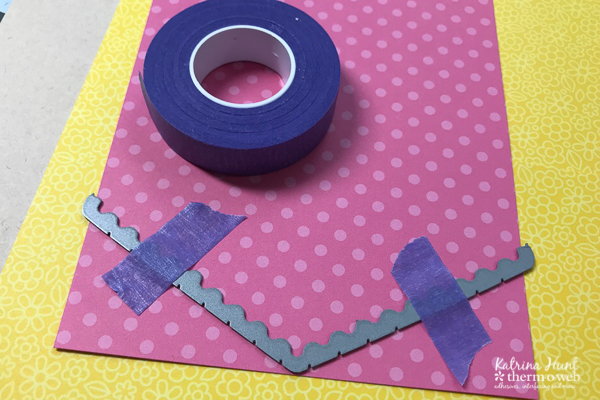 After die cutting, trim your banner piece down to about 3 inches in length. You can hold the center point down on your trimmer using purple tape to guarantee that you have the positioning correct. NOTE: I need to trim my papers a little shorter than 3 inches, for the way my layout was put together.
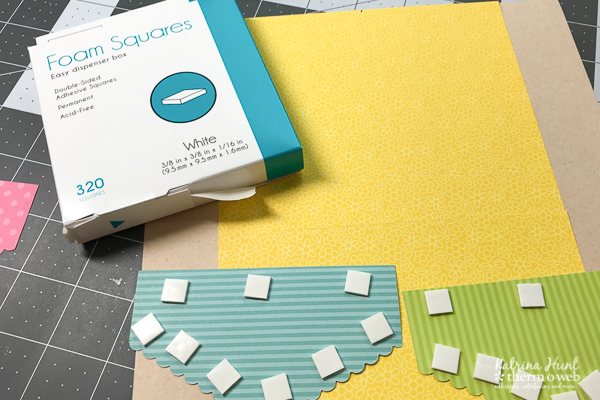
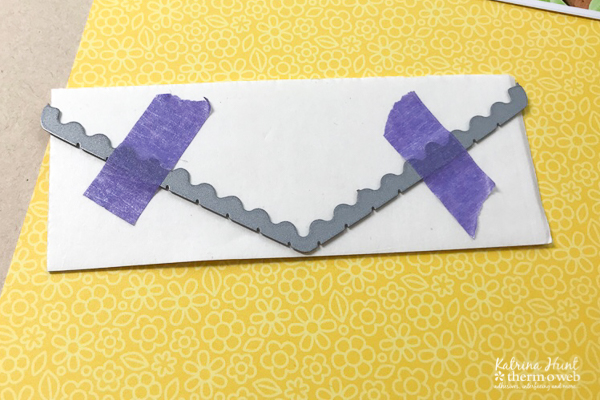
 Using the Gina K Foam Squares on the back of the banner pieces, adhere to the top of your layout. Begin by lining up one side of the banner and adhering that banner down, then adhere the other banner on the opposite side. This will leave a little gap if you use the measurements I used, but that will be covered by the third banner.
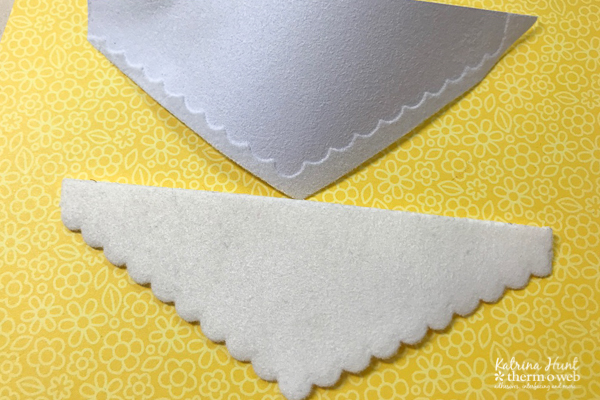
 Once you have the three banners in place, using Deco Foil Foam Adhesive cut a piece that is 3 inches x 4.25 inches with the same banner die. After die cutting the foam adhesive, then remove one of the protective adhesive coverings and lay face down on a piece of Deco Foil Flock Transfer Sheets in White Latte, placing the exposed adhesive on the furry side of the flock!
 Once you have laid the foam adhesive on the flock sheet, then run thru your manual die cutting machine to transfer the flock to the Deco Foil Foam Adhesive by pressure. Next carefully peel the foam adhesive away from the transfer sheet, making sure that the flock transferred successfully.
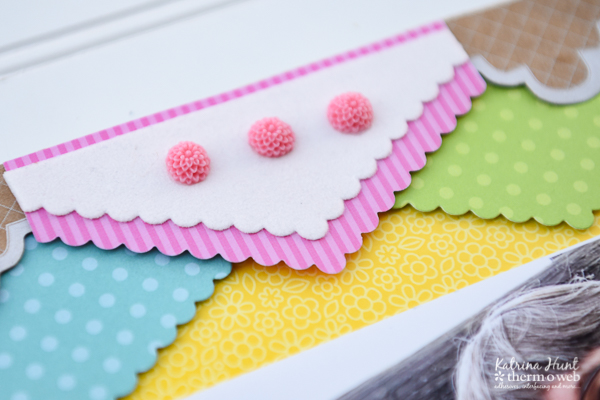
 After this process, you will then place the flocked piece on the middle banner, centering it. You can add embellishments to this if you like.
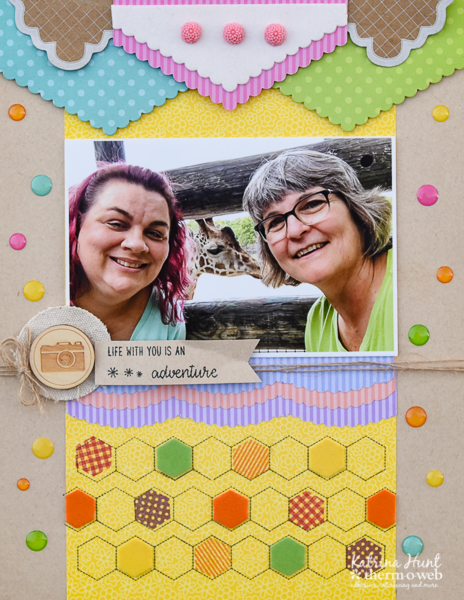
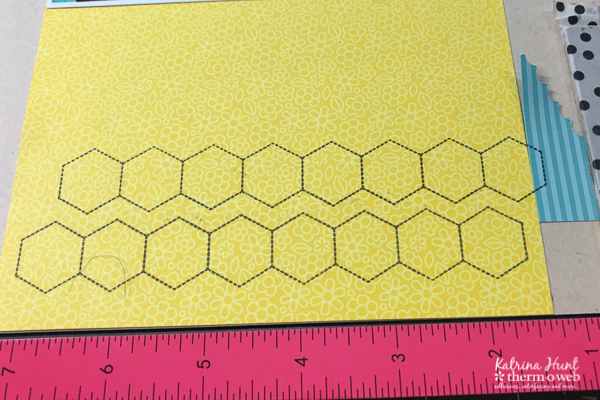
 Now that you have the top banner completed, you can move onto stamping at the bottom. I used a stamp positioning tool to do my stamping. I also created a mask with the Gina K Designs Magic Masking Sheets. Just stamp on the sheet, trim out (or die cut) image and then peel off backing. Be sure to save your image to use over and over. I ended up not using my mask, but thought I would show it!
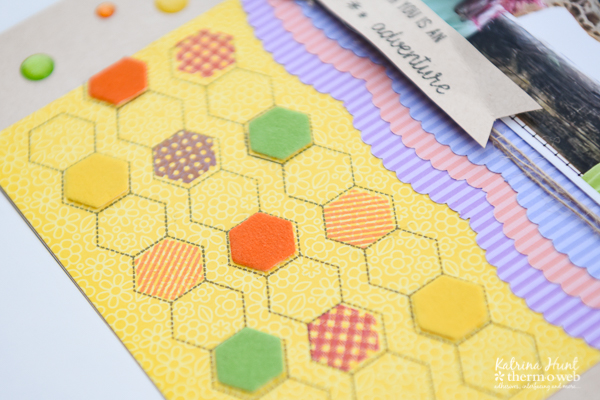
 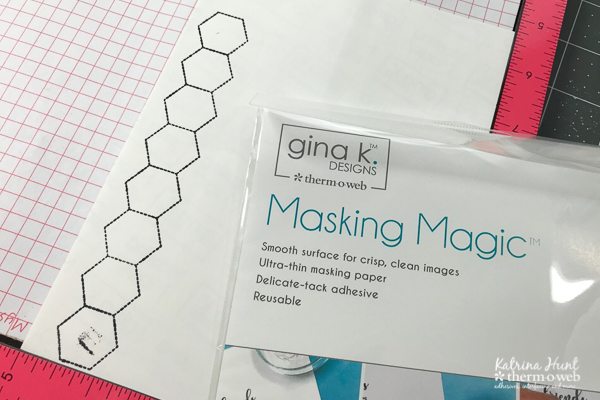 In addition to making the mask, I stamped three rows with the same stamp. This stamp set has fill-ins for the hexagons and I did use those also with Gina K Designs inks. In addition to the stamping, I also die cut hexagons with the coordinating Sunny Studio die set out of Deco Foil Foam Adhesive and applied flock in three different colors.
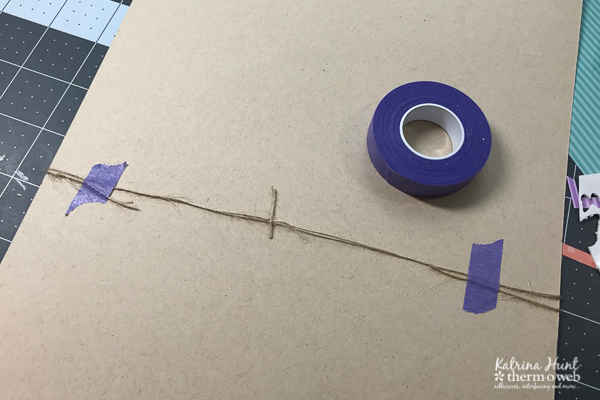
 As shown above, I added some manual punched borders underneath my picture, along with some twine that looks as if it is wrapped around the page. To hold the twine in place, Purple Tape is perfect on the back of your layout! This technique will keep your twine from slipping out of place and hides the "adhesive" part!
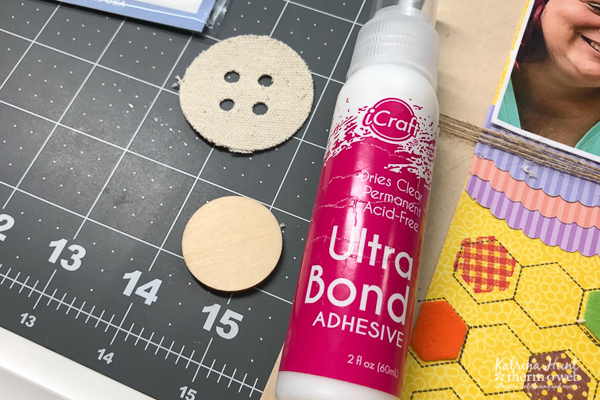
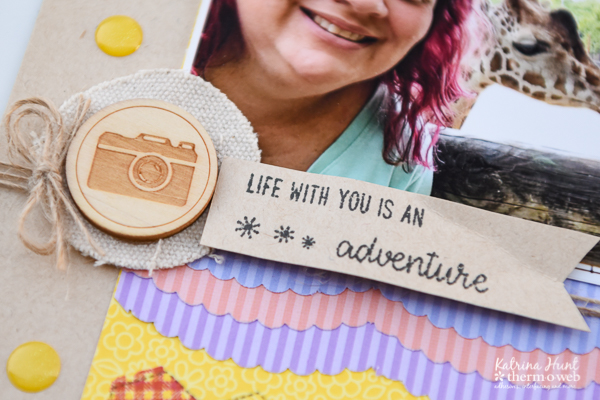
 Now that the rest of the layout is complete, it's time to add some more embellishing. Adhere a wood veneer flair onto a canvas button using the Ultra Bond Adhesive. In addition, this adhesive was used to hold the pink flower charms on the banner.
 In addition, you can use a Zot to hold a tiny twine bow to the side of the flair/button. Stamp a saying for your title and your layout is complete! Use foam adhesive to hold that banner strip up just a bit for dimension!
 That's all for me!! I hope you enjoy our team up with Sunny Studio!! Have a great week!