No Products in the Cart
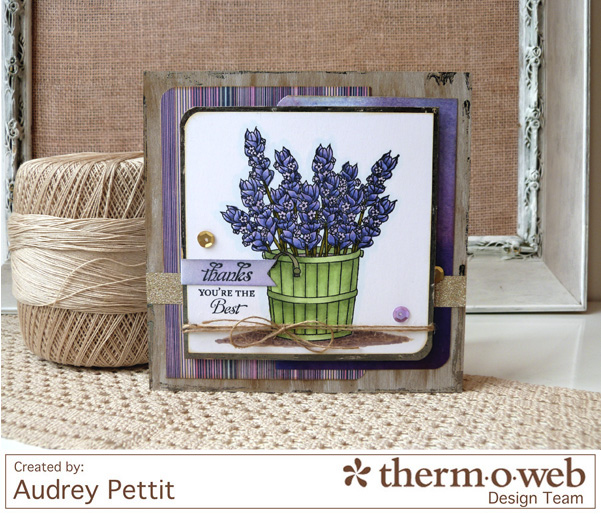 You're the Best Card by Designer Audrey Pettit
Supplies:
Therm O Web iCraft Deco Foil™ Transfer Sheets- Champagne
Therm O Web iCraft Deco Foil™ Adhesive Pen
Therm O Web XL Tape Runner
Therm O Web 3D Adhesive Squares- Combo Pack
Therm O Web Fabric Fuse™ Liquid Adhesive
Taylored Expressions Lavender Bouquet stamp set
Cardstock: Neenah 80 lb. Solar White; Ranger Kraft
Patterned Paper: BasicGrey
Markers: Copic (flowers- BV02, BV11, BV13, BV17) (stems- YG95, YG97) (bucket- YG11, G21, G24) (ground- E71, E74) (outline- B000)
Deco Tape: Tim Holtz Idea-ology
Ink: Memento Tuxedo Black; Ranger Distress Ink- Wilted Violet, Shaded Lilac
Paint: Ranger Distress Paint- Picket Fence
Corner Rounder: Marvy
Sequins: 28 Lilac Lane
Twine: Maya Road
You're the Best Card by Designer Audrey Pettit
Supplies:
Therm O Web iCraft Deco Foil™ Transfer Sheets- Champagne
Therm O Web iCraft Deco Foil™ Adhesive Pen
Therm O Web XL Tape Runner
Therm O Web 3D Adhesive Squares- Combo Pack
Therm O Web Fabric Fuse™ Liquid Adhesive
Taylored Expressions Lavender Bouquet stamp set
Cardstock: Neenah 80 lb. Solar White; Ranger Kraft
Patterned Paper: BasicGrey
Markers: Copic (flowers- BV02, BV11, BV13, BV17) (stems- YG95, YG97) (bucket- YG11, G21, G24) (ground- E71, E74) (outline- B000)
Deco Tape: Tim Holtz Idea-ology
Ink: Memento Tuxedo Black; Ranger Distress Ink- Wilted Violet, Shaded Lilac
Paint: Ranger Distress Paint- Picket Fence
Corner Rounder: Marvy
Sequins: 28 Lilac Lane
Twine: Maya Road
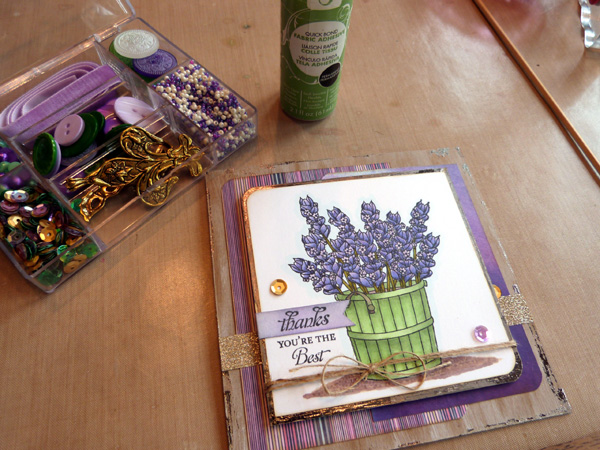
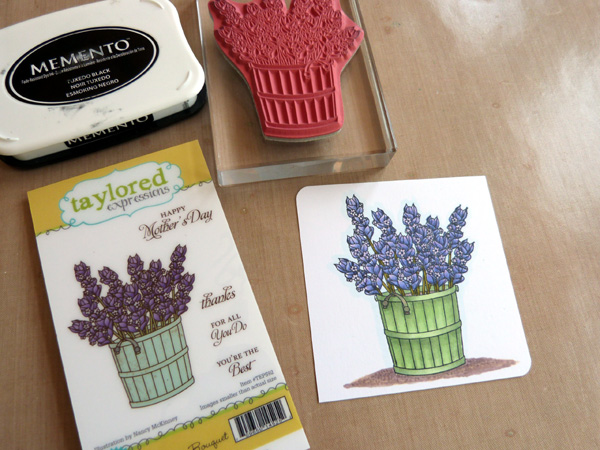 To begin, stamp your image onto 80 lb. Neenah Solar White cardstock using Memento Tuxedo Black ink. Trim the paper into a square that is slightly larger than your focal image, and round two opposite corners using a corner rounder punch. Color the image with Copic markers.
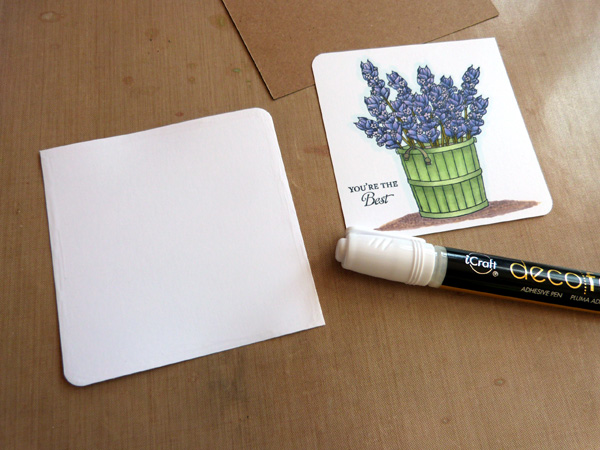 Cut a second square of white cardstock that is slightly larger than your stamped panel, and once again round two opposite corners with the corner punch. Using the iCraft Deco Foil Adhesive Pen, apply liquid adhesive to the edges of the second cardstock panel. Allow the adhesive to dry for a few minutes, until it is tacky to the touch.
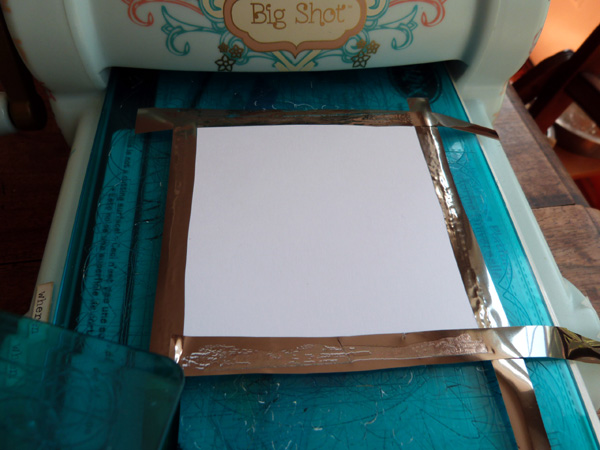 Cut thin strips of champagne Deco Foil Transfer Sheet, and apply the strips to the edges of the panel. Make sure the colored side of the foil is up, and the silver side is down against the adhesive. Run the paper and foil through the cutting plates on your die cutting machine. Alternatively, you can run the paper and foil through a laminator, if you prefer.
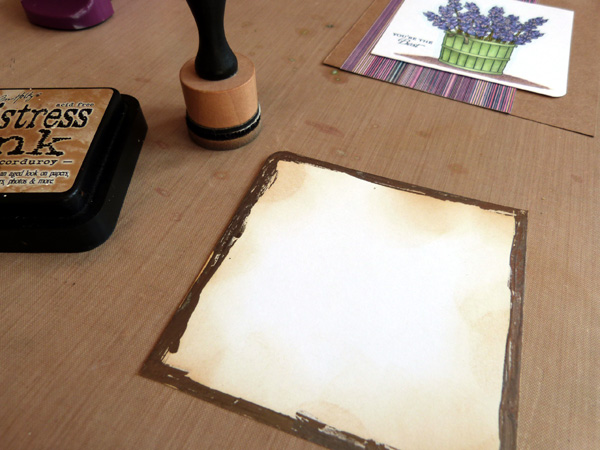 Peel off the foil transfer sheet and check out your cool foil frame. You can leave the paper as is, or apply light brown ink over the framed edge using an ink blending tool. This will tone down any remaining bare spots on the paper underneath.
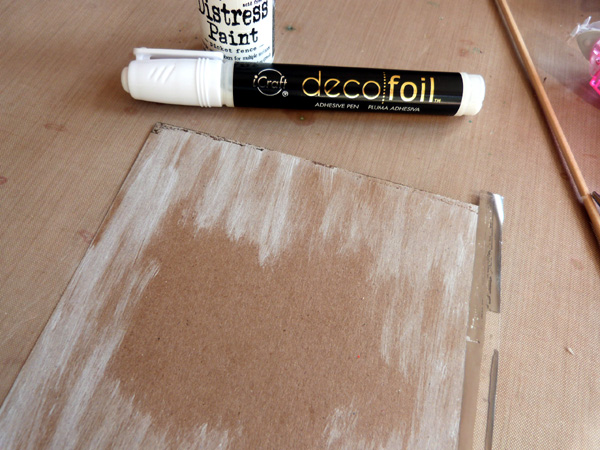 Cut a 5x5 piece of kraft cardstock for the card base. Swipe Picket Fence Distress Paint over the outside edges of the paper, and allow to dry. Then add a small touch of champagne Deco Foil to the very edges using the same process we used for the image mat.
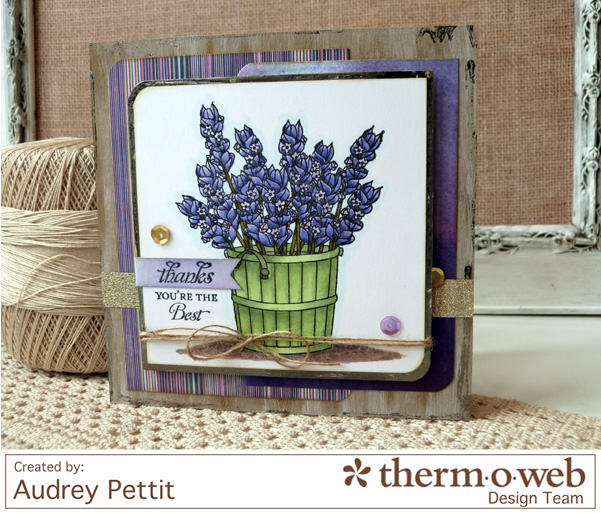
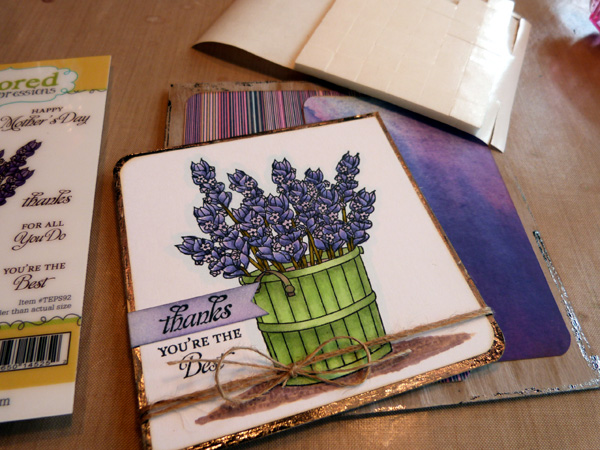 To assemble the card, adhere the kraft cardstock to a square card base using XL Tape Runner adhesive. Cut two panels of patterned paper, and round several of the corners with the corner rounder punch before adhering to the card base. Add a strip of gold deco tape across the bottom of the card. Adhere the stamped image onto the framed mat. Tie twine around the bottom of the panel, and add stamped sentiment. Adhere the image to the center of the card using 3D Adhesive Foam Squares for dimension.
 And finally, add sequins to the card using Fabric Fuse Liquid Adhesive to adhere.
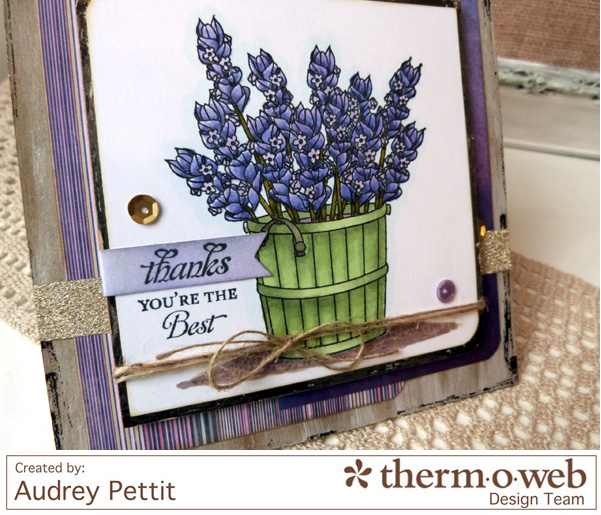 [pullquote width="300" float="left"]Here's one last close-up look at the details and all the pretty gold accents, from the foil to the glitter tape to the shiny metallic sequins. It all adds a great mixed-media look to any papercrafting project.[/pullquote]
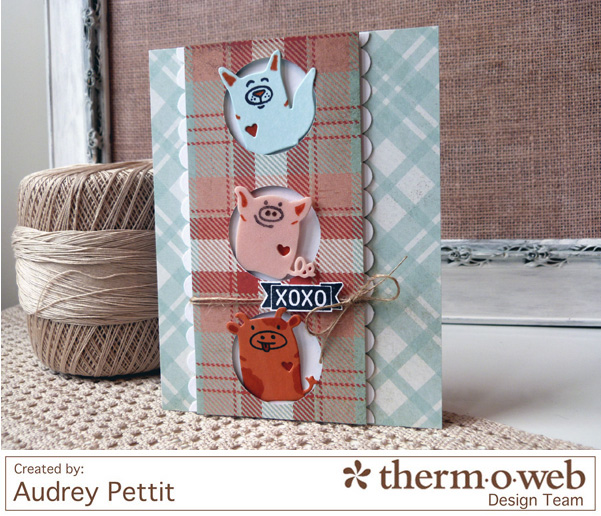
 XOXO Card by Designer Audrey Pettit
Supplies:
Therm O Web XL Tape Runner
Therm O Web 3D Adhesive Squares
Taylored Expressions Quick Critters Stamp & Die Combo
Cardstock: Ranger Watercolor Paper
Patterned Paper: Photo Play Paper
Scalloped Border Punch: Fiskars
1 3/8" Circle Punch: Stampin'Up
Ink: Memento Tuxedo Black
Copic Markers: YR18, BG000
Twine: Maya Road
Fun Foam
XOXO Card by Designer Audrey Pettit
Supplies:
Therm O Web XL Tape Runner
Therm O Web 3D Adhesive Squares
Taylored Expressions Quick Critters Stamp & Die Combo
Cardstock: Ranger Watercolor Paper
Patterned Paper: Photo Play Paper
Scalloped Border Punch: Fiskars
1 3/8" Circle Punch: Stampin'Up
Ink: Memento Tuxedo Black
Copic Markers: YR18, BG000
Twine: Maya Road
Fun Foam
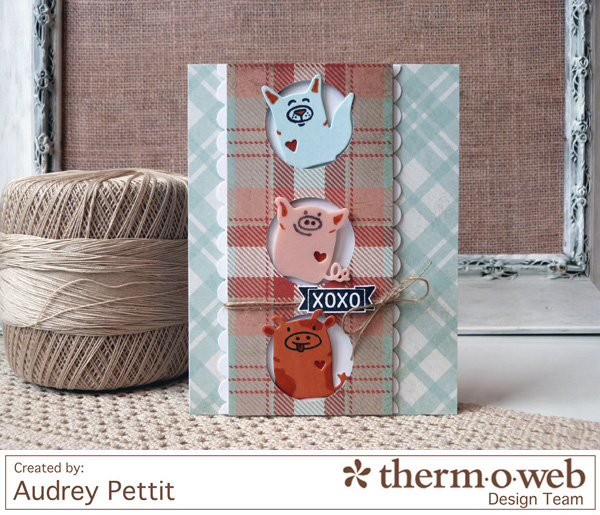
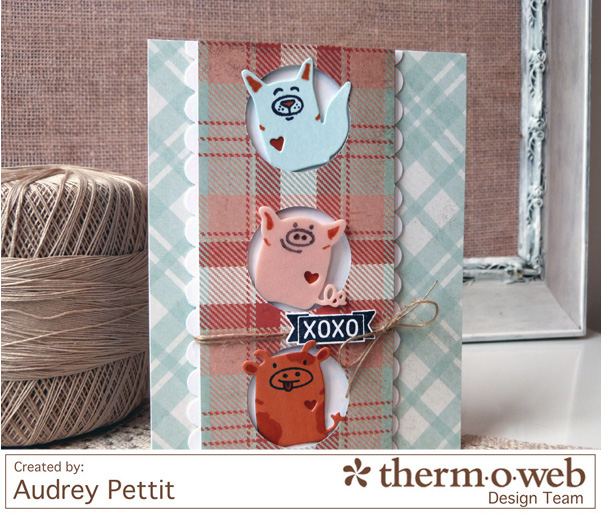 For my second card, I created a quick and easy little tower of critters using Taylor's adorable Quick Critters stamp and die combo. I simply punched three circles onto a strip of patterned paper, and used Therm O Web's 3D Adhesive Squares to add some dimension between the paper and the background cardstock, creating the perfect little windows in which to adhere my animal friends. I then tucked one critter into each opening, adding a bit of foam adhesive behind the heads of each animal for some life-like fun.
 Enjoy!
 And what would be more fun then a giveaway! Our friends at Taylored Expressions have generously offered to a lucky fan a $50 Gift Certificate to their store! That means you can pick anything you like from stamps to dies to embellishments and more! Simply follow the easy to use Rafflecopter to enter to win! And do stop by twice a day as we're sharing two projects with you which gives you more chances to win!
a Rafflecopter giveaway
And what would be more fun then a giveaway! Our friends at Taylored Expressions have generously offered to a lucky fan a $50 Gift Certificate to their store! That means you can pick anything you like from stamps to dies to embellishments and more! Simply follow the easy to use Rafflecopter to enter to win! And do stop by twice a day as we're sharing two projects with you which gives you more chances to win!
a Rafflecopter giveaway