No Products in the Cart
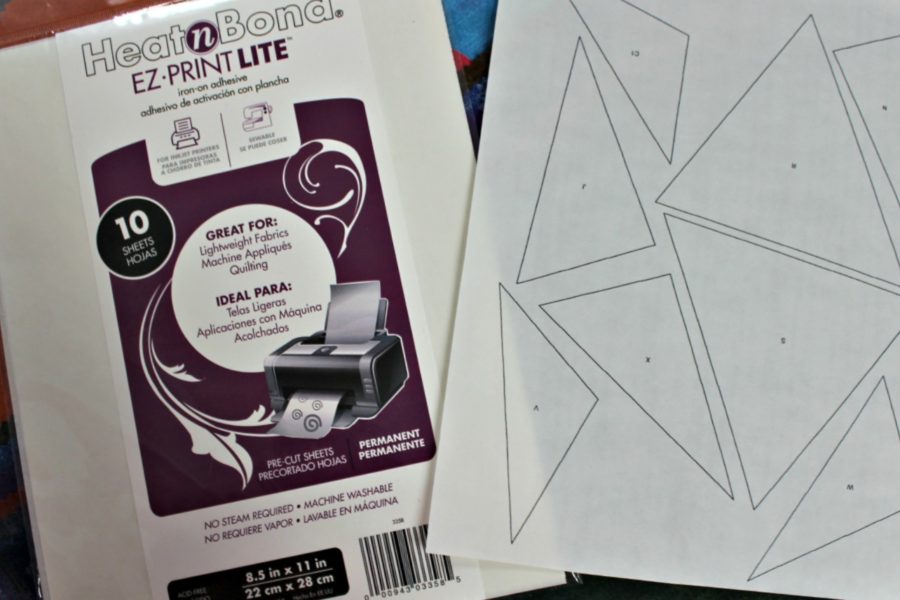
 Don't trace all those little pieces for fusible applique, just print the patterns. The secret is HeatnBond® EZ Print Lite.
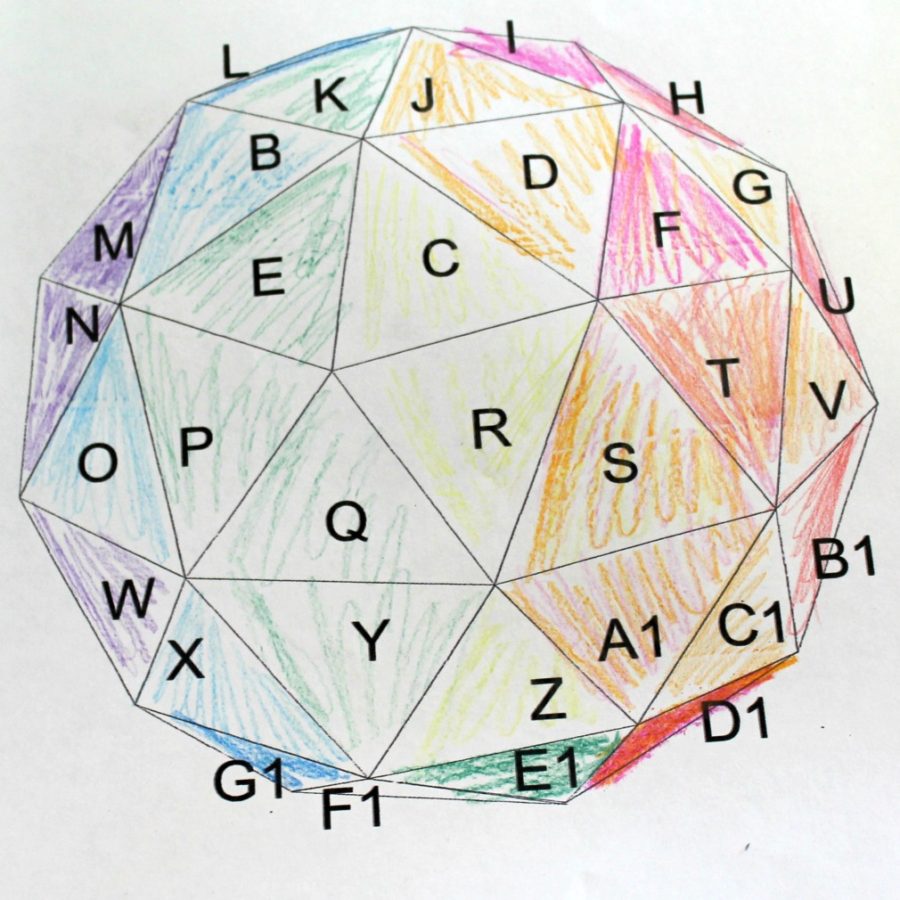
 Step 1: Using colored pencils, color the key (included in this pattern) for the ball to determine what color you want each triangle.
 Print patterns on HeatnBond EZ Print Lite sheets. (the last 5 sheets of this pattern)
Step 2: Cut around triangles from HeatnBond EZ Print Lite to separate. Don’t worry about cutting on the lines yet.
TIP: Keep all those HeatnBond EZ print Lite scraps. You never know when you’ll need a little piece.
Fuse HeatnBond Lite to the wrong side of fabrics. Cut out all the triangles on the dark solid lines.
Fuse HeatnBond Fusible interfacing to the wrong side of the background fabric. The interfacing will keep the satin stitching done later from distorting the design.
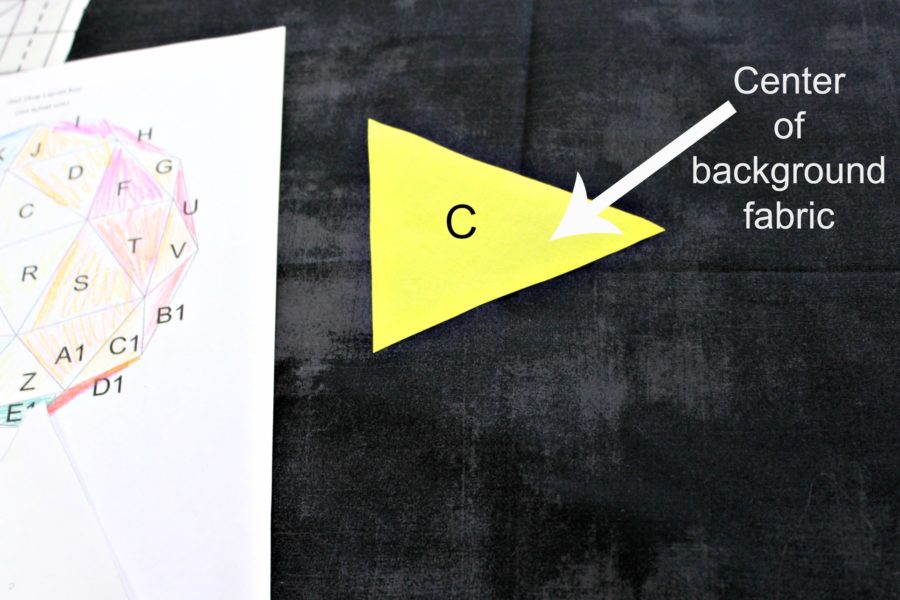
Find the center of the background fabric by folding in half twice. Lay background fabric right side up on ironing surface. Position piece “C” over center, This should put the finished ball in the right position.
Print patterns on HeatnBond EZ Print Lite sheets. (the last 5 sheets of this pattern)
Step 2: Cut around triangles from HeatnBond EZ Print Lite to separate. Don’t worry about cutting on the lines yet.
TIP: Keep all those HeatnBond EZ print Lite scraps. You never know when you’ll need a little piece.
Fuse HeatnBond Lite to the wrong side of fabrics. Cut out all the triangles on the dark solid lines.
Fuse HeatnBond Fusible interfacing to the wrong side of the background fabric. The interfacing will keep the satin stitching done later from distorting the design.
Find the center of the background fabric by folding in half twice. Lay background fabric right side up on ironing surface. Position piece “C” over center, This should put the finished ball in the right position.
 Peel backing paper off and position pieces on background fabric using the key as a guide. Rotate the patterns to fit. If a piece doesn’t fit, it probably needs rotated. This pattern is designed as a puzzle and all the pieces do fit together snugly. Small spaces left between the triangles will be covered by satin stitching, but try to match sides as much as possible.
 Bond ball to background when all the pieces are in place following package instructions.
Step 3: Cut words out and fuse to wrong side of fabric.
Bond ball to background when all the pieces are in place following package instructions.
Step 3: Cut words out and fuse to wrong side of fabric.
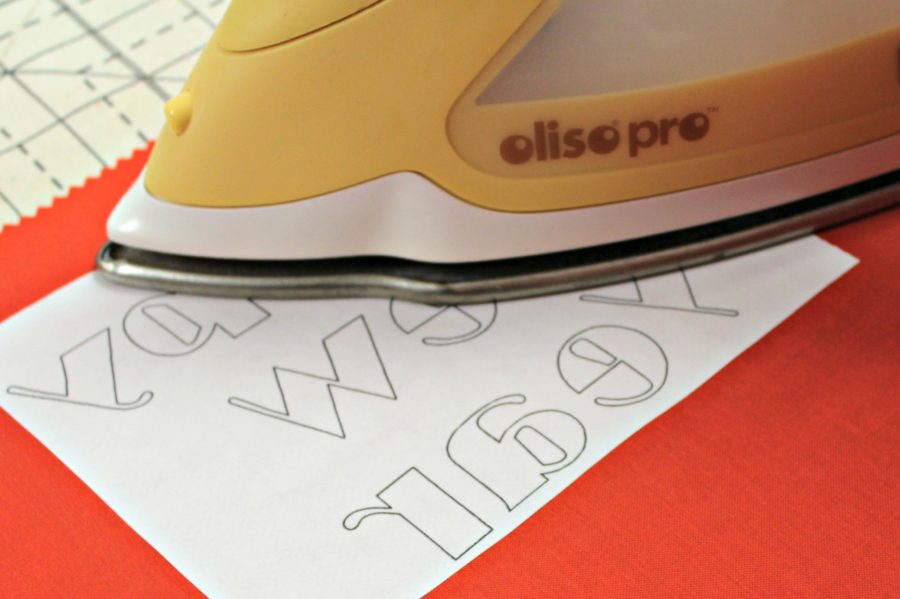 Carefully cut out letters, peel paper backing off and place on background by referring to cover picture for placement. In addition you'll bond letters to background following package instructions.
Step 4: Prepare glasses and confetti by fusing HeatnBond® pieces to wrong sides of fabrics. Pieces F and K are the drink in the glasses and should be a different color.Cut out fused fabrics and bond to background fabric using the key as a guide.
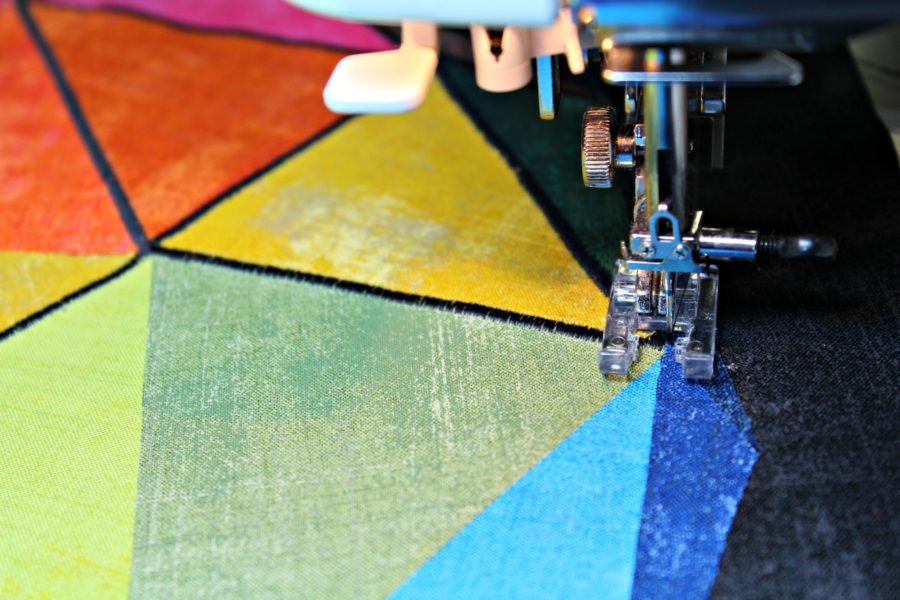
Step 5: Satin Stitch the ball using black thread. Aurifil 50 wt. #4241 was used for this. Next stitch all triangles inside the ball then satin stitch around the outside of the ball.
Carefully cut out letters, peel paper backing off and place on background by referring to cover picture for placement. In addition you'll bond letters to background following package instructions.
Step 4: Prepare glasses and confetti by fusing HeatnBond® pieces to wrong sides of fabrics. Pieces F and K are the drink in the glasses and should be a different color.Cut out fused fabrics and bond to background fabric using the key as a guide.
Step 5: Satin Stitch the ball using black thread. Aurifil 50 wt. #4241 was used for this. Next stitch all triangles inside the ball then satin stitch around the outside of the ball.
 Stitch around the letters, glasses, and confetti using a straight, zigzag, or blanket stitch.
Step 6: Follow the package instructions, spray StitchnSew™ Sew-in fleece with SpraynBond® basting spray and lay on top of wrong side of quilt backing fabric. Smooth to remove wrinkles. Spray back of quilt top and lay on top of fleece gently smoothing out any wrinkles.
Stitch around the letters, glasses, and confetti using a straight, zigzag, or blanket stitch.
Step 6: Follow the package instructions, spray StitchnSew™ Sew-in fleece with SpraynBond® basting spray and lay on top of wrong side of quilt backing fabric. Smooth to remove wrinkles. Spray back of quilt top and lay on top of fleece gently smoothing out any wrinkles.
 Step 7: Quilt as desired and add binding using your favorite method.
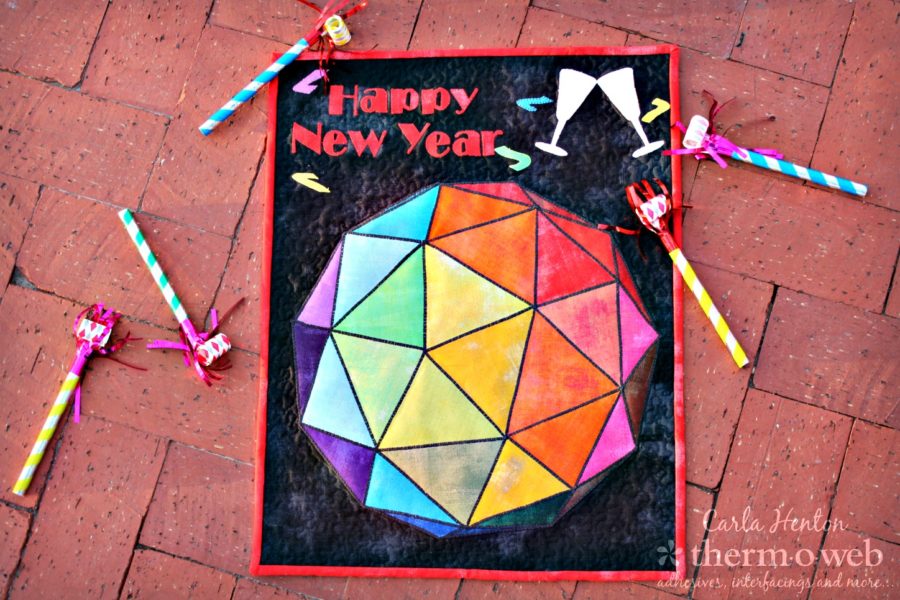
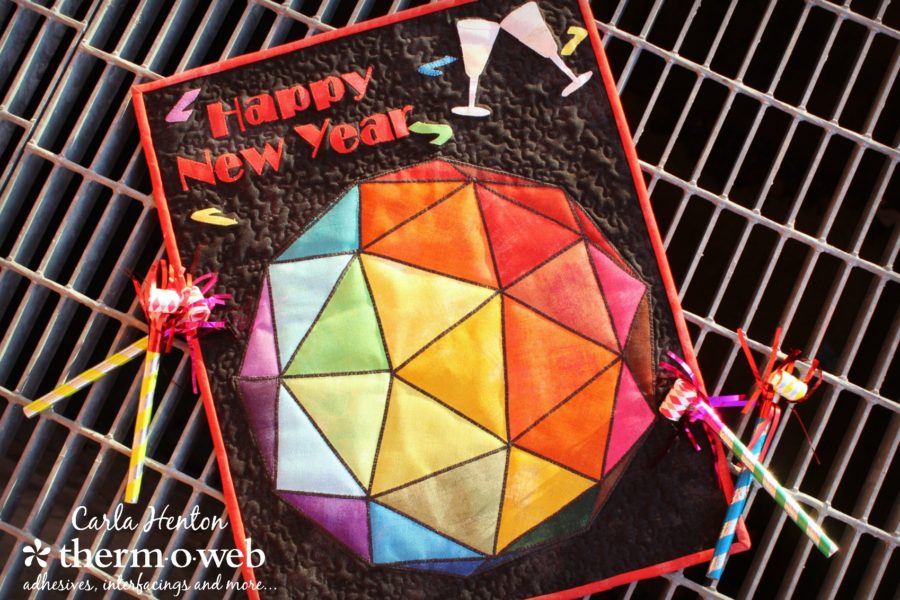 Now you are ready to celebrate the new year with a little Times Square flare and can "Let The Ball Drop".