Let It Snow Winter Garden Banner
I love a good garden banner! How about one to herald in winter? Join me and make this fun Let It Snow garden banner! (I'm secretly hoping that maybe the weather forecast will listen and we'll get snow in south Texas! Think it'll work?)
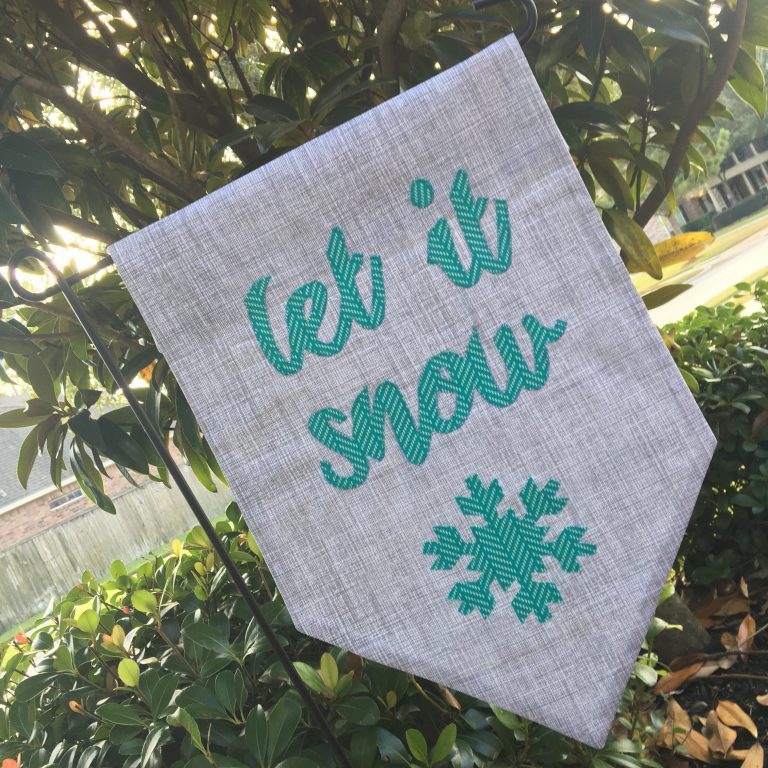 Finished Size: Approximately 20" H x 13" W
Let It Snow Winter Garden Banner Supplies + Materials Needed:
-Two 14" x 23" pieces of background fabric backed in HeatnBond Woven Fusible Soft
-Two pieces of applique fabric backed with HeatnBond Lite Fusible Adhesive
Let It Snow fabric - 7 1/2" x 9 1/2"
Snowflake Fabric - 5" square
-Let It Snow svg: Download here
-Printed snowflake 4 1/2" square (Snowflake from Marshmallow World font found
here: FontSpace)
-Coordinating thread for applique
-Garden flag stake or dowel rod for hanging indoors
[line]Let It Snow Winter Garden Banner Instructions:
Step 1: Applique Prep
Handcut Applique: Print the Let It Snow and Snowflake design out backward.Trace printed applique design on the back of HeatNBond with a pencil. You will be drawing directly on the paper side. Cut loosely around each part of the design. Then iron this to the BACK of the applique fabric you’ve chosen. Use sharp fabric scissors to cut the shape out along the traced line then peel off the paper backing.
Digitally Cut Applique: Using the cutter software for your machine import in the Let It Snow design and the snowflake design. Use the fabric cutting settings to cut out one of each piece.
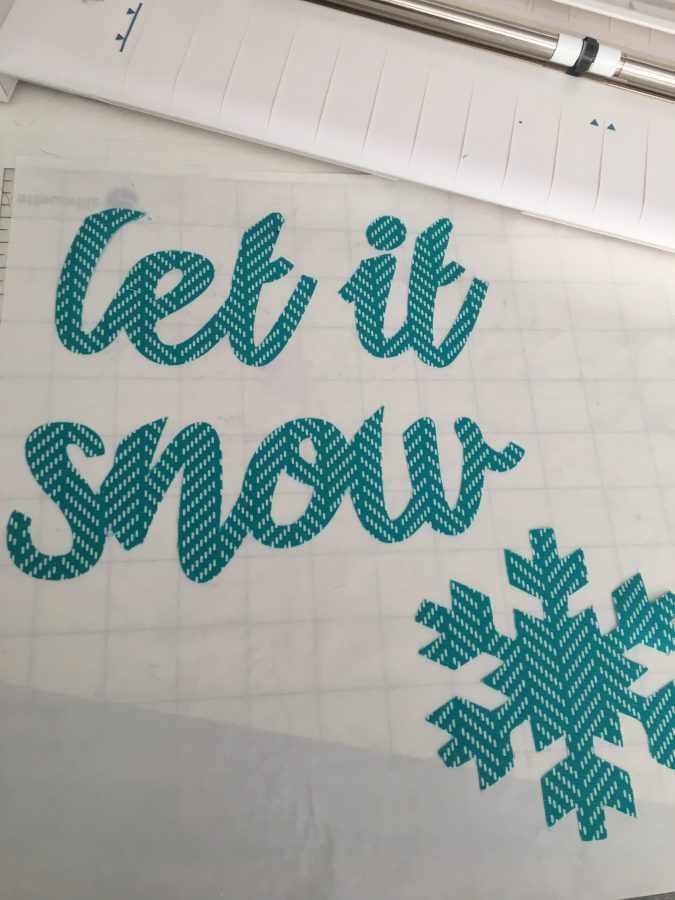
Set aside until we cut out the main pieces.
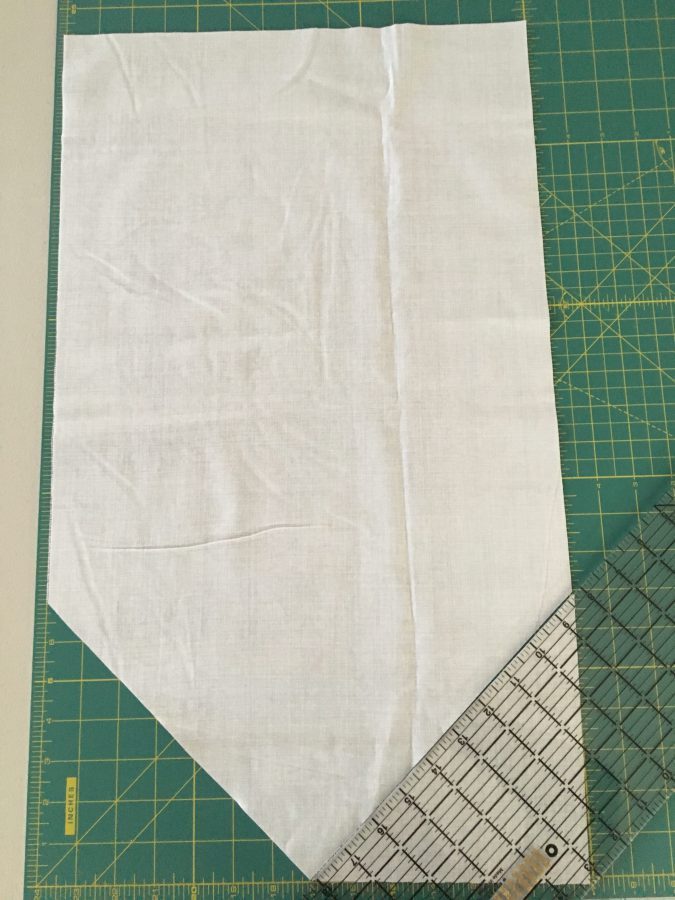
Step 2: Prepare Main Pieces
Place your two main fabric pieces right sides together. From the bottom 14" edge, measure up 7" and make a mark. Now mark the center of the 17" edge. Draw a line connecting the marks 7" up from the bottom with the middle of the bottom edge. Trim along this line to make a pointed banner bottom.
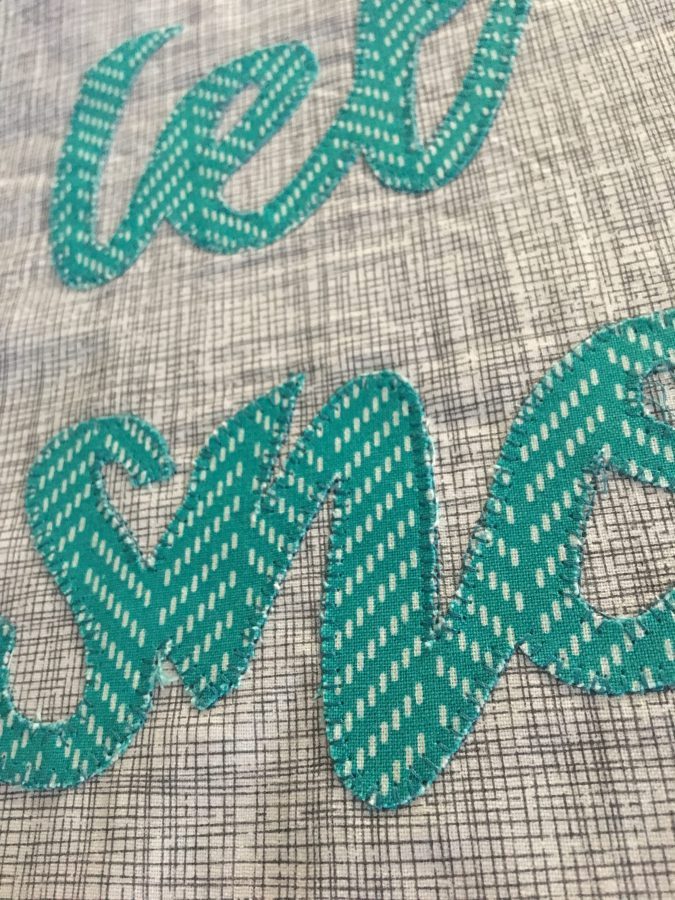
Now place an iron on the applique design cut in Step 1.
 Step 3: Applique + Embellish
Using an applique stitch and coordinating thread, stitch around the edge of each of the pieces.
 Step 4: Finishing Up
Place both main pieces right sides together. Stitch using a 1/2" seam around all edges leaving an opening for turning on the top edge. Clip corners then turn right sides out. Press the opening shut and edge stitch. Now fold the top down 2" towards the back to make a hanging sleeve. Slide the garden flag stake or dowel rod in this sleeve, hang, and enjoy!