No Products in the Cart
 Therm O Web Supplies:
Deco Foil™ Clear Toner Sheets • Cobwebs & Cauldrons
Deco Foil™ Clear Toner Sheets • Pumpkin Patch
Deco Foil™ Transfer Sheets • Copper
Deco Foil™ Transfer Sheets • Plum
Gina K. Designs Premium Cardstock • Wild Lilac
Gina K. Designs Premium Cardstock • Grass Green
Gina K. Designs Sheer Satin Fancy Ribbon 5/8" x 10 yd • Black/Gold
Zots™ Roll • 3D
Zips - Memory 32 Feet (1/8" wide x appx 1/64" thick)
iCraft Mixed Media Adhesive 2.1 fl oz
Memory Tape Runner XL™
Other Supplies:
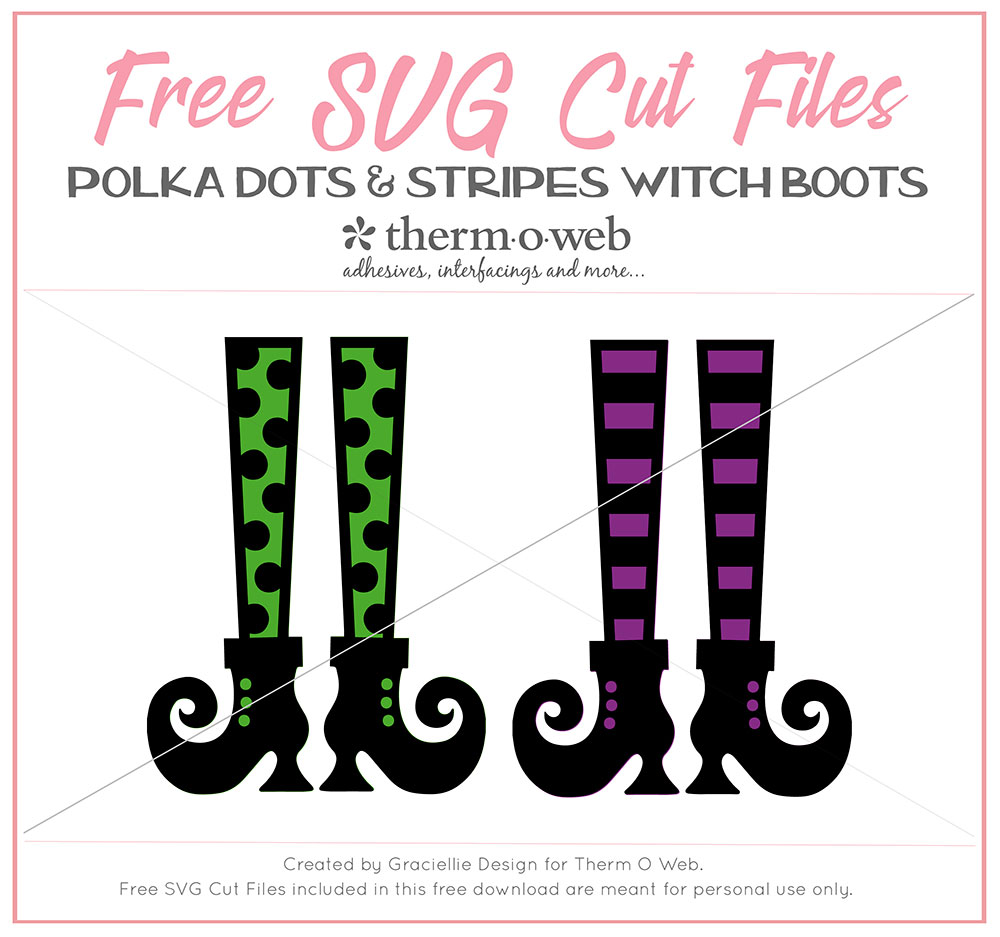
Free SVG Pack • Polka Dots and Stripes Witch Boots (Click to download)
Tag SVG
Cricut Explore Air 2
GKD Premium Dye Inks • Plum Punch, Wild Lilac, Grass Green, Lucky Clover, Amalgam
Papers • Textured White Cardstock, Metallic Black Cardstock, Kraft Cardstock
BM Witch Please Clear Stamp Set
Sponge Daubers
Sequins
Therm O Web Supplies:
Deco Foil™ Clear Toner Sheets • Cobwebs & Cauldrons
Deco Foil™ Clear Toner Sheets • Pumpkin Patch
Deco Foil™ Transfer Sheets • Copper
Deco Foil™ Transfer Sheets • Plum
Gina K. Designs Premium Cardstock • Wild Lilac
Gina K. Designs Premium Cardstock • Grass Green
Gina K. Designs Sheer Satin Fancy Ribbon 5/8" x 10 yd • Black/Gold
Zots™ Roll • 3D
Zips - Memory 32 Feet (1/8" wide x appx 1/64" thick)
iCraft Mixed Media Adhesive 2.1 fl oz
Memory Tape Runner XL™
Other Supplies:
Free SVG Pack • Polka Dots and Stripes Witch Boots (Click to download)
Tag SVG
Cricut Explore Air 2
GKD Premium Dye Inks • Plum Punch, Wild Lilac, Grass Green, Lucky Clover, Amalgam
Papers • Textured White Cardstock, Metallic Black Cardstock, Kraft Cardstock
BM Witch Please Clear Stamp Set
Sponge Daubers
Sequins
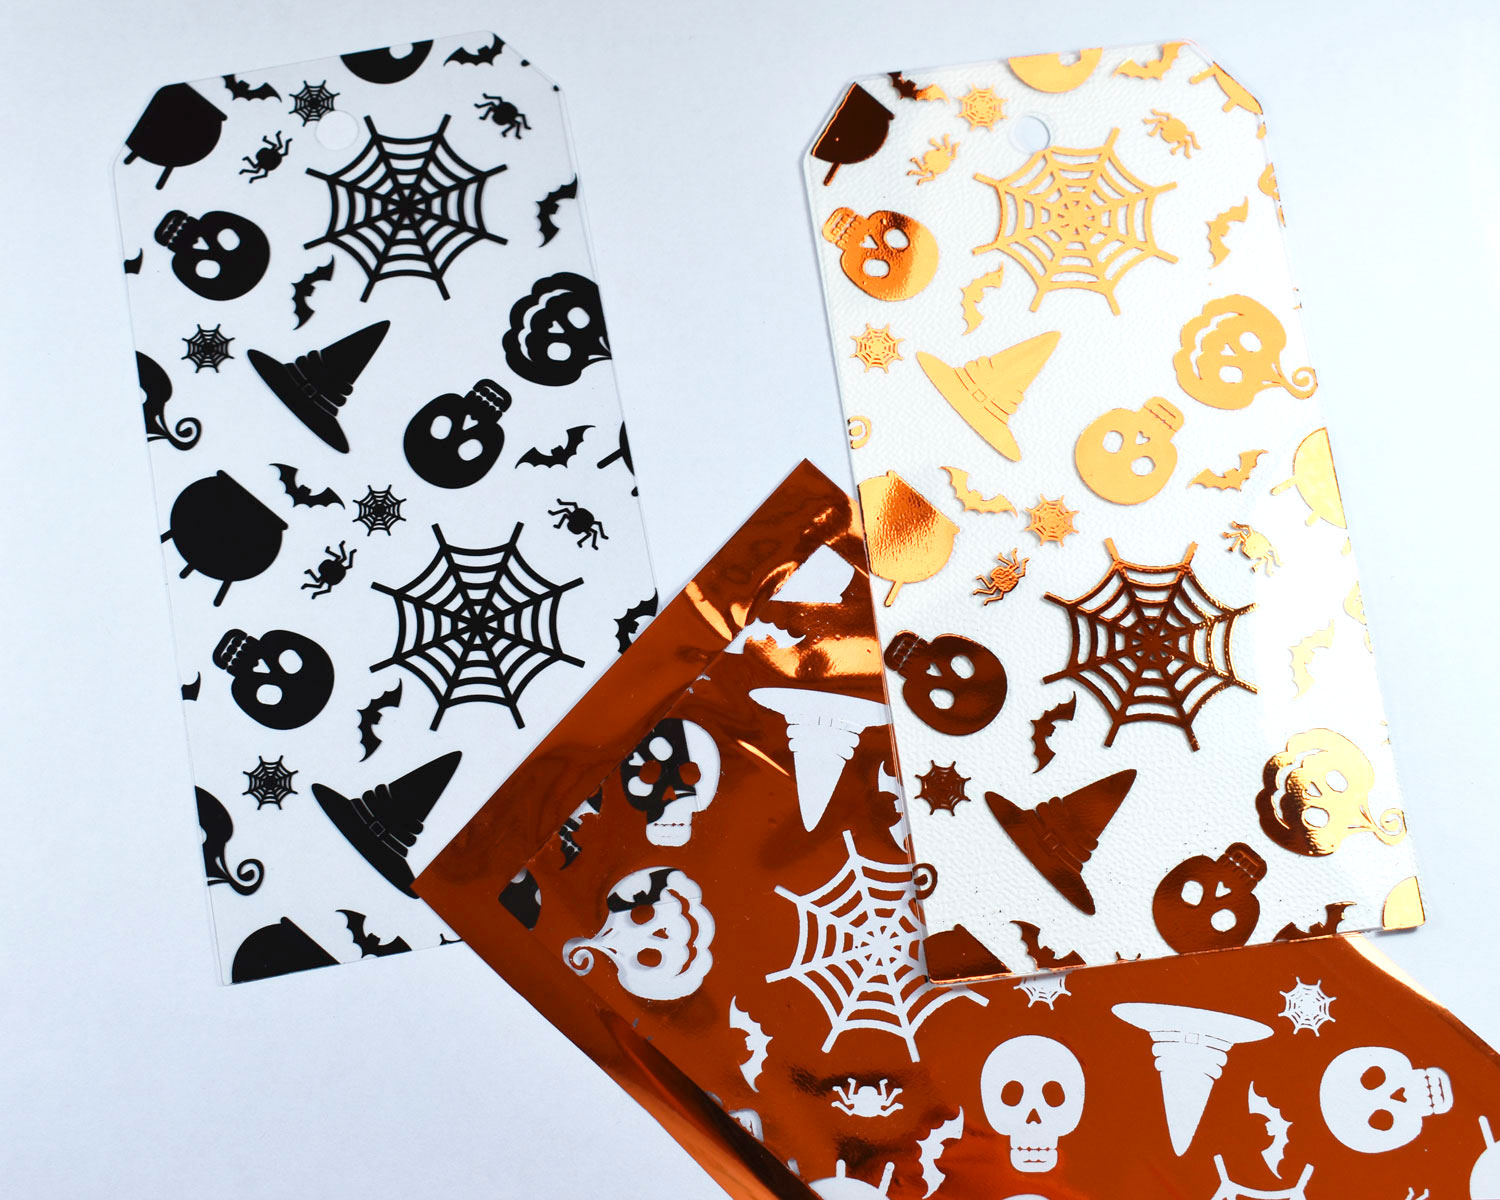
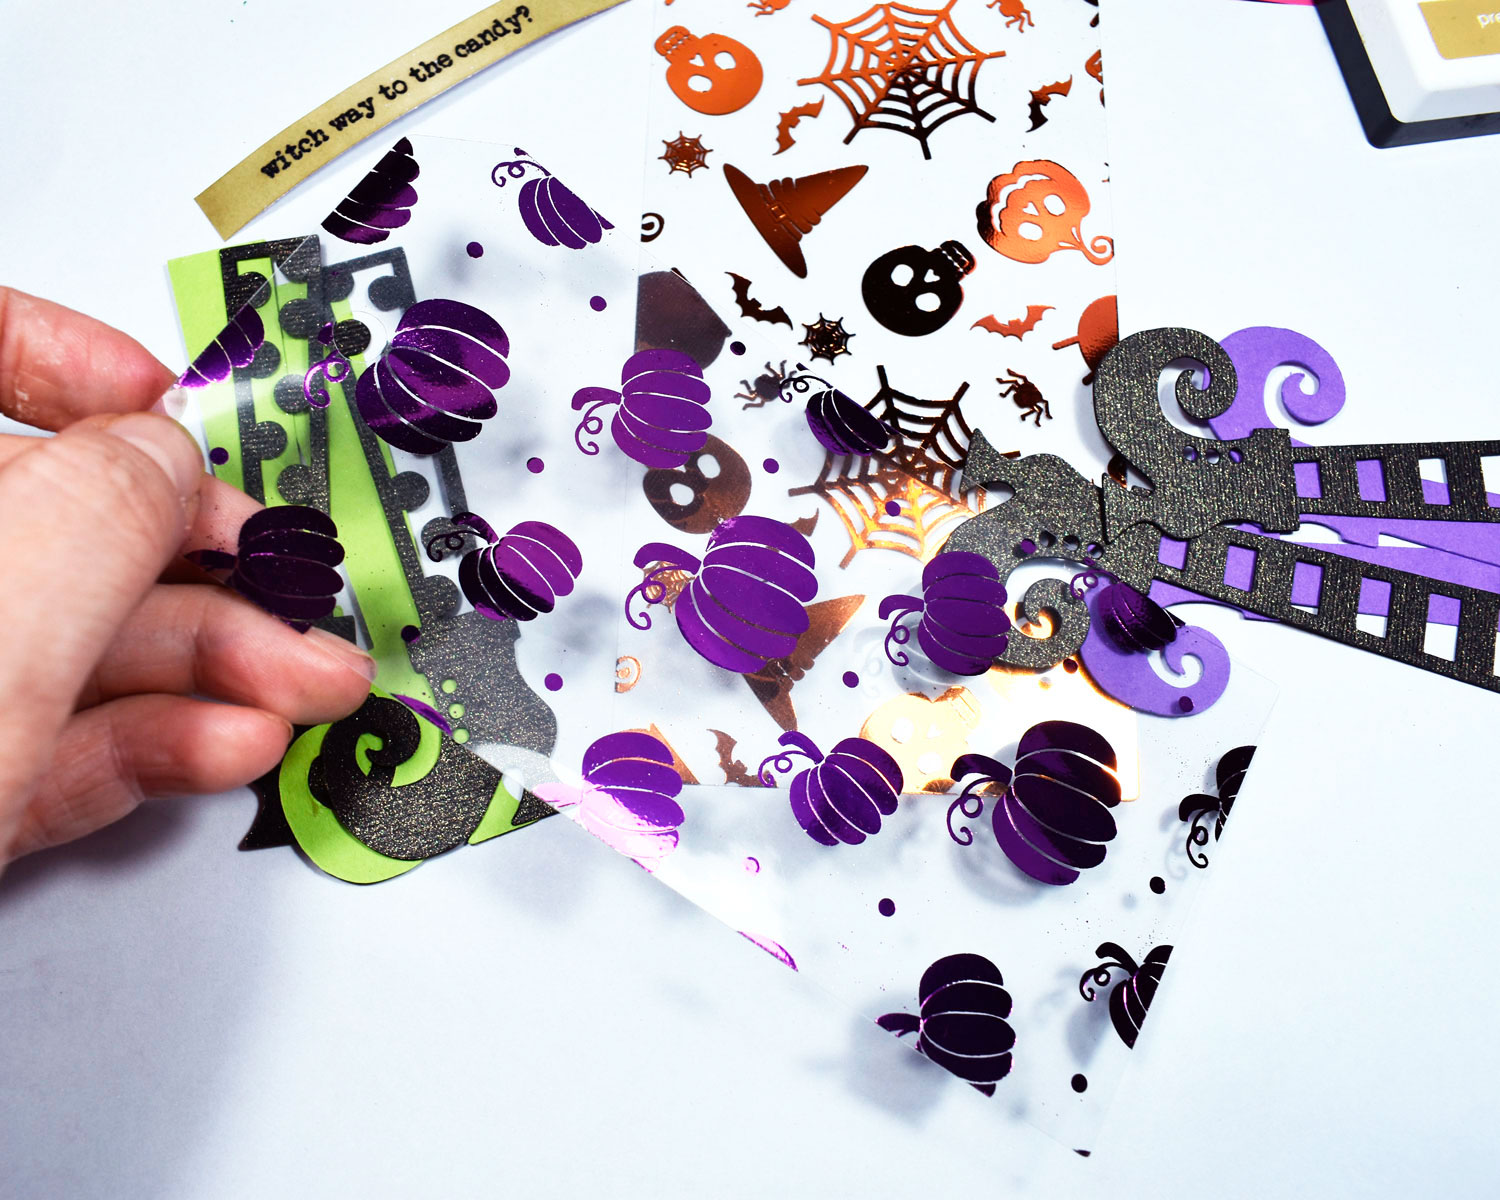
 Next, I foiled the Cobwebs & Cauldrons Clear Designer Toner Sheet using a sheet of Pumpkin Deco Foil. I also cut and foiled a second clear tag from the Pumpkin Patch Designer Toner Sheets using Plum Deco Foil.
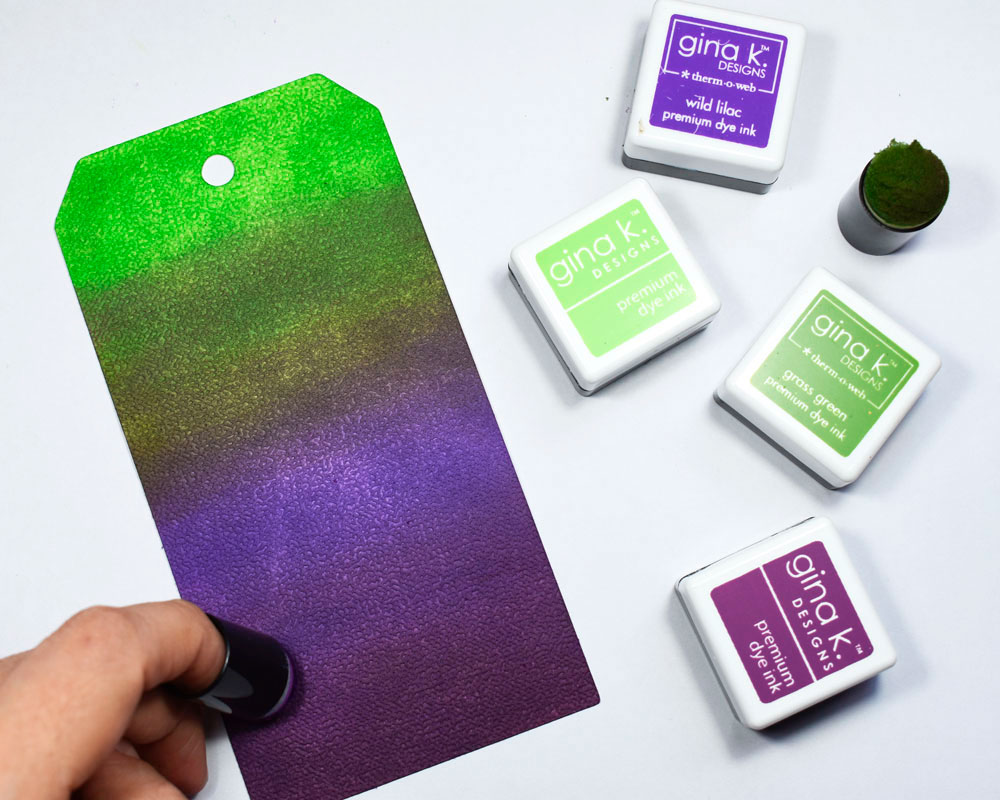
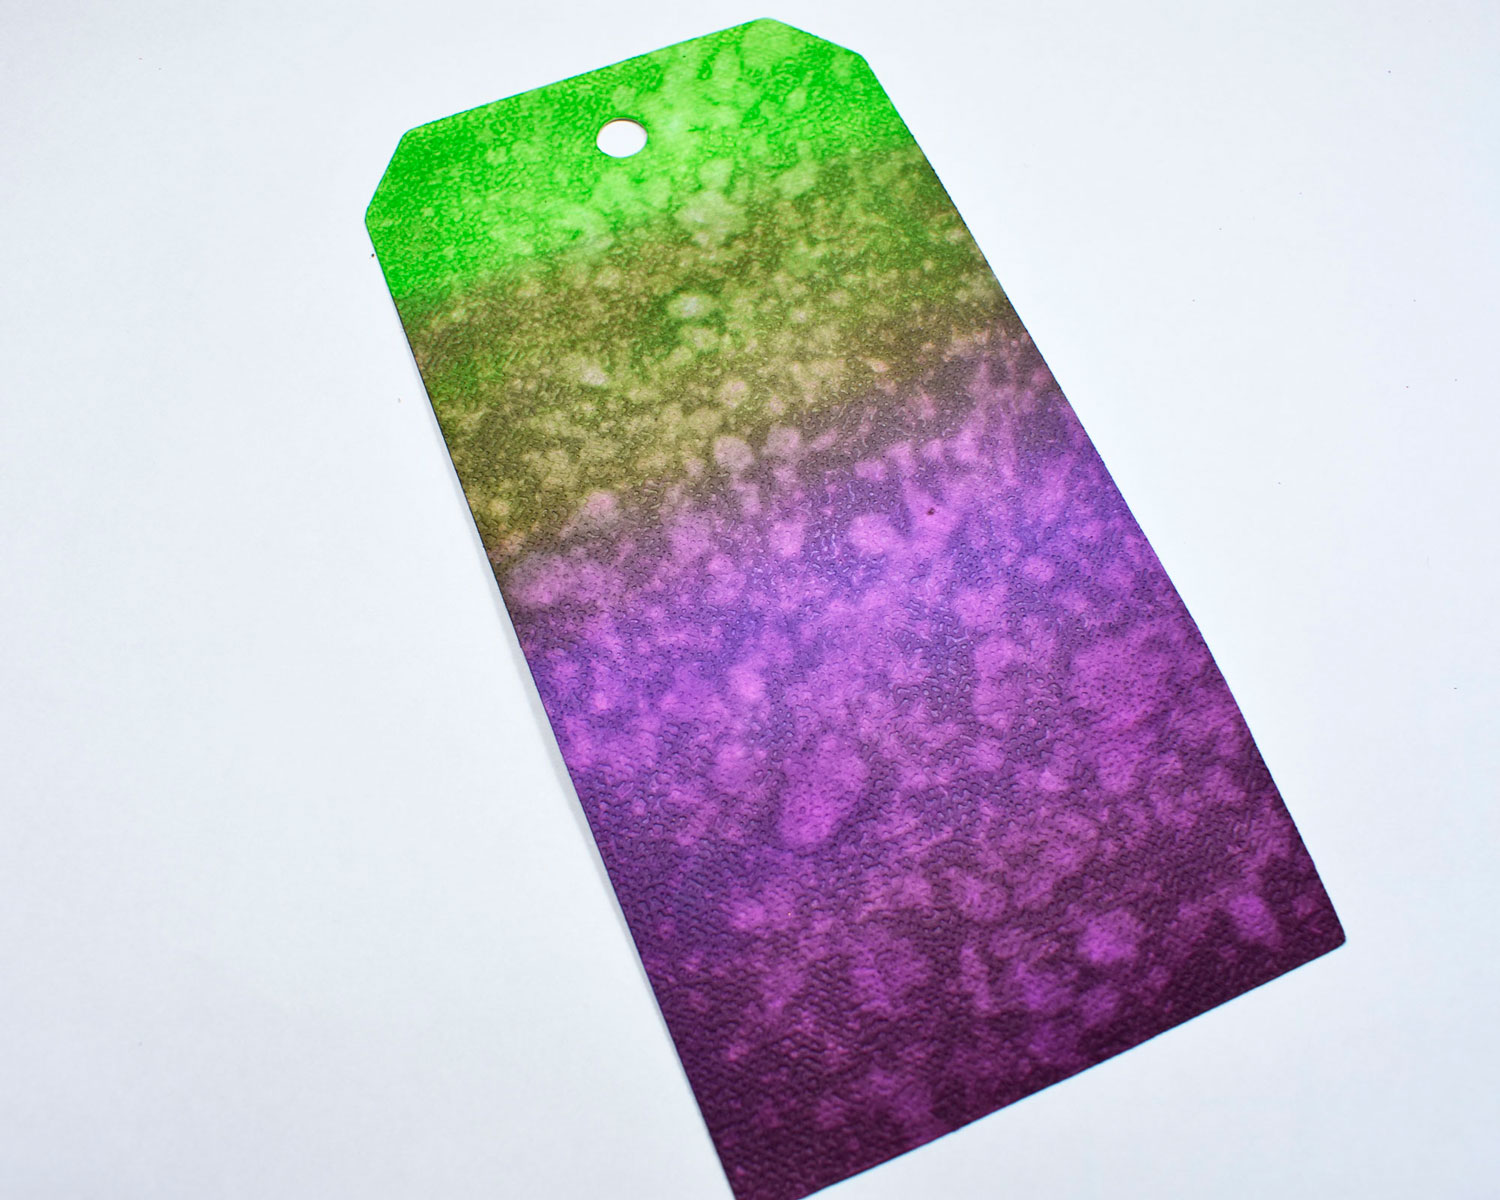
 To add a fun background to the clear foiled tags, apply ink to a coordinating white tag using purple and green inks. I used sponge daubers to create a deep color transition going from dark to light using Gina K. Designs Premium Dye Inks. Then I immediately splattered water on the tag to lift the ink and create texture... This is one of my favorite techniques when using these inks!
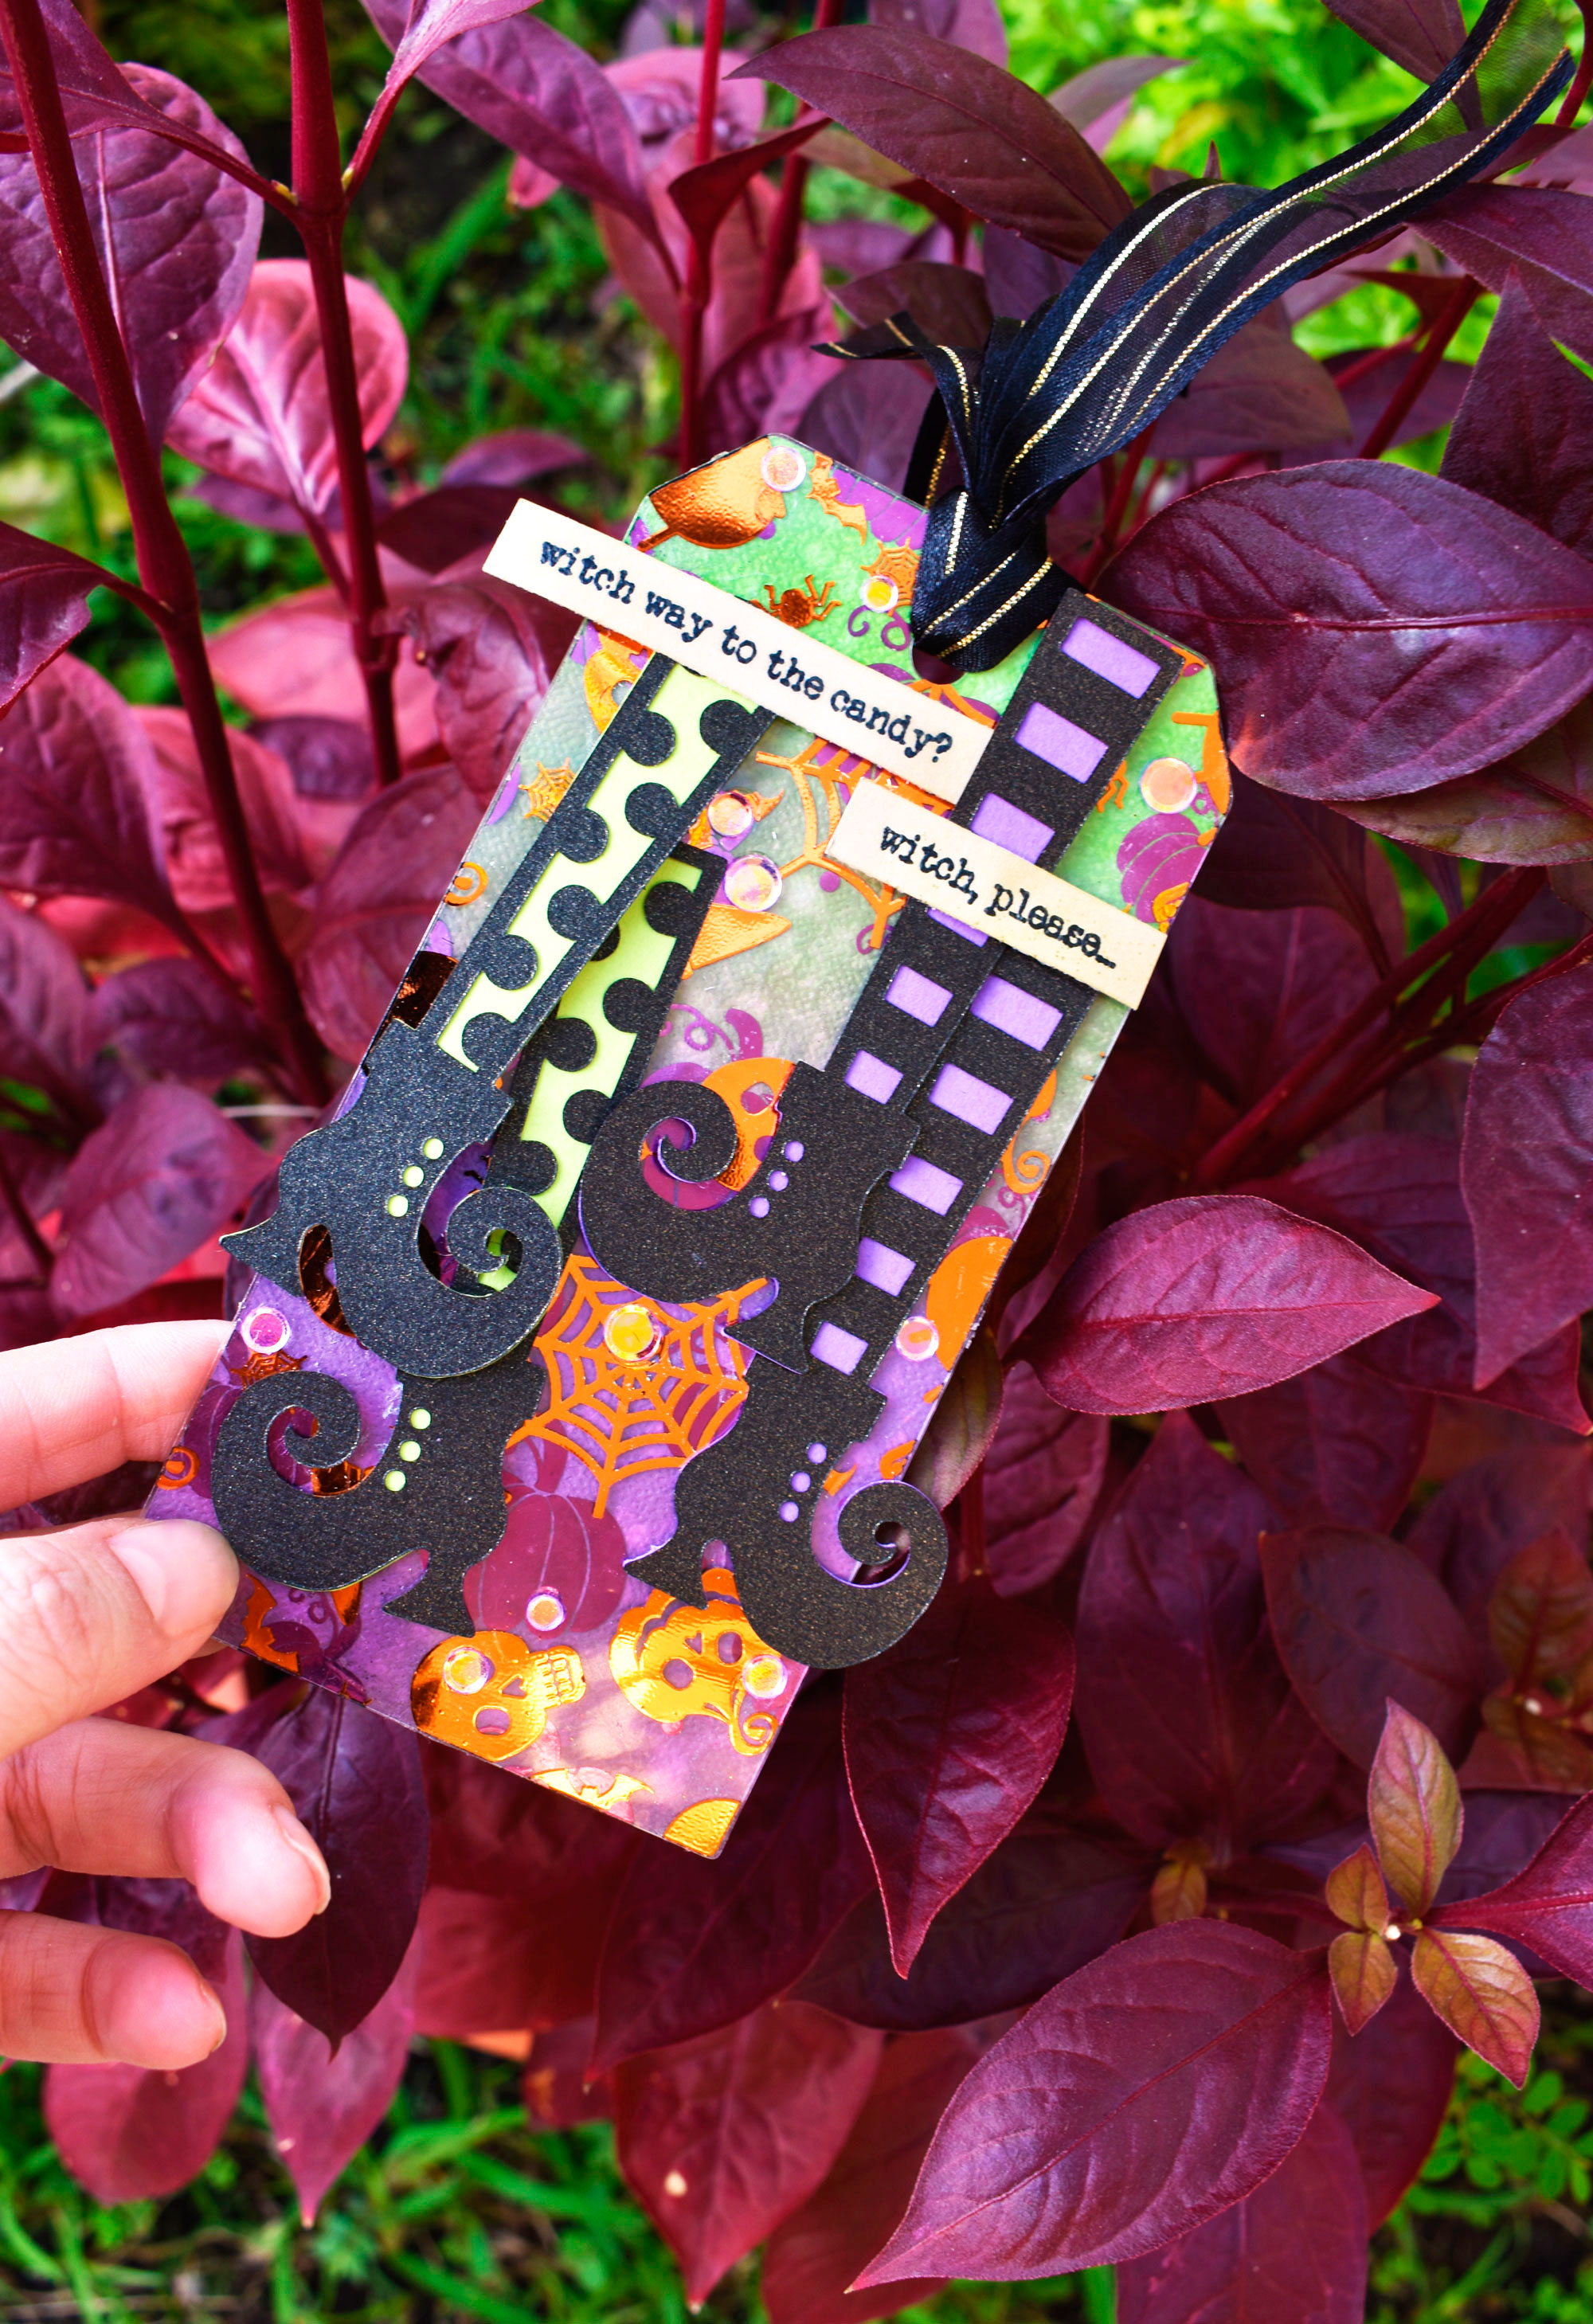
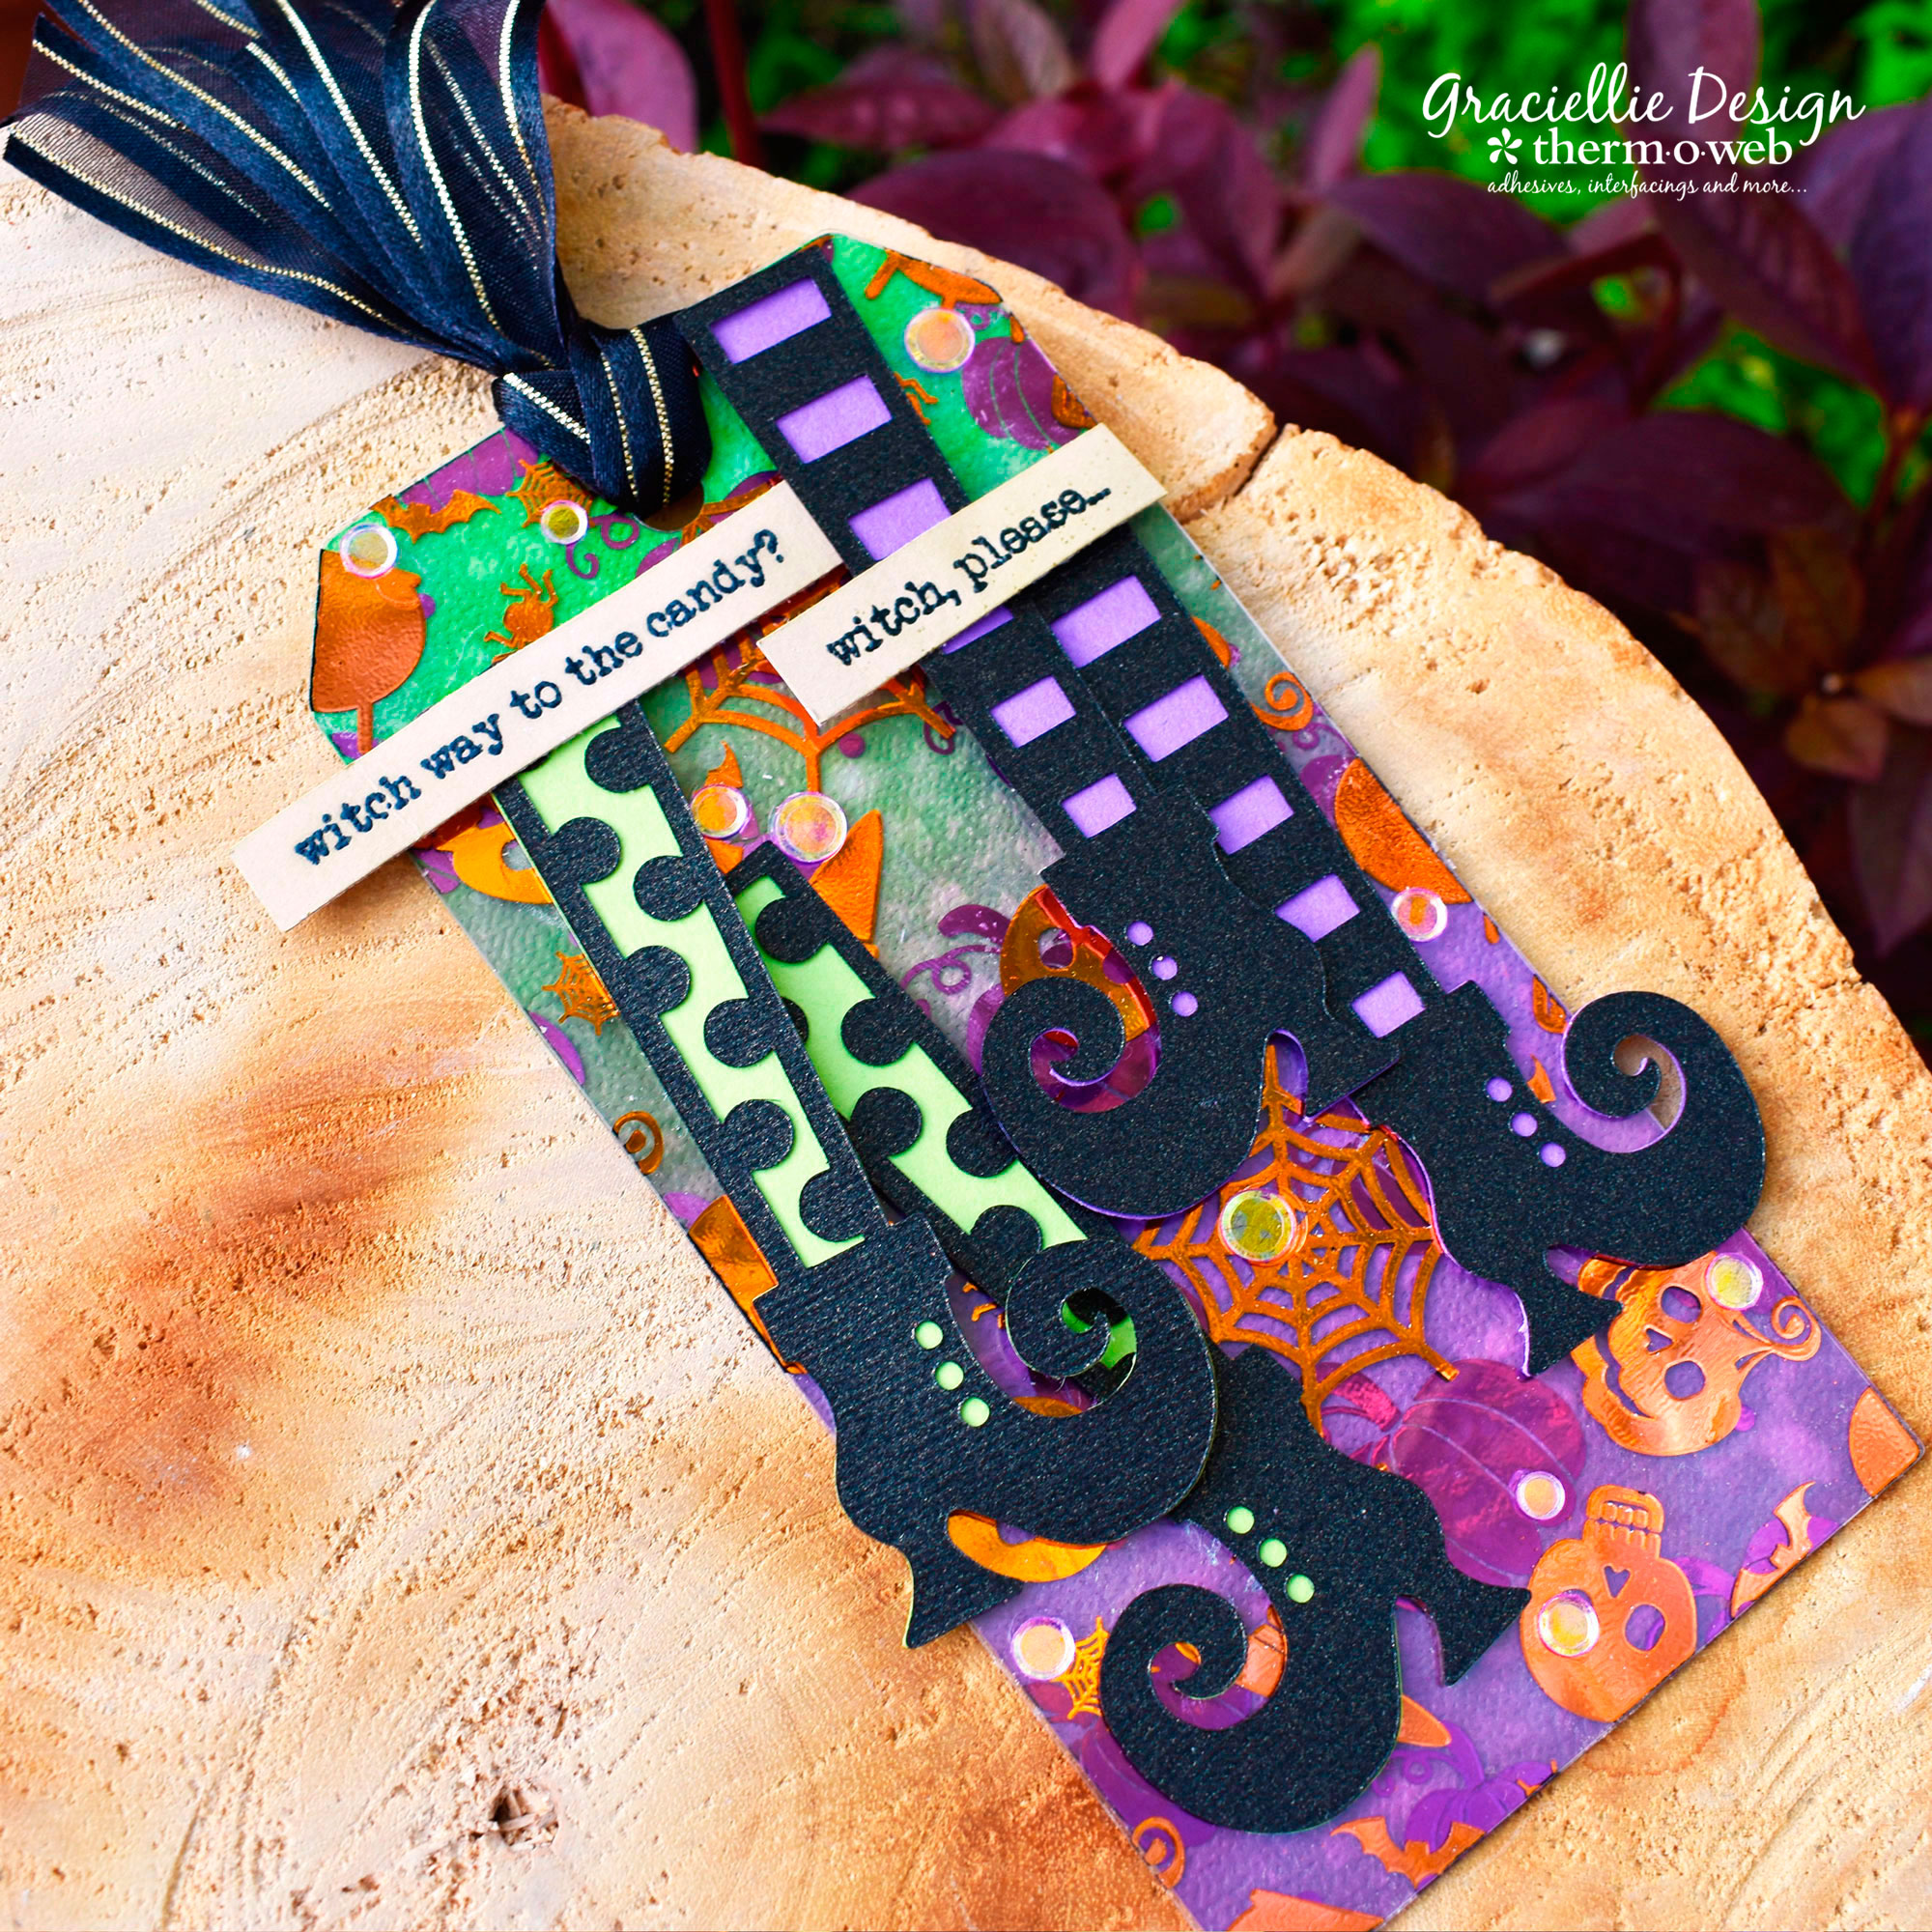
 Now you can layer all 3 tags, putting them together with some XL Tape Runner Adhesive.
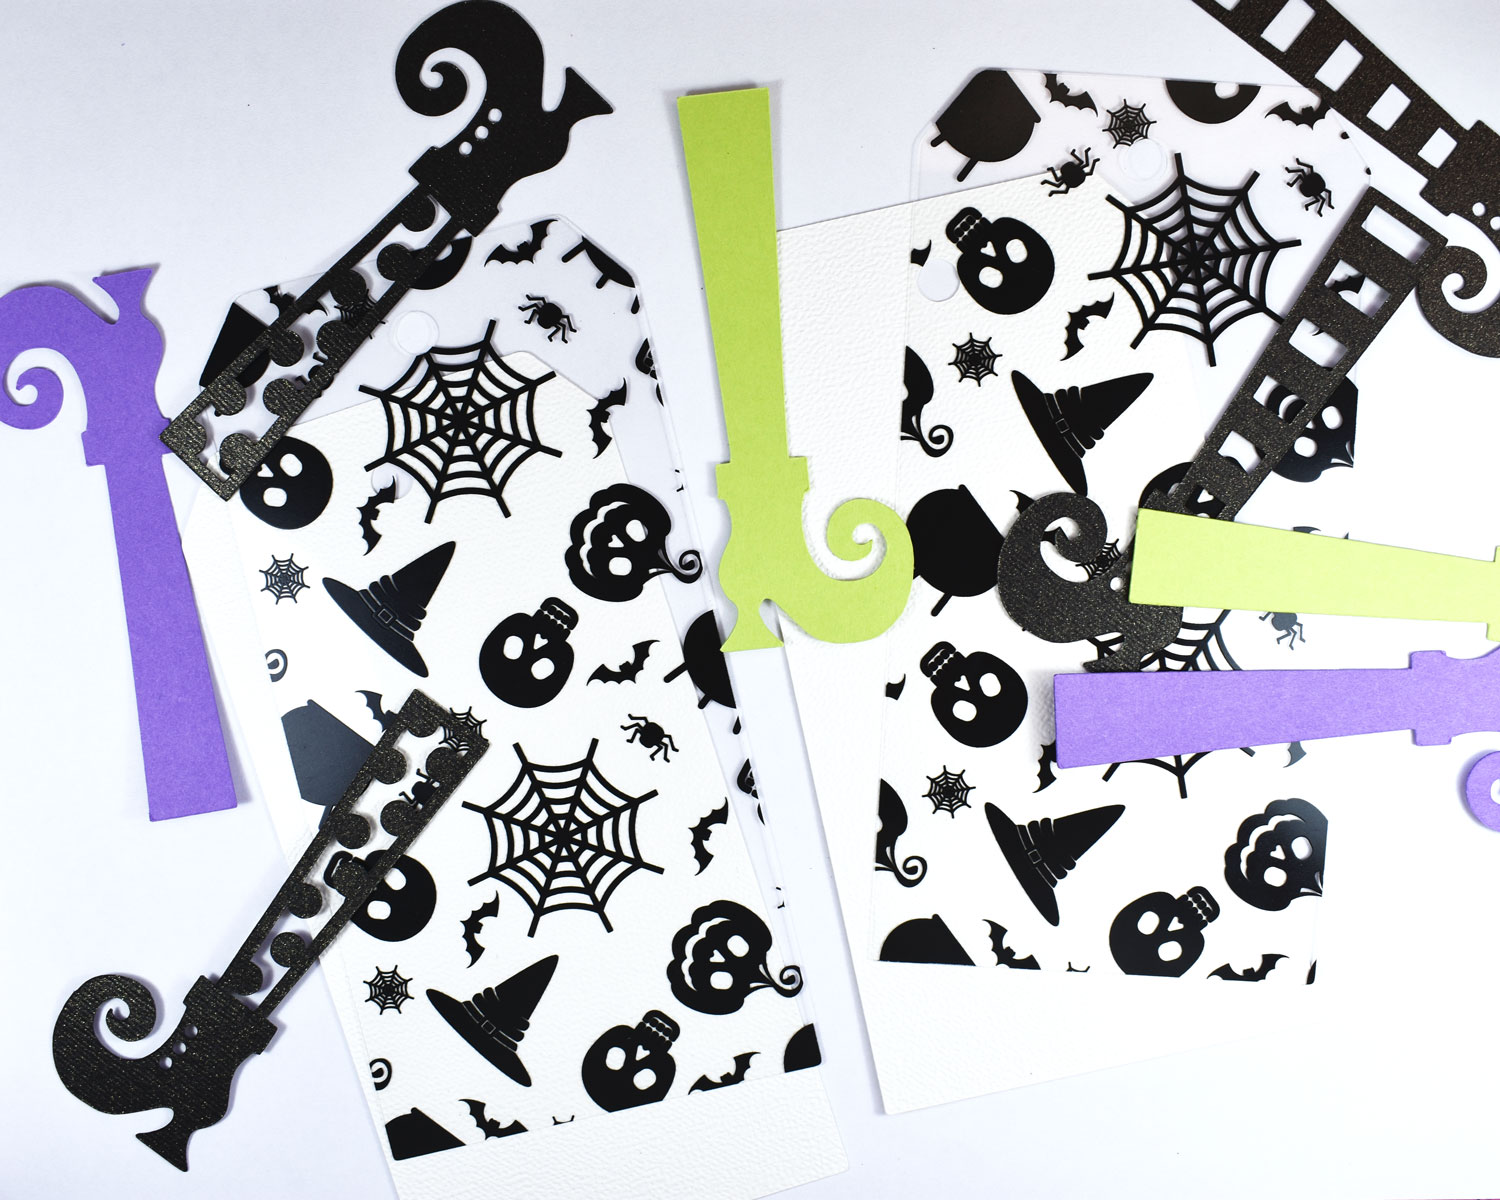
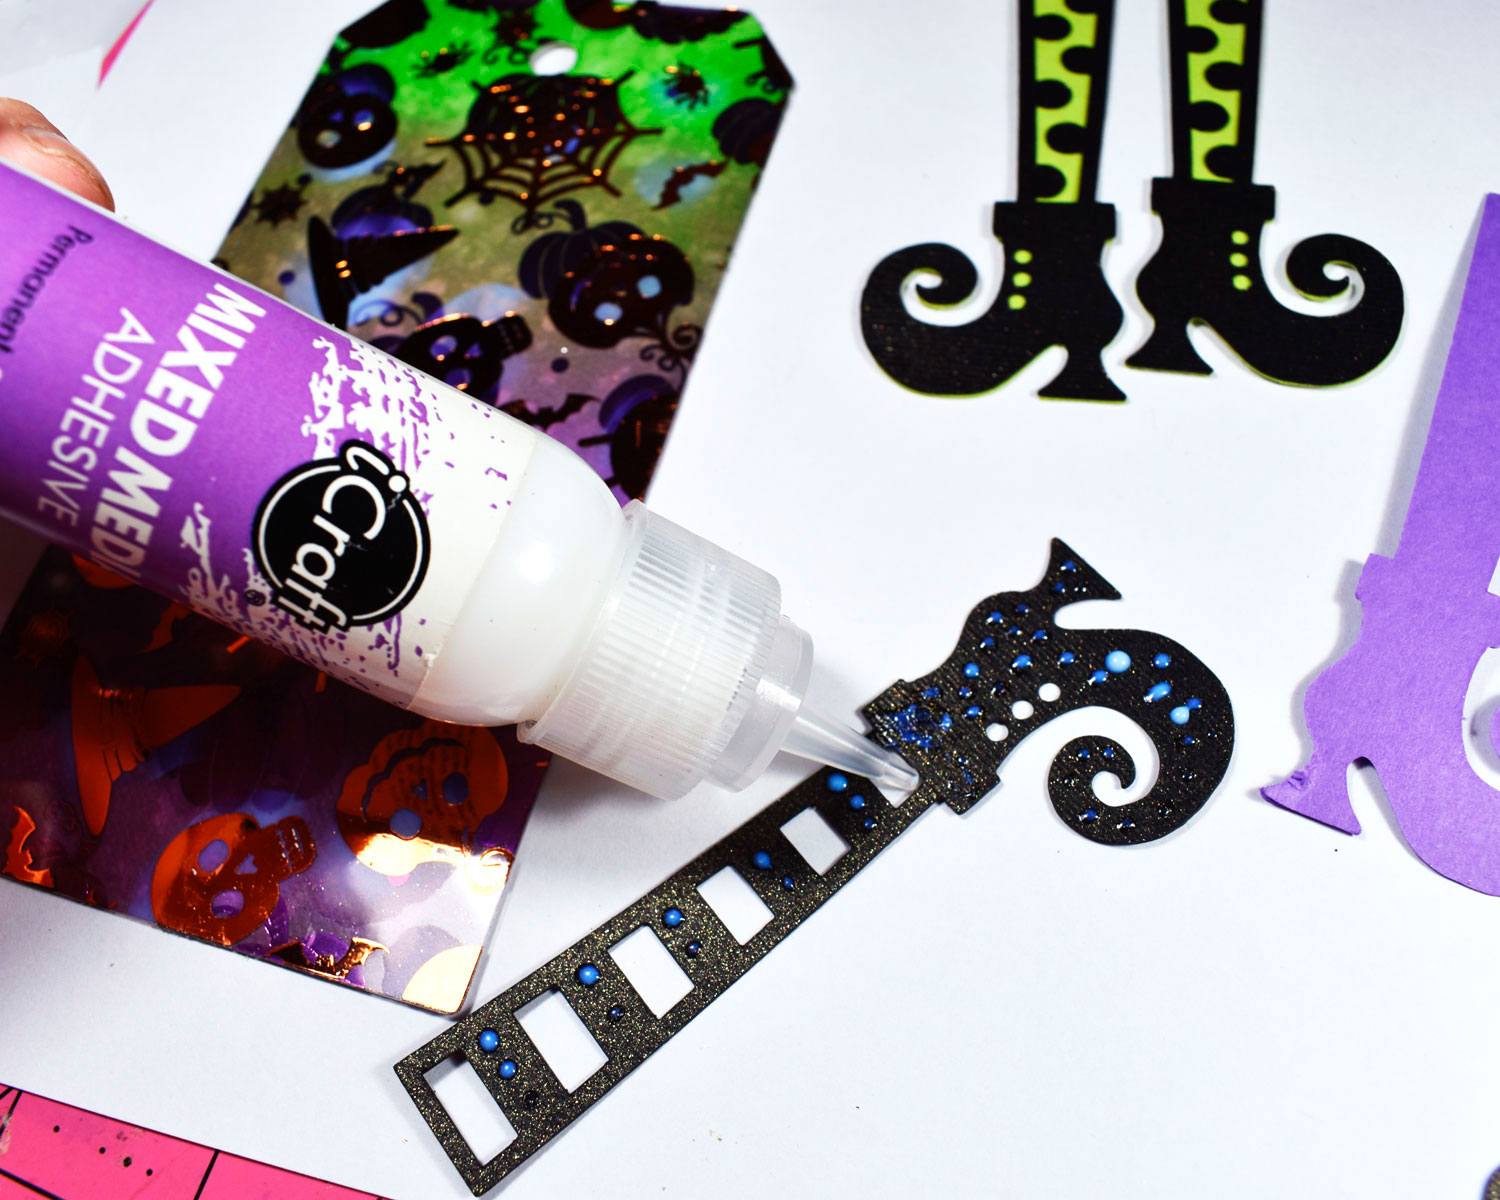
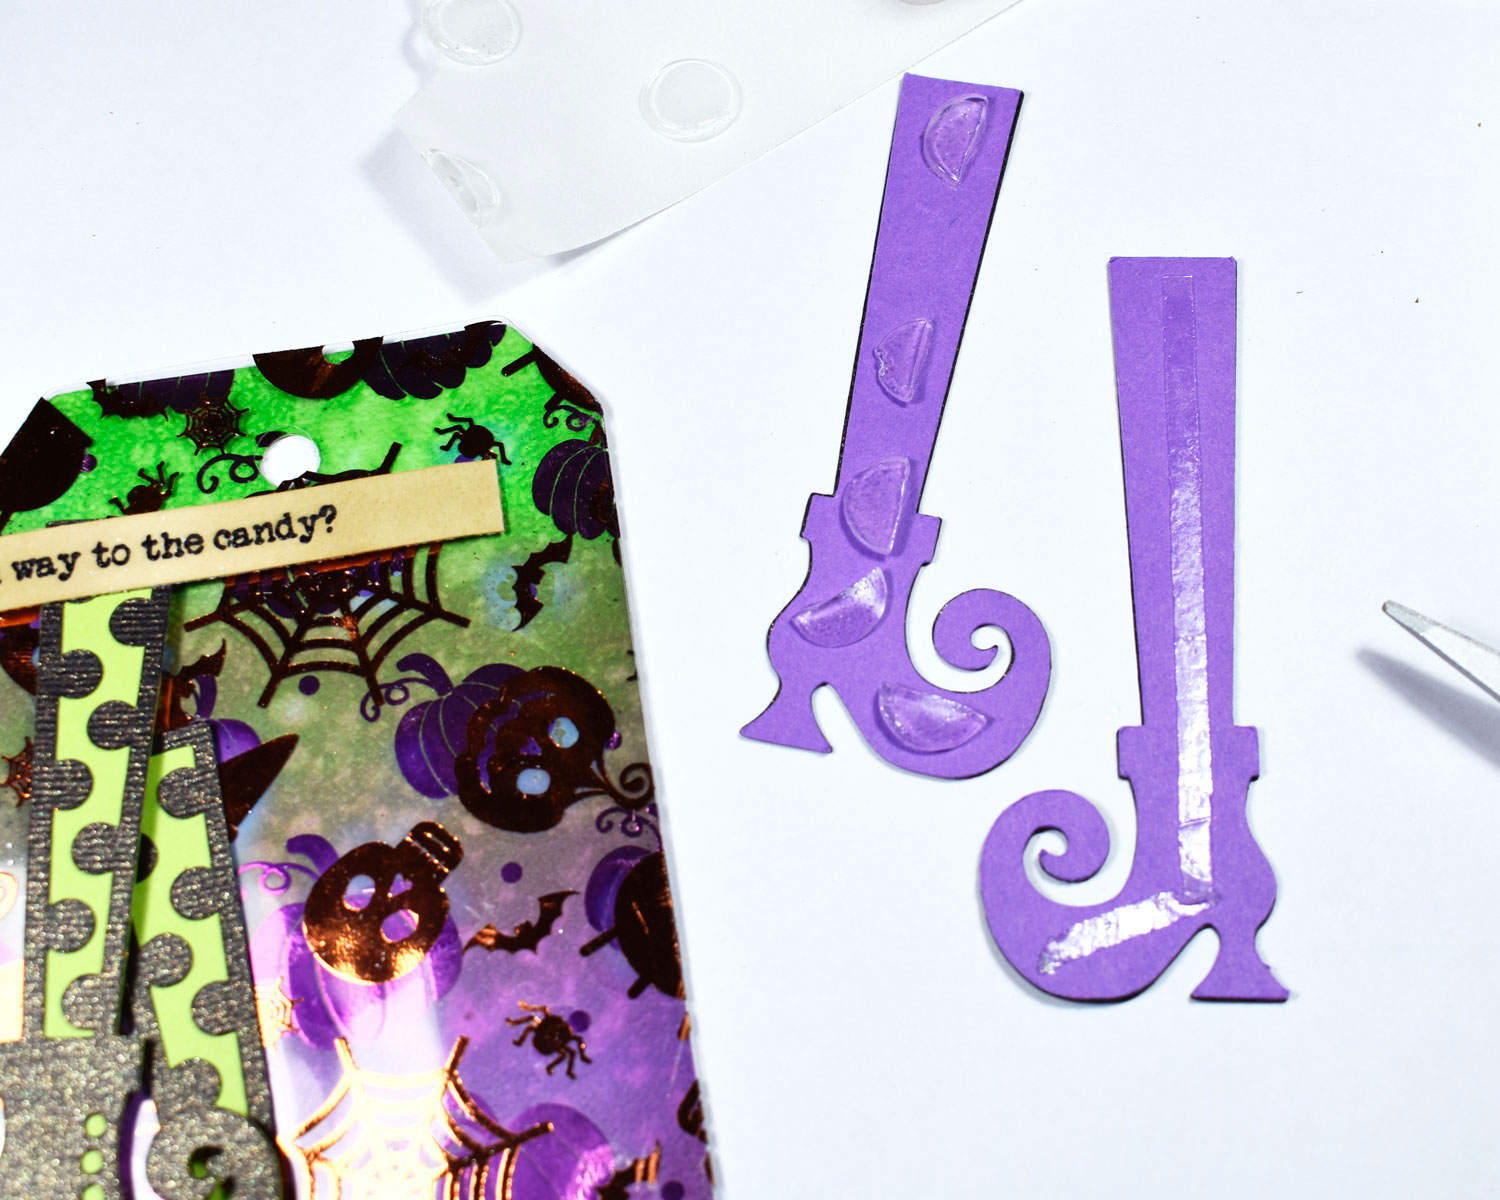
 For the SVG with boots, I used small drops of Mixed Media Adhesive. This SVG includes a silhouette cut so you can layer, and since they are very detailed the Mixed Media Adhesive works best to attach all the pieces!
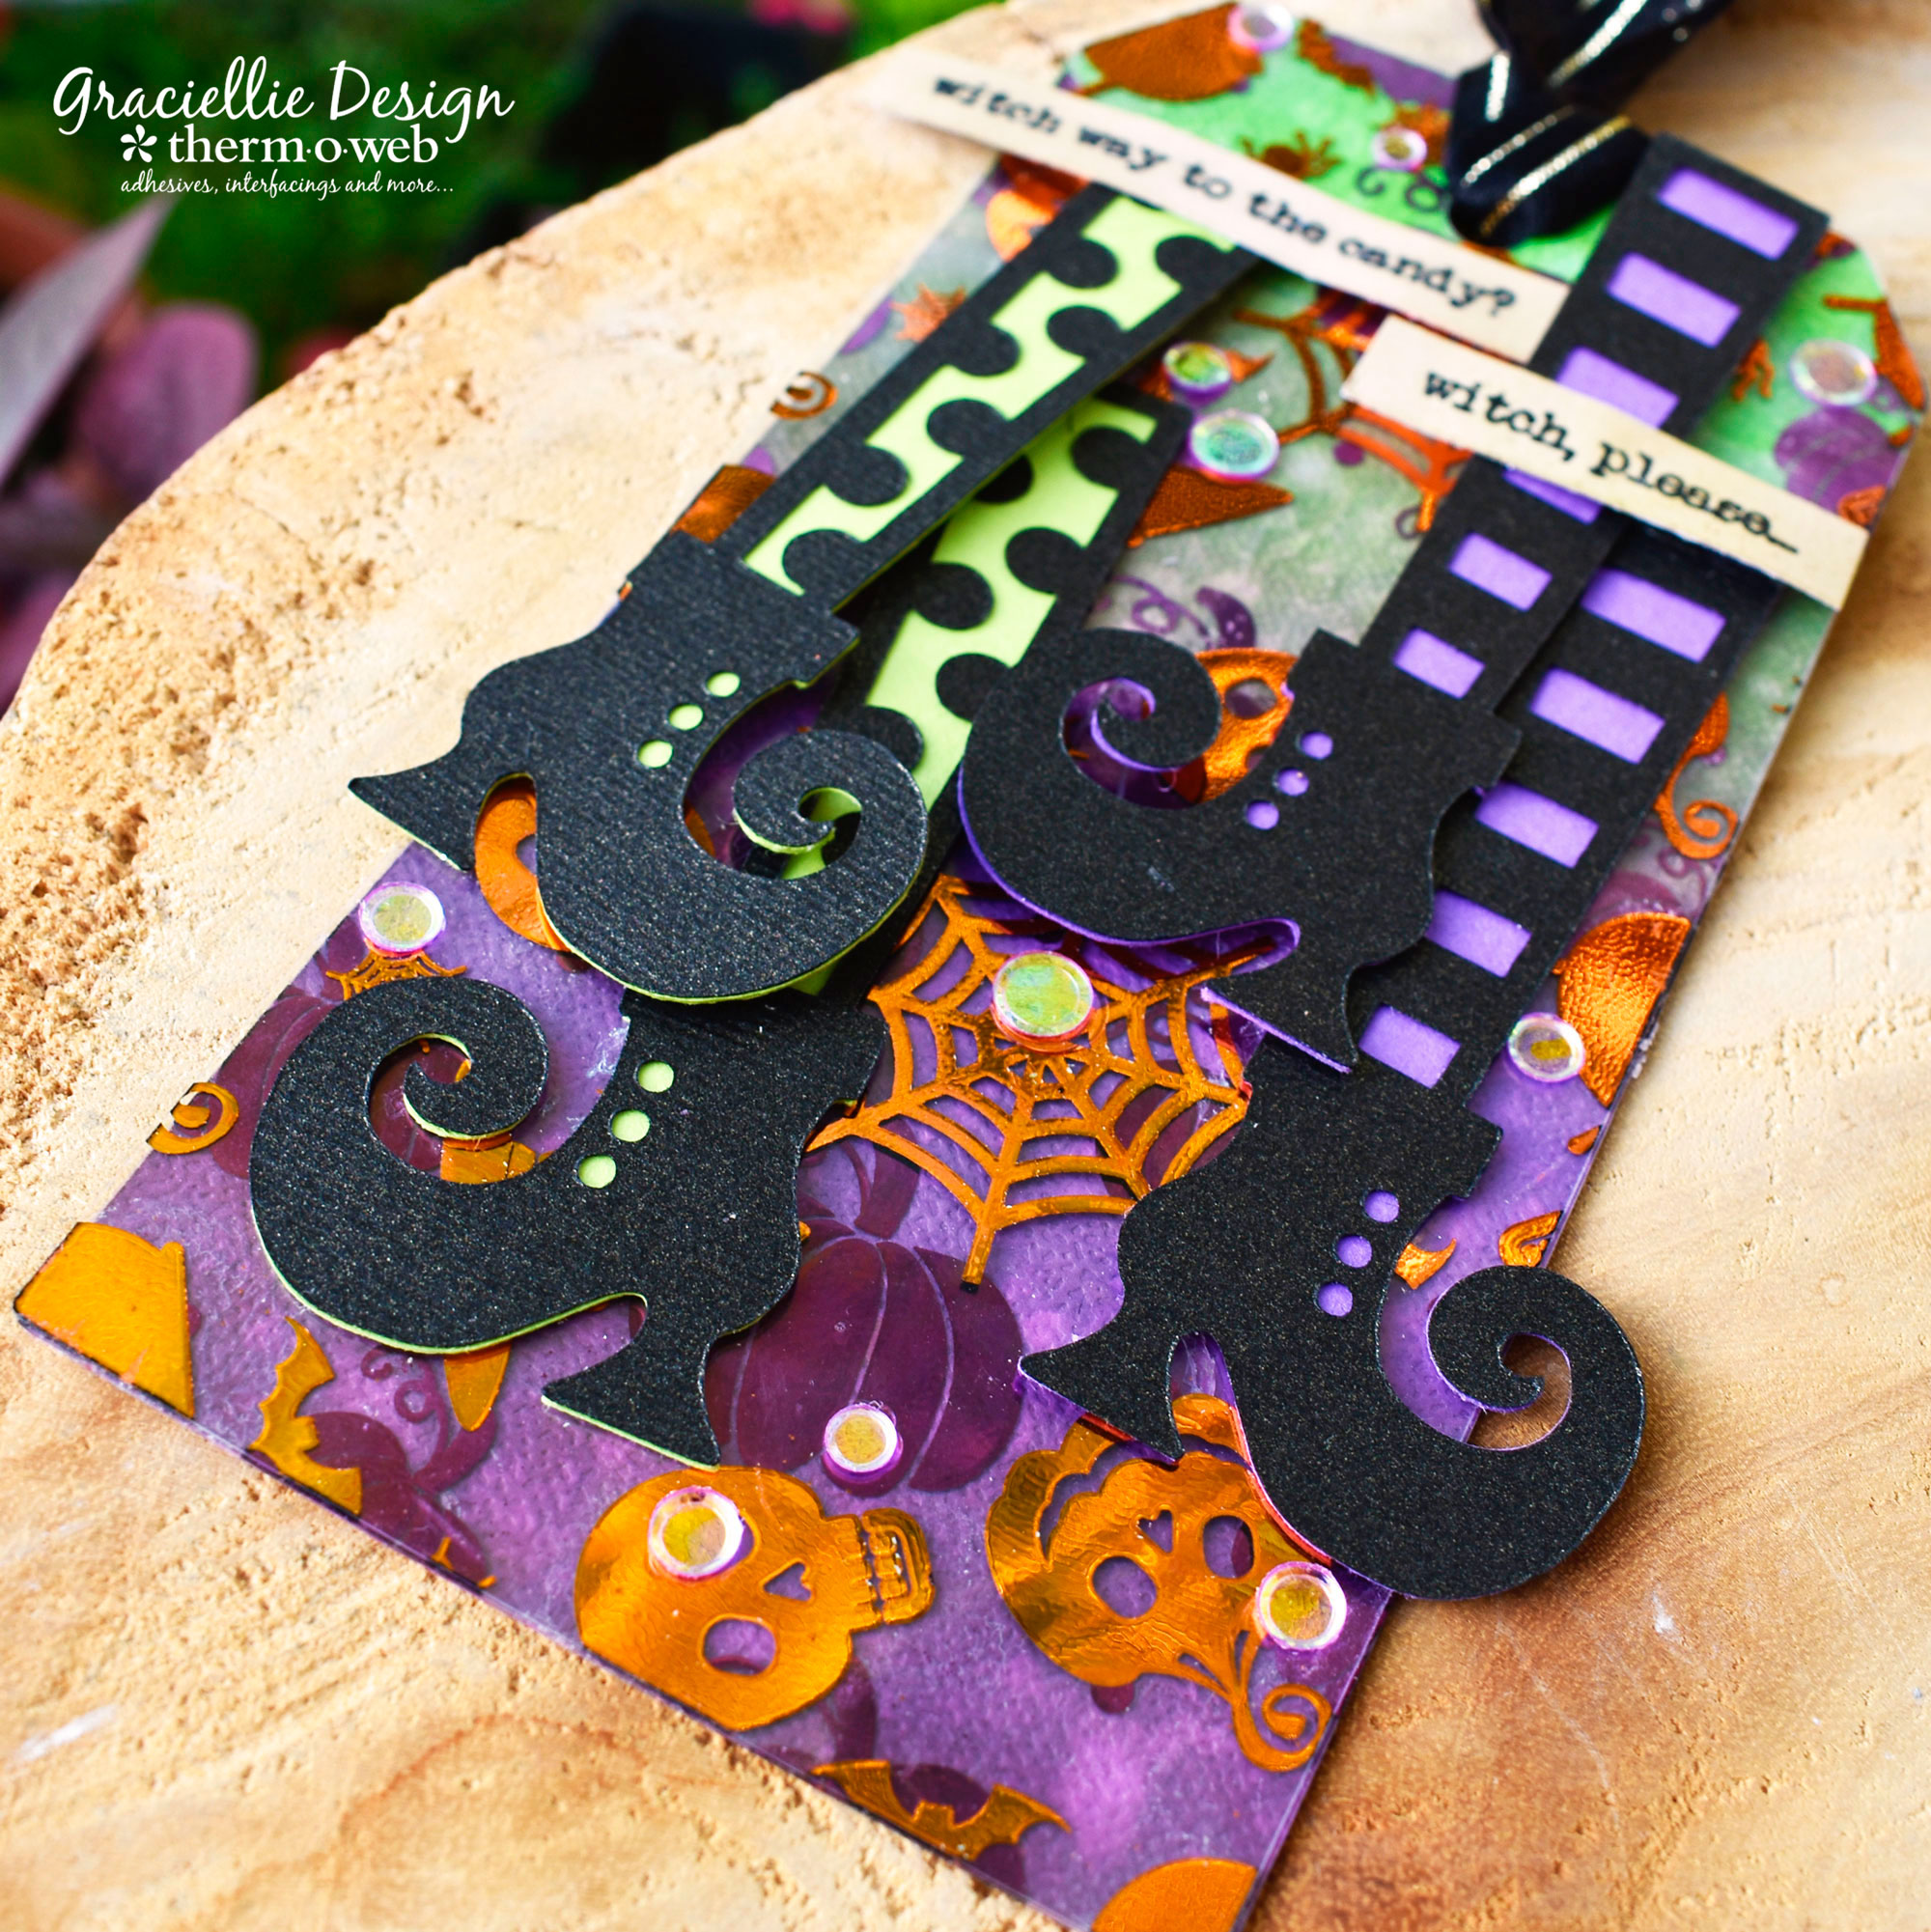
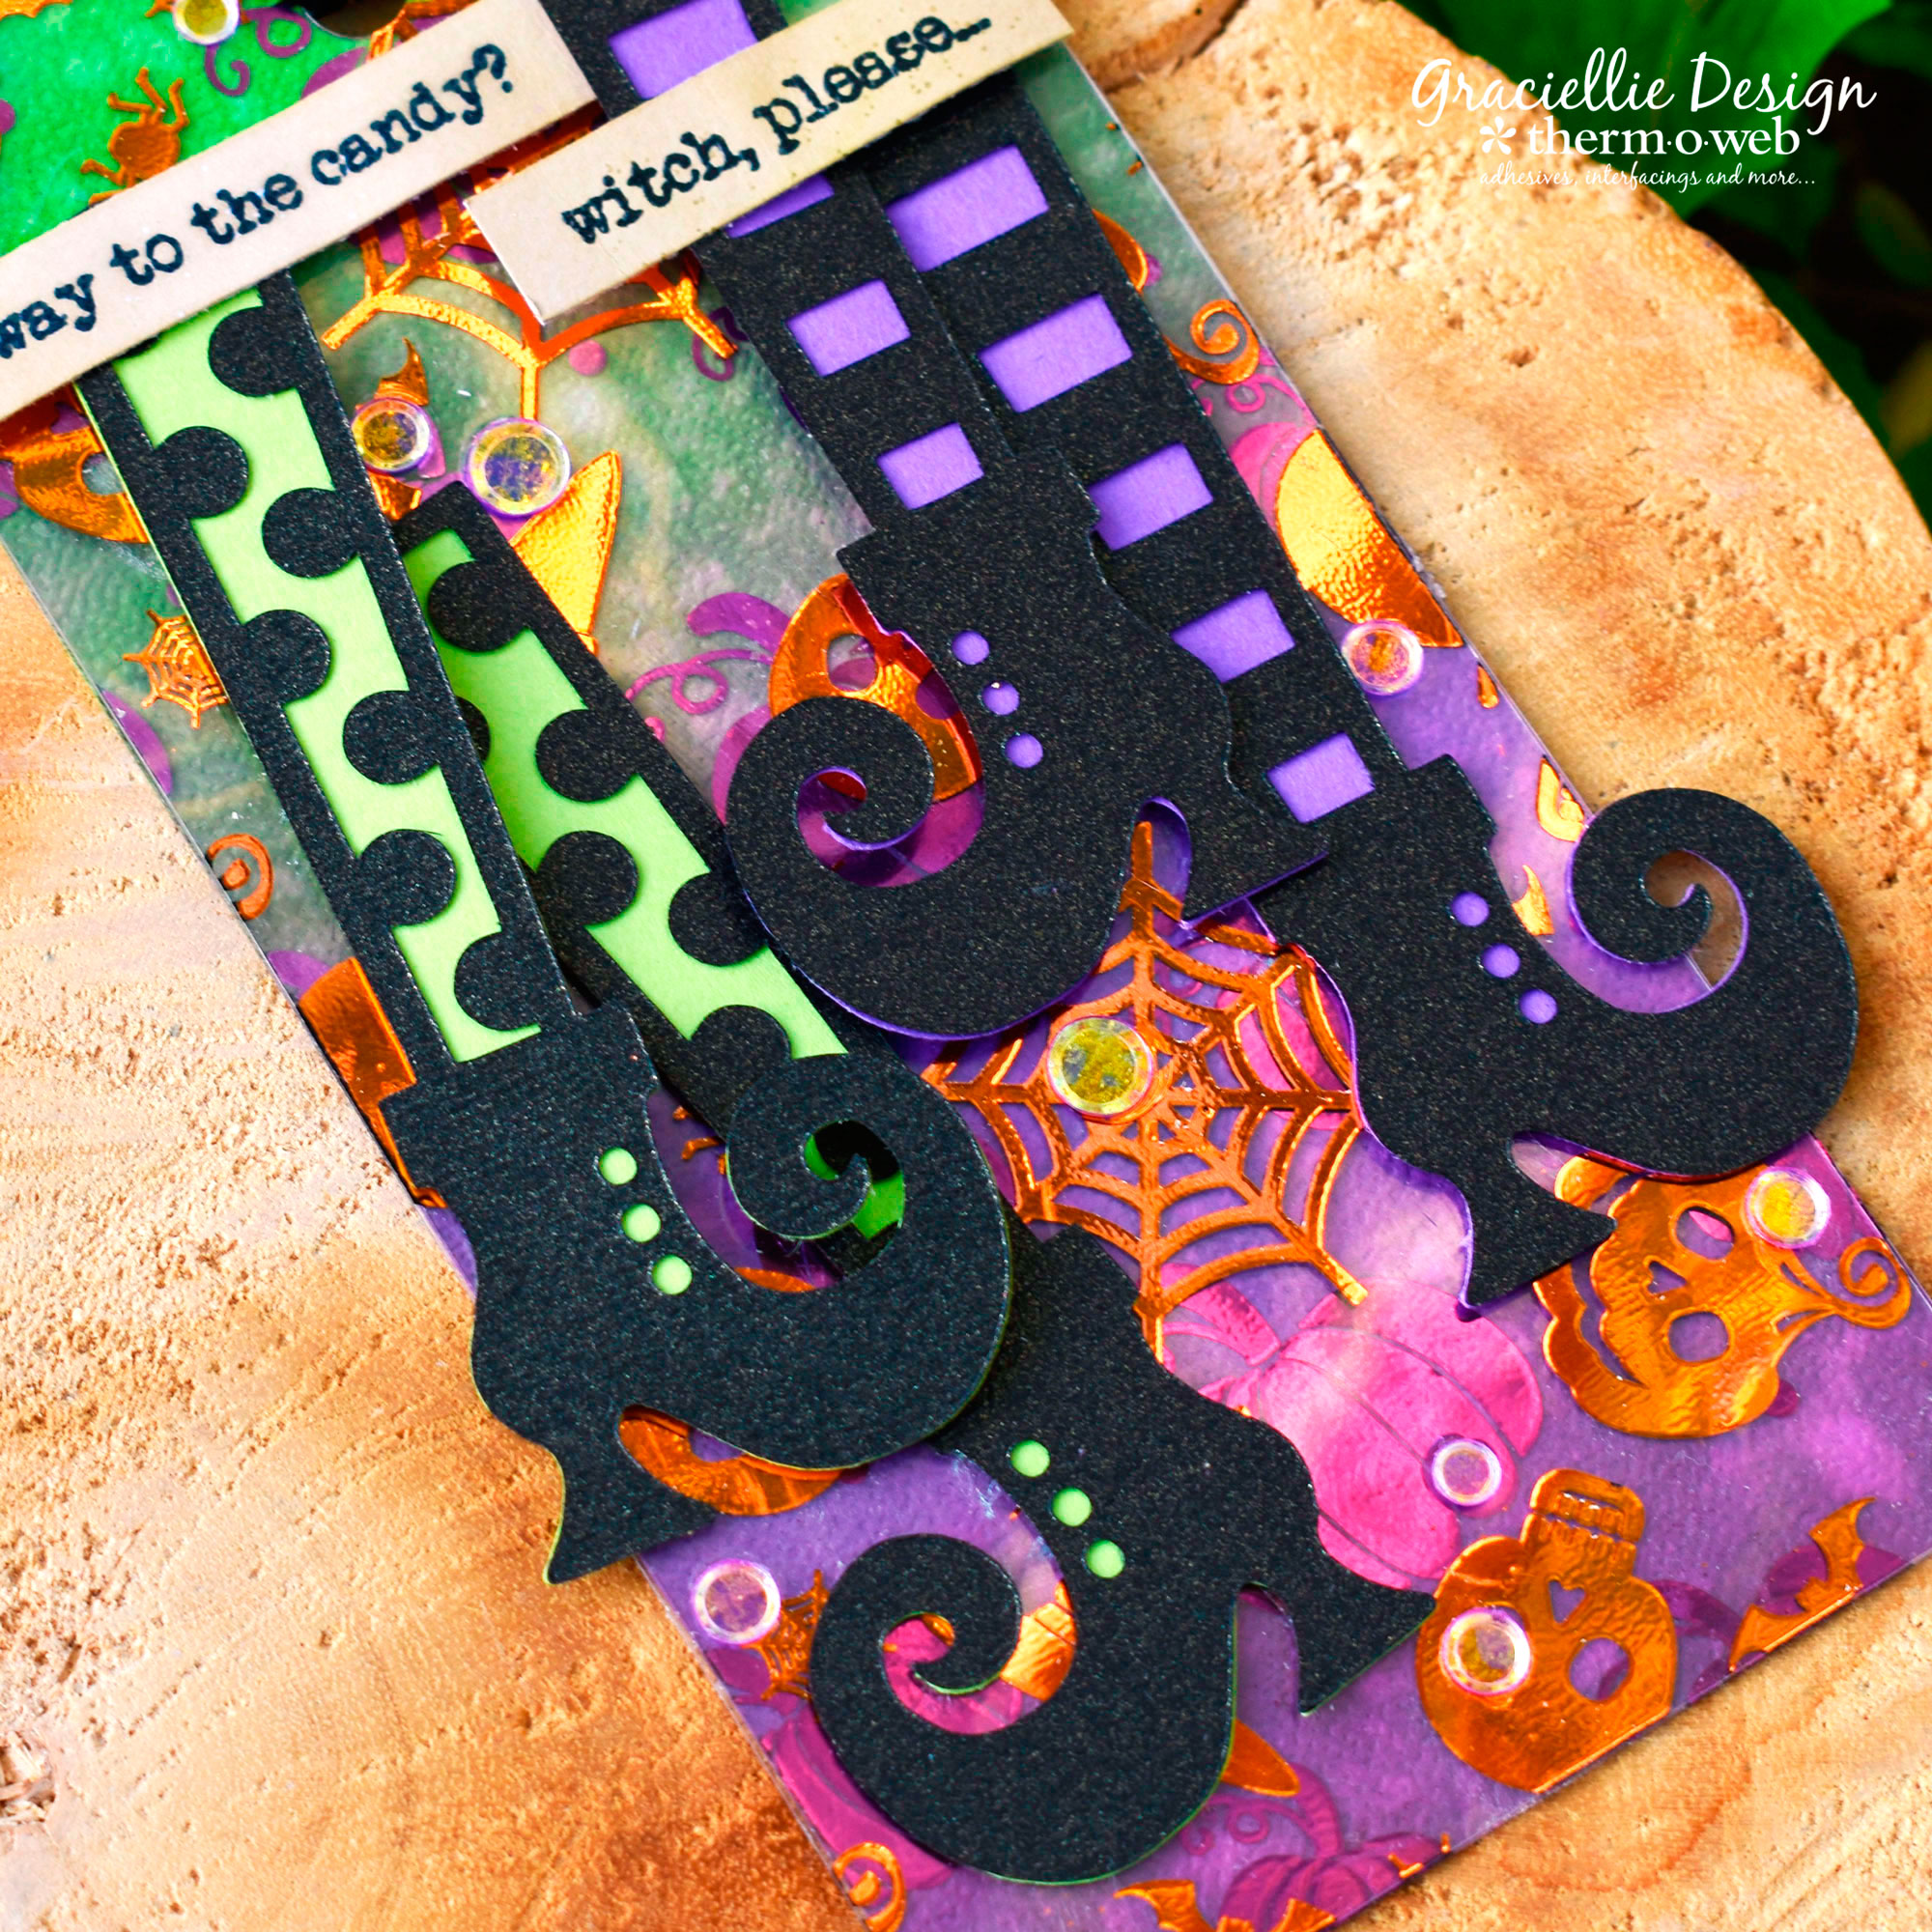
 To mount the witch boots and the stamped sentiments to the tag, I used Zips and 3D Zots cut in half. I finished the tag with several pieces of GK Black Sheer Satin Fancy Ribbon and sequins!
 I hope you enjoyed this fun tutorial and especially look forward to seeing what you'll create with today's SVG freebie! Make sure to tag us on social media and share your Halloween Deco Foil makes with us! Thanks so much for stopping by.