No Products in the Cart
 Hello Crafty Friends!!
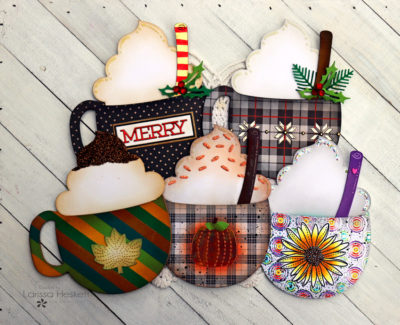 Larissa here today to share some ideas on ways to create the CUTEST Latte Gift Card Holders for ALL of your Gift Giving needs!! I've created SEVERAL different Designs using a combination of different Products to INSPIRE you!!
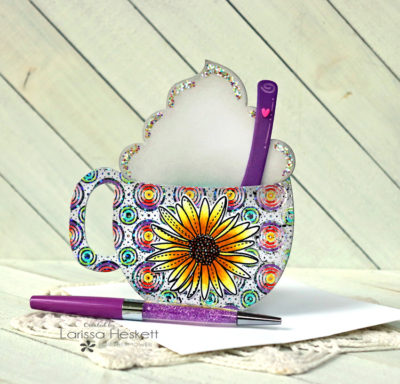
 I started by Coloring the Circle of Plenty Deco Foil Toner Card Front with Copic Markers!! I used 2 Colors per Ring, but that's one of the things I LOVE the MOST about these Toner Card Fronts you can color them any way you want!!
 I didn't color the entire Circle I left some Highlights for a FUN look!!
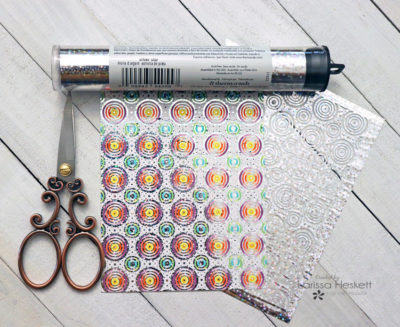 Then I Foiled the entire Card Front using some Deco Foil in Silver Stars!! The Iridescent Shine of the Stars coordinated nicely with the colors that I chose for my coloring!! This Process is ALWAYS my FAVORITE because of that moment when you pull back the Film from the Deco Foil and your Design is revealed!! It honestly NEVER gets old!!
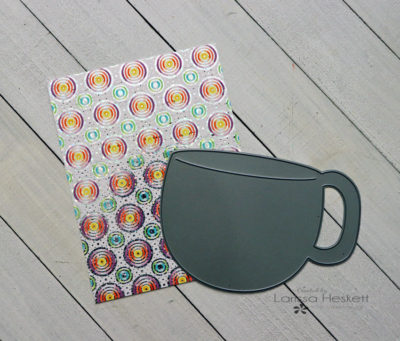 Next, I Die Cut the Simon Says Stamp Latte Gift Card Slider Die from the Colored and Foiled Circles a Plenty Card Front!! I would DEFINITELY buy a Mug like this!! SWOON!!
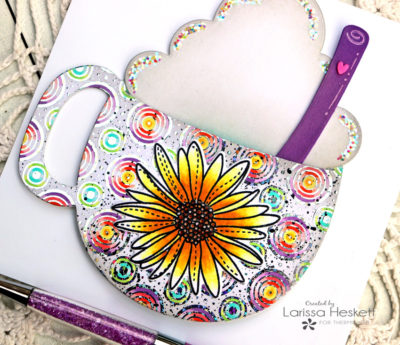 Next, I Stamped and Embossed the Daisy Image from the SSS Spring Flowers Stamp Set and colored it with Copic Markers!! I chose Yellow as I thought it would look nice on the Cup!! I used the same Copic Colors that I used for the Card Front adding a middle tone for the blending!! I used Y11, Y15 & YR23!! Then I used the coordinating Dies to Die Cut it out!! I thought that the Cup needed something so I decided to add some Black Soot Distress Paint Splatters and I really like the touch of the Black as it helps to make the Flower Image blend in a little better!! I adhered the flower to the center of the Cup using some Ultra Bond Adhesive!!
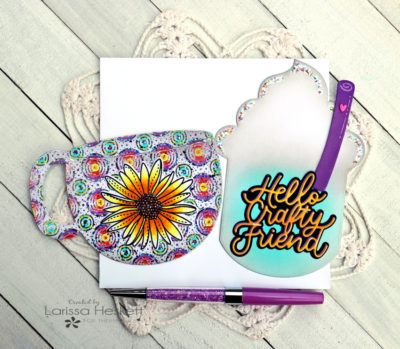 Then I started to work on the inside of the Card!! Beings its a Slider Card the Whipped Topping piece Slides out!! I wanted to add something SPECIAL to this piece as I found that I didn't really like the look of the Gift Card peeking out from the Cup!! I think it draws away from all of the CUTENESS of the Cup so I designed my Slider Cups a little different than they were intended to be used!! I wanted to ink the Topping to add some dimension, so I used Hickory Smoke Distress Oxide Ink as it ties in nicely with the Silver Star Deco Foil I used!!
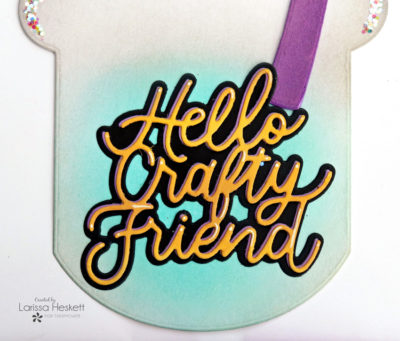 Then I Die Cut the SSS Hello Crafty Friend Die from some Lavender and Black Cardstock!! I wanted a FUN Layered Sentiment to again help tie into the colors of the Cup so that everything ties together and looks cohesive!! The options are ENDLESS here!! I inked behind where the Die Cut was going to go with some Peacock Distress Oxide Ink and blended it out with some Tumbled Glass Distress Oxide Ink!! I think this really makes the Die Cut POP off of the Insert and again it ties into the colors I used on the Cup!!
 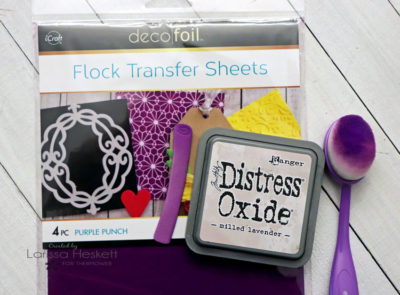 For the finishing Details, I Die Cut the Candy Stick from some Deco Foil Flock Sheets that I adhered to some Lavender Cardstock using some Easy Cut Adhesive Sheets!! I layered 2 more Lavender Cardstock Die Cuts in order to make the Flocked Candy Stick more 3-D!! Then I added some Dimension by inking with some Milled Lavender Distress Oxide Ink!! I adhered it to the Topping Insert using some Ultra Bond Adhesive!! I added some White Gel Pen Highlights and a Tiny Pink Clay Heart to finish off the Design!!
Products Used:
Therm O Web:
Deco Foil Toner Card Fronts by Unity in Circles a Plenty
Deco Foil in Silver Stars
Deco Foil Purple Punch Flock Sheets
Ultra Bond Adhesive
Purple Tape
Easy Cut Adhesive Sheets
Other:
Simon Says Stamp Latte Gift Card Slider Dies
Simon Says Stamp Spring Flowers Stamp Set and coordinating Dies
Simon Says Stamp Hello Crafty Friend Die
Simon Says Stamp Cardstock in Lavender, Banana Yellow and Black
Copic Markers
WoW Embossing Clear Gloss
Studio Katia Rainbow Hearts
Copic Markers
Distress Oxide Inks
For the finishing Details, I Die Cut the Candy Stick from some Deco Foil Flock Sheets that I adhered to some Lavender Cardstock using some Easy Cut Adhesive Sheets!! I layered 2 more Lavender Cardstock Die Cuts in order to make the Flocked Candy Stick more 3-D!! Then I added some Dimension by inking with some Milled Lavender Distress Oxide Ink!! I adhered it to the Topping Insert using some Ultra Bond Adhesive!! I added some White Gel Pen Highlights and a Tiny Pink Clay Heart to finish off the Design!!
Products Used:
Therm O Web:
Deco Foil Toner Card Fronts by Unity in Circles a Plenty
Deco Foil in Silver Stars
Deco Foil Purple Punch Flock Sheets
Ultra Bond Adhesive
Purple Tape
Easy Cut Adhesive Sheets
Other:
Simon Says Stamp Latte Gift Card Slider Dies
Simon Says Stamp Spring Flowers Stamp Set and coordinating Dies
Simon Says Stamp Hello Crafty Friend Die
Simon Says Stamp Cardstock in Lavender, Banana Yellow and Black
Copic Markers
WoW Embossing Clear Gloss
Studio Katia Rainbow Hearts
Copic Markers
Distress Oxide Inks
 Pumpkin Latte Gift Card Holder
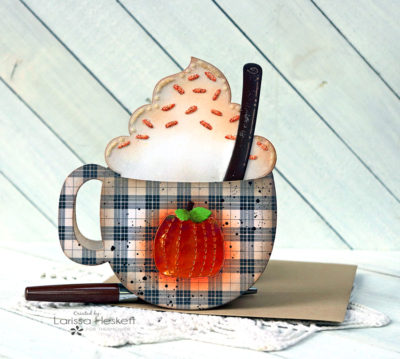
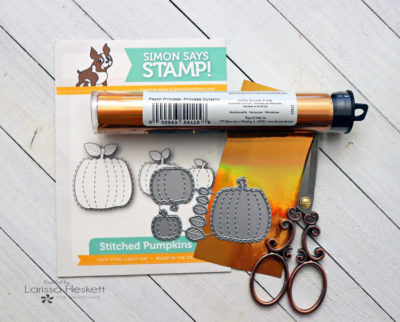 Then I Die Cut it again from some of the NEW Peach Princess Deco Foil that I laminated onto some of the Deco Foil Toner Sheets!! I inlaid it into the Pumpkin opening in the Circle and then I added the Die Cut Leaves also from the Set that I Die Cut from some Green Envy Flock Sheets!!
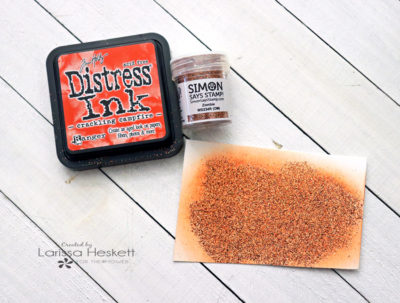 For the Sprinkles I Inked a piece of Cardstock with some Crackling Campfire Distress Oxide Ink and then added some SSS WoW Embossing Glitter in Zombie!! Then I Die Cut the Sprinkles!! I LOVE the addition of the Sparkle!!
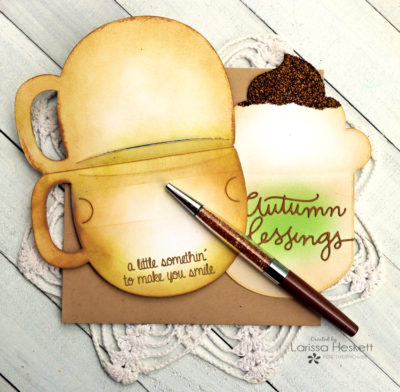
 These finished Shaped Cards fit perfectly in 5x5 Square Envelopes!!
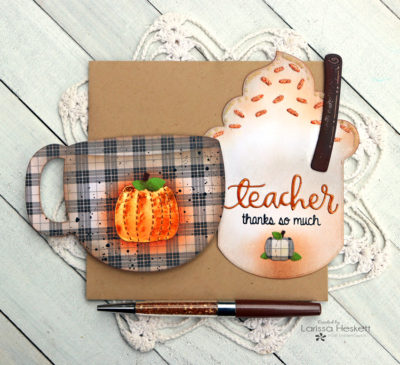 I added the SSS Teacher Die Cut that I Die Cut from the same Peach Princess Foiled Toner Sheet!! Then I Stamped and Embossed the Sentiment from CAS-ual Fridays Stamps!! I added another Pumpkin and some Deco Foil Green Envy Deco Foil Flocked Leaves!!
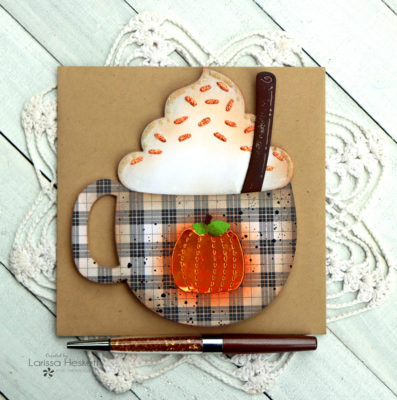
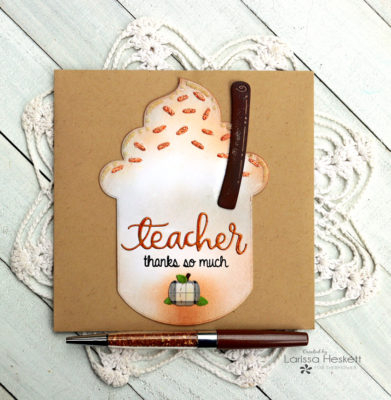 Here's a Close Up of all of the Details!! I really LOVE the way this turned out!!
 I Die Cut a Folded Piece of White 120 lbs. Cardstock using the Cup Die making sure to keep the fold above the Cut Line of the Die in order to create a Cup Shaped Card!! I like that the Die Cuts out the Shape with one pass, but the Slit intended for the Slider doesn't cut through so you have the Backside of the Cup to Die Cut the Slits in order to adhere the Gift Card!! I added the Gift Card and then I Stamped and Embossed the Sentiment onto the bottom part of the Card!! So I've turned this into a Shaped Interactive Card that can also hold a Gift Card!! I think this is going to be one of my NEW FAVORITE go-to Die Sets because the possibilities are truly ENDLESS!! As are all of the Products you can use with it!!
Products Used:
Therm O Web:
Deco Foil in Peach Princess
Deco Foil Toner Sheets
Deco Foil Green Envy Flock Sheets
Ultra Bond Adhesive
Purple Tape
Easy-Cut Adhesive Sheets
Other:
Simon Says Stamp Latte Gift Card Slider Dies
Simon Says Stamp Stitched Pumpkin Dies (retired)
but other similar Dies would work too
Simon Says Stamp Teacher Die
Simon Says Stamp WoW Embossing Powder in Zombie
Distress Oxide Inks
Distress Glitter in Rock Candy
Echo Park Farm House Kitchen 6x6 Paper Pad
I Die Cut a Folded Piece of White 120 lbs. Cardstock using the Cup Die making sure to keep the fold above the Cut Line of the Die in order to create a Cup Shaped Card!! I like that the Die Cuts out the Shape with one pass, but the Slit intended for the Slider doesn't cut through so you have the Backside of the Cup to Die Cut the Slits in order to adhere the Gift Card!! I added the Gift Card and then I Stamped and Embossed the Sentiment onto the bottom part of the Card!! So I've turned this into a Shaped Interactive Card that can also hold a Gift Card!! I think this is going to be one of my NEW FAVORITE go-to Die Sets because the possibilities are truly ENDLESS!! As are all of the Products you can use with it!!
Products Used:
Therm O Web:
Deco Foil in Peach Princess
Deco Foil Toner Sheets
Deco Foil Green Envy Flock Sheets
Ultra Bond Adhesive
Purple Tape
Easy-Cut Adhesive Sheets
Other:
Simon Says Stamp Latte Gift Card Slider Dies
Simon Says Stamp Stitched Pumpkin Dies (retired)
but other similar Dies would work too
Simon Says Stamp Teacher Die
Simon Says Stamp WoW Embossing Powder in Zombie
Distress Oxide Inks
Distress Glitter in Rock Candy
Echo Park Farm House Kitchen 6x6 Paper Pad
 Leaf Latte Gift Card Holder
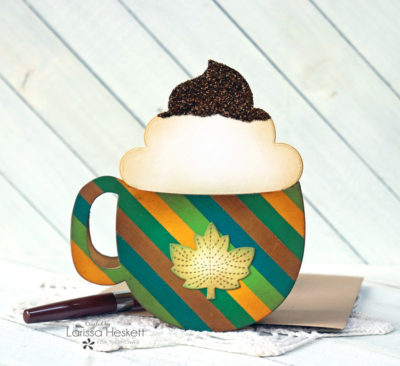
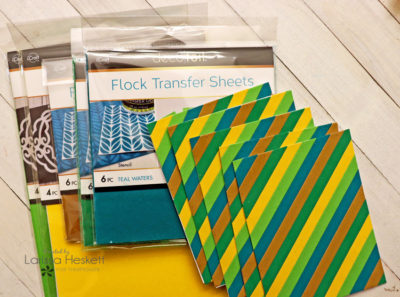 I created these Striped Backgrounds using a combination of Deco Foil Flock Sheets!! I LOVE the combination of the Fall Colors!! There are so many uses for these!!
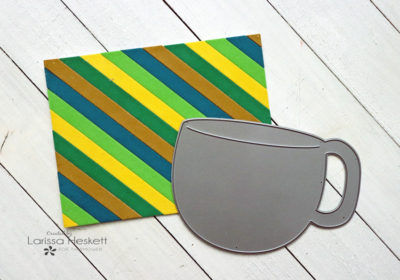 I Die Cut the Cup from the Deco Foiled Striped Paper I created and U absolutely LOVE the way it looks!! I Inked the edges of the Cup with some Distress Oxide Ink in Brushed Corduroy!!
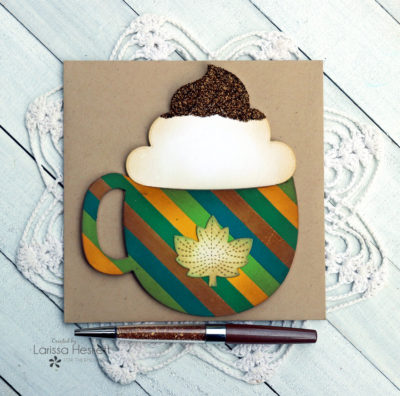 Then I added the Pretty Pink Posh Stitched Leaf!! I Inked the edges of the Leaf and then adhered it to the center of the Cup using some Ultra Bond Adhesive!!
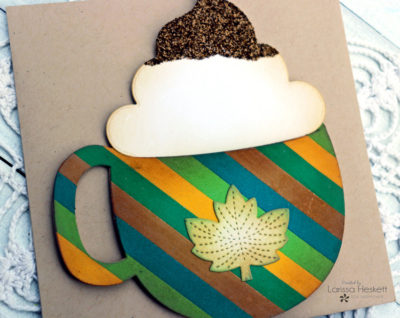 I added some Distress Glitter in Brushed Corduroy using some Ultra Bond Adhesive and I really like the way that it turned out!!
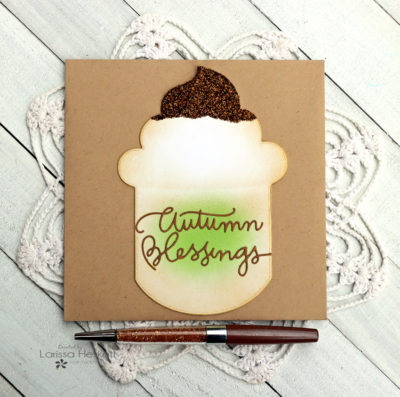
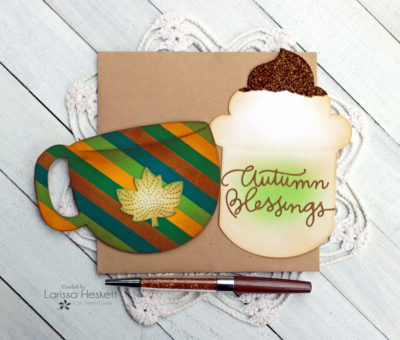 For the Slider Portion, I added the SSS Autumn Blessings Die after I inked with some Peeled Paint Distress Oxide Ink!!
 Here's a close up look of the Slider Portion of the Card!!
 I Die Cut a Folded Piece of White 120 lbs. Cardstock using the Cup Die making sure to keep the fold above the Cut Line of the Die in order to create a Cup Shaped Card!! I like that the Die Cuts out the Shape with one pass, but the Slit intended for the Slider doesn't cut through so you have the Backside of the Cup to Die Cut the Slits in order to adhere to the Gift Card!! I added the Gift Card and then I Stamped and Embossed the Sentiment onto the bottom part of the Card!! So I've turned this into a Shaped Interactive Card that can also hold a Gift Card!! I think this is going to be one of my NEW FAVORITE go-to Die Sets because the possibilities are truly ENDLESS!! As are all of the Products you can use with it!!
 Plaid Latte Gift Card Holder
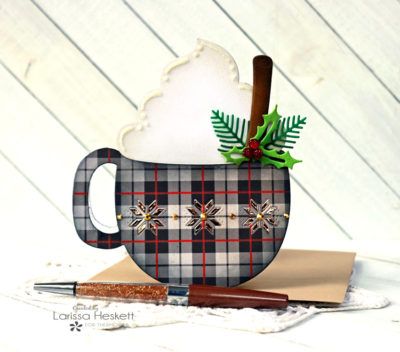
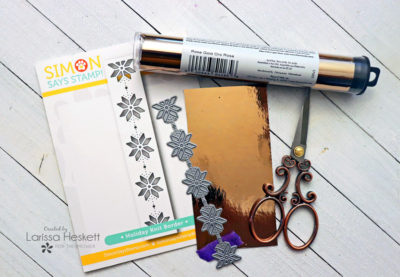
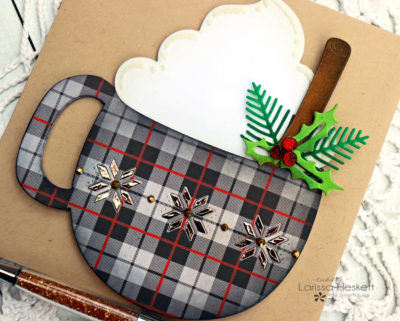 I Started by Die Cutting the Latte Dies from some Tim Holtz Patterned Papers both from the 8x8 Paper Pad!! Next, I used Dies both from SSS to add some Details to the Latte Cup!!
I used the SSS Holiday Knit Border Die and ran it across the Latte Die!!
I Started by Die Cutting the Latte Dies from some Tim Holtz Patterned Papers both from the 8x8 Paper Pad!! Next, I used Dies both from SSS to add some Details to the Latte Cup!!
I used the SSS Holiday Knit Border Die and ran it across the Latte Die!!
 Then I Laminated some Rose Gold Deco Foil onto the Deco Foil Toner Sheets and Die Cut the SSS Holiday Knit Border Die again!! Then I inlaid the Foiled Pieces into the Die Cut openings in the Latte Cup!! SWOON!! I LOVE the way in looks inlaid!! TIP: if you didn't want to inlay all of the tiny pieces you could also just place a Rose Gold Foiled Toner Sheet Strip behind the Die Cut openings on the Latte Cup and Glue it in place!!
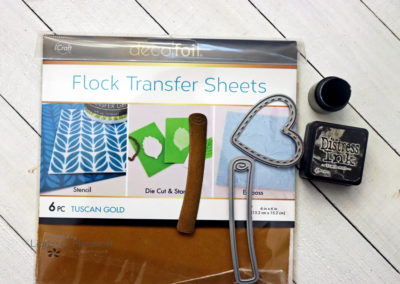
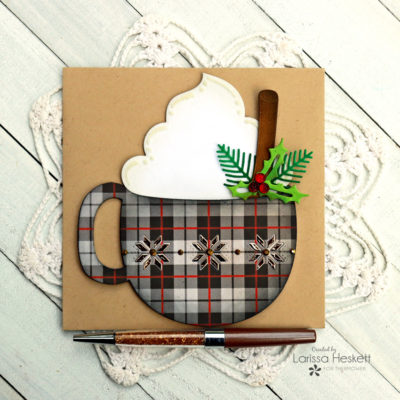 I added the Details that I Die Cut using the SSS Holiday Foliage Dies from some Deco Foil Flock Sheets in Green Envy and Emerald Green!! I added some Glittering Berries onto the Cinnamon Stick that I Die Cut from some Deco Foil Flock Sheets in Tuscan Gold!!
 I linked them all using Distress Oxide inks in order to make them POP!! Then I added some Distress Rock Candy Glitter with some Ultra Bond Adhesive!!
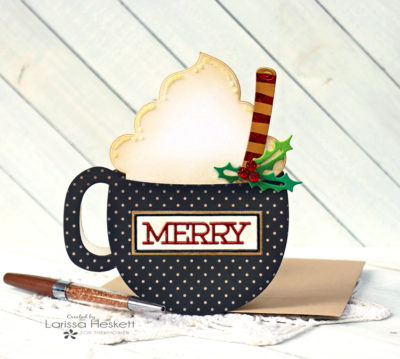 For the Last Card, I used the SSS Merry Frame Die to decorate the Cup!!
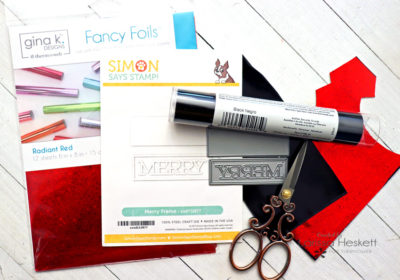 I Foiled both the Black Deco Foil and the Gina K Designs Fancy Foil in Radiant Red after laminating them to some Deco Foil Toner Sheets!! I Die Cut them both using the SSS Merry Frame Die and adhered them together to create a Multi-Layered Die Cut!!

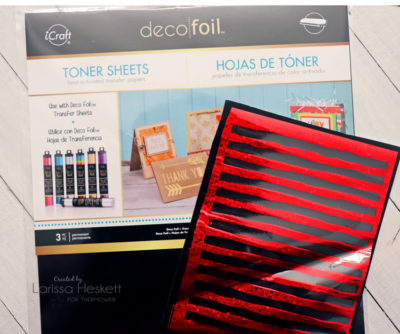 I Started with a Negative Piece of Gina K Designs Fancy Foil in Radiant Red that I saved from another Project!! Then I Laminated it to a Piece of Deco Foil Toner Sheets!!
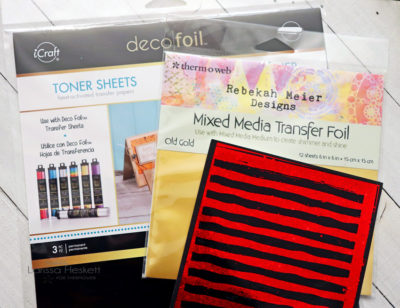 Then I laminated the Deco Foil Toner Sheet again this time using some Gold Foil!!
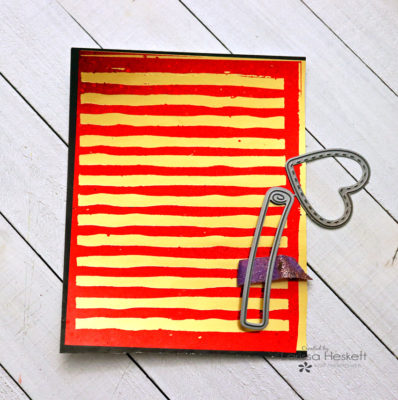 This is one of my FAVORITE techniques for the Holidays!! You can create Candy Canes or Sticks in ANY color combination!! SQUEAL!! It makes me SO HAPPY!! Then I Die Cut the Candy Stick and added it to my Card!!
 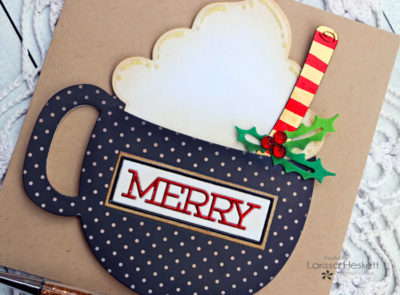 Here's a Close up with the added SSS Christmas Foliage Deco Foiled Flock Sheets Die Cuts and then I added the Glittering Berries!! Distress Rock Candy Glitter was added using some Ultra Bond Adhesive!!
Products Used:
Therm O Web:
Deco Foil in Black and Rose Gold & Gold
Gina K Designs Fancy Foils in Radiant Red
Deco Foil Toner Sheets
Deco Foil Flock Sheets in Green Envy & Emerald Green
Ultra Bond Adhesive
Purple Tape
Easy-Cut Adhesive Sheets
Other:
Simon Says Stamp Latte Gift Card Slider Dies
Simon Says Stamp Holiday Knit Border Die
Simon Says Stamp Merry Frame Die
Simon Says Stamp Christmas Foliage Dies
Tim Holtz Mini Paper Stash Christmas
Distress Rock Candy Glitter
THANKS SO MUCH for stopping by today, I hope I've INSPIRED you on ways to make some very FUN and SPECIAL Deco Foil Latte Gift Card Slider Cards!! Now more than ever its SO IMPORTANT to send a little HAPPY to those in our lives!! I hope you ENJOY the rest of the Blog Hop and don't forget to enter for SEVERAL chances to WIN!! #ncd2020hop
Have a FABULOUS WEEK!!
Larissa Heskett
Here's a Close up with the added SSS Christmas Foliage Deco Foiled Flock Sheets Die Cuts and then I added the Glittering Berries!! Distress Rock Candy Glitter was added using some Ultra Bond Adhesive!!
Products Used:
Therm O Web:
Deco Foil in Black and Rose Gold & Gold
Gina K Designs Fancy Foils in Radiant Red
Deco Foil Toner Sheets
Deco Foil Flock Sheets in Green Envy & Emerald Green
Ultra Bond Adhesive
Purple Tape
Easy-Cut Adhesive Sheets
Other:
Simon Says Stamp Latte Gift Card Slider Dies
Simon Says Stamp Holiday Knit Border Die
Simon Says Stamp Merry Frame Die
Simon Says Stamp Christmas Foliage Dies
Tim Holtz Mini Paper Stash Christmas
Distress Rock Candy Glitter
THANKS SO MUCH for stopping by today, I hope I've INSPIRED you on ways to make some very FUN and SPECIAL Deco Foil Latte Gift Card Slider Cards!! Now more than ever its SO IMPORTANT to send a little HAPPY to those in our lives!! I hope you ENJOY the rest of the Blog Hop and don't forget to enter for SEVERAL chances to WIN!! #ncd2020hop
Have a FABULOUS WEEK!!
Larissa Heskett