No Products in the Cart
 Supplies:
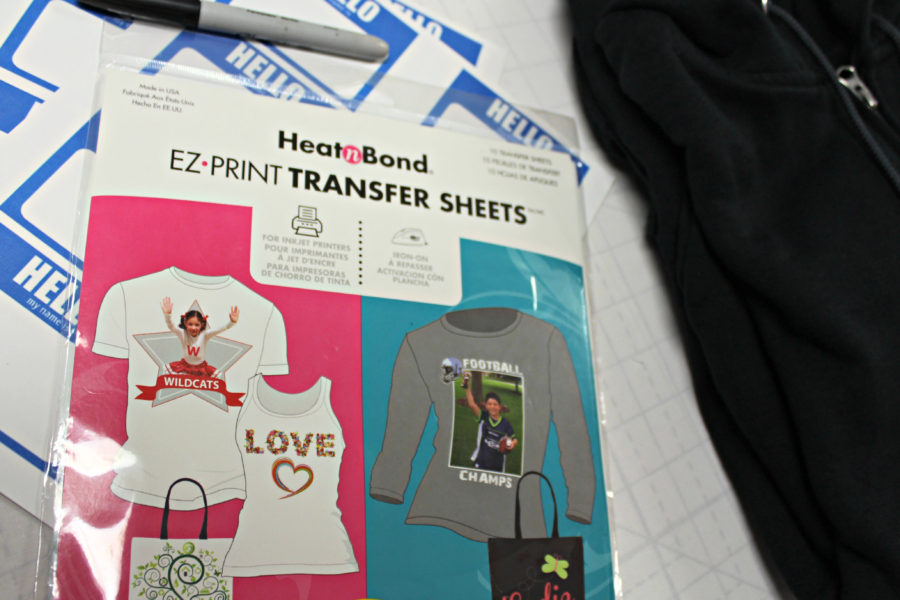
HeatnBond® EZ Print Inkjet Transfer Sheets • For Dark Colored Fabrics
Pressing sheet (included in the package)
Inkjet color printer/copier
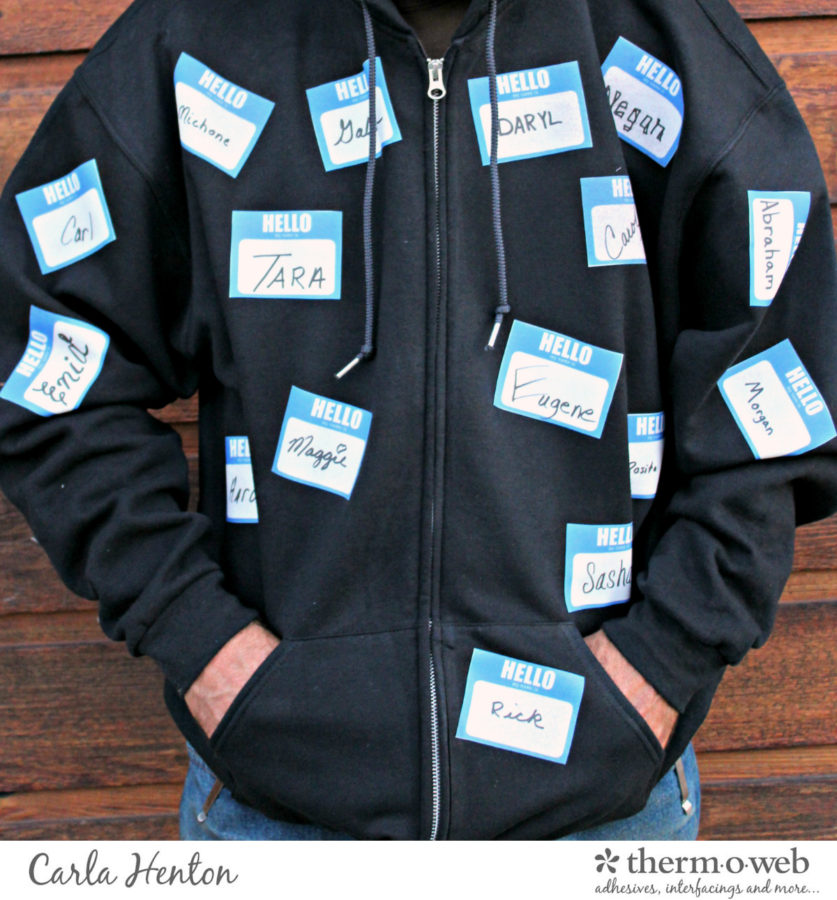
1- dark shirt (t-shirt or sweatshirt - this is identity theft, it's not meant to be pretty.)
Scissors, Iron – (I love my Oliso Pro), hard ironing surface, pillowcase or fabric to protect ironing surface, magic marker
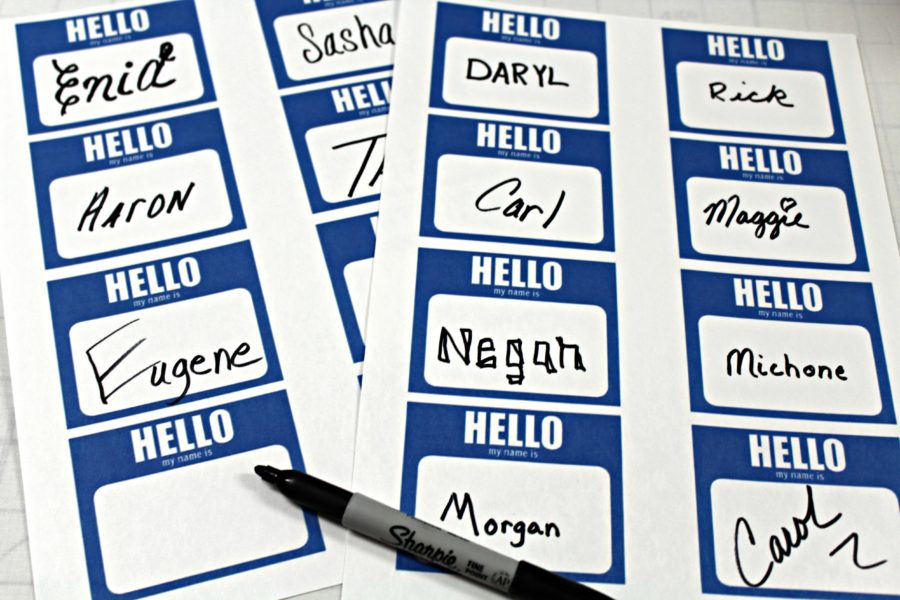
2 or more - "Hello" name badges printed pages (below)
Supplies:
HeatnBond® EZ Print Inkjet Transfer Sheets • For Dark Colored Fabrics
Pressing sheet (included in the package)
Inkjet color printer/copier
1- dark shirt (t-shirt or sweatshirt - this is identity theft, it's not meant to be pretty.)
Scissors, Iron – (I love my Oliso Pro), hard ironing surface, pillowcase or fabric to protect ironing surface, magic marker
2 or more - "Hello" name badges printed pages (below)
 Step 2:
Copy the first sheet of paper labels onto HeatnBond EZ-Print Transfer Sheet using an inkjet printer/copier. Make sure the settings are the best quality for photo paper. Do not reverse the image. Follow the package instructions for printing and allow the page to dry for at least 30 minutes. Copy the rest of the labels.
Step 3:
Cut out each label and plan the design on the shirt. Pre-heat iron for 3 minutes to high setting with no steam. Protect the ironing surface with fabric or Thermoweb recommends a pillowcase. Place the shirt on the protected ironing surface and press out any wrinkles where the designs will be placed. TIP: Slightly stretch the shirt over the ironing surface and place pins in the corners to keep the shirt from moving around.
Step 2:
Copy the first sheet of paper labels onto HeatnBond EZ-Print Transfer Sheet using an inkjet printer/copier. Make sure the settings are the best quality for photo paper. Do not reverse the image. Follow the package instructions for printing and allow the page to dry for at least 30 minutes. Copy the rest of the labels.
Step 3:
Cut out each label and plan the design on the shirt. Pre-heat iron for 3 minutes to high setting with no steam. Protect the ironing surface with fabric or Thermoweb recommends a pillowcase. Place the shirt on the protected ironing surface and press out any wrinkles where the designs will be placed. TIP: Slightly stretch the shirt over the ironing surface and place pins in the corners to keep the shirt from moving around.
 It is best to apply several of the name labels at one time in areas of the shirt. Peel off the marked paper backing on the dark HeatnBond Transfer Sheet and place the printed labels face up in the desired position. Cover the labels with the pressing sheet.
 Follow the package instructions for pressing and ironing times. Peel off the pressing sheet after ironing and let cool.
Repeat in different areas of the shirt always covering the transfers with pressing paper. Do not let the iron touch the transferred labels.
Follow the package instructions for pressing and ironing times. Peel off the pressing sheet after ironing and let cool.
Repeat in different areas of the shirt always covering the transfers with pressing paper. Do not let the iron touch the transferred labels.
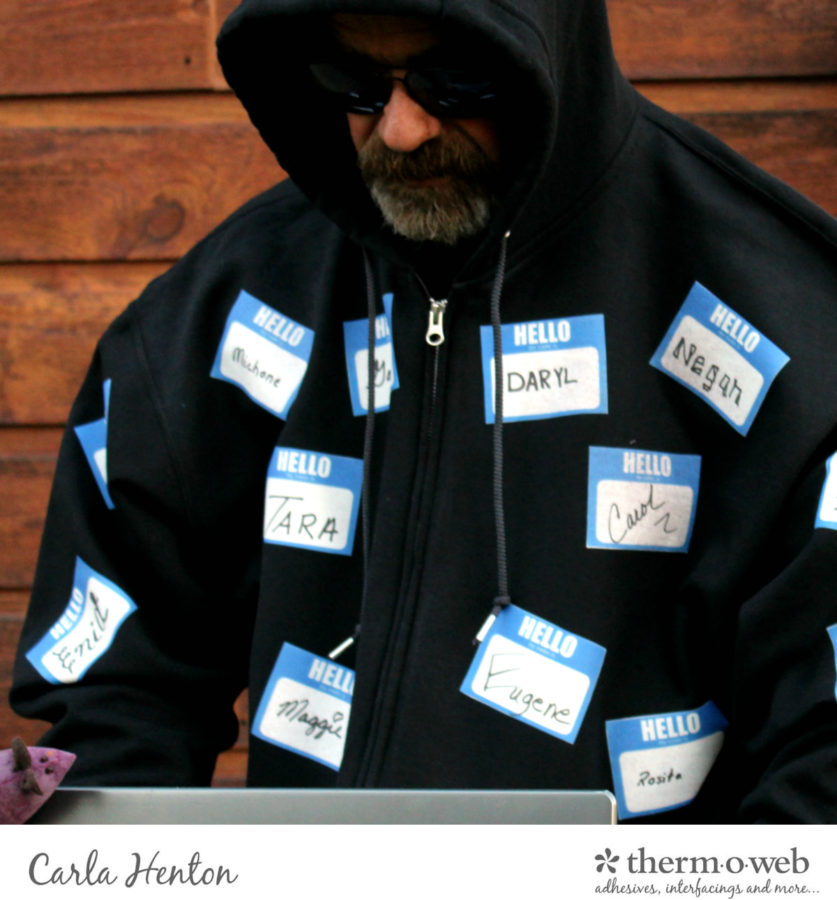 Put on your shirt with a pair of sunglasses and a stocking hat or hood and you are officially an identity thief. Spooky! Happy Halloween!
Carla
Put on your shirt with a pair of sunglasses and a stocking hat or hood and you are officially an identity thief. Spooky! Happy Halloween!
Carla