No Products in the Cart
 We're happy to announce we've teamed up with our friends at Joy Clair for this week! It's a new promotion for us with a company who offers beautiful stamps. You'll find products creative stamps for crafting and bible journaling.
We invite you to visit their blog and website to see their products and what their design team has created for our product promotion.
All this week you'll find projects twice a day from our team of designers and the talented team at Joy Clair! Don't miss a day!
Kicking off today is Audrey Pettit with the cutest Merry Christmoose Card and Gift Tag Set featuring Deco Foil and Joy Clair!
We're happy to announce we've teamed up with our friends at Joy Clair for this week! It's a new promotion for us with a company who offers beautiful stamps. You'll find products creative stamps for crafting and bible journaling.
We invite you to visit their blog and website to see their products and what their design team has created for our product promotion.
All this week you'll find projects twice a day from our team of designers and the talented team at Joy Clair! Don't miss a day!
Kicking off today is Audrey Pettit with the cutest Merry Christmoose Card and Gift Tag Set featuring Deco Foil and Joy Clair!
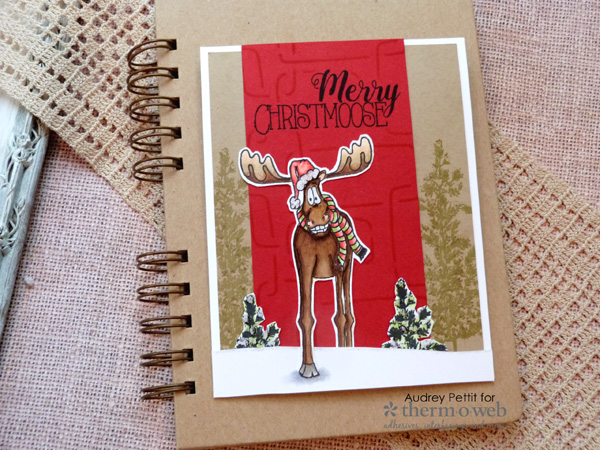
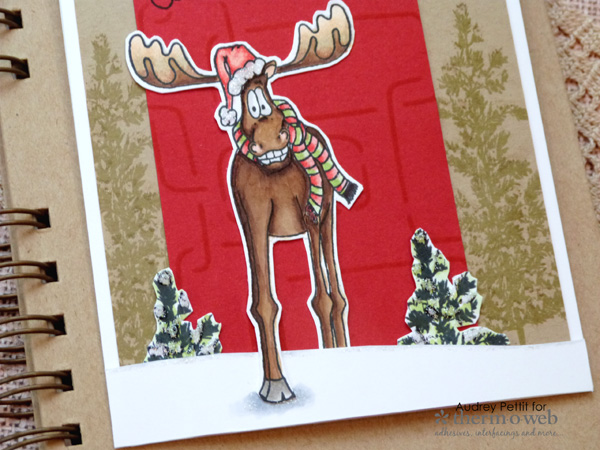 This week we are so excited to be joining up with our friends at Joy Clair for a fun week of holiday inspiration. When my kids were little, we had a "Christmoose" stuffed toy that would come out every Christmas with the decorations, so I absolutely couldn't resist this adorable Christmoose stamp set from Joy Clair. Today I'll be mixing that silly moose with Therm O Web cardstock, adhesives, and one of our cool new stencils, to create a sweet holiday card with a woodland theme.
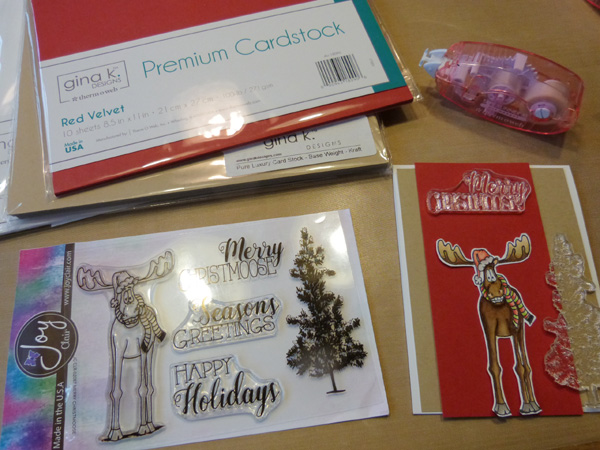 To begin, stamp the moose image onto Luxury White cardstock using Memento Tuxedo Black ink, color the image with Copic markers, and then die cut it using the digital electronic cutting file that comes with the stamp set, or fussy cut the image. Create a top folding A2 card base from Luxury White cardstock. Cut a slightly smaller panel from kraft cardstock. And lastly, trim a 2.75" x 5.5" strip of Red Velvet cardstock.
 Stamp a sentiment onto the top of the red strip using the black ink. Stamp the sentiment a second time onto a thin piece of scrap paper, such as computer paper. Loosely trim around the sentiment with your scissors. Dab a small amount of iCraft Mixed Media Adhesive onto the back of the sentiment mask, and use the tip of your finger to spread a thin, even coat of the adhesive over the entire mask. Set the mask aside until the adhesive is completely dry. Press the mask against the back of your hand several times to remove even more of the tack from the glue. Then place the mask over your stamped sentiment.
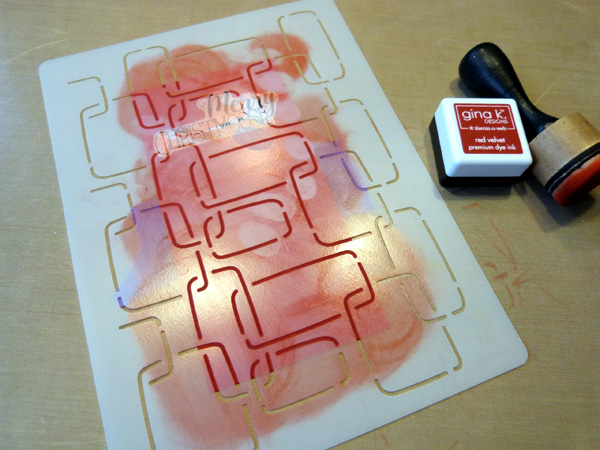 Center the Modern Links stencil over the red panel, and tape it in place on the backside of the panel. Then ink over the stencil using Red Velvet ink and an ink blending tool. Remove the stencil, and very carefully peel up the mask.
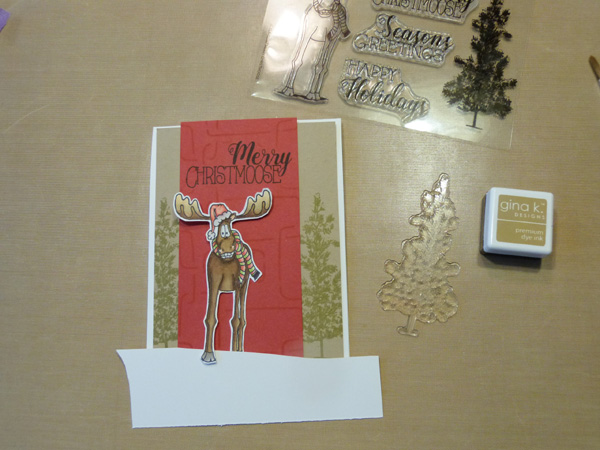 Stamp the pine tree image from the set onto the left and right sides of the kraft cardstock panel using kraft ink. Trim a slightly curvy edge onto a scrap piece of Luxury White cardstock to use as a snowbank for the bottom of the card. Adhere the layers to the card base. Tuck one pair of the moose's legs behind the snowbank, and let the other pair hang over to the front. Adhere all the elements in place, and then trim off the excess white cardstock using your scissors.
 Add a few final details to the card. Apply clear Wink of Stella glitter pen to the hat and scarf, as well as to the tops of the branches of the trees in the background. Apply Stickles glitter glue to the brim and pom pom of the hat. Stamp the tips of two additional pine trees onto Luxury White cardstock using Memento Tuxedo Black ink. Color Copic markers and add snowy touches with the Stickles. Fussy cut or die cut the treetops, and tuck them behind the snowbank.
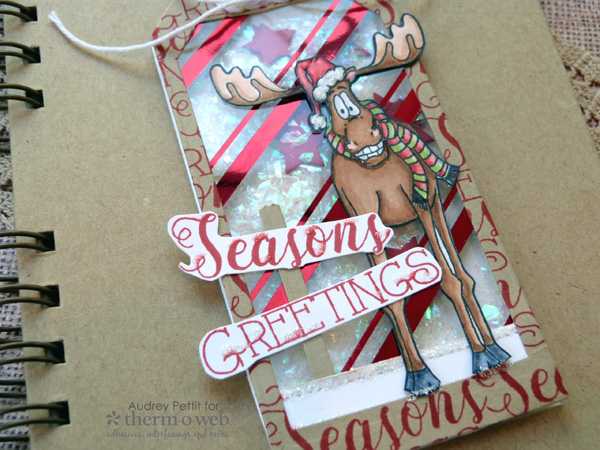
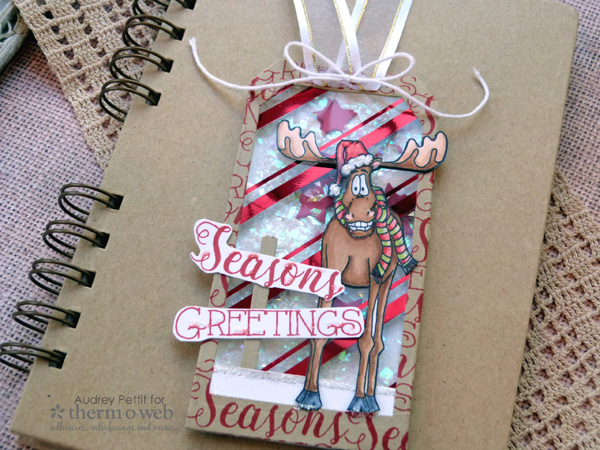
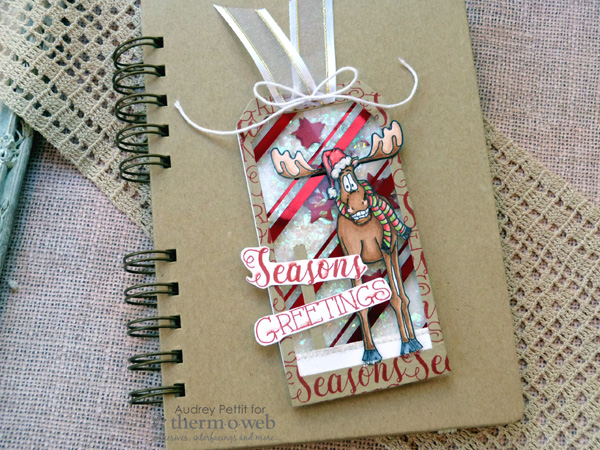 For my second project, I made a fun shaker tag using the Christmoose stamp set and one of our fabulous clear designer toner sheets.
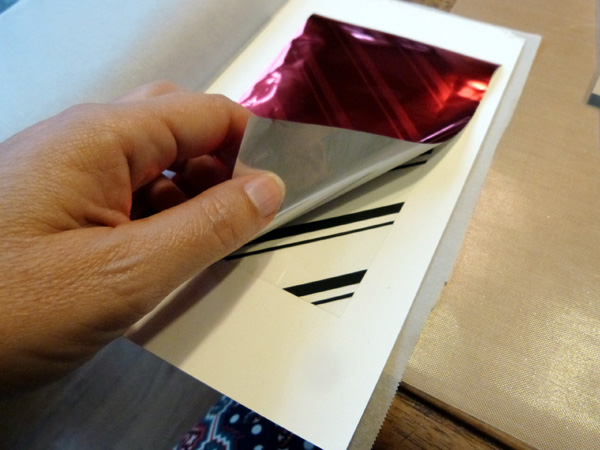 To begin, trim out a piece of Pinstripes clear toner sheet that is slightly larger than the base of your tag. Turn on your laminator machine, and let it heat up. Place a piece of scrap cardstock between the sheets of a folded piece of parchment paper. Place the clear toner sheet face up onto the cardstock. Add a strip of Red iCraft Deco Foil Transfer Sheet onto the acetate panel, with the colored side up and the silver side down. Close the top sheet of parchment, and run this sandwich through your laminator.
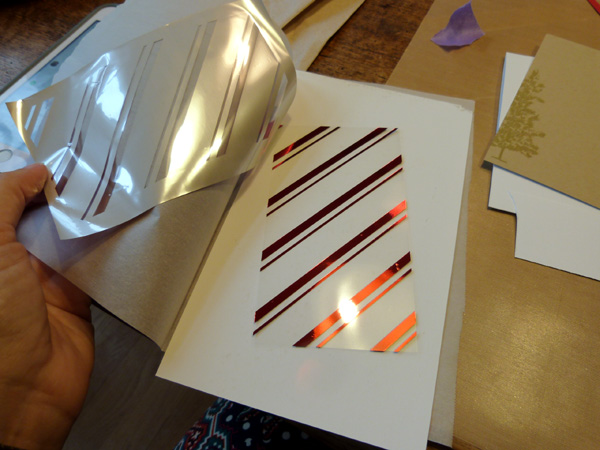 Peel off the foil transfer sheet to see your beautifully foiled acetate pattern.
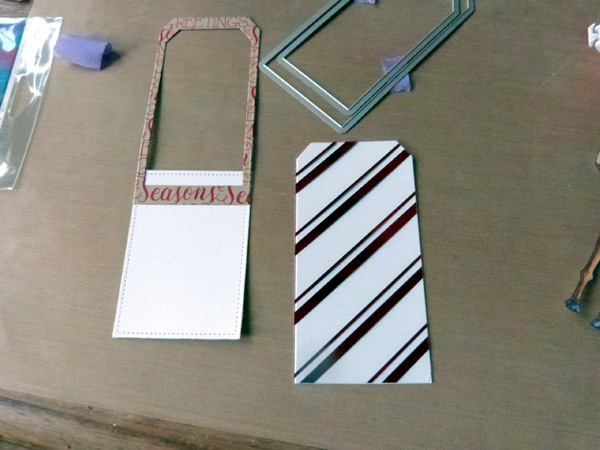 Die cut several tags to create your shaker element. Die cut the largest tag shape used once from the clear toner sheet, and once from Luxury White cardstock. Nestle two tag dies and hold them in place with Purple Tape. Die cut the tag frame shape from kraft cardstock. Stamp the Season's Greetings sentiment all over the kraft tag frame using GinaK Designs Red Velvet ink. Die cut a Stitched Rectangle from Luxury White cardstock. Adhere the die cut rectangle behind the kraft tag frame, as shown, and trim off the excess from the bottom.
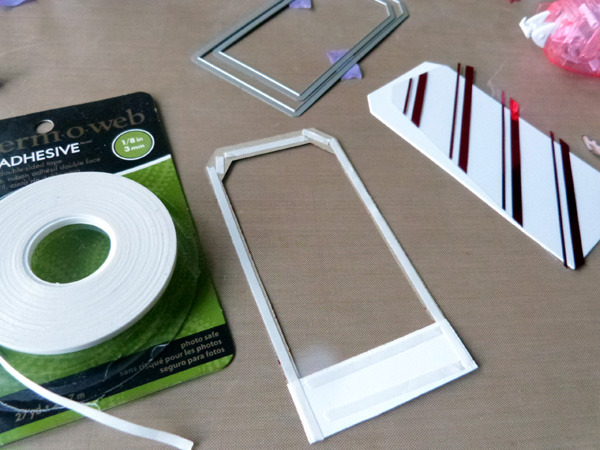 Line the back of the kraft tag frame with 1/8" iCraft Adhesive tape. Peel off the protective covering, and then adhere the foiled toner sheet tag to the frame. This will create the top window of the shaker.
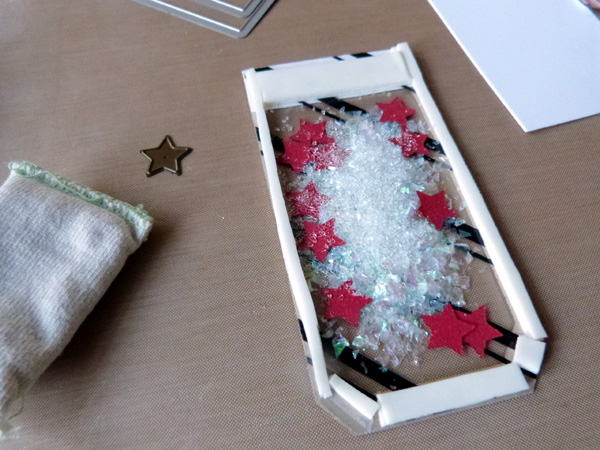 To build up the window frame for the shaker bits, stack two large pieces of iCraft Deco Foil Double-Sided Adhesive Foam together. Cut the foam into strips and pieces to cover the entire perimeter of the tag frame. It is super important to not have any gaps or openings for the shaker bits to fall out of. Lightly dab the sides of the foam with an antistatic powder tool to remove the stick, and then fill the shaker window with glitter. Die cut the smallest star from the Stitched Rectangles die set from Red Velvet cardstock, and add the stars to the shaker bits. Carefully place the white cardstock tag onto the shaker window.
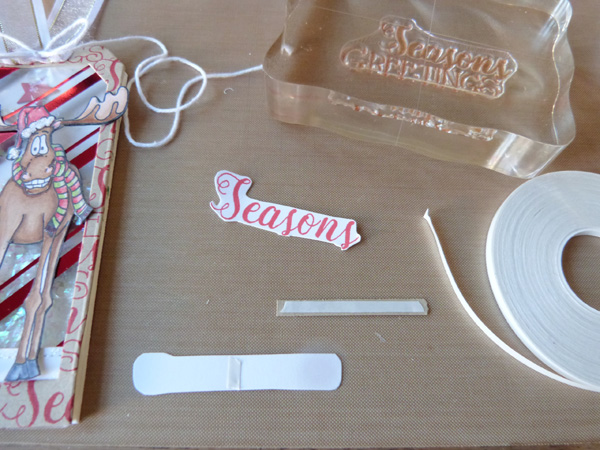 Stamp, cut, and color the moose image. Stamp the sentiment in red ink onto white cardstock, and trim around the two words using your scissor. Cut a thin strip of kraft cardstock to use a wooden sign pile. Back all the images with the iCraft adhesive, and then place the images onto the tag front. Attach a folded piece of satin ribbon to the top of the tag with the stapler. Tie a bow from white twine and attach it to the ribbon using Mixed Media liquid adhesive. Add Stickles glitter glue and clear Wink of Stella pen to the moose's accessories and along the top of the snowline and around the words on the sign.
 Enjoy!
Save
Enjoy!
Save
 a Rafflecopter giveaway