No Products in the Cart
 Freezin' Season Cards
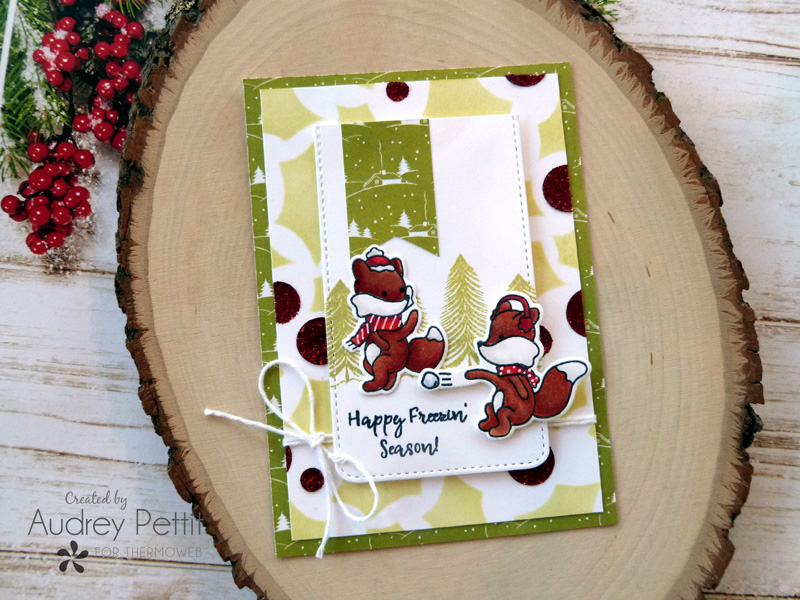
 We are so excited to be joining up for the very first time with our friends at LDRS Creative for a week of fun here on the Therm O Web blog. LDRS has some of the cutest stamps and dies out on the market, and I could not wait to play with the cute critters from the Snowball Fight stamp set. Today I have a pair of holiday cards to share with you that combines LDRS stamps and dies with Therm O Web's Glitz Glitter Gel. Because I always love a touch of sparkle at the holidays.
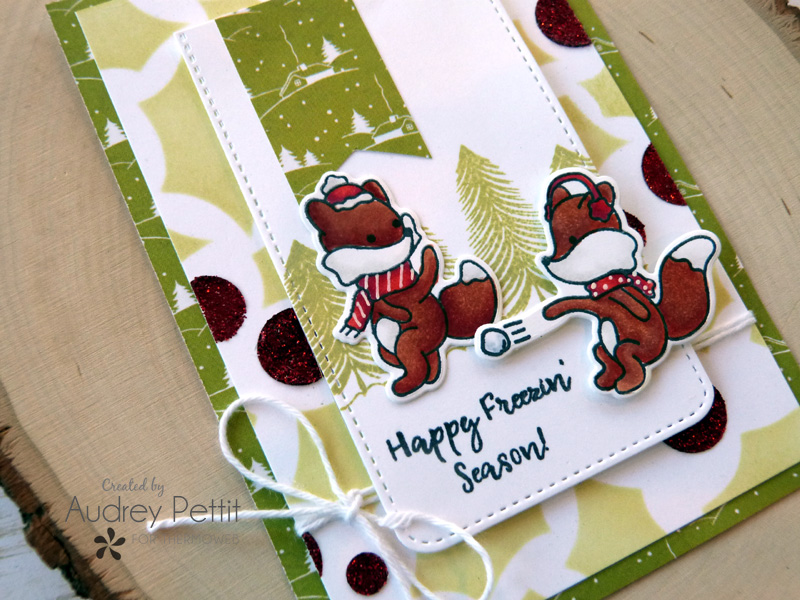
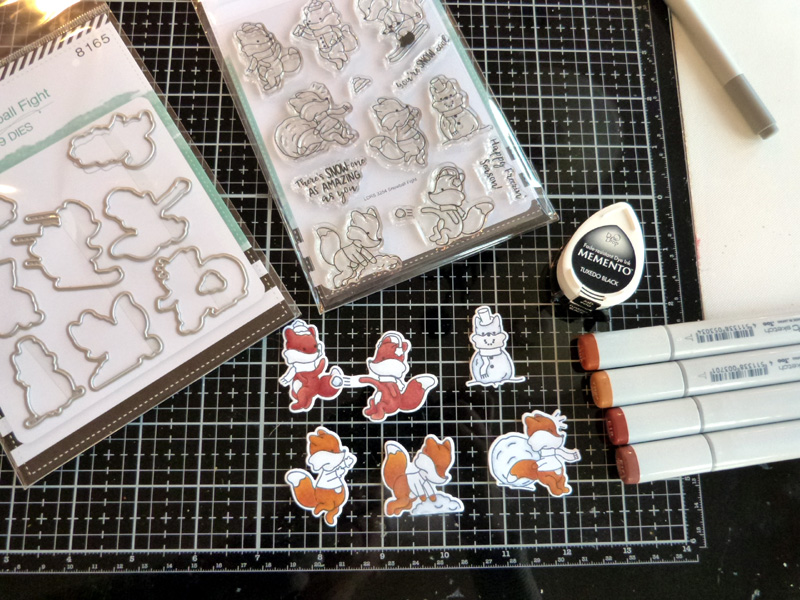 To begin, stamp the images in Memento Tuxedo Black ink onto white cardstock. Die-cut the images with the coordinating dies, and then color them with Copic Markers. Add white gel pen detailing to the scarves.
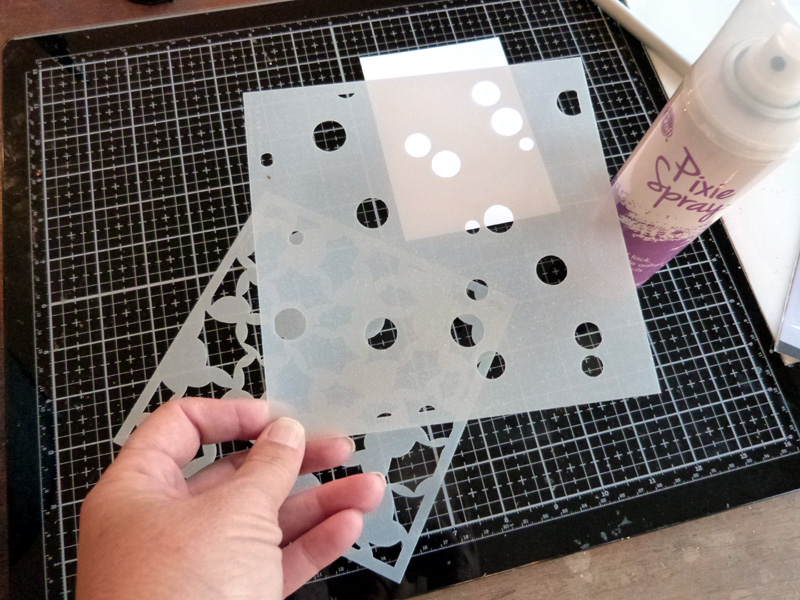 Trim a 3.25" x 4.75" piece of white cardstock and place it onto a non-stick work surface. Spray the back sides of the Holly & Berries stencils with iCraft Pixie Spray. Set the stencils aside for a few moments until the spray dries and becomes tacky to the touch.
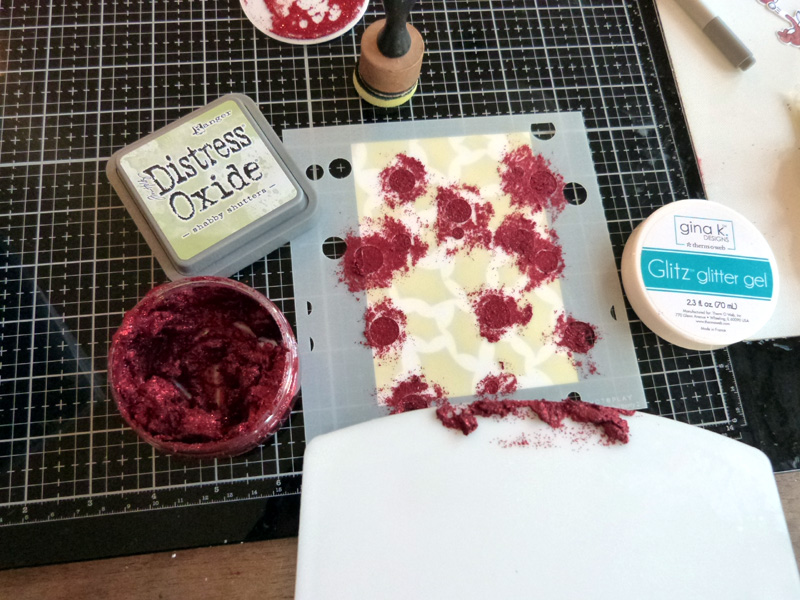 Beginning with the holly leaves stencil, place the stencil down onto the white cardstock, and ink over the stencil using Shabby Shutters Distress Oxide ink using an ink blending tool. Remove the stencil, and place the holly berries stencil onto the paper. Place some Red Glitz Glitter Gel onto the Stencil Pal tool, and spread the gel over the stencil. Remove the excess gel, and replace it in the container. Remove the stencil, and wash it and the tools in warm soapy water. Set the paper aside until the gel dries.
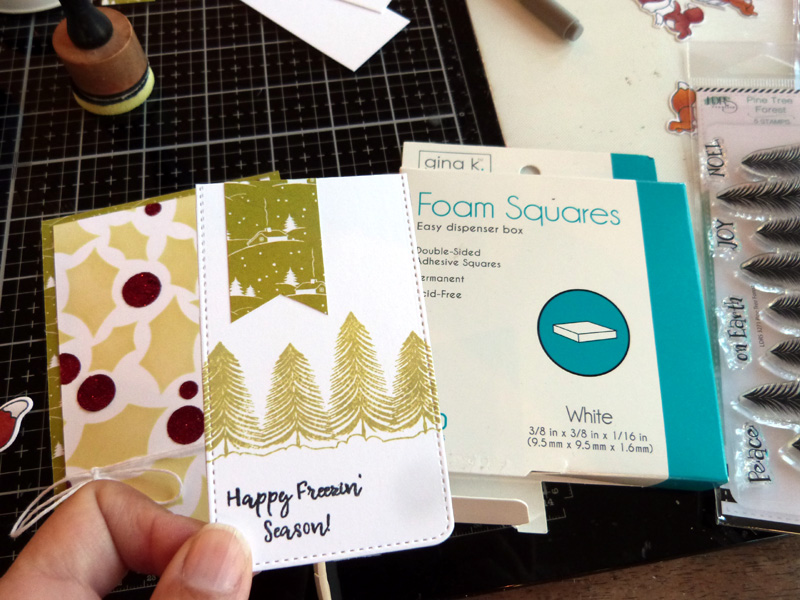 Create a 3.5" x 5" card base, and cover the base with patterned paper. Wrap white twine around the bottom of the stenciled paper, and then adhere the panel onto the center of the card base. Tie the ends of the twine into a bow, and trim as needed. Die-cut a tag from white cardstock using the Scallop Frames die set. Trim off the top section of the tag. Add a paper banner strip to the top. Stamp the pine tree image across the bottom center of the tag using Shabby Shutters Distress Oxide. Stamp the sentiment in black ink below. Apply Foam Squares to the back of the tag, and then attach it to the card.
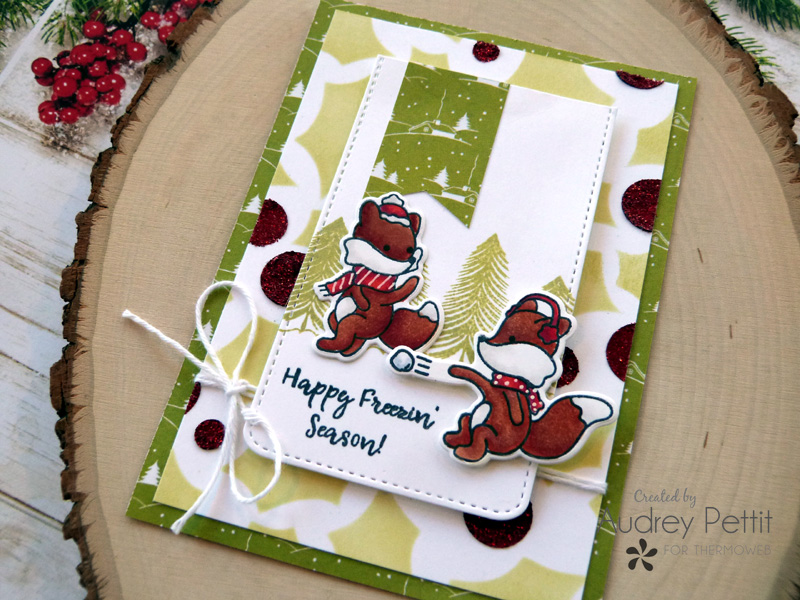 Adhere one image directly to the card using Mixed Media Adhesive. Cut apart Foam Squares, as needed, to cover the back of the second image, and then place it onto the card.
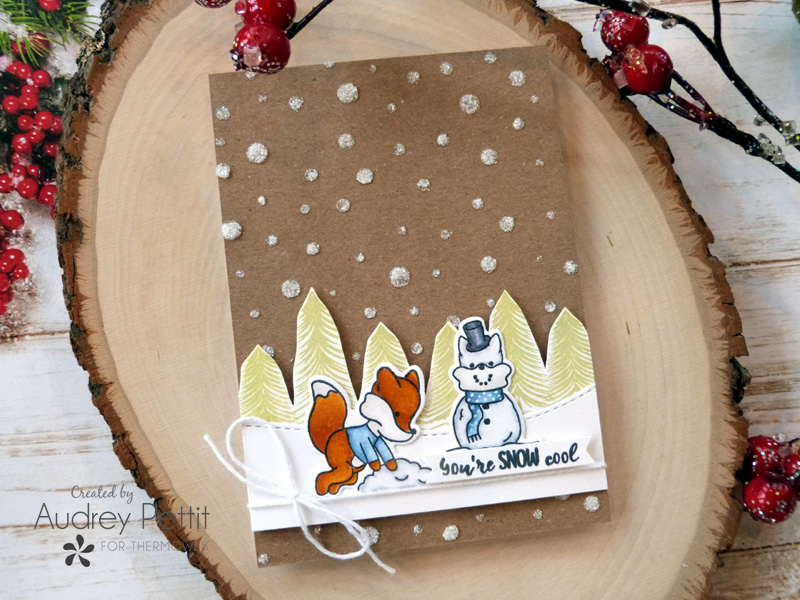
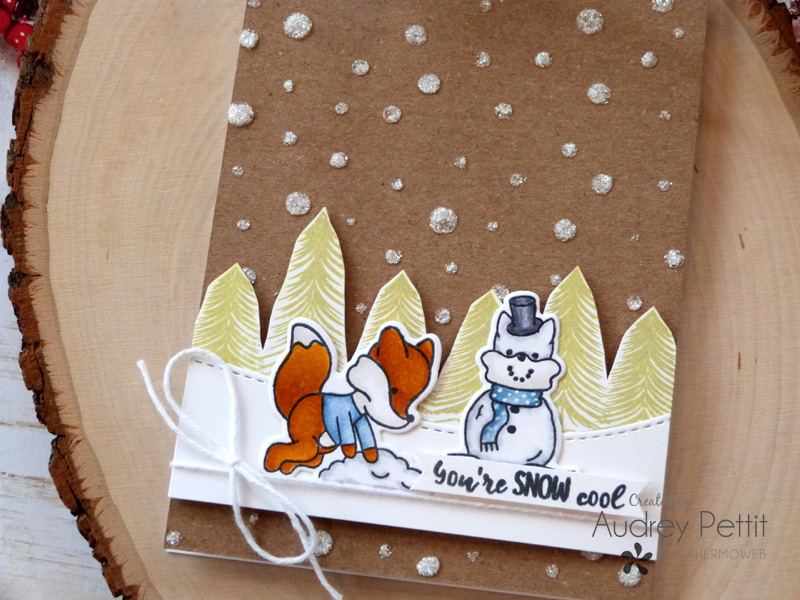 The second card uses the same stamp images and Glitz Glitter Gel, but this time in White against a kraft cardstock card base. And this combo gives a whole different look to the set.
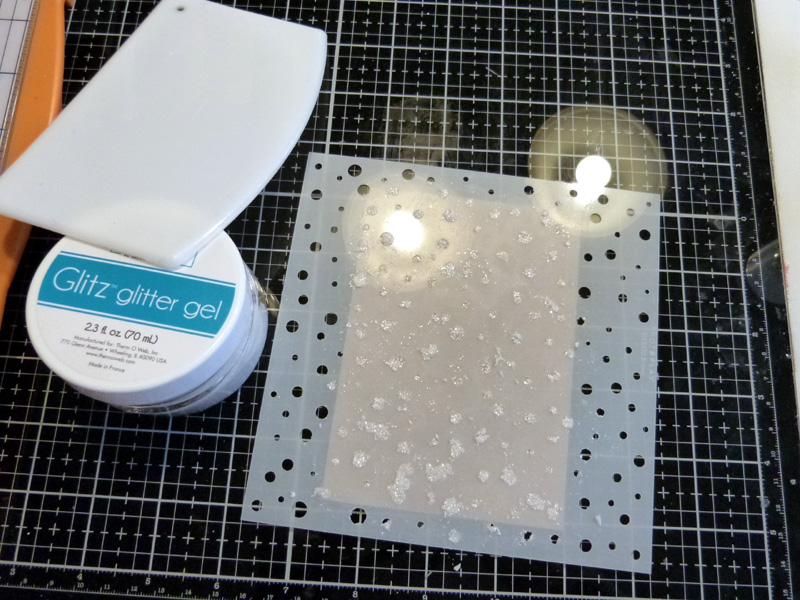 To begin, trim a 3.5" x 5" piece of kraft cardstock, and place it onto your non-stick work surface. Spray the back side of the Snow stencil with iCraft Pixie Spray, and set it aside until it becomes tacky to the touch. Then place the stencil down onto the cardstock, and spread White Glitz Glitter Gel over the panel using a Stencil Pal tool. Remove the stencil and set the paper aside to dry. Wash the stencil and tools immediately in warm soapy water.
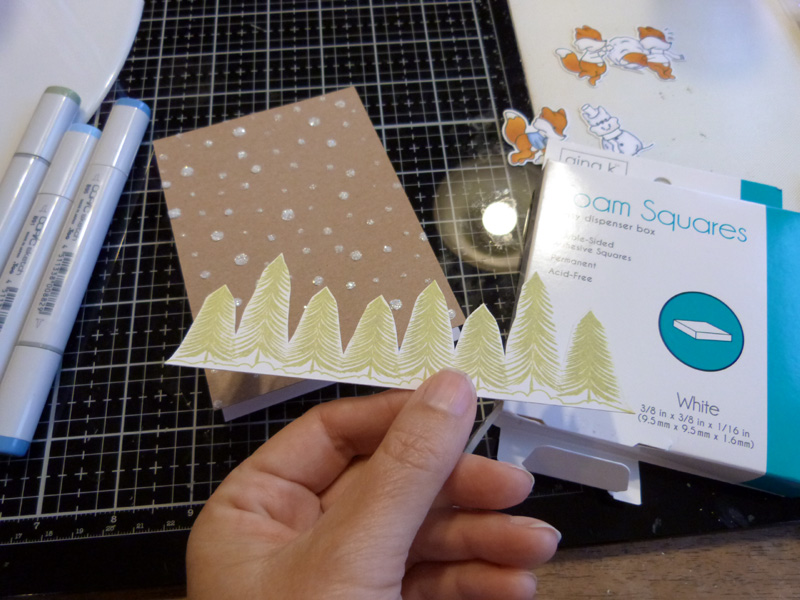 Adhere the stenciled panel onto a 3.5" 5" card base. Stamp the pine tree image onto white cardstock using Shabby Shutters Distress Oxide ink. Trim around the image with scissors. Place Foam Squares on the backside of the tree line, and then adhere it across the bottom of the card. Trim off the excess from the sides.
Cut a snowbank from white cardstock using the Slopey Joes border dies. Adhere the snow below the tree line using Foam Squares. Tie twine around the bottom of the snow. Adhere the images to the snowbank using Mixed Media adhesive. Stamp a sentiment in black ink onto a thin strip of white cardstock. Cut the ends into a V-notch, and then adhere the sentiment with small pieces of Foam Squares.
Save
Adhere the stenciled panel onto a 3.5" 5" card base. Stamp the pine tree image onto white cardstock using Shabby Shutters Distress Oxide ink. Trim around the image with scissors. Place Foam Squares on the backside of the tree line, and then adhere it across the bottom of the card. Trim off the excess from the sides.
Cut a snowbank from white cardstock using the Slopey Joes border dies. Adhere the snow below the tree line using Foam Squares. Tie twine around the bottom of the snow. Adhere the images to the snowbank using Mixed Media adhesive. Stamp a sentiment in black ink onto a thin strip of white cardstock. Cut the ends into a V-notch, and then adhere the sentiment with small pieces of Foam Squares.
Save