No Products in the Cart
 Hello friends! It's Ellen here and today I have a fun Valentine's ensemble for the "Kiss Me" week from ThermOWeb.
I don't have many items that fit the theme "Kiss Me", but I did manage to create something just as sweet. After all, a Valentine is all about giving something lovely to someone dear and that's what I want to show you here.
Hello friends! It's Ellen here and today I have a fun Valentine's ensemble for the "Kiss Me" week from ThermOWeb.
I don't have many items that fit the theme "Kiss Me", but I did manage to create something just as sweet. After all, a Valentine is all about giving something lovely to someone dear and that's what I want to show you here.
 Before I created the card I wanted to make a pretty envelope. For that, I used two fun techniques with foil. Let me explain how I did...
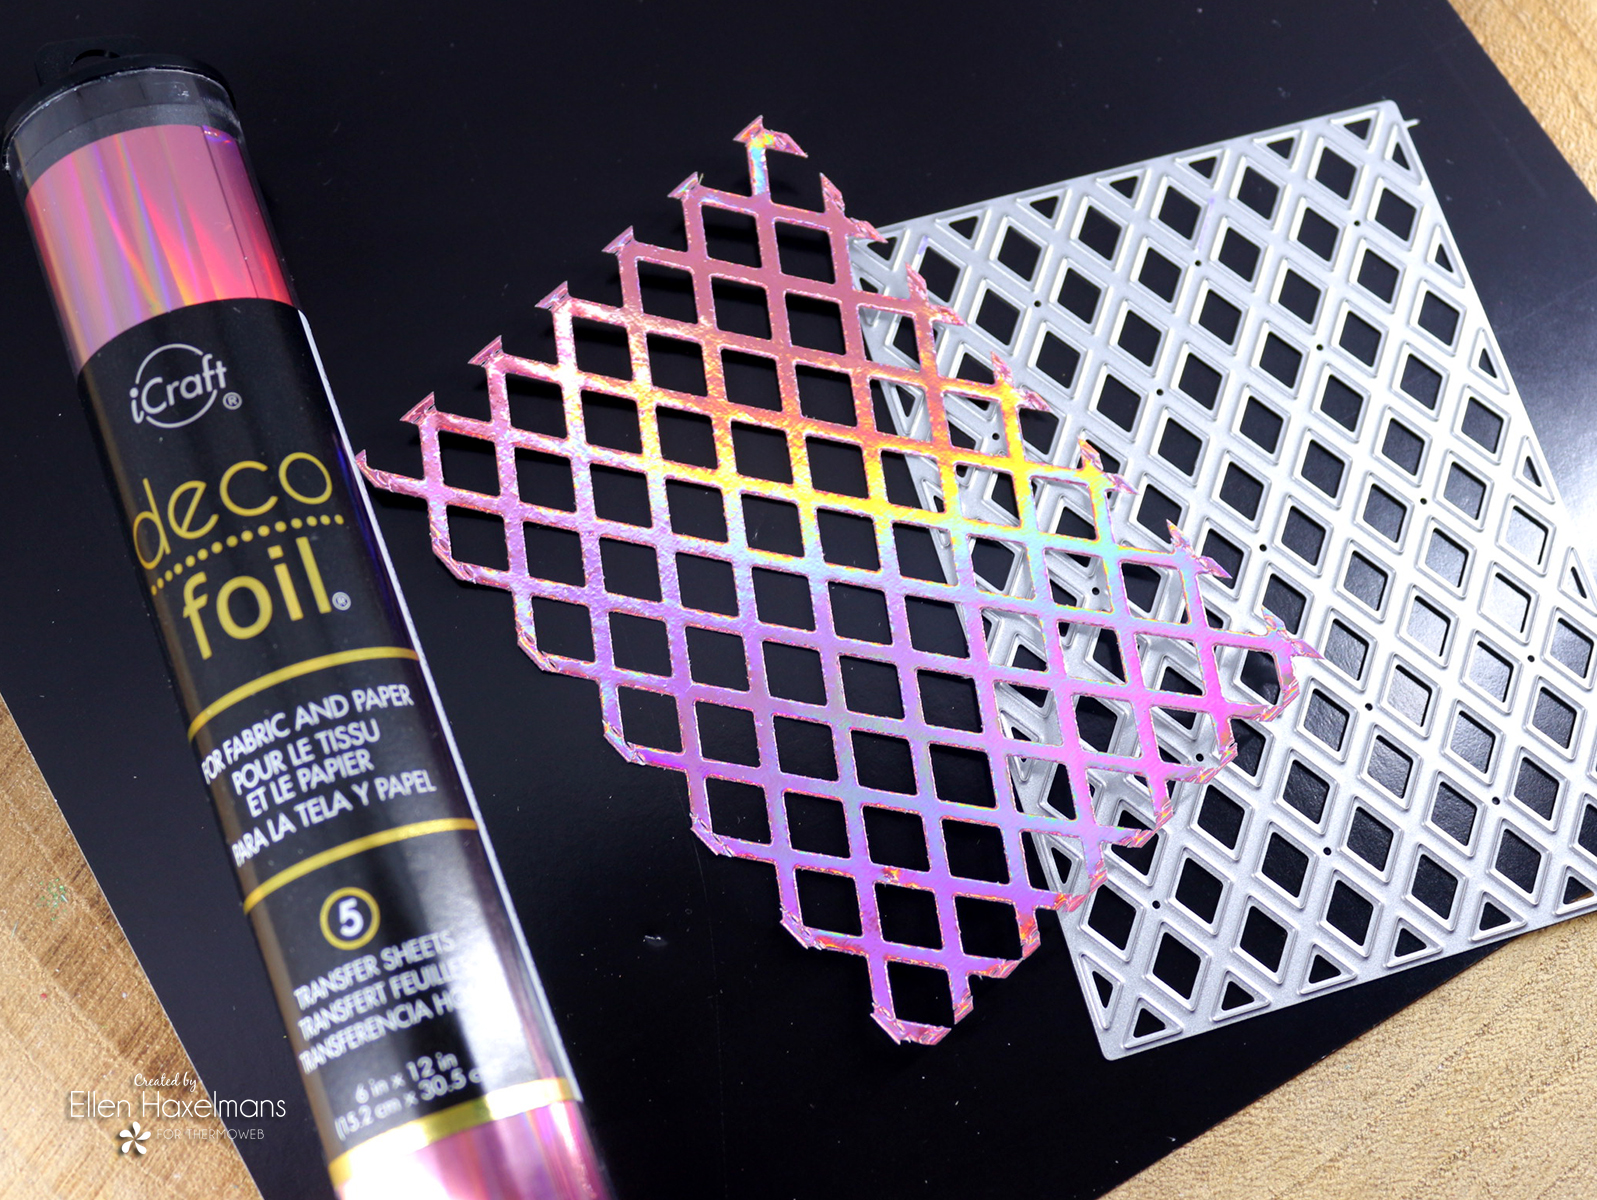
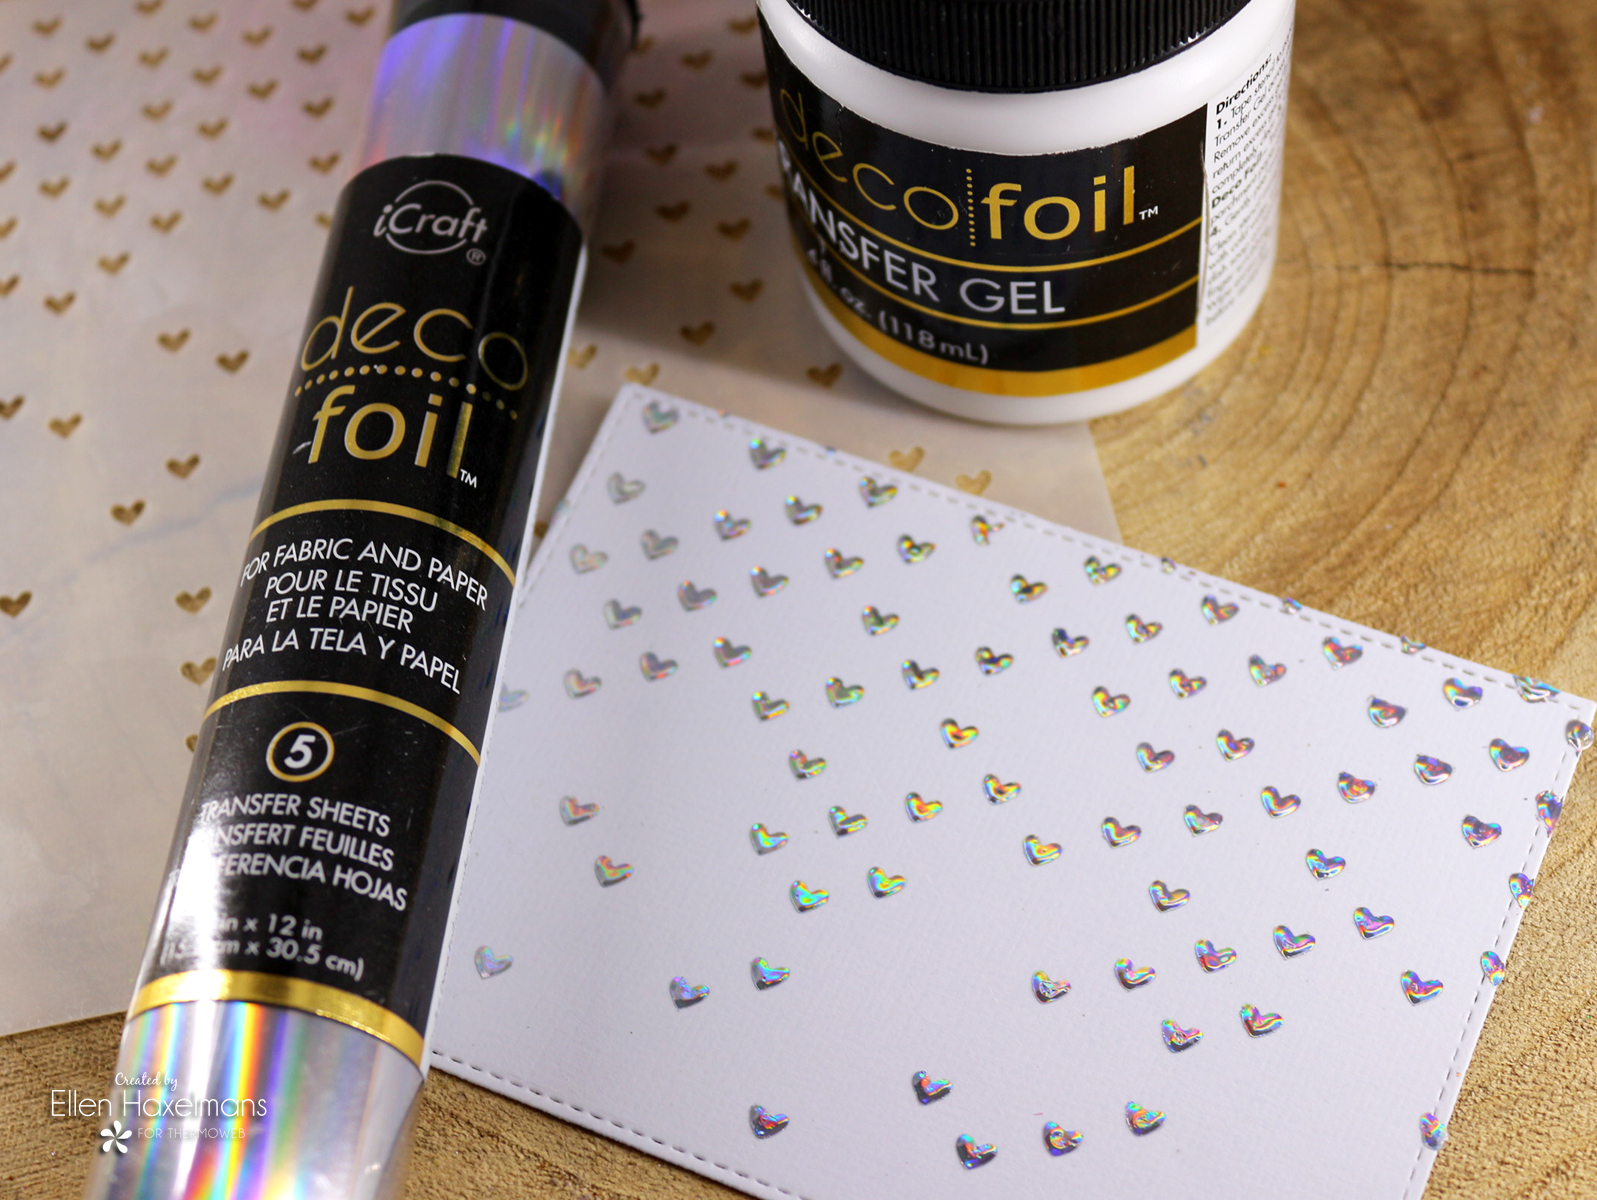 First I applied a foiled hearts pattern. I did start this by attaching temporary, with Pixie Spray, the stencil on a rectangular panel. Then I used Deco Foil Transfer Gel. The stencil pall helped me with evening out the gel. After removing and cleaning the stencil I let the gel dry. When the gel dried, I did add the Iridescent foil. I could do this by putting the foil pretty side up on top of the gel and push it true a laminator (between parchment paper).
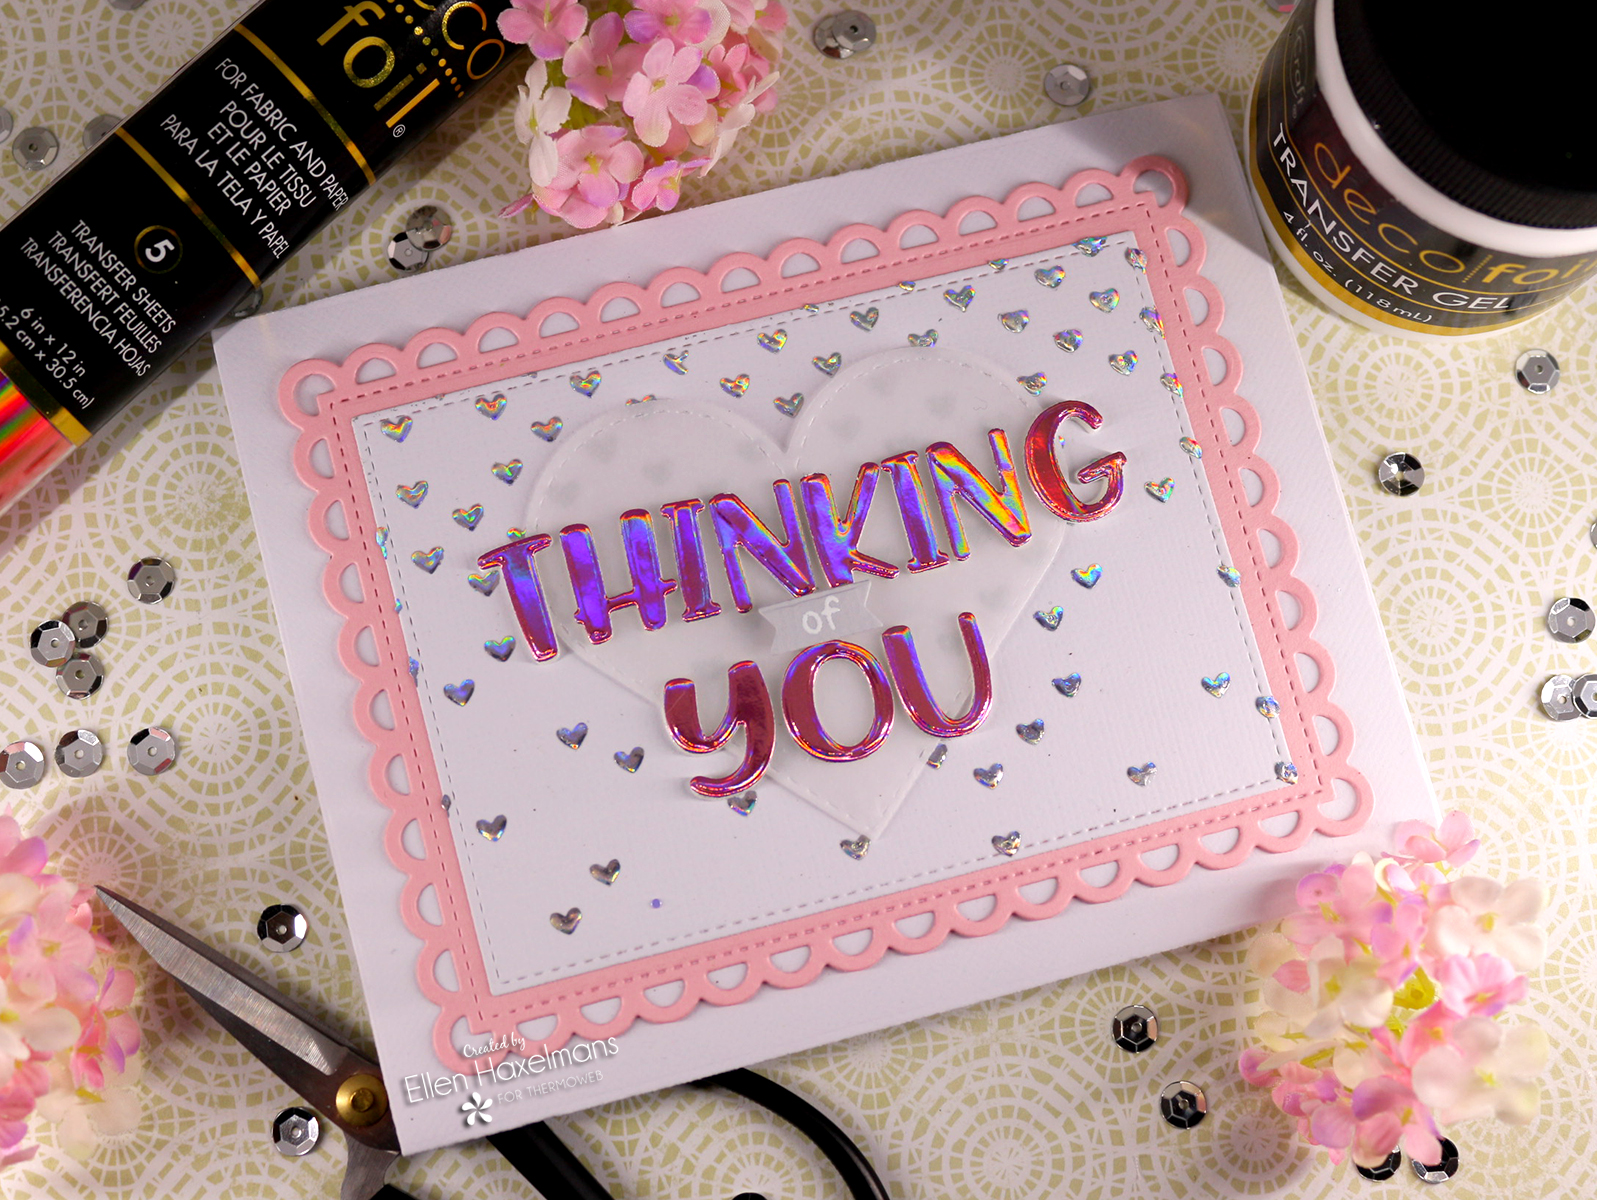
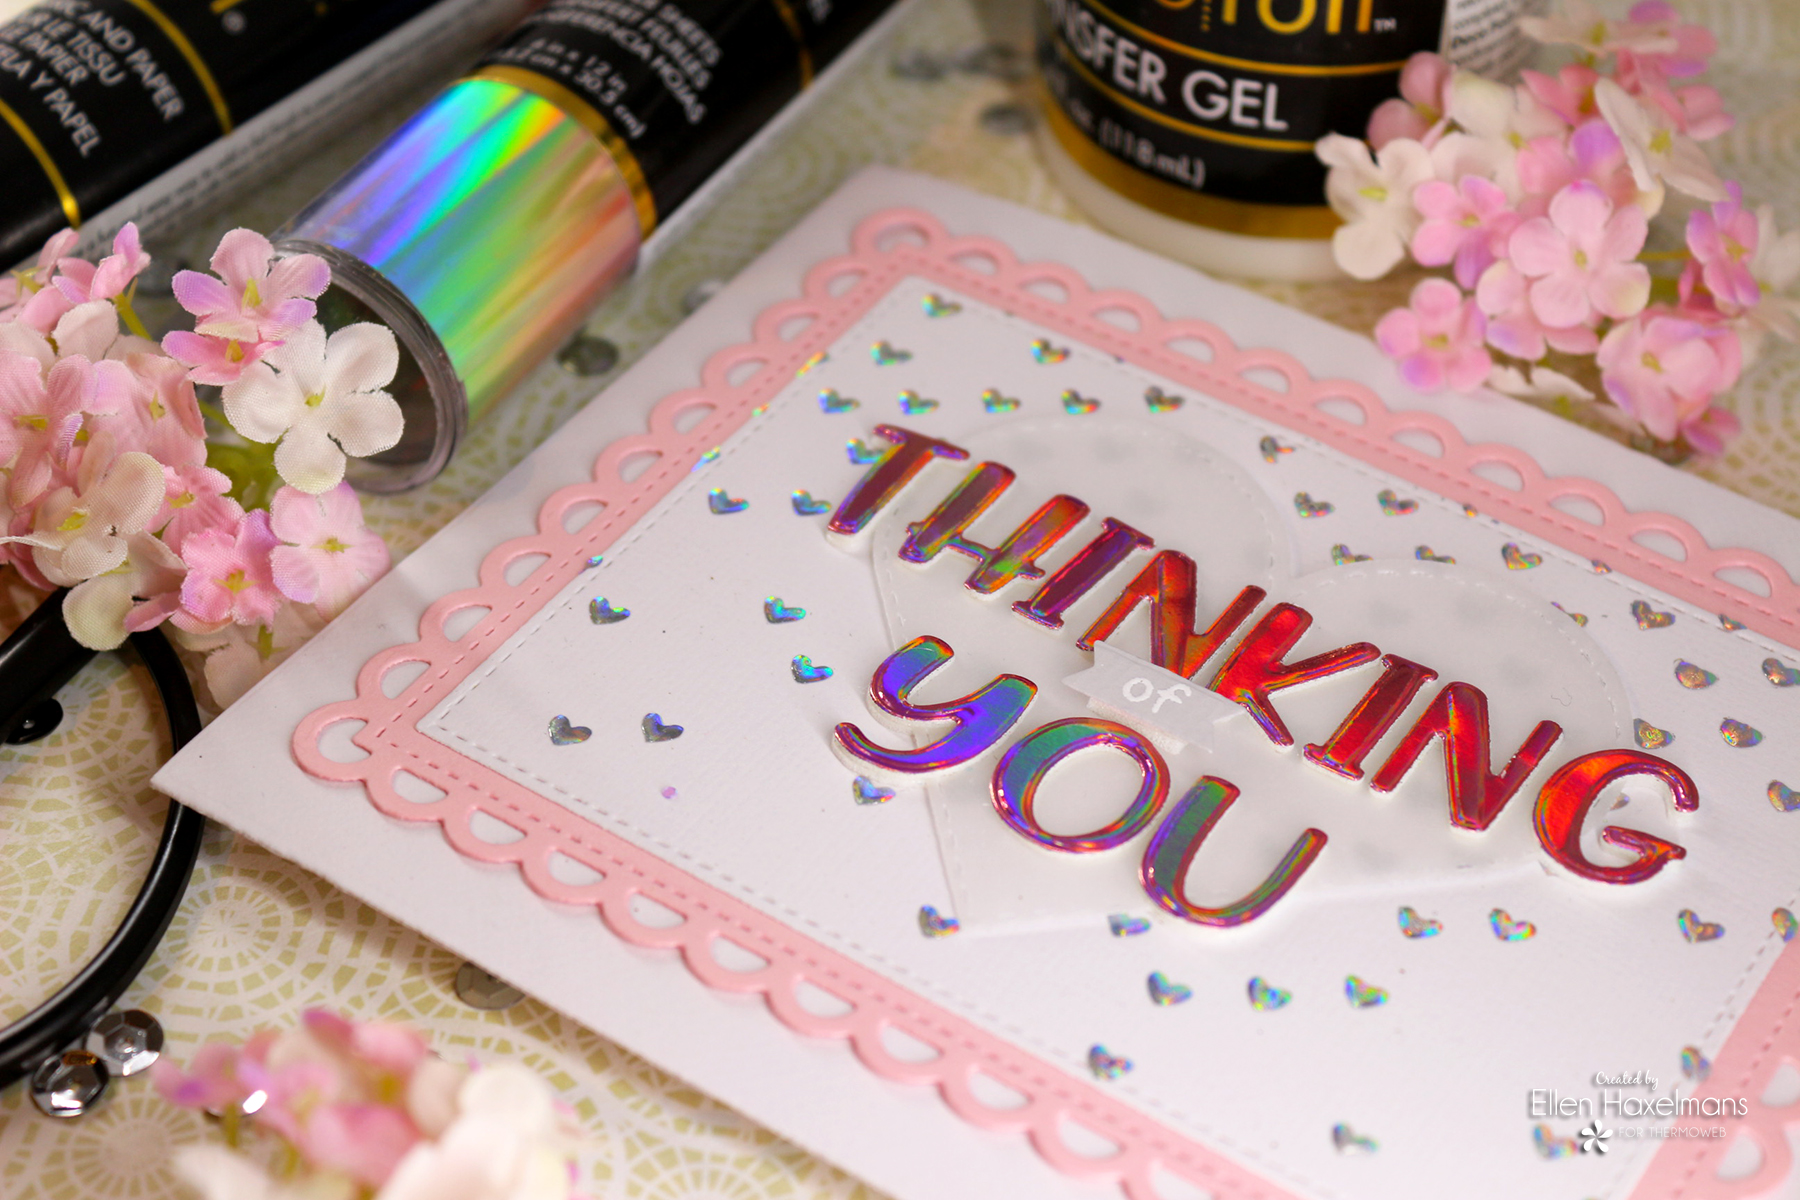
 To add text to the envelope I used a sweet message and more foil. I did take a piece of Toner Sheet and foil (facing upwards) between parchment paper and pushed it true the laminator. After, I did cut the foiled piece with dies. The last step was cutting the same letters out of double-sided foam adhesive. This gives the letters a lot more dimension.
 Next, I did cut out all the necessary pieces and put them together in an envelope. The iCraft Memory Tape runner and the iCraft SuperTape Adhesive Roll (1/4 in x 6 yd) helped me with that task.
 Of course, the envelope must be filled with a card.
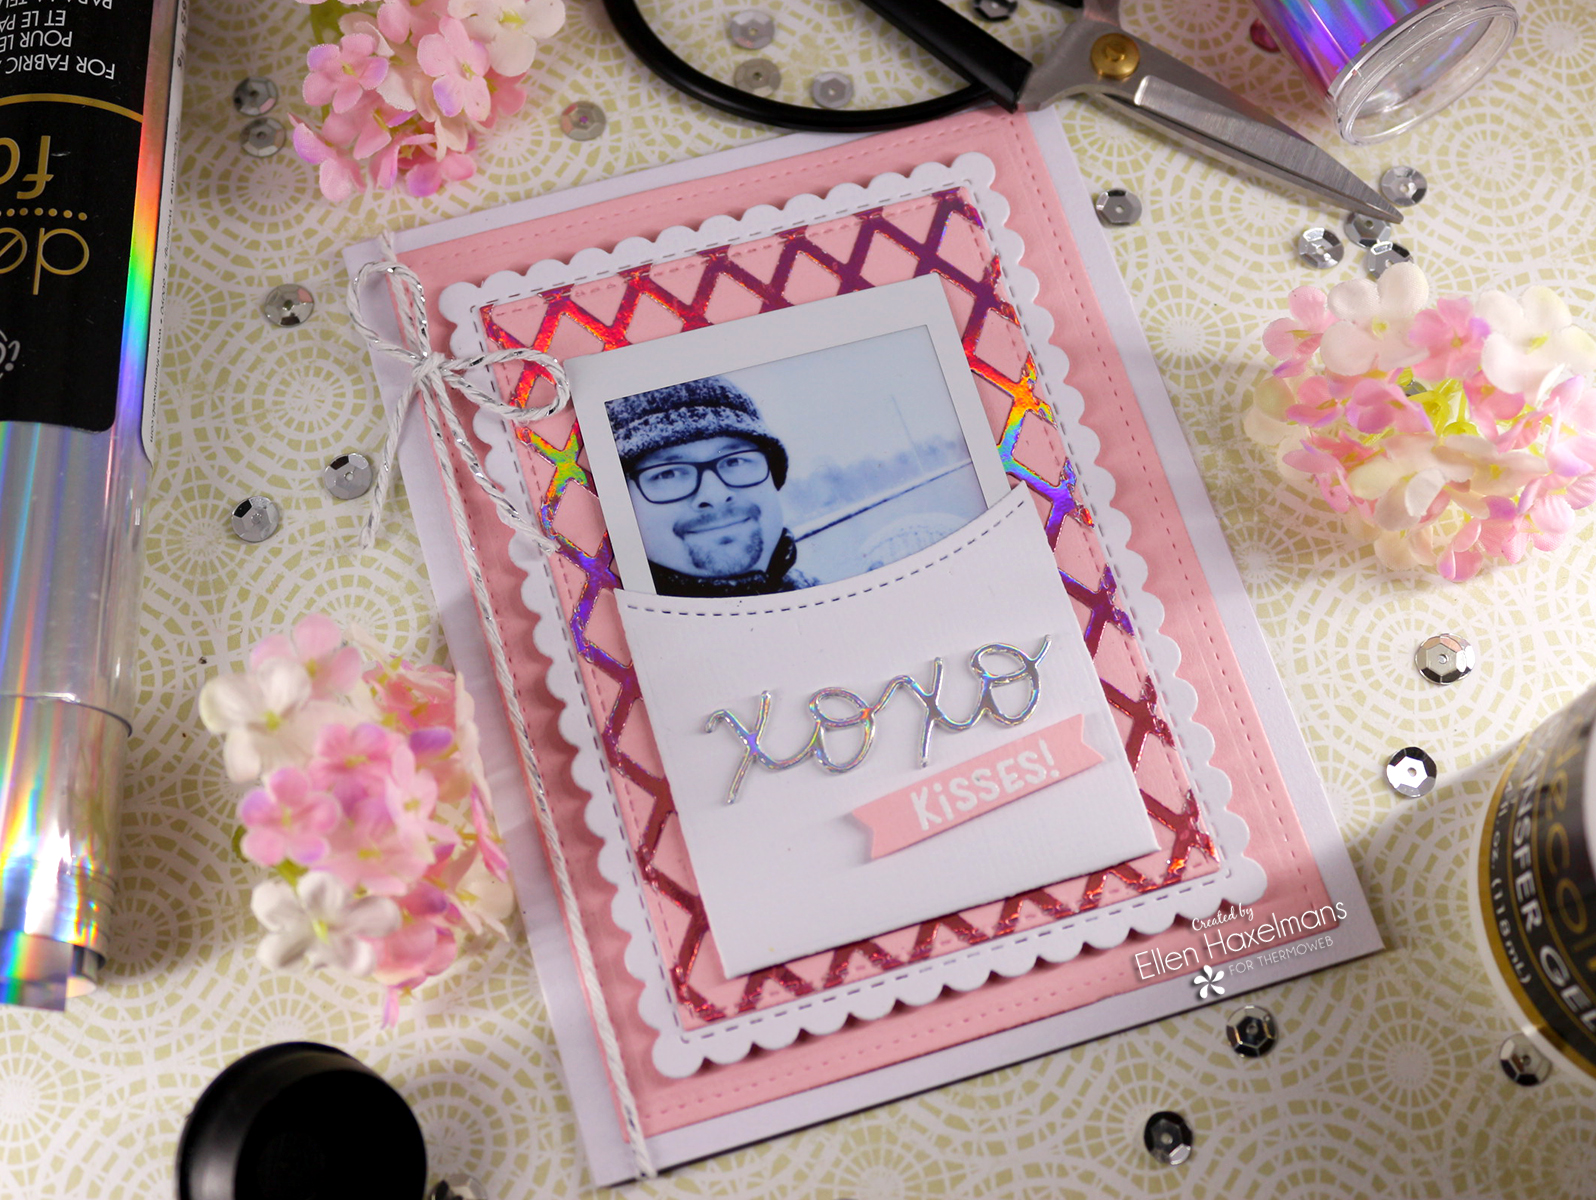 When I think of love, I'm thinking of sharing memories. What could be better than sharing a memory within a card! Let me explain how I made this fabulous card.
 Just like the letters above, I added the Enchanted Rose foil on a piece of Toner Sheet. This time I used a background die to get a pretty panel.
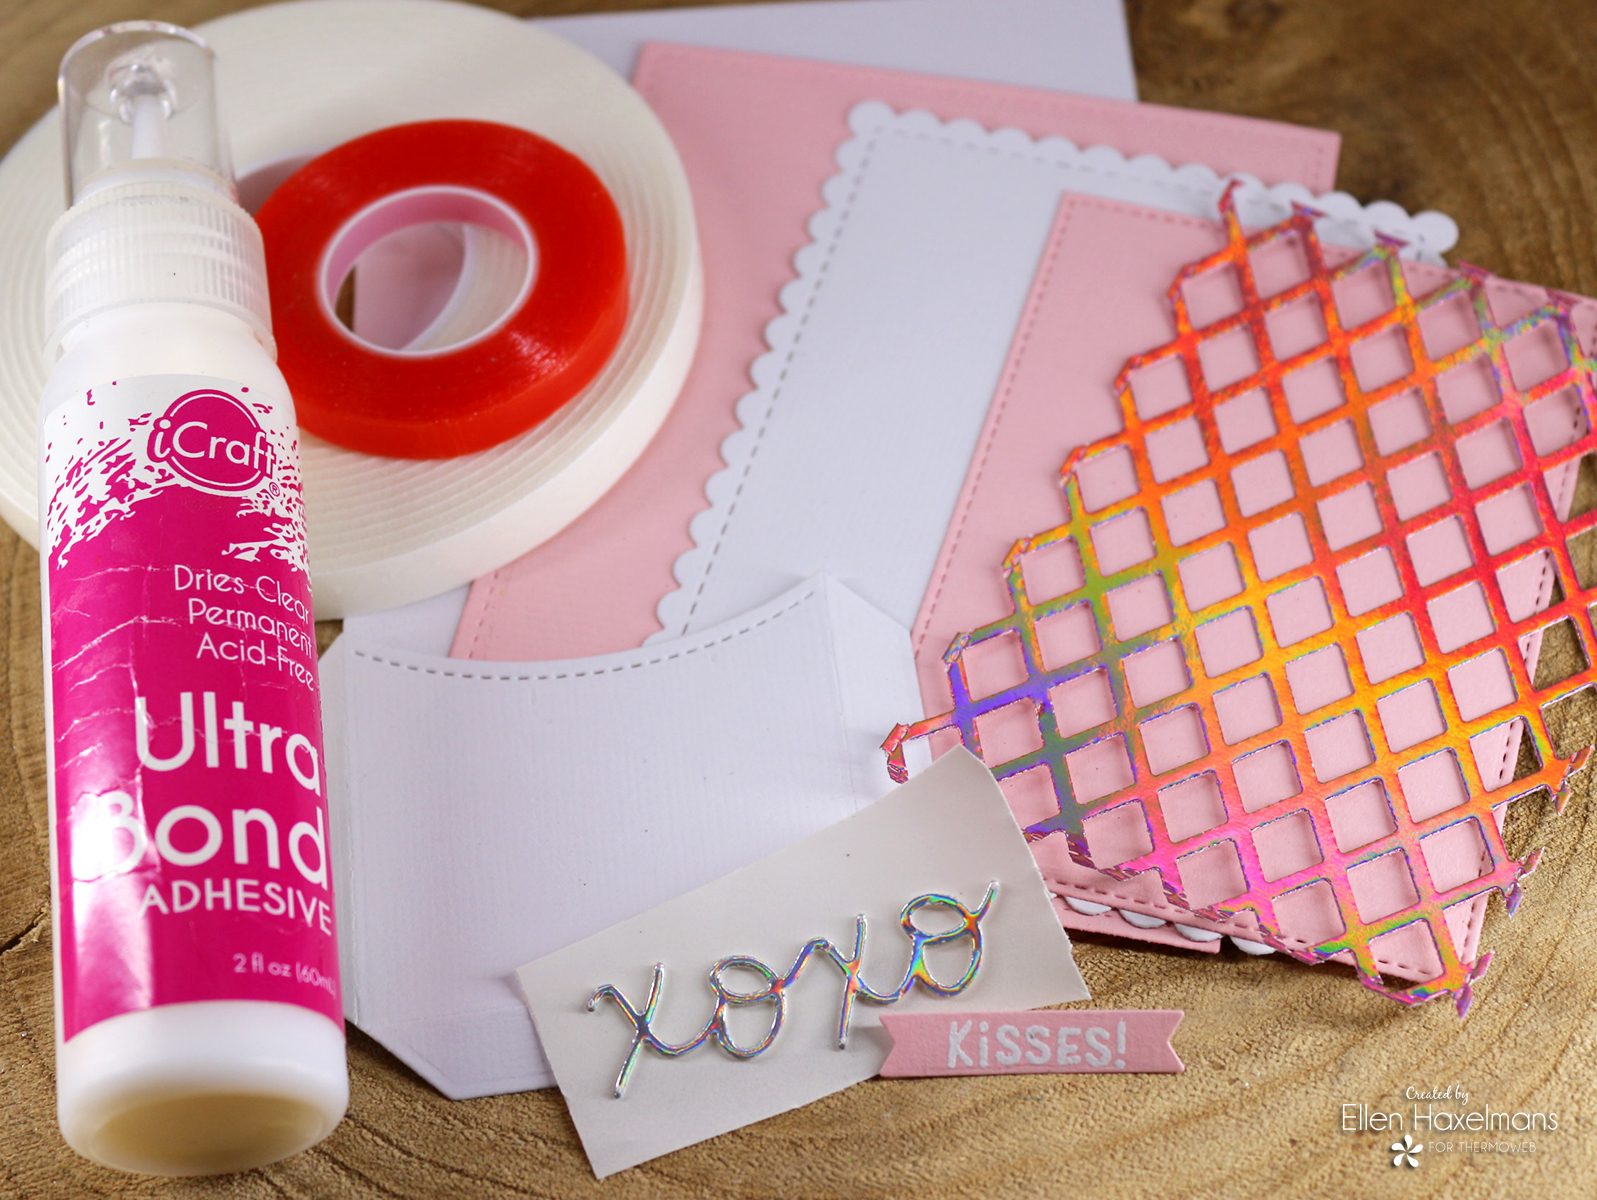 In the last step, I did combine different sizes of panels to make a card. The foiled pattern is attached with the iCraft Ultra Bond adhesive. Liquid glue is very handy on thin pieces, that's because you can just add a few drips to make it stick well. A little pocket was added to the smallest panel from the card. That pocket contains a nice memory on a Polaroid.
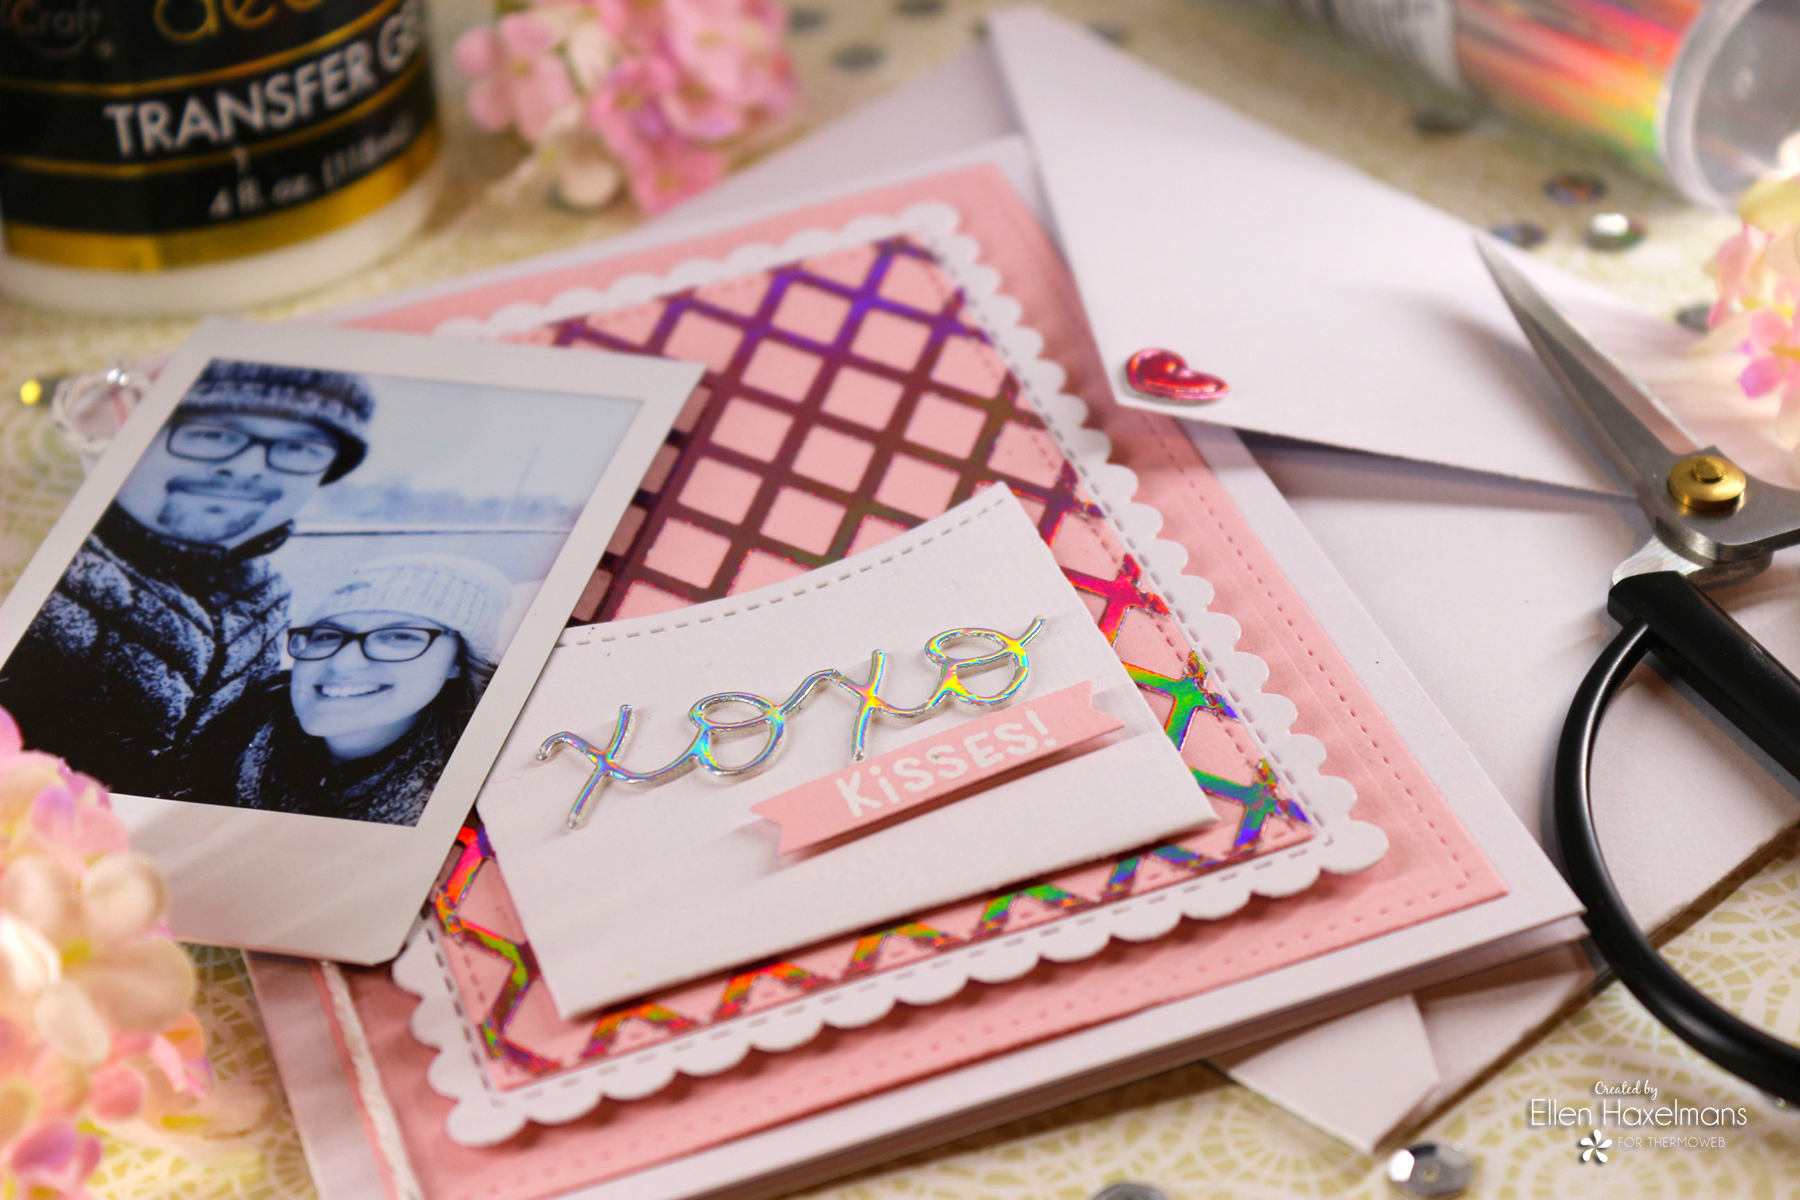 The xoxo (made with foil and foam as shown above) and the word kisses cannot be missing on this 'Kiss Me' themed card.
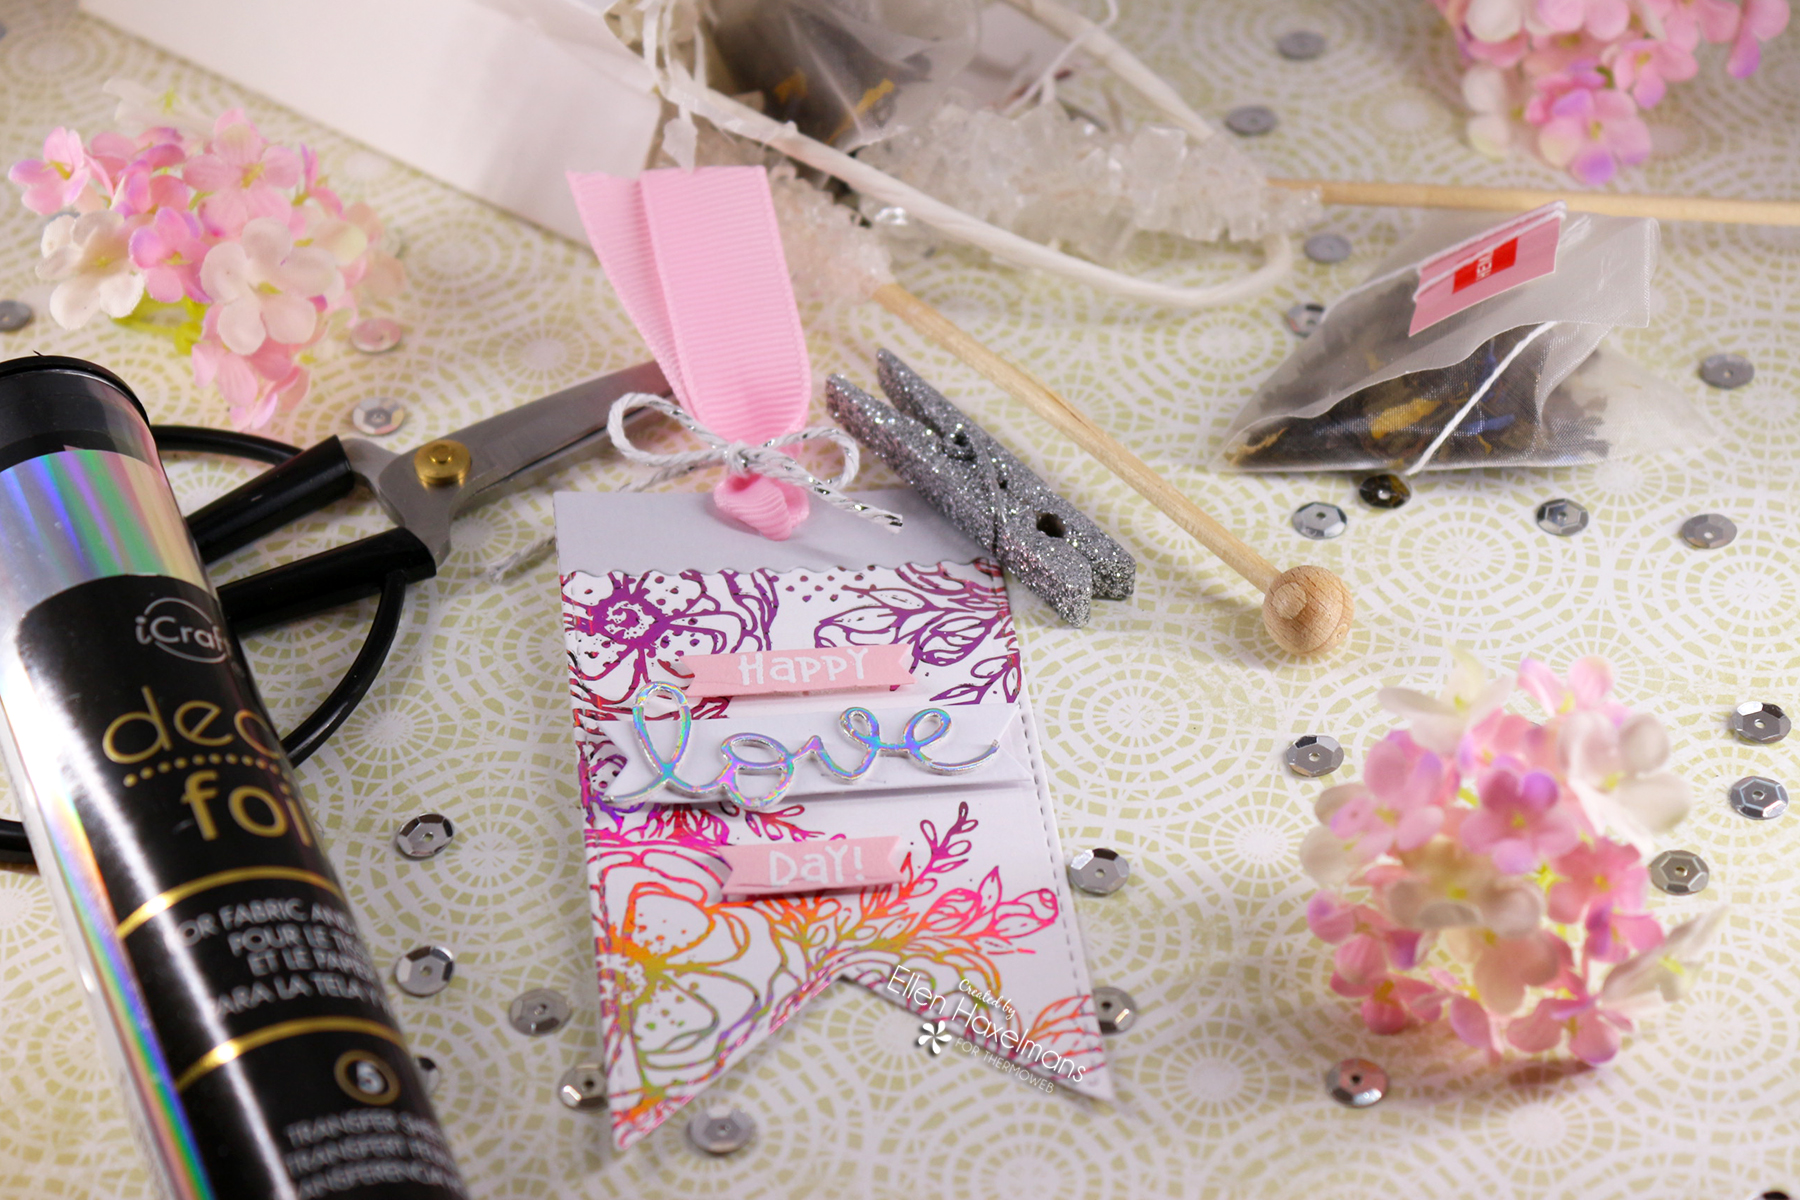
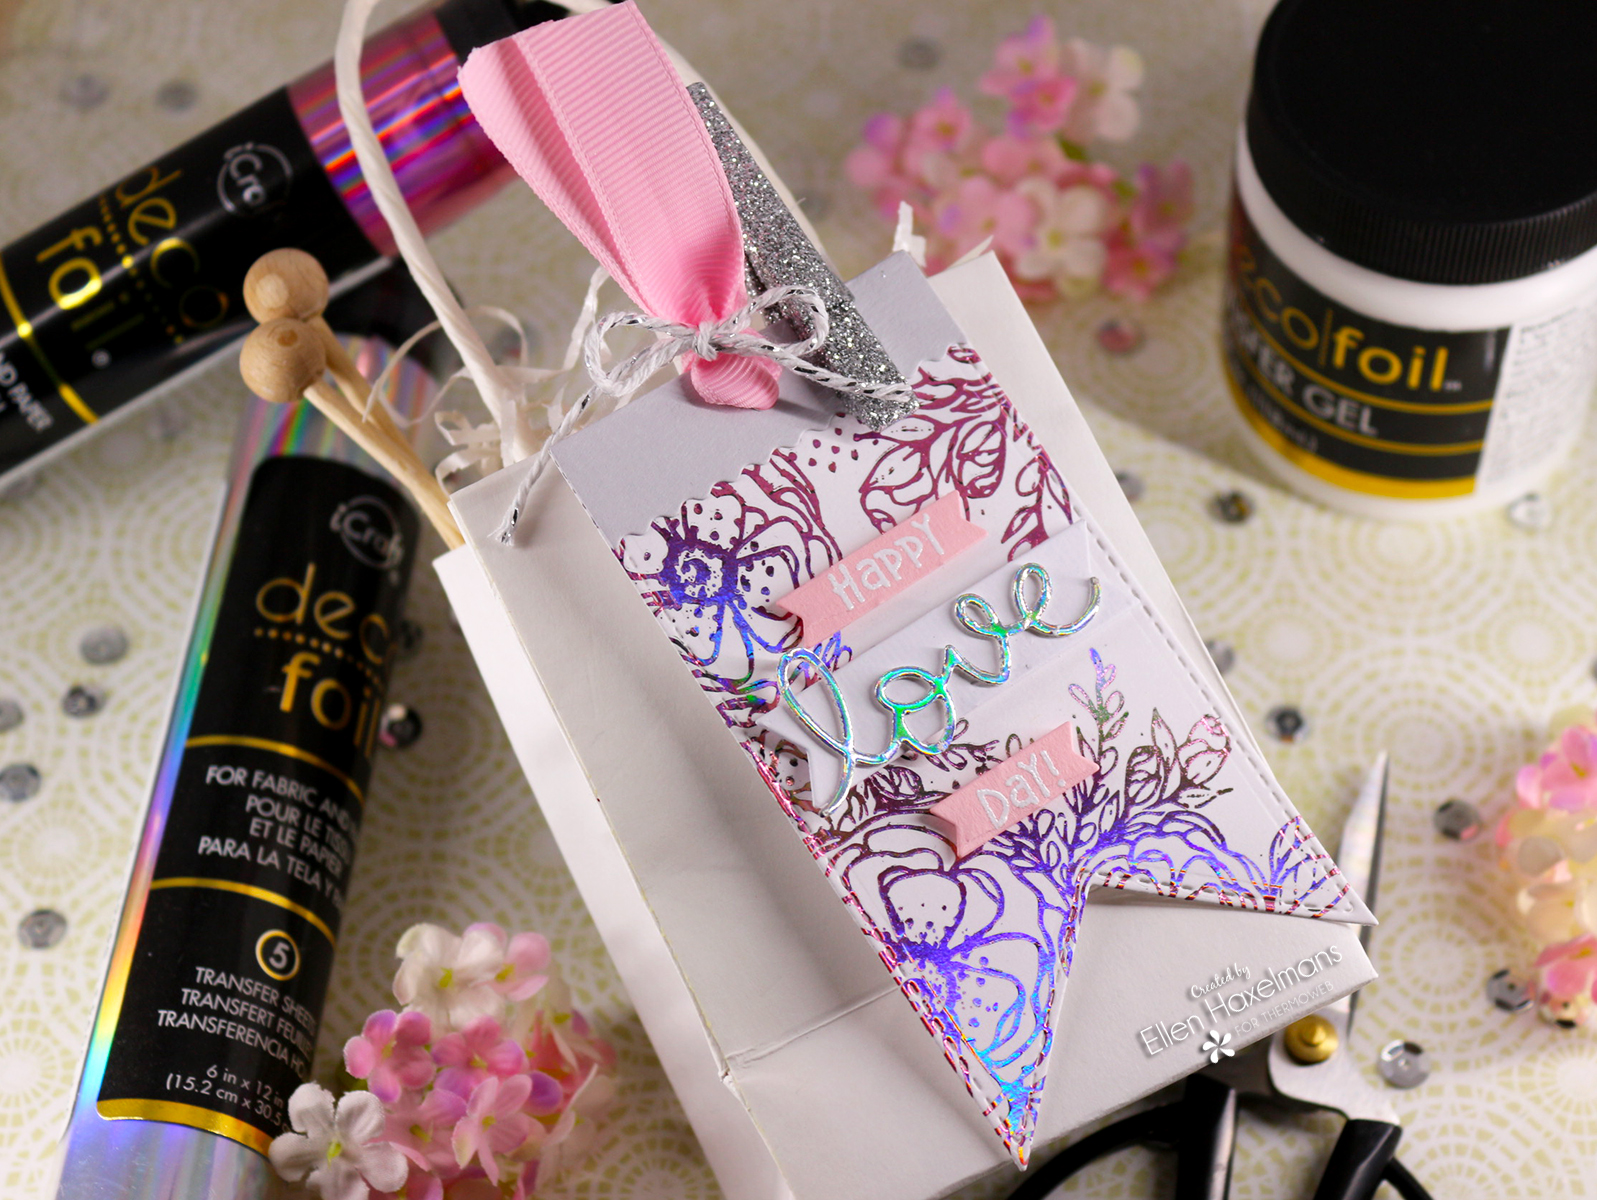 I could not resist showing another fun way of foiling. That's why I made an elegant tag for a little gift bag. For the tag I used a Toner Card front; here is how to use it.
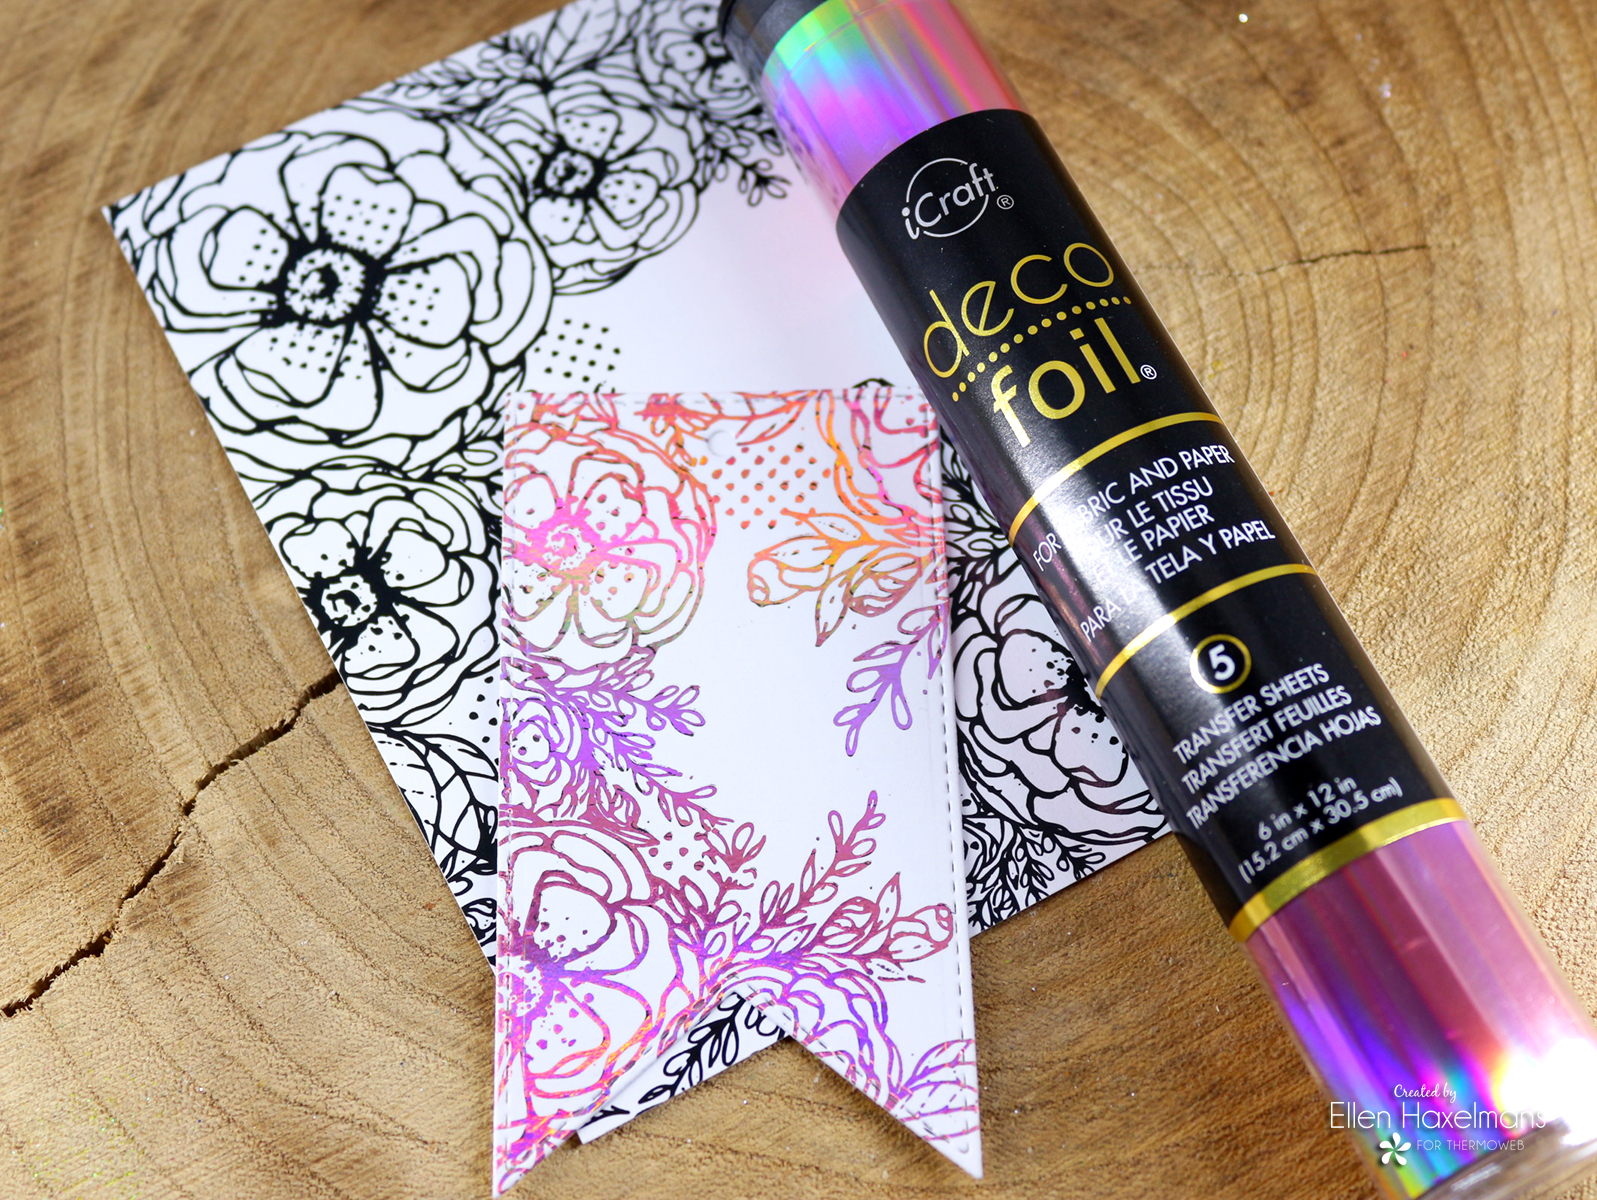 Just like a completely black toner sheet you can add foil to a toner card front. In the picture, you can see the Flower Devine Deco Foil Toner card front. I did take a piece of the Toner Card front and foil (facing upwards) between parchment paper. Next, I placed both elements in-between parchment paper and ran it through a hot laminator. When I removed the residue of foil, I had this get this pretty tag.
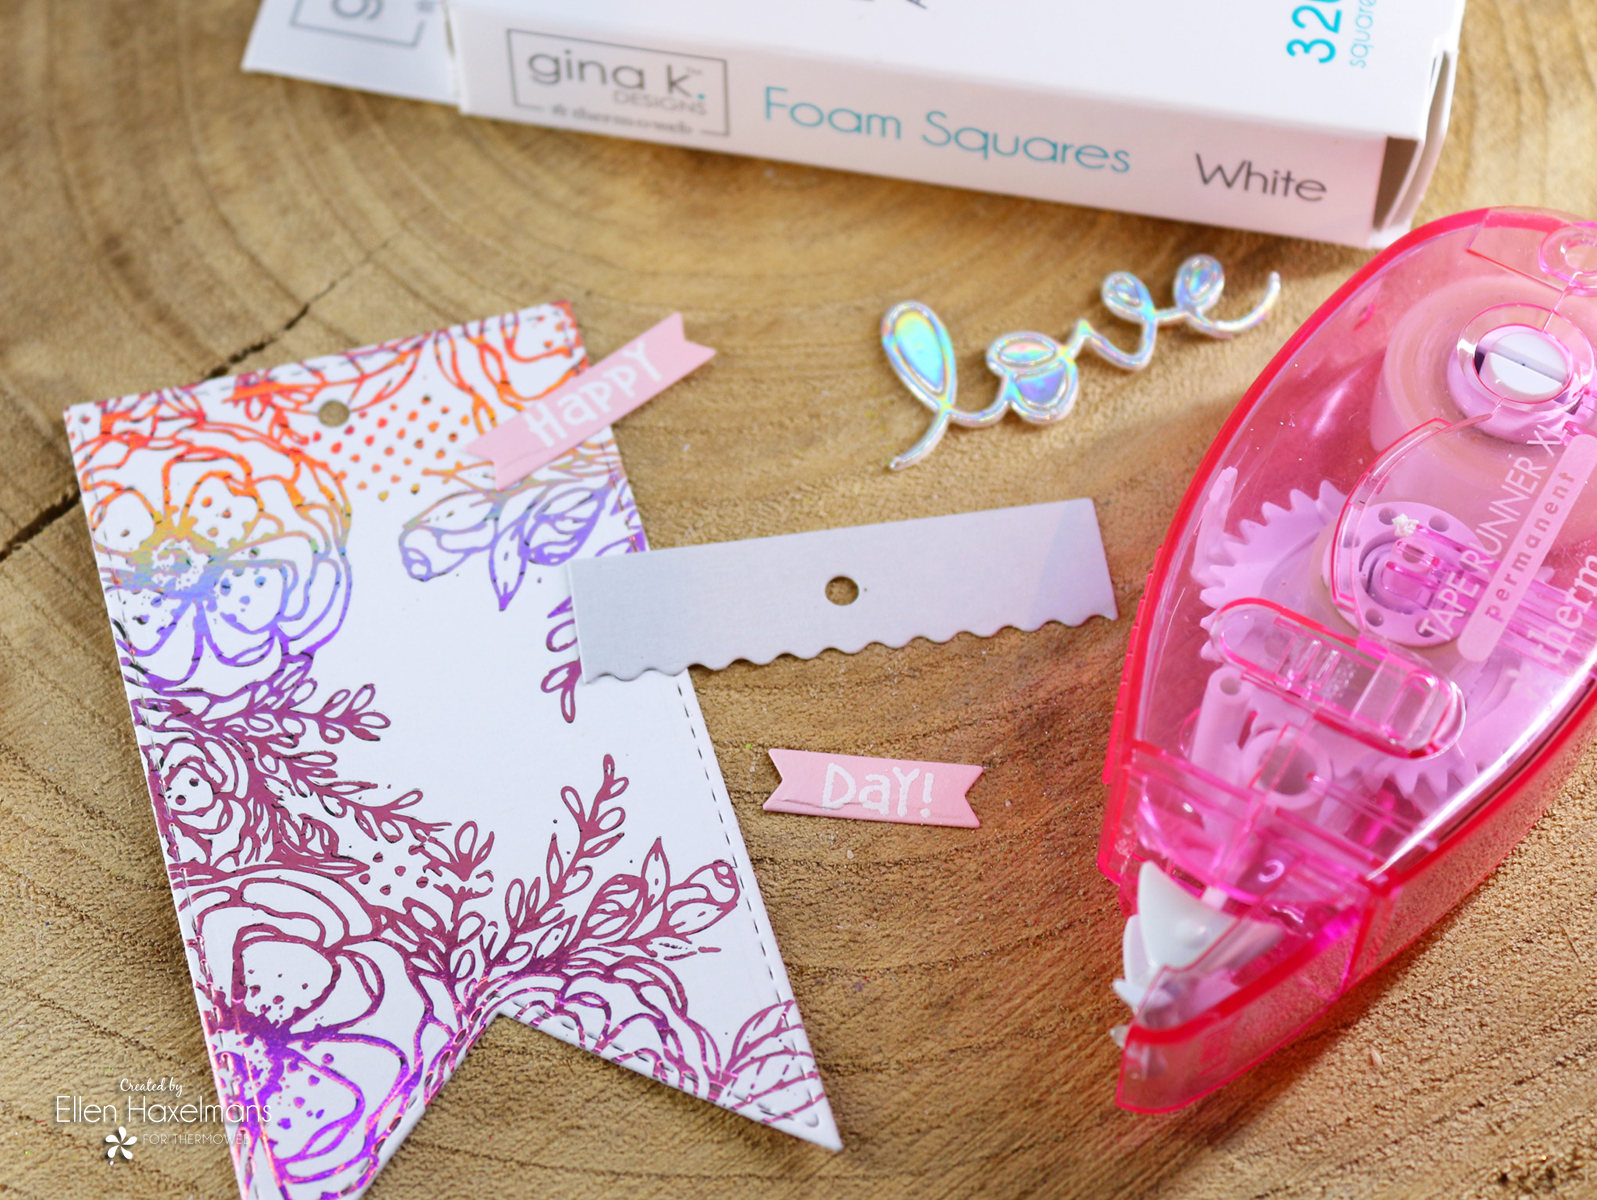 The rest of the elements were added with a glue runner and Foam Squares.
 Unfortunately, we did get to the end of this post. Hopefully, this has given you a lot of inspiration and we will see you soon again!