No Products in the Cart
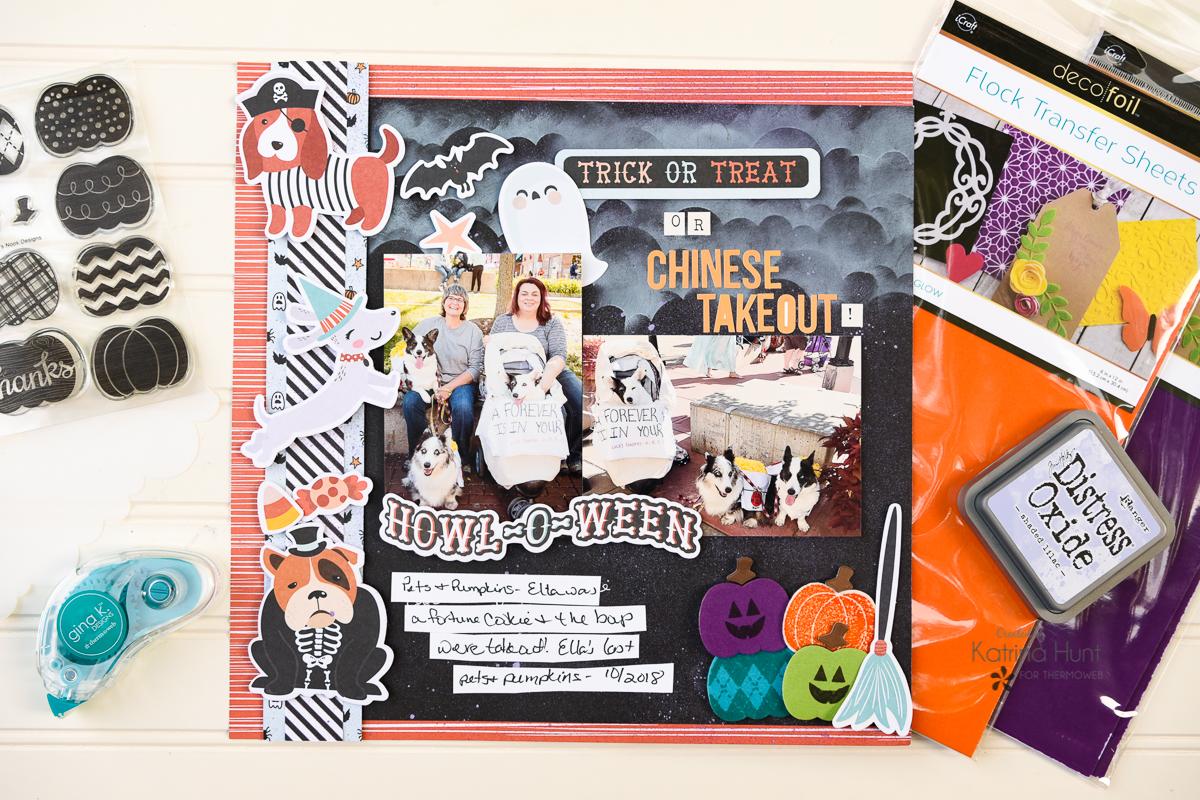
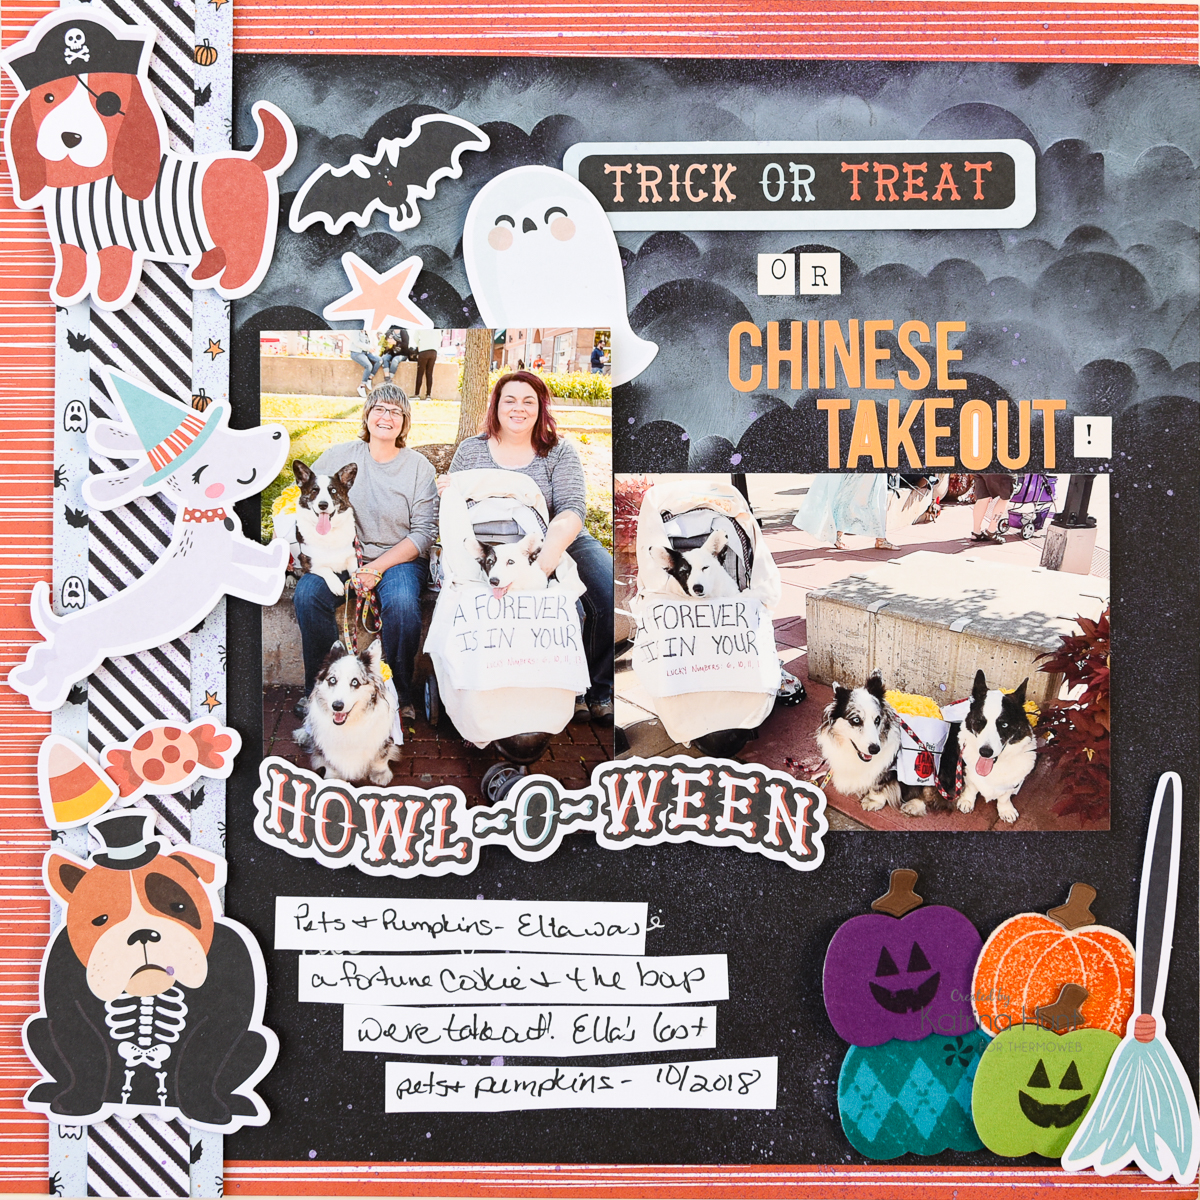
 Hey Hey!! Or should I say "trick or treat"?! It's Katrina from Paper, Scissors, Glue and Hybrid sharing a fun Halloween layout using some Deco Foil Flock and some fun stamps and a stencil from Newton's Nook for our team up this week!
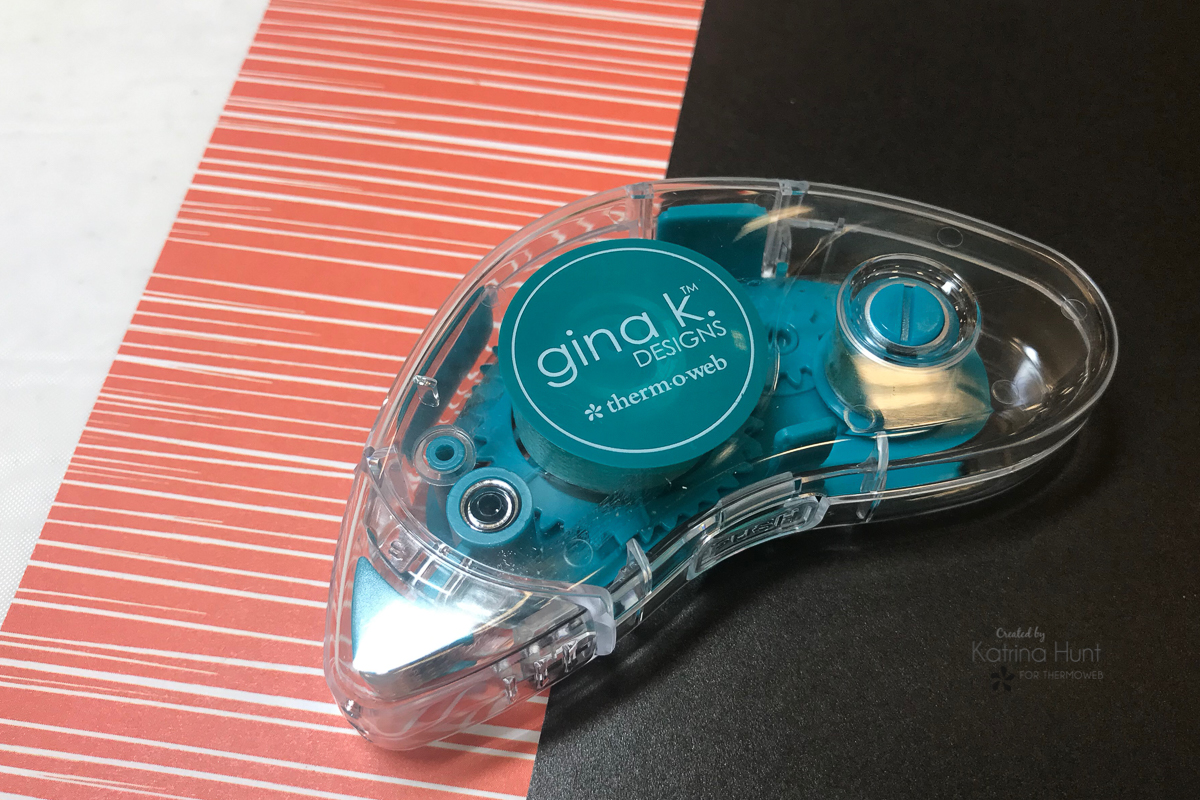
 This layout is super easy to put together using Gina K Designs Adhesives along with Newton's Nook to embellish with!
Adhere all paper layers with the Gina K Designs Permanent Dot Adhesive Runner. The only paper layer that Gina K Designs Foam Tape was used on was the black and white diagonal striped paper, just to give it a little dimension.
This layout is super easy to put together using Gina K Designs Adhesives along with Newton's Nook to embellish with!
Adhere all paper layers with the Gina K Designs Permanent Dot Adhesive Runner. The only paper layer that Gina K Designs Foam Tape was used on was the black and white diagonal striped paper, just to give it a little dimension.
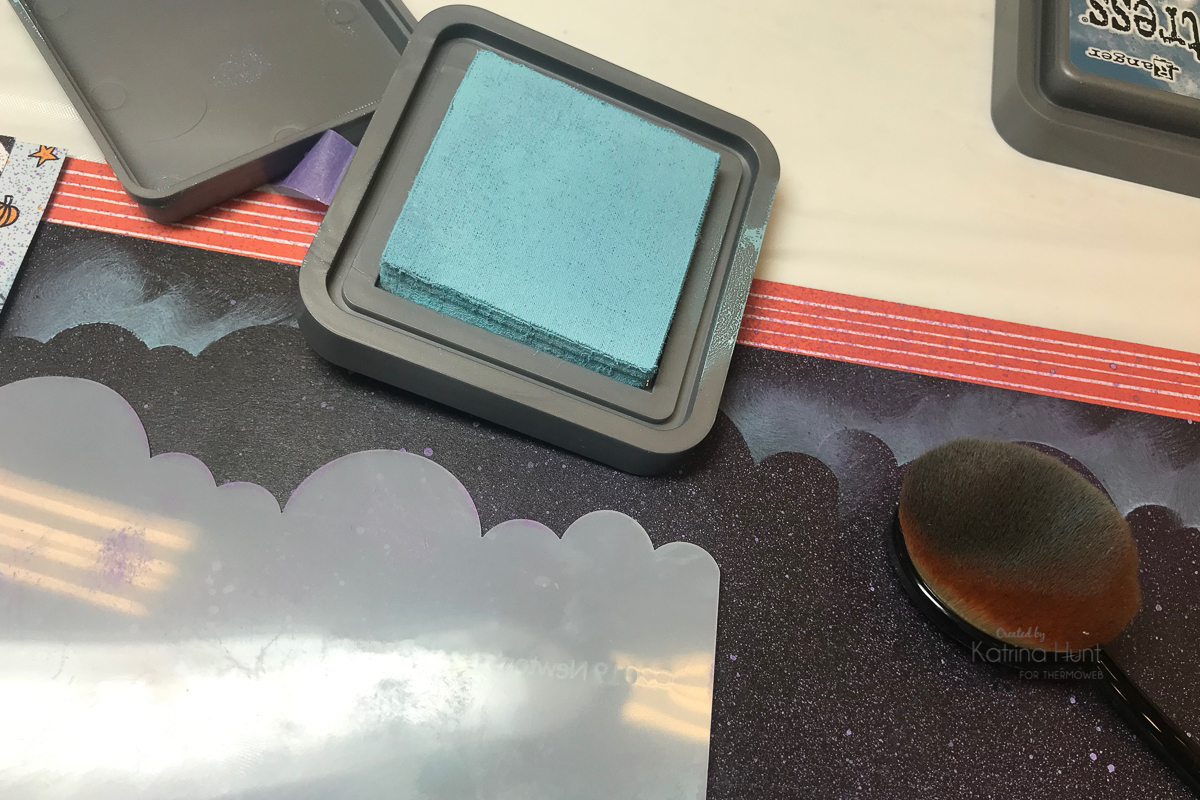
 Mist black background with Distress Oxide Spray in Wilted Violet let dry. Next, use Newton's Nook Cloud Stencil, along with Distress Oxide inks to create clouds in the background. One thing to note, the ink will reactivate the Distress Oxide spray, so keep that in mind if you use different colors.
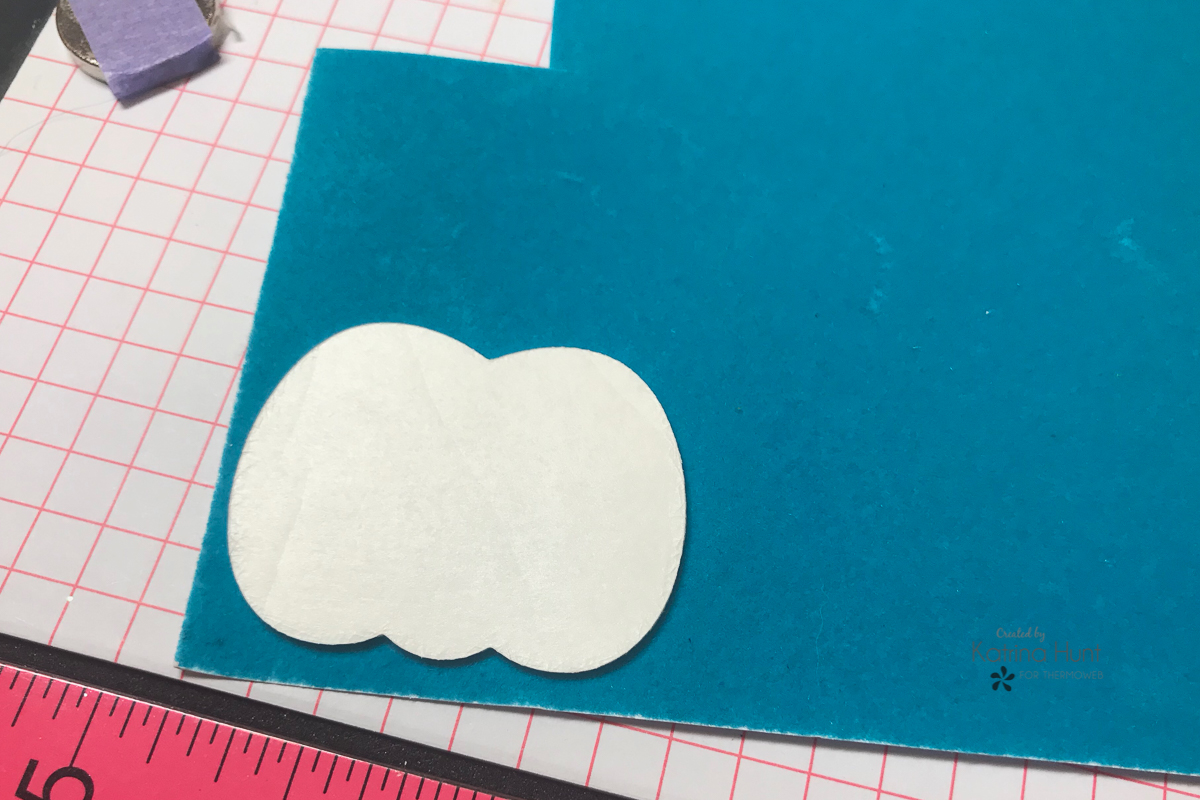
 Create pumpkin stack by the first die cutting the pumpkin shape from Deco Foil Foam Adhesive. Once die-cut, then apply the Deco Foil Flock Transfer Sheets in colors of your choice, running thru your manual die cutting machine to apply pressure to transfer the flock to the foam.
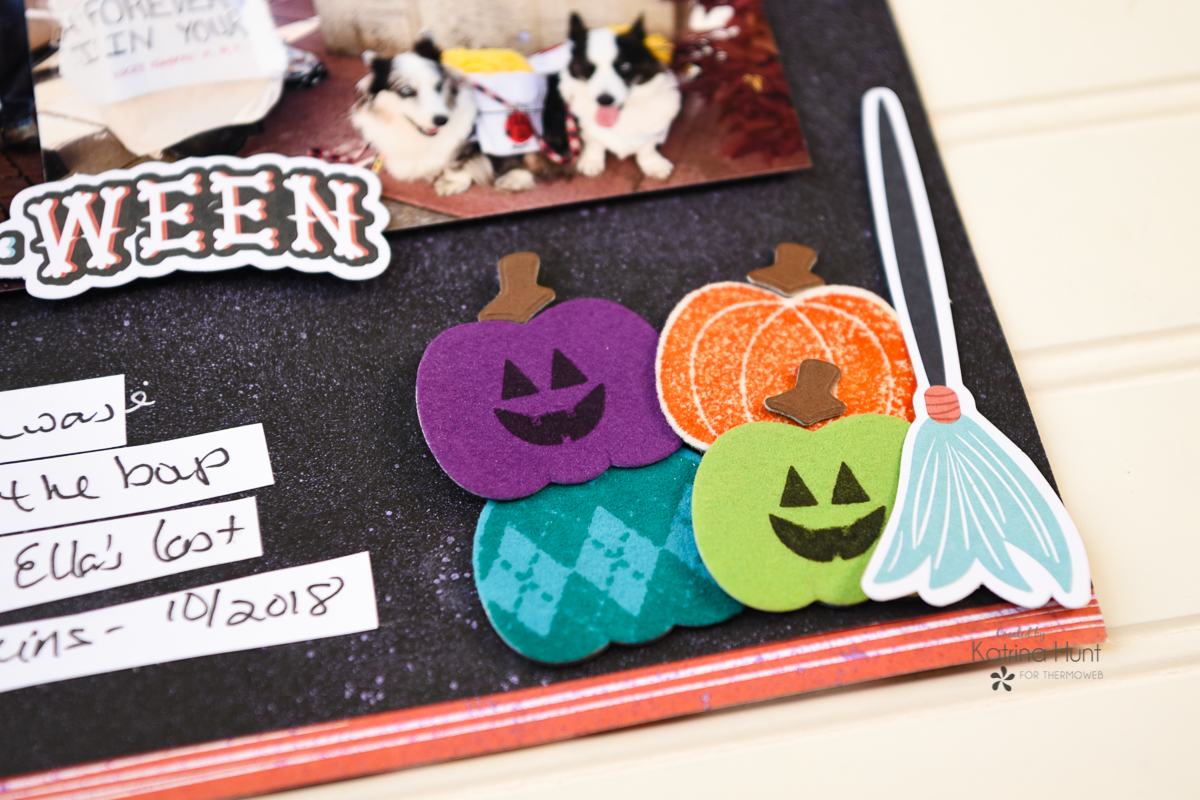
 After the die-cut image is flocked, then use a stamp positioning tool to align your stamp with the die-cut. I used the leftover die-cut foam and placed my pumpkin right back in the cut-out section to hold it in place. Stamp pumpkins with faces or designs of your choice from the stamp set.
 Layer your pumpkins anyway you like. In addition, you could do a stack of pumpkins that went up and down, but the cluster worked better for the design of my layout.
Finish embellishing your layout with die cut from the collection pack, or more pumpkins the that you have created from the stamp and die set. Use Gina K Designs Foam Tape for more dimension.
Layer your pumpkins anyway you like. In addition, you could do a stack of pumpkins that went up and down, but the cluster worked better for the design of my layout.
Finish embellishing your layout with die cut from the collection pack, or more pumpkins the that you have created from the stamp and die set. Use Gina K Designs Foam Tape for more dimension.

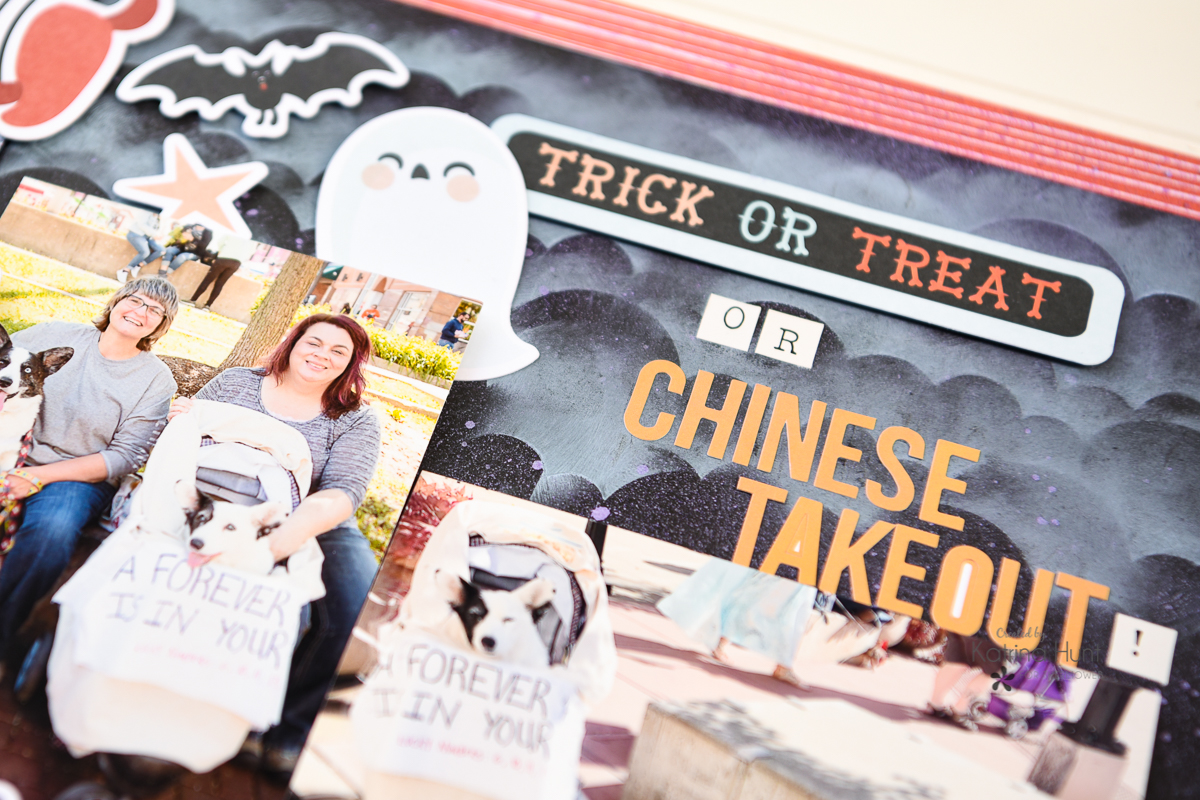
 And there you have it, a completed Halloween layout in no time at all. In conclusion, this layout is a special one, because this was Ella's last Pets and Pumpkins adventure. She loved being the Fortune Cookie!!!
Have a great weekend!!! Thanks for stopping by the blog today!
And there you have it, a completed Halloween layout in no time at all. In conclusion, this layout is a special one, because this was Ella's last Pets and Pumpkins adventure. She loved being the Fortune Cookie!!!
Have a great weekend!!! Thanks for stopping by the blog today!
 a Rafflecopter giveaway