No Products in the Cart
 Therm O Web Supplies Needed:
MEMORY TAPE RUNNER XL™
3D WHITE FOAM SQUARES • COMBO PACK
DECO FOIL™ TRANSFER SHEETS • EMERALD WATERCOLOR}
DECO FOIL™ TRANSFER SHEETS • GOLD
DECO FOIL™ WHITE FOAM ADHESIVE
DECO FOIL™ ADHESIVE PEN.34FLOZ
Other Supplies Needed:
Blue Moon Beads
Clear Acetate
Lifestyle Crafts Die
Spectrum Noir Sparkle Pen Crystal Clear
Lawn Fawn Scripty Cheers Die
Baker's Twine (American Crafts used)
Pen Touch White Pen
Distress Inks Peacock Blue, Shabby Shutters
Versafine Onyx Black Ink
EK Success Powder Tool
Die Cutting Machine
MISTI or stamping Block
Spectrum Aqua Marker Bud Green
Spectrum Aqua ColourBlend Pencils Emerald, Ivy, Carmine, Blackberry (Primaries), Walnut, Viridian, Alpine (Naturals), Carnation (Florals)
Paper Blending Stumps
Gamsol Blending Solution
Heat Gun
Clear Embossing Powder
Therm O Web Supplies Needed:
MEMORY TAPE RUNNER XL™
3D WHITE FOAM SQUARES • COMBO PACK
DECO FOIL™ TRANSFER SHEETS • EMERALD WATERCOLOR}
DECO FOIL™ TRANSFER SHEETS • GOLD
DECO FOIL™ WHITE FOAM ADHESIVE
DECO FOIL™ ADHESIVE PEN.34FLOZ
Other Supplies Needed:
Blue Moon Beads
Clear Acetate
Lifestyle Crafts Die
Spectrum Noir Sparkle Pen Crystal Clear
Lawn Fawn Scripty Cheers Die
Baker's Twine (American Crafts used)
Pen Touch White Pen
Distress Inks Peacock Blue, Shabby Shutters
Versafine Onyx Black Ink
EK Success Powder Tool
Die Cutting Machine
MISTI or stamping Block
Spectrum Aqua Marker Bud Green
Spectrum Aqua ColourBlend Pencils Emerald, Ivy, Carmine, Blackberry (Primaries), Walnut, Viridian, Alpine (Naturals), Carnation (Florals)
Paper Blending Stumps
Gamsol Blending Solution
Heat Gun
Clear Embossing Powder
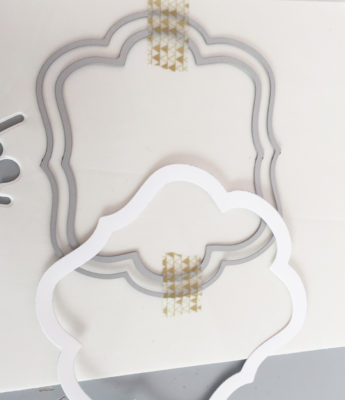
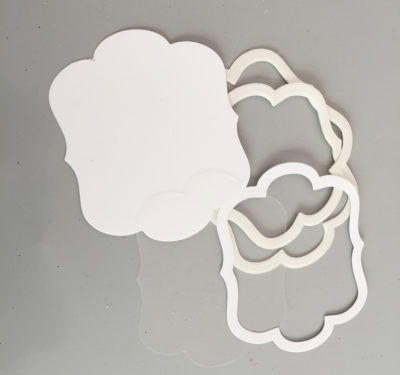 The more you cut out of the foam adhesive, the higher your stack will be, so that is completely up to you. I cut three.

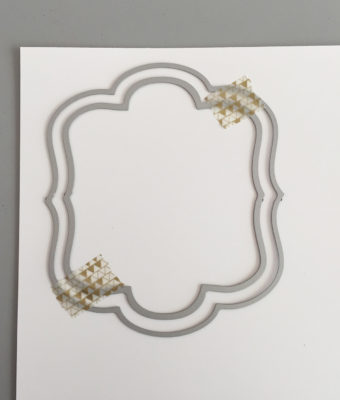
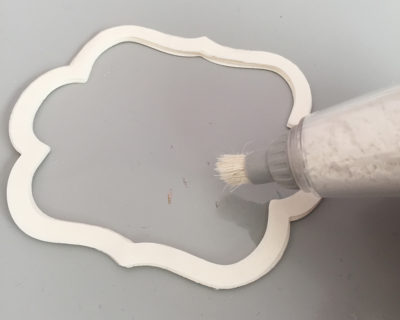 The Easy Cut adhesive will be the FRONT side of the tag (we will add foil later), so flip it over and add some adhesive to the back so you can adhere to the acetate.
[tooltip text="TooltipText"]NOTE: you can add Easy Cut Adhesive to both sides of the white cardstock if you prefer. That way, both sides have adhesive on them when they come out of the die cutting machine.[/tooltip]
The Easy Cut adhesive will be the FRONT side of the tag (we will add foil later), so flip it over and add some adhesive to the back so you can adhere to the acetate.
[tooltip text="TooltipText"]NOTE: you can add Easy Cut Adhesive to both sides of the white cardstock if you prefer. That way, both sides have adhesive on them when they come out of the die cutting machine.[/tooltip]
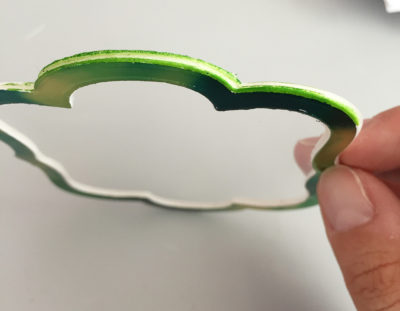
 Peel off the adhesive on the front (the Easy Cut Adhesive) and then press it into the Emerald Watercolor foil. Make sure you place the sticky side on the back (silver). Burnish the foil into the adhesive with your fingers or a bond folder, then peel off.
 Peel off the adhesive on the foam that was cut and adhere them to the back of the foiled front. Since the edges will be white, use a green marker that matches (Spectrum Aqua Bud Green is a close match) to cover up the white. Just color all of the edges. This will give the tag a nice clean look.
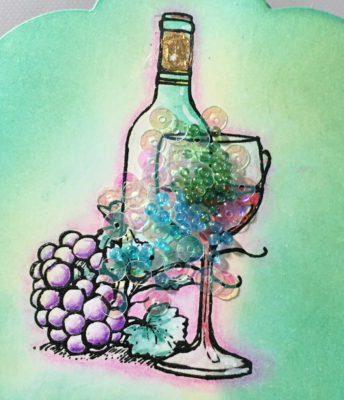
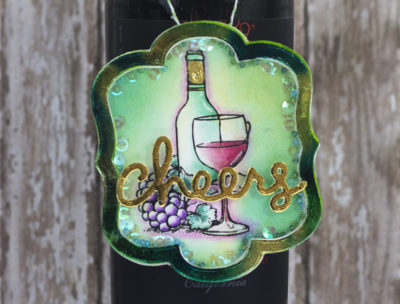
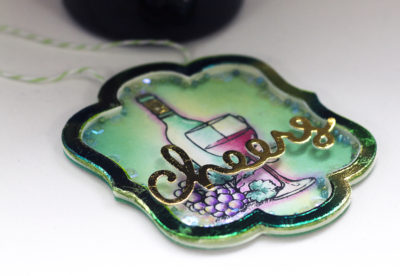
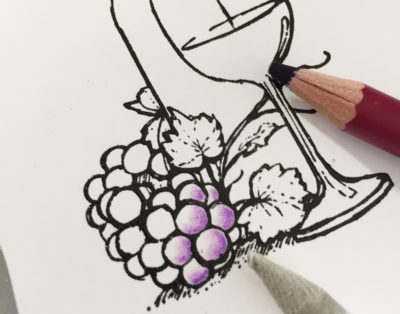 Stamp image in black ink and cover with clear embossing powder. Then color in the image using colored pencils. I used gamsol and blending stumps to give it a soft look.
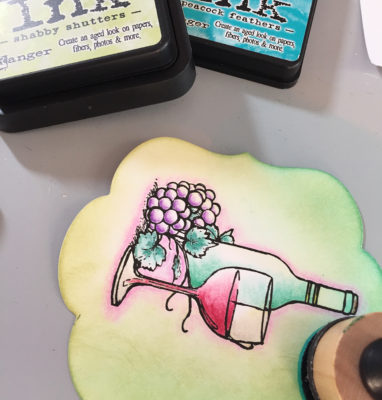 Cover the background and edges with Distress Ink. I blended two colors together (Peacock Blue and Shabby Shutters) to compliment the Emerald Watercolor foiled edge.
 Using the Adhesive Pen, color in the 'label' on the wine bottle.
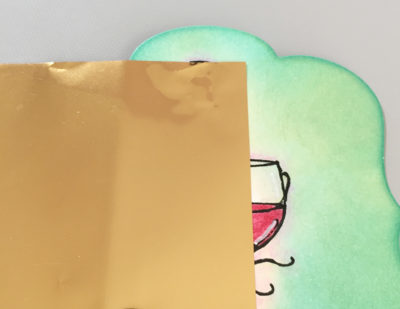 After it dries (make sure it is 100% dry!), press gold foil onto that area.
 Add some sparkle to the wine glass using a clear sparkle pen. This is a simple touch that really adds something extra to your project.
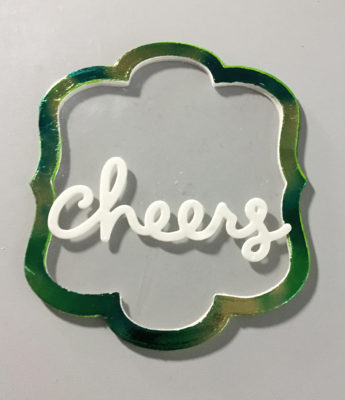
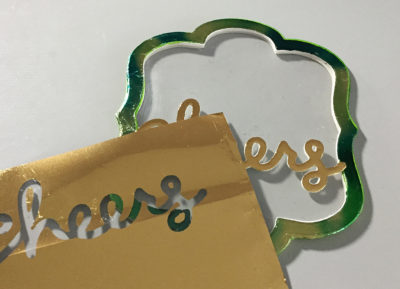 Die cut the 'cheers' out of foam adhesive and press it onto Gold foil. Adhere to the front of the tag, on top of the clear acetate.
Tie a piece of twine to the top of the stamped image. Secure it down with strong liquid adhesive. Allow it to dry.
Die cut the 'cheers' out of foam adhesive and press it onto Gold foil. Adhere to the front of the tag, on top of the clear acetate.
Tie a piece of twine to the top of the stamped image. Secure it down with strong liquid adhesive. Allow it to dry.
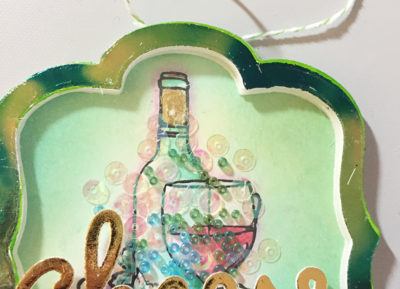
 Add some beads and sequins in the center of the image. Then, gently (and carefully!) add the front panel to it. Press it down to secure the edges. This will ensure the tag holds and no sequins fall out.
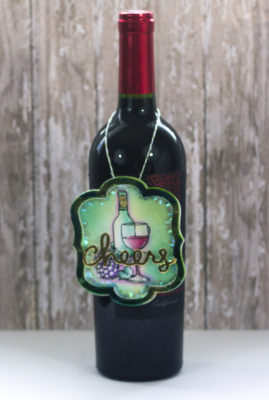
 That's it! Creating a foiled shaker tag really adds that extra touch for any host or hostess!
 Thinking about making a foil card? Make sure to use the hashags #decofoil and #thermoweb so we can see it! And don't forget to follow us on Instagram!