No Products in the Cart
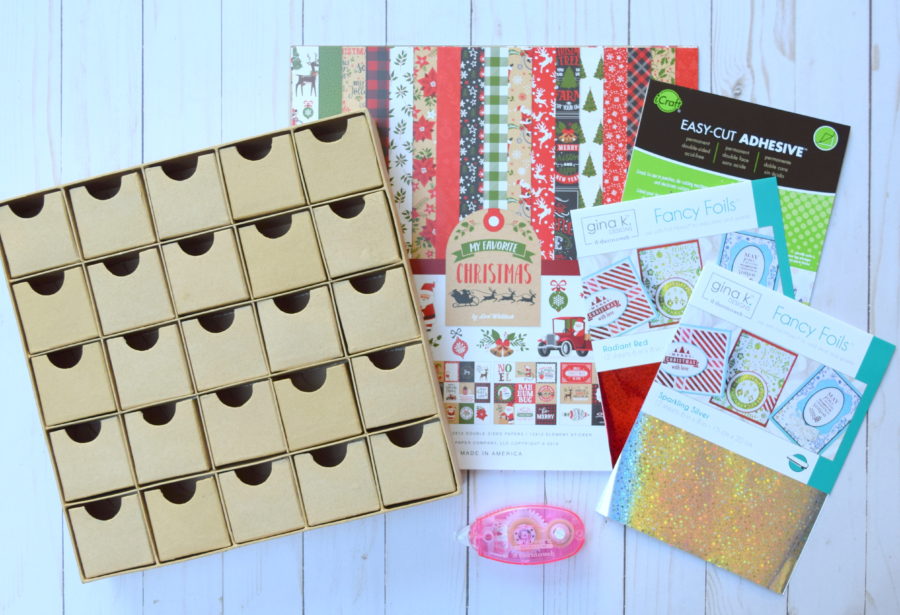
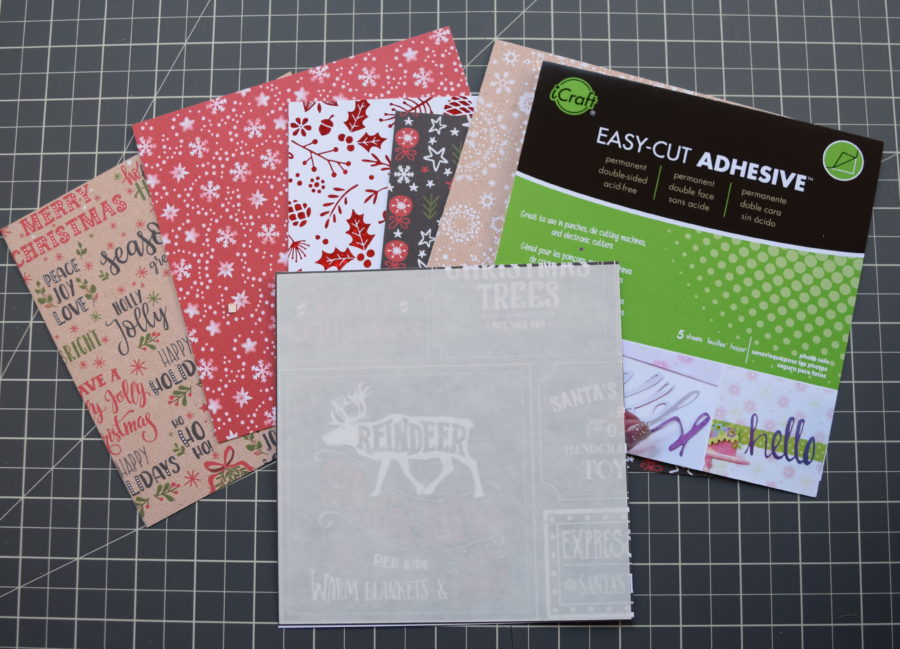 Start off by choosing 6 different patterns of paper and cutting them 5 3/4 x 5 3/4. Adhere the Easy-Cut adhesive sheet to the pattern paper so that the backside now becomes a sticker.
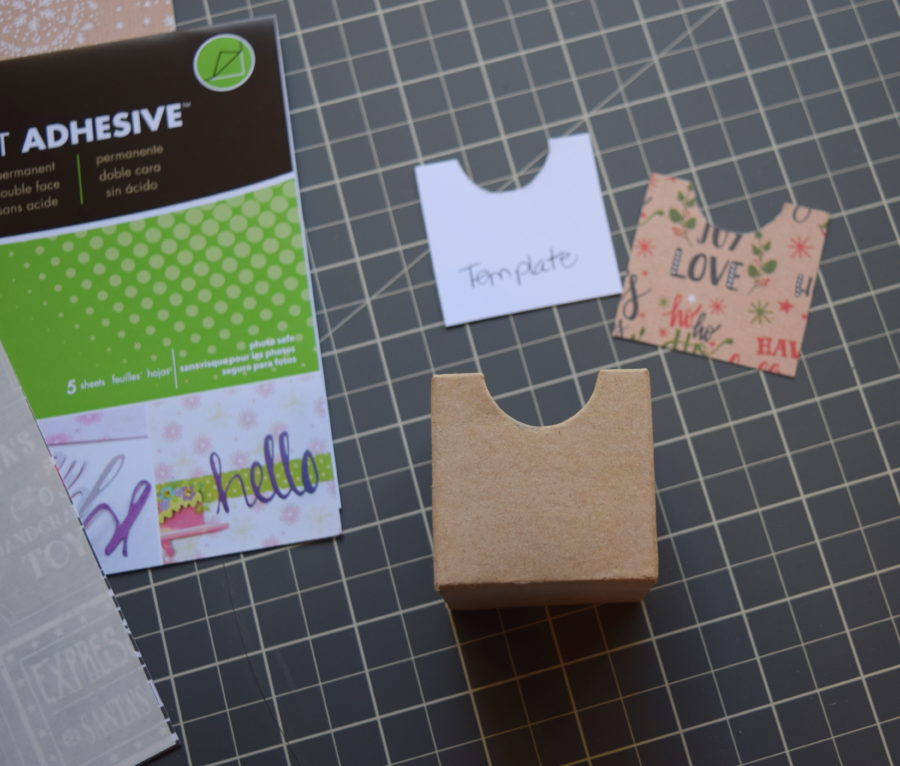 Use the template you can create by tracing the boxes in the advent calendar. You will need 4 each of the 5 patterns and 5 of the 6th pattern to make 25 boxes.
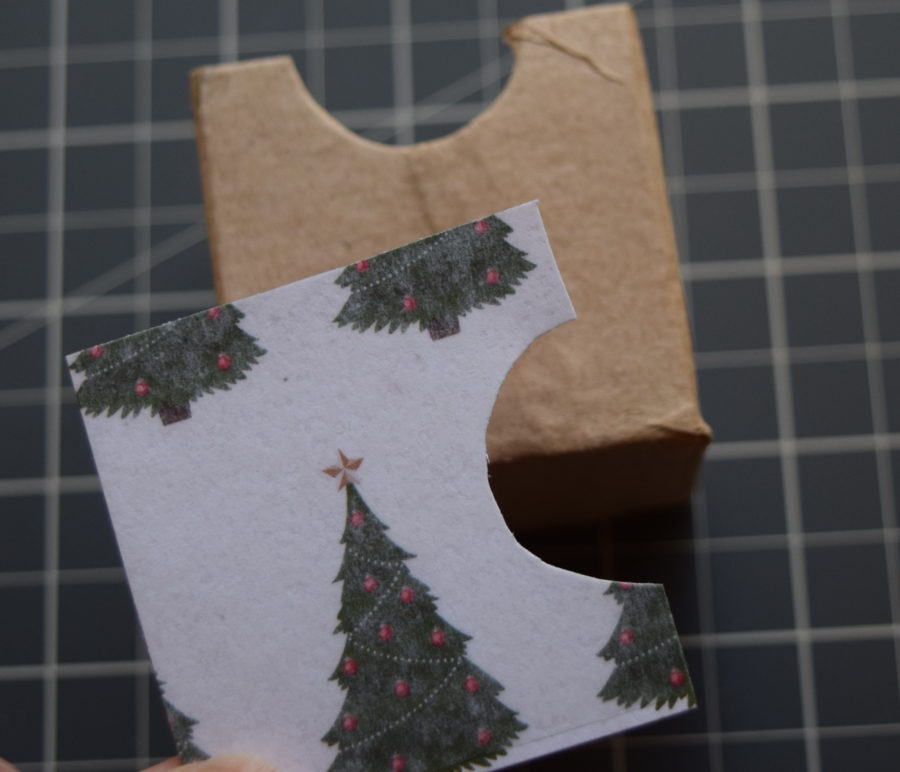 Once you cut the template, peel the back on and stick onto the box.
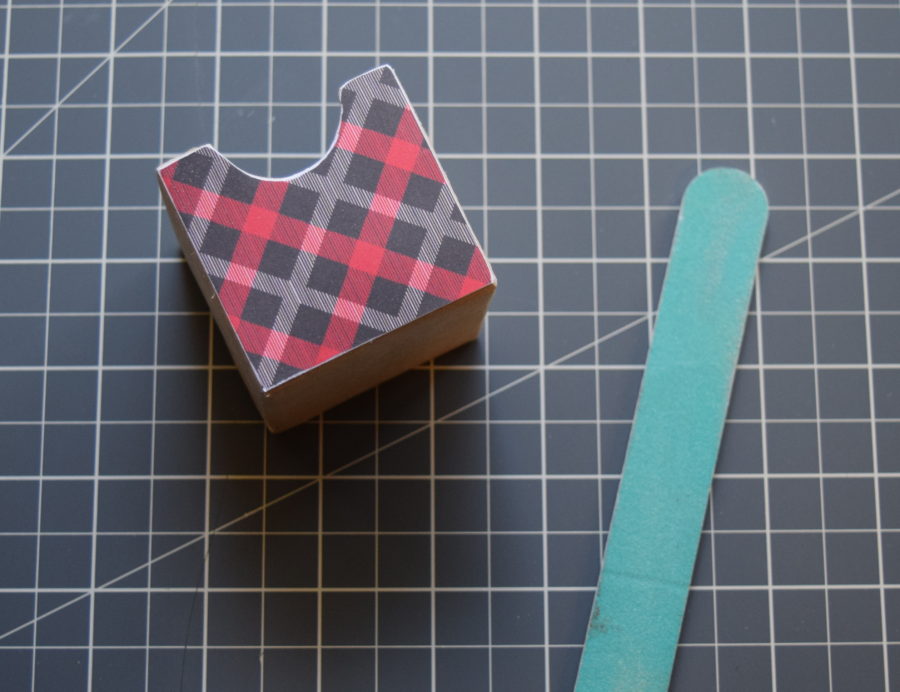 I wanted to give the boxes a rustic feel so I also sanded the edges after I adhered them. Do this for all 25 boxes.
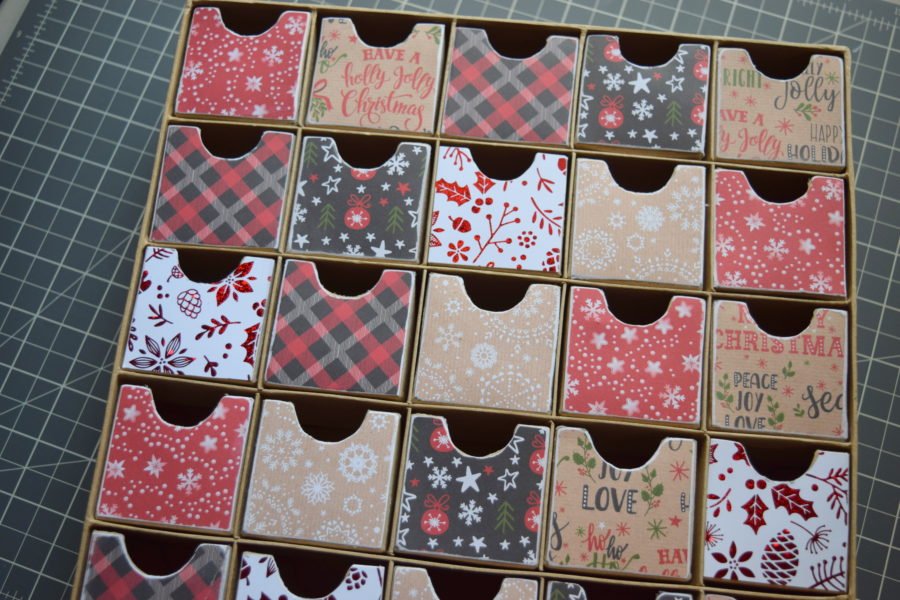 For one of my patterns, I foiled the Gina K. Designs Foil-Mates Ornamental Holiday which is currently 30% off on the website!
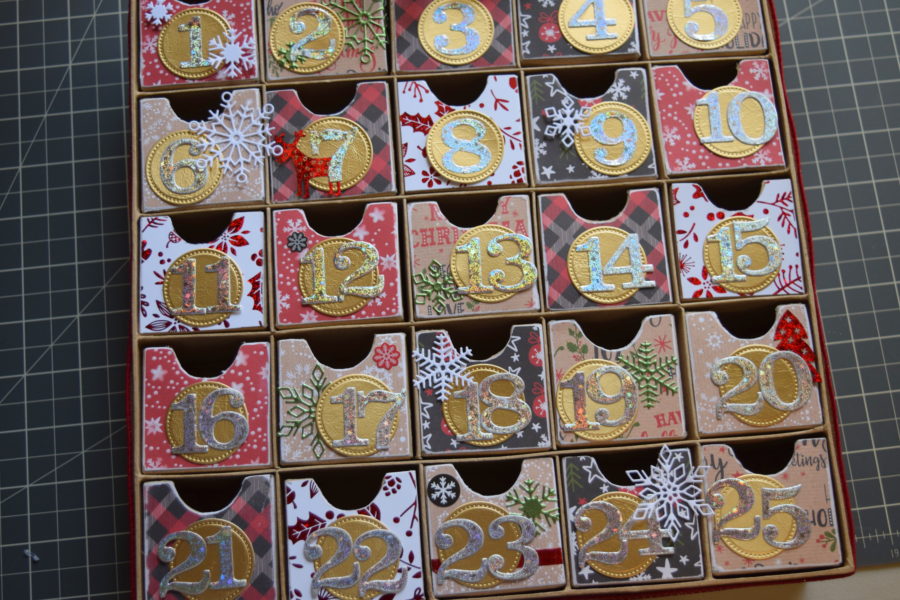
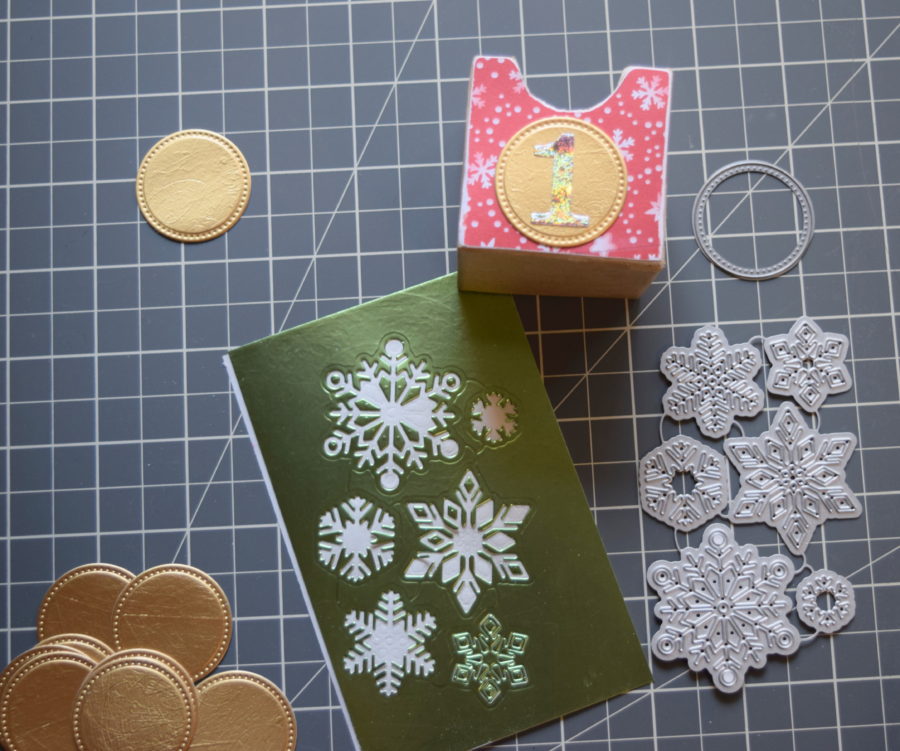 Now that all the boxes are done, you can choose to embellish them how you like. I chose some snowflake dies I liked along with a circle die to make the numbers stand out. I foiled the numbers using Gina K. Designs Sparkling Silver Fancy Foils.
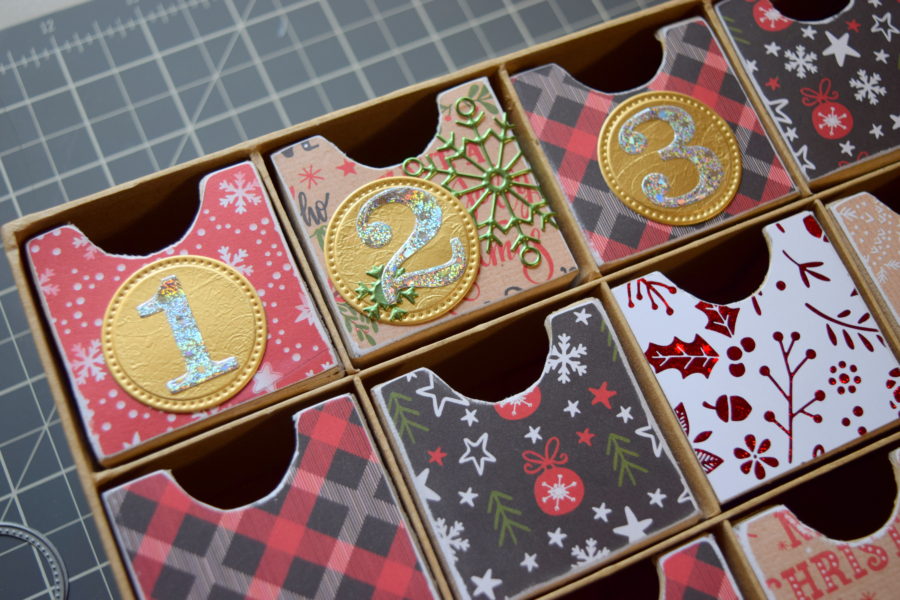 My embossing plate is cut so much it created a fun distressed look on the circles I thought looked good. Using the Easy-Cut adhesive on the backs of the foiled numbers makes adhering them to each circle fast and easy.
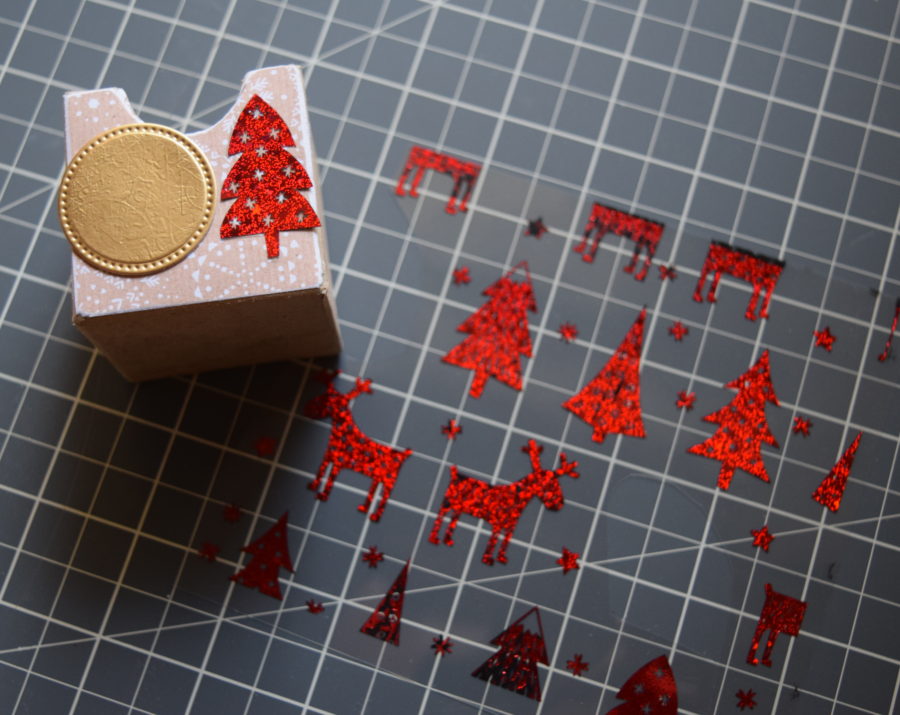 I also liked the little reindeer and trees on the clear toner sheets, so I foiled them with Gina K. Designs Radiant Red Fancy Foil. Then I cut them out and adhered them to the box for a fun embellishment.
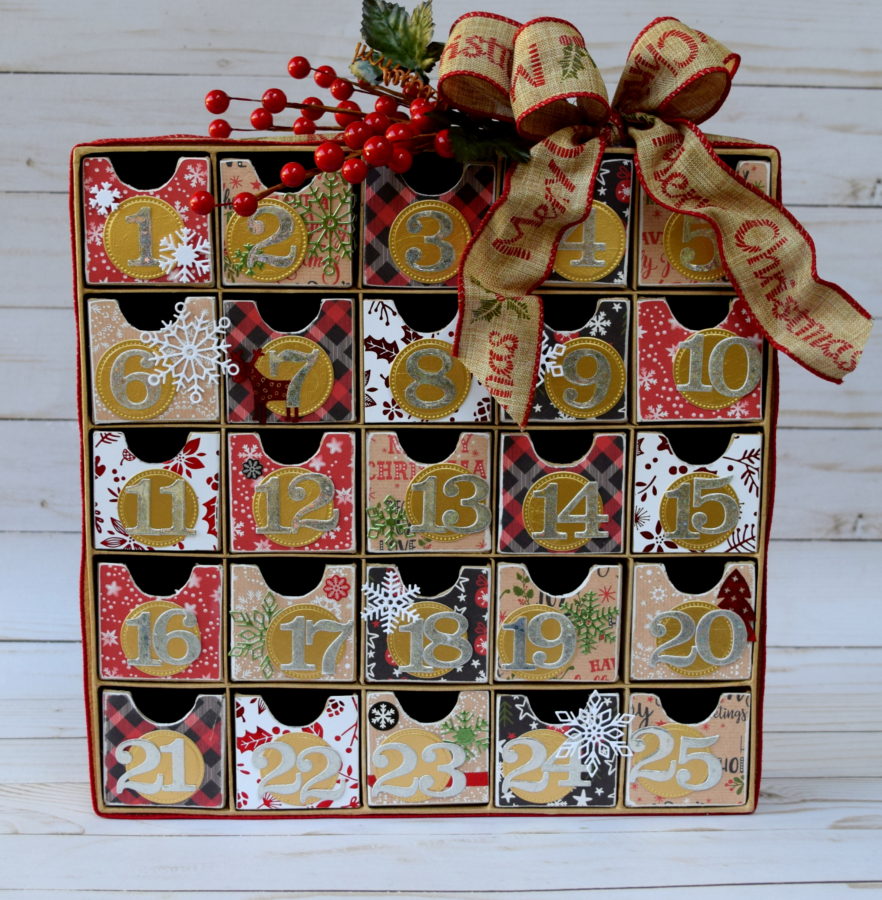
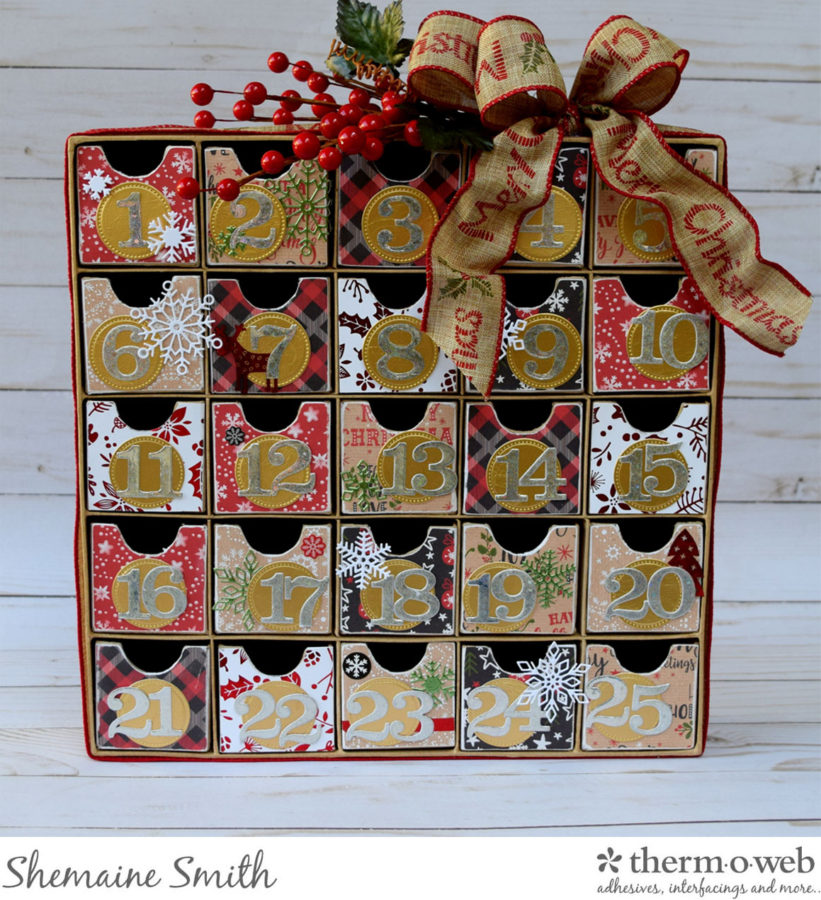
 Now that the boxes are embellished it's time to add the finishing touch with a nice large ribbon. Simply wrap the ribbon around the outside of the calendar and tie a nice big bow. You could embellish the top or add some floral sprays as I did. Either way, you have a great gift to give someone special.
 I'd love to see your take on this project using the wide variety of Therm-O-Web products available. Tag your projects with #thermoweb #decofoil #decoflock #ginakdesigns so we can be sure and find them via social media.
Have a great day!
Shemaine
I'd love to see your take on this project using the wide variety of Therm-O-Web products available. Tag your projects with #thermoweb #decofoil #decoflock #ginakdesigns so we can be sure and find them via social media.
Have a great day!
ShemaineWritten by Shemaine Smith